Many beginners search for plush toy sewing tips, expecting small improvements, yet still feel something looks slightly off in their finished toys. The seams are neat, the fabric is soft, the shape is close, but the result lacks that polished, professional feel. The difference often comes down to a few subtle details that are easy to overlook but instantly visible once understood.

Fabric Choice Changes the Entire Character
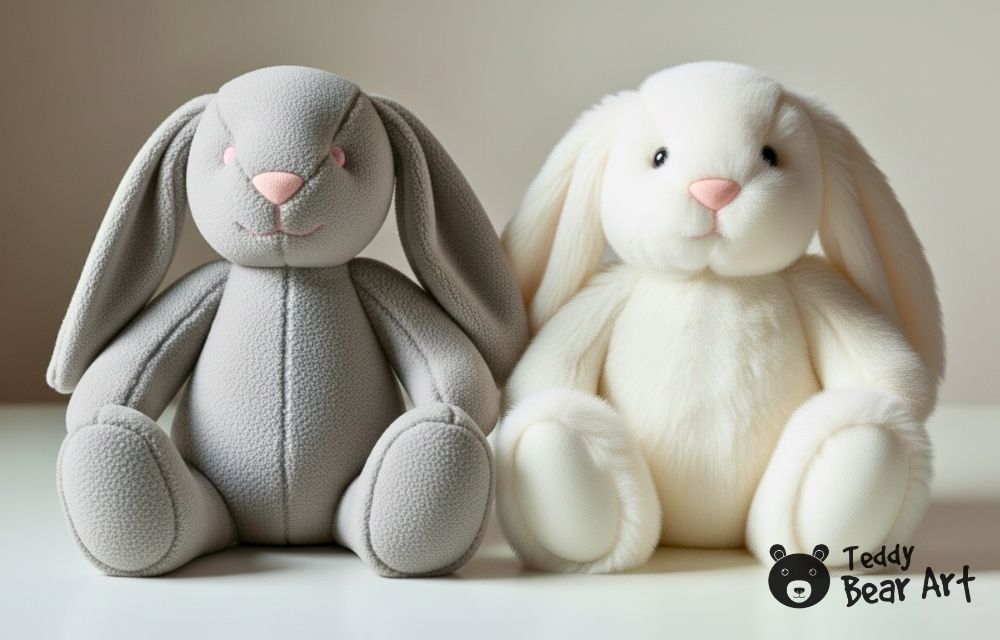
Among all plush toy sewing tips, fabric selection has one of the biggest visual impacts. The exact same pattern can produce completely different results depending on the material used.
Soft fleece gives a smooth, simple look. Faux fur adds depth and realism. Cotton creates a more structured and clean appearance. Each fabric interacts differently with stuffing, seams, and light.
Beginners often choose fabric based on availability instead of effect. A better approach is to think about the personality of the toy first. A teddy bear meant to feel classic and warm may benefit from textured fabric, while a minimalist design may look stronger in plain material.
Exploring different fabrics on simple patterns helps build intuition quickly. Over time, it becomes easier to predict how a finished toy will look before even cutting the fabric.
For additional insights on working with plush materials, this helpful guide on You Make It Simple offers practical advice on handling soft fabrics and improving cutting accuracy.
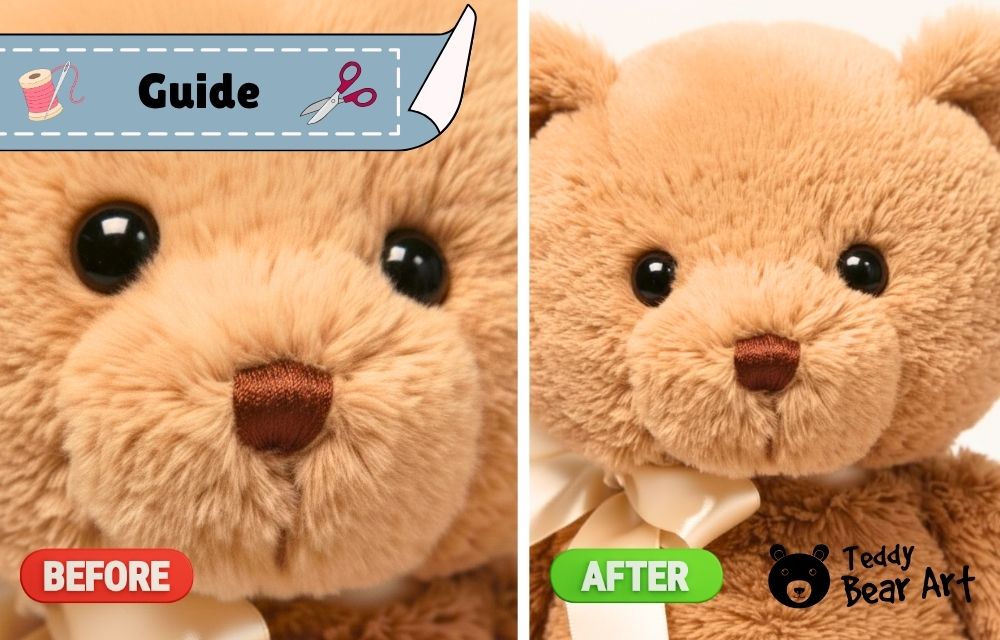
Eye Placement Defines Expression
A well-sewn toy can still feel “off” if the eyes are not positioned correctly. This is one of the most overlooked plush toy sewing tips, yet it has the strongest emotional impact.
Eyes that sit too high, too low, or too far apart change the entire expression. A small shift of just a few millimeters can turn a cute face into something unbalanced.
Instead of attaching eyes immediately, it helps to test placement first. Pins or temporary markers allow adjustments before committing. Looking at the toy from different angles also reveals issues that are not obvious at first glance.
Spacing, height, and symmetry all work together. Once these elements align, the face suddenly feels alive and intentional.

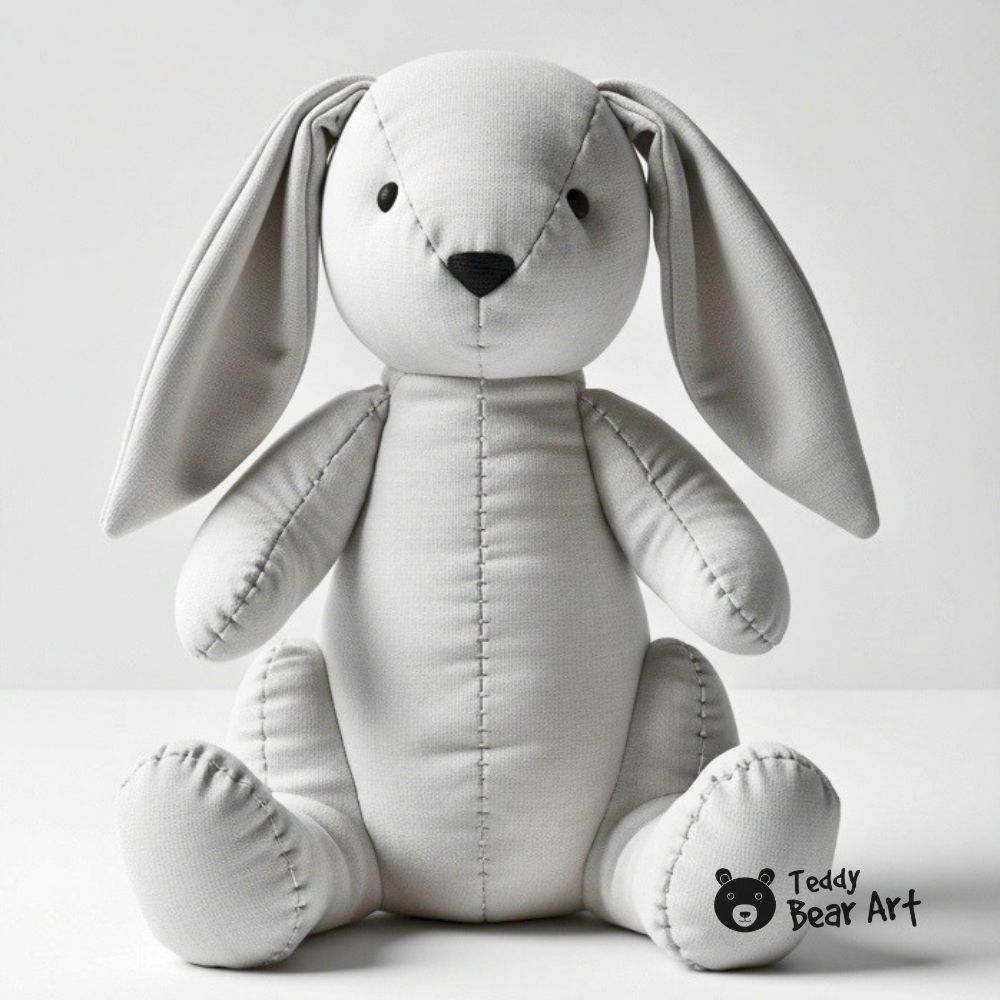
Seam Allowance Shapes More Than the Pattern Itself
One of the most underestimated plush toy sewing tips is how strongly seam allowance affects the final shape. Even a tiny inconsistency can completely change how a teddy bear or soft toy looks once turned and stuffed.
When the seam allowance is uneven, curves become distorted. A rounded cheek may turn flat, or a leg may twist slightly. These small shifts add up, and the toy begins to look unbalanced.
The most sensitive areas are always the face, paws, and tight curves. Keeping a steady seam line in these zones makes a noticeable difference. It helps to slow down deliberately in curved sections and avoid pulling the fabric through the machine.
A simple way to practice this is by using a basic teddy bear pattern and focusing only on keeping the seam allowance consistent throughout the project.
The ideal is an even seam allowance across the entire piece, usually 0.5–1 cm for plush toys (depending on the size of the toy and the fabric). This ensures:
- precise shapes after stuffing
- even edges
- a neat, professional finish
Stuffing Control Changes Everything
Many beginners assume that more stuffing automatically leads to a better result. In reality, stuffing is not about quantity, but about control.
Overstuffing is one of the most common mistakes. When too much filling is forced inside, seams begin to stretch, shapes lose their definition, and the toy becomes stiff instead of soft and expressive. Facial features are especially sensitive. Excess pressure can distort proportions and shift carefully placed details.
At the same time, stuffing direction plays an equally important role. Random filling creates uneven surfaces and lumpy shapes that are difficult to fix later.
Controlled stuffing builds the toy from the inside out. Working in small amounts and guiding the filling in a consistent direction helps create smooth curves and a stable structure. For example, shaping the head gradually and maintaining symmetry prevents distortion, while distributing filling evenly in the body keeps the proportions balanced.
The goal is not to fill every space as tightly as possible, but to support the form without tension. Once this balance is understood, even simple designs begin to look noticeably more refined.
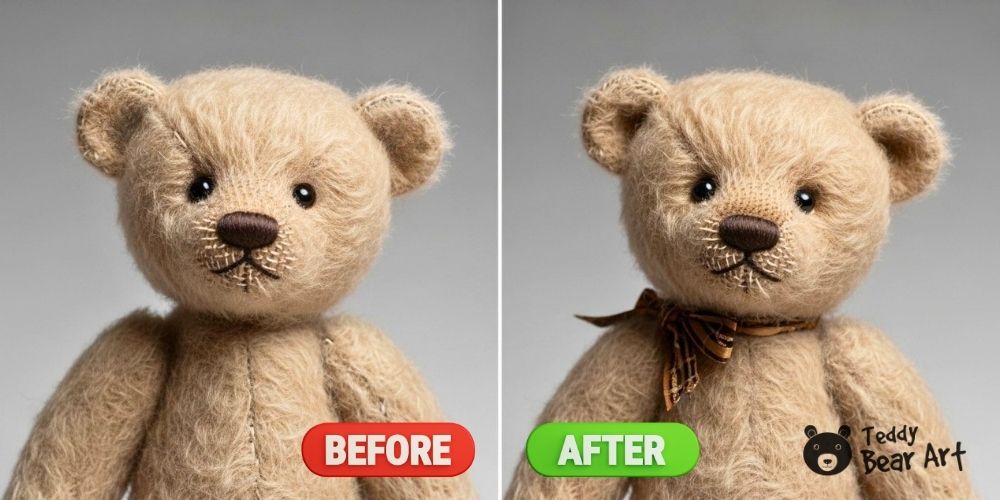
Finishing Details Make the Biggest Difference
At first glance, small finishing details may seem optional. In reality, they are often what separates a beginner result from a polished, professional-looking toy.
Even a well-sewn and properly stuffed plush can look unfinished if the final touches are missing. Subtle shaping, clean closures, and attention to tiny details bring everything together.
For example, carefully closing openings with neat, invisible stitches keeps the surface clean and uninterrupted. Slight adjustments to the face, such as gentle shaping or tightening, can improve expression without changing the pattern. Even minimal detailing can enhance depth and character.
These steps do not require advanced skills or special tools. What they require is patience and attention. Taking a few extra minutes at the end of the process can completely transform the final result.
It is often these quiet, almost invisible improvements that make a toy feel truly complete.
If you are interested in knowing how to customize stuffed animals, read this guide.
FAQ
What type of stuffing is best for plush toys?
High-quality polyester fiberfill works for most toys, but you can also experiment with eco-fillers, cotton blends, or wool, depending on texture and firmness. For a comprehensive comparison of the most popular stuffing materials and their pros and cons, check out Top 10 Teddy Bear Stuffing Materials.
How do I choose the right fabric so my plush toy looks and feels better?
Light cottons give clean, sculpted shapes, while plush or faux fur creates a softer, more classic teddy feel. Each fabric handles stuffing and stitching differently, so understanding their characteristics is key. For an in-depth look at different teddy bear fabric types, see Teddy Bear Fur Fabrics Guide.
Before You Go
Small details shape the final outcome far more than most expect. Plush toy sewing tips like consistent seam allowance, balanced stuffing, thoughtful fabric choice, precise eye placement, and controlled stuffing direction may seem minor at first, yet together they create a noticeable shift toward a more polished result.
Improvement does not require complex patterns or advanced tools. It comes from understanding how each decision affects the final toy. With a bit of attention to these often-missed details, even simple designs can look significantly more refined.
Have your own tips? Share them in the comments below, we’d love to see your ideas!
Saving this guide can be helpful for future projects, especially when something feels slightly off and needs a quick adjustment. Bookmark this article so you can return to it whenever you need guidance for your plush toys.
Get Free Patterns & Be the First to Know!
Want free teddy bear patterns, exclusive tutorials, and a chance to win craft supplies?
Sign up for our newsletter using the subscribe form in the middle of this article to receive new patterns, insider tips, and the latest news on teddy bear art. You’ll also automatically be entered into our annual giveaway for a chance to win teddy bear crafting materials.
Bonus entry: Save one of our pins on Pinterest to increase your chances of winning!
Let’s create, inspire, and craft beautiful teddy bears together!