DIY plush hedgehog step by step, and you will create a charming collectible that brings a little woodland friend to life. This tutorial is designed to be simple enough for beginners while offering tips and techniques that even experienced crafters will find useful. Each stage is shown with clear photos to guide you through creating a soft, round, and expressive hedgehog. Following this guide, you can make a plush that feels like a miniature work of art full of personality, rather than just a simple toy.

Materials Needed
- Glue
- Faux fur with the pile length of 1,3-1,5 cm
- Faux fur with the pile length of 1,5-1,6 mm
- A pair of black glass eyes on a metal loop, 4 mm in diameter
- Metal pellets or glass pellets for weight
- Felt fabric for the ears
- Threads and needle
- Polymer clay
- Scissors
- An awl
- Paints
Preparing the Pattern and Cutting the Fabric
The full hedgehog pattern is available in our free, cute hedgehog plush pattern guide, ready to download, so you can sew along with this tutorial.
Start by printing the hedgehog pattern and cutting it carefully. The pattern pieces include the body (belly and back) and ears. For best results, cut the fur so the pile is lying in the natural direction of the animal, which adds realism to the finished plush. Remember that seam allowances are not included.
DIY Plush Hedgehog Step by Step
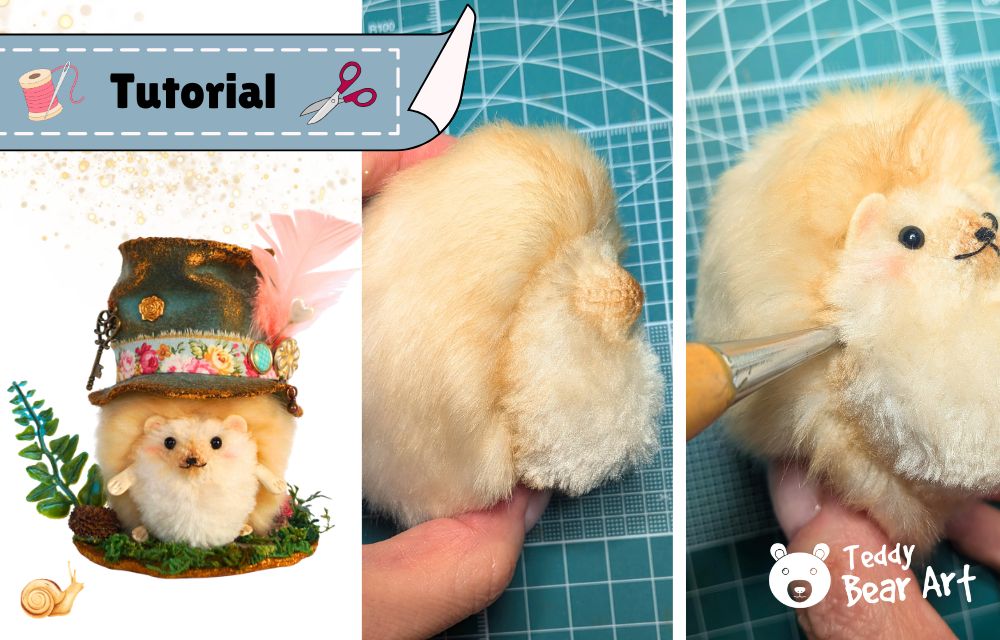
Start by sewing the darts. Next, attach the belly to the back, beginning at point A and sewing down to the bottom, then repeat with the mirrored side to create two main halves of the hedgehog. Once these two pieces are complete, sew them together along the sides, leaving an opening for turning the plush right side out.
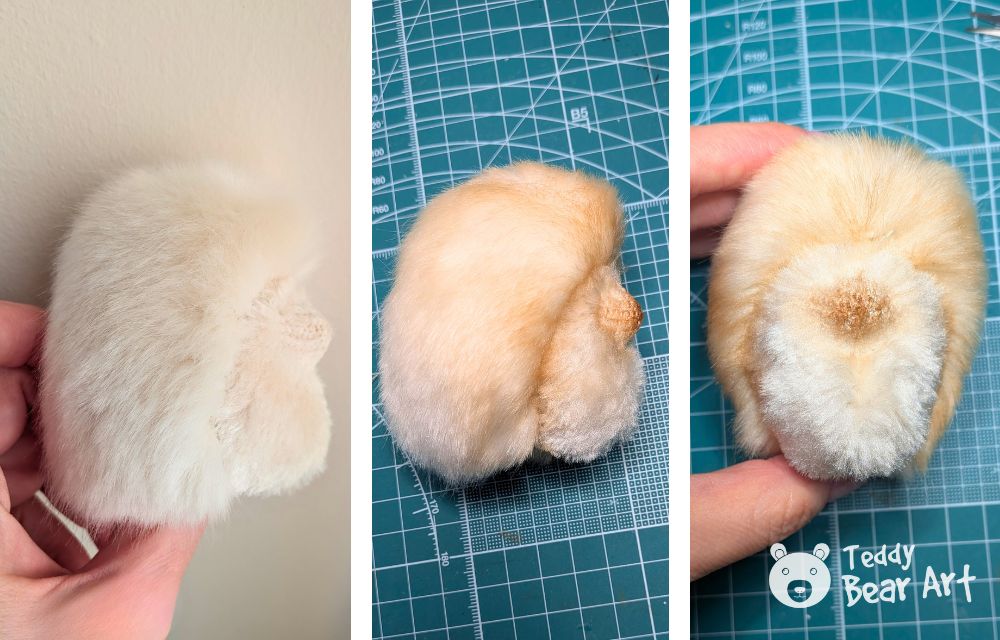
After turning, smooth the fabric, paying close attention to the nose area, then fill the body with polyester fiberfill and add pellets for weight if desired. Close the opening carefully.
Once the body is assembled and stuffed, gently extract the fur from the seams, brush it out, and trim a little fur on the nose for a neat finish. Tone the nose and the hedgehog’s fur as needed to give natural shading.
Insert the black glass eyes securely, and embroider the nose and mouth using fine cotton thread and a beading needle. Add a touch of blush for warmth and personality.

Cut out the ears from felt fabric, add some tone, and glue them.
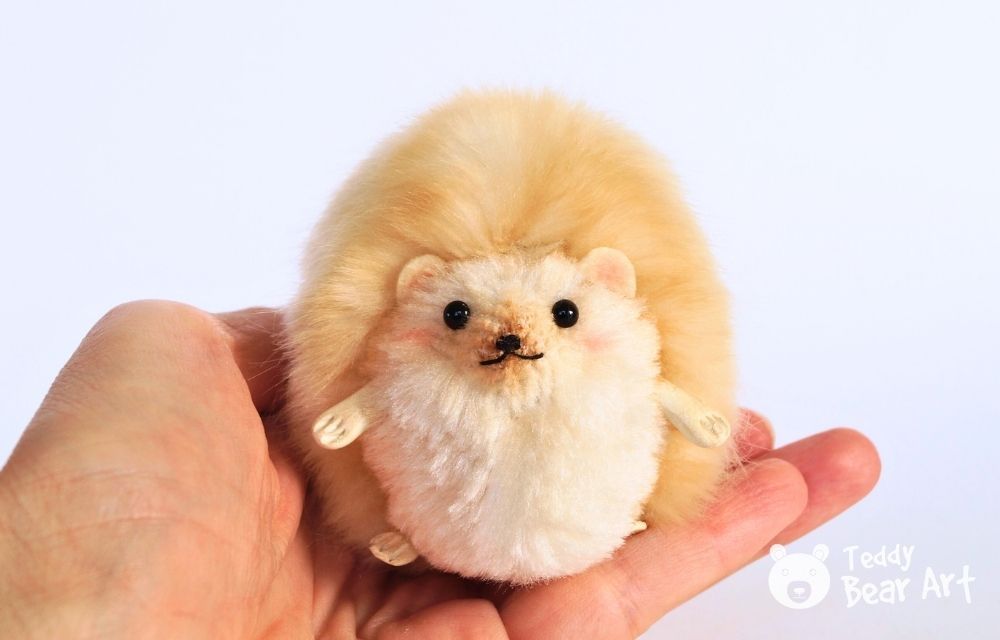
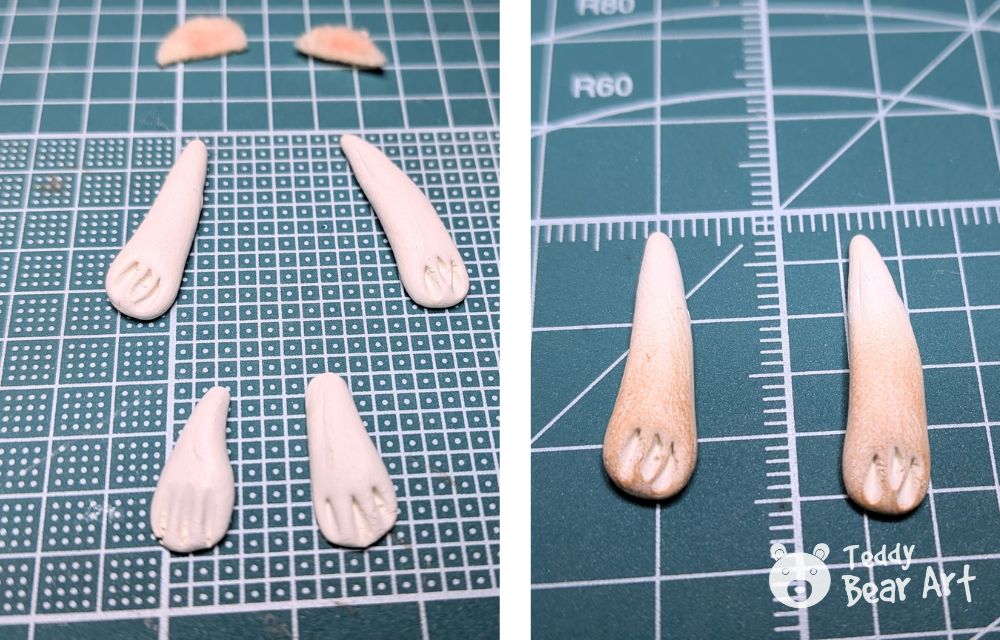
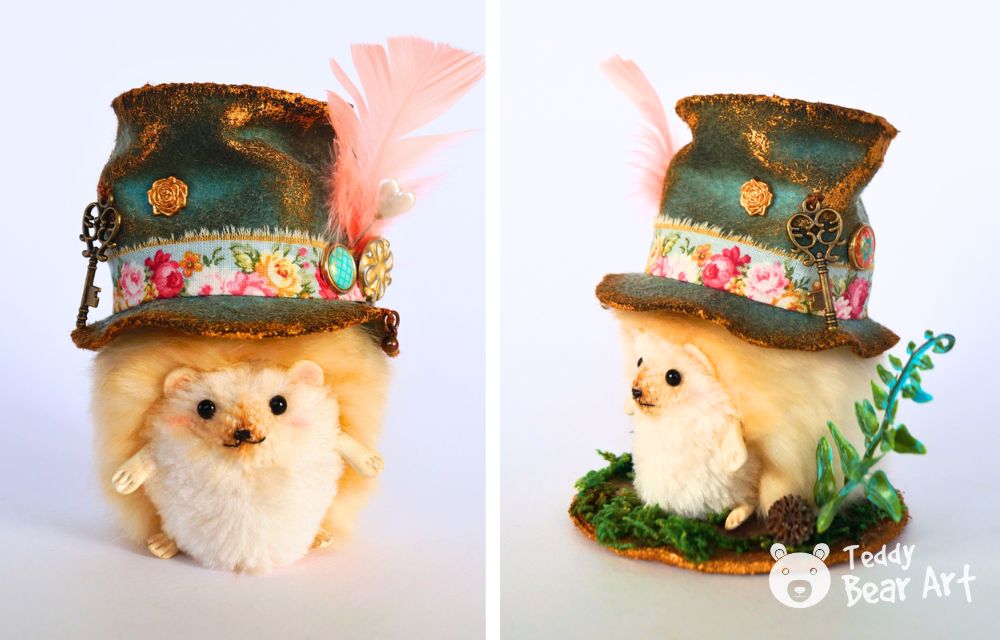
The limbs can be sculpted from self-hardening clay such as Milliput White, lightly toned, and then inserted into the body. To attach, make small holes with an awl and glue the limbs in place with strong universal adhesive such as UHU. Finally, add accessories as desired, for example, a felt hat or tiny props, to complete your collectible hedgehog.

FAQ
Is this tutorial suitable for beginners?
Yes, the pattern and step-by-step instructions are designed to be accessible. If you can sew curved seams and hand-sew a small opening, you can complete this plush successfully.
Can I sell hedgehogs made from this tutorial?
Finished plush toys can be sold in small quantities, such as at local craft fairs or in handmade shops. The pattern itself should remain free and not be redistributed. Adding small personal touches ensures each hedgehog is unique.
What materials give the most realistic look?
Using faux furs with natural pile length and glass eyes helps achieve a collectible-quality plush. Polymer clay noses and careful shaping of small features enhance lifelike expression.
Before You Go
After completing your hedgehog, consider making a few more in different fabrics or colors to create a charming miniature hedgehog family.
Save this tutorial for future projects, as the pattern can be reused to create multiple variations.
For additional ideas, tips, and collectible plush tutorials, visit TeddyBearArt.com, a resource dedicated to high-quality plush crafting.
Check out our other Hedgehog sewing pattern tutorial with a jointed head and limbs:
Get Free Patterns & Be the First to Know!
Want free teddy bear patterns, exclusive tutorials, and a chance to win craft supplies?
Sign up for our newsletter using the subscribe form in the middle of this article to receive new patterns, insider tips, and the latest news on teddy bear art. You’ll also automatically be entered into our annual giveaway for a chance to win teddy bear crafting materials.
Bonus entry: Save one of our pins on Pinterest to increase your chances of winning!
Let’s create, inspire, and craft beautiful teddy bears together!
Hi Hanna,
I’ve been looking for simple sewing projects for my daughter and came across your hedgehog pattern. She’s 8 and just starting to get interested in making things by hand, so I’m wondering if the simpler hedgehog version would be a good place to start. Do you think it’s manageable for a child with a bit of guidance? It looks like a really sweet project to try together.
Hi! This one might be a little more challenging than the frog pattern you mentioned before. I would suggest starting with something simpler, especially made from felt, as it’s easier to work with for beginners. Once she feels more confident, the hedgehog could be a lovely next step.
For example, these cute bunnies https://teddybearart.com/2-eas…