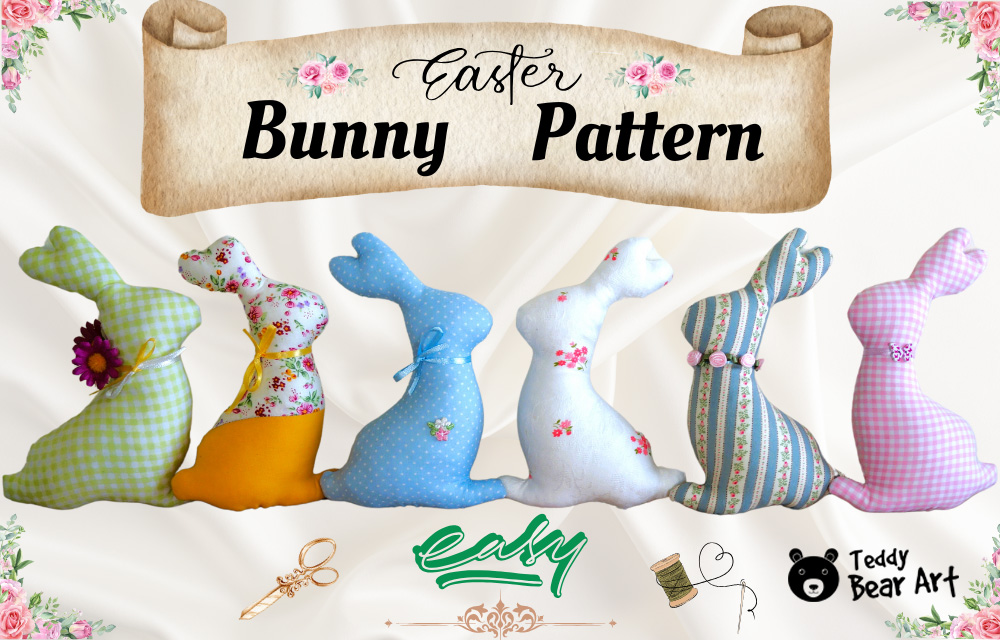
Sew a cute bunny with this Easter bunny sewing pattern and step-by-step tutorial. Create an adorable toy easily and quickly. This bunny makes a great decoration for an Easter basket, a cozy home decor piece, or a lovely gift for loved ones. Plus, this project is perfect for beginners, as it’s fast, simple, and doesn’t require complicated materials.
This Easter bunny sewing pattern is not only fun but also versatile. Once you’ve mastered the basics, you can customize your bunny with different fabrics, colors, or accessories to make it uniquely yours. For instance, add a little bowtie or a floral wreath around its neck to create a more personalized look. The simple design leaves room for creativity, whether making several bunnies as Easter gifts or using them as seasonal decor around your home. It’s a perfect project to explore your sewing skills while creating something adorable and meaningful for yourself or your loved ones.

Materials and Tools You’ll Need
Before you start, gather the following supplies:
- Soft cotton (great for a classic look)
- Sewing machine (or needle and thread for hand-sewing)
- Scissors
- Fabric marker, chalk, or pencil
- Pins or fabric clips
- Polyester stuffing or wool filling
Decoration Options:
- Embroidery floss for facial details
- Buttons, beads, or safety eyes (if making for adults or decor)
- Ribbon or lace for an extra festive touch
For Easter bunnies, soft, light, and spring-inspired shades work best. Here are some great options:
Classic Easter Colors:
- Pastel shades – soft pink, mint, lavender, sky blue, and pale yellow. These create a light and festive mood.
Vintage and Retro Colors:
- Muted tones – dusty rose, olive, beige, slate blue, and cream. They pair well with floral and gingham prints.
Natural and Cozy Tones:
- Linen and warm shades – ecru, light brown, sand, and ivory. Perfect for primitive-style bunnies.
If you want your bunnies to harmoniously match your teddy bears, consider using vintage fabrics with floral patterns, small checks, or polka dots.
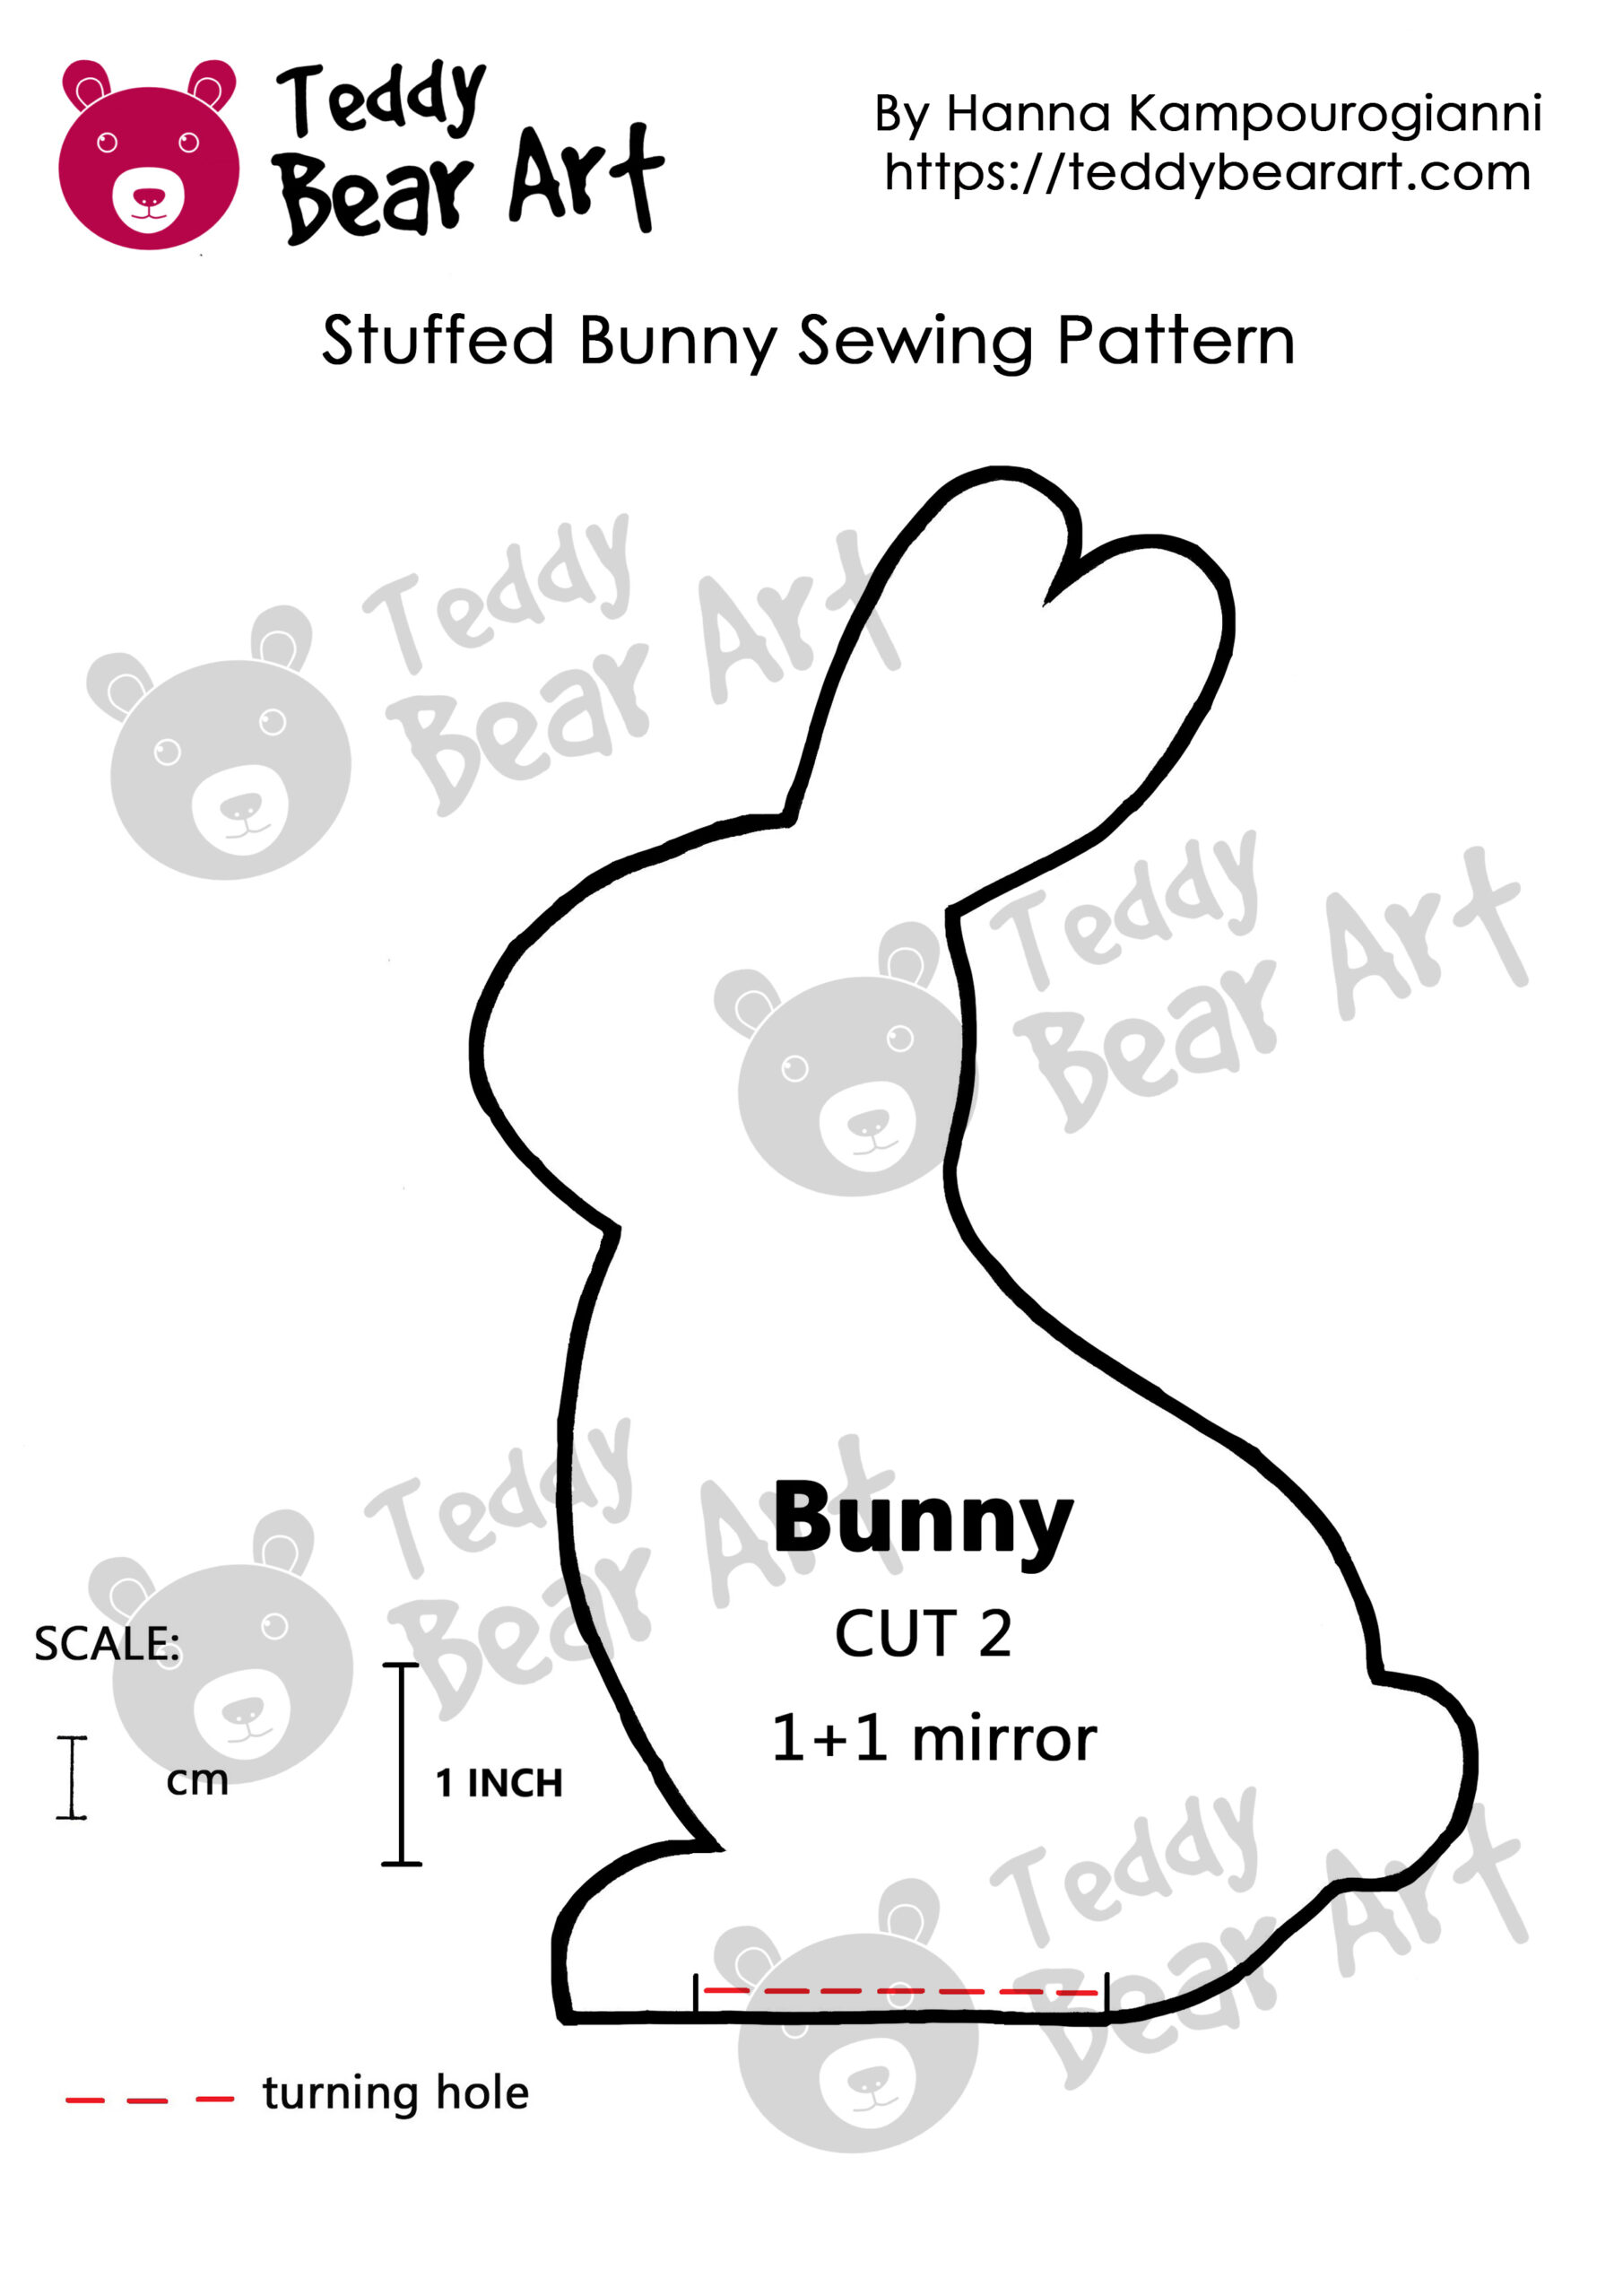
Free Bunny Pattern and Step-by-Step Tutorial
Step 1: Download the Easter Bunny Sewing Pattern
To download the pattern, follow the instructions below:
From a phone or a tablet (Android): There should be something similar for mobile devices with Android or iOS. Click on the image. Save it by holding your finger on the image and selecting the “Save Image” option. Then go to your photo gallery and print it (there is an option).
From a computer (Windows): Click on the photo of the pattern you see below. In the new tab that will open, you press the right mouse button and select the “Save image as …” option. Then, you choose where the image will be saved on your computer.
Step 2: Sewing Your Easter Bunny
- Align the two fabric pieces with the right sides together. It is necessary to cut out two identical pattern pieces at once, maintaining symmetry and saving time. Pin the pattern in place and trace around it. Cut out two identical pieces, leaving a seam allowance around the traced lines.
If you have enough fabric, you can transfer the pattern onto one layer of fabric, place the second layer of cloth underneath with the right sides together, and sew directly. This eliminates needing to pin or baste two mirrored bunny pieces together before sewing. - Using a ¼-inch seam allowance, sew around the edges, leaving a small gap at the bottom for turning and stuffing.
- In addition to trimming with zigzag scissors, make small snips along the curves, especially around areas like the ears, tail, and legs. This will help the fabric lie flat and prevent puckering when you turn it right side out.
Make small notches around the curved areas, particularly near the ears, to ensure the fabric smooths out and lays neatly when turned inside out. - Turn the bunny right side out through the opening and use a chopstick or turning tool to push out the ears and edges.

Step 2 – Transfer the bunny pattern onto the wrong side of the fabric, positioning it to achieve the desired final design.
Step 3 – Fold the fabric in half with the right sides facing in, sew along the pattern outline, and cut out the bunny.
Step 4 – Turn it right side out, fill it with stuffing, and your bunny is ready!
Step 3: Stuffing and Closing the Bunny
- Gently fill the bunny with stuffing, ensuring it’s firm but still soft. Use small amounts at a time to avoid lumps.
- Once fully stuffed, use a ladder stitch or invisible stitch to close the opening neatly.
Step 4: Adding Facial Features and Decorations
To give your bunny some personality, you can add simple embroidered eyes and a nose using a satin stitch. Small buttons or black bead eyes can be used instead if you’re making a decorative piece. Tie a thin ribbon around its neck for a festive look, or sew on a tiny felt bow for extra charm.
For an even cuter touch, consider sewing a tiny fabric carrot or a miniature Easter egg as an accessory!
Final Thoughts
This Easter bunny sewing pattern and tutorial is a fantastic way to bring some handmade charm into your Easter celebrations.
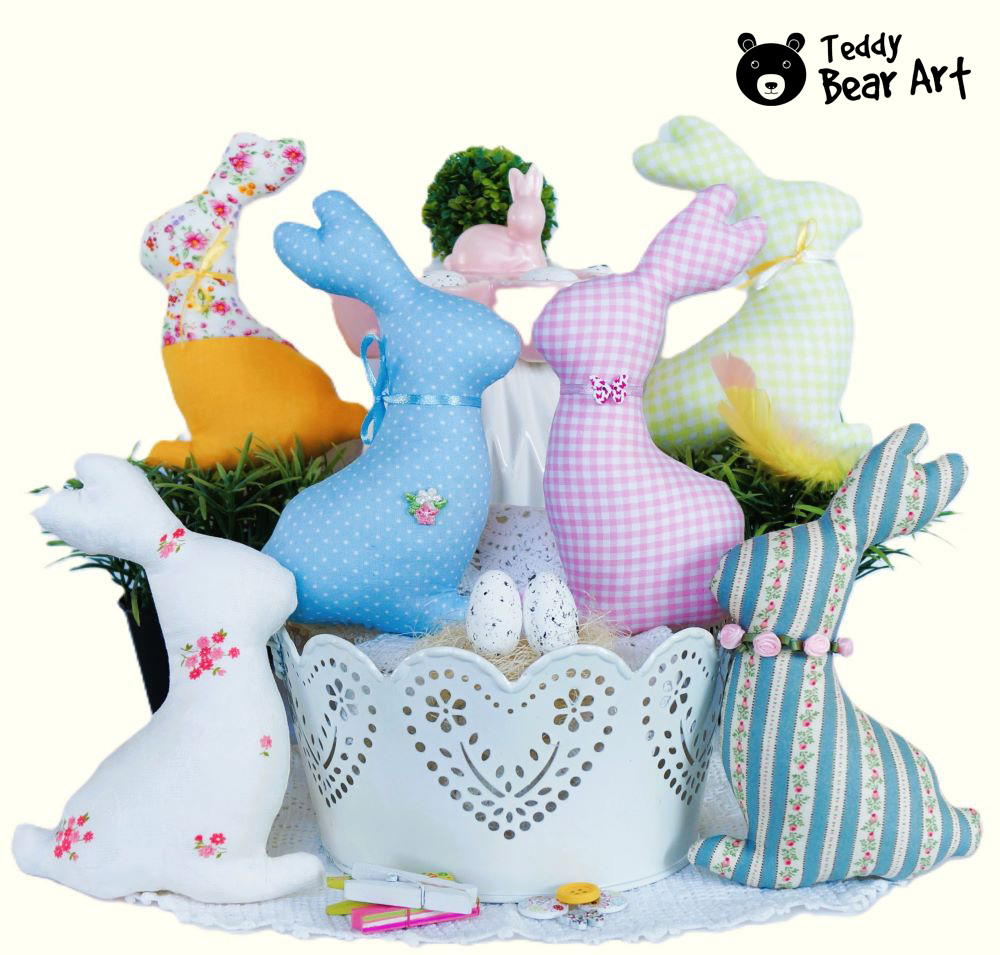
These handmade cute and elegant bunnies can be used in various ways, such as filling an Easter basket for a delightful surprise, adding a touch of spring to your home décor by displaying them on a mantelpiece or as part of a table centerpiece, making a thoughtful gift for loved ones, or even as charming accessories for teddy bears or dolls.
Don’t forget to share your creations with fellow sewing enthusiasts—happy stitching!
Let us know in the comments if you tried this pattern, and feel free to customize your bunny with different fabrics and decorations!
More Easy and Quick Stuffed Animal Patterns
If you enjoyed this Easter bunny, don’t miss out on other simple and quick patterns for making cute animals:
- Teddy Bear Sewing Pattern for Beginners: Step-by-Step Guide to Sew Your First Bear — the perfect pattern for those new to teddy bear making. Learn how to create your first bear with easy-to-follow steps!
- Free Felt Teddy Bear Template: Easy DIY for Beginners — make an adorable felt teddy bear, even if you’re a beginner. A simple and quick way to create your very own handmade animal!
- Free Stuffed Bunny Sewing Pattern for Beginners — create a cute stuffed bunny with this easy pattern, perfect for beginners looking for a quick and fun project.
Get Free Patterns & Be the First to Know!
Want free teddy bear patterns, exclusive tutorials, and a chance to win craft supplies?
Sign up for our newsletter using the subscribe form in the middle of this article to receive new patterns, insider tips, and the latest news on teddy bear art. You’ll also automatically be entered into our annual giveaway for a chance to win teddy bear crafting materials.
Bonus entry: Save one of our pins on Pinterest to increase your chances of winning!
Let’s create, inspire, and craft beautiful teddy bears together!
This Easter Bunny sewing pattern and tutorial looks like a fantastic project for both beginners and experienced crafters! I love how detailed the instructions are, making it easy to follow along. One question I have is about the type of fabric that works best for this pattern. Do you have any recommendations for materials that are easy to work with but still give a professional finish? Also, could you share any tips for adding personal touches to the bunny, like embroidery or accessories? I’m excited to try this out and would love to hear more about others’ experiences with this project!
Thank you for your comment! ???? If you decide to use fleece or soft velvet, you’ll need to slightly enlarge the pattern to avoid difficulties when turning out small details like the paws, ears, and tail. However, the best material for this project is definitely cotton. It’s light to work with, holds its shape well, and allows you to easily turn out even the smallest parts, giving a neat and professional finish. If you’d like to add a personal touch, try embroidering the nose and eyes, or creating a miniature accessory like a scarf or a flower crown. This will give your bunny a unique character! I’d love to see how your bunny turns out! ????✨
I’m not into sewing a lot, though I’ve learnt at some point. However, I can tell you that the I witnessed ly mother and my aunt make some DIY creative projects, I was watching! Personally, I really like how you detail all the steps to make those Easter bunnies! I’m sure that every person who’s interested in DIY crafts will find them easy to make and easy to execute properly. Please keep up the good work as your article is very useful!
Thank you so much for your kind words! I’m really happy that you liked the step-by-step guide for making Easter bunnies. I try to make the instructions as clear as possible so that everyone can easily follow them. I hope that one day you’ll try making something yourself too! ????
I really enjoyed reading this tutorial it’s not just a step-by-step guide but an invitation to make something uniquely yours. The idea of personalizing a simple Easter bunny with little touches like a bowtie or floral wreath got me thinking about how these crafts become a blend of tradition and self-expression. It’s amazing how something as playful as sewing a bunny can spark creativity and even bring a sense of connection to seasonal memories. Thanks for inspiring me to explore my own creative journey this Easter!
Thank you so much for your kind feedback! I’m happy that the tutorial inspired you to take a creative approach. Indeed, adding small details can turn a simple craft into something special and personal. I hope your Easter bunny brings you joy and becomes part of wonderful holiday memories!