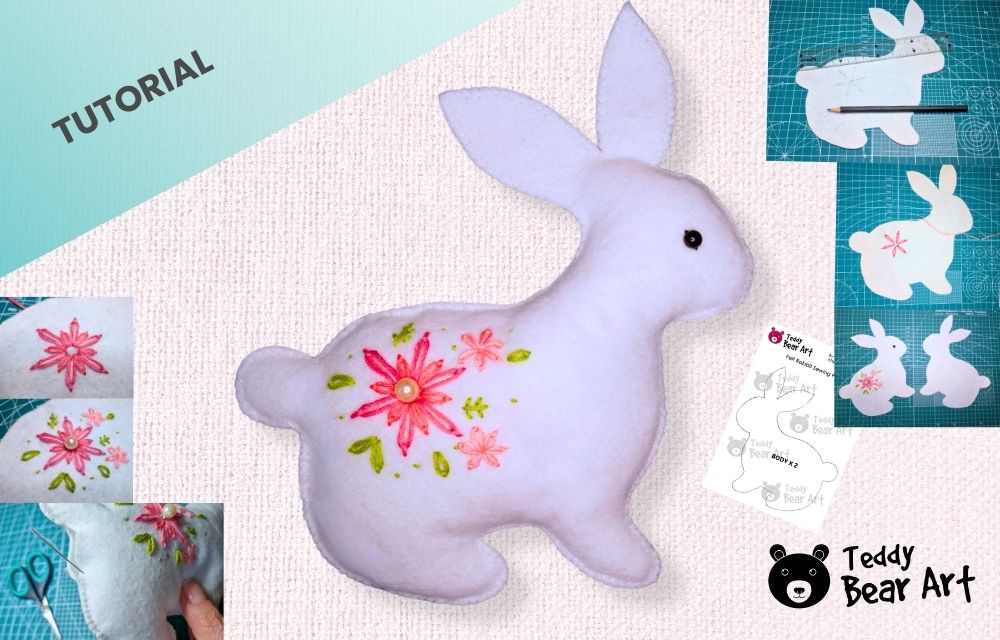
Creating a tiny felt rabbit can be incredibly calming, especially when the process is simple and the steps are easy to follow. This felt rabbit sewing pattern tutorial shows how two small pieces of felt can come together to form a soft and charming decoration. Learn how to sew a cute Easter bunny.
The project suits beginners who want a gentle introduction to hand stitching, and it also feels satisfying for experienced crafters who enjoy quick handmade pieces. The materials are minimal, the shapes are friendly, and the decorating stage opens the door to color play and personal style.

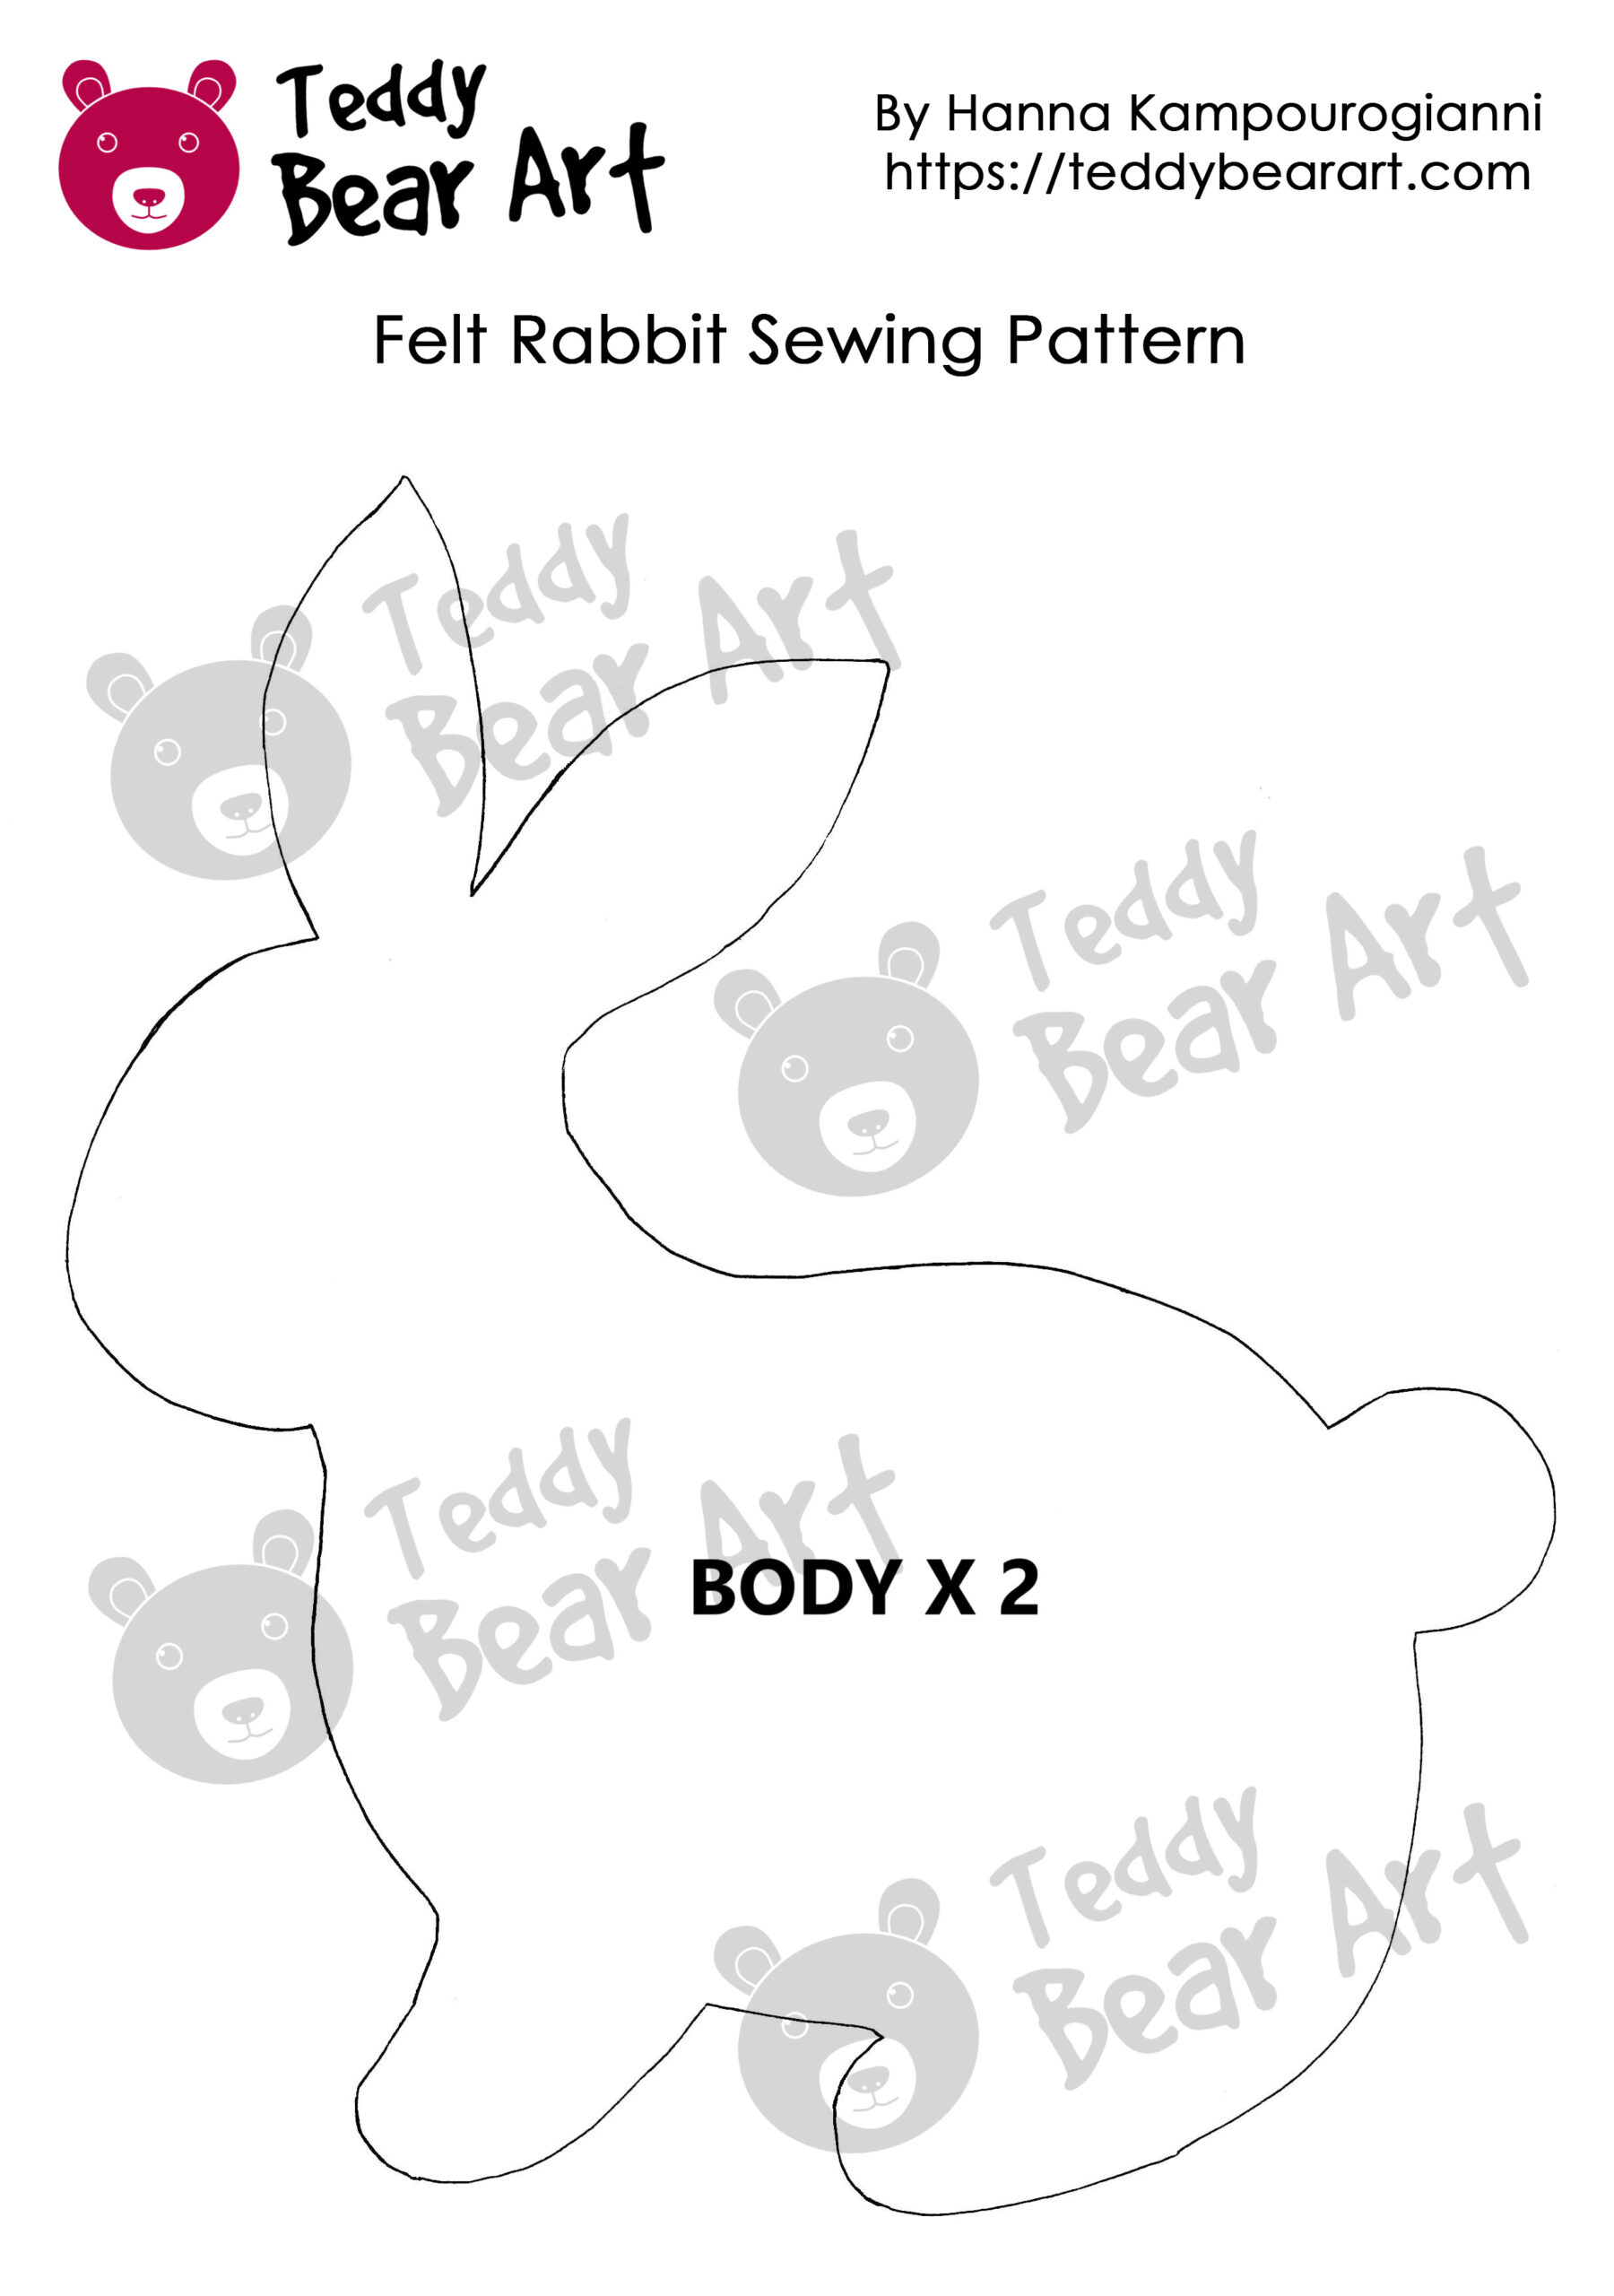
Download the Pattern
Notice that seam allowances are included.
To download the pattern, follow the instructions below:
From a phone or tablet: There should be a similar option for mobile devices with Android or iOS. Click on the image. Save it by holding your finger on the image and selecting the “Save Image” option. Then, go to your photo gallery and print it (an option available).
From a computer: Click on the photo of the pattern you see below. In the new tab that will open, you press the right mouse button and select the “Save image as …” option. Then, you choose where the image will be saved on your computer.
Materials You Will Need
- Felt sheets in your chosen colors
- Embroidery floss
- Hand sewing needle
- Small sharp scissors
- Polyester stuffing
- Beads
Step-by-Step Sewing Tutorial
Step 1: Trace the pattern onto felt
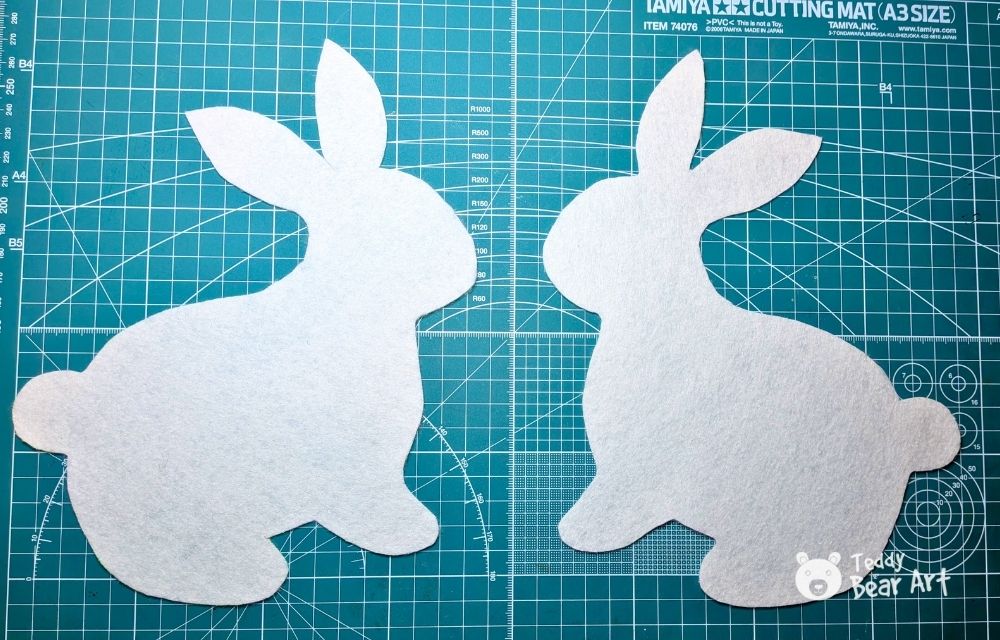
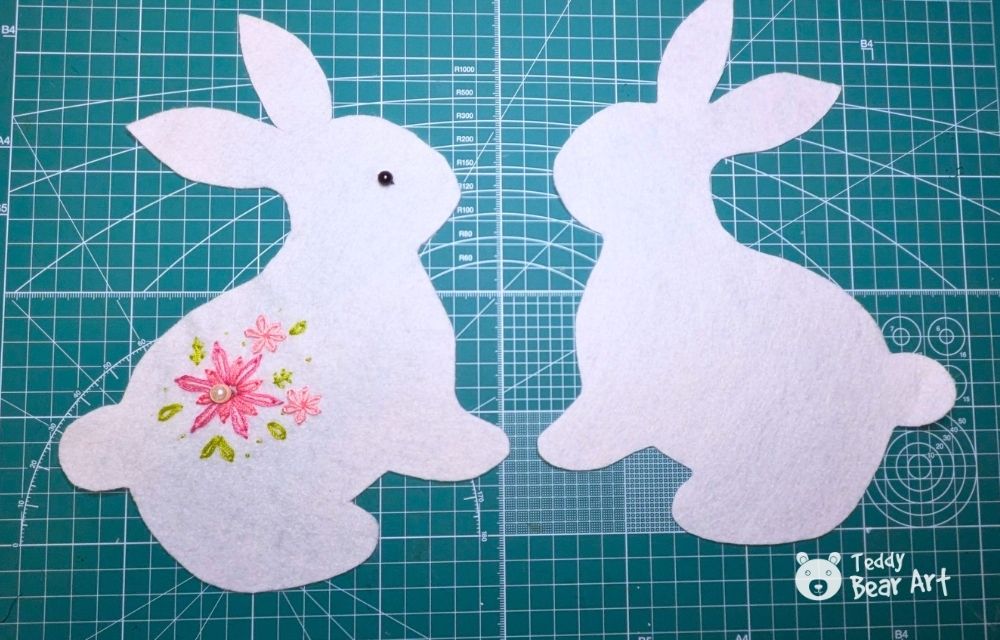
Before sewing begins, the pattern should be traced neatly onto the felt. This works well with a fine disappearing fabric marker or a simple pencil. Precise tracing helps the rabbit keep its clean shape once assembled. After the outlines are transferred, cut out the two matching pieces using small, steady scissor cuts to keep the edges smooth.
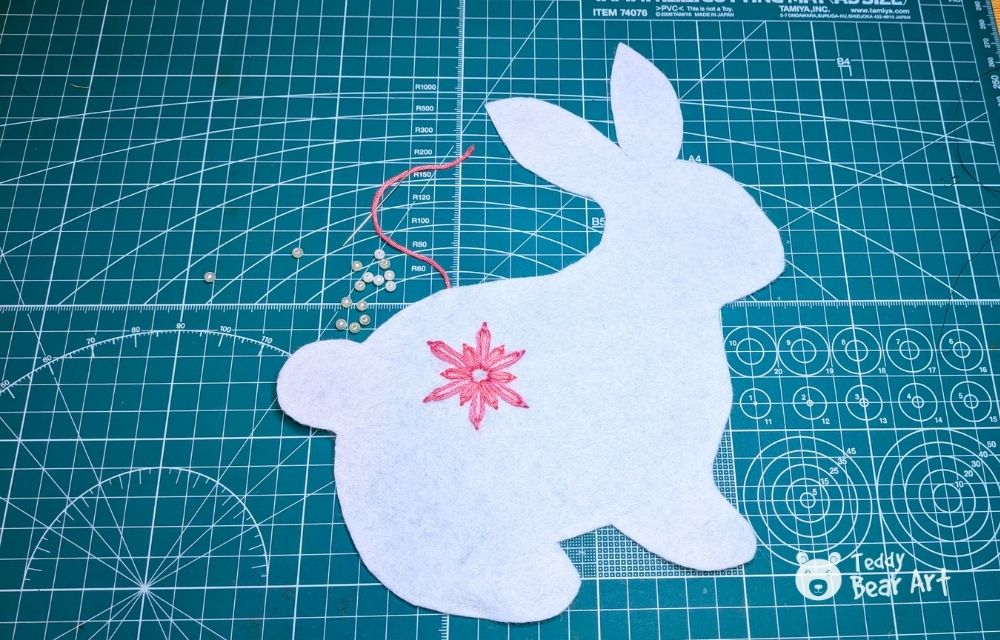
Step 2: Decorate the front piece
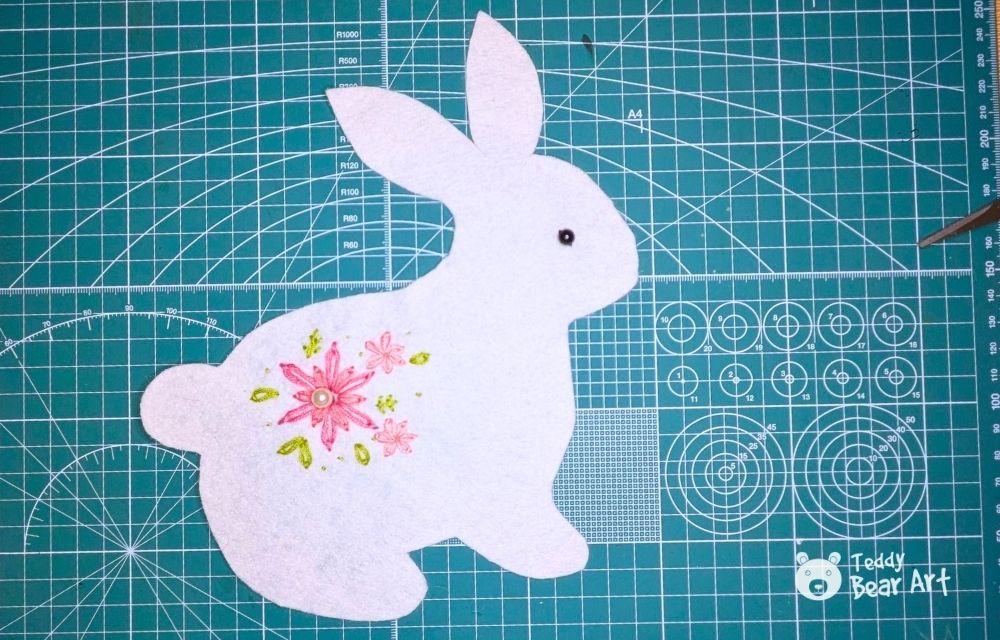
Now the front piece is ready for a little embellishment. A tiny flower embroidered with floss adds charm and a gentle, handmade feel. A few short stitches can create a petal or a simple cross shape. If embroidery is not part of the plan, beads, sequins, miniature felt shapes, or a tiny dot of fabric paint can serve as decoration instead. All decorative work should be done on one piece before the two parts are stitched together.


Step 3: Attach the eyes
Small black beads make perfect eyes and give the rabbit a lively expression. They should be sewn on securely with tight stitches. If beads are not available, the eyes can also be drawn with a fabric marker. This is the moment when the little rabbit starts to look expressive and full of character.
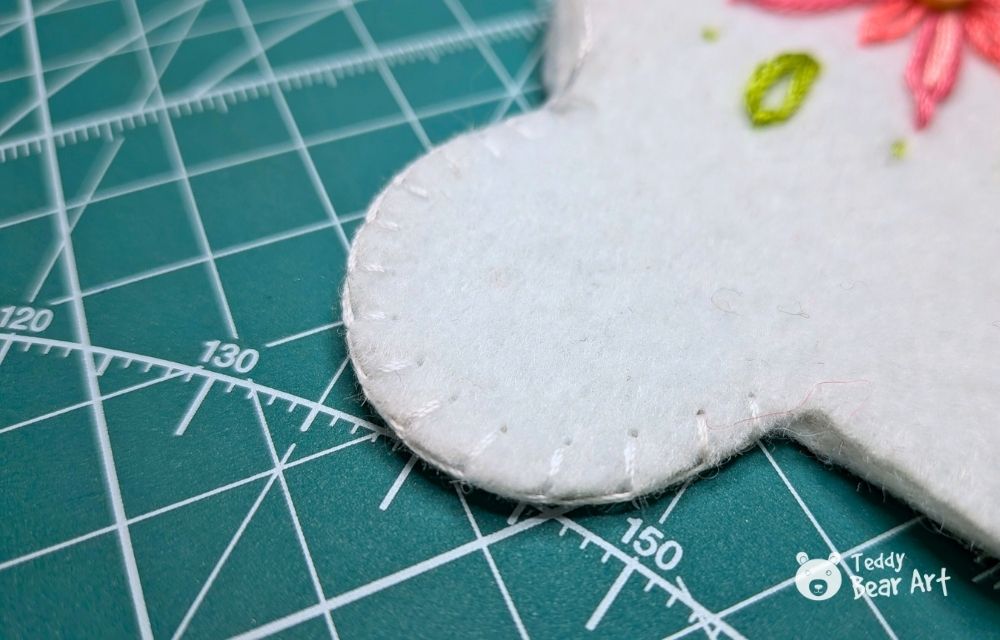
Step 4: Sew the two pieces together
When the front piece is complete, place the two felt pieces together with their right sides facing outward. Begin stitching around the edge with a blanket stitch. This type of stitch creates a neat border and adds a soft decorative outline. Move slowly around the entire shape, keeping the tension even so the felt does not pucker. Leave a small opening for stuffing.
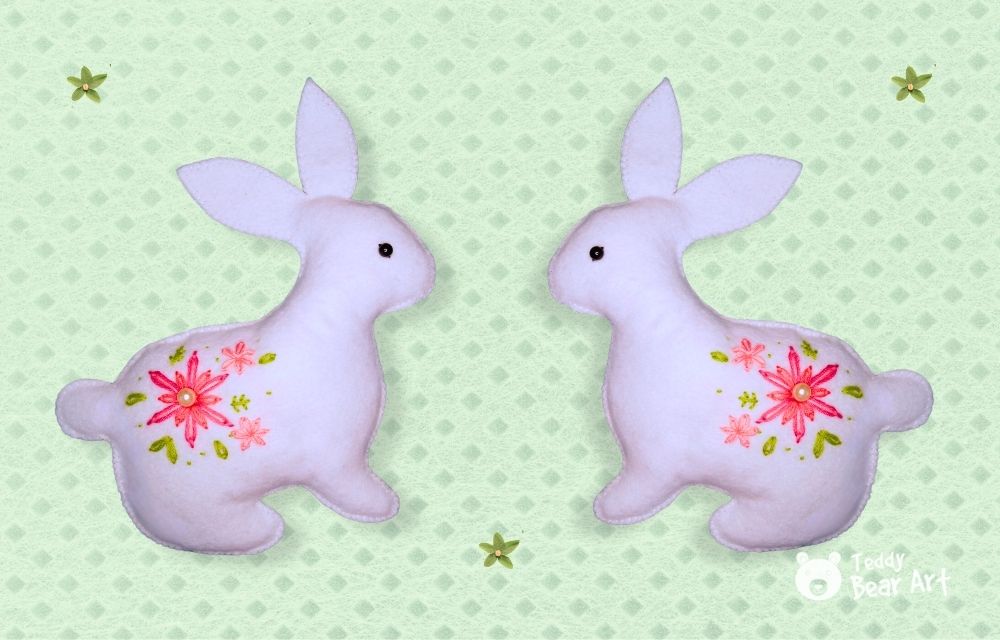
Step 5: Stuff the rabbit
Polyester stuffing works perfectly here. It should be added gently and not too firmly. Light stuffing helps the rabbit keep its soft, rounded shape. A small wooden stick, the back end of a paintbrush, or a cotton swab can help move the filling into narrow areas. Once the rabbit is softly filled, close the remaining opening with the same overcast stitch. When the final stitch is tightened, the rabbit takes on its sweet finished form.


Decoration Ideas
The rabbit can remain simple, but tiny accessories can shift its mood and style. A miniature ribbon bow adds a festive touch, a felt flower gives it a spring look, and a tiny scarf creates a cozy feel.
These small details make the rabbit perfect for seasonal displays, gift wrapping, or children’s room decorations. Pale gray, soft pink, mint, and cream felt all create completely different personalities, which makes the crafting experience fun and expressive.
Before You Go
This small felt project is friendly to beginners and still satisfying for experienced makers. A few materials, a bit of time, and the rabbit is ready to brighten a shelf, a basket, or a gift box.
The process is gentle and relaxing, which is why many crafters enjoy making several rabbits at once. They can become ornaments, Easter decorations, or little handmade presents. Sharing these creations often inspires fresh ideas, new color palettes, and charming variations.
Get Free Patterns & Be the First to Know!
Want free teddy bear patterns, exclusive tutorials, and a chance to win craft supplies?
Sign up for our newsletter using the subscribe form in the middle of this article to receive new patterns, insider tips, and the latest news on teddy bear art. You’ll also automatically be entered into our annual giveaway for a chance to win teddy bear crafting materials.
Bonus entry: Save one of our pins on Pinterest to increase your chances of winning!
Let’s create, inspire, and craft beautiful teddy bears together!
What an adorable and clearly explained tutorial! The step-by-step photos are incredibly helpful, and I love that this project is accessible for beginners but still results in such a charming finished rabbit. This is the perfect weekend craft, I can’t wait to make a few for Easter gifts. Thank you for sharing your lovely pattern!
You’re welcome! Happy sewing!
Thanks for sharing the tutorial,
This felt rabbit sewing tutorial is a simple and delightful project, perfect for beginners or experienced crafters looking for a quick, calming activity. Using just two pieces of felt and a few basic materials, you can create a charming little rabbit and personalise it with embroidery, beads, or tiny accessories. The process is relaxing, rewarding, and allows for creativity, making it ideal for gifts, decorations, or just the joy of crafting something handmade.
Keep up the good work!
Thank you for the kind feedback! I’m glad the tutorial inspired you. I’ll keep sharing more creative ideas!