Creating your own funny, cute, and chubby plush chick is a fun and rewarding sewing project, even if you’re just starting out! With this free chicken sewing pattern, you can easily make an adorable plush companion using soft faux fur, felt, and a few basic supplies. This beginner-friendly guide will walk you through each step of the process.
Once you’ve finished sewing your plush chick, you can add some cute accessories to make it even more charming. For example, you can attach a bow on its head or neck, or add a little flower, bee, or ladybug to give it a fun and playful look. You can also use tiny hats or scarves to add more personality. These accessories will give your chick a unique and adorable touch.

Materials and Tools You’ll Need
Before we start sewing, gather these materials:
- Faux fur (white or yellow) – for the chicken’s body and wings, with a pile length of approximately 20 mm
- Yellow felt – for the beak and feet
- Black glass eyes on a metal loop, 15-20 mm in diameter – for a realistic look
- Wool or thread – for the little “feathers” on the head
- Stuffing (polyfill) & weight pellets – for a soft yet balanced plush
- Basic sewing tools – scissors, an awl, needles (including a long needle for attaching the glass eyes), thread, pins
- A sewing machine (optional) and hand-stitching work too!
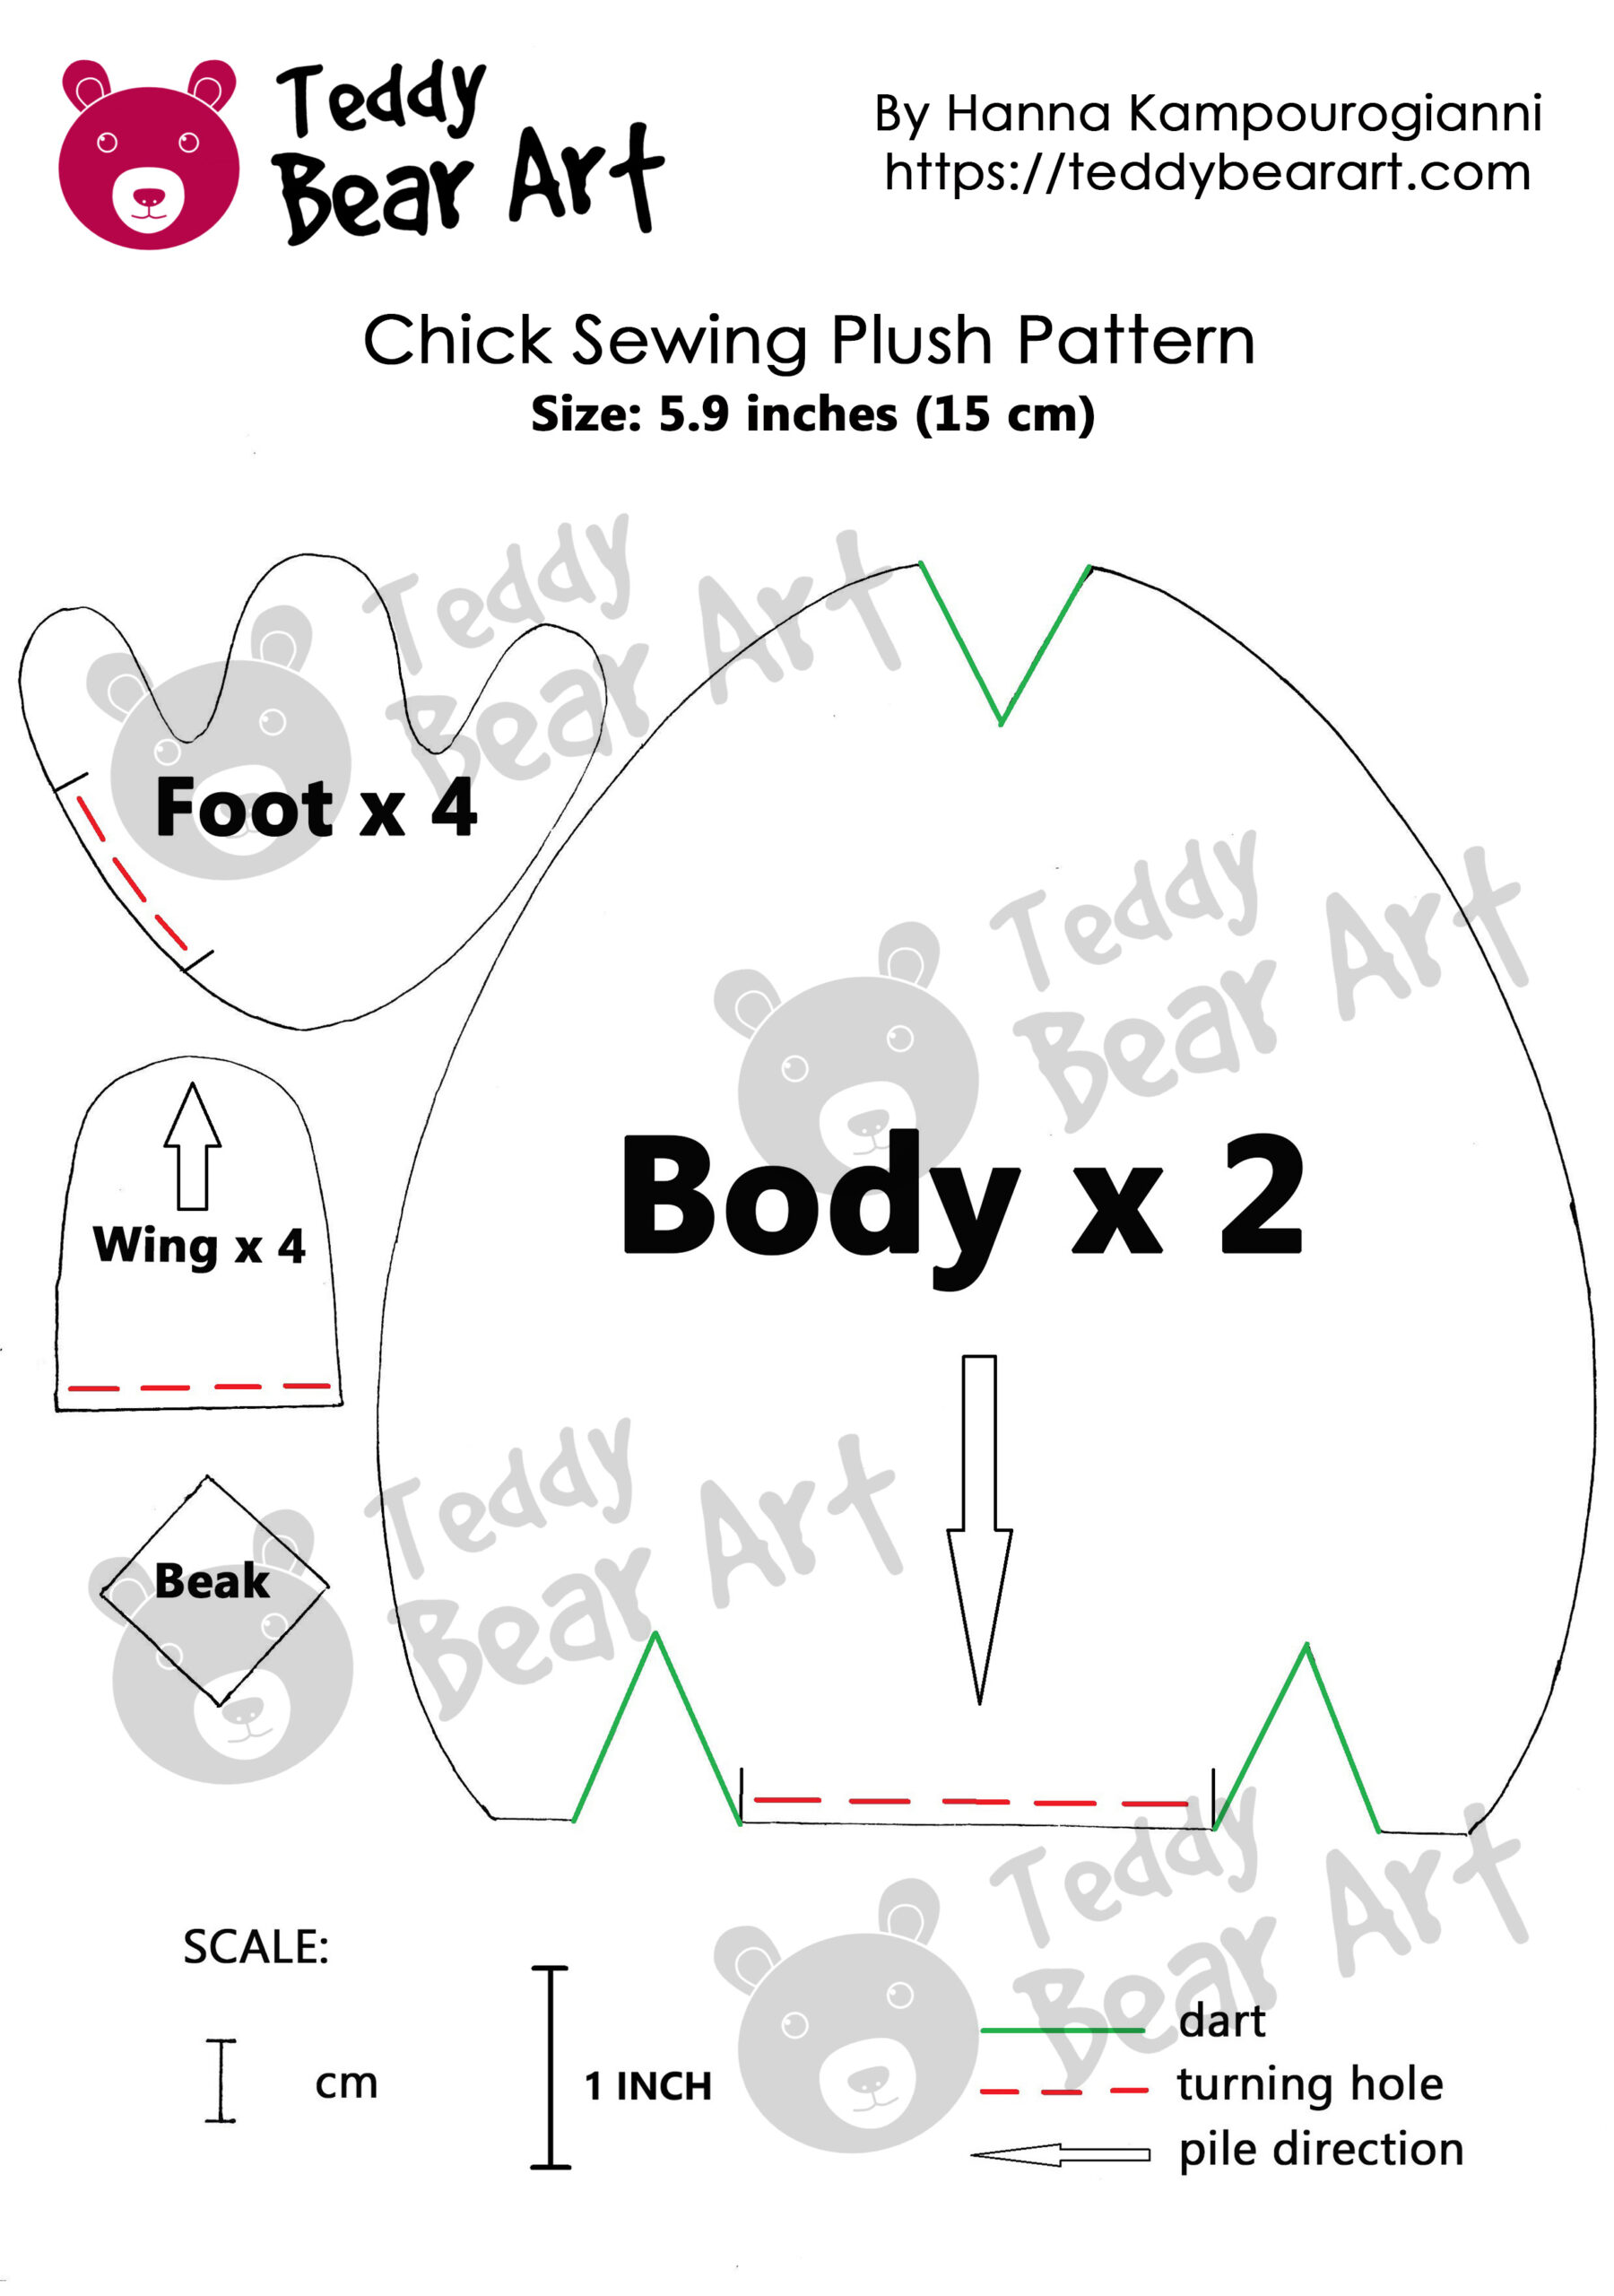
Download Your Free Chicken Sewing Pattern
To download the pattern, follow the instructions below:
From a phone or a tablet: There should be something similar for mobile devices with Android or iOS. Click on the image. Save it by holding your finger on the image and selecting the “Save Image” option. Then go to your photo gallery and print it (there is an option).
From a computer: Click on the photo of the pattern you see below. In the new tab that will open, you press the right mouse button and select the “Save image as …” option. Then, you choose where the image will be saved on your computer.
How to Sew Your DIY Chicken: Step-by-Step Guide
1. Cut Out Your Fabric Pieces
- Cut two body pieces from faux fur (white or yellow).
- Cut four wing pieces from the same faux fur.
- Cut one beak piece and four leg pieces from yellow felt.
- Prepare a small tuft of wool or thread for the head.
2. Assemble the Chicken’s Body
- Place the two body pieces together, with the fur sides facing in. Leave a 1/4 to 3/8-inch seam allowance around the edges.
- Sew around the edges, leaving a small opening for turning.
- Turn the body inside out.
- Stuff the body with your preferred filling material and add some weight pellets.
- Sew the opening closed carefully.
- Gently extract the fur from the seams.
- Gently extract the fur from the seams.
3. Attach the Eyes
- Positioning the Eyes: Position the glass eyes to achieve the desired expression for your chick. A slight tilt or change in placement can convey different emotions. Make sure both eyes are symmetrical and level.
- Preparing the Chick’s Head: Begin by carefully creating a small hole in the chick’s head where you want to place the eyes. You can use an awl for this. Be cautious not to make the hole too large or too small.
- Inserting the Eyes: Thread a strong thread through the metal loop on the eyes. Using a long needle, pull the thread through the hole you’ve created. The glass eyes are inserted through these holes, and the metal loop serves as a secure anchor for the eyes.
- Securing the Eyes: Once the eyes are inserted, pull the thread tight and secure it in the areas where the wings will be attached. Be careful not to pull the thread too tightly, as this could cause the glass eyes to crack. Tuck the ends of the threads inside the body of the chick.
4. Attach the Wings
- Sew two wing pieces together for each wing.
- Flip them right side out and stitch them onto the sides of the body.
5. Add the Beak, Sew the Feet and Hair Tuft
- Fold the felt beak slightly and sew it in place.
- Sew two foot pieces together for each leg, turn them inside out, and lightly stuff the toe area. Then close the opening and attach them to the body.
- Insert a small tuft of wool or thread at the top for extra charm. If you’re using a small piece of sheep wool, you can attach it using a felting needle. Alternatively, you can tie a knot in the wool and insert it into the hole made with an awl. Then, glue the wool in place. If you’re using thread, carefully use an awl to make a small hole in the fabric at the top and insert the “chick fluff” (fine fibers) into it. Then, gently glue them into the hole to create a soft, wispy look.
Final Thoughts
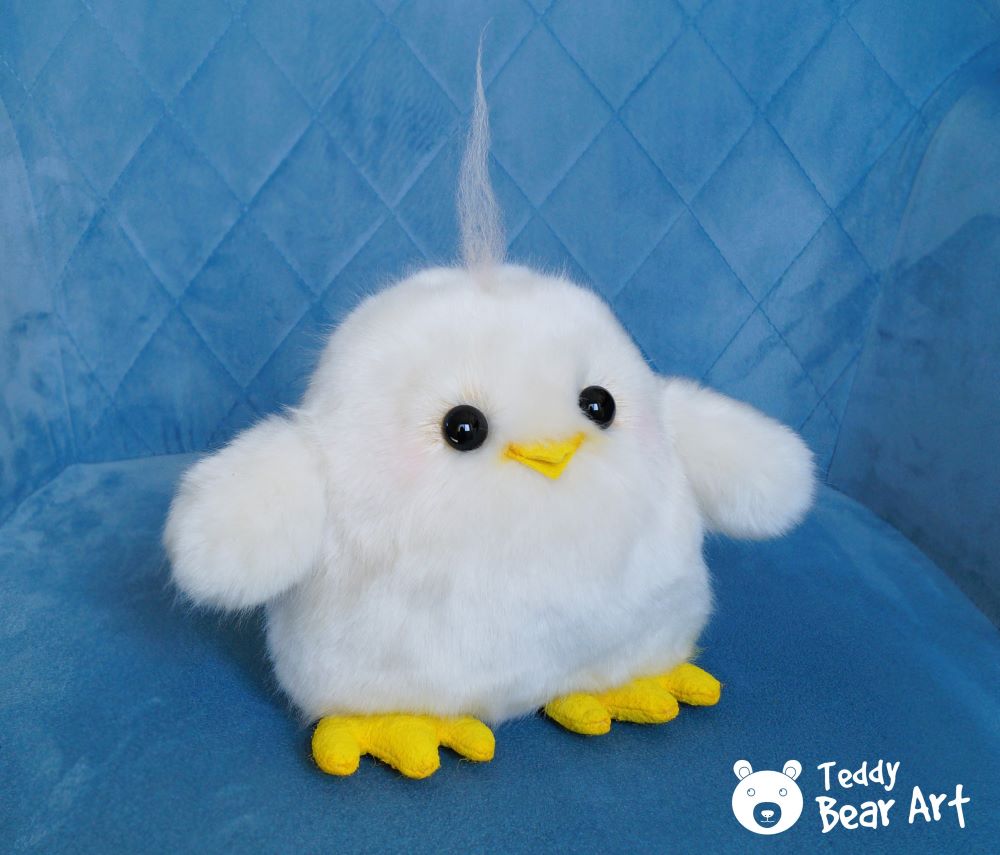
Sewing your plush chicken is an enjoyable project that’s perfect for beginners. With this free chicken sewing pattern, you’ll have a soft, funny, and chubby chicken in no time. Give it a try and let your creativity run wild! Have questions? Drop them in the comments below!
If you enjoyed this project, you might also like other simple and fun sewing projects to try in your spare time. For example, consider creating Easter bunnies using our free patterns. Or, if you enjoy making cute soft toys, consider these free patterns for creating buzzing bees, perfect for any celebration or decor.
Get Free Patterns & Be the First to Know!
Want free teddy bear patterns, exclusive tutorials, and a chance to win craft supplies?
Sign up for our newsletter using the subscribe form in the middle of this article to receive new patterns, insider tips, and the latest news on teddy bear art. You’ll also automatically be entered into our annual giveaway for a chance to win teddy bear crafting materials.
Bonus entry: Save one of our pins on Pinterest to increase your chances of winning!
Let’s create, inspire, and craft beautiful teddy bears together!
I really enjoyed reading this guide—it’s laid out in such a friendly, encouraging way that even someone new to sewing (like me) can follow along without feeling overwhelmed. The step-by-step instructions are detailed but not too technical, and I love the idea of using faux fur to give the chick a fluffy, adorable look. The suggestion to add a little bow or even a tiny hat for extra personality is such a fun touch! I also appreciate the tips on attaching the eyes securely and creating that cute tuft of “hair” on top, those small details really bring the plush to life. Overall, it’s a sweet project that feels totally doable, and I’m already picturing a row of these chubby chicks perched on my windowsill. Definitely bookmarking this one for a cozy weekend craft session.
Great job!
Thank you so much for your kind feedback! I’m glad the guide was helpful and inspiring for you. The faux fur really adds a cozy touch to the chick, and little accessories like the bow or hat make it even more unique. I hope your project turns out amazing, and the chicks on your windowsill bring you joy! Wishing you happy sewing and a wonderful weekend!
Hi Hanna
It’s a perfect beginner-friendly project that makes sewing fun and approachable. I love how the guide breaks everything down step-by-step, making it easy to follow, even for those with little to no experience. The materials are simple, and the instructions are clear, ensuring that anyone can create a cute and cuddly plush chick.The step-by-step instructions for attaching the eyes, wings, and beak are incredibly helpful and make the whole process feel manageable. Thank you for this!
Thank you so much! I’m really happy that you liked the guide. I tried to make it as clear and accessible as possible so that even beginners could easily sew this adorable little chick.