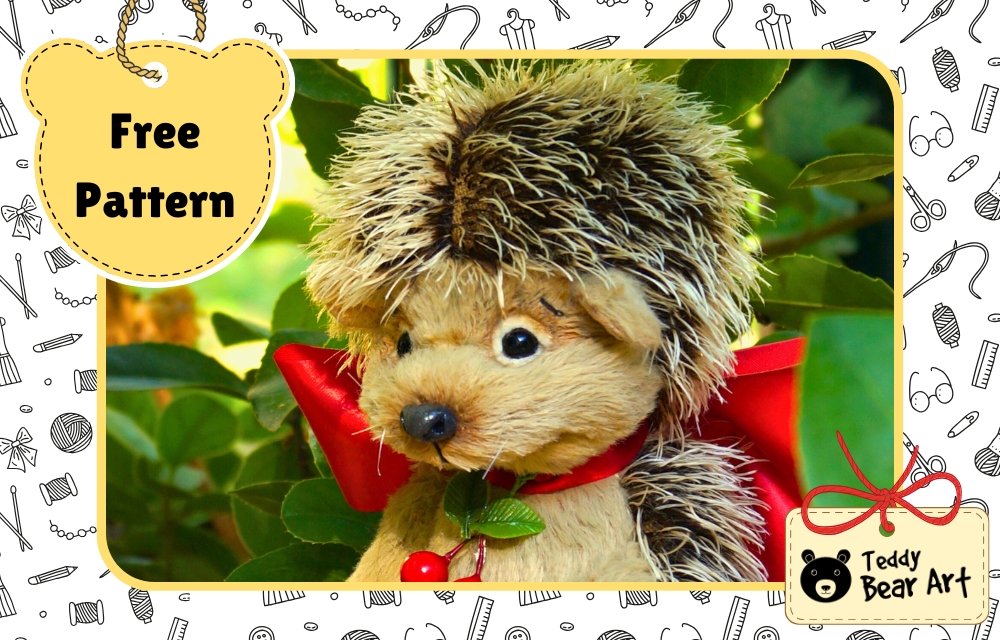
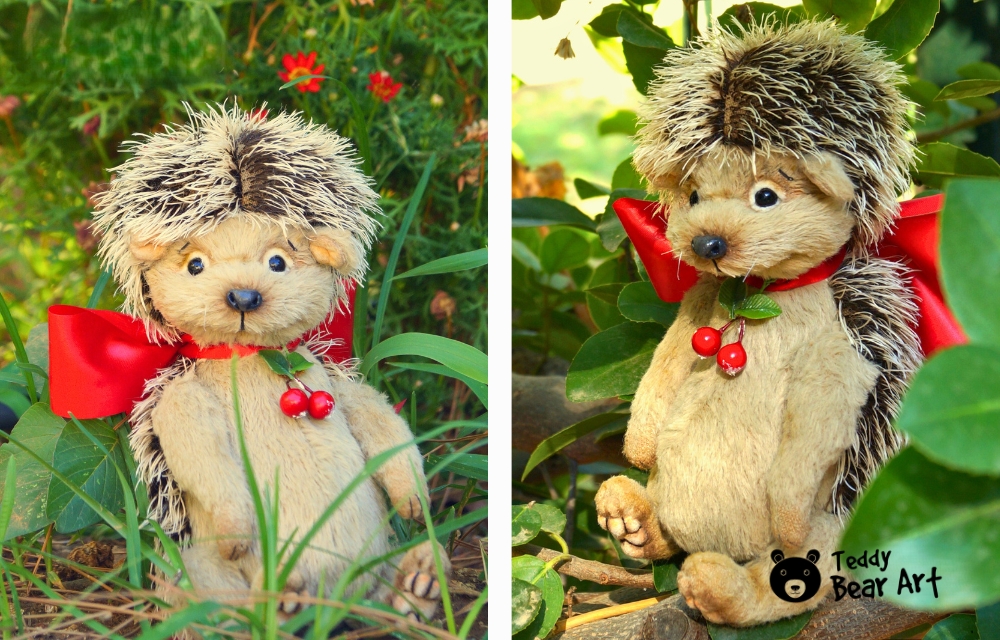
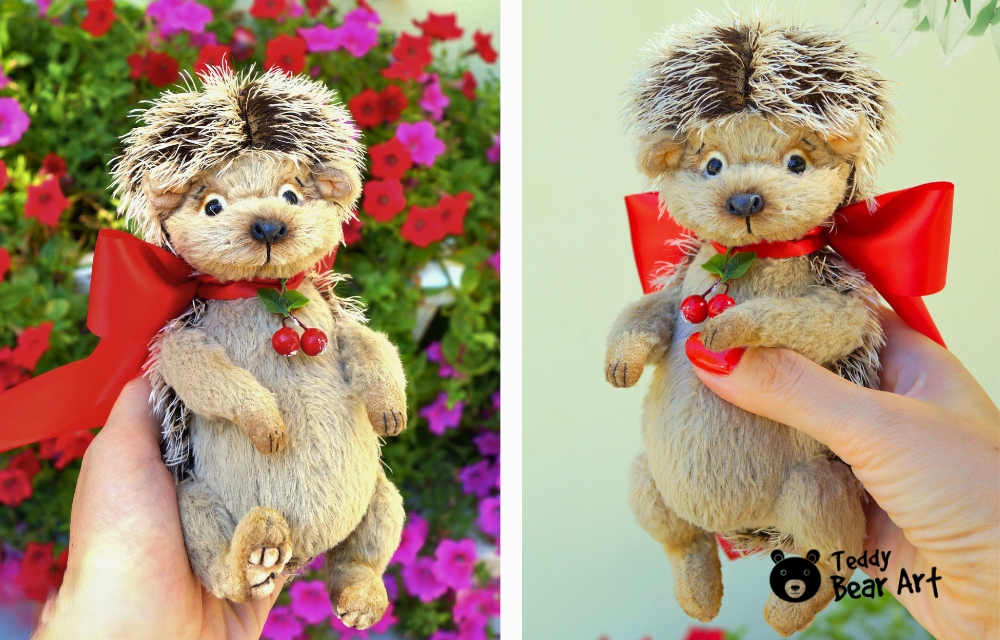
If you’re looking for a charming new project, this free hedgehog stuffed animal pattern is just what you need. There’s something incredibly satisfying about crafting a little woodland friend with your own hands, especially when it’s as cuddly and adorable as a hedgehog plush.
This pattern, combined with some sewing tips we’ve gathered from years of experience, will guide you step-by-step to create a soft, squeezable hedgehog that’s perfect for gifting, decorating, or simply adding to your collection of handmade stuffed animals.
Keep in mind, though, that this hedgehog pattern is better suited for crafters with a bit of experience, as it has some details that may be tricky for complete beginners.
Download Your Free Hedgehog Stuffed Animal Pattern
To download the pattern, follow the instructions below:
From a phone or tablet: There should be a similar option for mobile devices with Android or iOS. Click on the image. Save it by holding your finger on the image and selecting the “Save Image” option. Then, go to your photo gallery and print it (an option available).
From a computer: Click on the photo of the pattern you see below. In the new tab that will open, you press the right mouse button and select the “Save image as …” option. Then, you choose where the image will be saved on your computer.
Materials You’ll Need for Your Hedgehog Plush
- Viscose Steiff Schulte with a 6 mm pile.
- Hedgehog mohair fabric with short pile.
- Strong threads match your fabric color and a hand-sewing needle.
- Small size black glass eyes on a metal loop, like 8 mm or black beads.
- Pins.
- Scissors.
- A long needle for setting eyes.
- Waxed thread.
- An awl.
- Use 12 mm diameter discs, 4 pieces for the arms.
- Use 18 mm diameter discs, 6 pieces for the head and legs.
- Use T-shaped cotter pins, 5 pieces.
- Washers,10 pieces.
- Have pliers ready.
- Use synthetic filler for stuffing.
- Use small metal or glass pellets for weight.
- Get a thin piece of fabric for paws and inner ears.
- Polimer clay for the nose.
- A small piece of felt for the eyelids.
- Fishing line for whiskers.
- Glue.
- Paints.
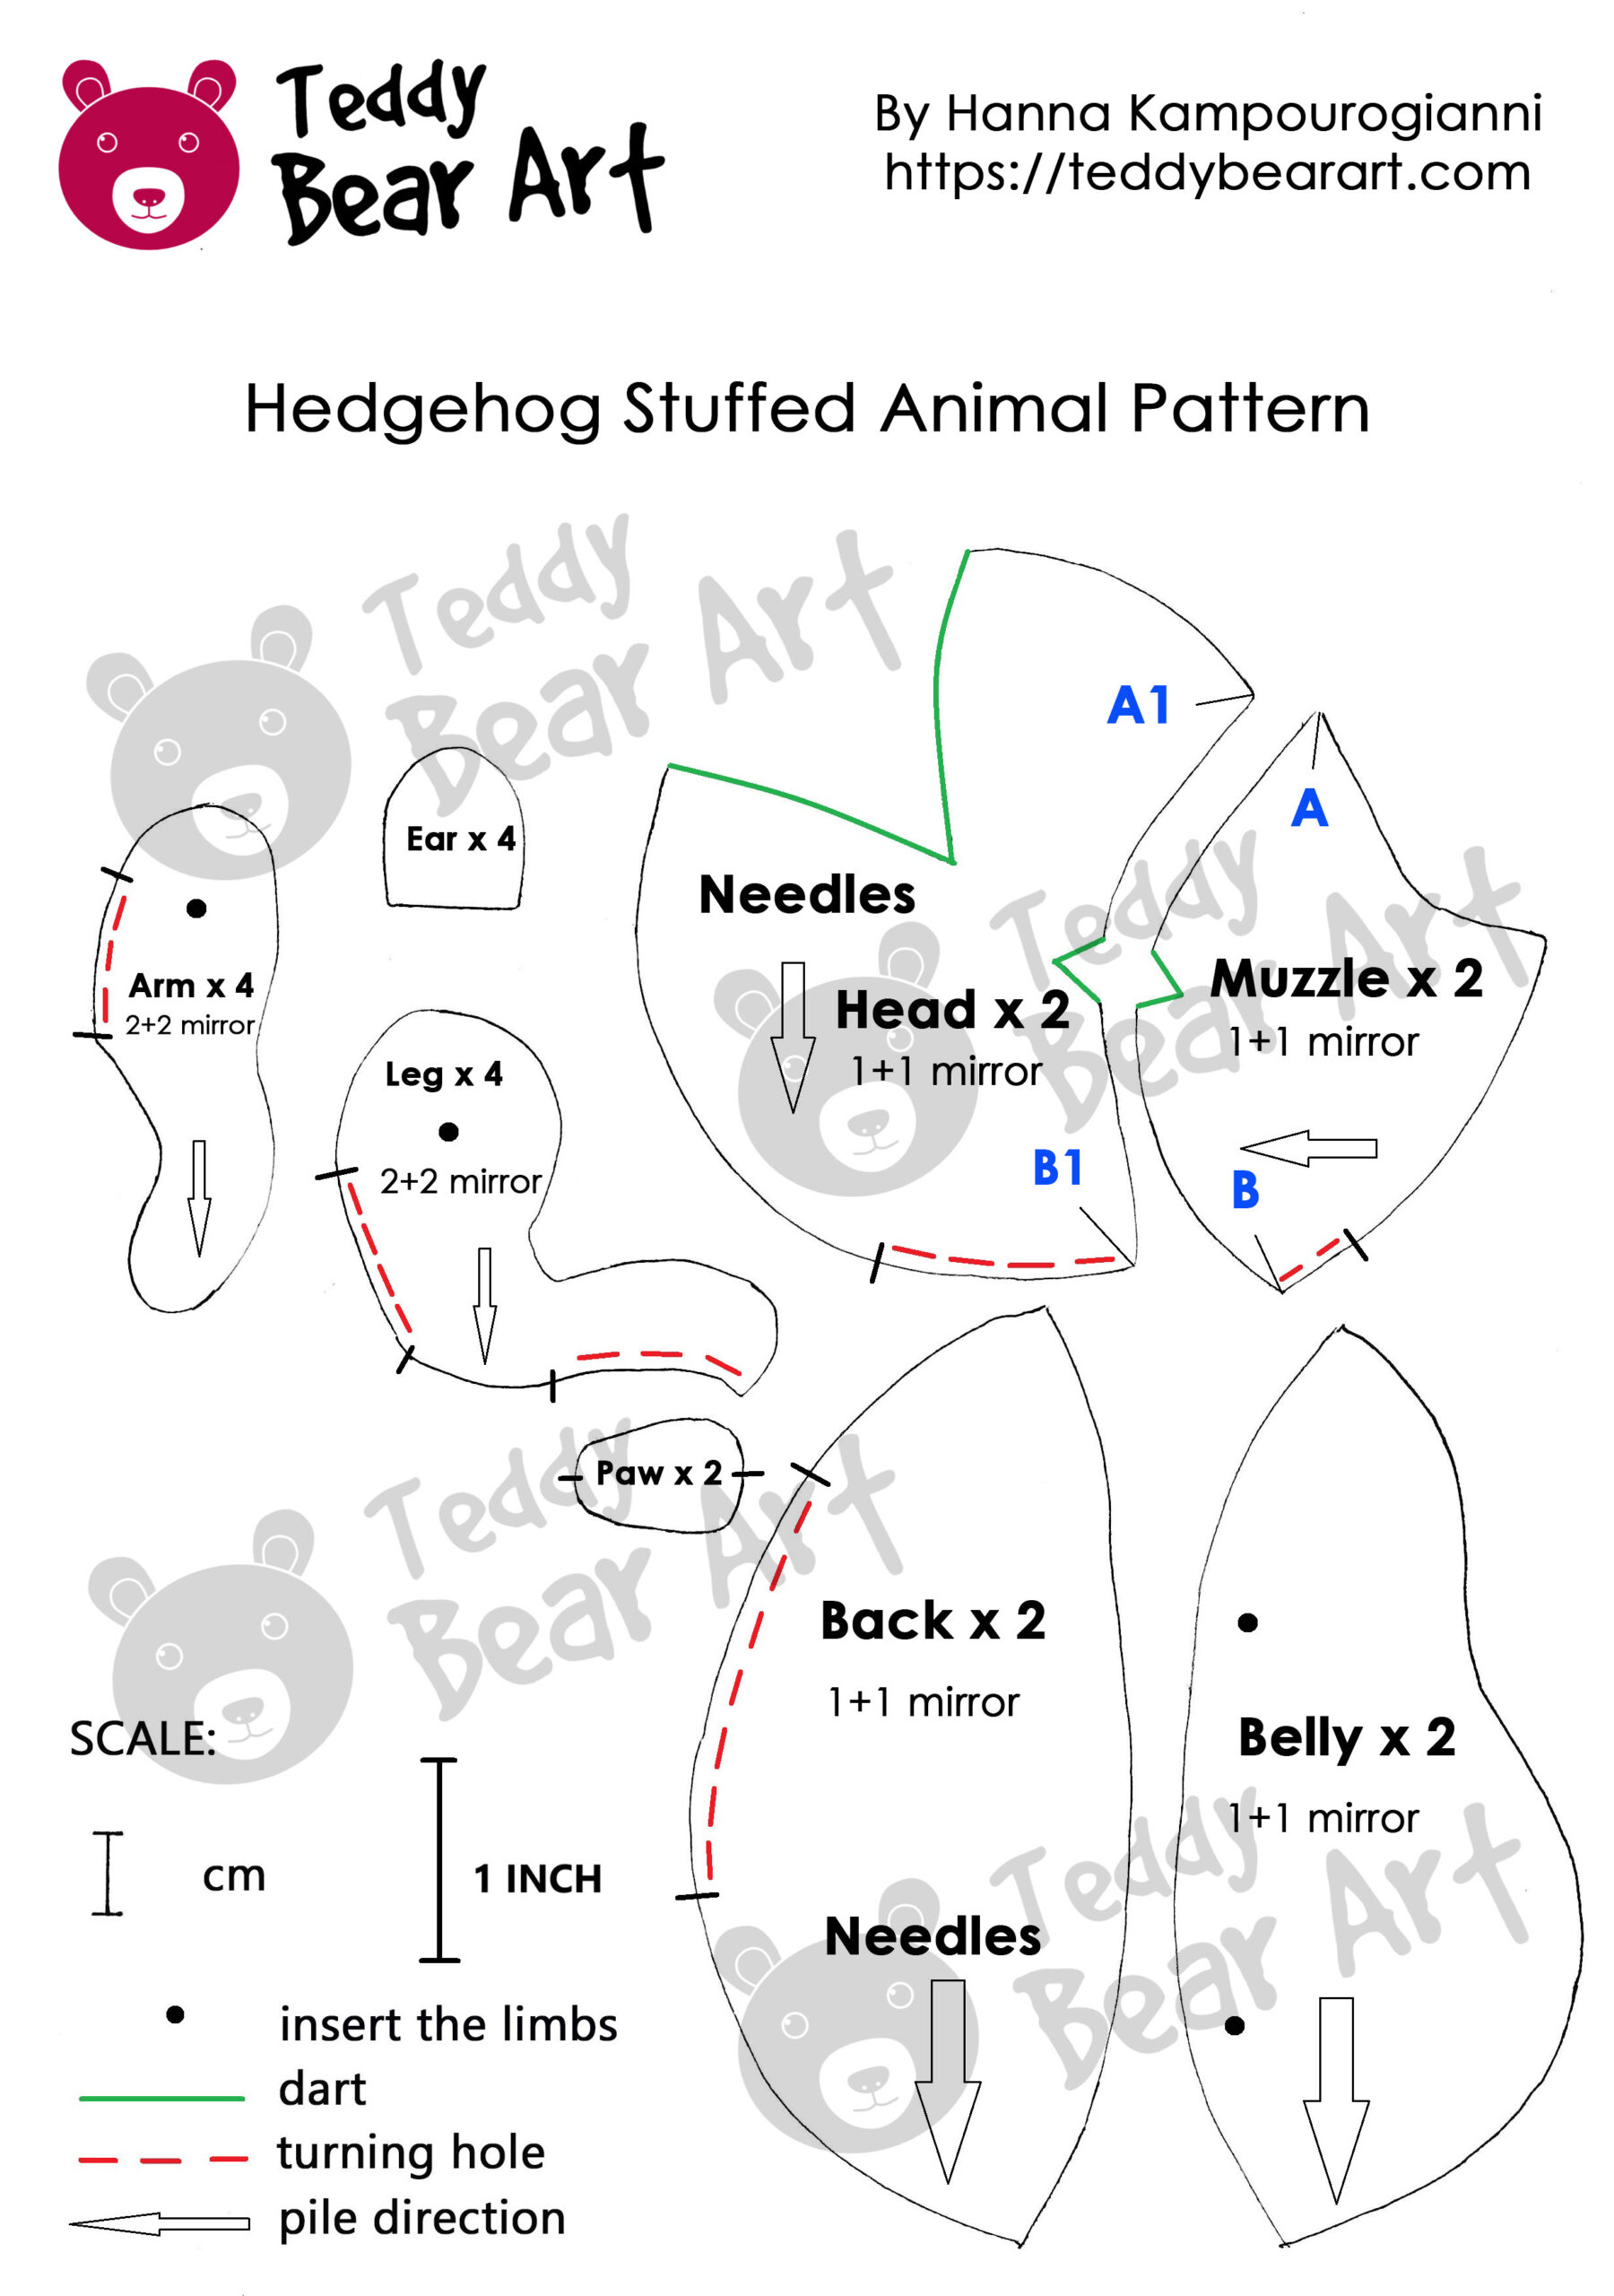
Hedgehog Sewing Instructions: Step-by-Step Guide
1. Cutting and Preparing Fabric Pieces
Cut each piece carefully — precision is key to how your hedgehog will look in the end. Leave a seam allowance of about 5–7 mm around each pattern piece.
2. Sewing the Head
First, stitch all the darts (usually marked in green on the pattern).
Next, sew the face piece to the back of the head (the spiky part) along the marks from A–A1 to B–B1.
Join the two assembled parts together, leaving a small opening for turning the right side out.
Sew the ears separately.
3. Sewing the Body
Attach the belly piece to the back piece, then sew the two halves of the body together. Leave an opening for stuffing. Turn the body right side out and gently shape the corners and curves with a wooden stick.
4. Making the Limbs
Sew two mirrored parts for each arm and leg. Then, attach the feet.
5. Stuffing and Shaping
Stuff the head and limbs with polyester filling, insert the discs with cotter pins, and stitch the openings closed.
After stuffing the limbs, trim the fur slightly and embroider the fingers. Make small pulls on the feet to shape realistic little soles like a real hedgehog’s.
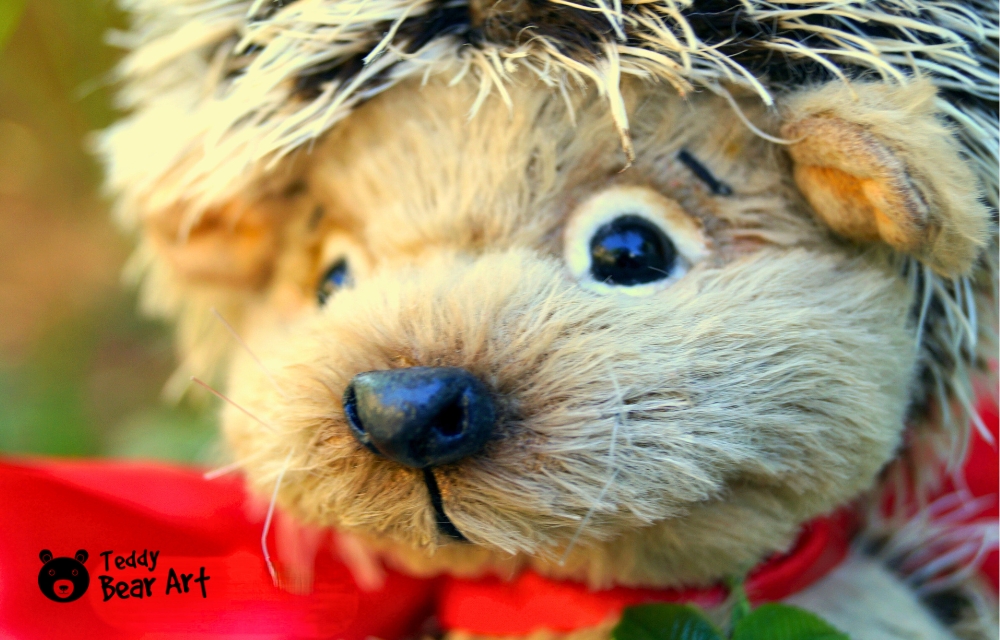
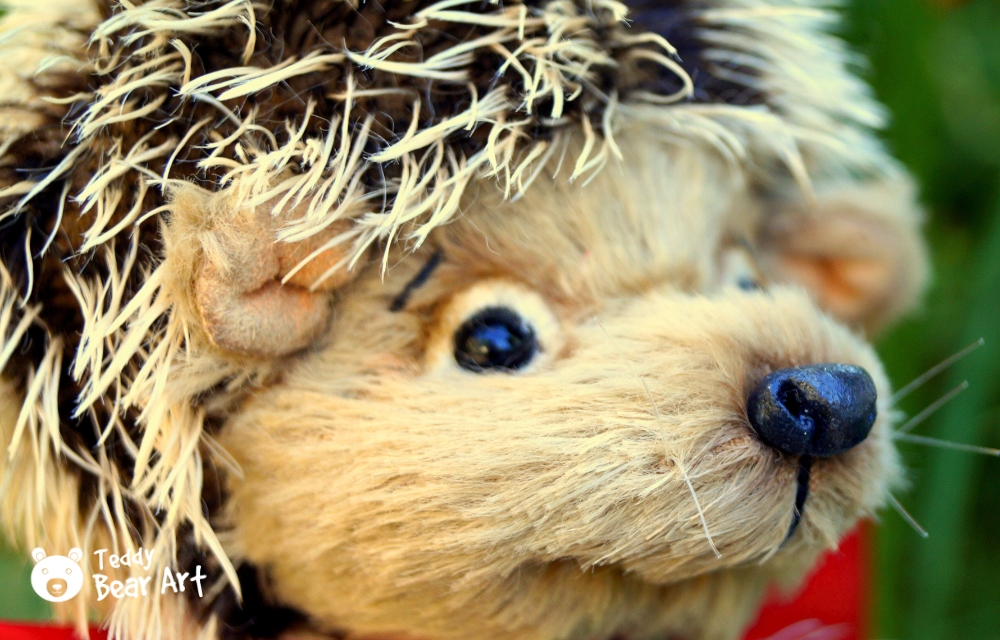
Shape the face by pulling the fabric around the eyes and mouth area — this will give your hedgehog a sweet smile.
Attach or needle-felt the eyelids, embroider the brows, then secure the sculpted nose. Sew on the ears.
Attach the head and limbs to the body, stuff the body, add some weight if desired, and sew the opening closed. Gently pull out the fur from the seams and brush your plush — but be careful not to brush the spiky back and head, or you might damage them.
6. Final Touches
Trim a little fur on the hands and feet for extra detail.
Add whiskers made of fishing line — you can glue them in or stitch them on with a simple method.
Finish by shading around the eyes, nose, inside the ears, and on the paws and soles for more character and a lifelike look.
FAQ: Common Questions About the Hedgehog Stuffed Animal Pattern
How long does it take to sew the hedgehog?
Depending on your experience and pace, sewing the hedgehog can take anywhere from 4 to 8 hours.
Can I use felt instead of viscose?
We wouldn’t recommend it. You’ll spend time, energy, and materials sewing, but the result will be very different from what you see in the photos, which can be disappointing. That’s why for each pattern, we provide a list of EXACT materials so your hedgehog turns out just as intended.
Can I resize the pattern?
Yes, you can print the pattern at a different scale to make your hedgehog bigger or smaller. However, keep in mind that changing the size affects the proportions and overall look. For a larger size, you’ll need plush and mohair with longer pile, bigger eyes, and different materials — it’s almost like designing a new pattern. If you’re ready to take on that challenge, then definitely go ahead!
Is this pattern suitable for complete beginners?
This pattern is best for crafters with some basic sewing experience, as a few parts can be a bit tricky for absolute beginners.
Get Free Patterns & Be the First to Know!
Want free teddy bear patterns, exclusive tutorials, and a chance to win craft supplies?
Sign up for our newsletter using the subscribe form in the middle of this article to receive new patterns, insider tips, and the latest news on teddy bear art. You’ll also automatically be entered into our annual giveaway for a chance to win teddy bear crafting materials.
Bonus entry: Save one of our pins on Pinterest to increase your chances of winning!
Let’s create, inspire, and craft beautiful teddy bears together!
This hedgehog plush pattern is absolutely delightful—thank you for sharing such a detailed guide! I really appreciate the sewing tips included throughout, especially the reminder that this pattern is better suited for those with a bit of sewing experience. It’s helpful to know that before diving in, so expectations are set from the start.
One thing I found especially valuable was the materials list—it’s super thorough! I had never thought to use polymer clay for a plush nose or fishing line for whiskers before, but those little details really add so much character. For anyone else planning to try this, I’d suggest laying out all the tools and pieces before starting. It really helps avoid mid-project frustration (speaking from experience!).
Thanks again for this adorable project— I’m ready to get to work on our new hedgehog friend!
Thank you so much for such a warm comment! It means a lot to know you found something new and are ready to give it a try. I hope your hedgehog turns out just as cute and cozy as you imagine. If anything comes up or you get stuck — feel free to reach out, I’m always happy to help. Wishing you lots of luck and inspiration!
This hedgehog plushie tutorial was absolutely delightful to read! I really appreciate how detailed and well-structured the instructions are. It made a complex project feel approachable. The emphasis on using specific materials for the best results was super helpful, especially for someone who values a high-quality finish. I’m excited to give it a try! Do you have any tips for personalizing the pattern like accessories or color variations?
Thank you so much for your kind words! I’m really happy you found the hedgehog tutorial helpful and inspiring. For personalizing the pattern, you can try adding a little scarf, a tiny hat, or even a backpack — felt works great for small accessories. Playing with different fabric colors or mixing textures (like adding faux fur for the back) also makes each hedgehog unique. We have free patterns for a tiny bag, a scarf, and other cute accessories on this website — feel free to check them out! Happy crafting!
Hanna,
I loved your free hedgehog pattern and all the helpful tips — it’s such a fun project for beginners and pros alike! I really appreciate the advice on using faux fur and adding cute details.
Quick question: would you choose minky for the face, body, and paws to make the hedgehog extra soft?
Kind regards,
Martin
Hi Martin,
Thank you so much — I’m really happy you enjoyed the pattern and tips!
Yes, minky is a perfect choice for the face, body, and paws — it’s super soft and easy to sew compared to some other plush fabrics. I love how smooth it feels, especially for cuddly parts like the tummy and little feet. Just make sure to pin it well, since minky can be a bit slippery. Happy sewing — can’t wait to see your hedgehog!
Best wishes,
Hanna
Dear Hanna,
This was such a heartwarming and helpful post—thank you for sharing your free hedgehog pattern and sewing tips! It’s clear that a lot of love and care went into both the design and the instructions. As someone who’s always on the lookout for unique, handmade gift ideas, this little hedgehog truly stands out.
Overall, I really enjoyed the tone of this article—it feels personal, approachable, and encouraging. It’s exactly the kind of content that inspires creativity and community. I’ll definitely be recommending your blog to a few crafty friends who would love a hedgehog of their own. Keep up the wonderful work—you’re brightening days one plushie at a time!
Have a great day!
FArid
Dear Farid,
Thank you so much for your beautiful message — it really made my day!
I’m so happy to hear that you enjoyed the hedgehog pattern and found the post warm and helpful. It means a lot to know it inspired you and that you’ll share it with your crafty friends — that’s the best compliment!
Wishing you lots of fun and creativity with your projects. Thank you for your kind words and support — it truly keeps me going!
Have a wonderful day too!
Have a nice day,
Hanna
Hey, this looks more life-like than the Sonic the Hedgehog I grew up with. Yeah, the video game character. My favorite thing about this pattern is probably the fishing-line whiskers, or the realistic paws. You have a real gift for this craft and breaking the process down to show us more amateurish ones how everything comes together. He looks pretty life-like.
Have you given him a name? I did. He’s Professor Quillington
Have a nice day
Jason
Hey Jason,
OMG, I’m totally thrilled by your comment — it made me laugh and smile! ???? I only just recently found out that Sonic is actually a hedgehog, lol, so your comparison is perfect!
I love that you noticed the fishing-line whiskers and realistic paws — those little details really bring the plushie to life. And Professor Quillington is such a brilliant name, it suits him perfectly!
Thank you so much for your kind words and fun energy. Wishing you a great day too!
Cheers,
Hanna