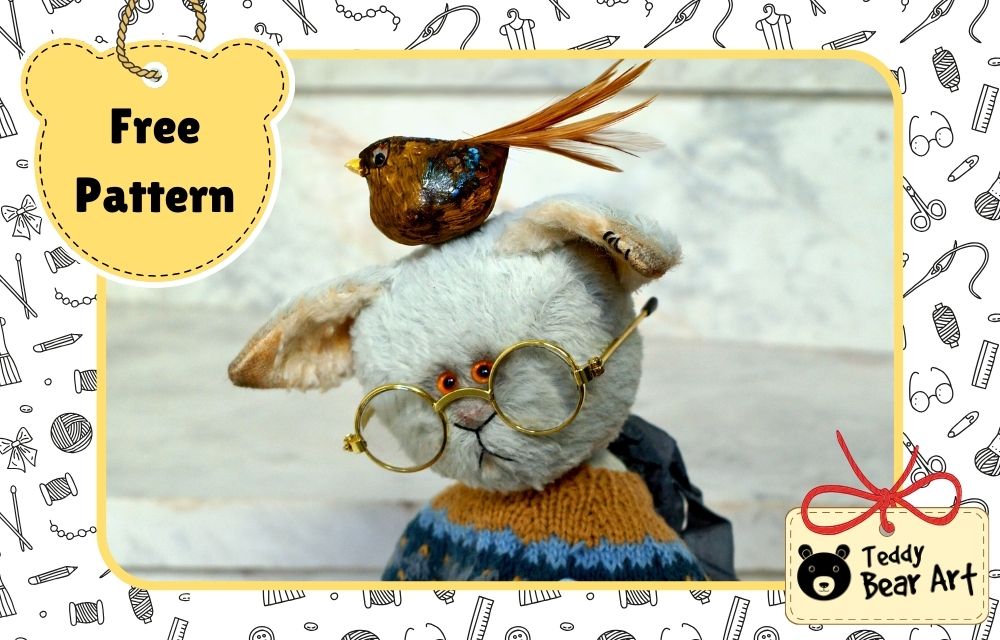
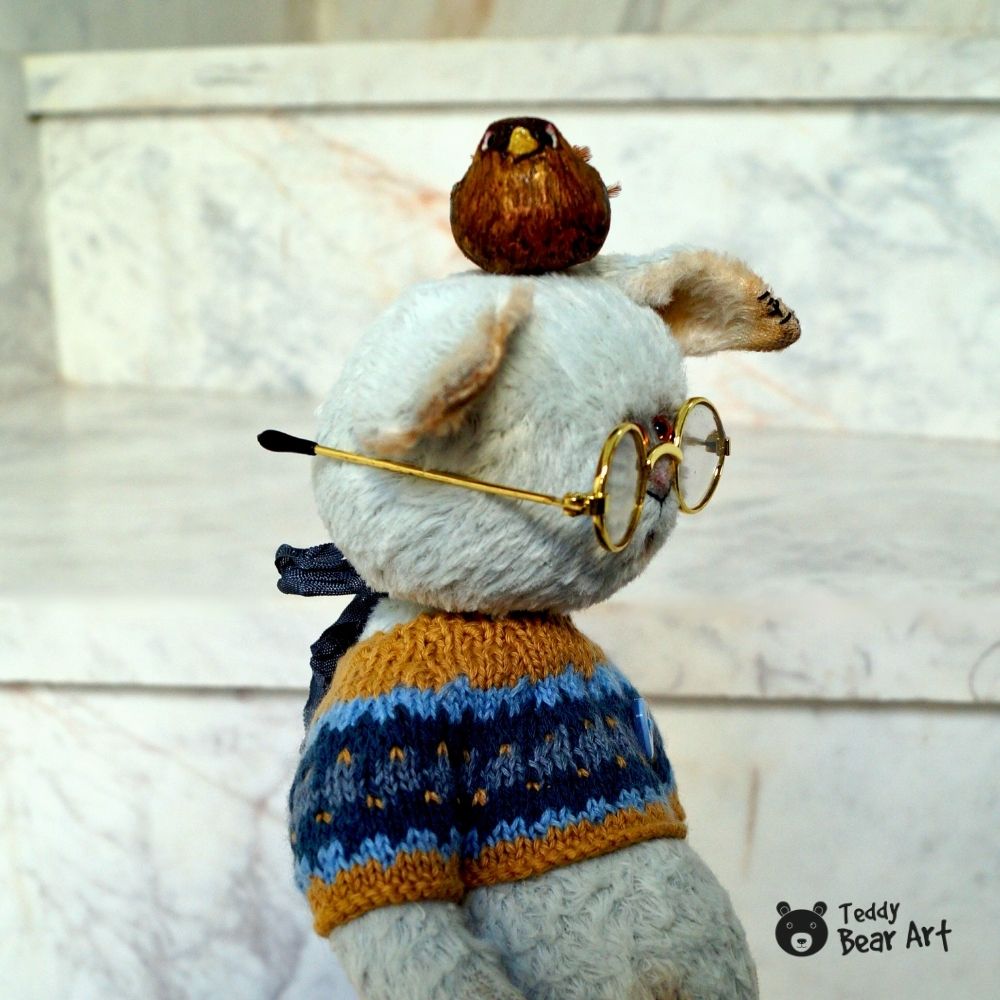
Some projects stay with us for a long time, not because they are easy, but because they slowly grow into real characters. From this experience came the idea to share this jointed cat plushie pattern. This cat started exactly like that, from sketches on paper, from testing proportions, from adjusting the face features and the length of the paws until its personality finally appeared. Working in the traditional teddy technique always feels like a quiet dialogue with the material; the fabric tells us what kind of creature wants to be born. The pattern is designed for makers who already enjoy complex shapes, jointed construction, and character-driven soft toys.
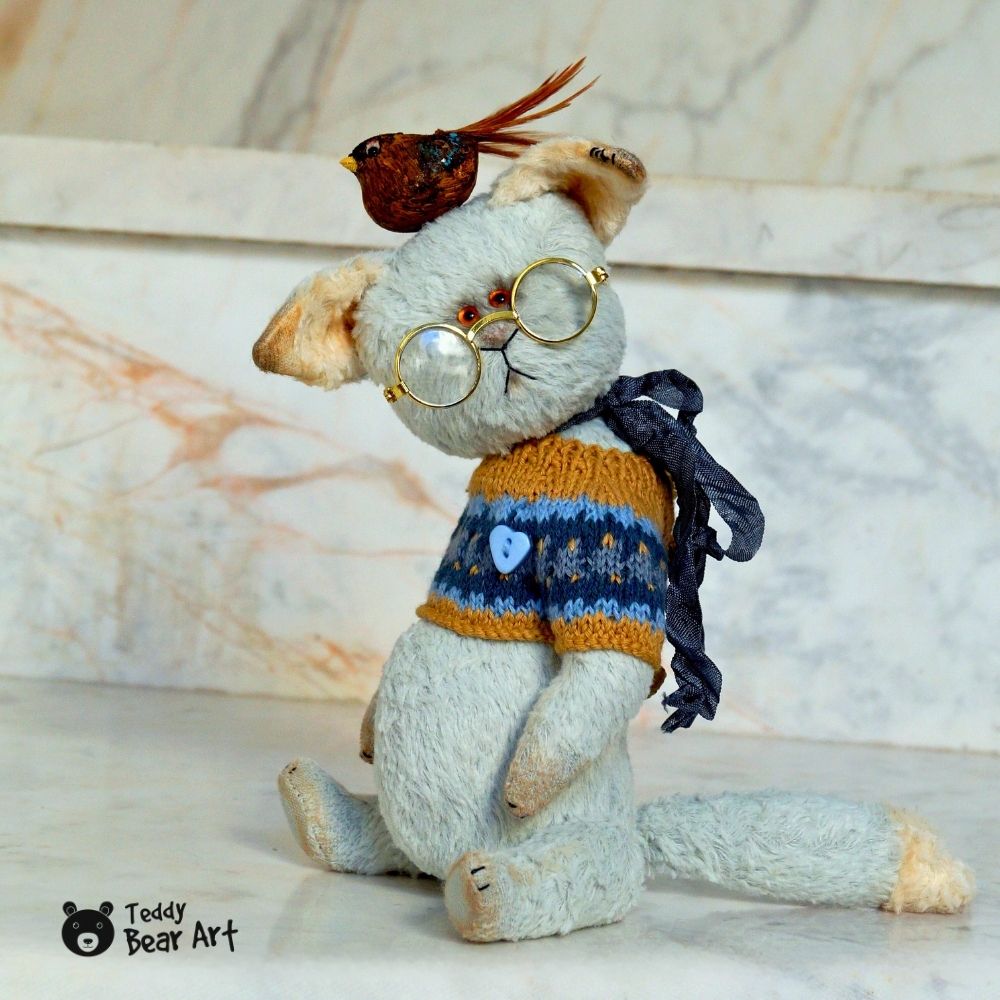
This pattern is not about speed or shortcuts. It is about process, patience, and enjoying classic teddy-making methods adapted to a cat with attitude and soul.
Download the Pattern
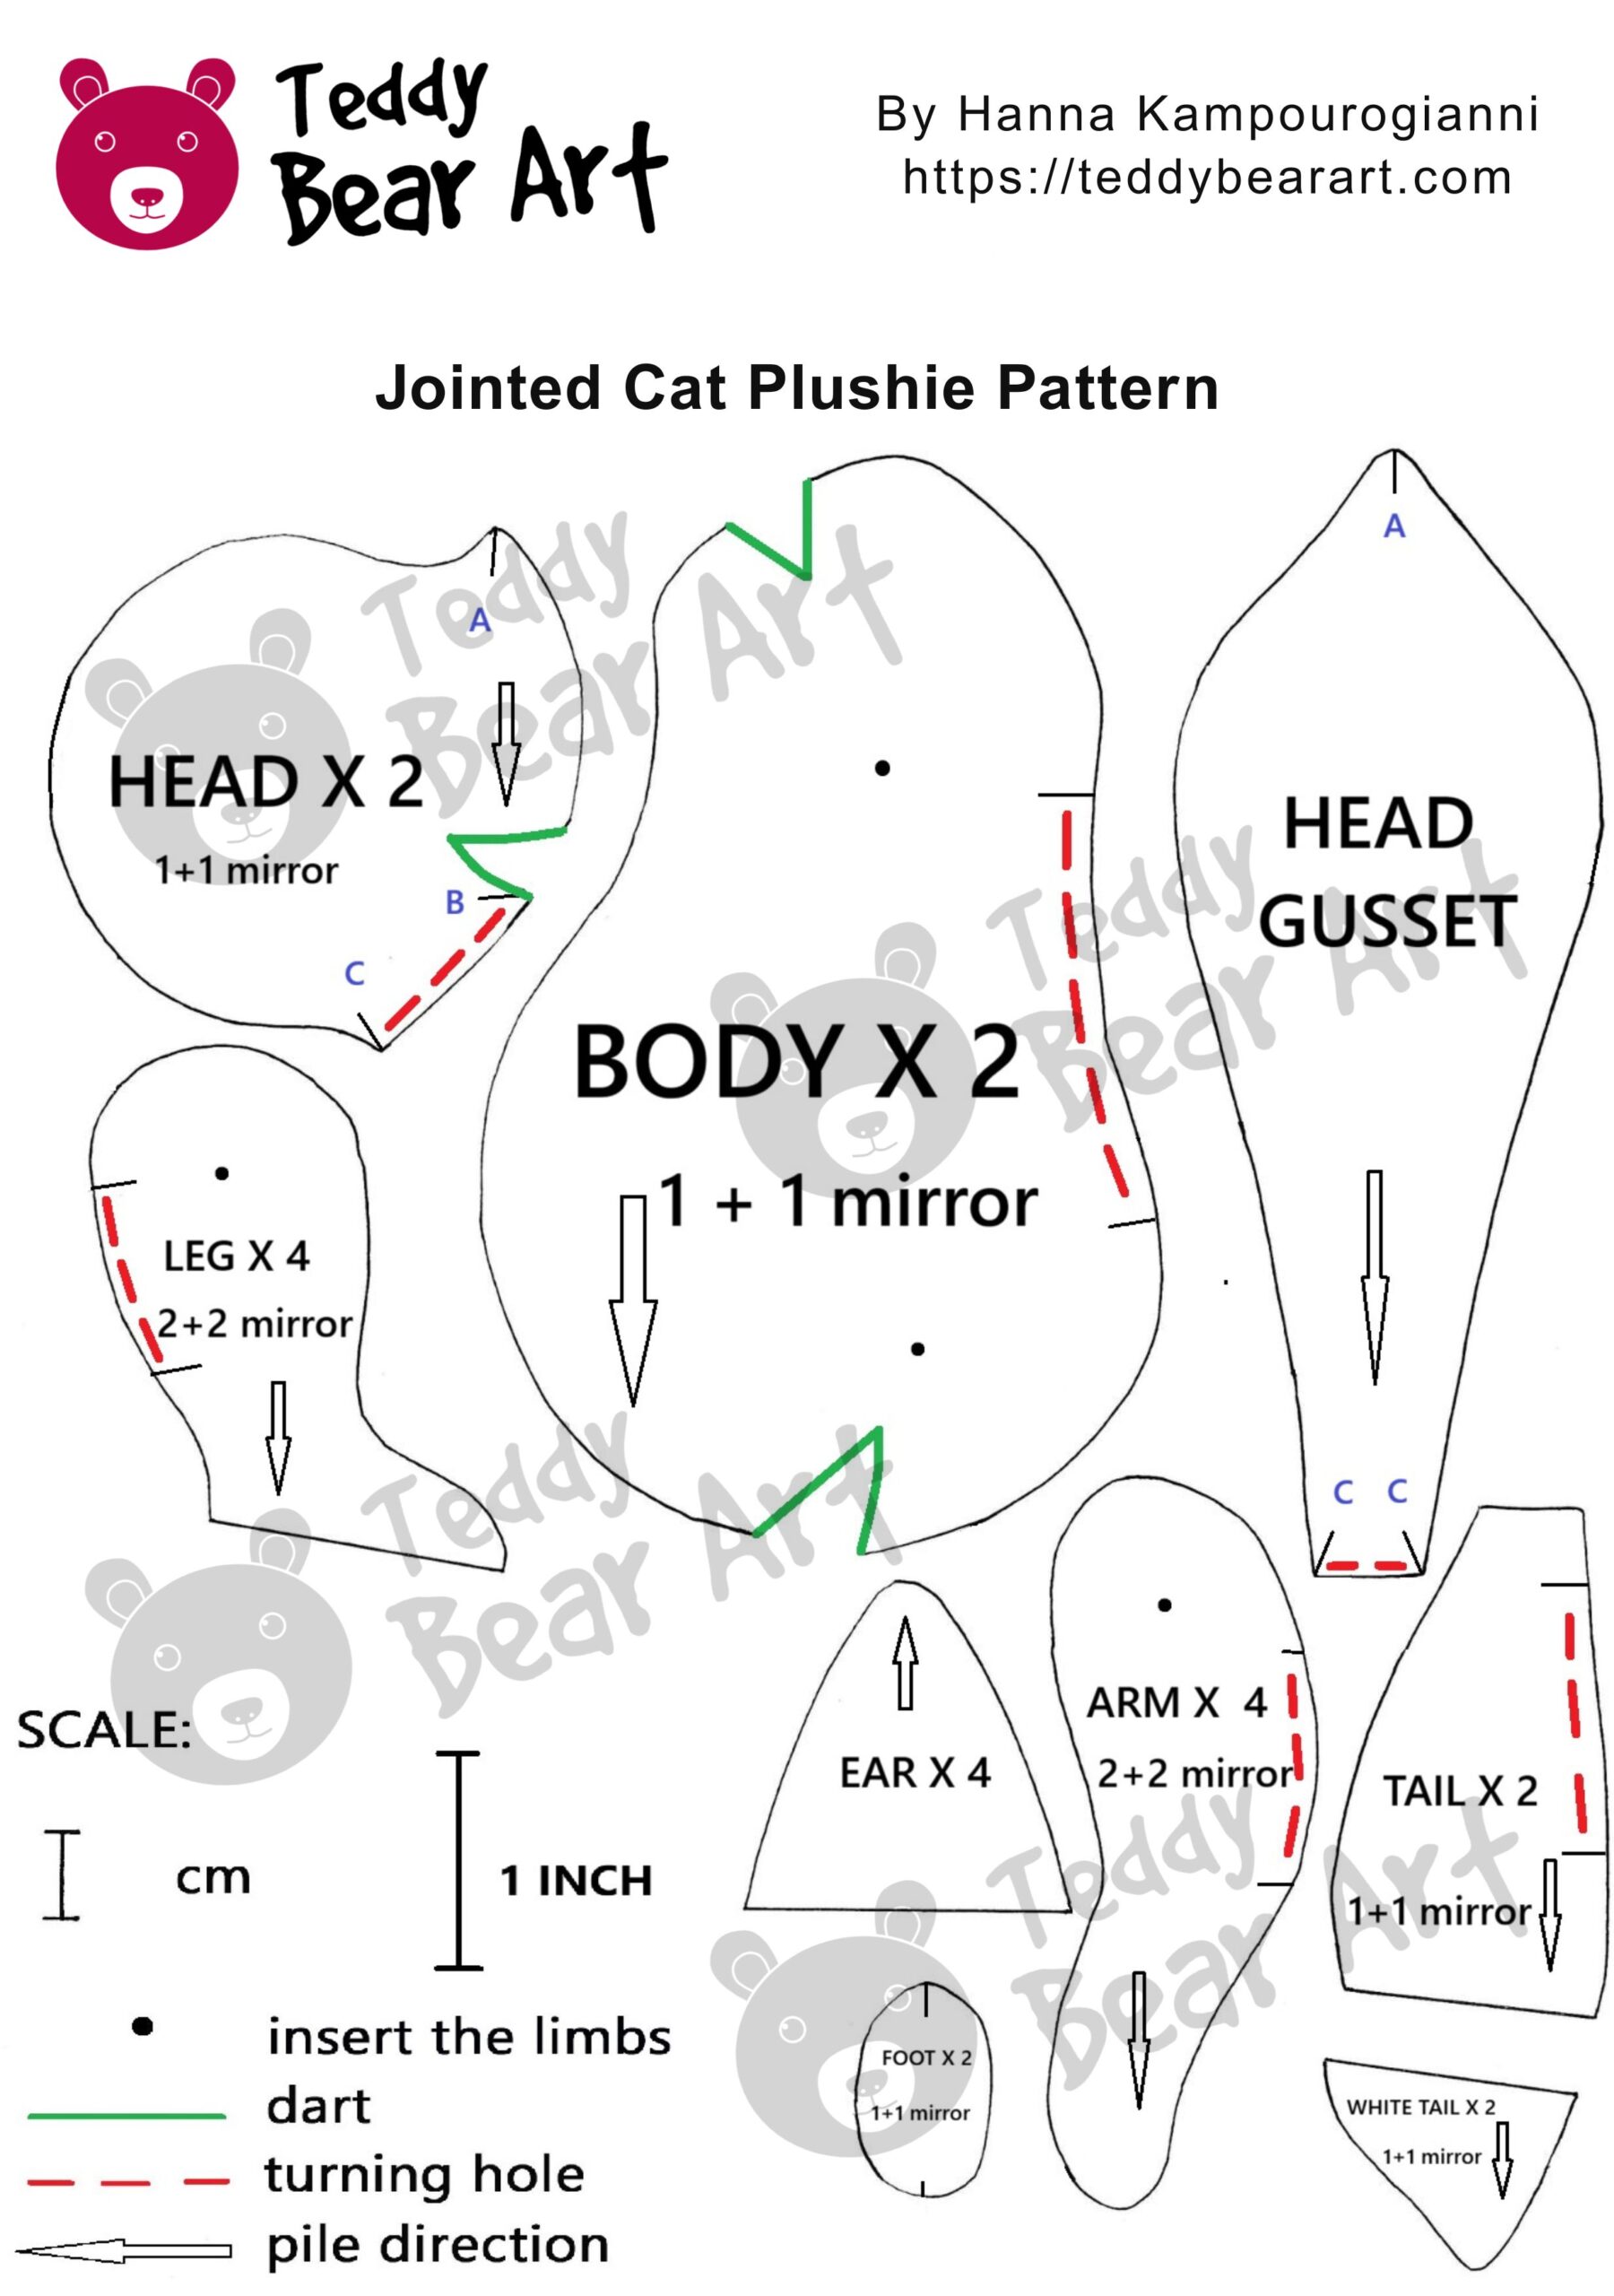
Notice that seam allowances are not included.
To download the pattern, follow the instructions below:
From a phone or tablet: There should be a similar option for mobile devices with Android or iOS. Click on the image. Save it by holding your finger on the image and selecting the “Save Image” option. Then, go to your photo gallery and print it (an option available).
From a computer: Click on the photo of the pattern you see below. In the new tab that will open, you press the right mouse button and select the “Save image as …” option. Then, you choose where the image will be saved on your computer.
Materials and Tools
- Viscose fabric (Schulte or Helmbold is recommended)
- Strong threads and a needle for hand sewing
- A pair of small glass eyes with a pupil on a metal loop
- Waxed thread
- Metal pellets or glass pellets for weight
- Fabric for paws and ears (you can use the same viscose, just trim the pile)
- Discs 22 mm – for the legs – 4 pieces, 18 mm for the arms, and the head – 6 pieces
- Washers – 10 pieces
- T-shaped cotter pins – 5 pieces
- Synthetic filler or sheep wool filler
- Long doll needle
- Scissors
- An awl
- Pliers
Short Sewing Instructions
- Start by sewing all the darts. Then sew the two pieces of the head together, matching the markings from point B to point A. Carefully insert the head gusset, sewing along points A to C, to shape the head and add volume.
- Sew the body pieces, limbs, tail, and ears.
- Stuff the head and limbs, and insert the discs and joints.
- Finish the head: insert the eyes, sew on the ears, and embroider the nose and mouth. Carefully trim or pluck the mohair on the nose, ears (this can be done in advance, before sewing the ears), hands, and feet.
- Assemble the cat as follows: attach the head first, then the limbs, add the weight and stuffing, and sew everything together. Finally, attach the tail.
- Add light shading to give the cat more character. Embroider the claws, and, if desired, add small patches for a vintage look.
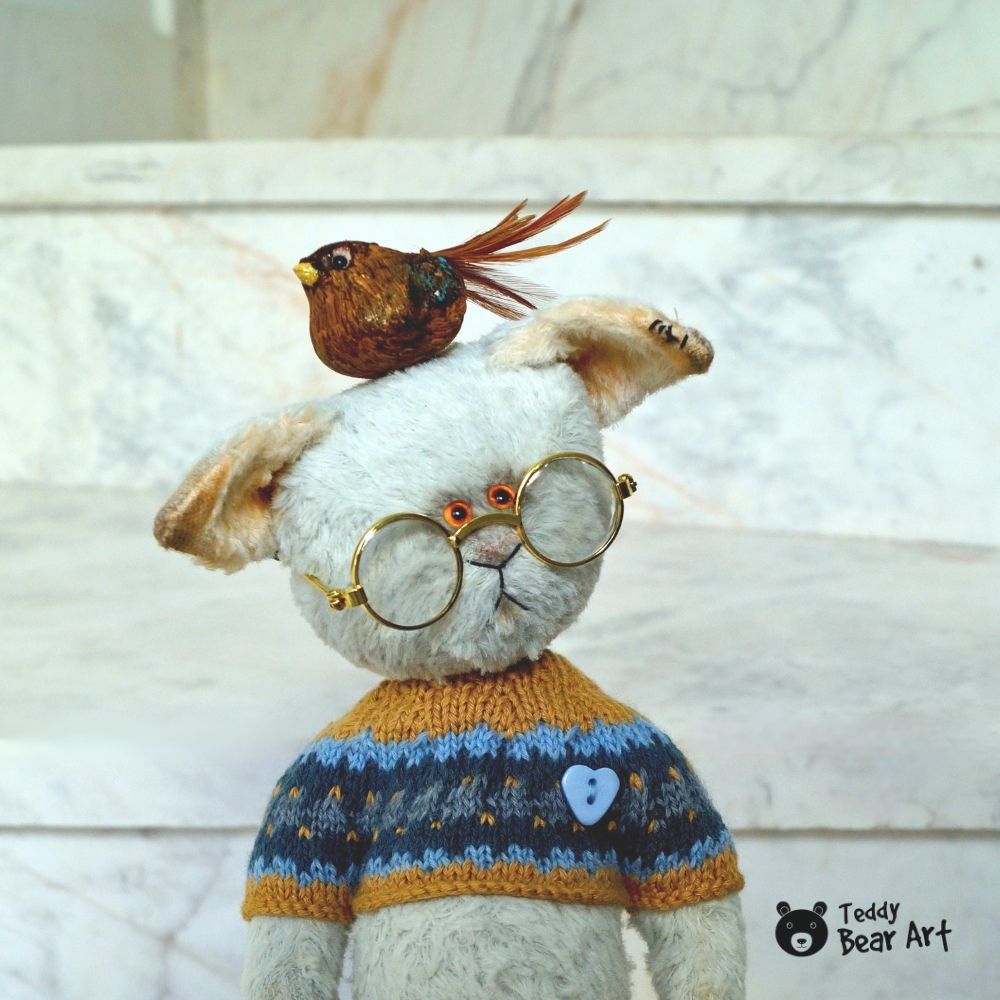
- Design the clothing and accessories. If you don’t have ready-made glasses like in the photo, you can make them from wire.
Want to learn more about inserting discs and joints for fully posable plushies? Check out our Step-by-Step Guide to Disc Joints.
Frequently Asked Questions
What type of fabric is best for the cat plushie?
Viscose or short-pile mohair or other high-quality plush fabrics work best. Make sure to pay attention to the pile direction when cutting the pieces.
How do I make the little bird accessory?
You can use a small foam shape as the base, paint it, add feathers, and attach it with a pin so it stays securely on the cat’s head.
Before You Go
This jointed cat plushie pattern is shared as inspiration and encouragement to continue exploring character-based plush design. Working with jointed soft toys is a skill that grows with every project, and this cat is meant to be a rewarding challenge rather than a quick make. Enjoy the process, trust the materials, and allow the character to emerge naturally through your hands.
This jointed cat benefits greatly from subtle shaping. Clothing or accessories such as scarves or tiny sweaters work beautifully with this design and emphasise its character-focused style.
For more cat plushie ideas, check:
Get Free Patterns & Be the First to Know!
Want free teddy bear patterns, exclusive tutorials, and a chance to win craft supplies?
Sign up for our newsletter using the subscribe form in the middle of this article to receive new patterns, insider tips, and the latest news on teddy bear art. You’ll also automatically be entered into our annual giveaway for a chance to win teddy bear crafting materials.
Bonus entry: Save one of our pins on Pinterest to increase your chances of winning!
Let’s create, inspire, and craft beautiful teddy bears together!
I love how you made this pattern feel fun and accessible. Your pictures really make me want to grab fabric and start sewing! I’m curious: what’s one tip you’d give to someone who’s never worked with jointed plushies before to make sure their first one turns out great? That kind of personal trick could get a lot of readers sharing their own sewing wins (and oops moments). Overall, it’s a delightful, generous resource that will make a lot of makers smile!
Thank you so much! If you’re working with disc joints for the first time, don’t forget to mark where the limbs will attach and make sure to tighten the cotter pin ends well. This way, the limbs will move smoothly and stay secure. And little “mistakes” are proof that you’re actually making something, practicing, and getting better with each try!
This is a beautiful pattern, Hanna. You can really feel the patience and care behind it, the kind that only comes from working through many test pieces and letting the character slowly reveal itself. I like that you didn’t rush or oversimplify the process; the respect for traditional teddy techniques really shows.
Thank you so much! I really appreciate it. I’m very fond of this cat myself, and I’m happy it resonated with you.