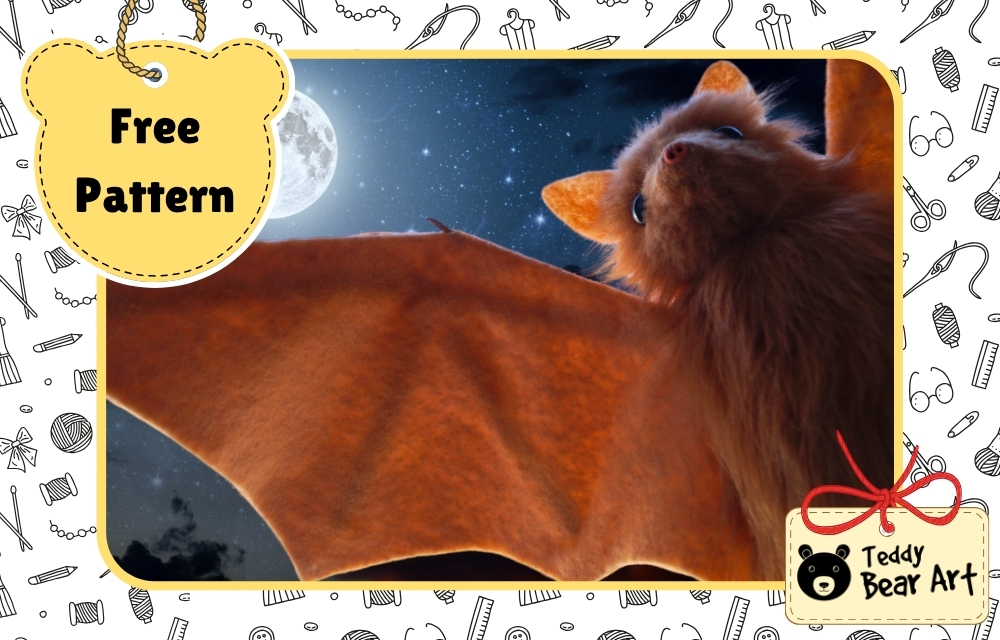
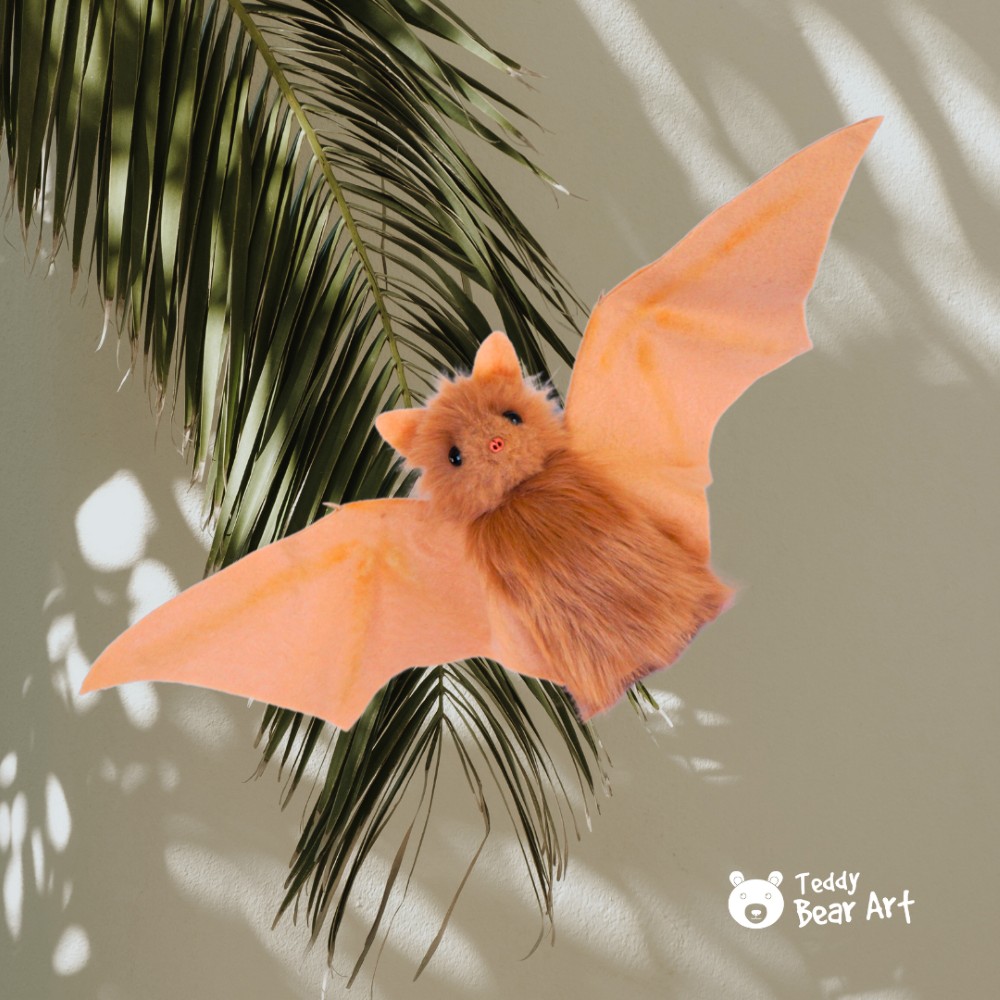
Looking for something a little different from your usual teddy bear projects? This handmade plush bat sewing tutorial is just the thing. It’s playful, fuzzy, and slightly whimsical — a wonderful sewing adventure for those who love creating soft, expressive characters. With loads of close-up step-by-step photos, even beginners will feel confident stitching their own adorable plush bat.
This bat isn’t just for Halloween — its cuddly body and oversized wings make it a charming companion or gift all year round. Grab your fabric scraps, some stuffing, and let’s dive in.

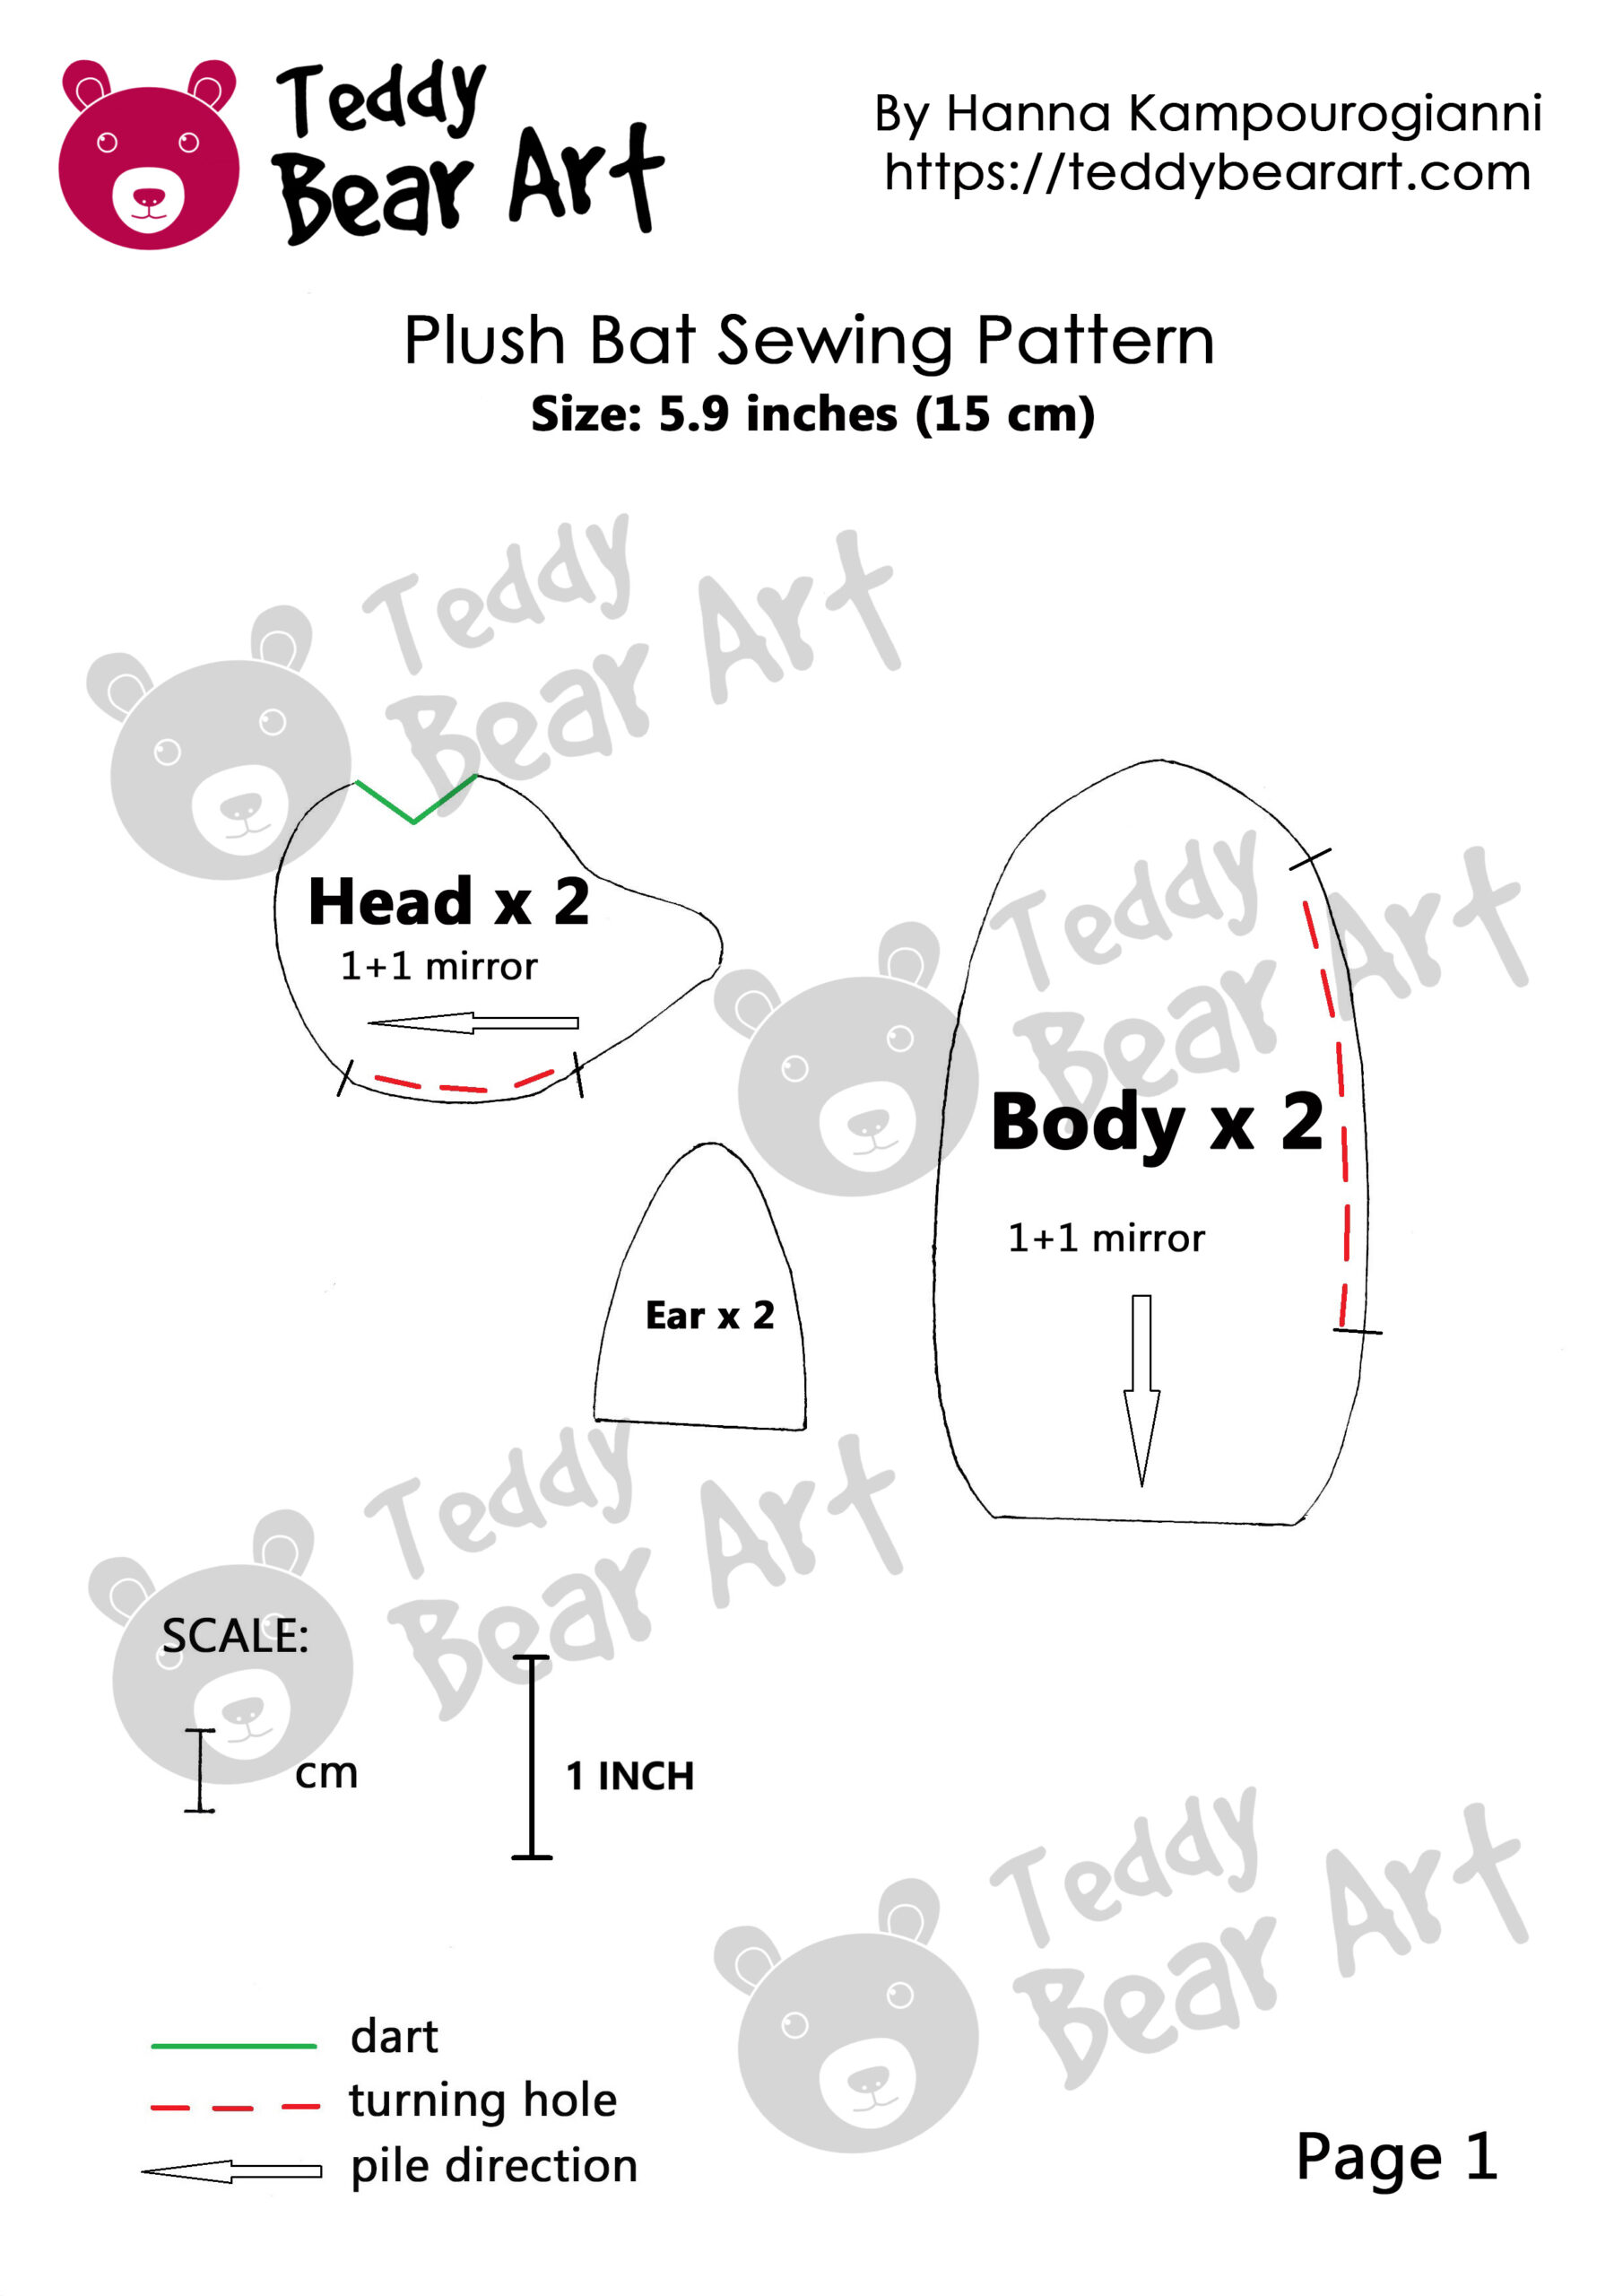
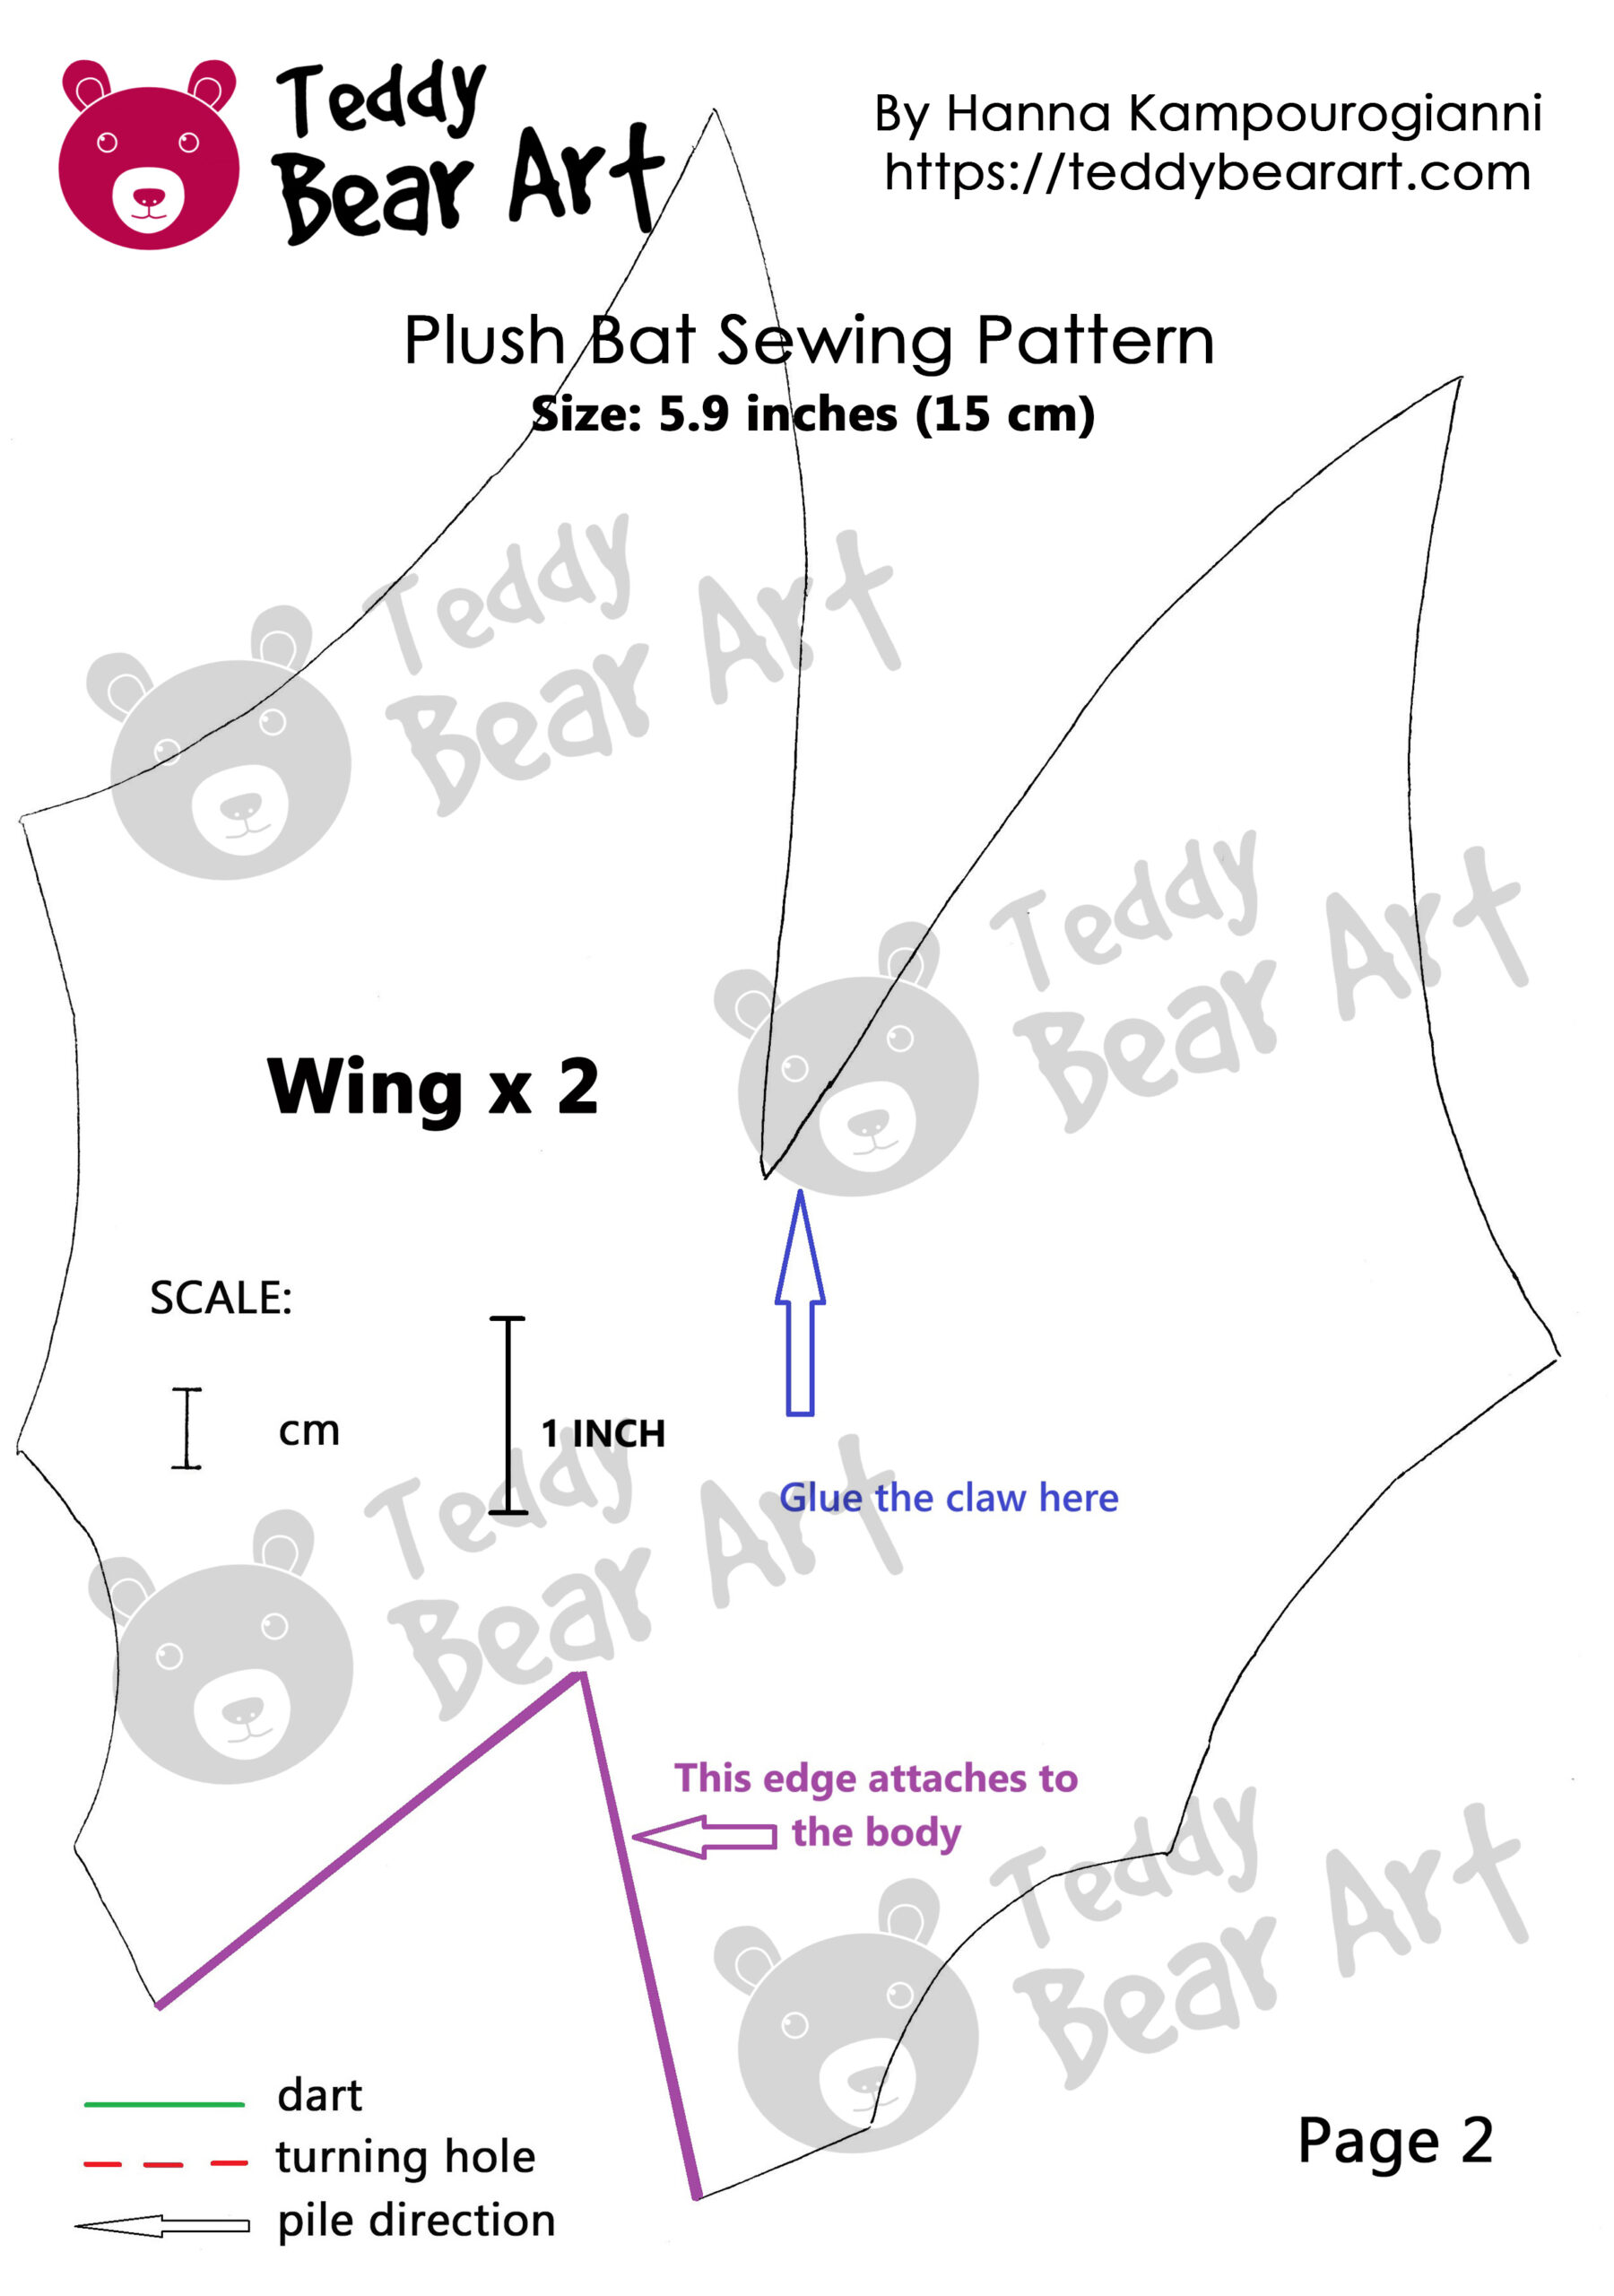
Download Free Bat Plush Sewing Pattern
To download the pattern, follow the instructions below:
From a phone or tablet: There should be a similar option for mobile devices with Android or iOS. Click on the image. Save it by holding your finger on the image and selecting the “Save Image” option. Then, go to your photo gallery and print it (an option available).
From a computer: Click on the photo of the pattern you see below. In the new tab that will open, you press the right mouse button and select the “Save image as …” option. Then, you choose where the image will be saved on your computer.
Materials and Tools You’ll Need
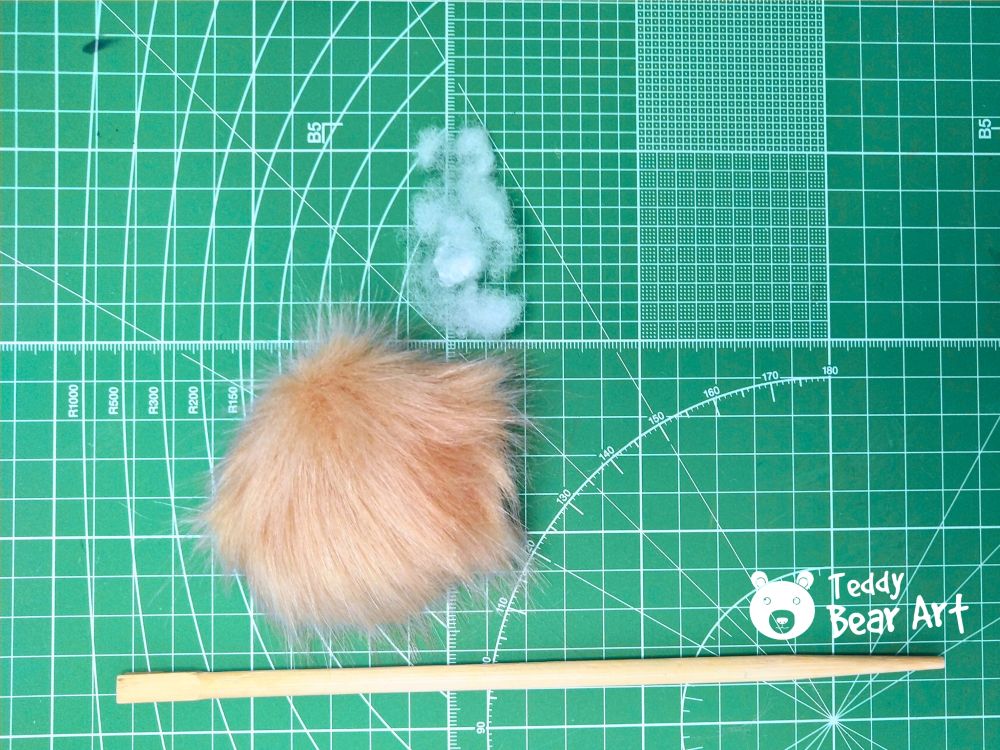
- Faux fur fabric with pile 2.5-3.0 cm
- Felt fabric for the wings
- Chenille wire
- Black beads for eyes or glass eyes on a metal loop in diameter of 8 mm
- Discs in diameter approximately 8 mm – 2 pieces
- Cotter pin
- Instant UHU glue
- Matching thread and sewing needles
- Polymer clay for small details
- Synthetic or other stuffing
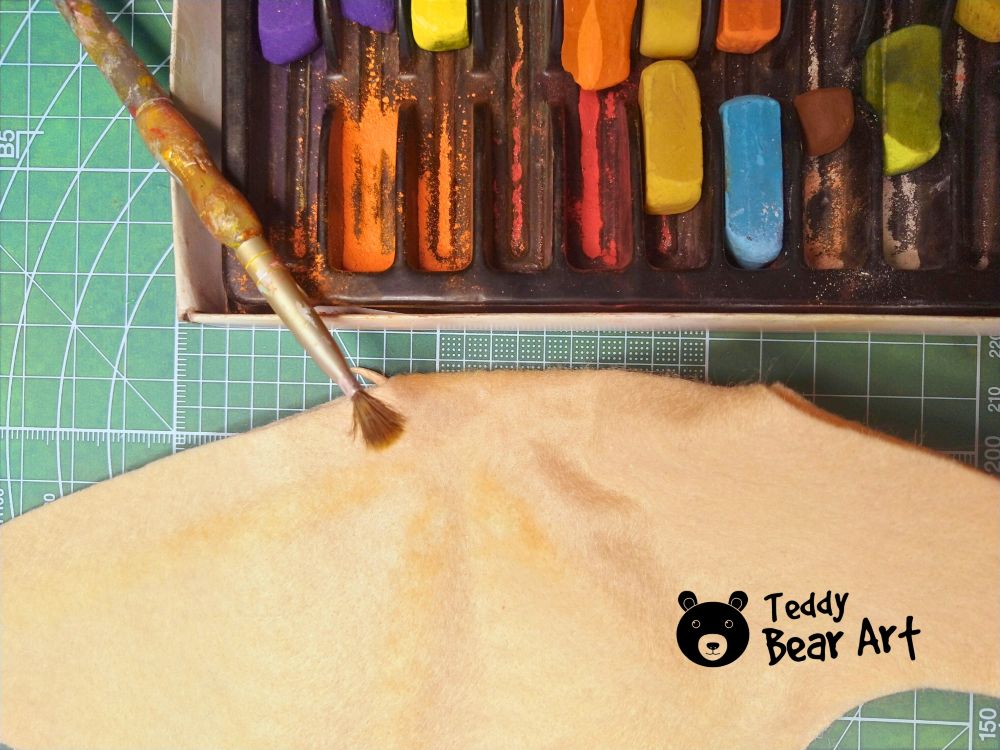
- Chalks or pastels for shading
- Extras (optional, for a rotating head): an awl and pliers. This is not necessary — you can sew the head to the body.
Step-by-Step Plush Bat Sewing Tutorial
Cutting Out the Pieces
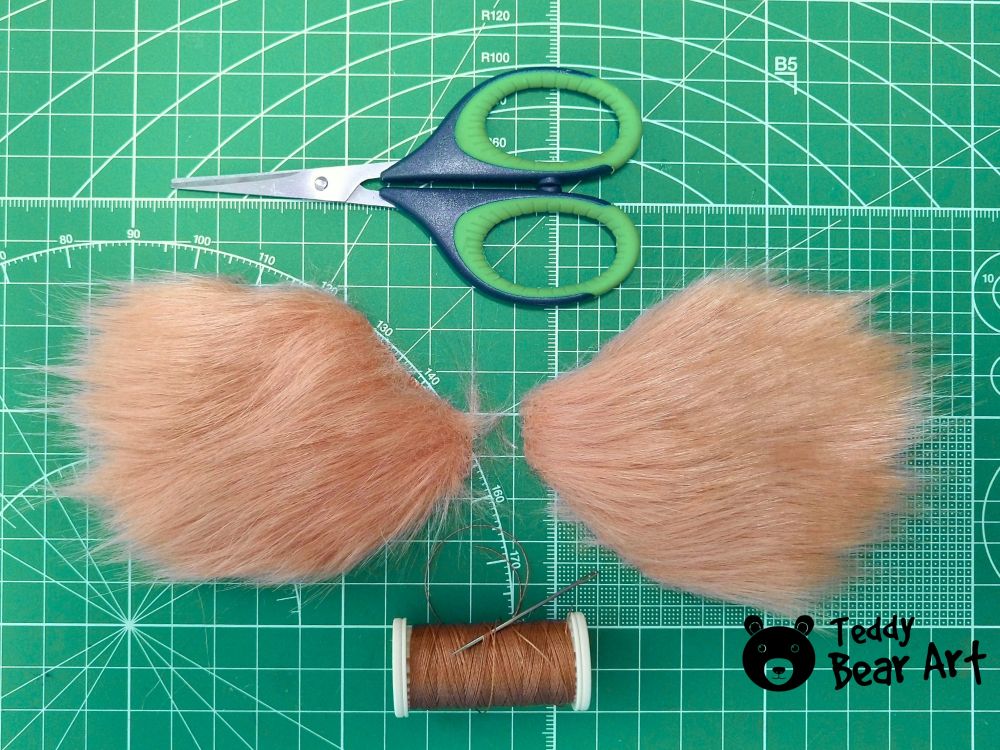
Lay your pattern pieces on the fabric with the pile running in the same direction. Trace and cut carefully. Watch for mirrored pieces. Keep fabric markings light and tidy to avoid visible lines on the final plush.
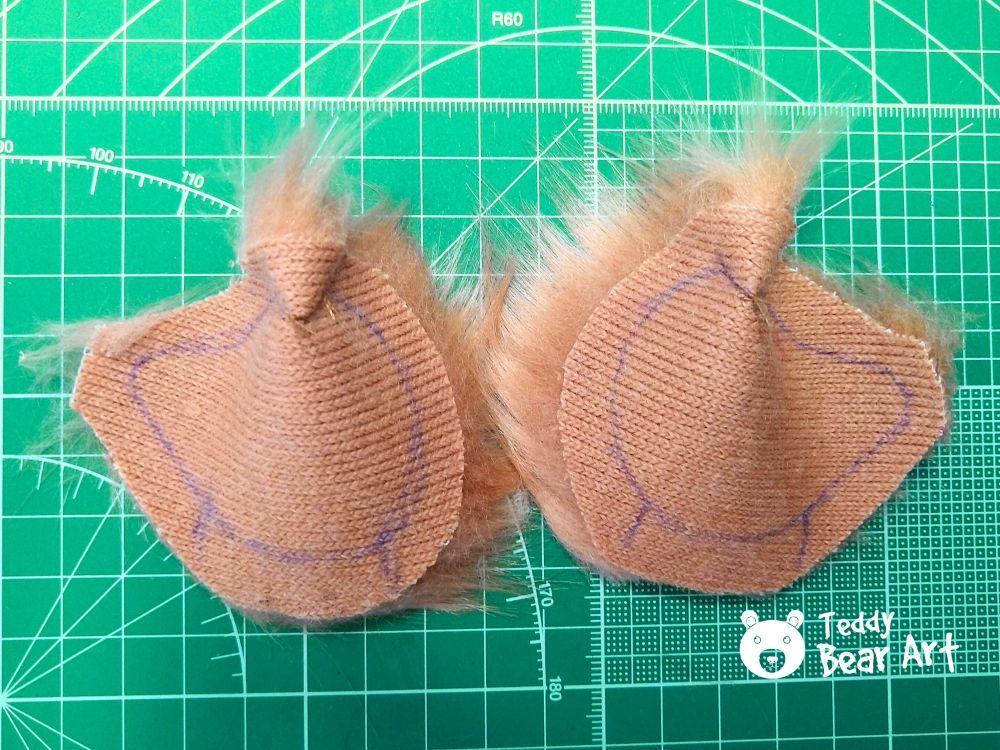
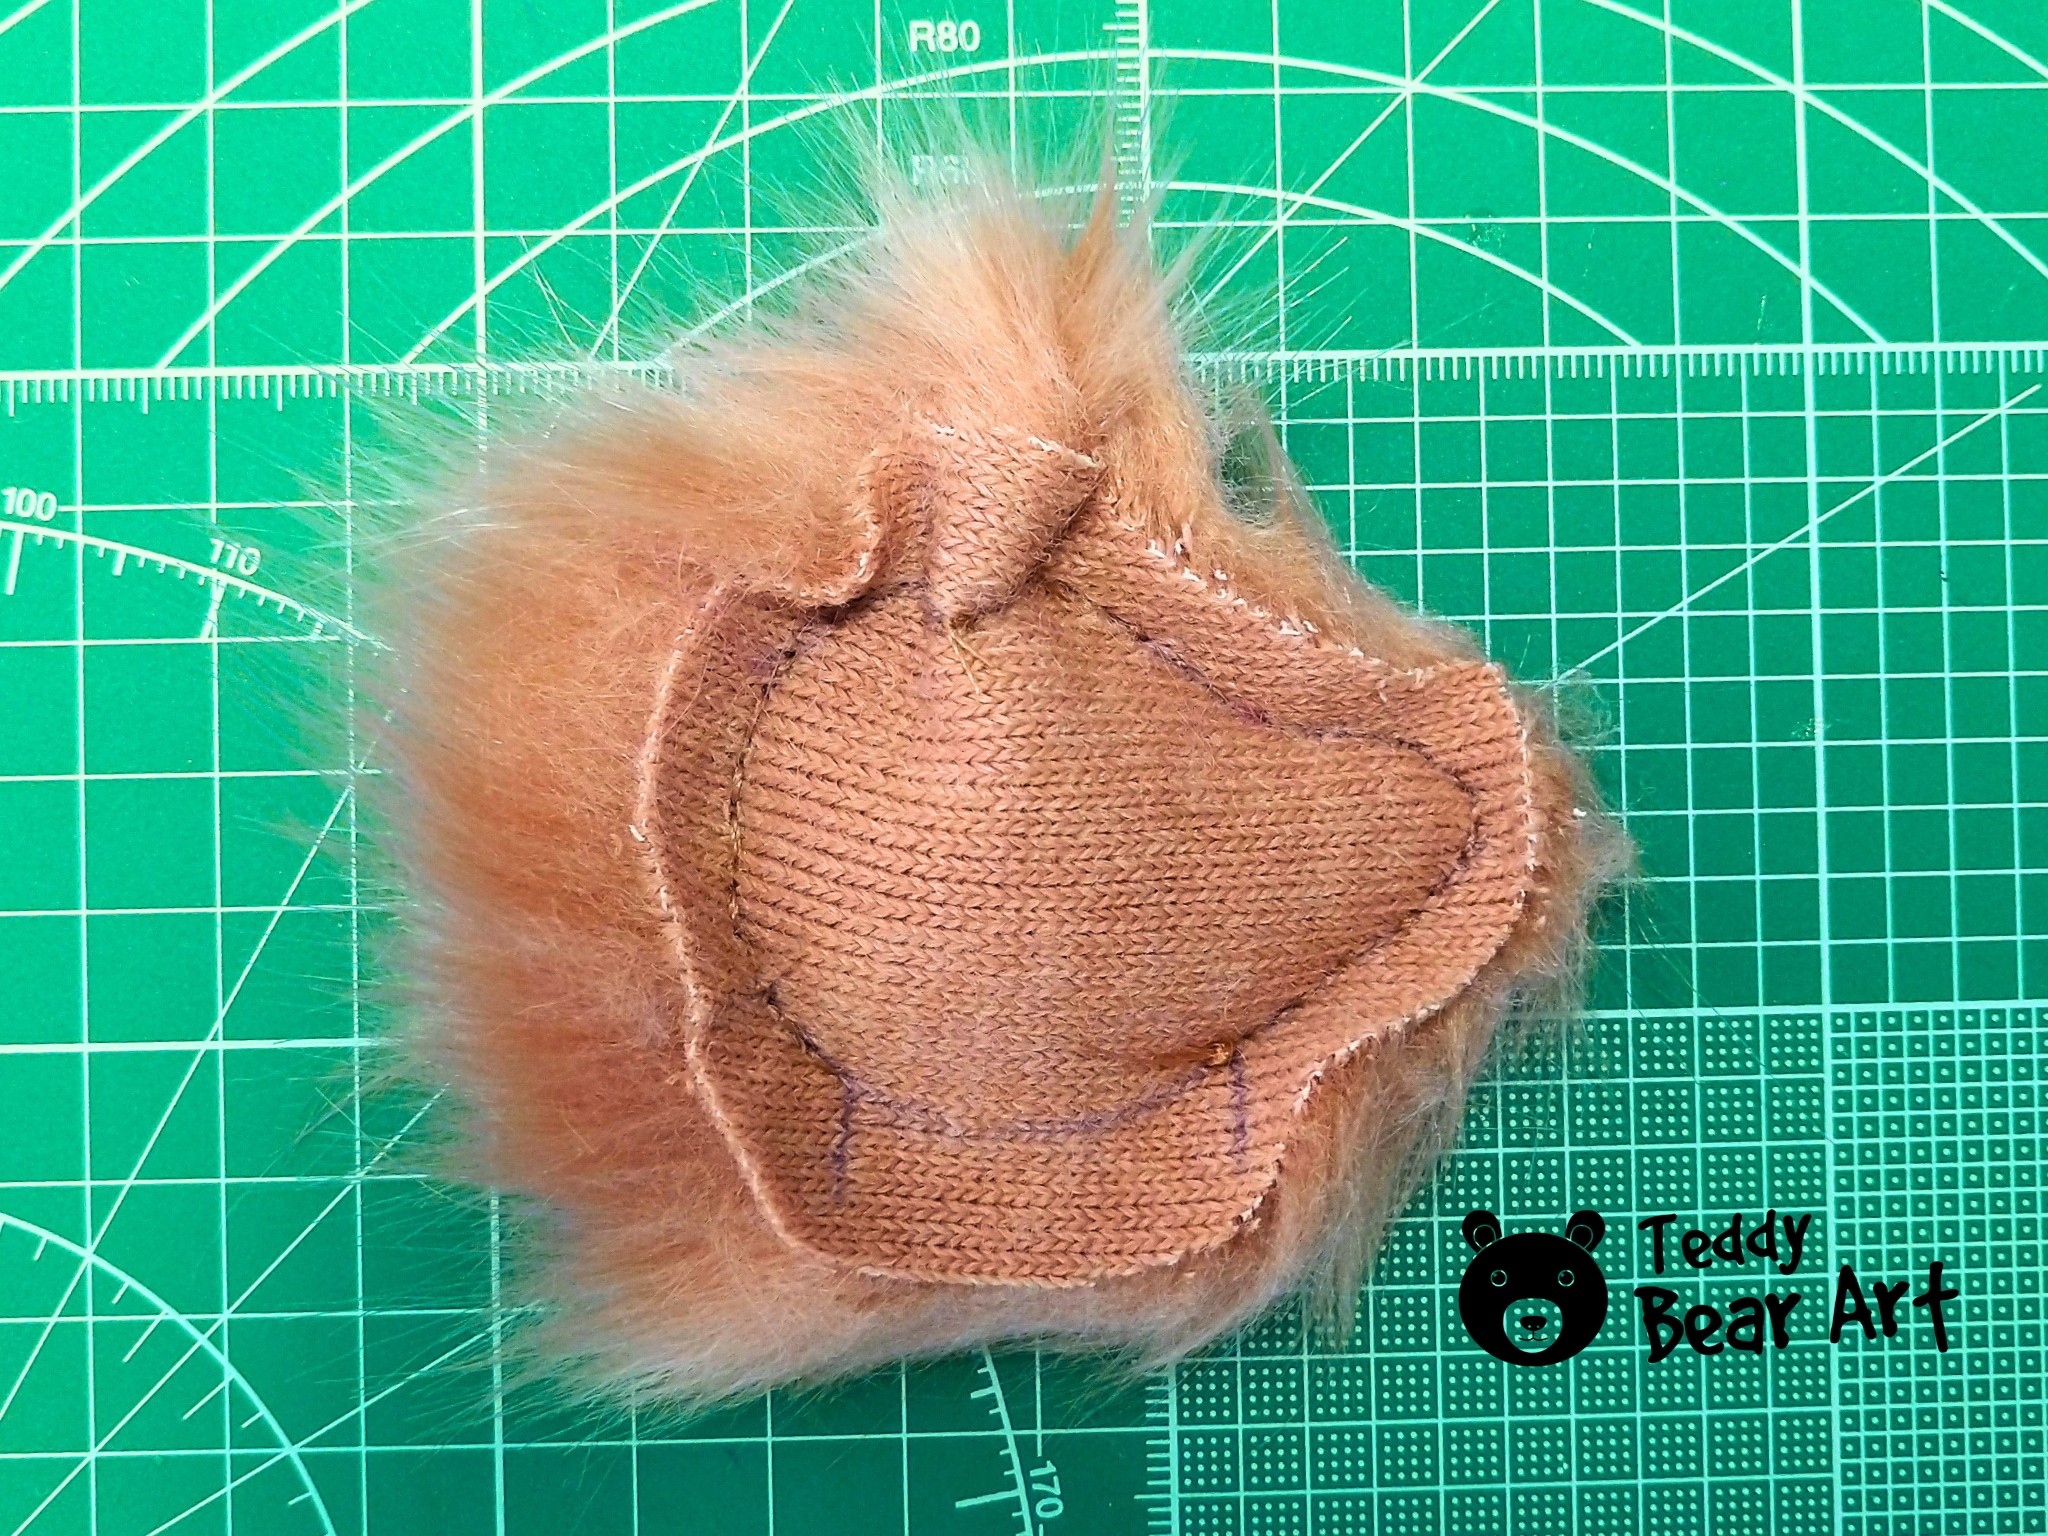
Sewing the Head
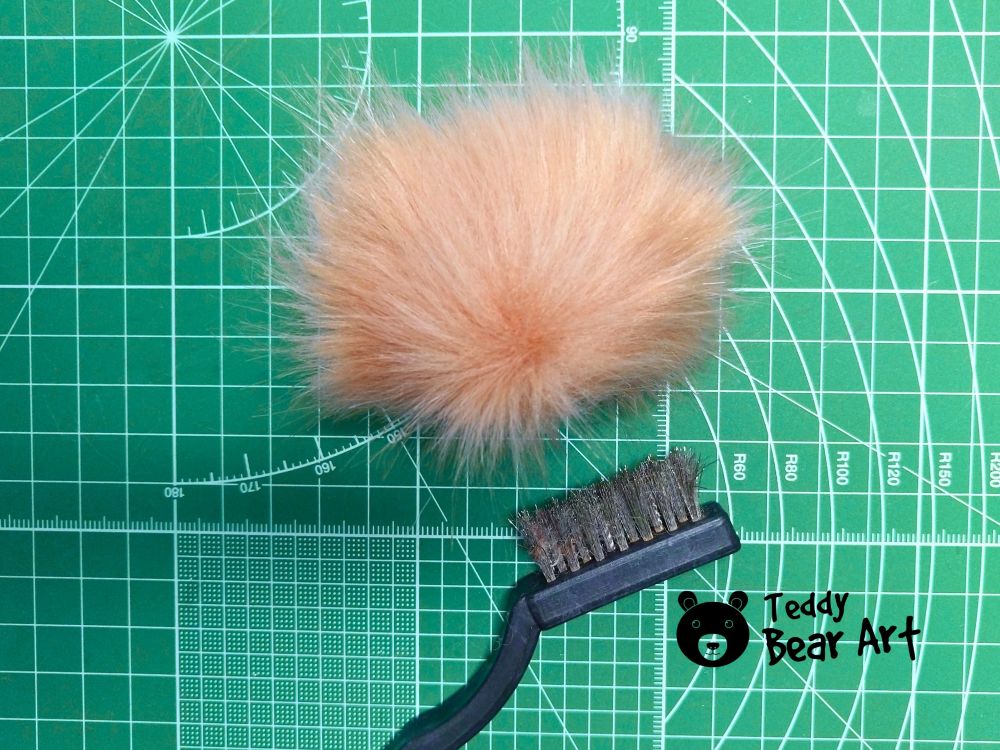
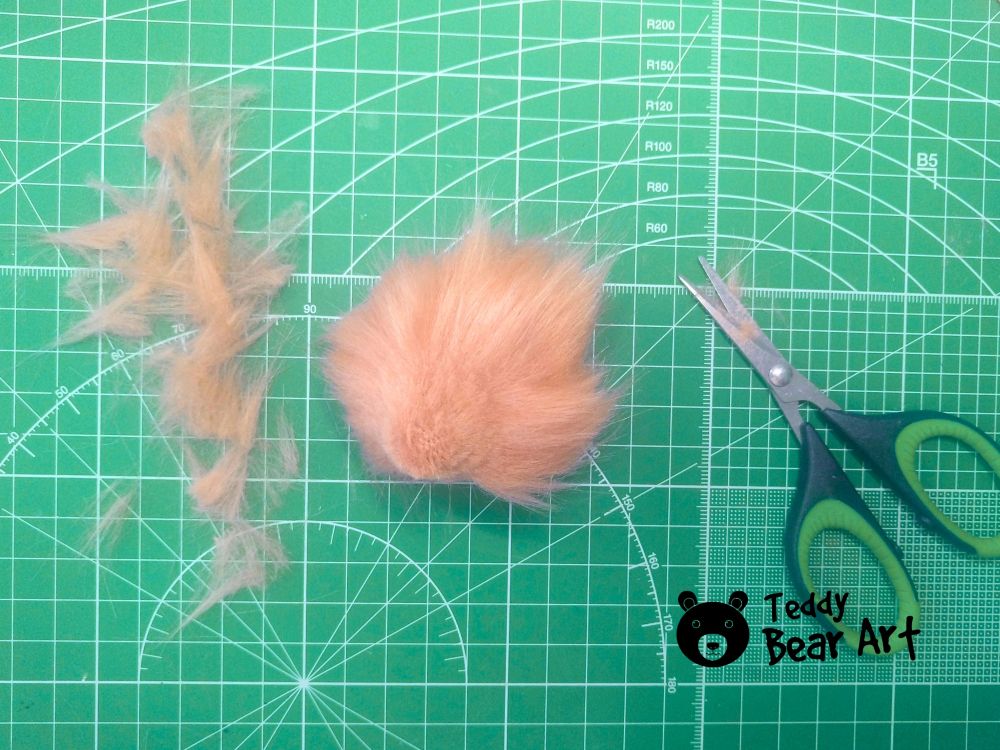
Start by sewing the darts on both mirrored headpieces to give the face shape. Then stitch them together, leaving an opening at the neck. Turn right side out and stuff firmly (the head should feel solid and hold its shape). Trim some pile around the sewing hole.
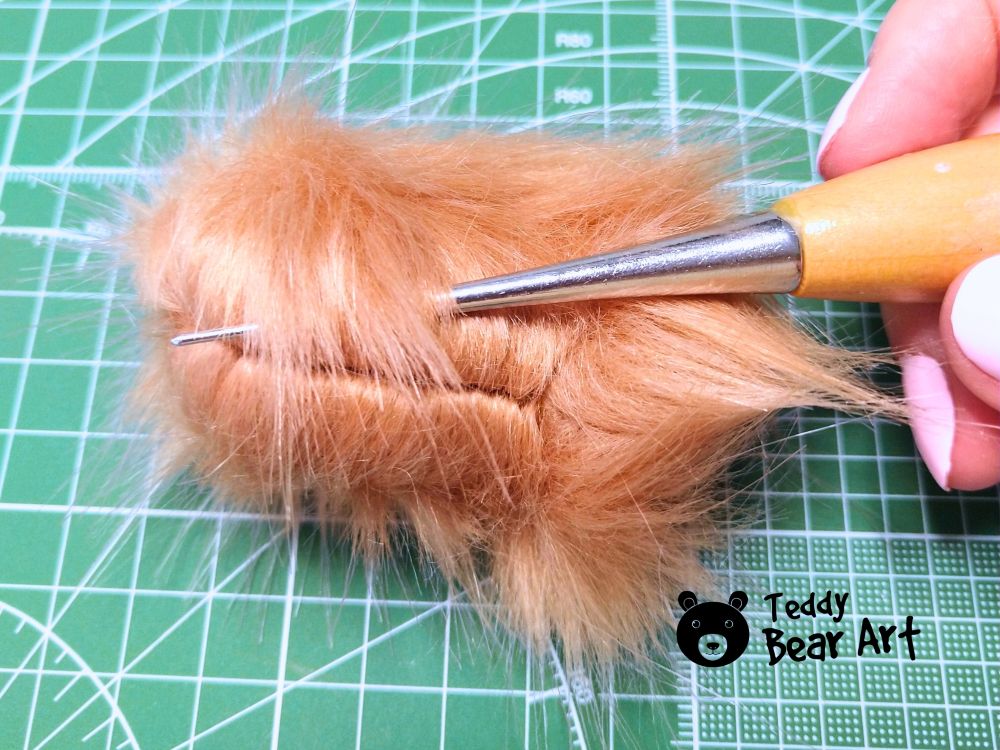
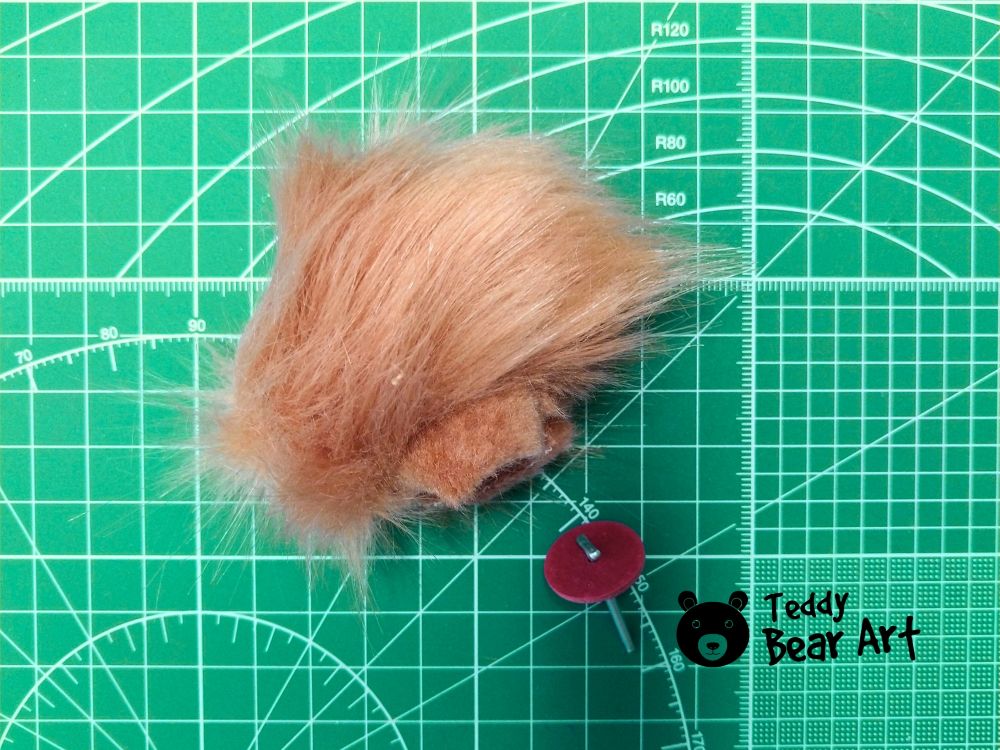
Insert the cotter pin joint if using—this gives the bat a moveable head, and close the hole. If not, prepare the base for a firmly sewn connection. Remove the pile from the seams.
Next, trim the fur on the muzzle so that the nose is visible.
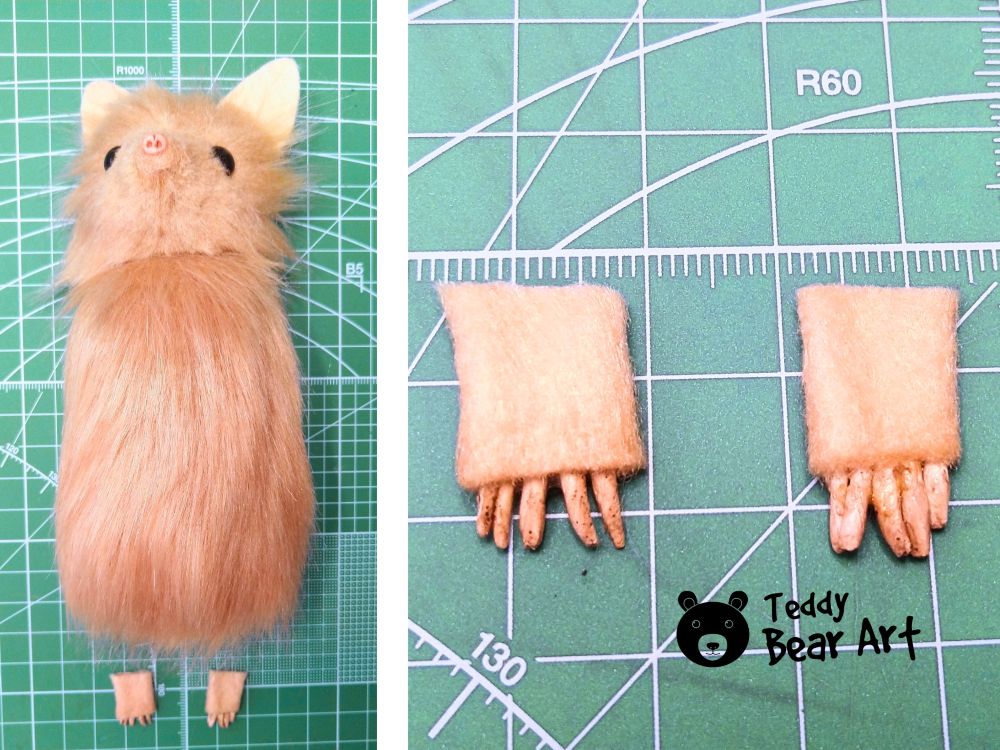
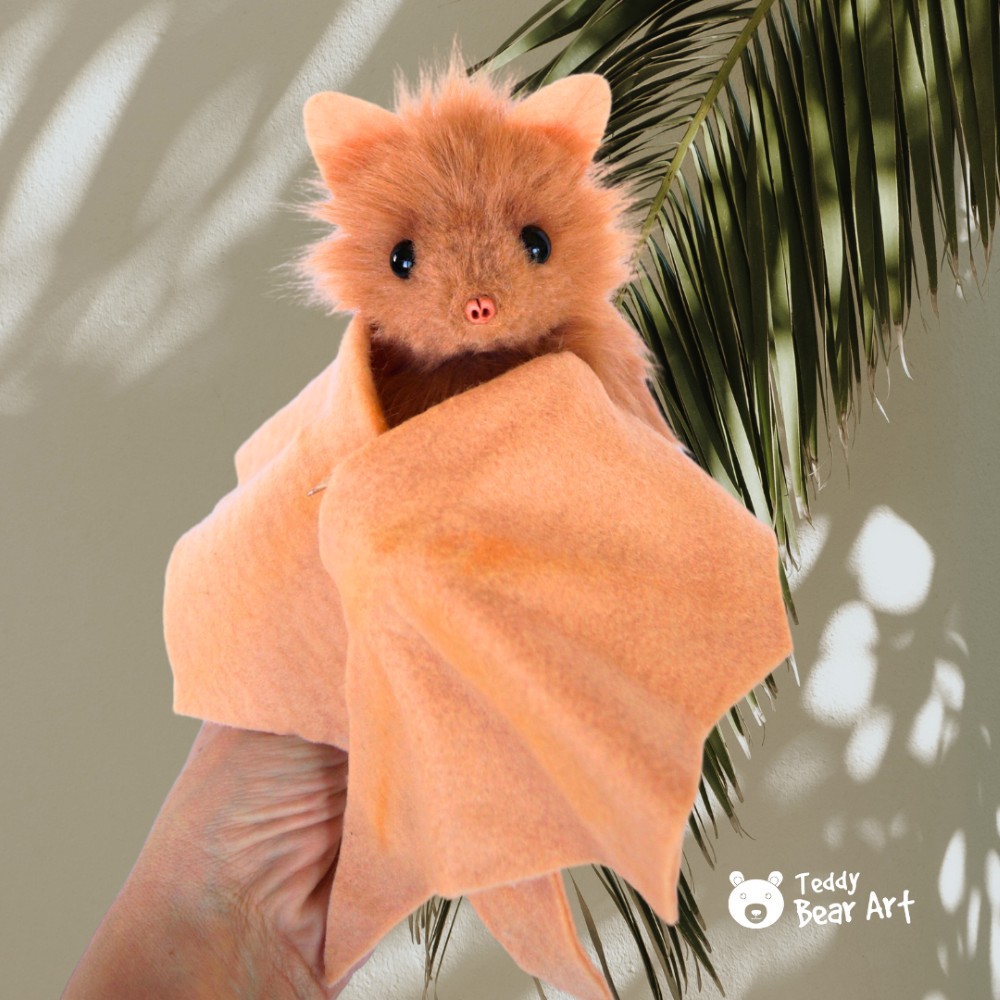
Insert glass eyes or sew on small black beads. Cut two ears from felt, and stitch them into place on top of the head. A tiny polymer clay nose (or even a small black button) can be glued or sewn on. Brush the plush gently to lift the fur, then trim it around the muzzle to neaten it.

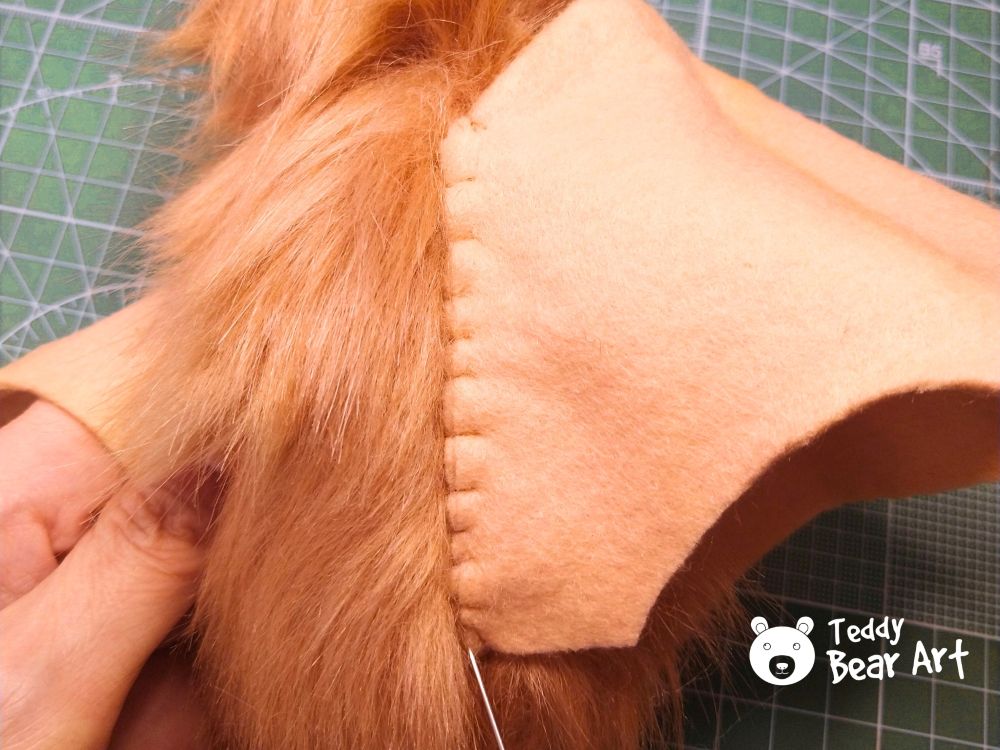
Sewing the Body and Attaching the Head
Use the same fabric to sew the body pieces together. Remember to leave an opening. Turn it right side out.
To attach the head: if you used a joint, now’s the time to secure it. If not, sew the head directly to the body using a ladder stitch for a clean finish.
Fill the body tightly, making sure the shape is even and firm. Close the bottom opening neatly.
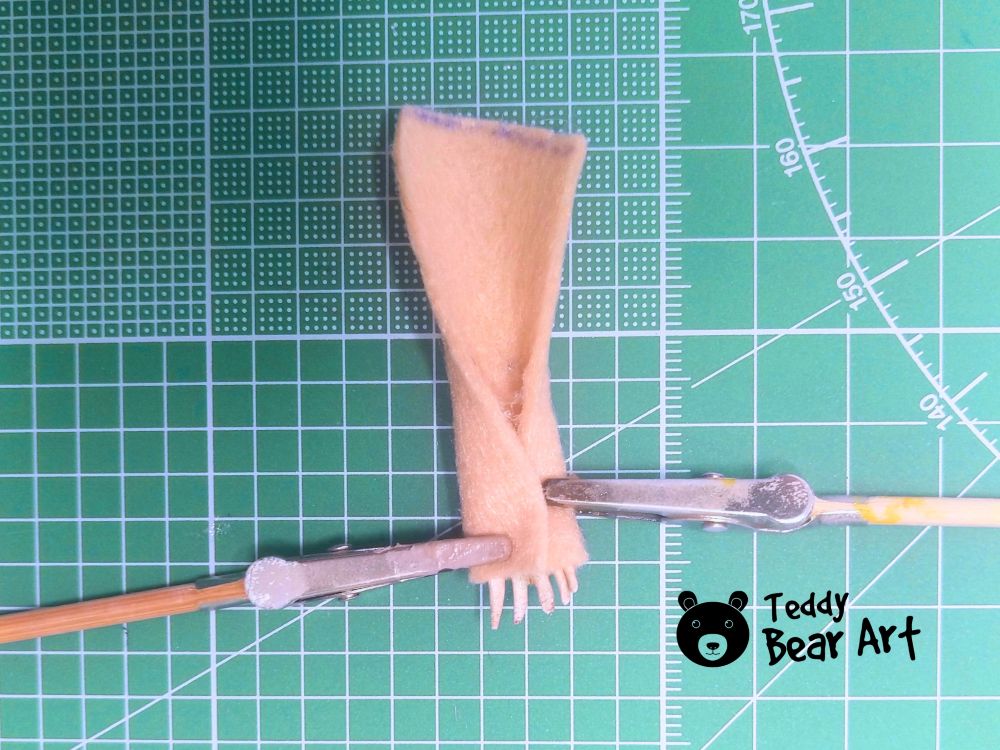
Make paws from polymer clay and felt, and glue them to the body.

Attaching the Wings
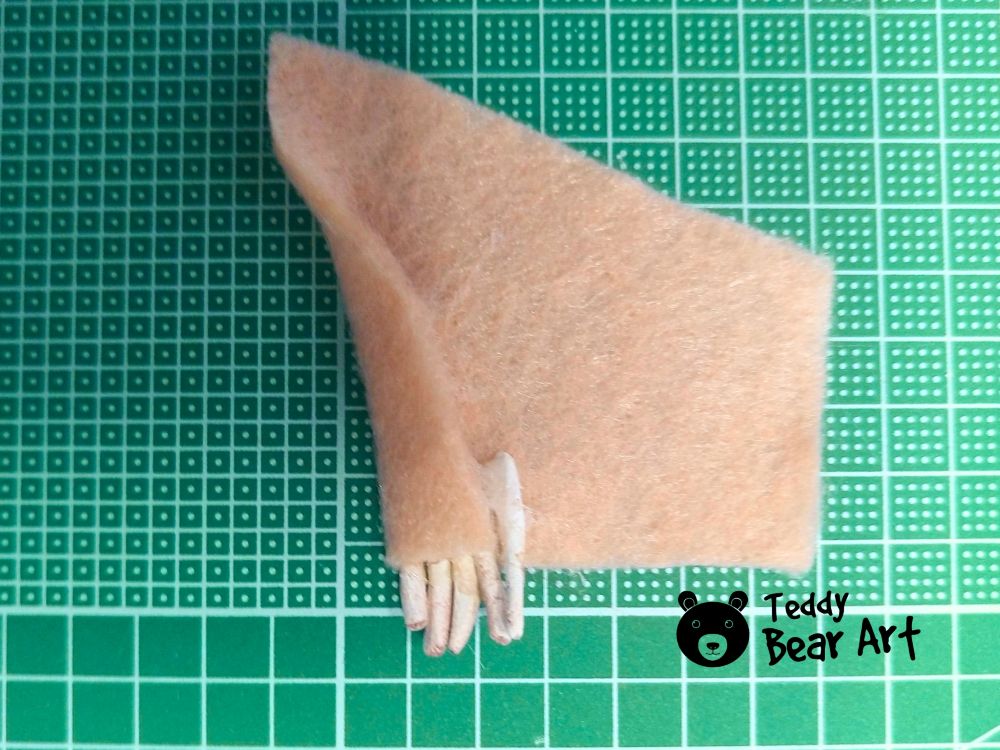
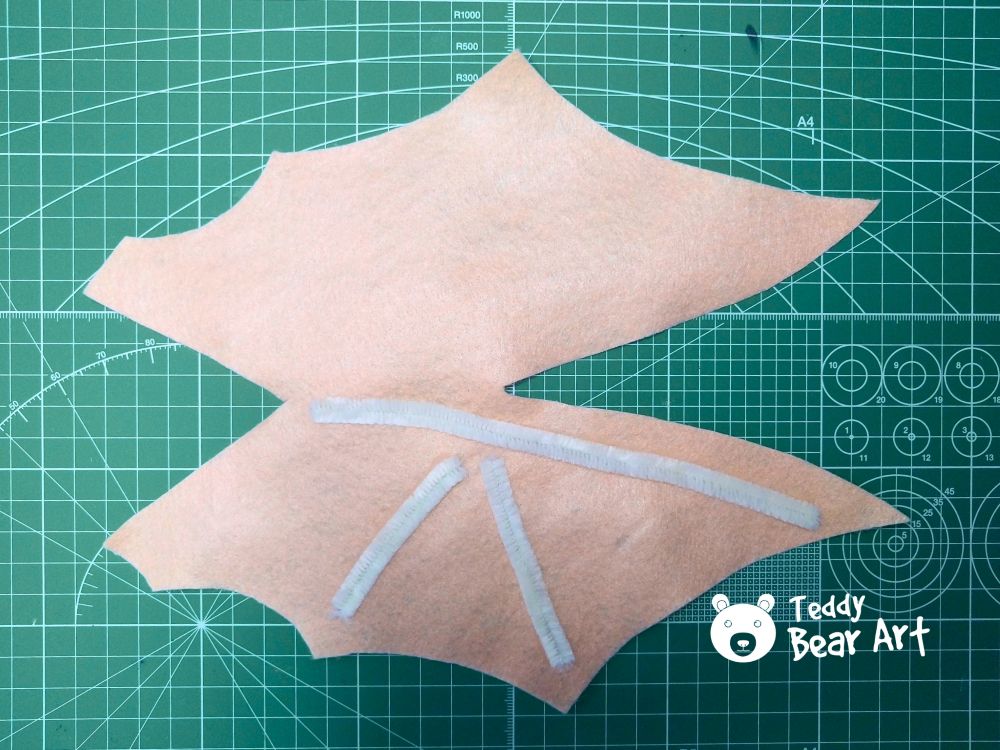
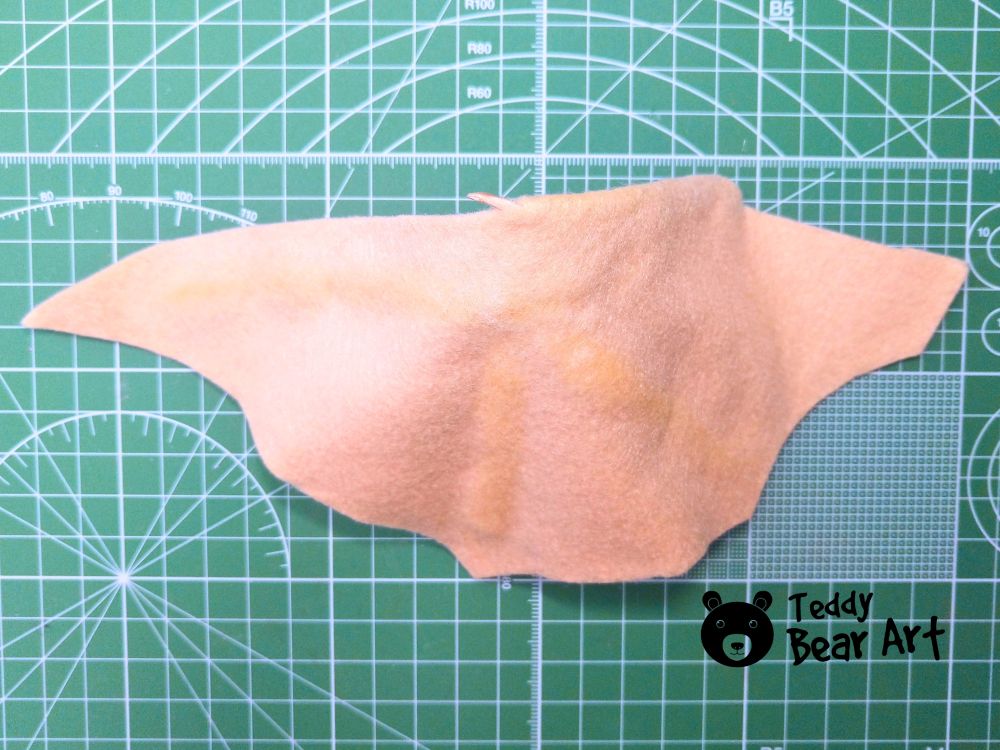
Cut two wings from felt. Insert chenille wire inside, and once the glue dries, gently fold the wing in half and glue the edges together. At the same time, attach the small sculpted bat claw at the base of the wing. Repeat the process for the second wing.
Gently add a touch of pink pastel to the inner parts of the ears for a soft blush effect. Lightly shade around the eyes and along the wing membranes with brown to give your plush bat more depth and character. That’s it — your adorable handmade bat is all finished and ready to charm!
Frequently Asked Questions
Can I sell plush bats made with this pattern?
Yes, absolutely! As long as you’re making them by hand and not mass-producing on an industrial scale, you’re welcome to sell your finished plush bats. A link back to this post is appreciated if you’re sharing your work online.
Can I use different fabrics?
You can, but don’t expect the same results. Every fabric behaves differently, and your plush may come out looking quite unique. If you’re okay with a surprise and want to experiment, go for it!
Can I resize the pattern?
Yes, but be prepared to adjust eye size and choose a different plush pile length. This will result in a new look that might differ from the photos you see here. If you’re feeling creative, this can be a fun way to make your bat truly one-of-a-kind. Additionally, we have a small bat pattern that you can use for a small-sized bat.
Final Thoughts
Creating your own plush bat is more than just a sewing project — it’s a joyful experience filled with imagination and fuzzy textures. We hope this handmade plush bat sewing tutorial inspires you to try something new and brings a little magic to your crafting time.
If you make your own bat, we’d absolutely love to see it! Tag us or share a link in the comments. And don’t forget to check out our other free plush patterns and sewing tutorials for more handmade inspiration.
Get Free Patterns & Be the First to Know!
Want free teddy bear patterns, exclusive tutorials, and a chance to win craft supplies?
Sign up for our newsletter using the subscribe form in the middle of this article to receive new patterns, insider tips, and the latest news on teddy bear art. You’ll also automatically be entered into our annual giveaway for a chance to win teddy bear crafting materials.
Bonus entry: Save one of our pins on Pinterest to increase your chances of winning!
Let’s create, inspire, and craft beautiful teddy bears together!
This tutorial is fantastic! The step-by-step instructions and detailed photos make every stage so clear and approachable—what an inspiring project for plush lovers.
I especially love how you explain shaping the wings and joining fabrics with precision. Do you have any tips on choosing the best stuffing materials or fabric types that hold shape well without being bulky? I’d love your recommendations before I get started.
Thanks for sharing such a creative and cozy pattern!
Thank you so much for your kind words! I’m really happy you enjoyed the tutorial—I tried to make it as clear and inspiring as possible for all plush lovers.
If you’re using long-pile faux fur for the body and head, that’s a fantastic choice! It adds so much character and fluffiness to the bat. Just be sure to gently brush the fur out of the seams with a needle or a small comb after sewing, so the joins stay neat and the fur looks natural.
For the wings, felt is still a great option—it’s thin but sturdy, holds its shape nicely, and is easy to sew by hand. You can also try soft faux suede or a medium-weight cotton with some interfacing if you want a different texture.
As for stuffing, I recommend using polyester fiberfill (like Poly-Fil or similar). It’s lightweight, soft, and helps the shape hold without looking bulky. Just take your time filling small areas gradually to keep the form smooth.
I’m so glad the pattern inspired you! Wishing you lots of fun and creativity with your fluffy little bat—I’m sure it’ll turn out absolutely magical!
Hey a great post you have here!
This was an interesting read as it was simple to work with. From the template to the step by step and list of resources, all this post is great for beginners.
The plush bat is adorable and not even hard to construct thanks to your kinks of creating this guide.
Thanks again and have a great day!
Thank you so much! I’m glad you found the post helpful and easy to follow. Happy to hear you liked the plush bat! Have a great day!
ok i am new to sewing and really want to make this…
For those who might not have a sewing machine like myself, could this project reasonably be completed entirely by hand sewing, and if so, what adjustments or considerations would be necessary?
Would it still look the same or would it be messy?
Yes, this project is meant to be hand-sewn — it’s actually designed that way! There’s very little sewing involved, and all the pieces are small, so it’s easy to stitch them by hand. The key is just to take your time and sew neatly. The result will look beautiful — just as good as if it were done on a machine. In fact, hand sewing gives it a special charm!