If you are wondering how to fix loose teddy bear joints, you are not alone. Many teddy bear makers run into this problem at some point. A finished bear looks beautiful: neat seams, a lively face, and then suddenly the arms or legs feel floppy. Instead of holding a gentle pose, the limbs swing too freely.
The good news is that loose joints are a very common issue in traditional teddy bear making, and in most cases, they can be fixed without starting your bear from scratch.
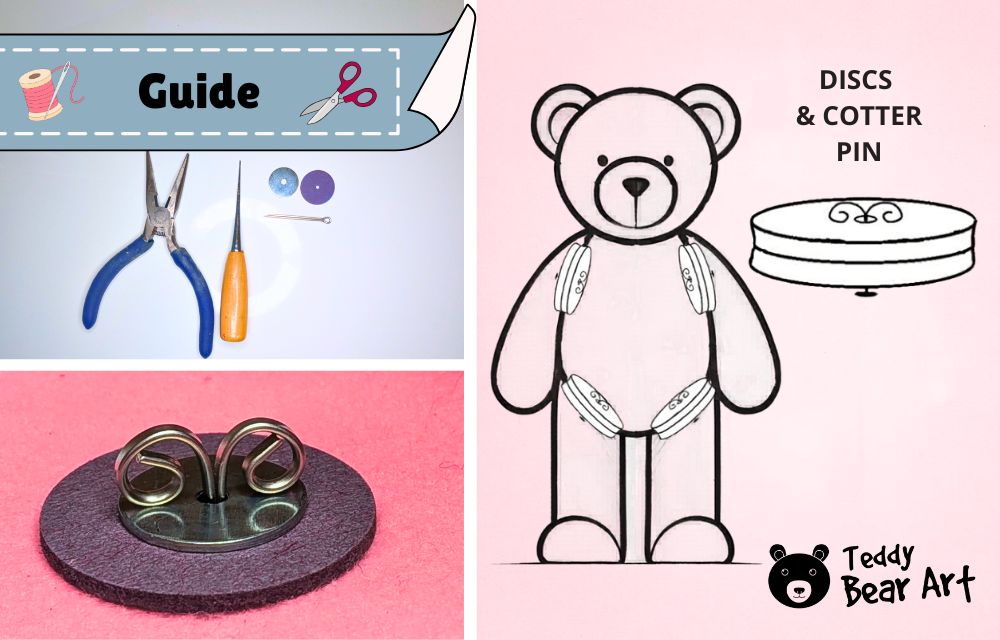
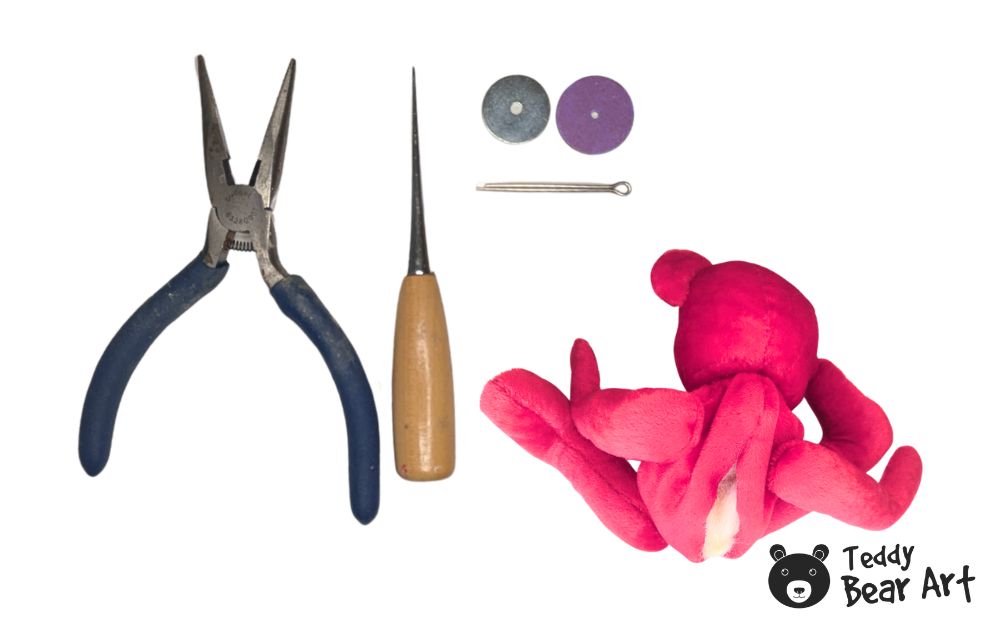
In this step-by-step guide, you will learn why teddy bear joints become loose, how disk joints and cotter pins actually work, and how to restore smooth movement with the right tension, all in one afternoon.
How to fix loose teddy bear joints:
Loose teddy bear joints can usually be fixed by tightening the cotter pin inside the body, checking that the disks sit flat against the fabric, and adding firm stuffing around the joint. In most cases, this simple adjustment restores smooth movement and proper tension without replacing the entire joint.

Why Teddy Bear Joints Become Loose
Loose joints usually happen for a few specific reasons. Understanding them helps you fix the problem much faster.
Cotter Pins Not Tightened Enough
The most common cause is simple: the cotter pin wasn’t twisted tightly enough when the bear was assembled. When the pin is loose, the disks inside the joint do not press firmly against the fabric, and the limb begins to wobble.
Sometimes, beginners hesitate to twist the cotter pin more firmly because they fear damaging the fabric. As a result, the joint ends up with too little tension.
Incorrect Disk Size
If the disk inside the limb or body is too small, it cannot support the joint properly. Pressure is concentrated in a smaller area, and the joint slowly becomes unstable.
A slightly larger disk usually creates a much stronger and smoother joint.
Soft or Shifting Stuffing Inside the Body
Joint stability also depends on what happens around the joint inside the body. If the stuffing is too soft or loosely packed, the disks can move slightly every time the bear is handled.
Over time, this movement reduces the tension of the joint.
Wear and Tear Over Time
Older teddy bears sometimes develop loose joints simply because they have been loved and handled for many years. Cotter pins may relax slightly, stuffing compresses, and the disks shift a little.
In these cases, small adjustments can restore the original firmness.
Joint Holes Stretched by Fabric
If the fabric around the joint hole stretches during turning or stuffing, the joint can become less stable. Mohair and dense backing fabrics usually hold joint holes more securely.
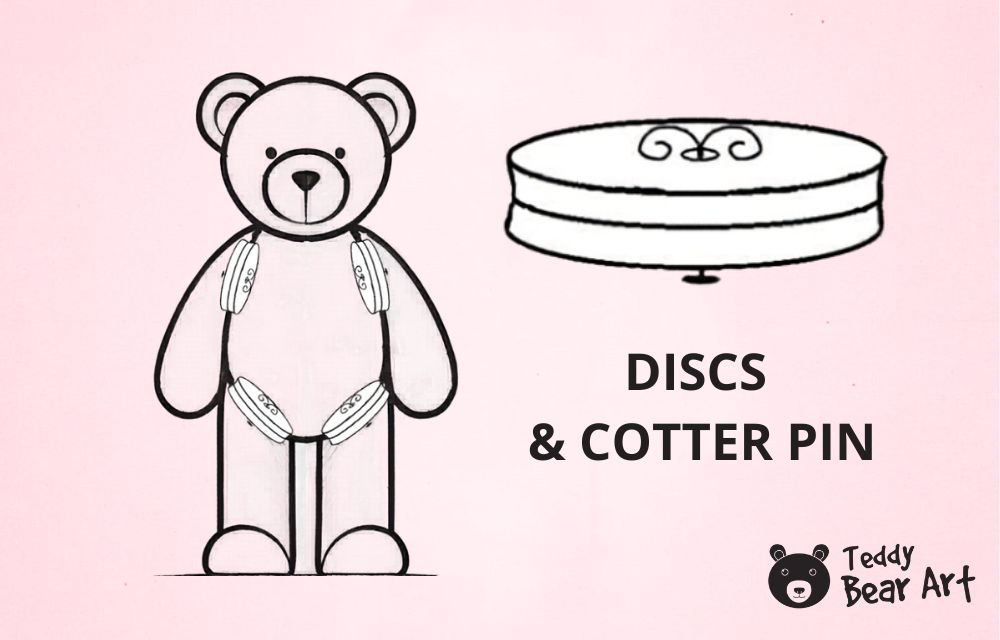
How Teddy Bear Disk Joints Work
Before fixing a loose joint, it helps to understand how the mechanism inside the bear functions.
The Role of Disks in Joint Stability
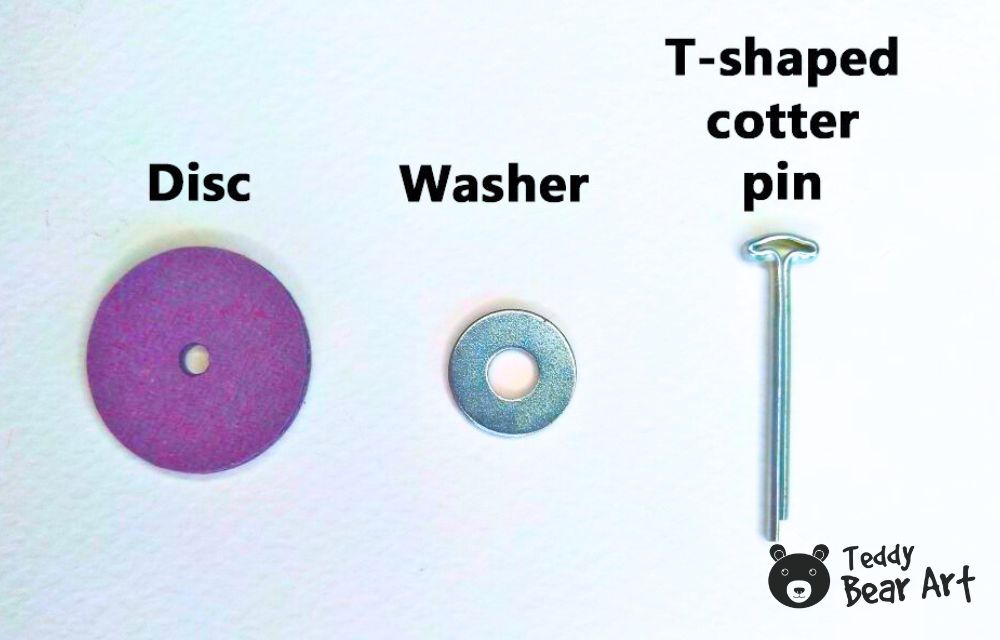
Disk joints are the traditional method used by many teddy bear artists. Inside the limb and body are strong disks that press against the fabric, distributing pressure evenly while still allowing movement.
Many makers also add metal washers between the disk and the cotter pin. A washer is a small flat ring that reinforces the joint, protects the disk from the pin, and distributes pressure more evenly. This is especially helpful for larger bears or heavily stuffed limbs.
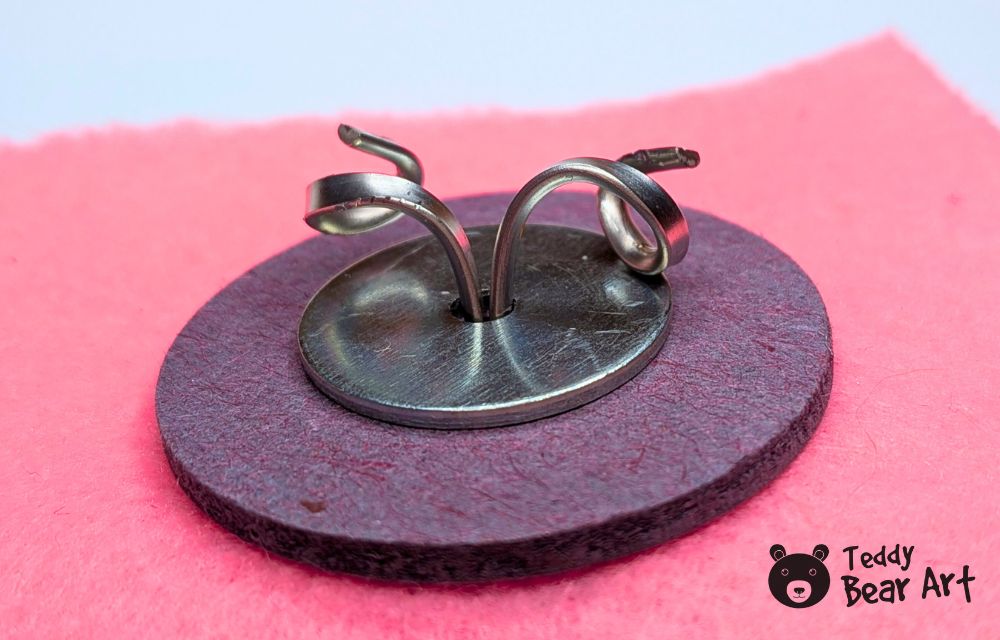
How Cotter Pins Create Tension
A cotter pin passes through both disks and the fabric. When the ends of the pin are twisted apart, they pull the disks toward each other.
If washers are used, they sit between the pin and the disk, keeping tension stable over time.
Choosing the Right Washer Size
The washer should be slightly smaller than the disk so it sits comfortably on top without extending beyond the edge.
Very small washers may not distribute pressure effectively, while overly large washers can interfere with joint movement.
Most makers choose washers that fit neatly within the disk diameter and allow the pin to move freely while reinforcing the joint.
Why Proper Alignment Matters
Disks, washers, cotter pins, and fabric must sit evenly together. If one component shifts during assembly, pressure becomes uneven, and the joint may loosen faster.
Careful placement inside the body ensures smooth movement for years to come.
Step-by-Step Fix for Loose Teddy Bear Joints
Here’s how to repair loose joints in one afternoon.
Step 1: Identify Which Joint is Loose
Gently move each limb. Sometimes only one joint is loose while the others are fine. Identifying the exact location saves time.
Step 2: Carefully Open the Seam
Open the body seam near the loose joint using a seam ripper. Many makers use the back seam because it is easy to access.
Open only a small section to keep the repair simple.
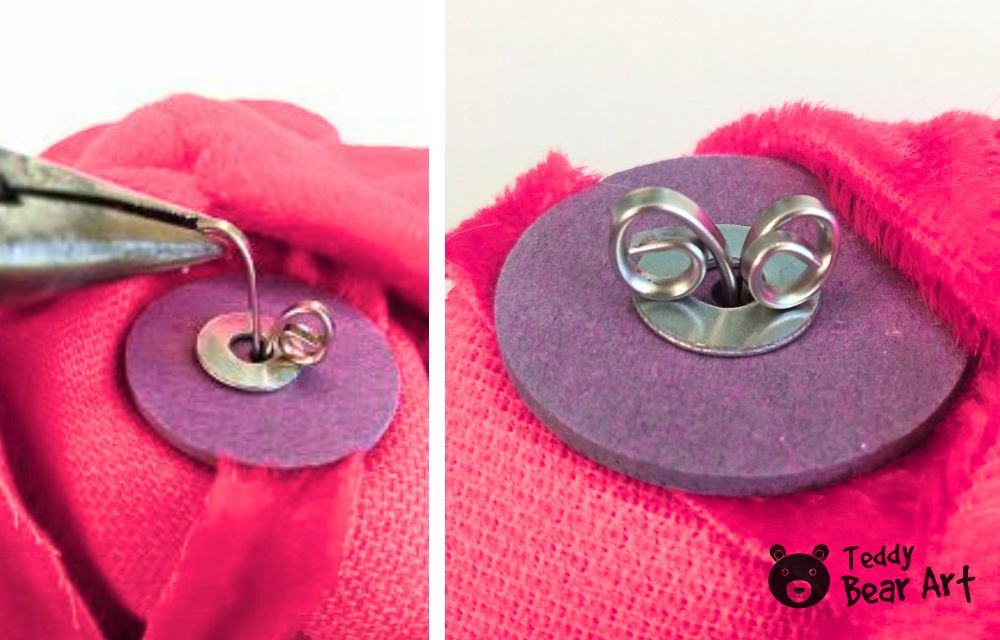
Step 3: Tighten the Cotter Pin
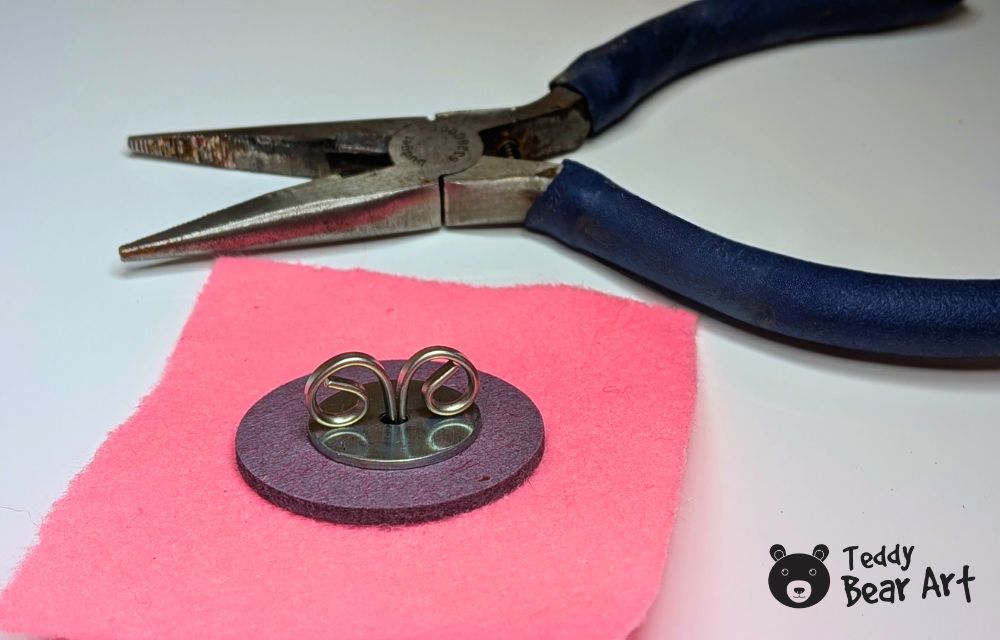
Locate the cotter pin inside the body. Using pliers, carefully twist the ends a little tighter.
Make small adjustments and test the limb after each twist.
How to Tighten Cotter Pins for Teddy Bear Joints
In this short video, I show how to tighten cotter pins correctly so teddy bear joints move smoothly without becoming loose.
Step 4: Check Disk Alignment
While the seam is open, check that the disks sit flat against the fabric. If one has shifted or tilted, reposition it.
This small correction often improves the joint dramatically.
Step 5: Restuff the Body Firmly
Add extra stuffing around the joint if needed. Firm stuffing stabilizes the disks and prevents them from shifting again.
Experienced makers often pack stuffing firmly around joints for this reason.
Step 6: Close the Seam Securely
Once the joint moves smoothly and holds its position, close the seam with a ladder stitch.
Test the joint again after closing — the limb should move easily but not flop loosely.
How Tight Should Teddy Bear Joints Be
Many beginners worry about overtightening. The goal is smooth movement with gentle resistance.
A simple test: lift the bear by one arm. It should stay in position while still allowing easy movement.
If the joint feels stiff or squeaks slightly, loosen the cotter pin slightly.
Common Teddy Bear Jointing Mistakes
- Using disks that are too small reduces stability.
- Over-tightening cotter pins can stress the fabric.
- Loose stuffing around the joint allows the disks to move.
- Skipping washers in larger bears can reduce long-term durability.
Avoiding these mistakes improves every bear you make in the future.
When You Need to Replace the Joint Completely
Sometimes tightening the cotter pin isn’t enough.
- The pin may be bent or damaged.
- Disks can crack or weaken over time.
- Fabric around the joint hole may be worn.
In these cases, replacing the joint with new hardware is the safest solution.
Tips for Preventing Loose Teddy Bear Joints
- Choose disk sizes that fit comfortably inside the limb and body.
- Use strong cotter pins designed for teddy bear making.
- Pack stuffing firmly around the joint area to support disks.
- Consider adding metal washers for additional strength, especially in larger bears.
- Always test joint movement before closing the seam.
These simple habits make a big difference in your bear’s durability.
Before You Go
Loose joints are one of the most common challenges in teddy bear making. Fortunately, the solution is often simple. By tightening the cotter pin, checking disk alignment, and packing stuffing firmly, you can restore smooth movement and stability.
With a little practice, adjusting joint tension becomes second nature. Your bears will not only look beautiful but will hold their poses with the quiet strength that makes traditional jointed teddy bears so special.
If you want to learn the full process of jointing a teddy bear step by step, see my detailed guide here:
Get Free Patterns & Be the First to Know!
Want free teddy bear patterns, exclusive tutorials, and a chance to win craft supplies?
Sign up for our newsletter using the subscribe form in the middle of this article to receive new patterns, insider tips, and the latest news on teddy bear art. You’ll also automatically be entered into our annual giveaway for a chance to win teddy bear crafting materials.
Bonus entry: Save one of our pins on Pinterest to increase your chances of winning!
Let’s create, inspire, and craft beautiful teddy bears together!
I really appreciate how clearly this guide breaks everything down, especially the part about carefully opening the seams and working step by step instead of rushing. I’ve had a few older bears with loose joints, and I always felt a bit intimidated to even start fixing them, but this makes it feel much more manageable. The idea that you can restore stability in just one afternoon is very encouraging.
One thing I’m curious about: how do you decide whether a joint just needs tightening versus fully replacing the discs inside? I imagine with older or well-loved bears it might not always be obvious which option is better.
This is a clear and highly practical guide that addresses a common issue in teddy bear making with both technical depth and accessibility. I appreciate how you explained the mechanics of cotter pins, disks, and washers, which helps readers understand not just the “how” but the “why” behind each fix. The step-by-step approach, combined with preventative tips, makes it especially valuable for both beginners and experienced makers. Overall, it’s a well-structured and trustworthy resource that empowers readers to confidently restore joint stability without unnecessary rework.
Thank you so much for your kind words, I’m really glad the guide made the process feel more approachable for you. That was exactly my goal, because I know how intimidating joint repairs can seem at first, especially with older or sentimental bears.
As for your question, I usually look at how the joint behaves. If it still holds the limb but feels loose, tightening is often enough. But if the joint no longer keeps its position, or you can feel that the discs inside have worn down or shifted, then replacing them is a better long-term solution. With well-loved vintage bears, I also try to be as gentle as possible and only replace parts when truly necessary.