
Looking for how to make giraffe stuffed animal? This project is designed for skilled makers who feel confident working with miniature details and enjoy more advanced teddy techniques. A tiny giraffe looks delicate and sweet, but behind its gentle appearance lies careful shaping, precise stuffing, and detailed finishing.
This pattern is perfect for those who want to challenge themselves and create a little creature that almost feels alive in the palm of a hand.

My Experience Making This Mini Giraffe
I’ve made this mini giraffe several times, and the most important thing I learned is that fabric choice makes all the difference. This pattern only works properly with thin viscose like the one I listed. Thicker fabrics such as fleece, plush, or faux fur may seem easier to handle, but they completely ruin the proportions and make the toy look bulky instead of delicate.
Because the giraffe is very small, even slight changes in fabric thickness affect how the pieces turn and fit together. With thicker materials, small parts like the legs and neck become difficult to shape neatly.
The viscose I use has a subtle texture that naturally mimics giraffe fur, which gives the finished toy a softer and more realistic look.
Download the Pattern
Notice that seam allowances are not included.
To download the pattern, follow the instructions below:
From a phone or tablet: There should be a similar option for mobile devices with Android or iOS. Click on the image. Save it by holding your finger on the image and selecting the “Save Image” option. Then, go to your photo gallery and print it (an option available).
From a computer: Click on the photo of the pattern you see below. In the new tab that will open, you press the right mouse button and select the “Save image as …” option. Then, you choose where the image will be saved on your computer.
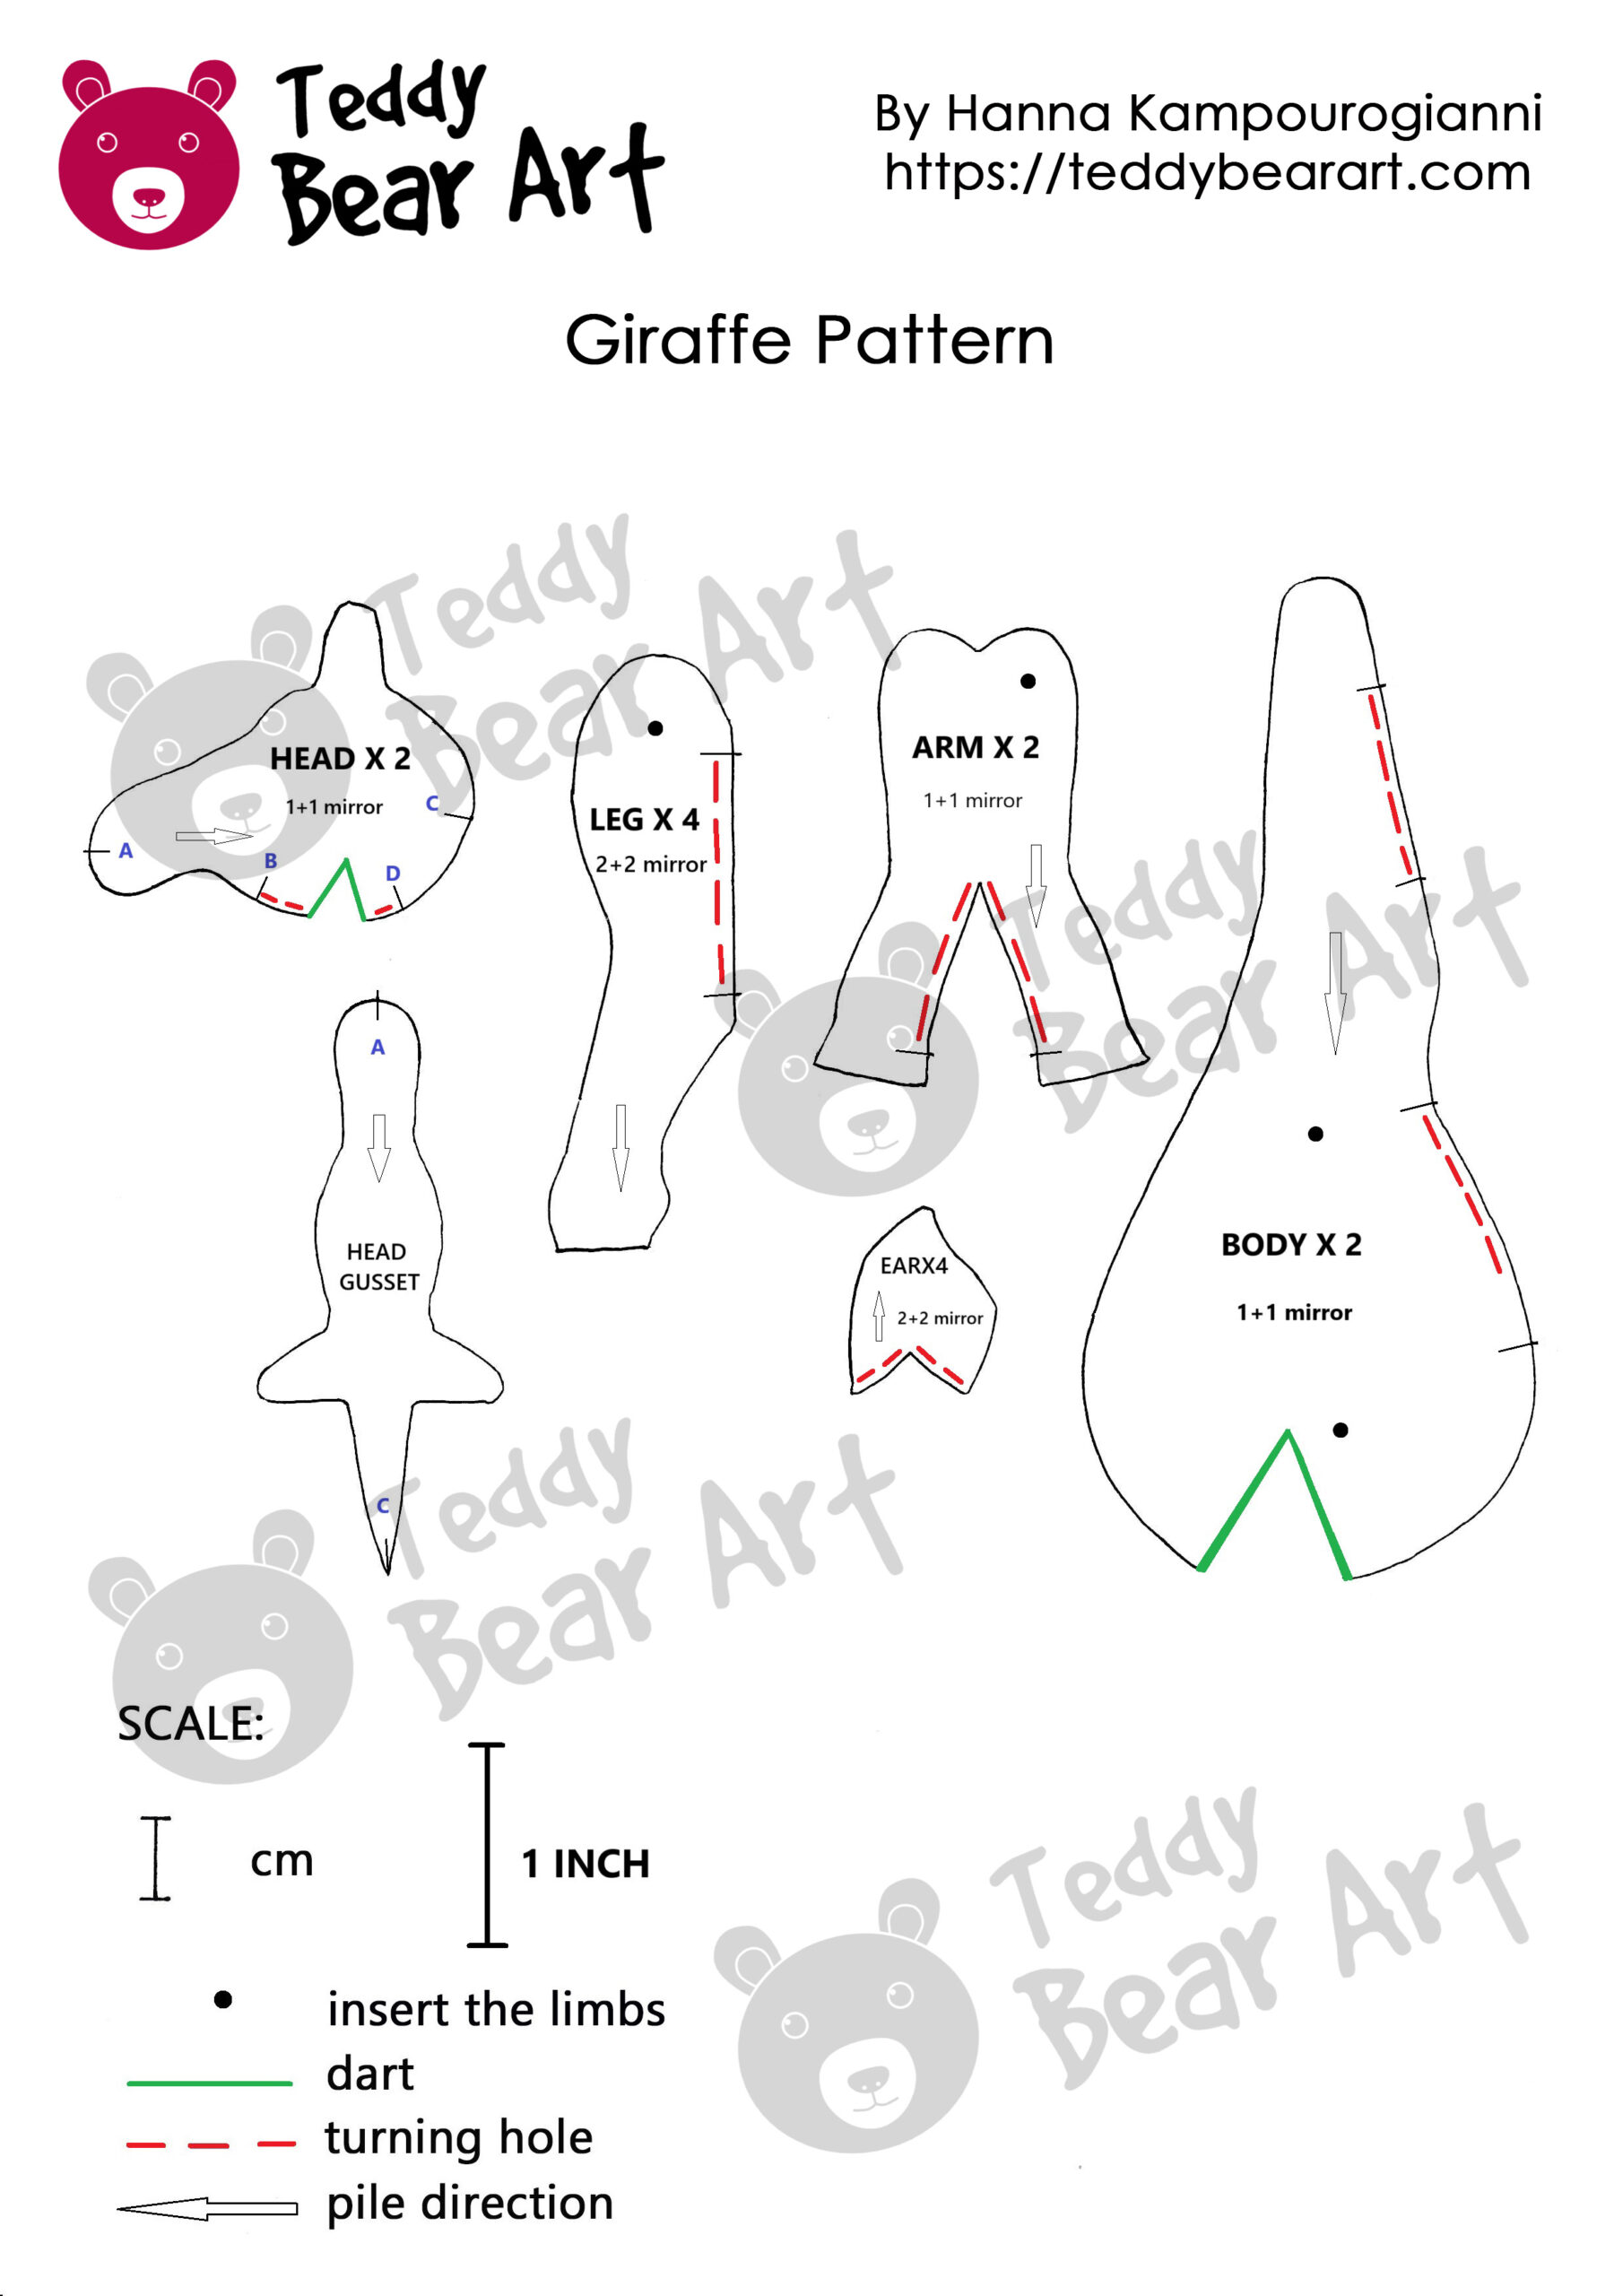
Materials You Will Need
- Viscose fabric with a pile length of 6 mm
- Small glass eyes with metal loops
- Joint discs, 6 pieces of 9 mm for head and arms, plus 4 discs for legs
- Metal washers
- Five T-shaped cotter pins
- Thin elastic fabric for the inner ear parts
- Oil paints
- Acrylic paints
- Clay for the hooves
- Thread for the mane and eyelashes, or two small bundles of artificial eyelashes
- Felt
- Glue
- Merino wool for the tail tip
- Pliers
- Awl
- Thread and needle
- Stuffing material
- Weighting material

Step-by-Step Making Guide
1. Creating the Head
Work on the giraffe begins with preparing the head, since its expression sets the entire mood of the toy. First, the pile on the nose area is removed with tweezers on both head pieces and on the head gusset.
This creates a clean foundation for the future muzzle and helps achieve the soft, baby-like look typical for young giraffes. After that, the darts marked in green are stitched, forming the initial contours of the face.

Once the darts are closed, the head pieces are joined along the A to B line, and the head gusset is sewn in place from A to C. The final seam, from C to D, closes the shape completely.
When all seams are done, the head is turned right side out, gently stuffed, and prepared for jointing. A disc with a cotter pin is inserted, the fur is teased out of the seams, the tiny horns are trimmed, and the muzzle is shaped with delicate scissors work. Light brushing brings back softness and volume.

Next comes shaping the expression. Small nostril indentations are formed using thread sculpting, followed by defining the area around the eyes. When the basic facial features are in place, the eyes are inserted, giving the little giraffe its first spark of personality.
Eyelids made from felt can be glued on or lightly felted, depending on the desired finish. At this stage, the head is set aside until the rest of the body is ready for coloring and final detailing.
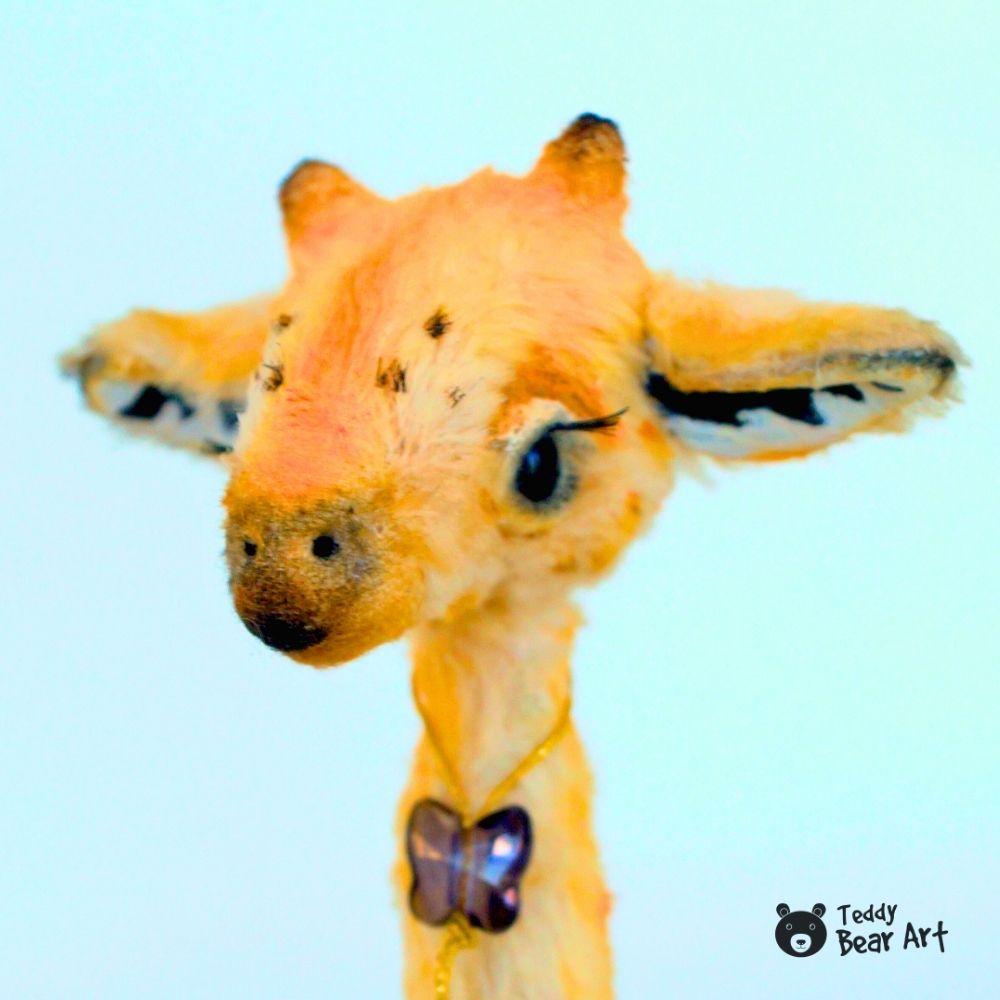
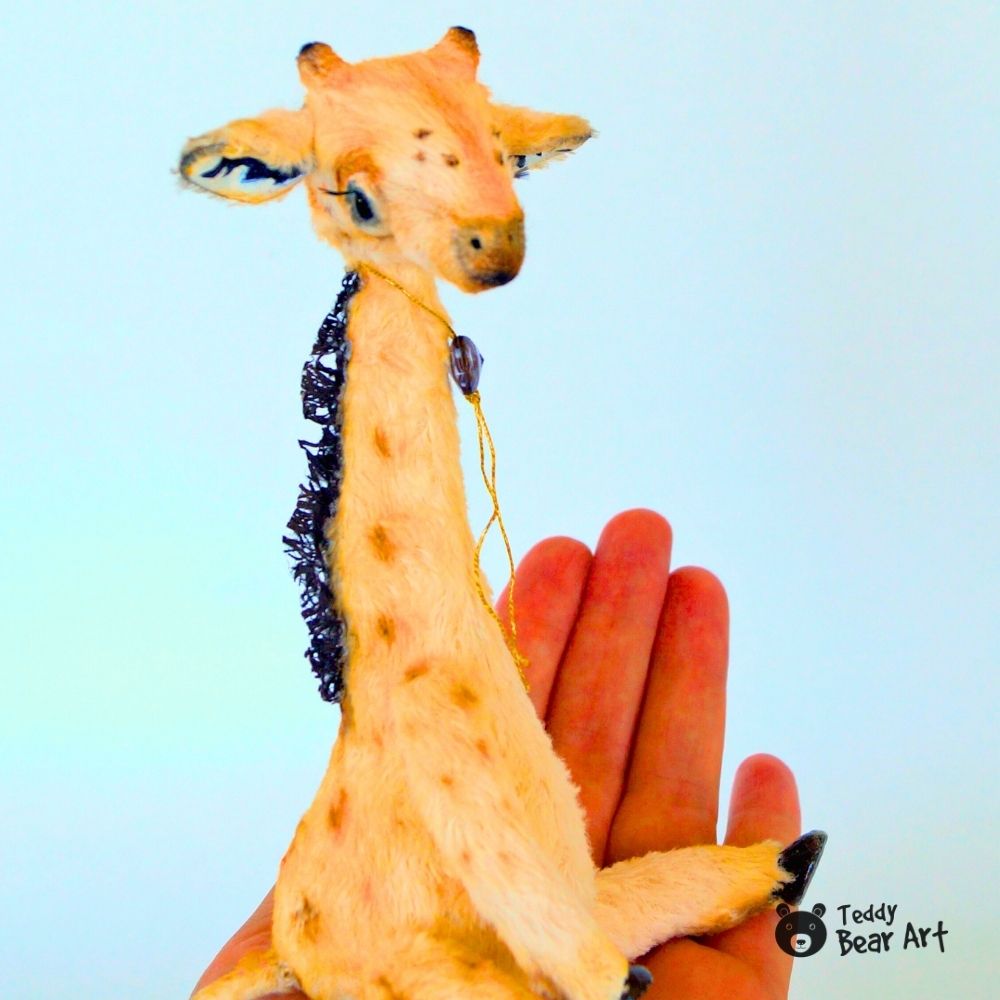
The ears come next. They are tiny and delicate, so after stitching, they’re turned right side out with the help of a thin tool. The inside of each ear is gently painted with acrylics or oils, following soft natural markings.
Acrylics dry quickly, while oils create more subtle blending but require patience. Once the paint sets, the ears are attached to the head, completing the recognizable giraffe silhouette.
2. Creating the Body and Limbs
We begin by closing the darts on the body pieces. After the darts are stitched, the two body halves are joined, leaving two openings. One will later make it easier to insert the head, since the long neck needs extra space. The second opening will be used for attaching the limbs and filling the body.
Next, all limb pieces are sewn. Each arm and leg is stitched along the outline and prepared for jointing. To give the giraffe realistic proportions, small hooves are sculpted separately. In this case, hooves are shaped from Milliput White self-hardening clay, adjusted to the correct size, then painted with acrylics and coated with two layers of acrylic varnish to create a smooth protective finish.
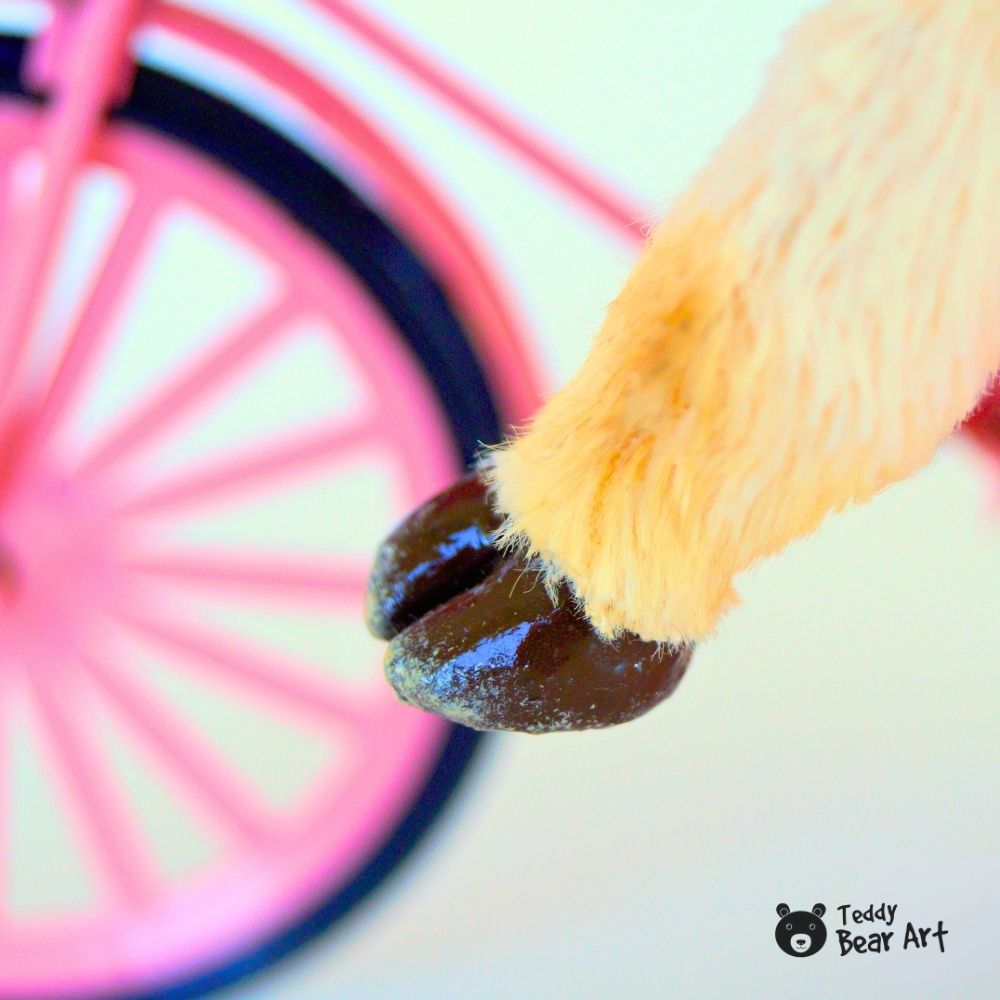
When the hooves are fully dry, they are glued to the ends of the limbs. Discs with cotter pins are inserted, the limbs are filled, and the openings are closed with neat stitches.
3. Assembly and Painting
With all separate parts prepared, the giraffe begins to come to life. First, the head is inserted, ensuring the joint sits securely in place. The arms are added next, followed by the legs.
A small metal weight is placed inside the torso—this material works best for miniature toys, providing the necessary balance without taking much space.
After that, the body is filled with soft synthetic stuffing, and both openings are closed with careful stitches. The entire surface is gently brushed to lift the pile and restore the plush texture.
Now the coloring begins. Oil paints are used here, and only three shades are needed: orange, brown, and black. The basic principle is simple, light before dark. First, a soft layer of orange establishes the base tone.
Then, shadows are added with brown, along with the giraffe’s characteristic spots. Finally, black defines the muzzle, the tips of the ears and horns, and the eyelids, guided by the reference photos for accuracy. The upper eyelids are touched with white acrylic to brighten the expression.
The mane is created from merino wool, needle-felted along the neck, and trimmed evenly. In this case, it is additionally brushed with black acrylic to give the fibers structure and firmness. A tiny thin tail is sewn separately, finished with a small tuft, painted, and stitched in place.
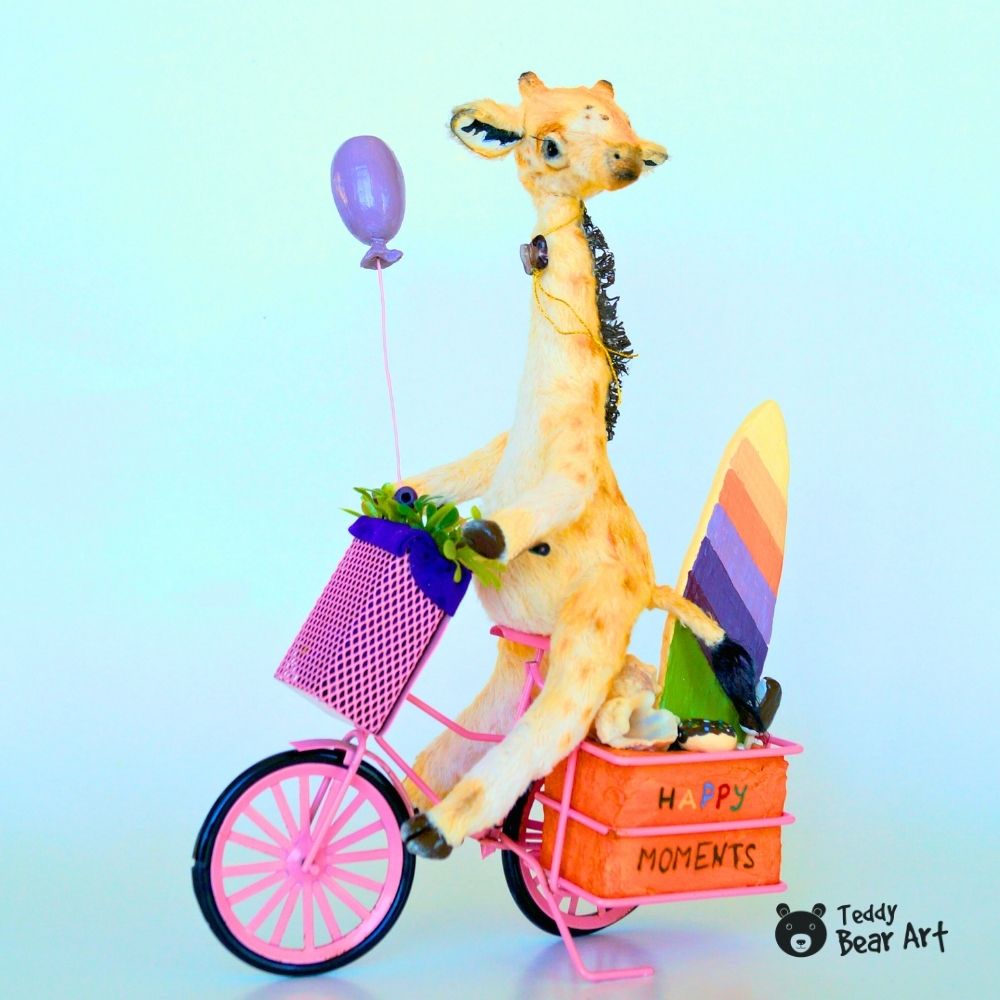
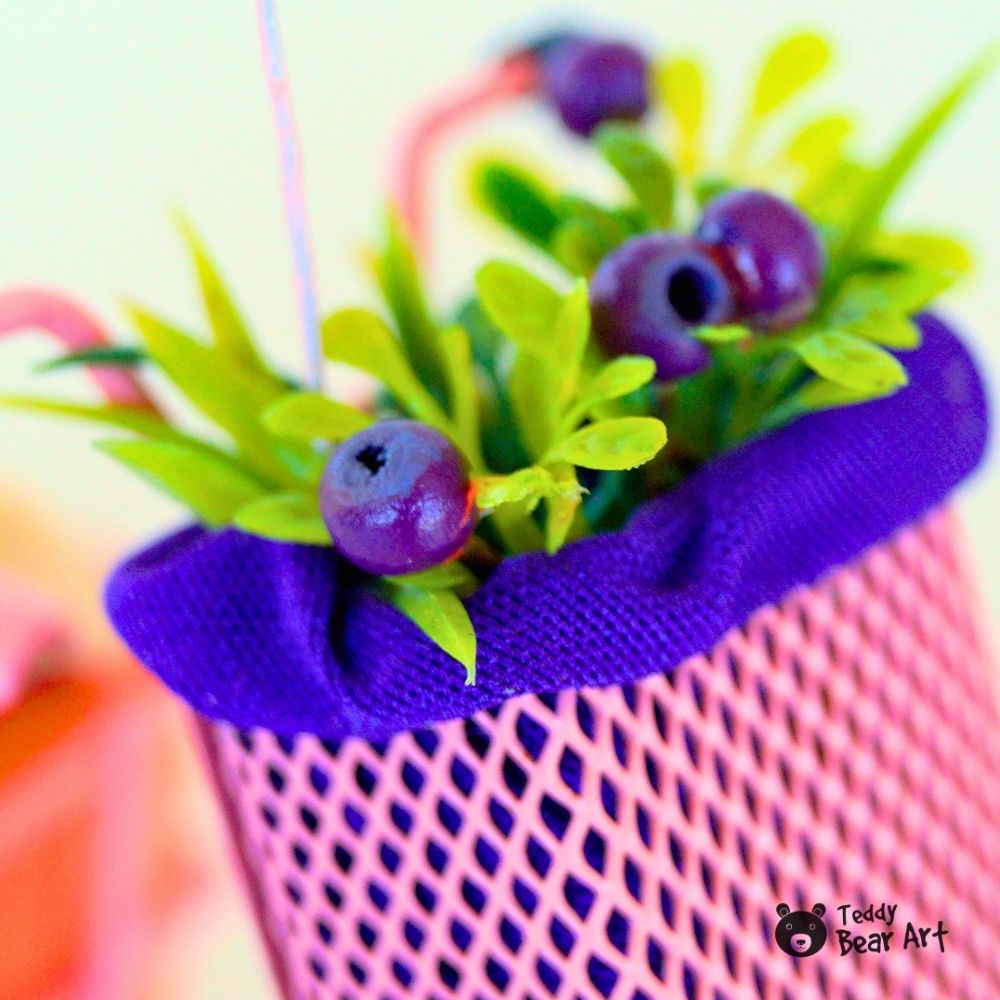
As the final touch, a small cluster of faux eyelashes is glued on and trimmed to the right length to suit the delicate face. The giraffe is then left to dry completely. Once dry, any accessories of your choice can be added, and your miniature giraffe is ready to shine!

Frequently Asked Questions
Can I sell the giraffes made from this pattern?
Yes, absolutely. You’re welcome to sell the finished giraffes you create. The only restriction is that the pattern itself cannot be resold, shared, or distributed.
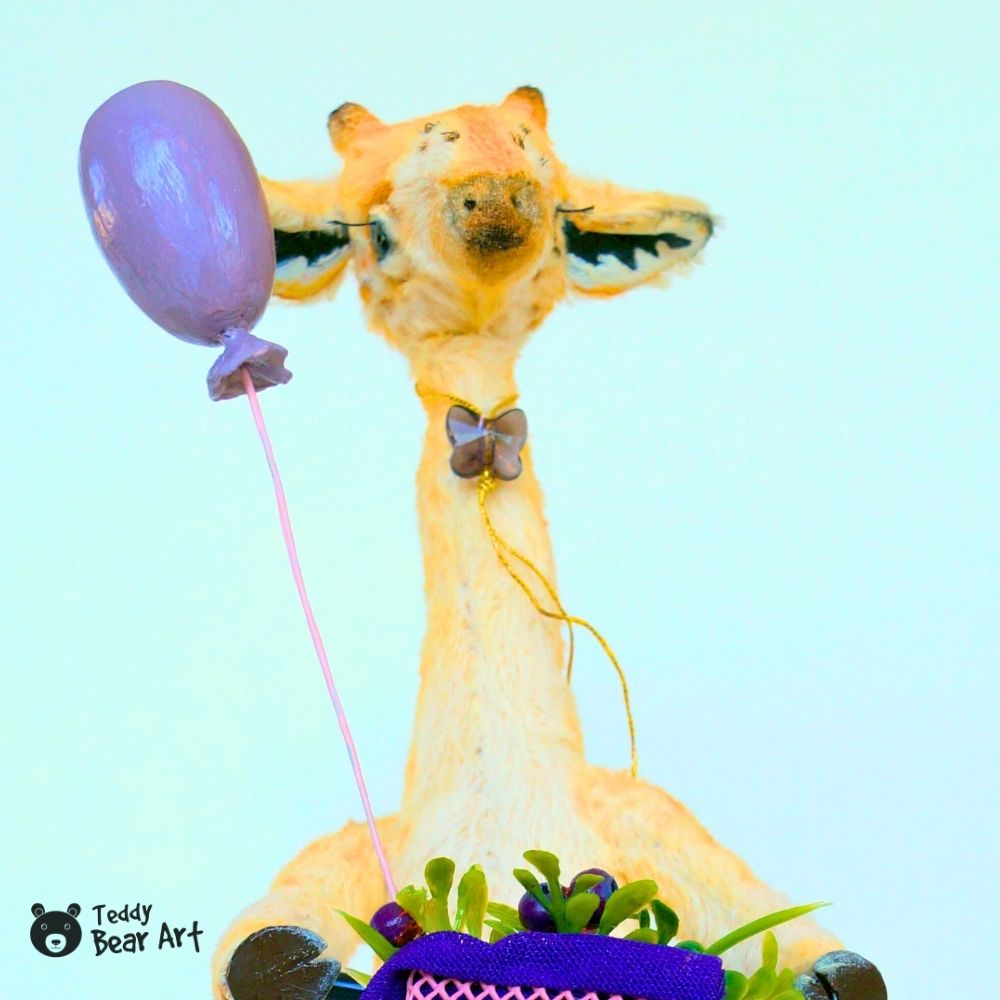
How do I make the little balloon shown in the photos?
The balloon is made from a small decorative foam egg. A tiny clay tip is attached to the bottom, a wire is inserted, and the whole piece is painted with acrylics and sealed with acrylic varnish.
Can I scale the pattern up or down?
Yes, you can resize the pattern to any scale you like. Just keep in mind that the final giraffe will look different from the one shown in the photos.
Before You Go
If you’ve been wondering how to make a giraffe stuffed animal, now you have a complete step-by-step plan, from sewing and stuffing to painting and finishing touches. Feel free to create your own versions, experiment with colors, accessories, and sizes, and let each giraffe have its own character and charm. Happy crafting!
Get Free Patterns & Be the First to Know!
Want free teddy bear patterns, exclusive tutorials, and a chance to win craft supplies?
Sign up for our newsletter using the subscribe form in the middle of this article to receive new patterns, insider tips, and the latest news on teddy bear art. You’ll also automatically be entered into our annual giveaway for a chance to win teddy bear crafting materials.
Bonus entry: Save one of our pins on Pinterest to increase your chances of winning!
Let’s create, inspire, and craft beautiful teddy bears together!
What an adorable baby giraffe! The instructions are clear and easy to follow, and the materials should be easy to find anywhere. I appreciate how you explained the difference between acrylic and oil-painted details on the ears, and the importance of using the weighting material to give the toy stability. I’ve never tried to make something this small, so I’ll have to practice with some of the other tutorials on your website.
Thank you so much for your kind feedback.
I’m glad the instructions felt clear. Miniature toys do take a little practice, but you will get the hang of it quickly.
All the materials for this project can be found in specialized teddy bear-making shops, both online and offline. They usually have everything from fabrics and stuffing to weighting materials and paints.
If you try any of the other tutorials, feel free to share your experience. I always enjoy seeing the results.
What an incredibly charming giraffe pattern! Thank you for sharing such a wonderful free tutorial. The step-by-step instructions are so clear and easy to follow. The design looks unique and more advanced than what I’ve made before, but I’m excited to give it a try. Collectible toys like this truly inspire me. Your generosity in sharing your patterns is sincerely appreciated!
Thank you for such a heartfelt comment! I’m so glad you liked the giraffe and found the instructions clear. The design is indeed a bit more advanced, but you’ll do great, your enthusiasm is already half the success. Thank you for appreciating my work and for creating such lovely things!