
Soft felt crafts have a special charm because the material is warm to the touch and easy to shape. This guide on how to sew a felt rabbit shows how a few simple steps can turn two small pieces of felt into a sweet running bunny perfect for decorations or handmade gifts.
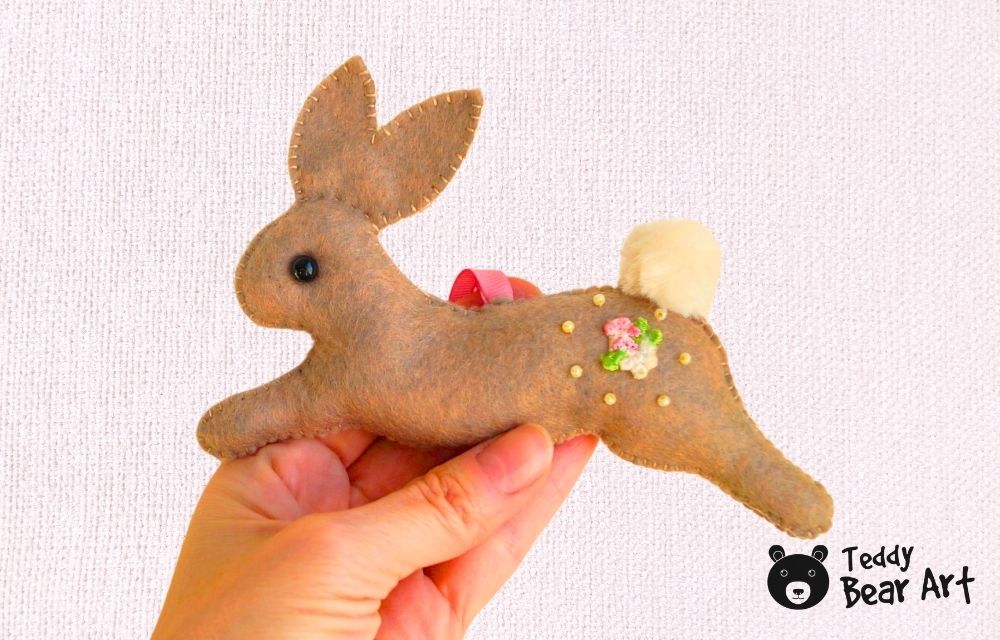
The process is gentle, beginner-friendly, and enjoyable for anyone who likes calm, steady hand sewing. The shapes are simple, the stitches are manageable, and adding little details gives each rabbit its own personality. Learn how to sew a cute Easter bunny for spring decoration.
Download the Pattern
Notice that seam allowances are included.
To download the pattern, follow the instructions below:
From a phone or tablet: There should be a similar option for mobile devices with Android or iOS. Click on the image. Save it by holding your finger on the image and selecting the “Save Image” option. Then, go to your photo gallery and print it (an option available).
From a computer: Click on the photo of the pattern you see below. In the new tab that will open, you press the right mouse button and select the “Save image as …” option. Then, you choose where the image will be saved on your computer.

Materials You Will Need
- Felt sheets in the colors you prefer
- Embroidery floss or embroidered patches
- Hand sewing needle
- Small sharp scissors
- Polyester stuffing
- Beads or small embellishments
- Ribbon
- Optional fabric markers or pastel chalk
Sewing Guide
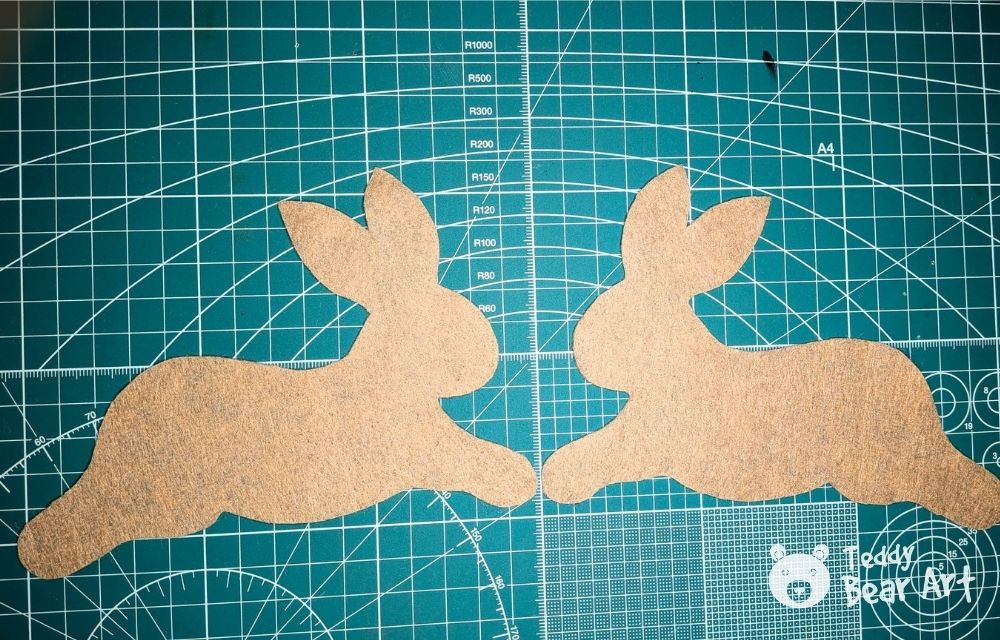
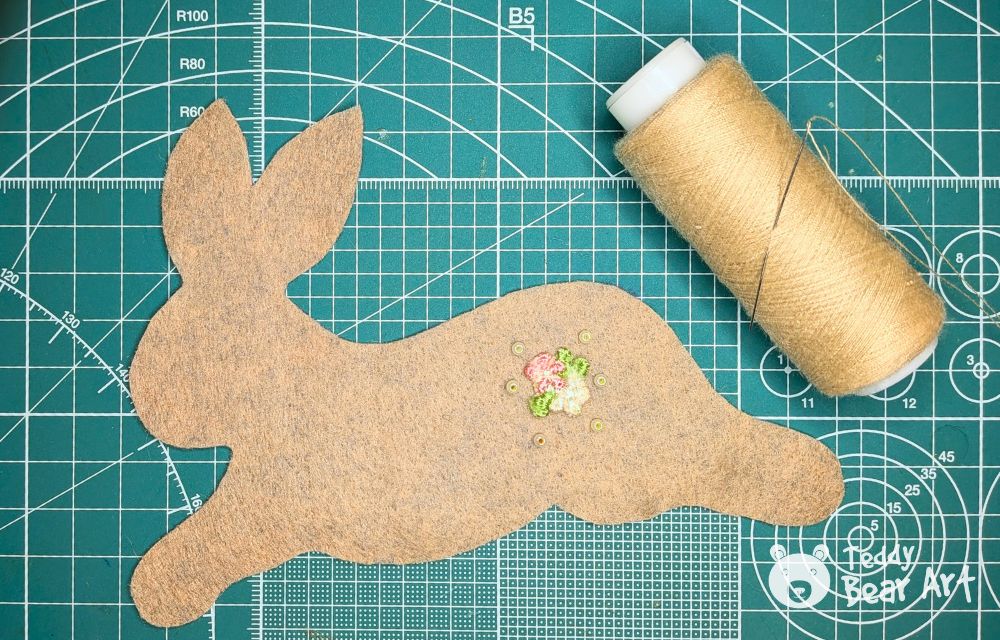
Step 1: Trace the pattern onto felt
Place the printed template on the felt and trace around it with a fine fabric marker or a regular, sharp pencil. Clear tracing lines help the rabbit keep its shape once stitched. Cut the two identical body pieces with small, clean scissor movements. Curved lines look smoother when the scissors stay close to the felt, and the hand moves slowly.
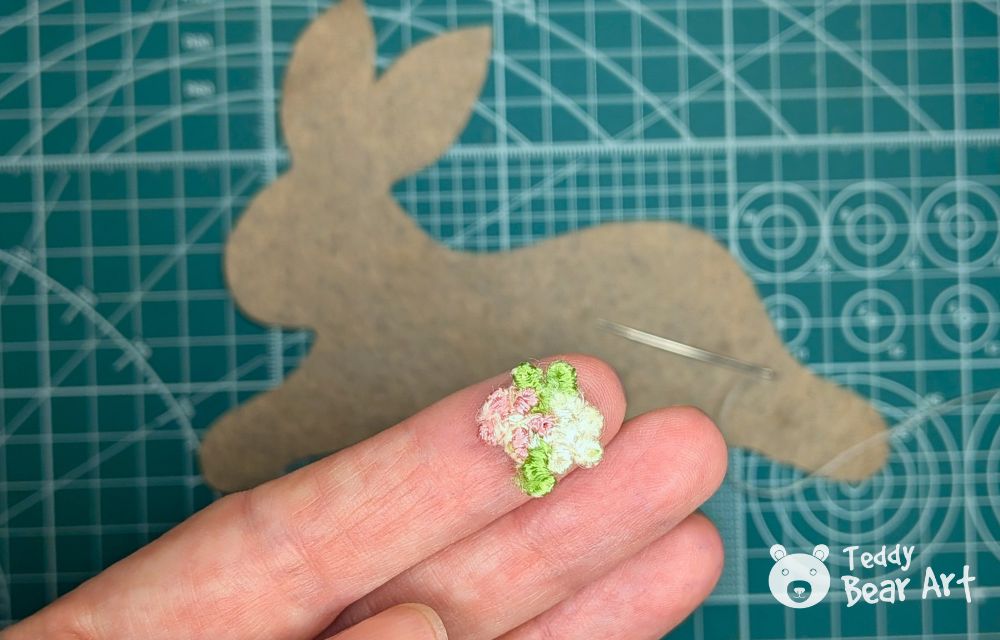
Step 2: Decorate the front piece
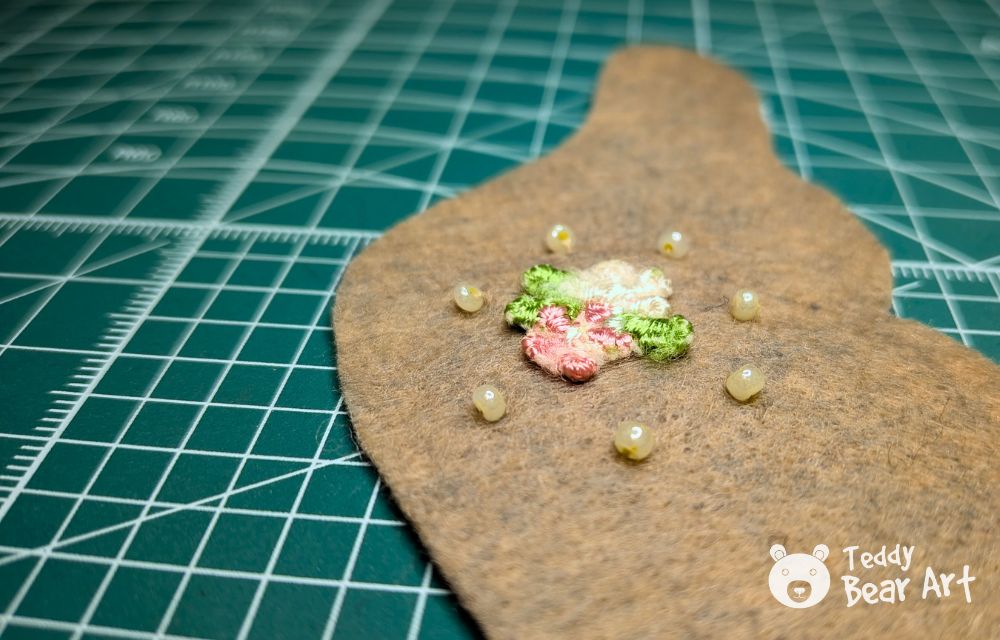
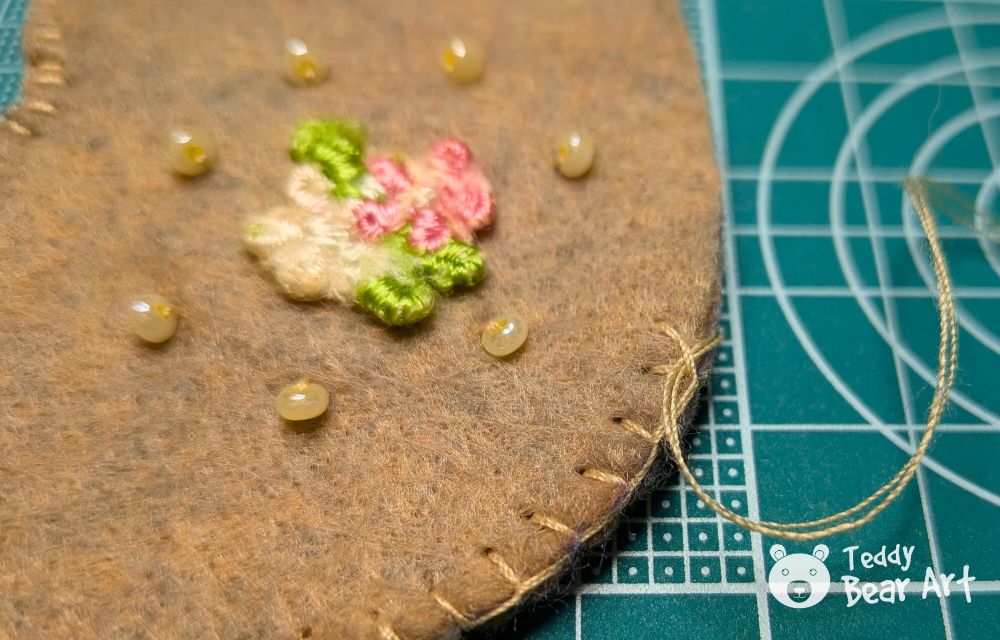
Before stitching the two shapes together, decorate the surface that will form the front of the rabbit. Small embroidered shapes such as flowers, dots, or leaves bring a lovely handmade feel. A few short straight stitches can form petals, tiny crosses can look like decorative marks, and single French knots add texture.
If embroidery is not the plan, beads, fabric paint, miniature felt appliqués, sequins, or embroidered patches can be used instead. All decoration should be completed at this stage, so the design remains clean and easy to handle.
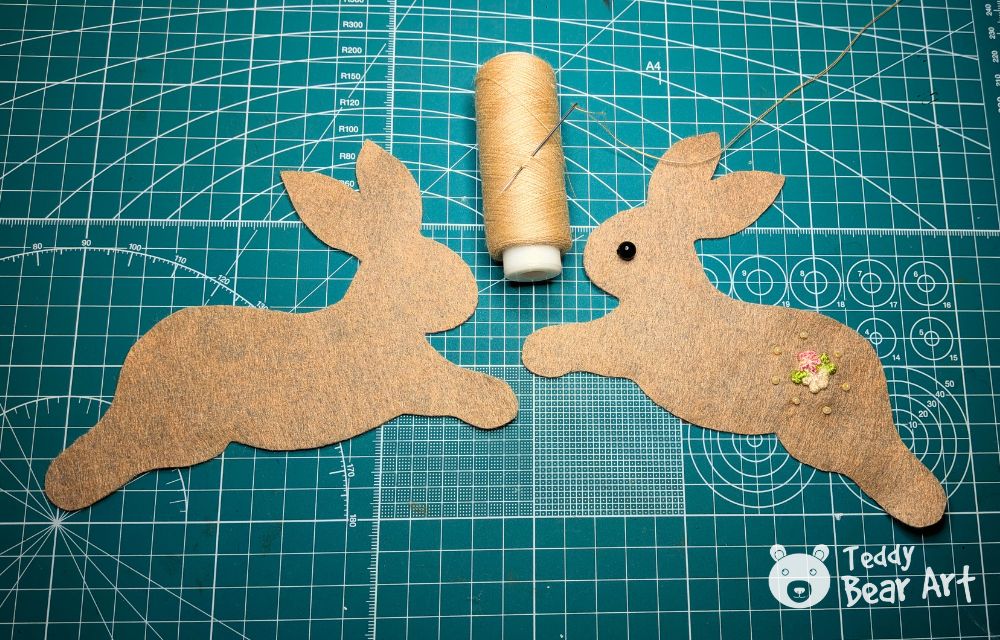
Step 3: Add the eye
Tiny black beads create bright, expressive eyes. They should be sewn on securely with tight stitches so they stay in place. A fine fabric marker can also be used to draw the eyes if a bead look is not desired. With this step, the rabbit begins to show a bit of character and charm.

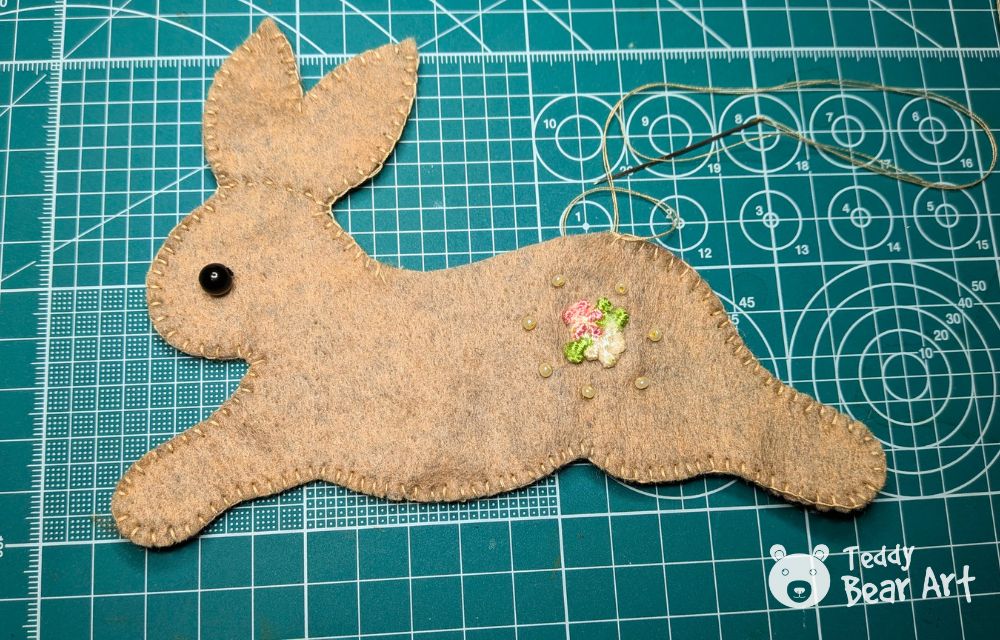
Step 4: Sew the two pieces together
Place the two felt pieces together with the right sides facing outward. Begin stitching around the edge with a blanket stitch. This border stitch adds a decorative outline and helps keep the edges smooth. Move steadily around the shape, keeping the stitches even so the seam stays neat. Leave a small opening that will allow the stuffing to be added.
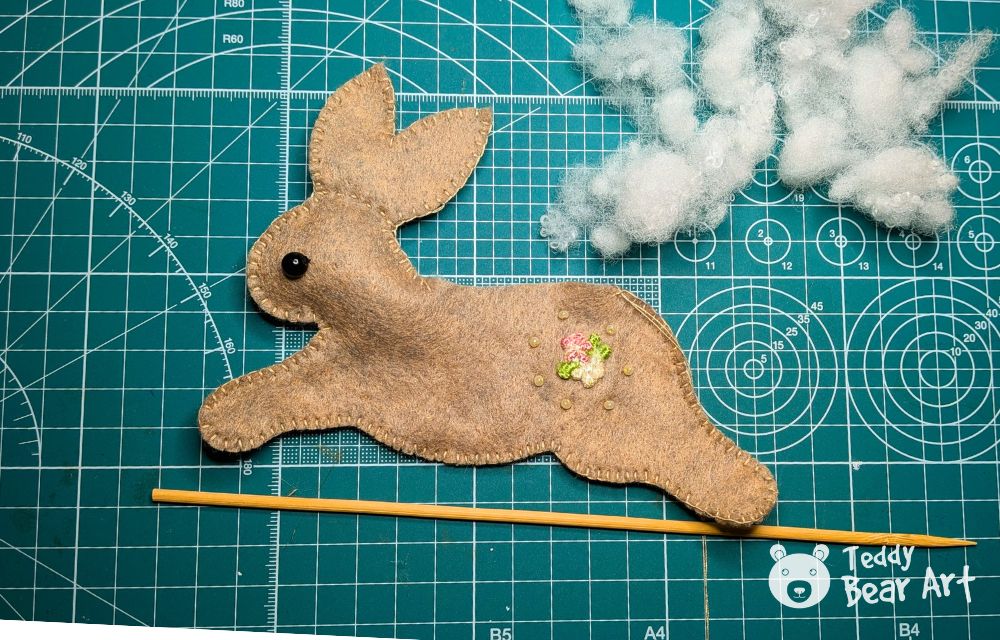
Step 5: Stuff the rabbit
Use small amounts of polyester stuffing, adding it gently so the rabbit stays soft and rounded. A wooden stick helps push the filling into narrow parts of the body. After the shape feels even, close the remaining opening with more blanket stitches. Smooth the edges with your fingers so the final silhouette looks balanced.
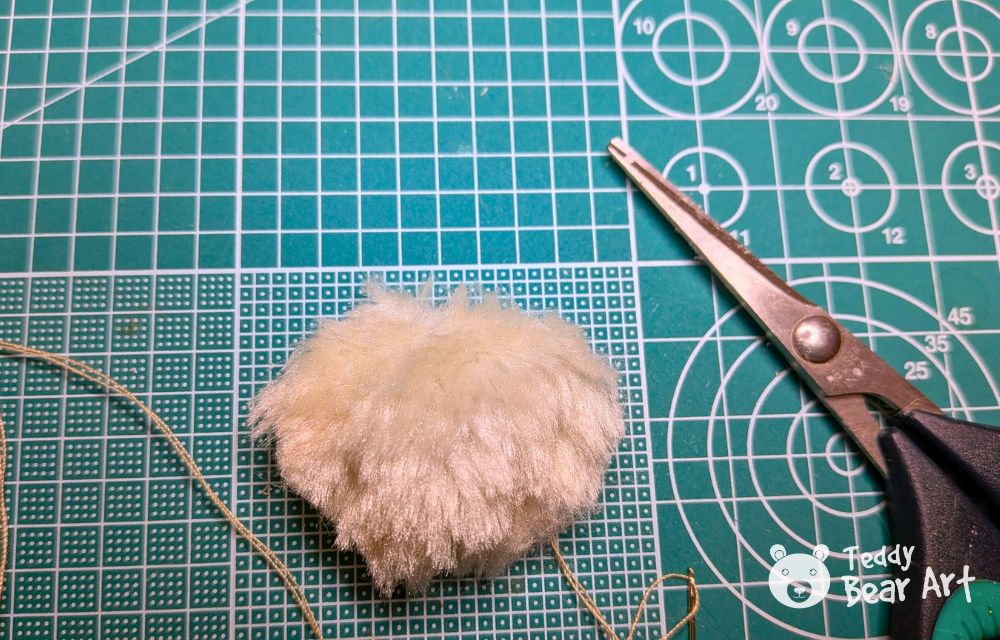
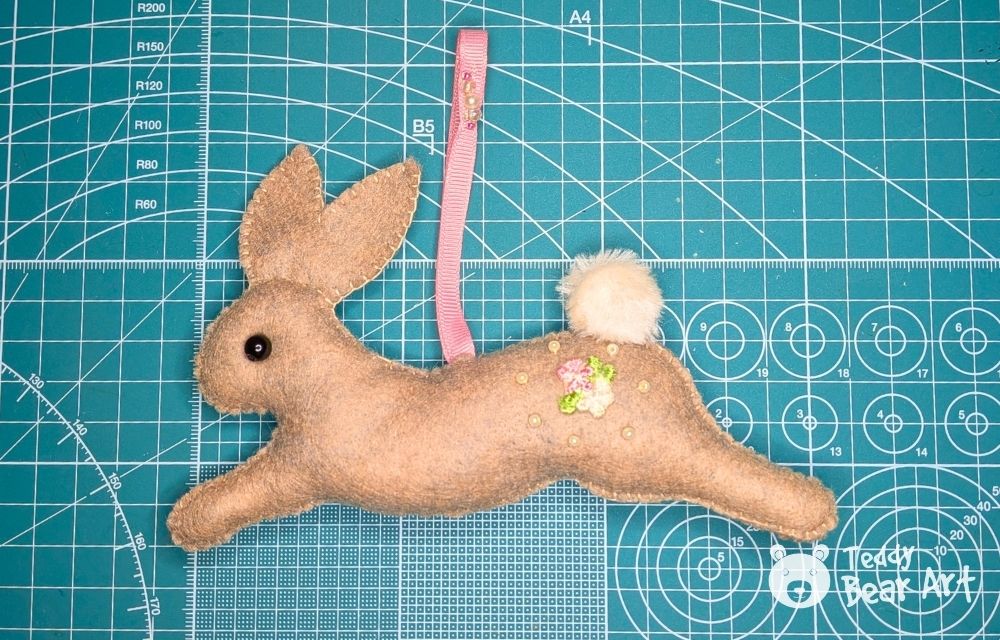
After the final stuffing, sew the little tail onto the rabbit.


If the bead eye sticks out too much, simply stitch through it again and tighten the thread to sink it gently.
At this stage, we also sew in a ribbon or a small cord so the rabbit can be hung as a decoration.
Decoration Ideas
A simple felt rabbit already looks adorable, but small accessories can create different moods. A tiny satin bow adds a festive touch. A miniature felt flower makes the rabbit look ready for spring. A pastel colored scarf gives a cozy winter style.
These little choices make the rabbit perfect for Easter baskets, nursery shelves, seasonal decorations, or handmade presents.

Soft shades like cream, pale pink, mint, or warm gray each create their own atmosphere. Many crafters enjoy making several rabbits in different colors, so a full little collection appears on the table or shelf.
Before You Go
This running bunny project brings together easy shapes, gentle stitching, and a relaxing craft rhythm. The steps are approachable for beginners and still satisfying for experienced makers who enjoy quick felt creations. With a few materials and a bit of time, the rabbit becomes a cheerful decoration ready to brighten a basket, a table display, or a small gift package.
Projects like this often inspire more crafting ideas, from garlands to seasonal sets, and adding new colors or small embroidered details keeps every rabbit unique. The calm process and soft materials make this a lovely project to revisit whenever quiet creativity is needed.
Get Free Patterns & Be the First to Know!
Want free teddy bear patterns, exclusive tutorials, and a chance to win craft supplies?
Sign up for our newsletter using the subscribe form in the middle of this article to receive new patterns, insider tips, and the latest news on teddy bear art. You’ll also automatically be entered into our annual giveaway for a chance to win teddy bear crafting materials.
Bonus entry: Save one of our pins on Pinterest to increase your chances of winning!
Let’s create, inspire, and craft beautiful teddy bears together!
What a delightful and thorough tutorial! Your step-by-step photos make this felt rabbit project feel completely achievable, even for beginners. I love that you included tips on choosing eco-friendly felt and natural stuffing, it adds such a thoughtful, sustainable touch to a handmade gift.
Have you considered doing a holiday-themed version (like a Christmas bunny with a little scarf)? Thanks for sharing such a charming, well-photographed guide. It’s inspiring me to pick up some felt and give it a try!
Thank you so much for your thoughtful comment. I’m happy you enjoyed the tutorial. And I’m actually already working on winter bunnies for Christmas and New Year. I’m giving them cozy little scarves and warm colors so they can decorate a home or studio for the holidays.
Thank you for the idea, it fits perfectly with what I’m creating right now.
This is such a sweet little project! I love how simple and calming the steps are, perfect for anyone who enjoys slow, relaxing hand sewing. The photos and clear instructions make it really easy to follow, even for beginners.
The little personality each rabbit can have with just a few details is adorable. Definitely saving this one for a rainy afternoon craft session. Thanks for sharing such a lovely pattern!
Thank you! I’m really happy you enjoyed the tutorial. Hope your rainy-day sewing turns into a cozy little rabbit you’ll love!