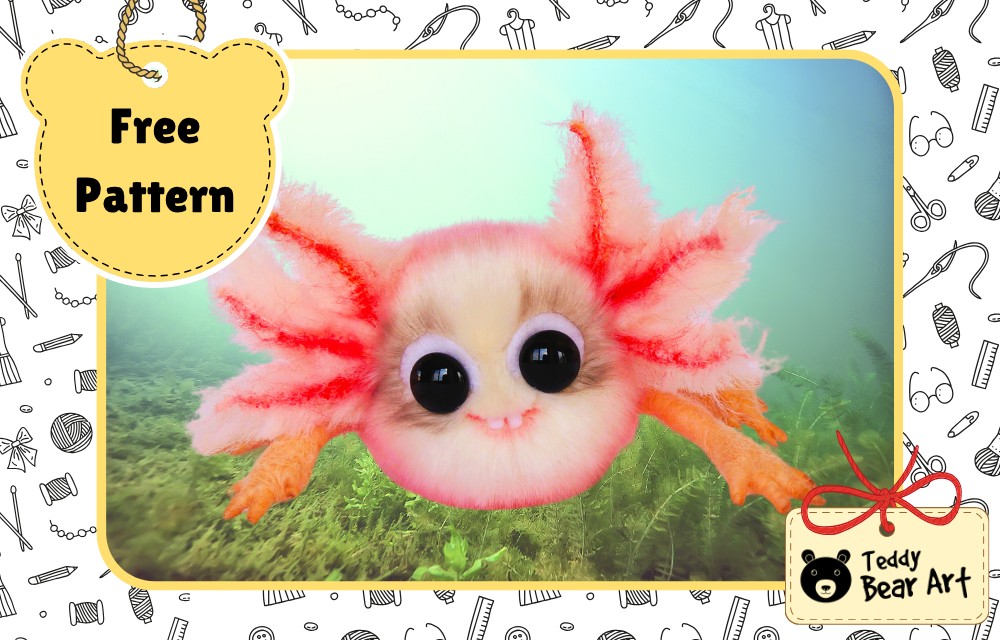
If the whimsical charm of axolotls has ever enchanted you, you’re in for a treat! This axolotl plush sewing pattern is your ticket to creating an adorable, one-of-a-kind plush toy that’s perfect for gifting or keeping as a sweet companion. In this guide, we’ll walk through every step of the process, sharing tips and tricks to bring our soft axolotl to life with ease, even if you’re new to sewing plushies.
Downloading the Axolotl Plush Sewing Pattern
To download the pattern, follow the instructions below:
From a phone or a tablet: There should be something similar for mobile devices with Android or iOS. Click on the image. Save it by holding your finger on the image and selecting the “Save Image” option. Then go to your photo gallery and print it (there is an option).
From a computer: Click on the photo of the pattern you see below. In the new tab that will open, you press the right mouse button and select the “Save image as …” option. Then, you choose where the image will be saved on your computer.
Materials You’ll Need for Your Axolotl Plush
- White faux fur with a 1.5–2 cm pile (this will be painted)
- A small piece of faux fur with a longer pile for the axolotl’s gill ears
- Oil paints
- Flat, wide paintbrushes
- Polyester stuffing (regular plush toy filling)
- Small bag of weighting pellets (optional, but adds a nice heft)
- Glass eyes on metal loops, 14 mm diameter (black)
- White felt (for eyelids and cute little teeth)
- Merino wool and chenille wire (for shaping the legs)
- Strong thread, regular sewing thread, and a long needle (especially helpful for inserting the eyes)
- Awl (to help place features)
- Strong glue
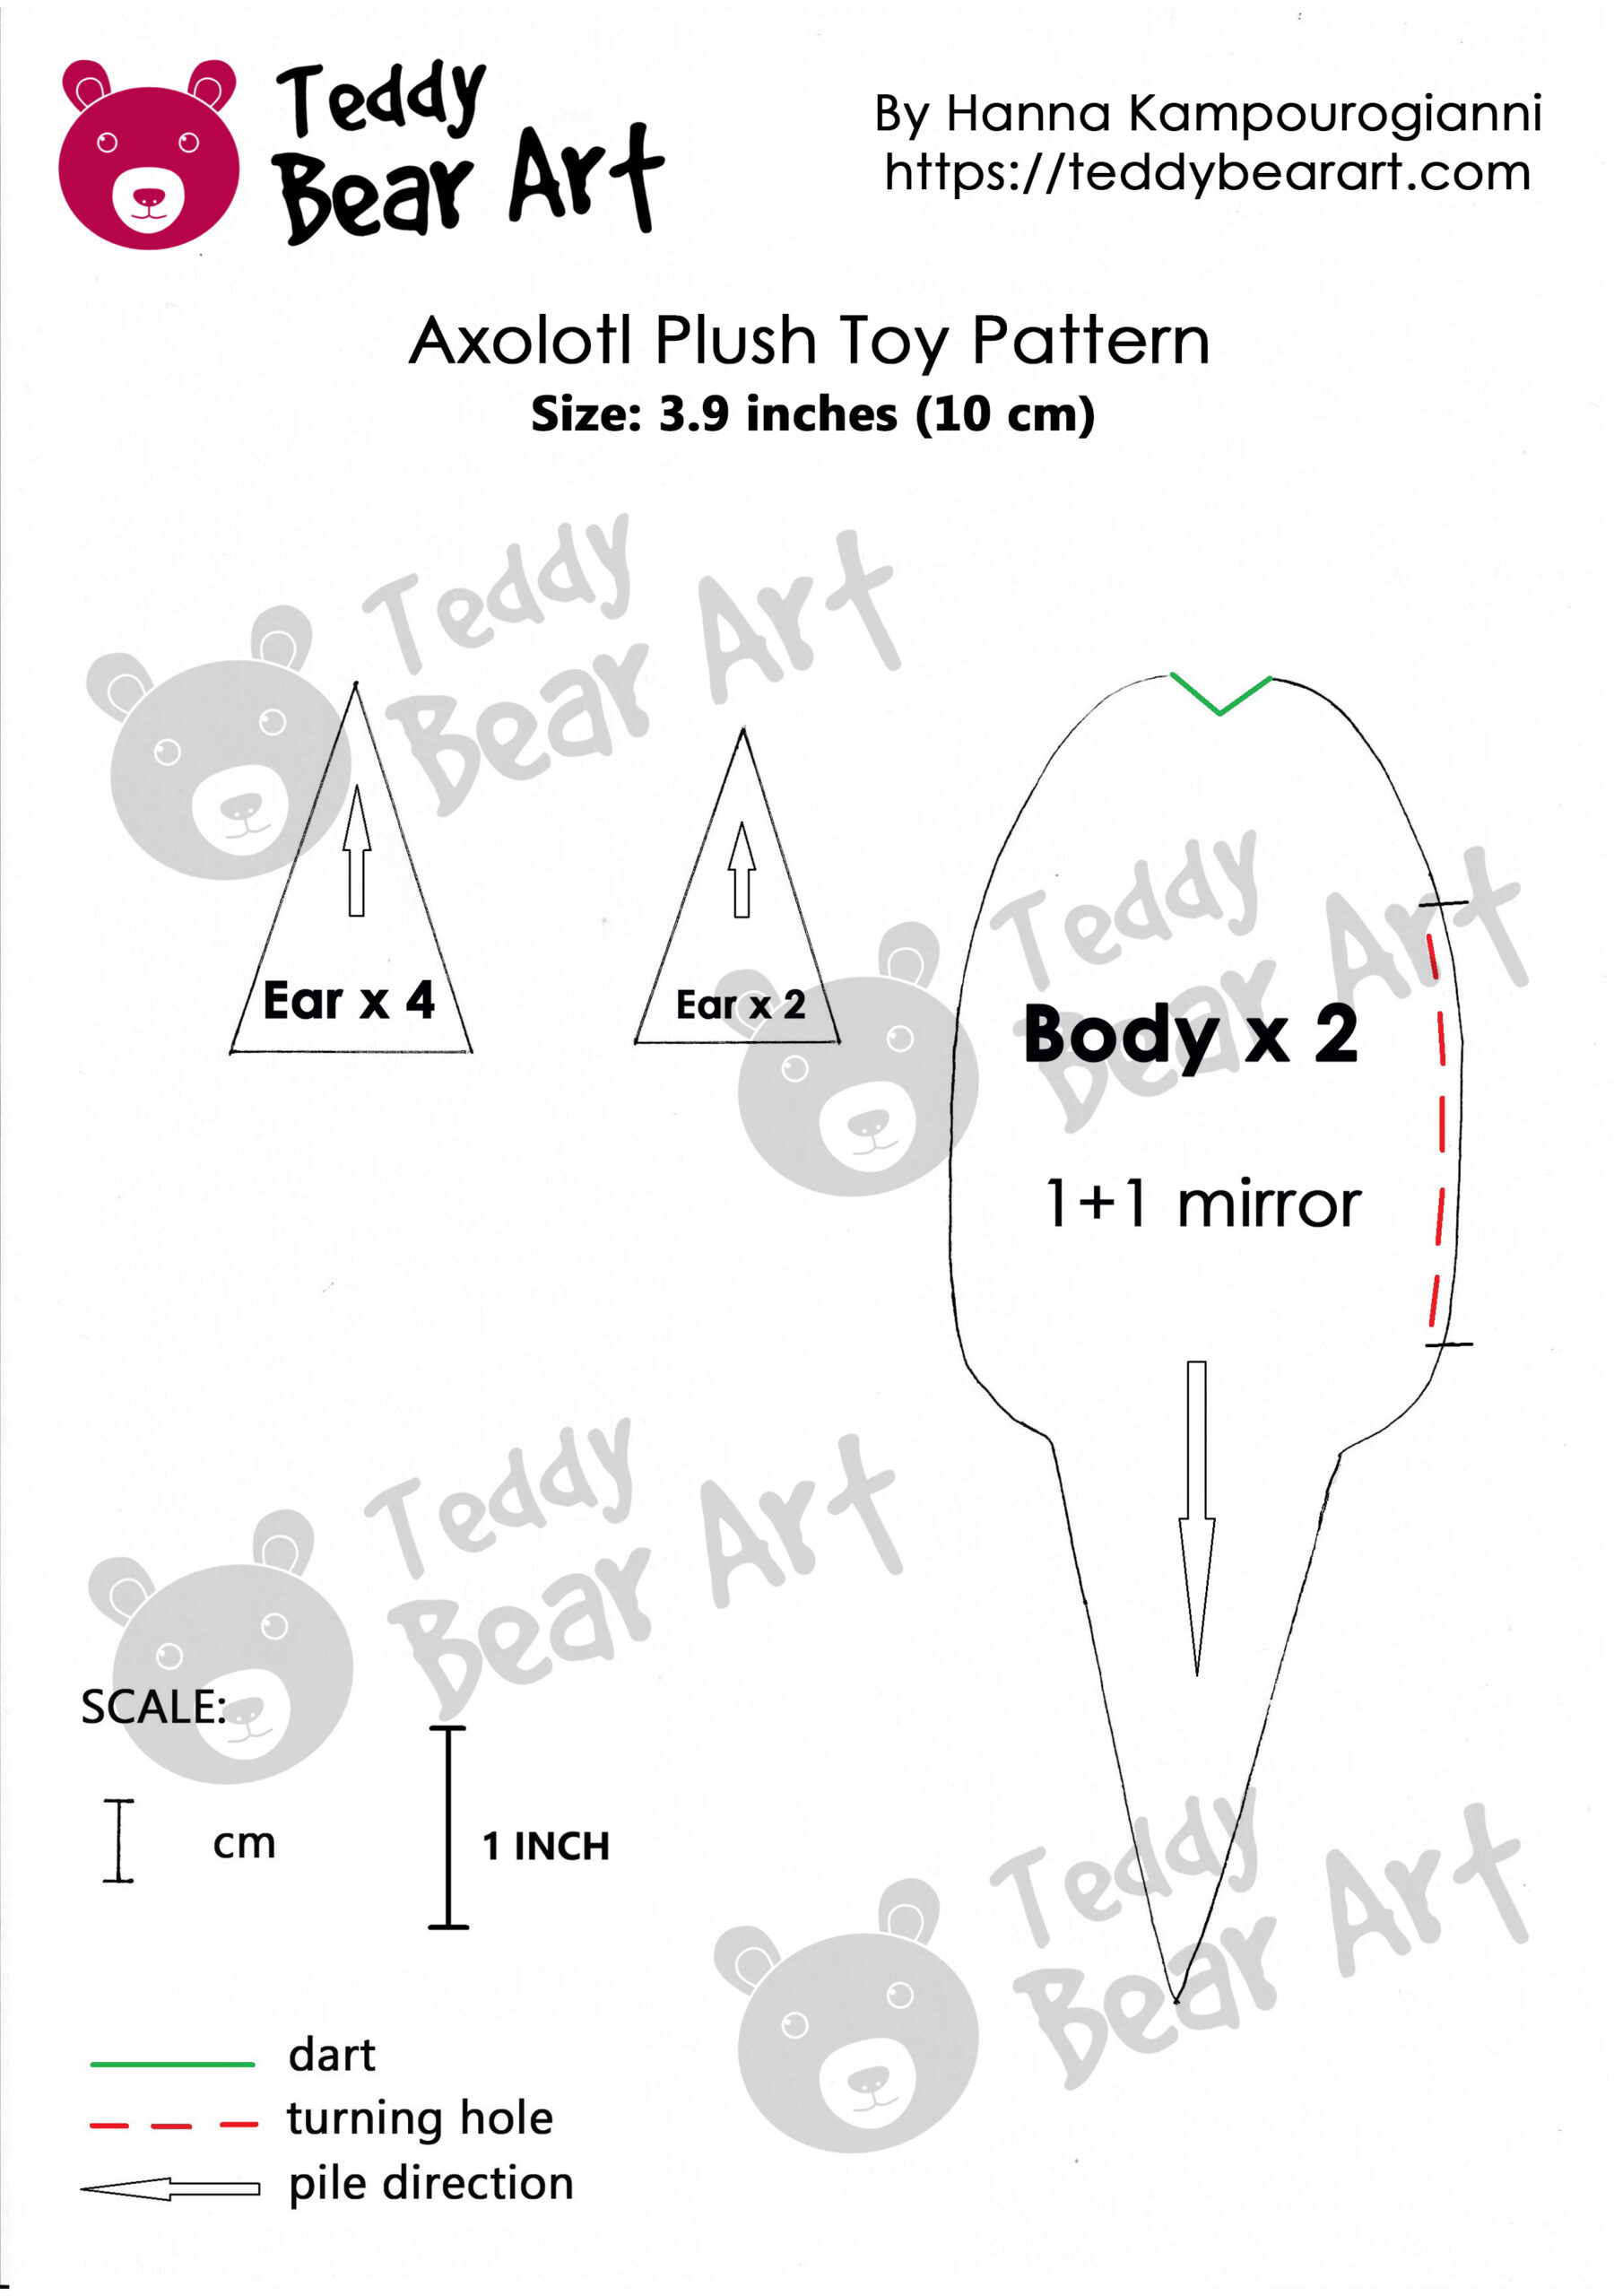
Step-by-Step Sewing Instructions Using the Axolotl Plush Sewing Pattern
Let’s bring our axolotl plush to life step by step using the sewing pattern. Please note that the seam allowance is approximately 1 cm.
Start by sewing the body. Begin with the darts—these little folds help shape the plush. Then sew the two main body pieces together, right sides facing inward. Leave a small opening at the bottom for turning and stuffing. If we’re new to sewing, it helps to pin everything securely and take it slow around the curves. Once stitched, gently turn the plush right side out.
Now it’s time to stuff the body. Fill it evenly with soft polyester stuffing to give our axolotl its huggable form. If we want it to feel a little heavier and more satisfying in hand, we can add a small pouch of metal pellets at the bottom. After stuffing, sew the opening shut with an invisible ladder stitch. Use an awl or the tip of a needle to lift the faux fur pile around the seams—this gives the plush a smoother, more natural finish.
For coloring, we’ll keep it simple. Use oil paint or high-quality textile paint in a single soft pastel shade—such as pink, lilac, or blue—depending on your chosen theme. Apply the paint using the dry-brush technique: load the paint onto a flat brush, wipe it well on paper until nearly dry, and then gently brush it into the fur. This way, the fibers stay soft, and the plush looks professionally finished. Don’t forget to let it dry thoroughly before continuing.
Next, let’s give our axolotl its sweet little face. Insert the safety eyes or glass eyes into the correct position—here’s a helpful visual guide if you’re unsure how to do it. We’ll secure them in place and then craft tiny eyelids out of felt or use a bit of wool with a felting needle. You can also glue them if that’s easier. For the mouth, trim a little U-shaped curve into the fur pile to create a soft smile. Add some gentle pink shading around it with pastel or fabric paint. Felt teeth make a fun final touch—just cut tiny pieces and glue them in place inside the smile.
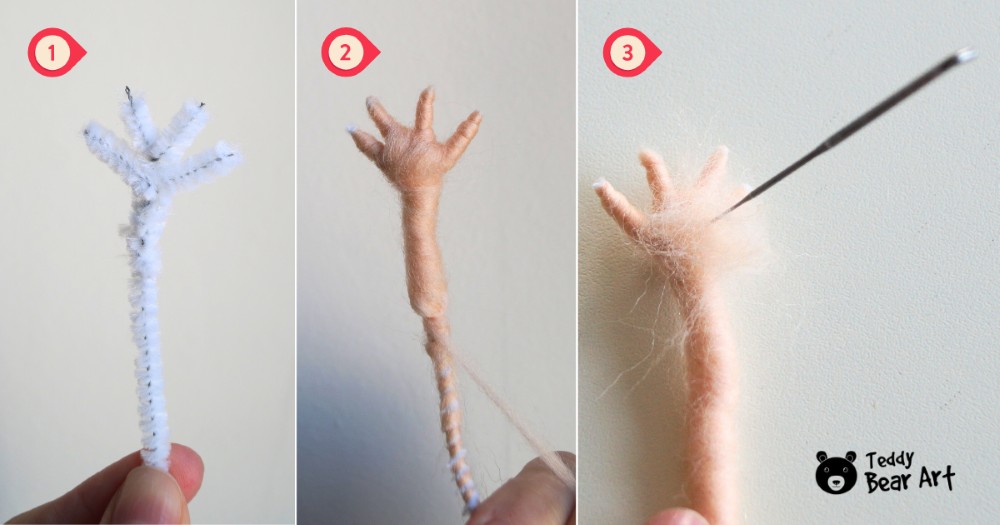
Now to the limbs. For the axolotl’s limbs, we’ll use chenille wire as the core and wrap it tightly with merino wool. Wrap the wool evenly to create soft, rounded textures. Shape four little fingers on the front legs and five toes on the back ones. For the glance finish, needlefelt the paws. Once all the limbs are ready, make small holes in the body with an awl and glue the legs in place. If we want them extra secure, we can stitch them through the fabric instead.
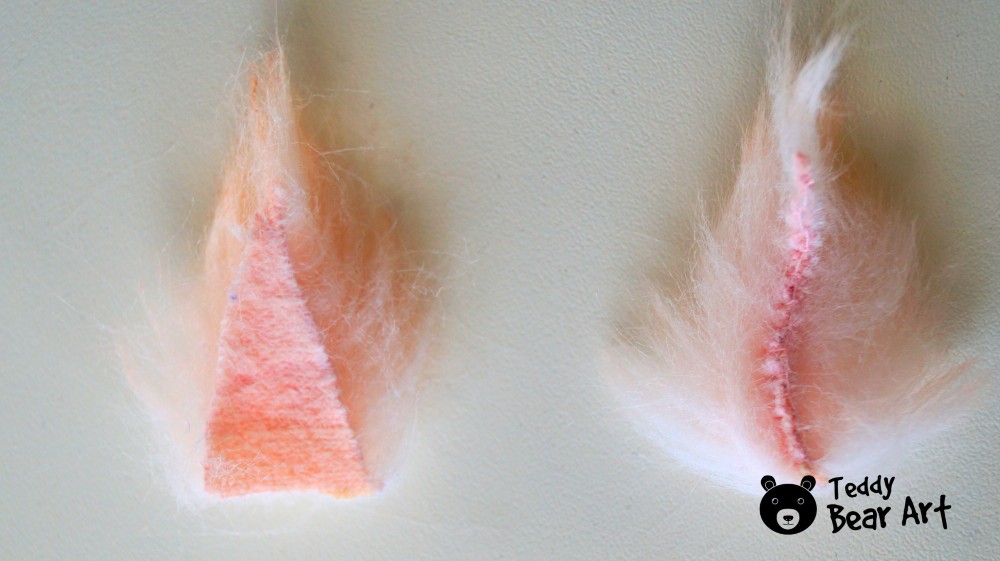
Finally, let’s add the signature gills—those frilly “ears” on each side of the axolotl’s head. Cut six soft triangles from faux fur, sew down the middle, and paint them to match or slightly contrast with the body, and let them dry. Then attach three gills on each side of the head. These can be sewn in place for strength. Adjust the angle slightly to give them a lively, fluttery look.
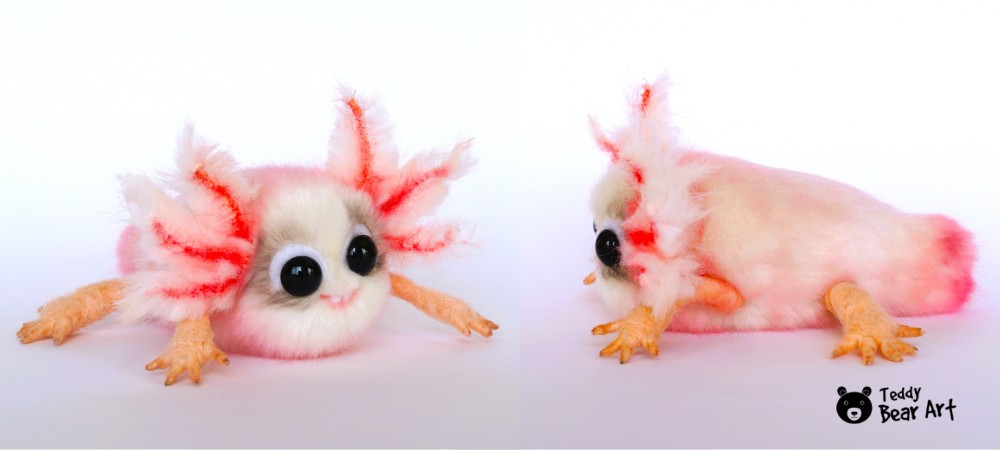
Once everything is attached and dry, our little axolotl is complete, ready to snuggle, gift, or pose for photos!
Final Thoughts: Your Cute Axolotl Plush Is Ready!
That’s it — your soft and colorful axolotl plush is now complete! This project is a wonderful way to practice your sewing skills while creating a toy full of personality. Each step, from stuffing and painting to attaching the gills, brings your little creature to life and makes it truly one of a kind.
If you enjoyed making this plushie, be sure to check out our other free patterns and tutorials on our website — there’s plenty of inspiration for your next creative adventure. And if you share your axolotl on social media, don’t forget to tag us — we love seeing how our patterns come to life in your hands!
Happy sewing and see you in the next project!
Get Free Patterns & Be the First to Know!
Want free teddy bear patterns, exclusive tutorials, and a chance to win craft supplies?
Sign up for our newsletter using the subscribe form in the middle of this article to receive new patterns, insider tips, and the latest news on teddy bear art. You’ll also automatically be entered into our annual giveaway for a chance to win teddy bear crafting materials.
Bonus entry: Save one of our pins on Pinterest to increase your chances of winning!
Let’s create, inspire, and craft beautiful teddy bears together!
This DIY guide for making an axolotl plush is not only charming but also incredibly helpful for both beginners and experienced crafters alike. The step-by-step instructions, paired with clear visuals, make the process feel approachable and enjoyable. I love how the pattern allows for creativity with colors and fabric choices, giving each plush a unique personality. As someone who enjoys sewing as a hobby, I found this guide inspiring—it’s a fun way to bring a quirky and adorable creature to life, and it would make a thoughtful handmade gift or a cute personal keepsake.
Thank you so much for such a heartfelt review! I’m happy you liked the guide.
This is so cute! My grand daughter will have a lot of fun when visiting to make this Cute Axolotl toy. She is very craftsy and loves making things. So this is very cute. I am wondering if you have any other cute patterns. Is this something that would be easy for a 9 yr. old to make? How long do you think it takes to make it?
Thank you very much, I appreciate it! I want to clarify that these patterns are more suitable for adults and experienced crafters—they are not intended for young children. It’s better to make them together with an adult. New great patterns are added every week!
This is such a fun and creative guide! The axolotl is already such a unique creature, and turning it into a plush makes for an absolutely adorable DIY project. I love how beginner-friendly the steps sound — it’s great to see sewing patterns that are approachable for all skill levels.
Sewing plush toys not only offers a relaxing, hands-on break from screen time, but also taps into that satisfying feeling of making something totally your own. Projects like this are especially popular for gifting — they feel thoughtful and personal, unlike store-bought toys. I imagine kids (and even adults!) would love receiving a handmade axolotl plush.
I’ve tried my hand at a few simple plush patterns in the past — mostly cats and stars — and I always appreciated having clear, step-by-step visuals to follow. What I’ve learned is that picking the right fabric (especially one that doesn’t fray too much) makes a huge difference when you’re still building confidence.
However, there’s a few questions that i have.
Could this pattern be resized to make a mini or jumbo version, or would that affect the structure too much?
Any tips on attaching smaller pieces like the gills securely without visible seams?
Thank you so much for your thoughtful questions! A slight increase in the pattern size is definitely possible without much difficulty. However, if you want to make a much larger version, you’ll need to adjust more than just the pattern itself — for example, you’d need to choose fabric with a longer pile, use bigger eyes, and carefully maintain the proportions. This can get quite tricky and requires some experience.
As for attaching smaller pieces like the gills securely without visible seams, I recommend using invisible stitches and reinforcing the attachment points carefully. Patience and good-quality thread make a big difference here.
Honestly, it’s usually easier and more enjoyable to work with the original, tested pattern I created, as it’s designed to give the best results right away. But if you decide to experiment with resizing, just take your time and enjoy the process!
Hello, I really enjoyed reding your article. This is a real cute article. Your axolotls are the cutest I have ever seen. I would not be doing the sewing and creating myself but my wife sure can. I am going to show her this article and see if we can get some homemade axolotls in our home. They are really cute. We have the oil pants and brushes already because my son is an artist. I read the instructions and they should be quite easy for my wife. OK, I am going to wrap up this comment so I can go to the pattern on my computer to collect the pattern. Thank you for this inspiration. MAC.
Hi Mac, thanks a lot for your lovely comment. I’m really glad you liked the article and the axolotls! Hope your wife has fun making them — sounds like you’ve got everything you need. Let me know how it goes, I’d love to see the results. Thanks again for reading!