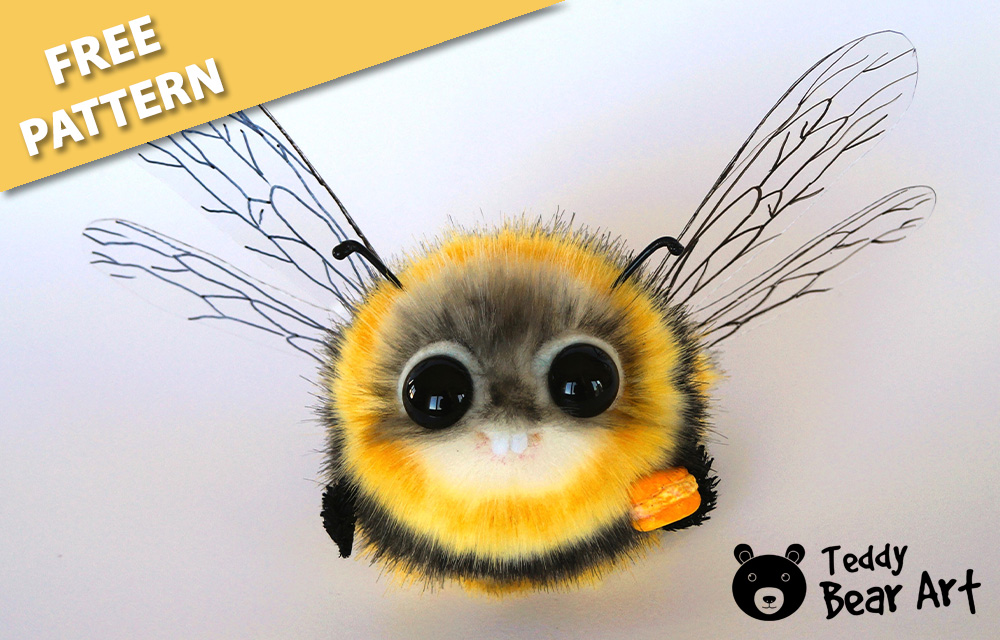
Crafting your own bumblebee plush toy can be a delightful and rewarding experience. With the right pattern and a few helpful tips, you can create a flawless plush toy that looks professionally made. In this guide, we’ll provide a bumblebee plush toy pattern and share essential tips and tricks for achieving a perfect finish.

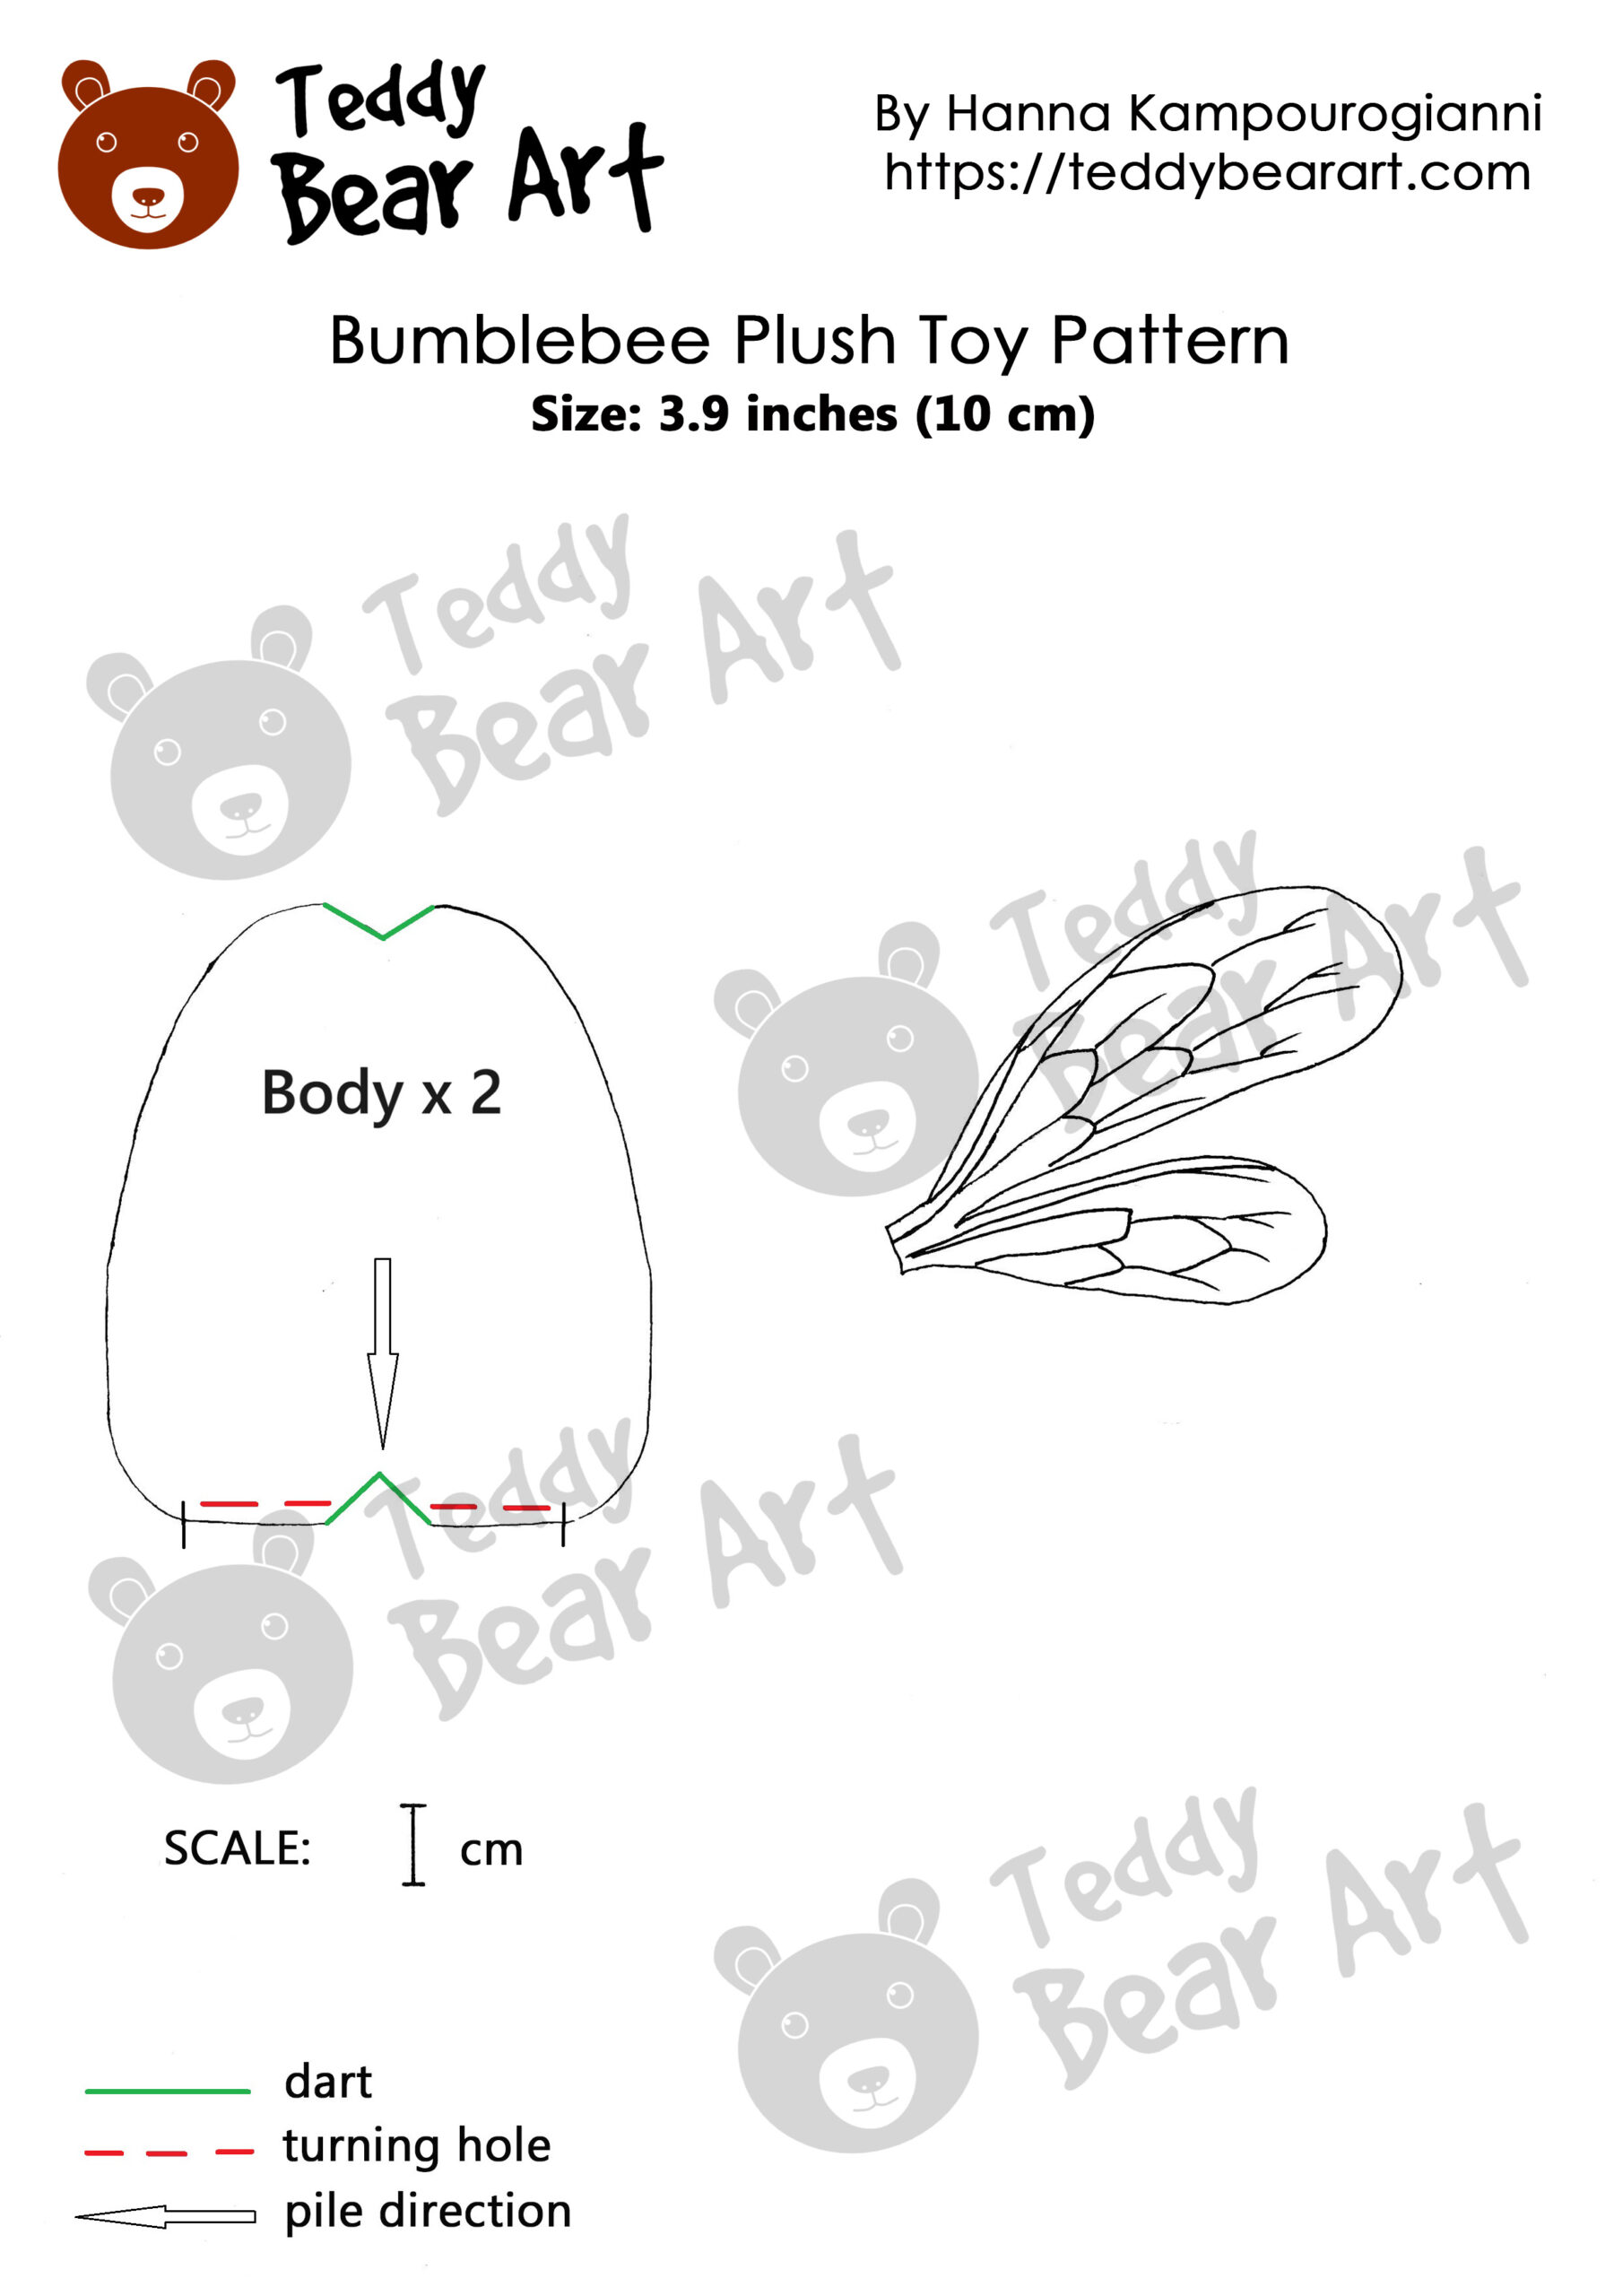
Download the Bumblebee Plush Toy Pattern
To get started, you’ll need a reliable pattern.
Download the pattern following the instructions below:
- From a phone or a tablet: There should be something similar for mobile devices with Android or iOS. Click on the image. Save it by holding your finger on the image and selecting the “Save Image” option. Then go to your photo gallery and print it (there is an option).
- From a computer: Click on the photo of the pattern you see below. In the new tab that will open, you press the right mouse button and select the “Save image as …” option. Then, you choose where the image will be saved on your computer.
Gathering Materials
You’ll need:
- White faux fur minky fabric with a pile length of 2 cm
- A pair of black glass eyes on a metal loop, 14 mm in diameter
- Waxed thread
- Hand-sewing needle and thread
- A long needle (10 cm – 15 cm) for setting the eyes
- Stuffing material (polyfill)
- Weighting material
- Scissors
- Awl
- Glue UHU
- Oil paints ( yellow, orange, brown, and black)
- Black acrylic paint
- Brushes
- A small piece of white felt fabric
- Needles for needle felting
- Сhenille wire
- Black rubber cord
- Polyethylene terephthalate for the wings (transparent plastic used for packaging children’s toys)
- CD/DVD/BD Black Marker
Sewing the Bumblebee Plush Toy
Sewing the Body
Begin by stitching all the marked tucks (darts). Then, sew the two body pieces together with the right sides facing each other, leaving a small gap for stuffing. Beginners should sew slowly and use plenty of pins to keep the fabric in place. After stitching, turn the body inside out.
Stuffing the Body
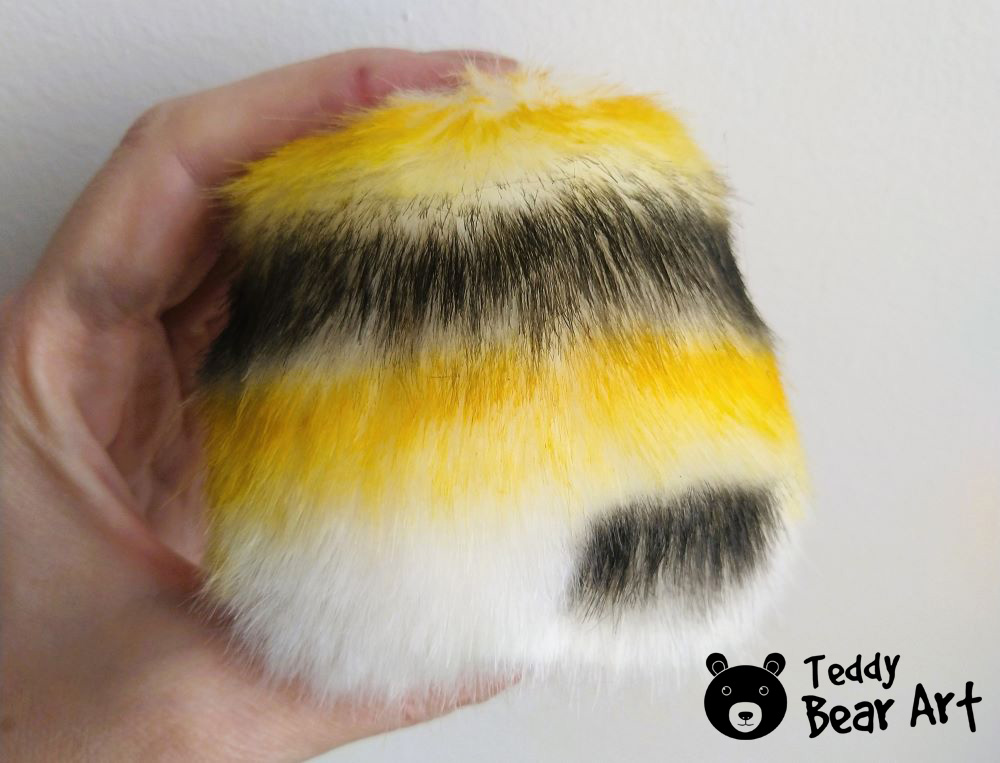
Stuff the body with synthetic filling, adding a small bag with metal pellets for weight. Sew the opening to close the body. Use an awl to lift the pile from the seams, then comb it in various directions.
Adding Details and Features
Painting
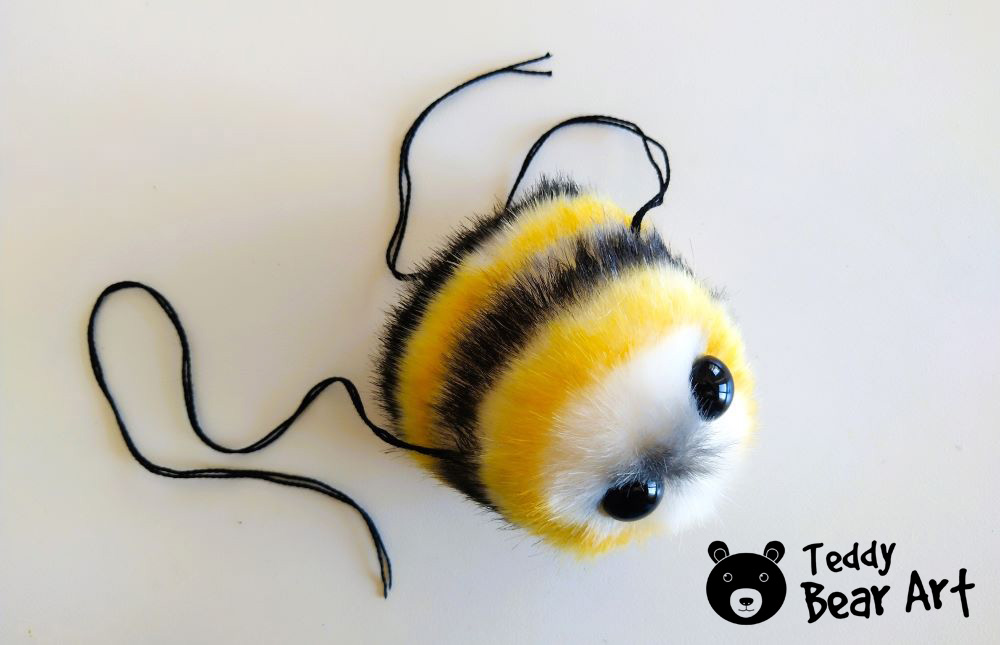
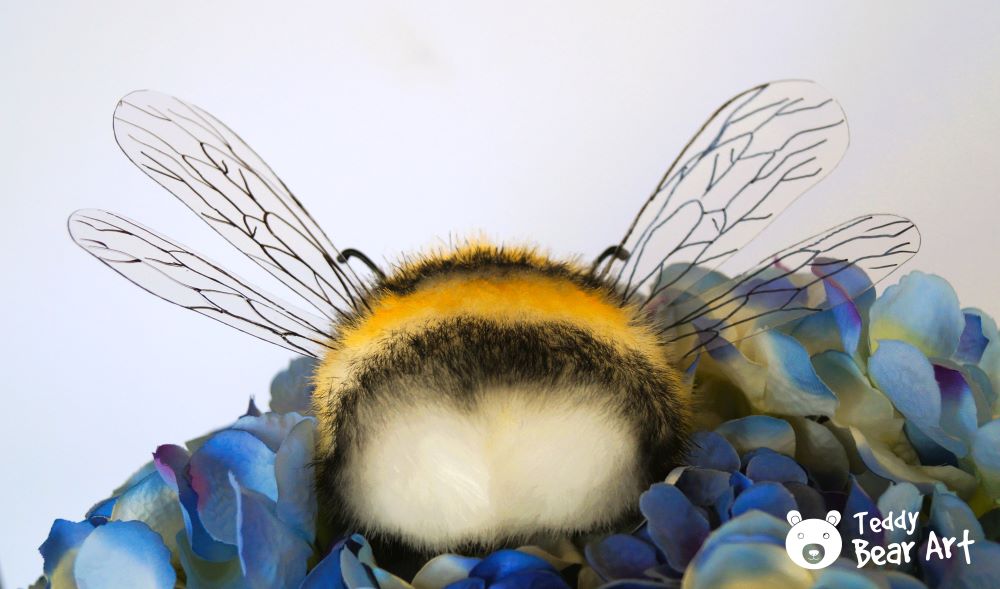
Paint the bumblebee with oil paints, starting with the yellow stripes. You need to paint two yellow and two black stripes in total, leaving the bottom of the bumblebee white.
As for the face, you can add the black shades before or after attaching the eyes.

After painting the yellow stripes, add orange and then brown shadows to them. Once the bumblebee is fully painted, let it dry for several days.
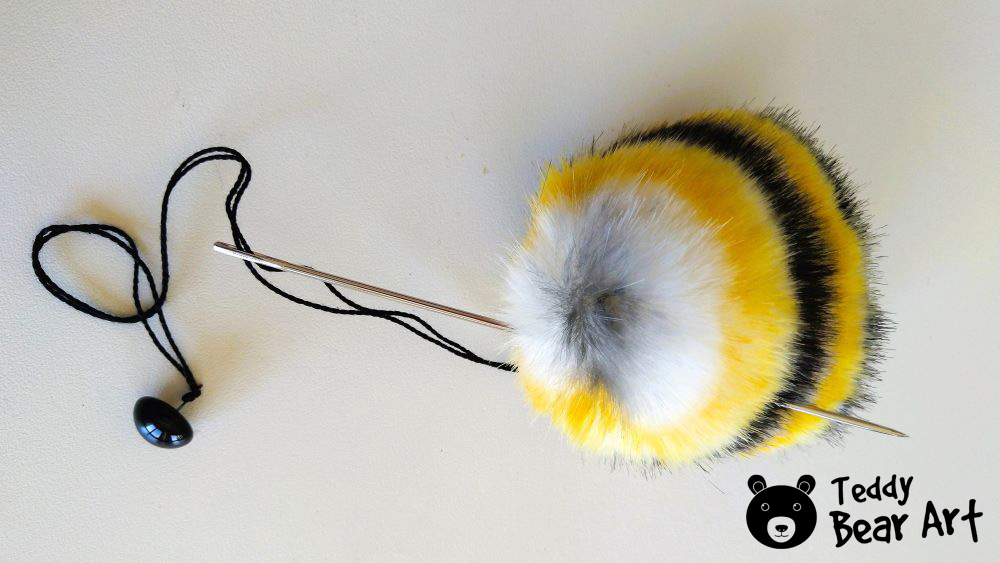
Attaching The Eyes and The Wings
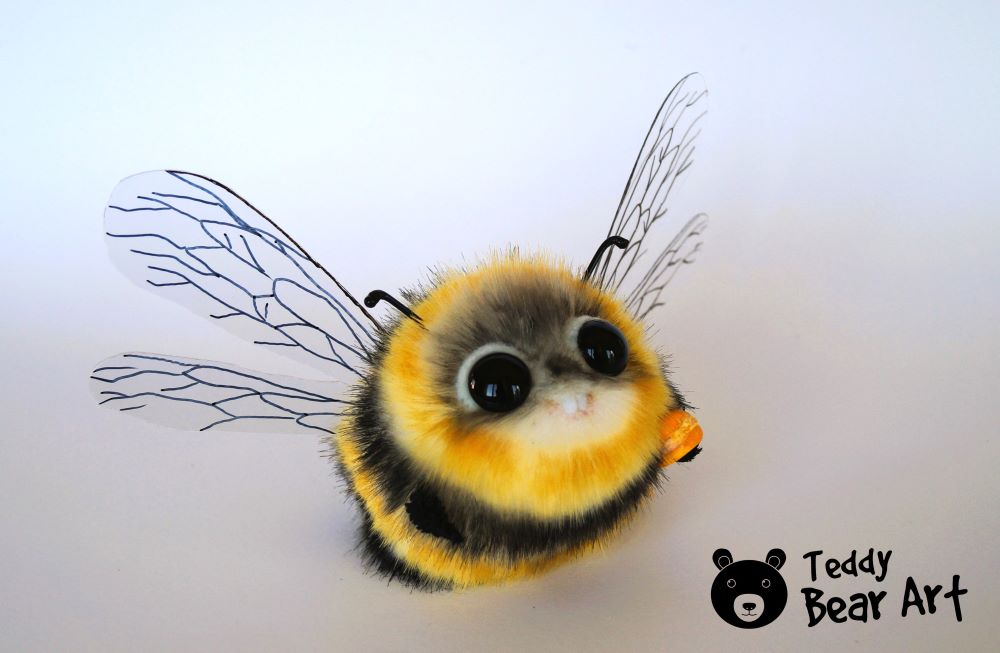
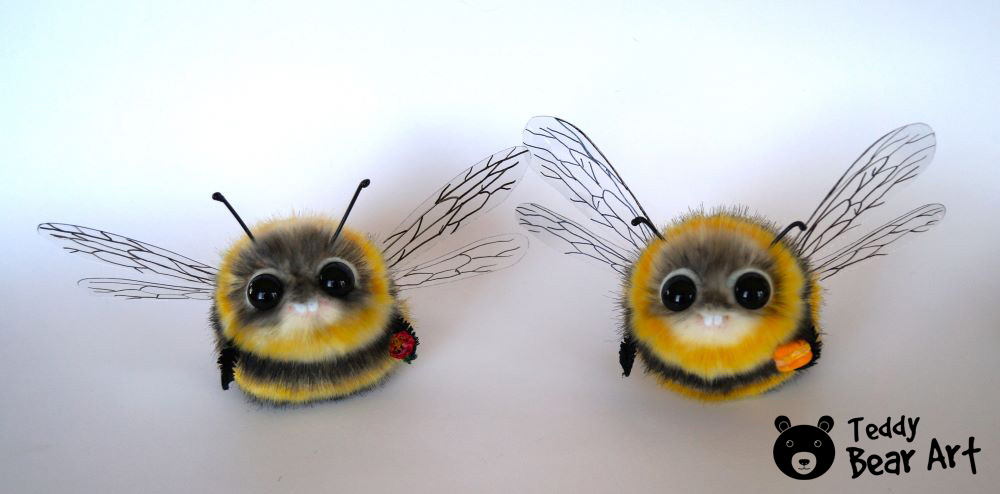
Insert the eyes.
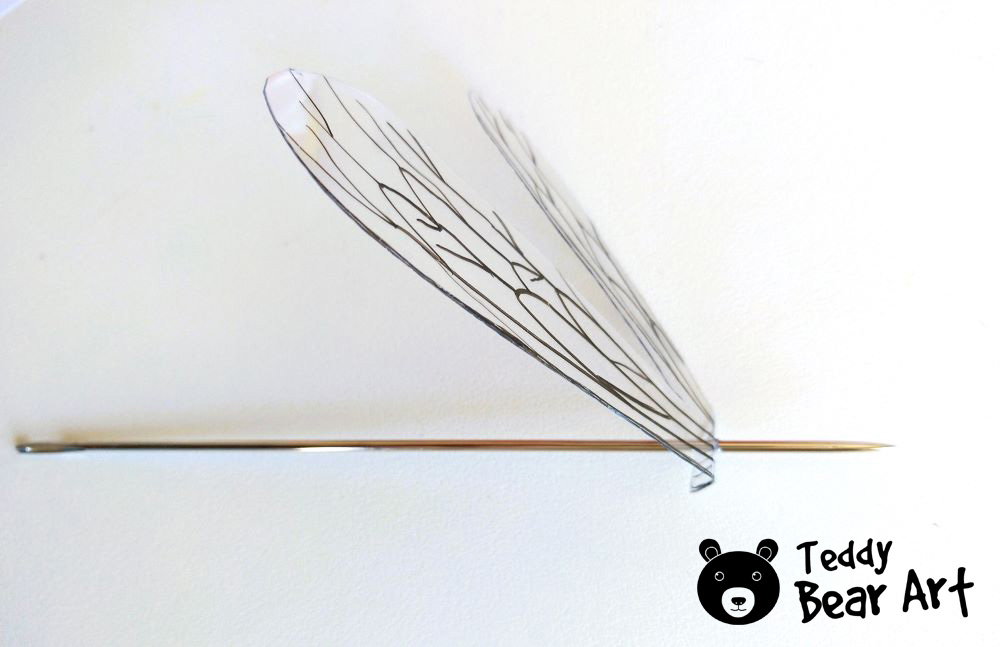
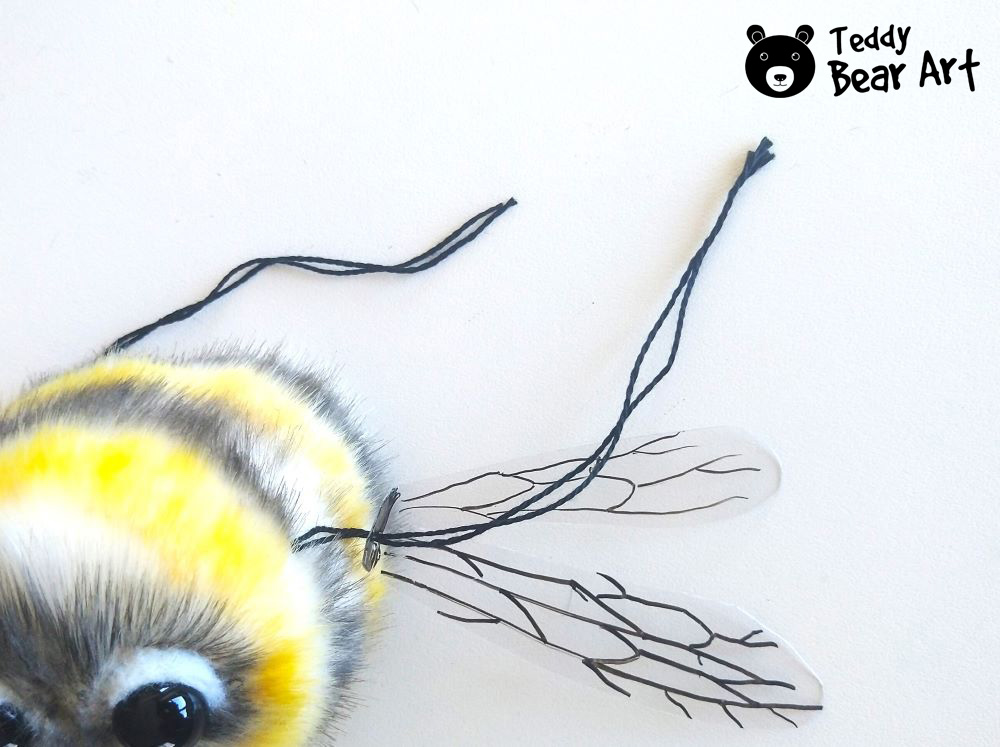
Create two pairs of wings. Fold a piece of plastic in half and cut out the wings. Use a black marker to draw a design on one wing and trace it onto the second wing for a perfect match.
Once dry, cut the plastic into two pieces. Fold the edge of each wing and make a small hole in the center. Sew the wings onto the bumblebee.

Adding Details
Create the eyelids from felt or wool using the needle felting technique.
Shade the face with black oil paint, and trim the pile to make a cute smile. From white felt fabric, cut out two very small teeth and glue them to the mouth.
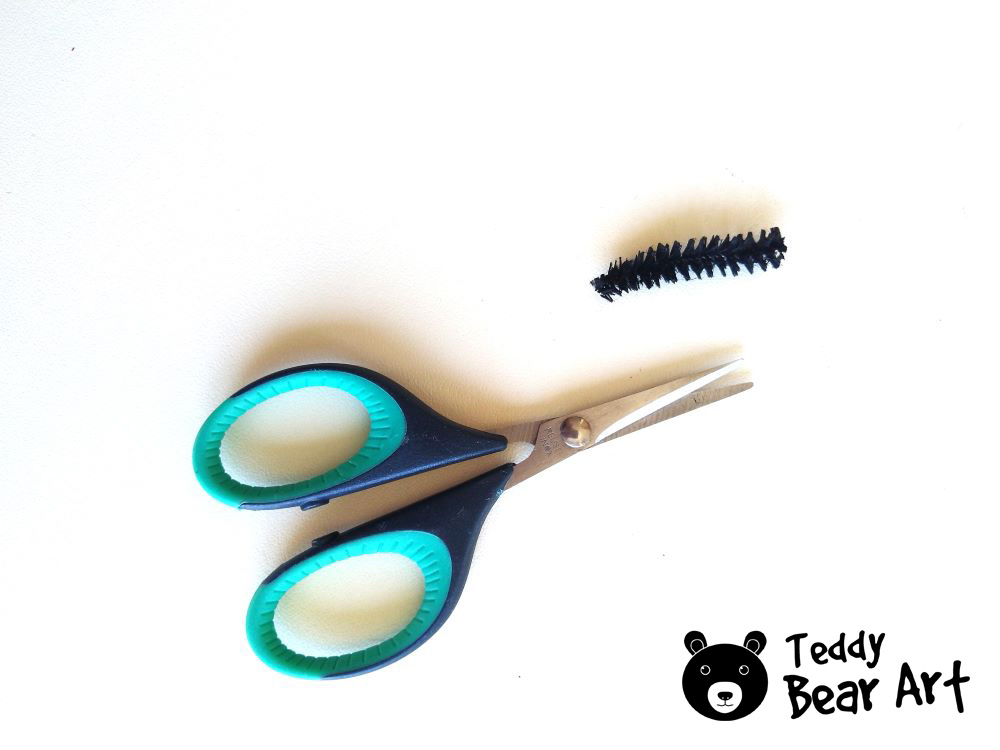
Create two arms from chenille wire painted with black acrylic paint and attach them to the body using this method.
Similarly, make the antennae from a black rubber cord and attach them to the bumblebee. Add a cute accessory to complete the look.
Tips and Tricks for a Flawless Finish
- Painting Techniques: Use two flat, wide, stiff brushes for painting. Start with one brush to apply the yellow stripes, then use it to add orange and brown shadows. Use the second brush for the black stripes. This method prevents color mixing. After the paint dries, gently comb the fur to add fluffiness.
- Creating a Cute Face: Place the eyes further apart to give the face a cute expression.
- Adding Weight: Position the weighted bag inside the bumblebee to ensure it holds the desired pose.
- Chenille Wire Tips: While you can leave chenille wire unpainted, acrylic paint adds a more realistic look to the legs once dried.
- Importance of Clean Hands: Don’t forget to keep those hands clean! Maintaining cleanliness is crucial, especially when working with light-colored parts of your bumblebee plushie. This simple tip ensures you avoid accidental smudges and keeps your creation looking flawless from start to finish. Happy crafting!
Before You Go
Buzzing with creativity, crafting your own bumblebee plush toy is a delightful endeavor. Armed with newfound tips and tricks, we trust this guide has equipped you to fashion your buzzing buddy with finesse.
Now, dive into the world of plushy perfection and let your imagination take flight. Happy crafting, and may your bumblebee bring endless joy!
More Goodies
Check out these additional resources for more buzzing inspiration:
- “Bee Plushie Sewing Pattern: A Fun Project for All Levels of Crafters” – Dive into this comprehensive sewing pattern, perfect for crafters of all skill levels. Get ready to embark on a delightful journey, creating your very own bee plushie!
- “Cute Bee Stuffed Animal Pattern: A Delightful Project for Crafters” – Explore this adorable stuffed animal pattern and bring a touch of sweetness to your crafting table. With clear instructions and charming design, this project is sure to bring a smile to your face!
- Explore another charming summer project with this link: “Free Insect Plush Sewing Pattern Tutorial.” Follow along to create an adorable white, fluffy insect traveling on a watermelon boat. It’s the perfect blend of whimsy and creativity for your crafting adventures!
Get Free Patterns & Be the First to Know!
Want free teddy bear patterns, exclusive tutorials, and a chance to win craft supplies?
Sign up for our newsletter using the subscribe form in the middle of this article to receive new patterns, insider tips, and the latest news on teddy bear art. You’ll also automatically be entered into our annual giveaway for a chance to win teddy bear crafting materials.
Bonus entry: Save one of our pins on Pinterest to increase your chances of winning!
Let’s create, inspire, and craft beautiful teddy bears together!
Crafting my own plush toys has always been a fun hobby, and this bumblebee pattern looks like a fantastic project to try next! The detailed instructions and helpful tips make it seem achievable even for someone like me who’s still learning.
I’m curious about the painting technique—how forgiving is it for beginners? Also, adding weighted bags for better posing sounds like a clever idea. Can’t wait to give it a go and see how my buzzing buddy turns out!
I’m so glad to hear you’re excited about the bumblebee pattern! Crafting your own plush toys is such a rewarding hobby, and it’s great to see your enthusiasm.
If you make a mistake, gently dab off the excess paint with a cotton swab dipped in a suitable solvent for oil paints. Do this carefully to avoid damaging the fur.
As an alternative, you can use fabric acrylic paints, which are more forgiving and easier to correct. They dry quickly and adhere well to faux fur.
For weighting your bumblebee, I recommend using steel or glass beads.
Have fun crafting your buzzing buddy! I can’t wait to see how it turns out. Feel free to share pictures of your finished project! 🐝
I commend you on writing this wonderful piece of content! You’ll help people interested in creative arts and DIY tremendously. It reminded me of my childhood because my mother used to make stuff like this; and I really enjoyed it as well. I am not a manual type of woman but you almost convince me to start! Keep going with the good work!
Thank you so much for your kind words! I’m thrilled to hear that the content brought back fond memories of your childhood. It’s amazing how crafts can connect us to our past. Even if you don’t consider yourself a manual type, you’d be surprised how fun and relaxing teddy bear making can be! If you ever decide to give it a try, I’m here to help. Thanks for the encouragement, and I’ll definitely keep the good work going!