
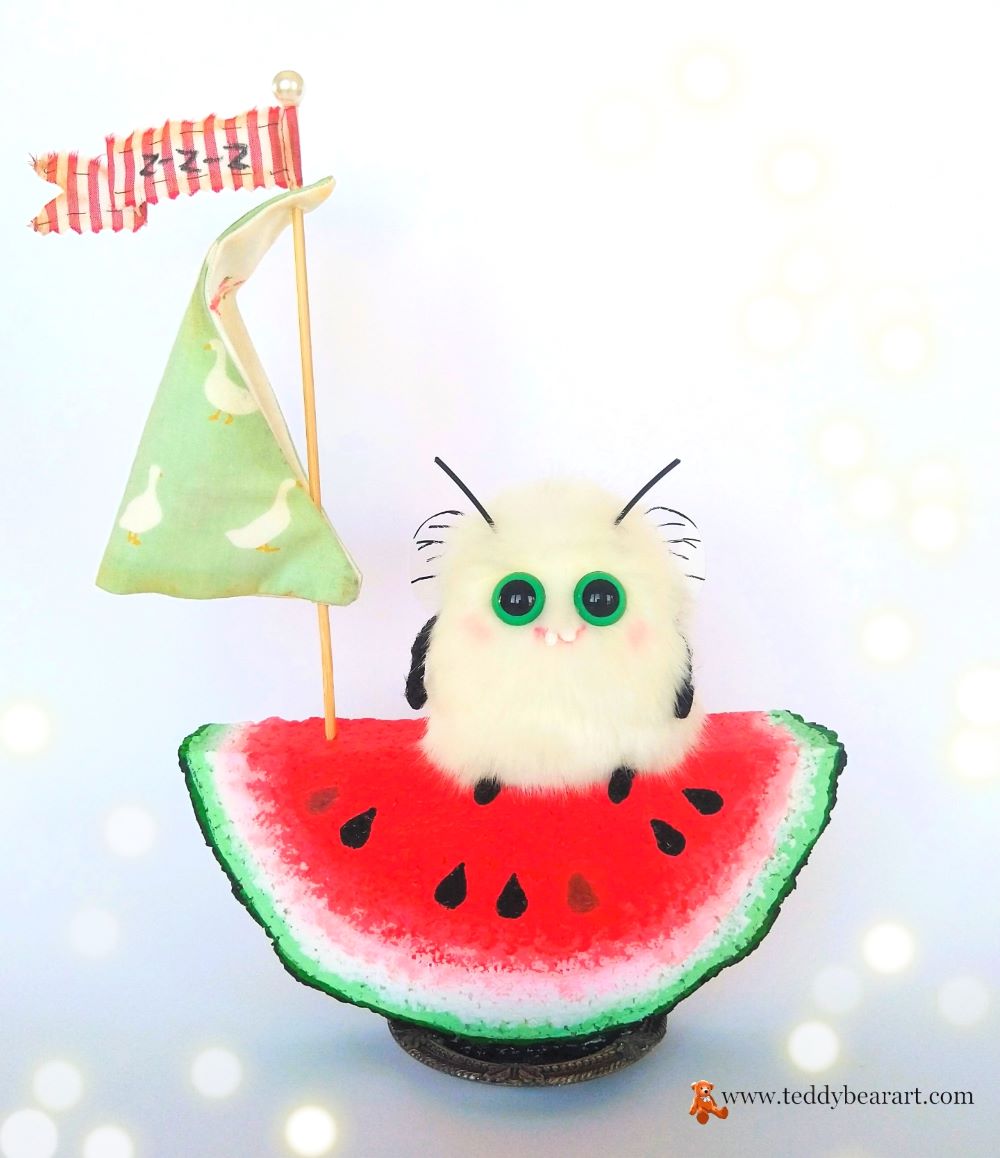
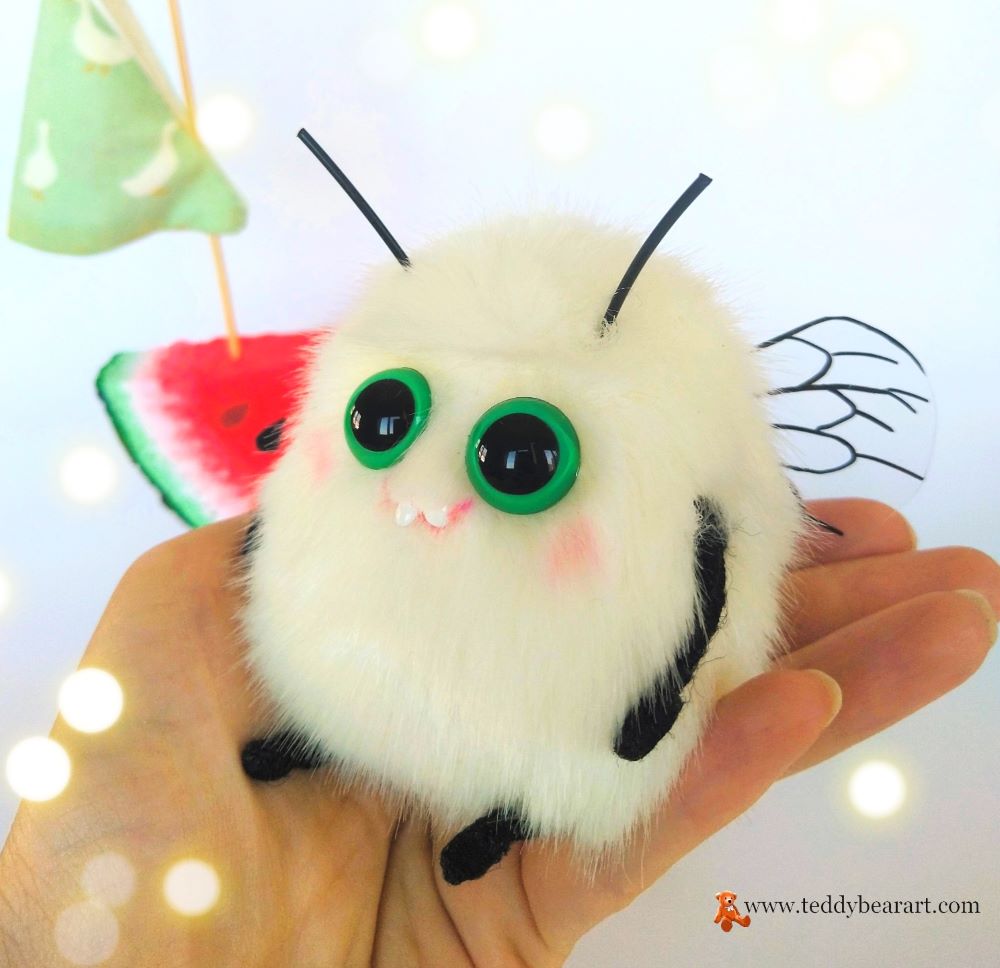
Download a free insect plush sewing pattern. Read the tutorial on how to make a cute and funny little insect and his watermelon ship. Get the list of required materials.
Download a Free Insect Plush Following the Instructions Below
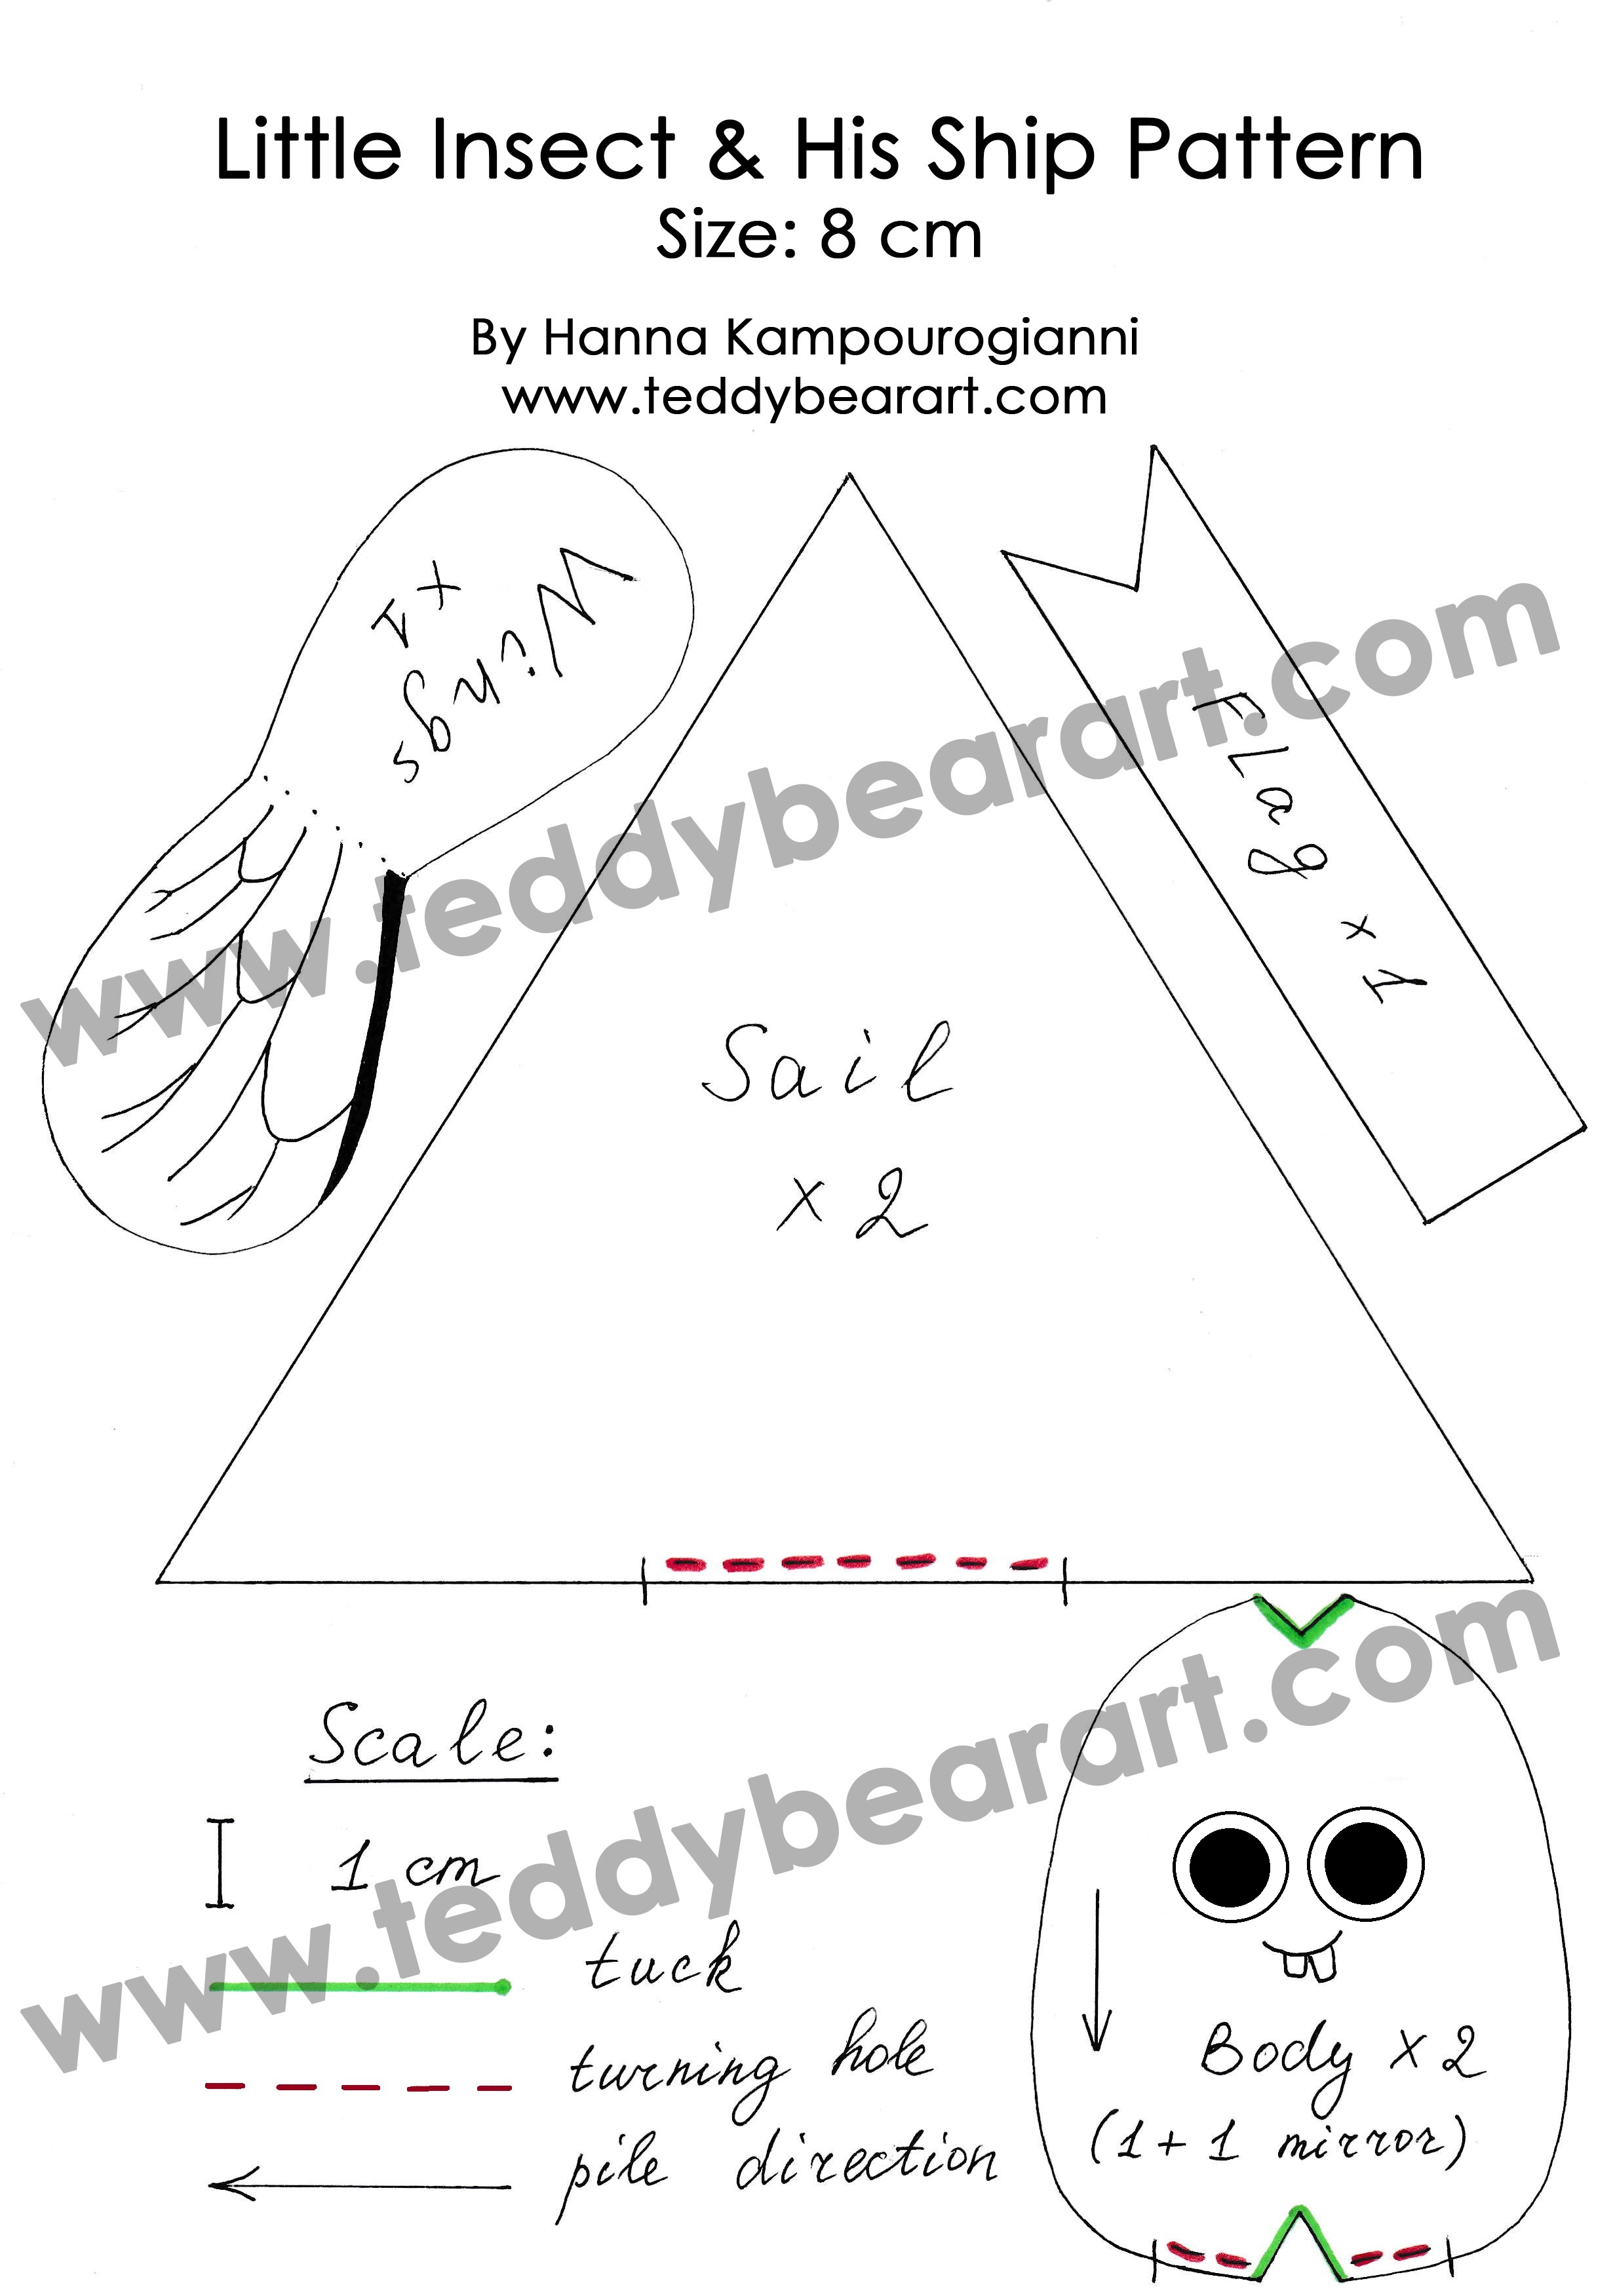
From a computer: Click on the photo of the pattern you see below. In the new tab that will open, you press the right mouse button and select the “Save image as …” option. Then, you choose where the image will be saved on your computer.
From a phone or a tablet: There should be something similar for mobile devices with Android or iOS. Click on the image. Save it by holding your finger on the image and selecting the “Save Image” option. Then go to your photo gallery and print it (there is an option).
The List of Materials
For the insect you will need:
1. A piece of faux fur or plush 20×15 cm with a pile of length 1-1.5 cm.
2. Strong threads, the same color as your plush fabric, and a needle for hand sewing.
3. Scissors.
4. A pair of plastic eyes – 14 mm in diameter.
5. Strong glue UHU.
6. Milliput White modeling clay to make the teeth.
7. Synthetic filler.
8. Metal or glass pellets for the weight (small diameter).
9. Black Merino wool.
10. Chenille wire for the limbs.
11. Wire for antennae.
12. A piece of transparent thin plastic for insect wings that can be cut out of any package. For example, the packaging of children’s toys.
13. A black marker for cd/dvd/bd.
14. White acrylic paint for the teeth.
15. Glossy varnish for acrylic paints (for the teeth).
16. Orange and pink oil paints.
17. Brushes.
18. An awl.
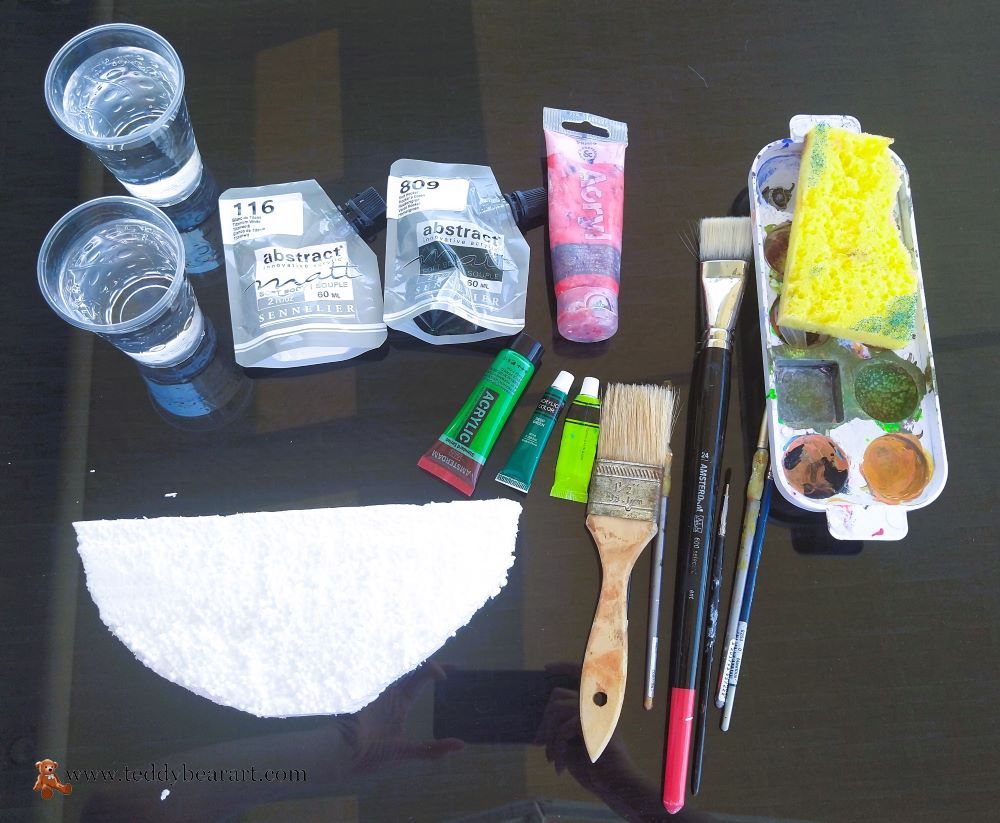
For the watermelon ship, you will need:
1. Styrofoam.
2. Red, green, white, and black acrylic paints.
3. Glossy varnish for acrylic paints.
5. Wooden food stick for the ship mast.
6. A piece of cotton fabric for the ship sail.
7. A piece of fabric for the flag.
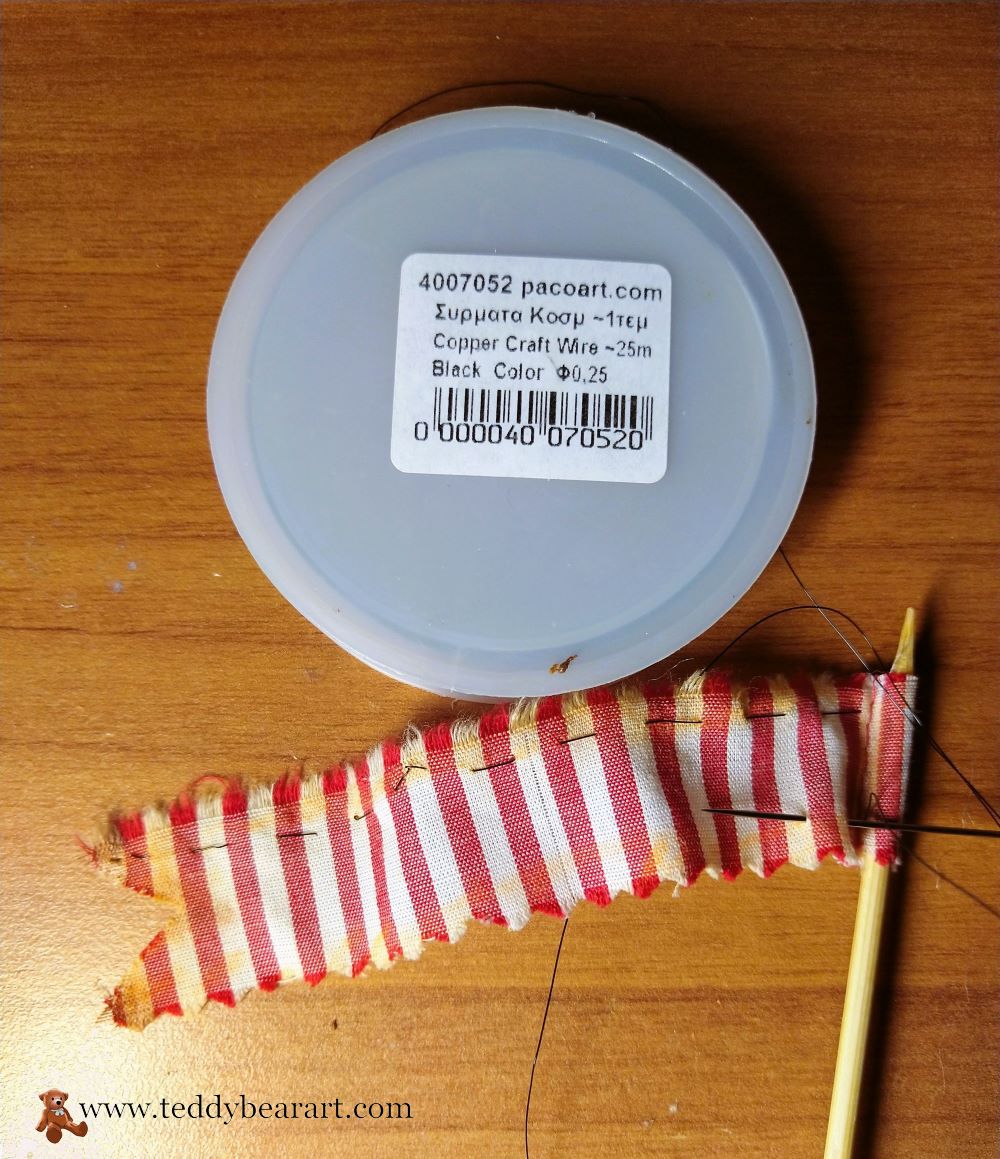
8. Black copper craft wire 1 mm in diameter for the flag.
9. Brushes.
10. Strong glue UHU.
11. A small plate or saucer.
12. Milliput White modeling clay to attach the watermelon to the plate.
Plush Insect Step-by-Step Making Guide
Print the pattern paying attention to the scale (indicated in the figure). If you have no opportunity to print then transfer it from a screen to baking paper.
Arrange the pattern pieces on the fabric so that the direction of the pile matches the arrows.
Leave approximately 0.7 cm for seam allowances.
Trace the details of the pattern with a pencil. Cut off a little pile from the edges, then after stitching the details, the pile will lie more evenly. Sew up the tucks (marked in green). Sew the two sides of the body and turn it out.
Fill it with synthetic filler and add some metal pellets for weight. Sew up the hole. With the help of an awl remove the pile from the seams. After that, comb it in different directions.
Make two holes using the awl, put some glue on the eyes, and insert them into the holes. Cut out some pile around the eyes if it needs.
Cut out some piles to create a mouth for the insect. Mold two teeth, paint them in white color, let them dry, and cover them with the glossy varnish for acrylic paints. Then attach the teeth with the UHU glue.
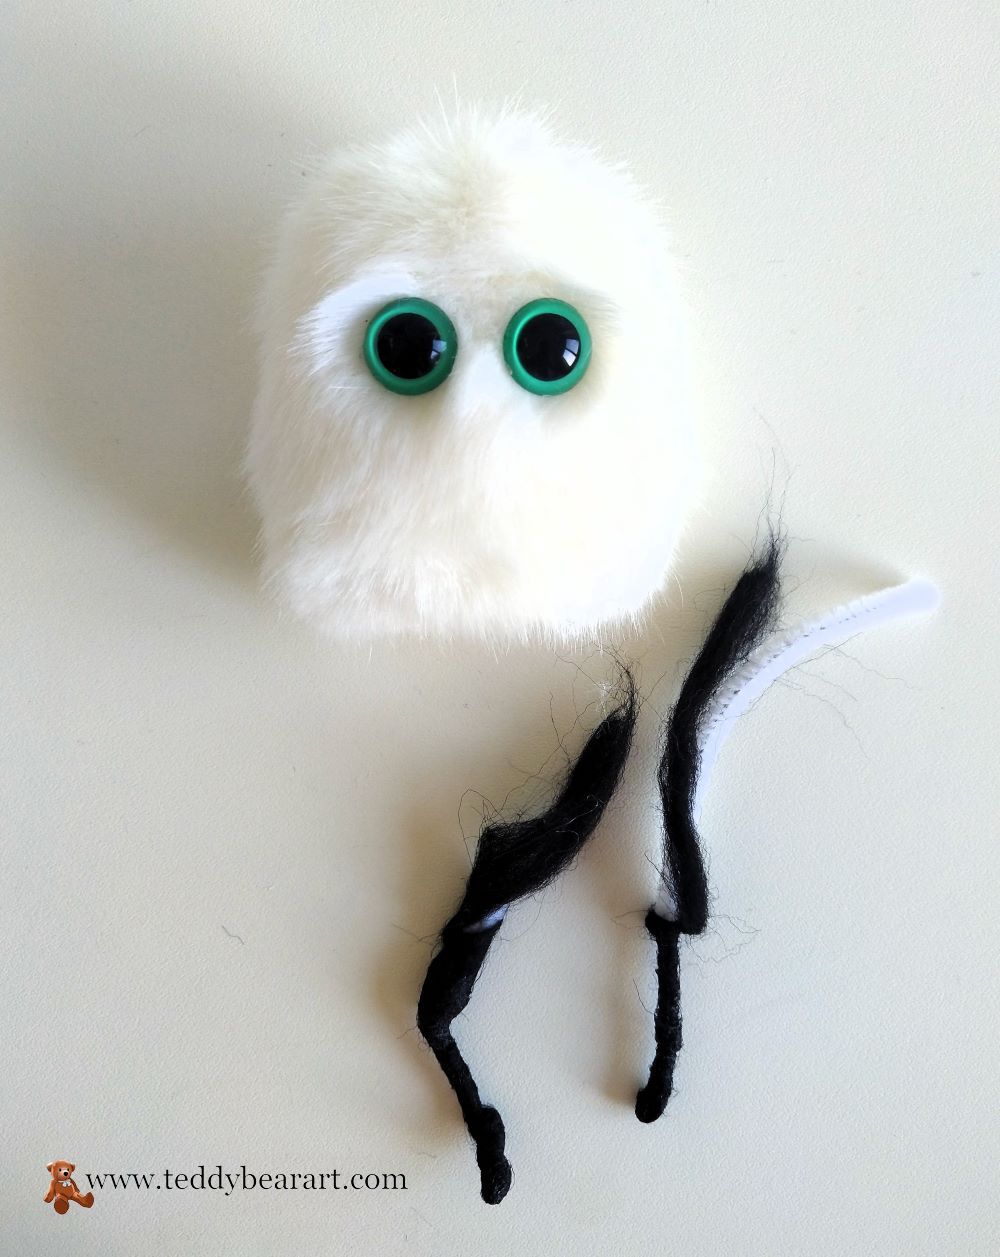
Create limbs by winding thin strips of wool around chenille wire. Thicken the place where the foot and palm will be.
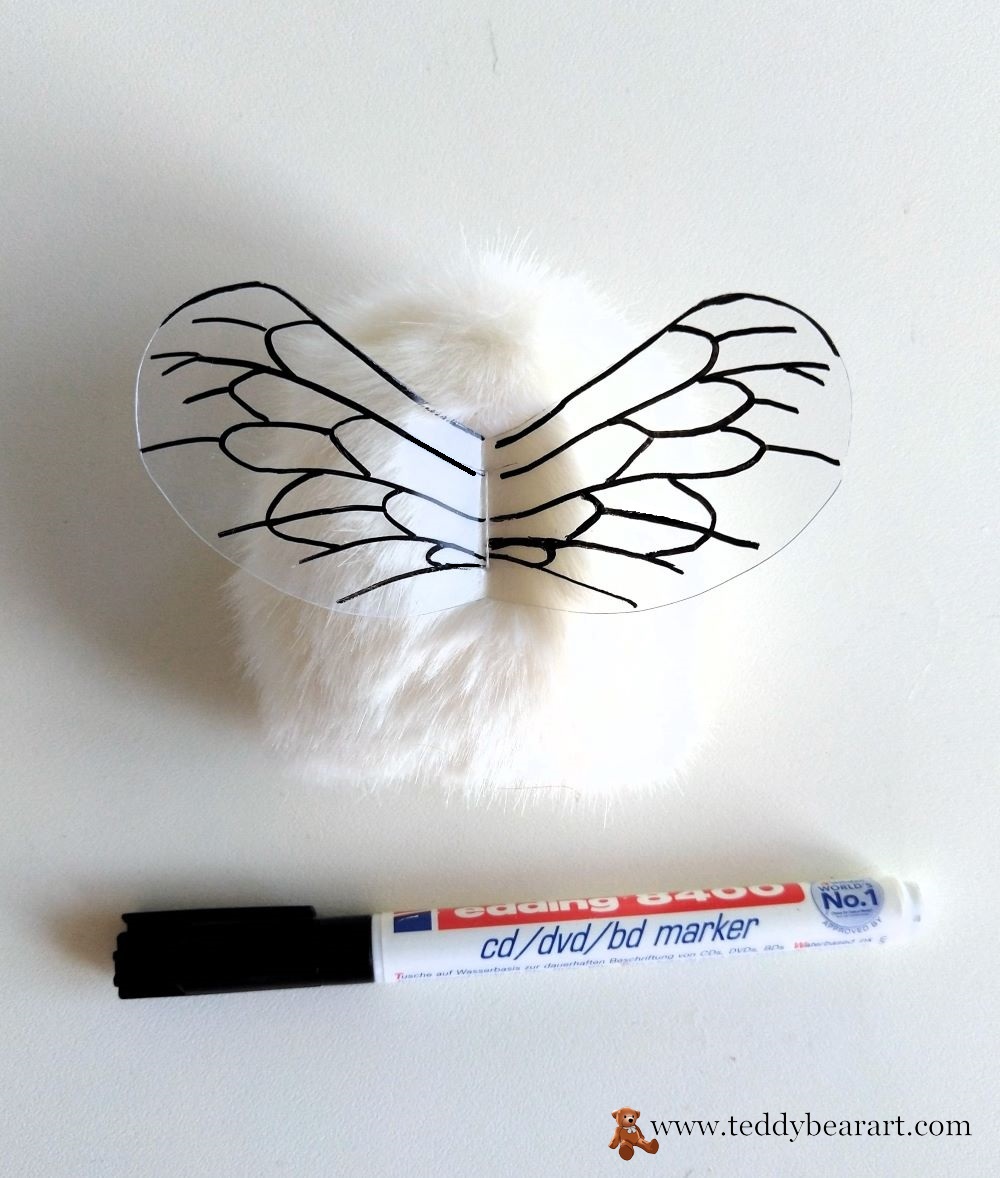
How to make wings? Fold a piece of thin plastic in half and cut out the wings. Make two holes in the middle for sewing. With a black marker for DVD/CD, draw the pattern on one wing, let dry, fold it in half, and copy the pattern onto the other wing. Sew on the wings.
After that, insert the limbs, carefully making a hole with an awl on a plush base and gluing the handles and legs of the insect into the holes. Insert and glue the antennae in the same way.
As a final touch, apply some colors to his face. Read how I paint my plush and plush toys with oil paints while maintaining a beautiful pile.
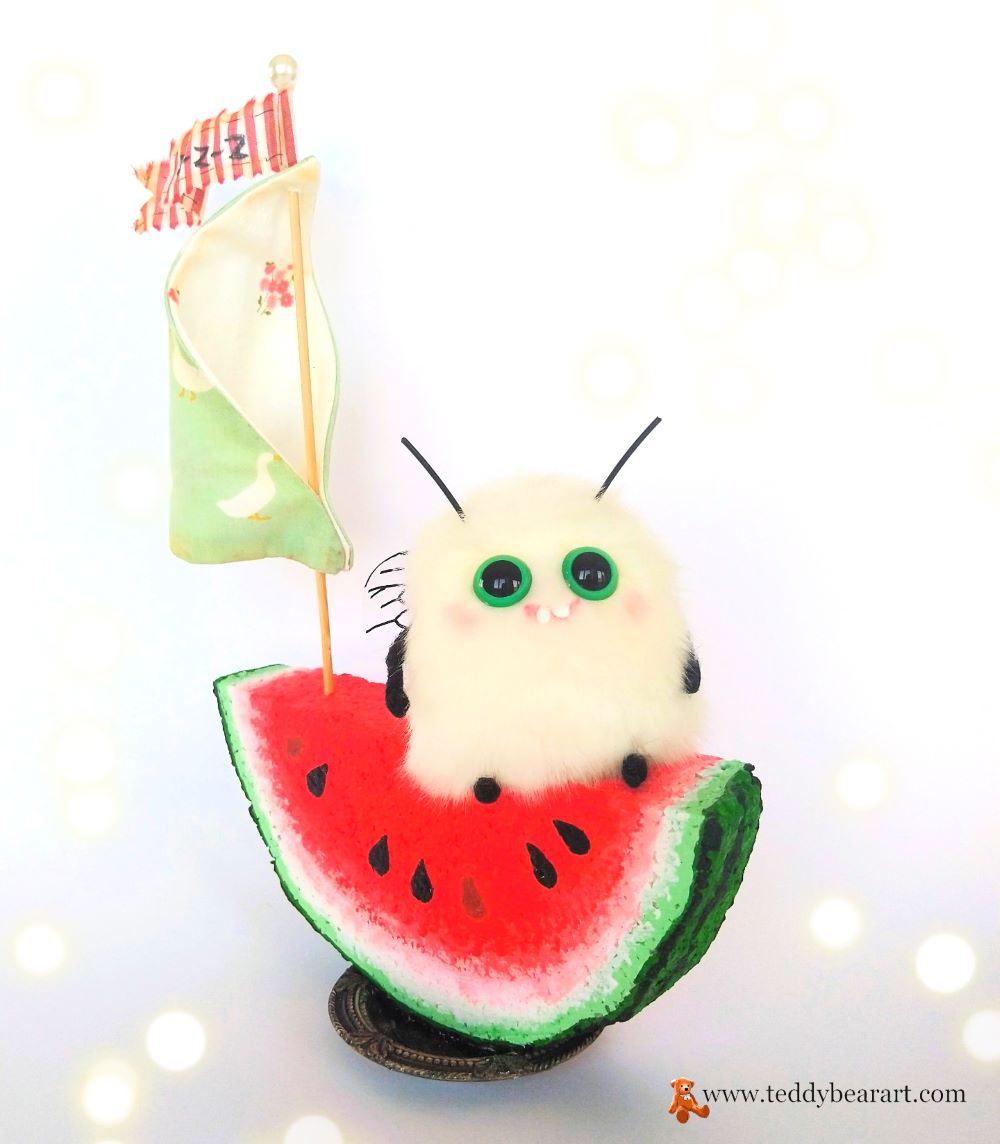
The cute plush insect is ready!
Watermelon Ship-Making Guide
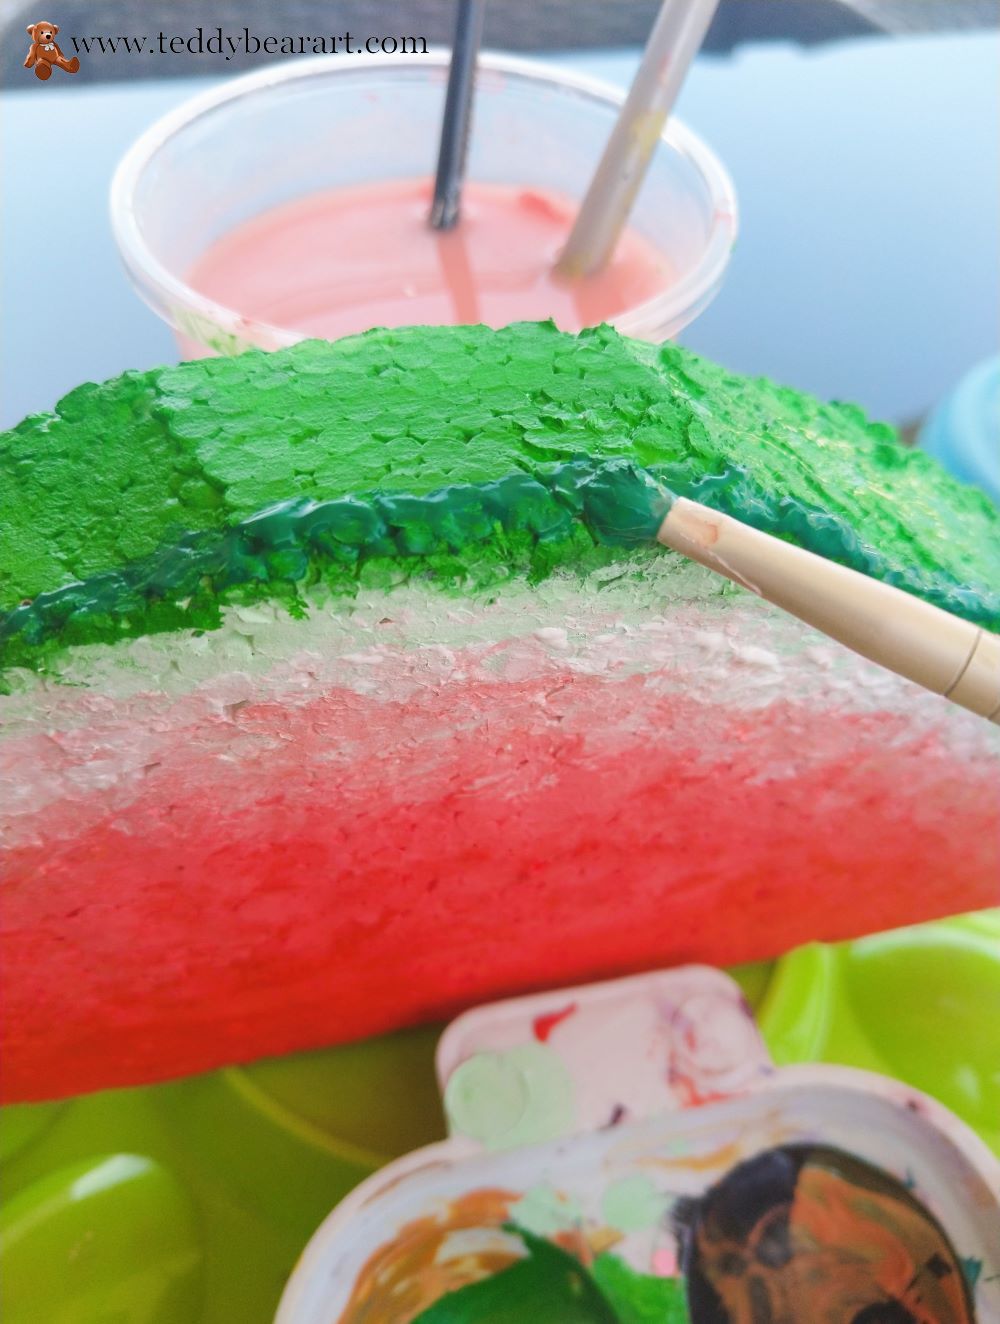
With a sharp knife, cut out a piece of styrofoam that looks like a piece of watermelon. Using acrylic paints, paint it, moving from light to dark tones. Mix white with a drop of green to make a light green, and apply. Then add more green to the white, apply, and blend.
Then apply green, and blend. In the end, add some black to the green to get a dark green color, and draw stripes on the watermelon rind.
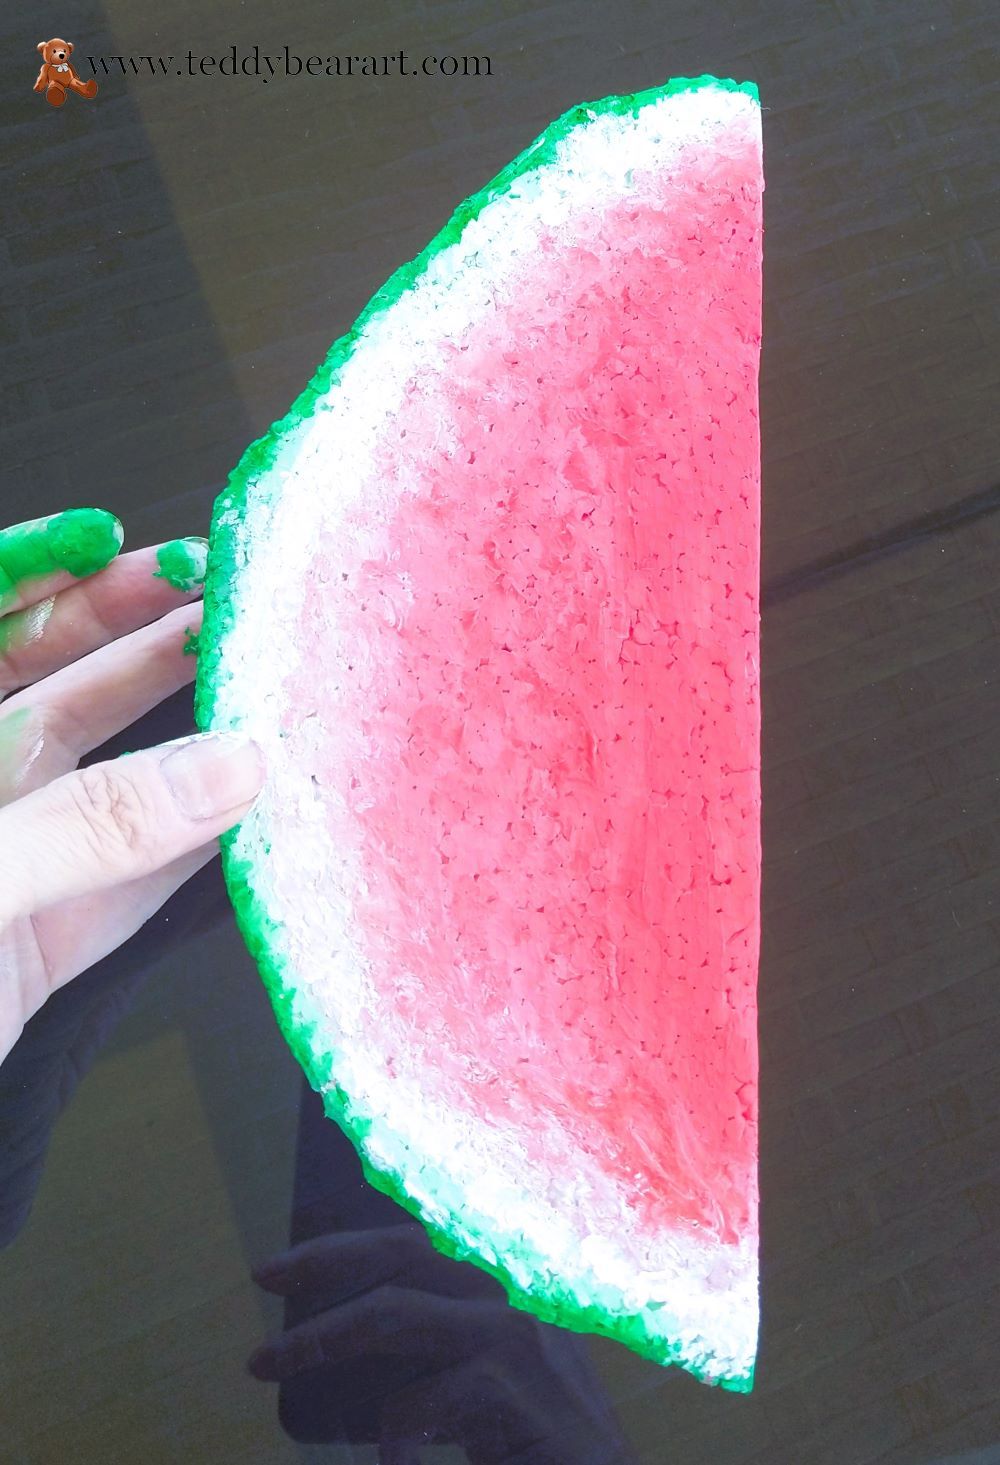
In the same way, we draw the pulp of a watermelon. First, add a drop of red to white to make pink, and then gradually move from pink to red and bright red. When the paint is dry, paint over the watermelon seeds black. Paint the watermelon with glossy acrylic paint. Let dry again.
How to make a sail and a ship’s mast? Sew a triangle out of double cotton fabric, turn it inside out, iron it, and sew up the opening to turn it inside out. This is the ship’s sail.
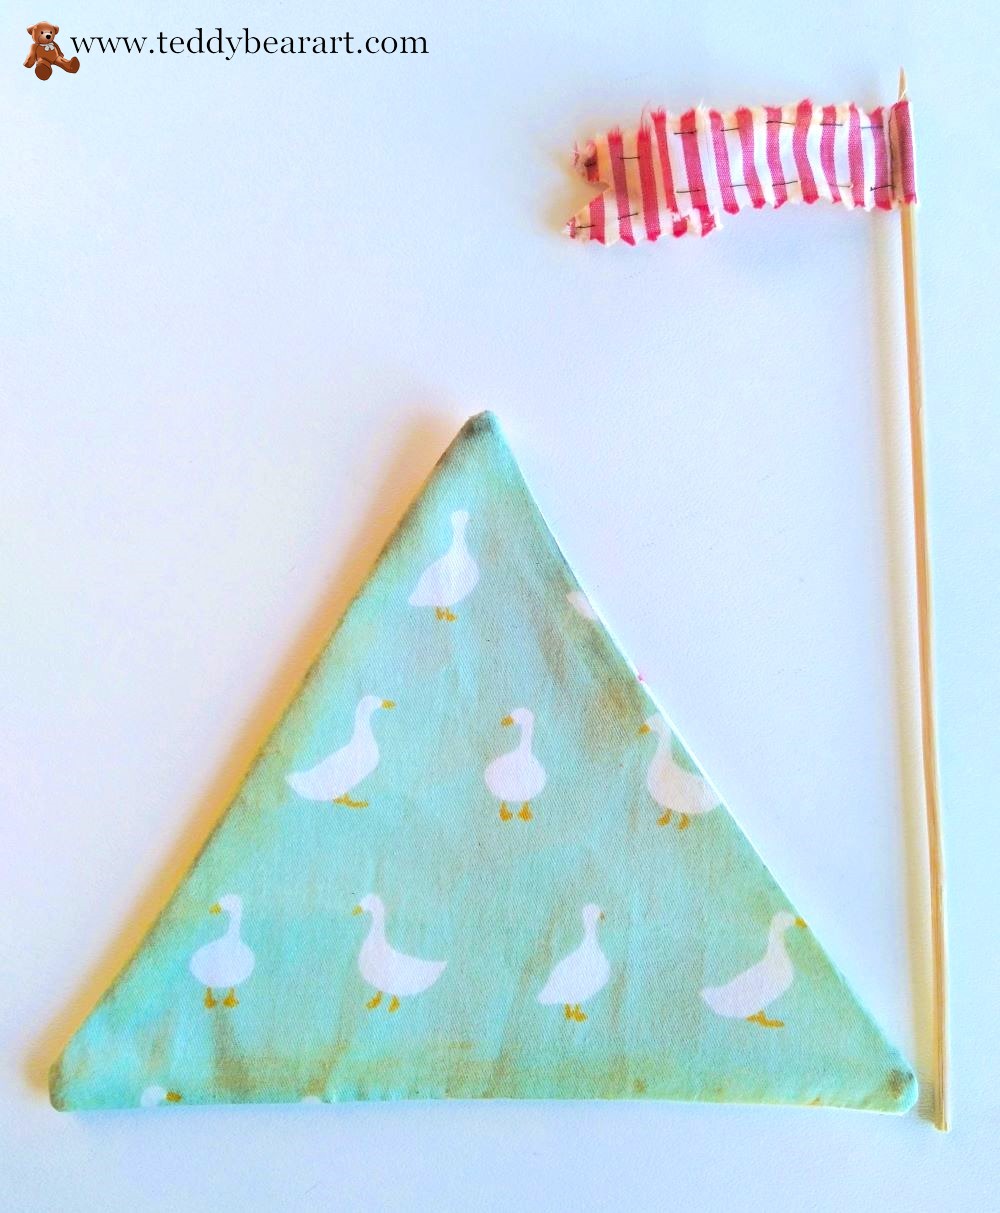
Attach this to a wooden chopstick. Pass it on top and glue it additionally, and just glue it on the bottom. Cut out the flag from another fabric.
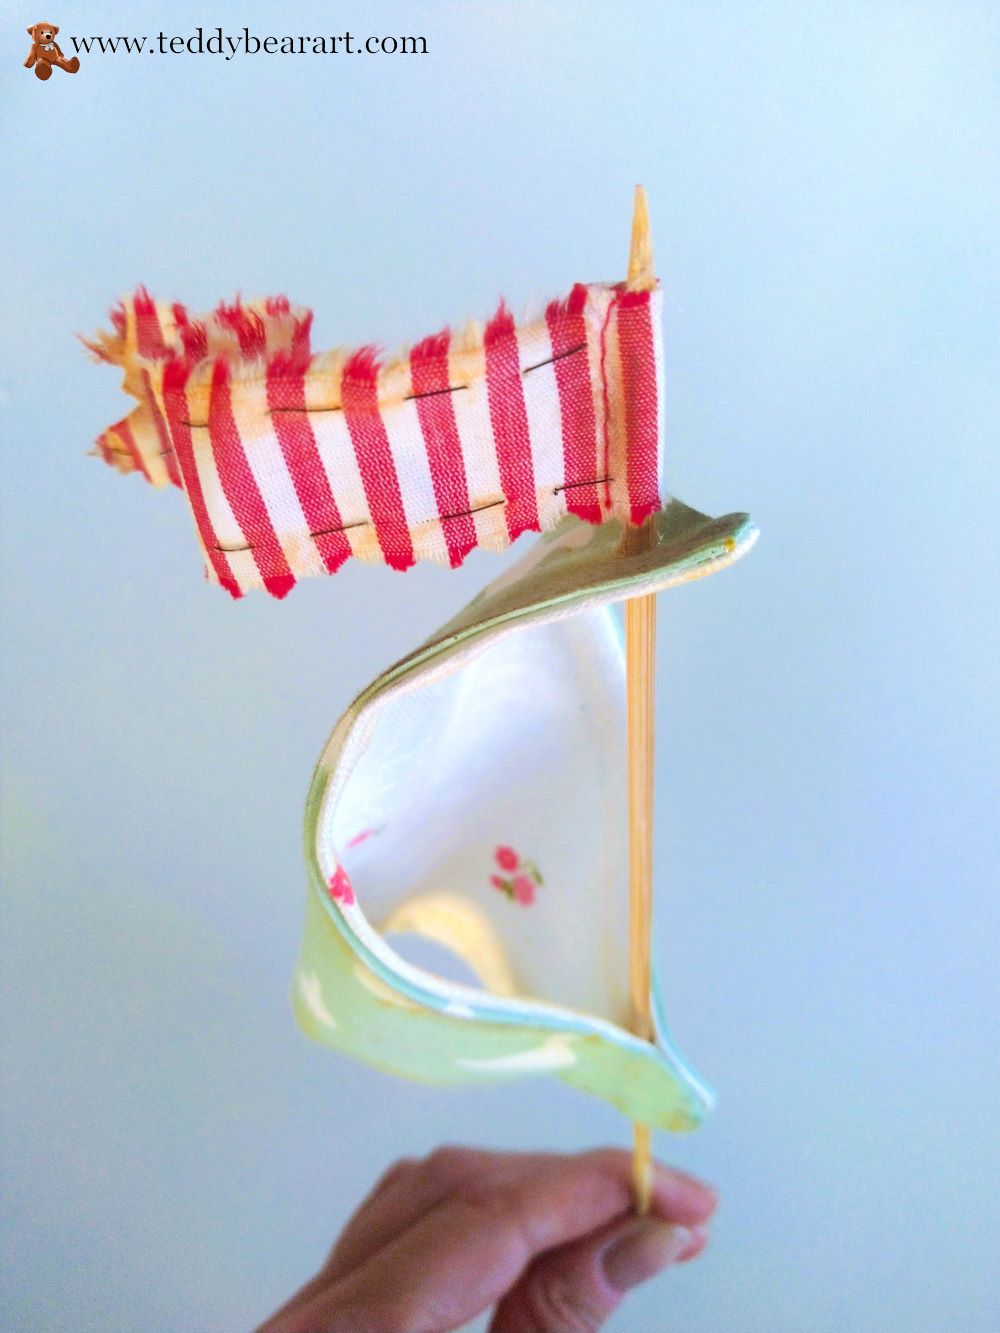
In order to create the appearance of the movement of the ship, the direction of the wind, and the flag waving in the wind, sew it with thin wire (I used the wire to create jewelry) and glue it to the mast.
The top of the mast can be decorated with a bead. After that, with the same mast, make an even vertical hole in the watermelon and glue it there.
That’s it, the watermelon ship is ready. Glue it to the plate with the Milliput White clay and leave it to dry for one day.
Final Words
Congratulations! Your cute plush insect is swimming on the watermelon ship! Having the plush sewing pattern, the list of required materials, and using the knowledge about making such a little insect and his sweet ship you can create more great artistic ideas!
Feel free to sell your sweet plush insect, it will be very pleasant for me if you will indicate my name or this website.
If you ever need a hand or have any questions, feel free to leave them in the comments below and I will be more than happy to help you out.
Get Free Patterns & Be the First to Know!
Want free teddy bear patterns, exclusive tutorials, and a chance to win craft supplies?
Sign up for our newsletter using the subscribe form in the middle of this article to receive new patterns, insider tips, and the latest news on teddy bear art. You’ll also automatically be entered into our annual giveaway for a chance to win teddy bear crafting materials.
Bonus entry: Save one of our pins on Pinterest to increase your chances of winning!
Let’s create, inspire, and craft beautiful teddy bears together!
Thanks for your interesting content. When I was a child, one of my dreams was to plush sewing animals, especially insects like spiders and ladybugs but I didn’t know how. I’m so glad that you put these patterns. Now I can make my dream true and start with this beautiful insect and its watermelon.
Thank you! Happy to be helpful.