Vintage teddy bears are more than just toys; they’re cherished keepsakes that often hold sentimental value. Whether you’ve inherited a beloved stuffed friend or stumbled upon a vintage bear in need of some TLC, DIY vintage teddy bear repair can be a gratifying way to restore its charm.
This guide will walk you through the essentials of repairing vintage teddy bears, including the necessary tools, common mistakes to avoid, historical repair methods, and how to find professional help when needed.
Essential and Additional Tools and Supplies for DIY Vintage Teddy Bear Repair
To effectively repair your vintage teddy bear, it’s helpful to distinguish between essential and additional tools and supplies.
Essential Tools and Supplies
- Needles: Necessary for sewing and fixing damages. Use fine needles for delicate fabrics and sturdier ones for more heavy-duty repairs.
- Thread: Strong, color-matched threads are essential for durability and blending seamlessly with the bear’s fabric.
- Fabric: Fabric that matches or complements the original material is necessary for patching and replacement.
- Stuffing: High-quality stuffing is crucial for restoring the bear’s shape and comfort. For more modern bears, polyester fiberfill or cotton batting is commonly used. However, for vintage bears, it is often important to use wood wool (excelsior) or sawdust to maintain historical accuracy and authenticity. Using traditional materials like wood wool helps preserve the bear’s original feel and appearance.
- Seam Ripper: Essential for carefully removing old stitches or seams without damaging the fabric.
- Scissors: Sharp scissors are necessary for cutting fabric, thread, and other materials accurately.
- Pins: These are used to hold fabric and patches in place while sewing, making them essential for precise repair.
- Iron and Ironing Board: An iron is important for pressing fabrics and seams, which helps achieve a smooth and professional-looking repair.
Additional Tools and Supplies
- Needle Threader: Convenient for threading fine needles or working with delicate threads, but not essential.
- Patch Kits: Special kits with pre-cut fabric patches and instructions can simplify the repair process, though they are not always necessary.
- Fabric Marking Tools: Fabric chalk or markers can help outline repair areas or mark where patches will be placed. These are useful but not critical.
- Cleaning Supplies: Gentle fabric cleaners or wipes are useful for preparing the bear for repair and final cleaning but are not always required if the bear is already clean.
- Replacement Parts: Replacement components like eyes and noses may be needed if the original parts require replacement, depending on the bear’s condition.
- Reference Materials: Guides, books, or online tutorials provide additional knowledge and tips but are not crucial for basic repairs.
You can find these tools at craft stores or online.
Step-by-Step Guide to DIY Vintage Teddy Bear Repair
Initial Assessment
Start by carefully examining your vintage teddy bear. Identify which areas need repair, such as torn seams, worn fabric, or lost stuffing. Check the bear’s exterior and interior to ensure you don’t miss any hidden damage.
Gently squeeze the bear to feel for lumps or unevenness in the stuffing. For convenience, you might want to take photos of the damage from different angles to have a clear before-and-after reference.
Preparing for Repair
Before you start the repair, gather all necessary tools and materials, including needles, threads, fabric, stuffing, and other supplies. If the bear needs cleaning, use a gentle cleaner suitable for delicate fabrics.
Check out our detailed guide on different types of teddy bear fur fabrics to make the best choice.
Test the cleaner on a small, inconspicuous area to ensure it won’t cause damage. Work in a clean, well-lit area to improve visibility and ensure accuracy. Lay out all tools and materials within reach and plan each step of the repair process for a smooth workflow.
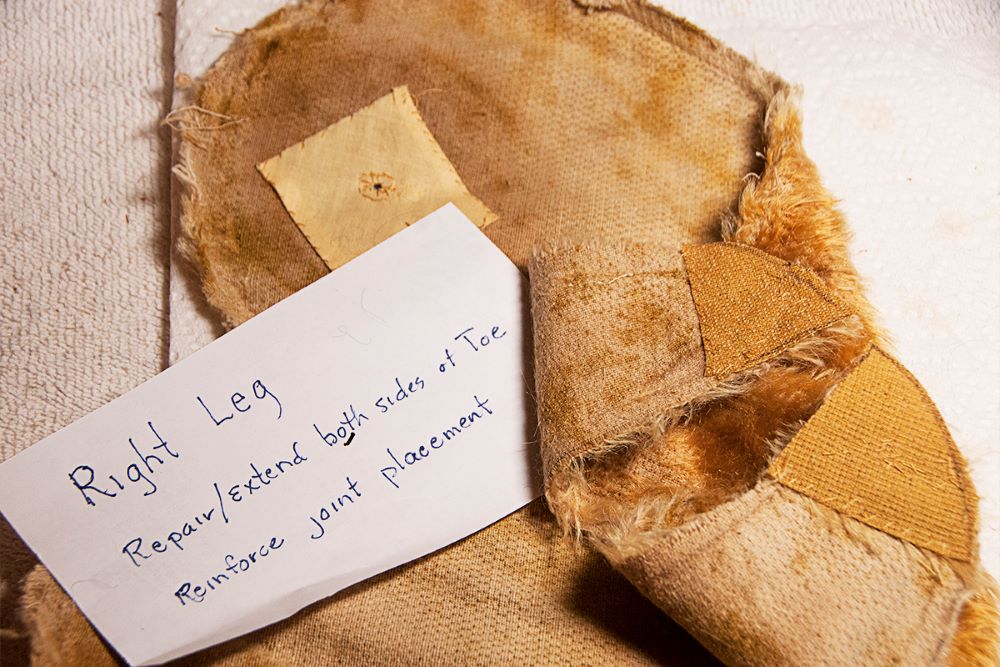
Repairing Torn Seams
To repair torn seams, use a needle and thread that match the color and strength of the original. Carefully align the fabric edges and stitch the tear with strong, even stitches. For best results, consider using a ladder stitch for an invisible repair or a whip stitch to secure the edges and prevent further fraying.
If needed, reinforce the seam with additional stitches to ensure durability. Make sure the stitches are tight enough to hold the fabric but not so tight that they cause puckering. Trim any loose threads for a neat finish.
Replacing Joint Discs
If, during the repair, it becomes clear that one or more of the discs holding the movable parts are damaged or loose, they need to be replaced. Carefully remove the old discs and insert new ones of the appropriate size and material.
Ensure that the new discs are securely fastened to provide reliable connection and mobility of the bear’s parts. This step is crucial for maintaining the functionality and longevity of the vintage bear.
Patching Worn Fabric
For fabric replacement or patching, cut a piece of fabric slightly larger than the damaged area. Attach it by sewing it in place, depending on the extent of the damage. If sewing, ensure the seam around the patch is strong and neat, using an overcast or simple stitch to secure it. Smooth out any wrinkles so the patch lays flat against the bear’s body.
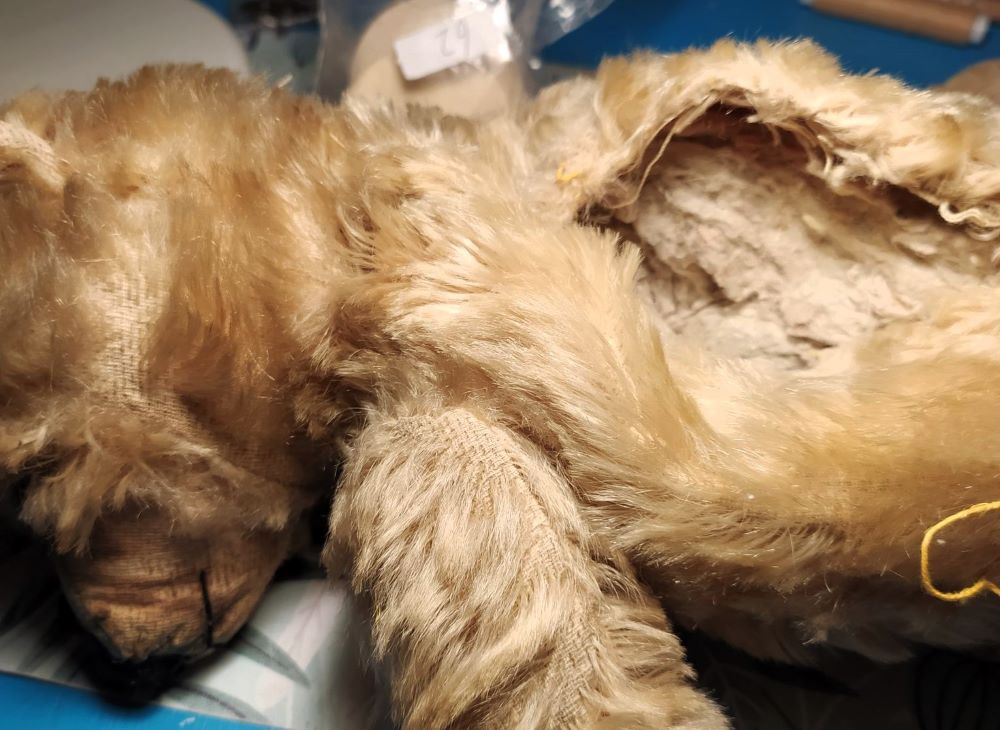
Replacing Stuffing
To replace the old stuffing, carefully open the bear’s seams or use a small existing opening to access the stuffing. This means that instead of fully opening the seams, you can utilize an already existing small hole, such as one that might be there from previous damage or partially unpicked seams.
Using an existing opening allows you to minimize the intervention and preserve as much of the original stitching and structure of the bear as possible. If necessary, use a seam ripper to gently open the seams without damaging the surrounding fabric.
Remove the old stuffing and add new material, distributing it evenly inside the bear to restore its shape and firmness. Ensure the new stuffing is evenly distributed to avoid overstuffing, which can distort the bear’s shape. Once the stuffing is in place, stitch the seam closed with small, even stitches to securely seal the opening.
Explore the top 10 stuffing materials for teddy bears and find the perfect one for your project with this detailed guide.
Replacing Eyes
If your bear’s eyes are damaged or missing, you can replace them with new ones. Choose eyes that match the original in size and style. Carefully remove any remaining parts of the old eyes. Use a needle and thread to attach the new eyes securely. Ensure they are positioned symmetrically to maintain the bear’s original appearance.
Discover various methods for attaching teddy bear eyes and bringing them to life with this comprehensive guide.
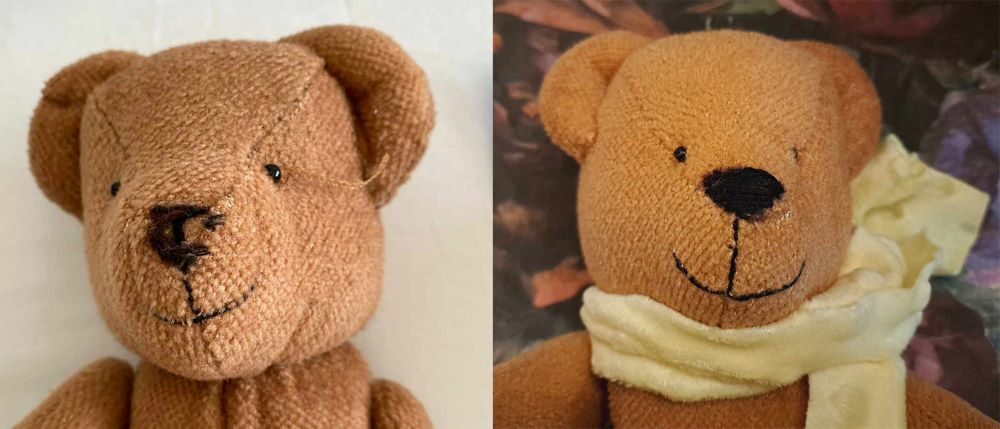
Embroidering the Nose (and Face)
To restore or enhance your bear’s nose and facial features, use embroidery floss that matches the original color. Start by removing any remaining parts of the old nose or stitches.
Outline the nose area with a self-erasing fabric marker if necessary. Use satin stitches or backstitches to embroider the nose, making sure the stitches are tight and even. For other facial features like the mouth, use similar stitches to maintain a cohesive look.
Follow this guide to explore different techniques for embroidering teddy bear noses.
Final Touches
After completing the repairs, thoroughly inspect the bear to ensure all repairs are secure. If needed, perform a final cleaning using a gentle cleaner to remove any residue from the repair process. Gently brush the fur with a soft brush or cloth to restore its fluffiness.
Make sure all repaired areas are sturdy and do not cause additional issues. Consider adding a small ribbon or accessory to give your bear a fresh, finished look.
Maintenance Tips
To keep your vintage teddy bear in good condition, handle it gently and store it in a dry, sun-protected place. Avoid exposure to direct sunlight or moisture, as these can cause fading and deterioration.
Regularly check its condition and perform light cleaning to maintain its appearance and extend its lifespan. If you notice any minor issues, address them promptly to prevent them from becoming major problems.
These guidelines will help you effectively repair and restore your vintage teddy bear, bringing back its original charm and durability.
Common Mistakes in Vintage Teddy Bear Repair and How to Avoid Them
Repairing vintage teddy bears requires careful attention, and avoiding these common mistakes is crucial for achieving a successful repair:
- Ignoring Historical Value: Don’t overlook the age and history of the bear during repairs. Using inappropriate materials or modern methods can diminish the historical value and authenticity of the bear. Try to preserve original materials and methods whenever possible.
- Insufficient Preparation: Skipping the step of thorough preparation before repair can lead to unsatisfactory results. Ensure the bear is clean and all damages are carefully documented before beginning the repair process.
- Ignoring Fabric Texture: When replacing fabric or adding patches, consider the texture and weight of the original material. Using a fabric that differs significantly in texture can make the repair noticeable and affect the bear’s appearance.
- Improper Stuffing Density: Using too much or too little stuffing can affect the bear’s shape. Proper stuffing density is essential for maintaining its original form and plushness.
- Unsuccessful Application of Craft Techniques: If you use craft techniques such as knitting or embroidery for repairs, make sure they match the original style and quality of the bear. Improper techniques can spoil the appearance.
- Disregarding Specific Materials: Some vintage bears may contain specific materials like antique fabrics or fillers that require special care. Using the wrong materials for repairs can negatively impact the outcome.
- Lack of Caution with Sensitive Areas: Be cautious when working with delicate areas such as eyes, noses, and other decorative elements. Damaging these parts can reduce the bear’s value and appearance.
- Failure to Plan: Repairing without prior planning and considering each step can lead to mistakes. Create a repair plan to avoid improvisation, which can result in undesirable outcomes.
- Inadequate Testing After Repair: Insufficient testing of repaired areas before finalizing can leave weak spots unnoticed. Check all repaired areas for strength and functionality.
By being mindful of these common pitfalls, you can ensure a more effective and lasting repair for your vintage teddy bear.
Historical Methods of Vintage Teddy Bear Repair
Vintage teddy bears, cherished for their sentimental value, have been repaired using a variety of methods throughout history. These methods reflect the materials, technologies, and craftsmanship available at different times. Let’s delve into some fascinating historical repair techniques.
In the early 20th century, most teddy bear repairs were done by hand. Basic methods such as patchwork were commonly used to address damage. Fabric scraps were applied over holes and tears, and these patches were sewn on with simple stitches like running stitch or backstitch. Often, a ladder stitch was employed to make the repair less noticeable, ensuring a more seamless appearance.
By the mid-20th century, sewing machines became more common for repairs, making the process faster and more uniform. Early machines with a straight stitch were ideal for reinforcing seams and fixing small rips. After World War II, zigzag stitching became more prevalent, providing extra strength to seams and helping to prevent fraying.
During this period, fabric dyes were also used to restore the bear’s color. For bears with faded or discolored fur, fabric dyes helped return the original hue. However, due to the fragility of older fabrics, this process required careful application to avoid uneven coloring and potential fabric damage. In cases where dyeing was not feasible, textile paints were used to restore or add details like facial features or patterns.
Stuffing materials evolved as well. Kapok, a lightweight and resilient natural fiber, was popular in the early 20th century for its ability to retain shape over time. Later, cotton batting became an alternative, offering softness and plushness, though it tended to compress more over time compared to kapok. In some regions, particularly in Europe, wool batting was also used during the mid-century.
When bears were missing or had damaged parts, skilled craftsmen would create custom replacements, such as eyes, noses, and even entire limbs, from available materials. For instance, button eyes were often replaced with handcrafted glass or plastic eyes. Accessories like clothing or hats were also handmade from fabrics matching the bear’s original style.
In the 1950s and 60s, repair kits and specialized tools became more accessible. Teddy bear repair kits included fabric patches, thread, and instructions for basic repairs, making the process more straightforward. Specialized tools such as seam rippers were introduced, simplifying the removal of damaged sections without causing further harm.
By the latter half of the 20th century, specialized restoration services emerged. Professional teddy bear restorers began offering services to repair and restore vintage bears using advanced techniques and materials. Collectible bears, in particular, were handled by experts who used meticulous methods to maintain authenticity and market value.
Historical methods have also influenced modern repair practices. Today’s techniques often draw inspiration from traditional methods, focusing on preserving the original character and materials of vintage bears. While traditional materials like kapok and cotton batting are still used, modern alternatives such as synthetic fibers offer improved durability and comfort.
Understanding these historical methods not only provides insight into past craftsmanship but also helps us appreciate the evolution of teddy bear repair. The techniques developed over time have shaped how we care for and restore these beloved toys today.
How to Choose a Professional for Vintage Teddy Bear Repair
If DIY repair isn’t feasible or you prefer professional assistance, finding the right expert is essential. Here are some additional insights and tips to help you make an informed choice:
- Researching Potential Repair Specialists
Start by researching specialists who have experience with vintage teddy bear repairs. Look for repair services or individual artisans who specifically mention teddy bear restoration in their offerings. Utilize online resources, such as forums and social media groups dedicated to teddy bear collectors and enthusiasts, to get recommendations.
Additional Tip: Consider joining online communities or forums focused on teddy bear collecting and repair, as these often provide valuable recommendations and reviews of skilled professionals.
- Reviewing Their Portfolio and Past Work
Examine the professional’s portfolio or examples of their previous work. A reputable repair specialist should have a collection of before-and-after photos of teddy bears they’ve repaired. This can give you a sense of their skill level and the quality of their work. Look for consistency in craftsmanship and attention to detail.
Additional Tip: Don’t hesitate to ask for references from previous clients. Speaking directly with someone who has used their services can provide insights into their reliability and the quality of their repairs.
- Understanding Their Repair Techniques and Materials
Ask about the techniques and materials the professional uses for repairs. Ensure they use high-quality, durable materials that match the original fabrics and stuffing. Inquire about their methods for handling delicate or antique fabrics and whether they use any modern techniques that might enhance the repair process.
Additional Tip: Request information on whether the repair professional uses any special tools or methods for maintaining the original appearance and feel of the teddy bear.
- Evaluating Their Experience and Specialization
Choose a professional with extensive experience in repairing vintage or collectible toys. Specialization in teddy bear repair is a plus, as it indicates familiarity with common issues and proper restoration techniques. Verify their background and experience by checking their qualifications and any certifications related to toy restoration.
Additional Tip: Look for professionals who are members of recognized organizations or guilds related to toy restoration or antique repair. Membership in these groups often signifies a commitment to high standards and ongoing education.
- Discussing Turnaround Time and Costs
Communicate clearly about the expected turnaround time and repair costs. Obtain a detailed estimate before the repair begins to avoid any surprises. Discuss the scope of work and make sure both you and the professional have a clear understanding of what will be done.
Additional Tip: Be aware of any additional fees that might arise during the repair process and ensure that these are communicated upfront.
- Assessing Customer Service and Communication
Choose a repair professional who demonstrates excellent customer service and clear communication. They should be responsive to your inquiries, provide detailed explanations of the repair process, and keep you updated on the progress. A good professional will be patient and willing to address any concerns or questions you may have.
Additional Tip: Test their responsiveness by asking a few questions before committing. This can give you a sense of how well they handle customer interactions.
- Ensuring Proper Handling and Packaging
Verify how the professional handles and packages the teddy bear during the repair process. Proper handling and packaging are essential to prevent any additional damage. Ask about their procedures for shipping or transporting the bear to and from their workshop.
Additional Tip: Inquire if they offer any insurance or guarantees for the bear during the repair process, as this can provide added peace of mind.
- Seeking Professional Reviews and Testimonials
Read reviews and testimonials from other customers who have used the repair professional’s services. Online reviews can provide valuable insights into their reputation and the experiences of other clients.
Check platforms like Google Reviews, social media pages, specialized forums for teddy bear enthusiasts, and craft or antique sites for reviews and recommendations.
Additional Tip: Pay attention to both positive and negative reviews. Consistent feedback regarding quality and customer service can help you make a more informed decision.
By following these guidelines, you can find a skilled professional who will handle your vintage teddy bear with the care and expertise it deserves. Whether the bear is a cherished heirloom or a valuable collectible, selecting the right repair specialist will help ensure it receives the best possible restoration.
Conclusion
DIY vintage teddy bear repair is a rewarding process that allows you to restore and preserve a cherished keepsake. By using the right tools, avoiding common mistakes, and understanding both historical and modern repair techniques, you can effectively bring your vintage bear back to life. If needed, professional help is available to ensure your teddy bear receives the best care possible.
Feel free to share your repair experiences or ask any questions in the comments below.
Acknowledgments
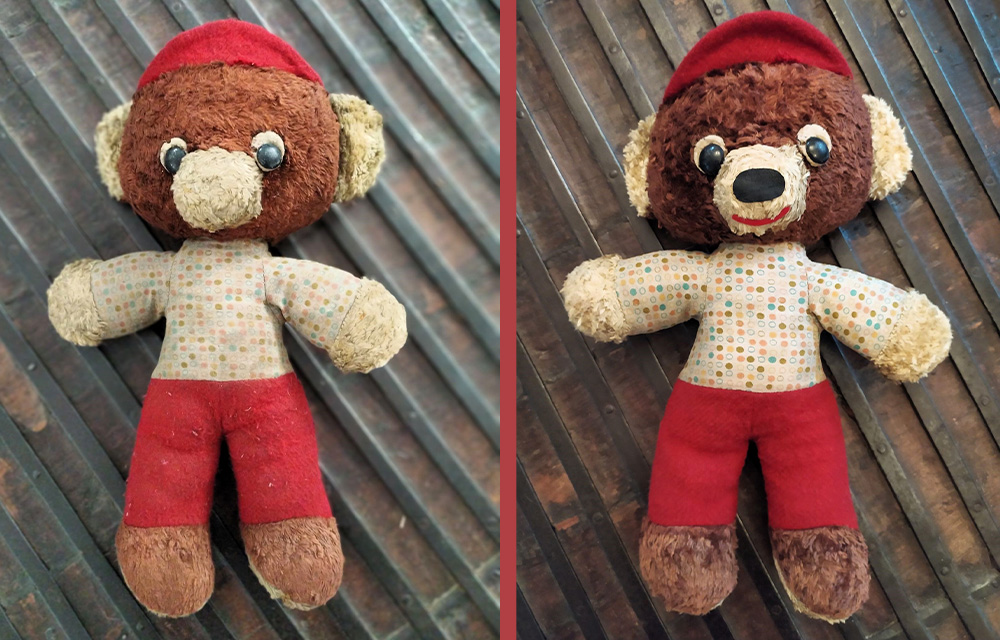
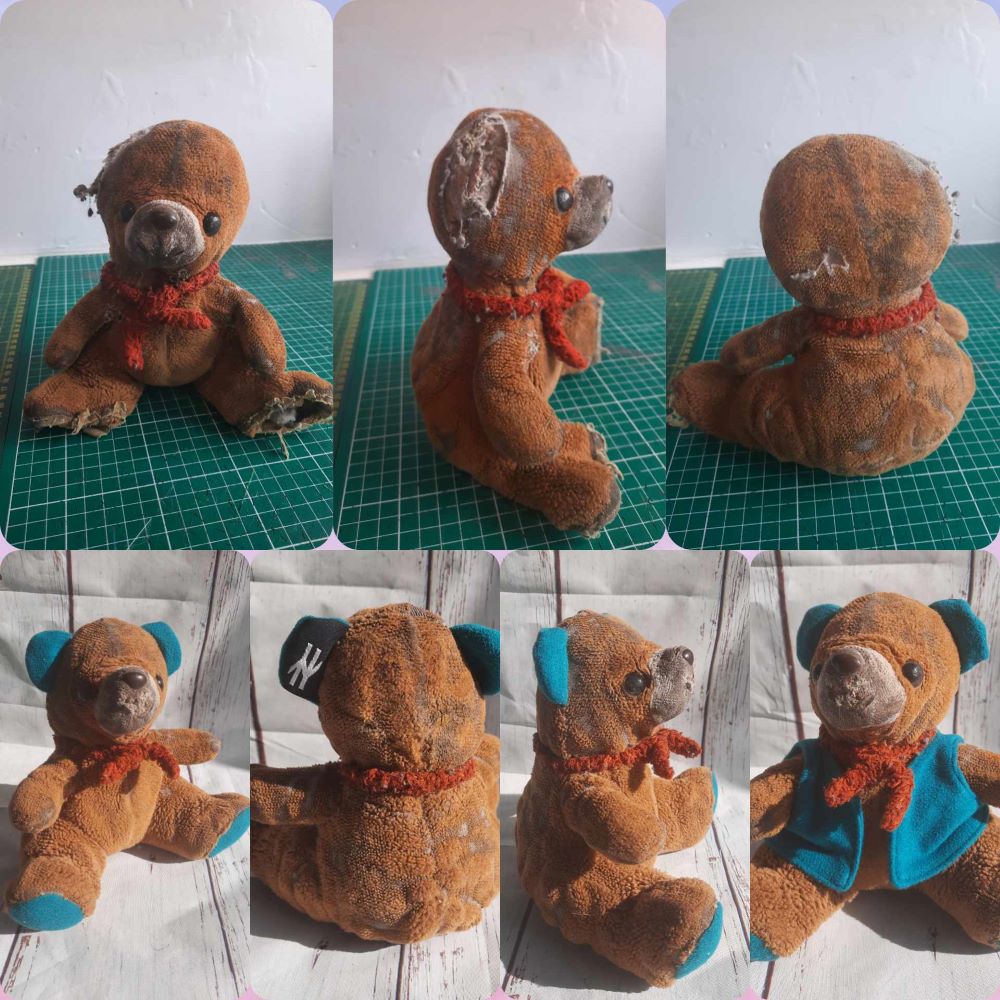
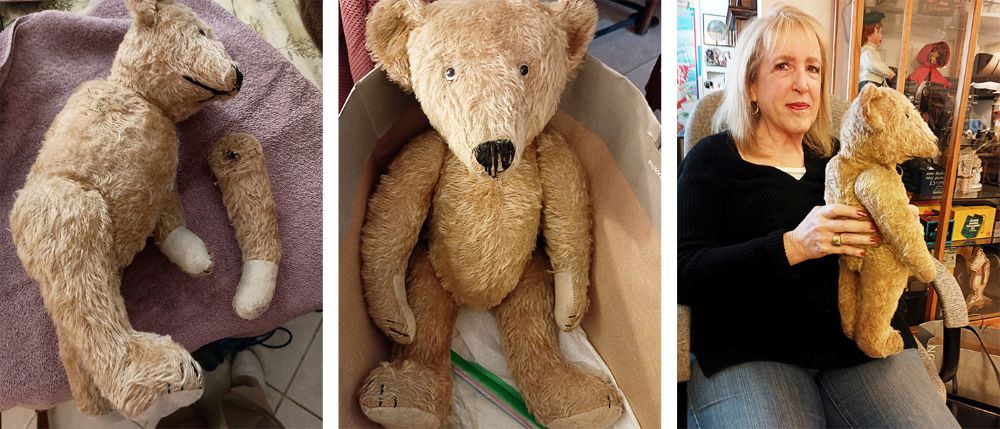
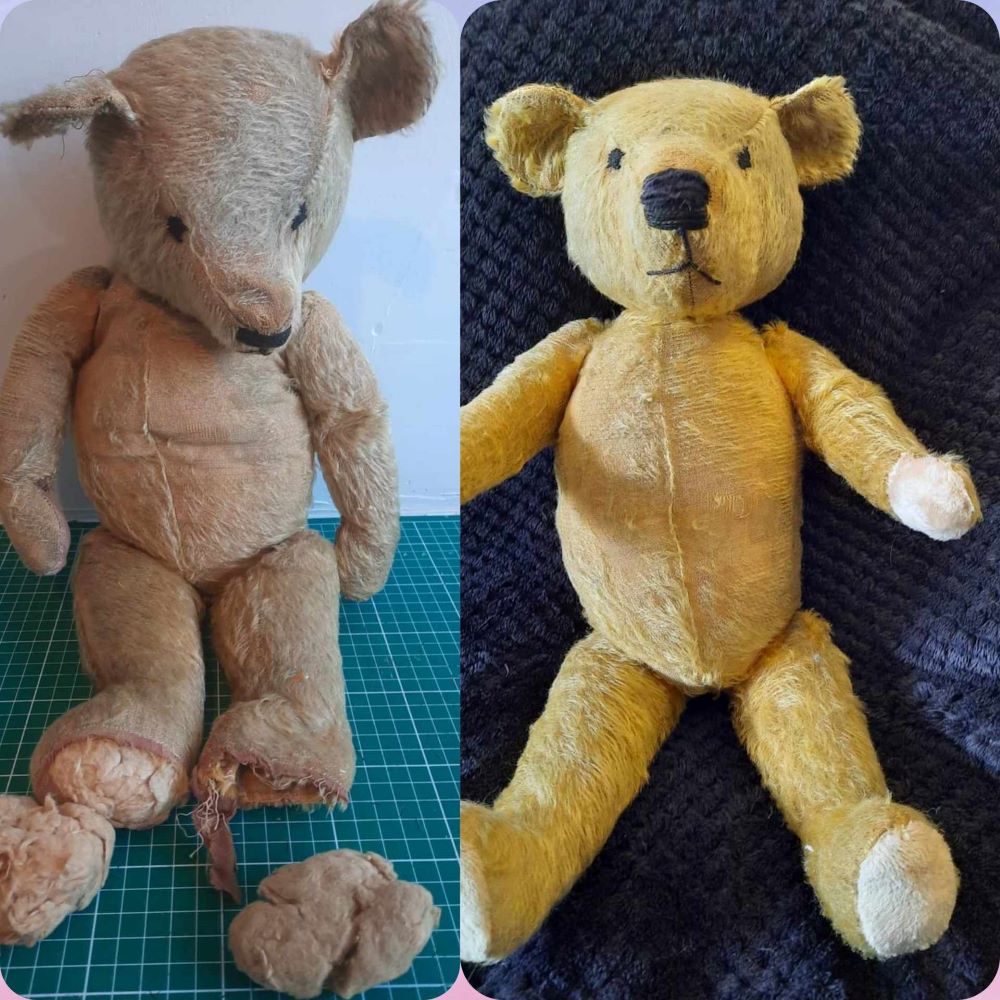
I would like to extend my sincere thanks to Sławomira Kluch for providing the before-and-after photos of the Polish teddy bear, which I used for the feature image. I also appreciate Anita Crowe and Joanne Lesley Behr for their photos and insights into the restoration process.
A special thank you goes to Betty Ashley. Your expert guidance and extensive consultation were crucial in the creation of this article. Your knowledge and support have been truly invaluable, and I am deeply grateful for your assistance.
Additional Resources
- Expert Tips for Cleaning Old Stuffed Animals
Discover how to revive vintage stuffed animals with our tried-and-true cleaning tips and tricks. Read the article - Caring for Collectible Teddy Bears: Cleaning and Preservation
Learn the best practices for maintaining and preserving collectible teddy bears to keep them in pristine condition for years to come. Read the article
Get Free Patterns & Be the First to Know!
Want free teddy bear patterns, exclusive tutorials, and a chance to win craft supplies?
Sign up for our newsletter using the subscribe form in the middle of this article to receive new patterns, insider tips, and the latest news on teddy bear art. You’ll also automatically be entered into our annual giveaway for a chance to win teddy bear crafting materials.
Bonus entry: Save one of our pins on Pinterest to increase your chances of winning!
Let’s create, inspire, and craft beautiful teddy bears together!
Your article on vintage teddy bear repair is wonderfully detailed and incredibly useful!
I appreciate how you’ve categorized essential and additional tools for vintage teddy bear repair. It’s great to see the emphasis on using traditional materials like wood wool for authenticity. Your breakdown of tools like needles, thread, and stuffing helps make the repair process more approachable for those new to the craft.
Your step-by-step guide is comprehensive and practical. The advice on initial assessment and preparation of having a clear understanding of the bear’s condition and gathering all materials beforehand can really streamline the process. I especially like your tips on replacing stuffing and eyes. They’re straightforward yet crucial for maintaining the bear’s original charm.
Thank you so much for your thoughtful comment! I’m thrilled to hear that you found the article detailed and useful. I aimed to make the repair process approachable, especially for those new to working with vintage teddy bears. Using traditional materials like wood wool is key to preserving that authentic charm, so I’m glad that resonated with you.
Your appreciation of the step-by-step guide means a lot. Preparing and assessing the bear beforehand really does make a difference, and I’m happy you found the tips on replacing stuffing and eyes helpful. Keeping a bear’s original character intact is so important, and I’m glad the article provided value in that regard. Thanks again for your kind words and happy bear restoring! 😊
Even though I am an adult in retirement years, I always have loved stuffed animals and I will never outgrow receiving one for a gift. The fact that these vintage bears are still around and have not disintegrated is great. I had a stuffed toy raccoon that I had for 39 years and its “fur” and outsides just disintegrated and I had to discard it. Since you can repair these old pairs and they are still available to be appreciated, gives a nod to the original creators. Thanks for sharing the tips to their repairs and for finding professionals when repairs can’t be DIY.
Thank you so much for sharing your story! It’s truly heartwarming to hear about your love for stuffed animals, and I completely understand how special they can be, no matter our age. It’s amazing how these vintage bears have stood the test of time, and I’m glad that the tips on repairs and finding professionals were helpful to you. The care and craftsmanship that went into creating these beloved bears deserve to be honored, and I’m happy to help keep that legacy alive. If you ever need more advice or just want to share memories, feel free to reach out!