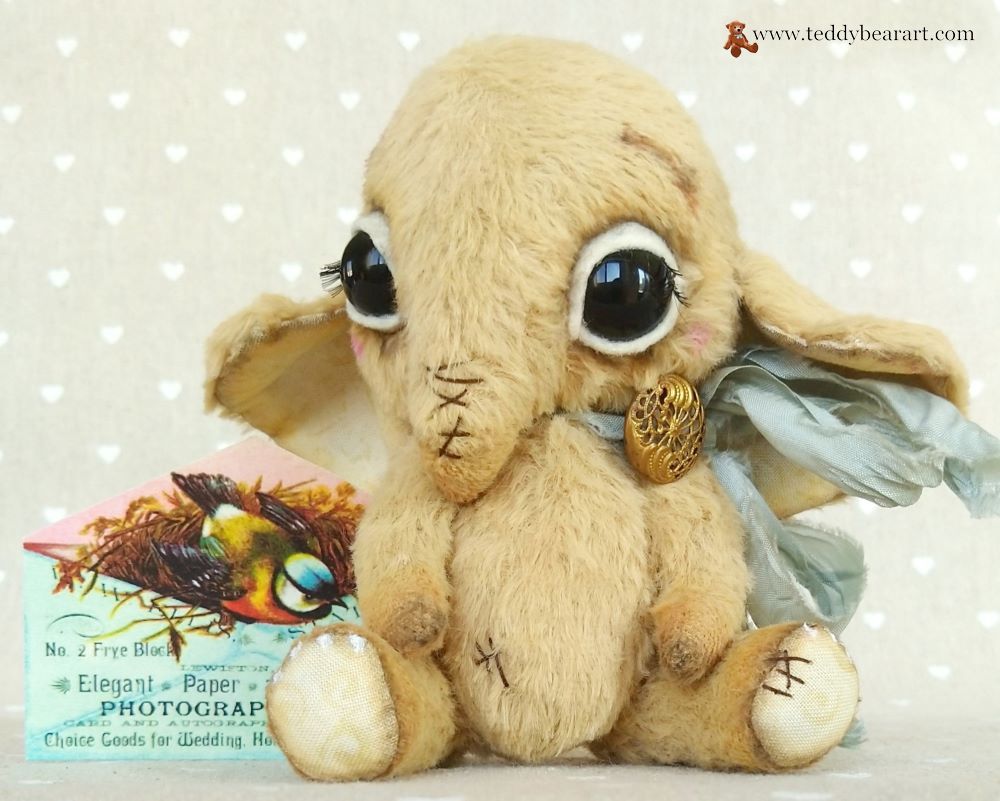
When it comes to creating adorable teddy bears and stuffed animals, there’s one crucial detail that can truly bring them to life: their eyes. In this guide, we’ll cover five ways to attach teddy bear eyes and infuse your creations with that spark of personality. If you’re a seasoned teddy bear artist or just starting out, understanding these techniques will help you give your bears the unique charm they deserve.
Method 1: Attaching Glass Eyes on a Metal Loop
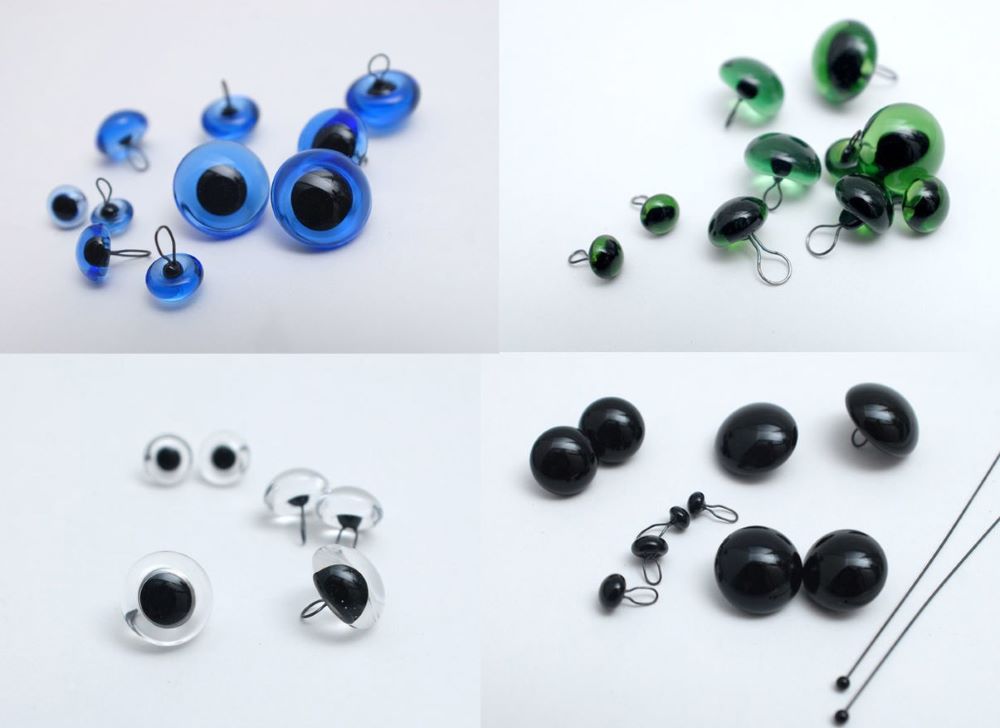
Glass eyes with a metal loop are a timeless choice for teddy bear makers. These eyes can infuse your bear with a classic, lifelike appearance that captures the very essence of what makes teddy bears so endearing.
To use them effectively, you’ll need to pay attention to details and follow these steps for a secure attachment.
Selecting the Right Eyes
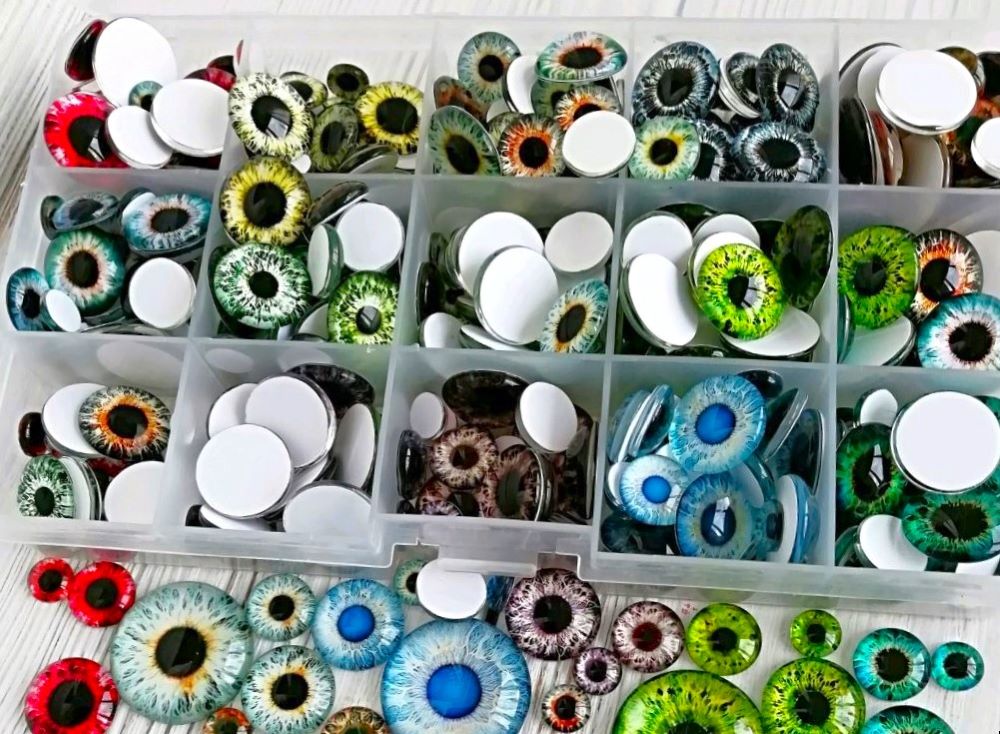
Before you begin, it’s crucial to choose the right size and color of glass eyes to match your bear’s character. The eyes should reflect the personality you want your teddy bear to exude.
A larger size might give your bear a more innocent and soulful look, while smaller eyes can convey a sense of curiosity.
The Attachment Process
- Positioning the Eyes: Position the glass eyes to achieve the desired expression for your teddy bear. A slight tilt or variation in placement can convey different emotions. Make sure both eyes are symmetrical and level.
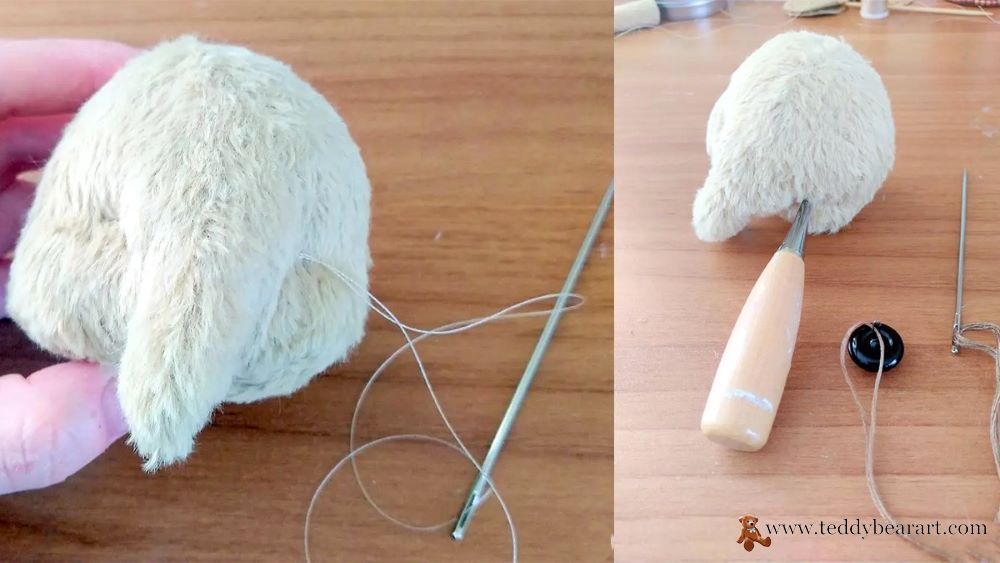
Once the eyes are positioned, pin the ears temporarily and see how to place ears on a teddy bear. Their height and angle can change the expression just as much as the eyes. - Preparing the Bear’s Head: Begin by gently creating a small hole in the bear’s head where you want to place the eyes. You can use an awl for this purpose. Be careful not to make the hole too large or too small.
- Inserting the Metal Loop: Use waxed threads. Take the glass eye with the metal loop and insert the loop through the hole you’ve created. The metal loop serves as a secure anchor for the eye.
- Securing the Eye: Once the metal loop passes through the hole, fasten the threads around the neck or in the area of the bear’s future ears and hide the ends of the thread inside of the head.
Pros and Cons of Method 1
Pros:
- Glass eyes on a metal loop provide a realistic and enduring look that’s synonymous with classic teddy bears.
- Transparent glass eyes with black pupils can be painted with acrylic paints to suit your taste.
- They are available in a wide range of sizes and colors, allowing for versatility in design.
- Easy to clean off glue and paint.
- The metal loop ensures a secure attachment that can withstand the test of time.
Cons:
- Attaching glass eyes with metal loops may require more effort and precision compared to some other methods.
- Beginners might need a bit of practice to master the technique and achieve the desired results.
Tips:
- To position the eyes symmetrically, use pins and a compass circle tool.
- If the loop is too wide, squeeze it a little with pliers before inserting the eye. Do this very carefully so that the glass does not crack.
- Before inserting the eyes, tighten the eye sockets. If you try to pull the thread with the eye, it may crack.
- Never paint your eyes with anything other than paint, such as nail polish. Use professional acrylic paints and varnish for these paints.
Using glass eyes with metal loops is a method that, when mastered, can bring out the timeless charm of your teddy bear. It’s a choice that offers enduring appeal and a realistic gaze, making it a popular option among teddy bear artists.
So, if you’re looking to create a classic and lifelike teddy bear, this method is certainly worth considering.
Method 2: Attaching Safety Eyes
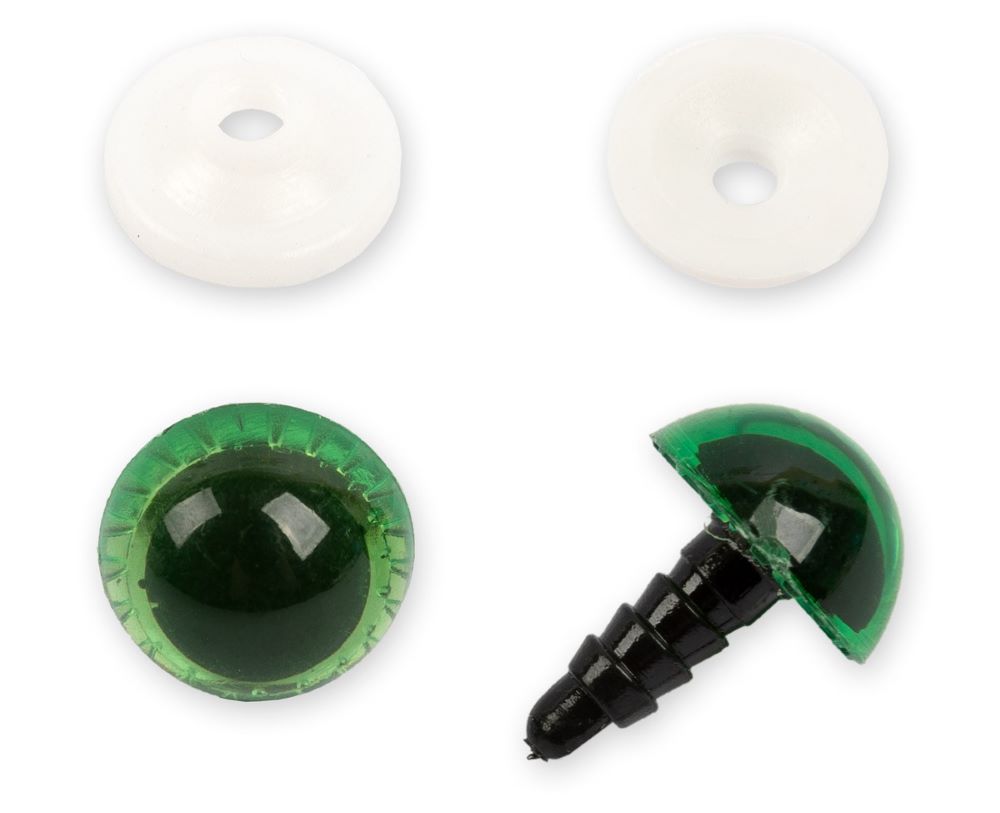
Safety eyes are a fantastic option for teddy bear makers, especially if you’re looking for an easy and secure way to give your bears their signature gaze.
These eyes are designed with a practical purpose in mind: to ensure the safety of young children who might play with your stuffed animals. Here’s how to attach safety eyes securely and effortlessly.
Choosing the Right Safety Eyes
Safety eyes come in various sizes, colors, and designs, making them versatile for different teddy bear styles. To get started, pick the safety eyes that best match the character of your bear. You can choose between a vast array of colors, ensuring your bear’s eyes convey the perfect personality.
The Attachment Process
- Marking Eye Positions: Begin by marking the positions where you want to place the safety eyes on your teddy bear’s face. You can use a water-soluble pen or chalk for this purpose.
- Creating Holes: Using a sharp object, create small holes at the marked positions. The holes should be just large enough for the safety eye’s shaft to fit through.
- Inserting the Eyes: Now, insert the safety eyes through the holes from the outside of the bear’s head. Inside the bear’s head, you’ll find a washer for each eye.
- Securing with Washers: Place the washer on the eye’s shaft from the inside of the head. Ensure it clicks into place, securing the eye firmly. The washer prevents the eye from coming loose, making it a safe choice, particularly if the bear is intended for children.
Pros and Cons of Method 2
Pros:
- Safety eyes are quick and easy to use, making them an ideal choice for beginners and those seeking convenience.
- They come in various designs, including animal-shaped pupils, which can add extra character to your teddy bear.
- The secure attachment method ensures the eyes won’t come off, even with regular play.
Cons:
- Safety eyes may not provide the same depth and realism as glass eyes, which are often preferred for collectors’ bears or more traditional styles.
- If glue gets on the plastic eyes, they will instantly and irrevocably deteriorate.
Tips:
- If the hole in the safety washer is too narrow, it can be widened by heating it over a fire and then piercing it with an awl.
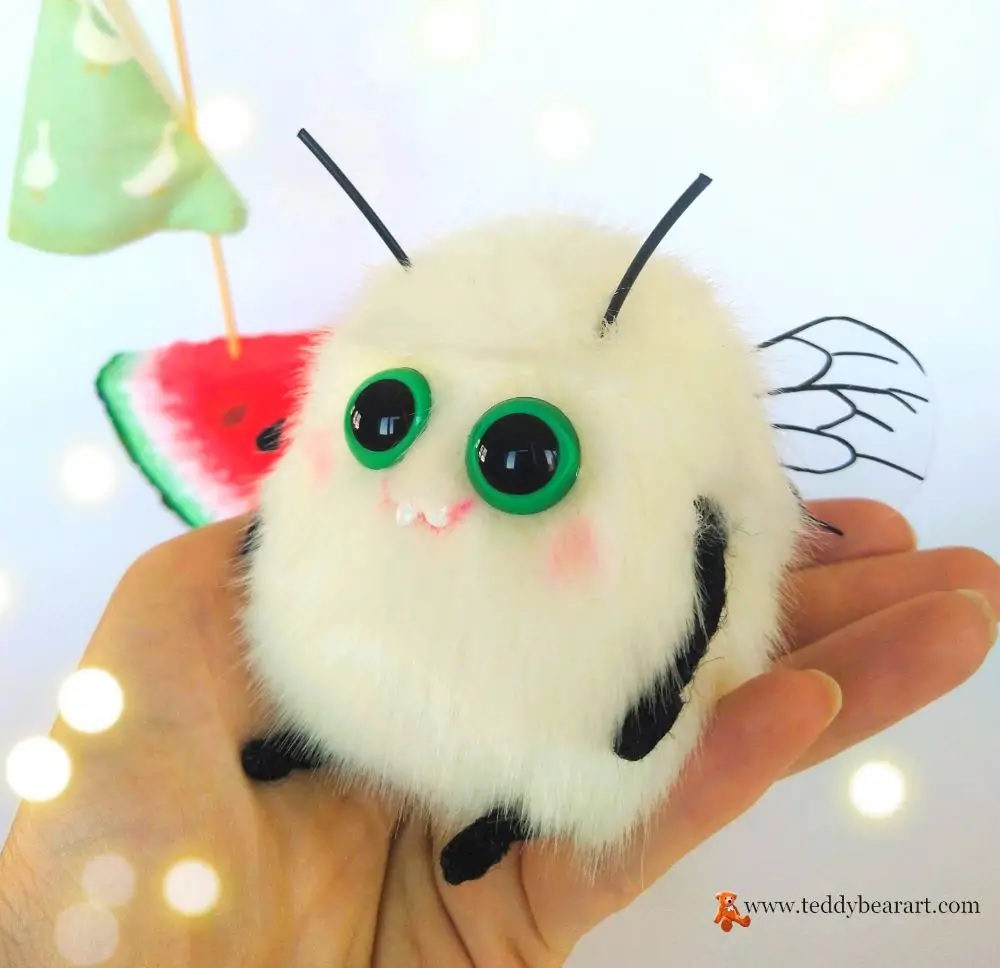
Safety eyes are an excellent choice if you want to create teddy bears that are not only charming but also safe for children to enjoy. They offer both practicality and a wide range of design options, making them a versatile choice for teddy bear artists of all levels.
So, if you’re seeking an easy and secure way to give your bears their signature gaze, safety eyes should be at the top of your list.
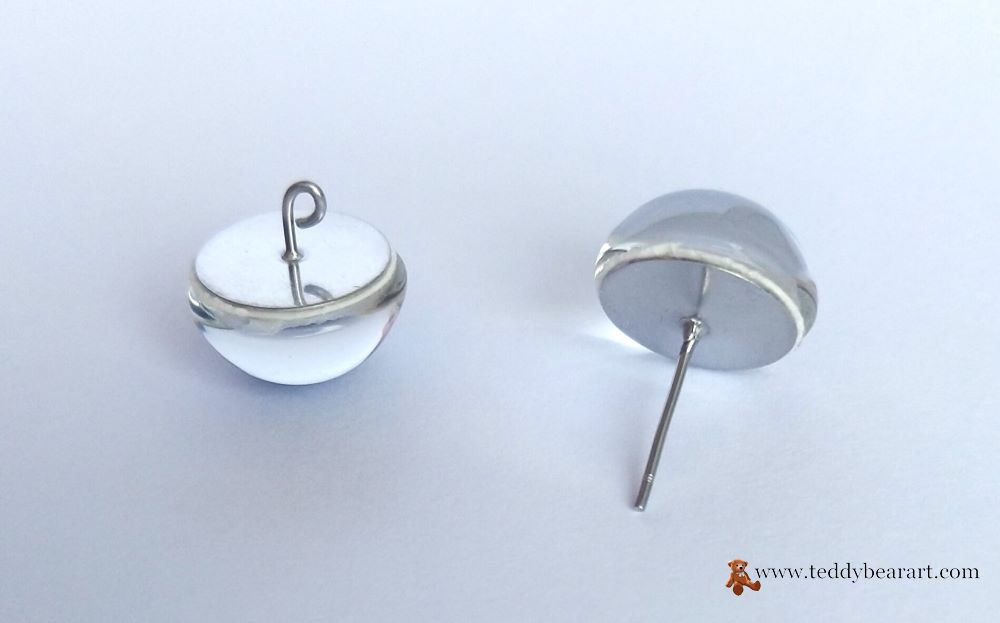
Method 3: Creating a Loop for Glass Eyes Without One

Sometimes, you may come across glass eyes for your teddy bear project that does not have the convenient metal loops attached. In such cases, don’t worry; you can create your own loops using jewelry wire or a flat steel base for earrings.
This method offers more flexibility in eye placement and allows for customization of your teddy bear’s gaze.
Creating Custom Loops
- Selecting the Right Wire: Begin by choosing a suitable jewelry wire. You’ll want a wire that is sturdy and can hold its shape, but also thin enough to easily pass through the bear’s head. Copper or aluminum wire is often a good choice.
- Cutting the Wire: Cut a small piece of the wire, typically around 2 inches in length.
- Forming the Loop: Using round-nose pliers, carefully create a loop. If you choose a base for the earrings do the same – create a loop using pliers.
- Attaching the Loop: Attach your loop to the eye using two-component epoxy resin, for example, Milliput White or strong glue. Let it dry very well.
- Inserting the Glass Eye: Insert the eye in the same way as method 1, using waxed thread. In addition, glue the eyes to be more secure.
Pros and Cons of Method 3
Pros:
- Creating your own loops provides a high level of customization for your teddy bear’s eyes. You can adjust the eye placement to achieve the perfect expression.
- This method offers a flexible approach, allowing you to work with various eye sizes and colors.
Cons:
- Crafting custom loops requires some additional crafting skills, so it may not be the ideal method for beginners.
- You’ll need to be patient and precise to ensure the loops are secure and the eyes are symmetrical.
Tips:
- Use superior-quality epoxy resin.
- Steel base for earrings you can buy in jewelry-making stores.
Crafting your own loops for glass eyes is an excellent choice when you want to infuse your teddy bears with a unique and personalized look, using unique customized glass eyes. It’s a method that allows you to take full control of your bear’s gaze and make it truly your own.
While it may require a bit of practice and attention to detail, the results can be incredibly rewarding, offering endless possibilities for customization. So, if you’re looking to create teddy bears with a one-of-a-kind charm, creating custom loops for glass eyes is a fantastic option to explore.
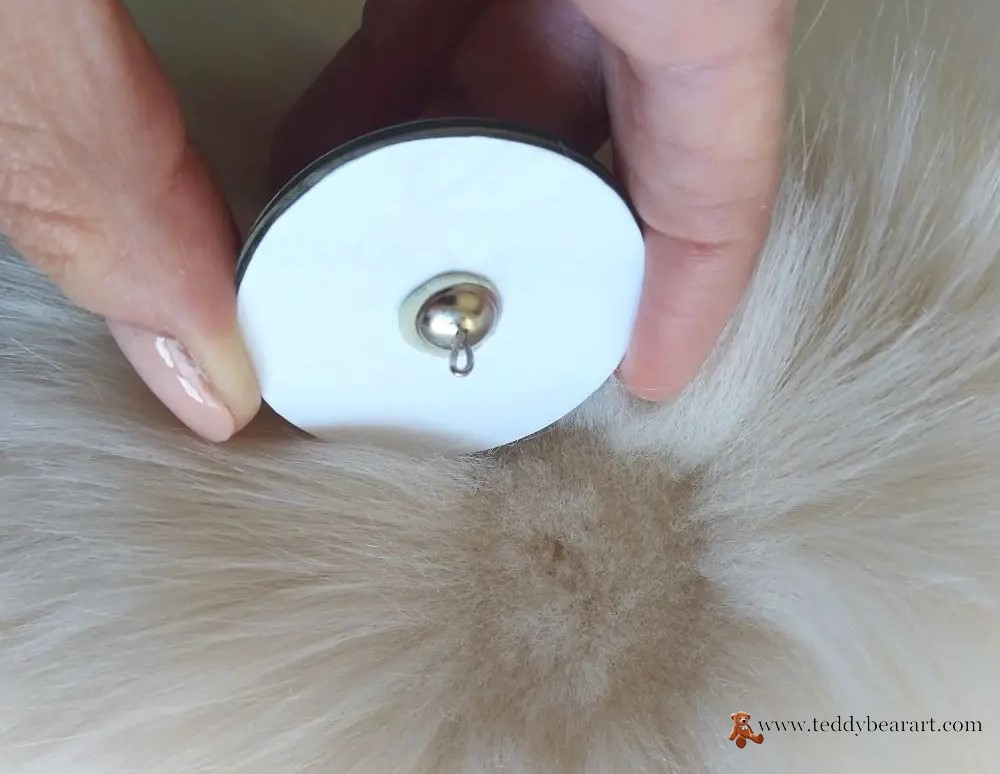
Method 4: Gluing Glass Eyes into Felted Recesses
If your teddy bear has a felted face and you prefer not to use metal loops, gluing glass eyes into felted recesses can achieve a charming, seamless look. This method is perfect for those who want to maintain a natural, unobtrusive appearance. Here’s how to securely attach glass eyes using this technique.
This method is also suitable for bears made from mohair or faux fur.
Preparing the Felted Recesses
- Create Small Recesses: For felted bears – start by creating small indentations in the area of the felt where you want to place the glass eyes. You can use a felting needle to gently push the fibers to the side to make room for the eyes. For plush bears, tighten the eye sockets using waxed threads, then create felted eye sockets and roll them to the head.
- Applying Adhesive: Next, apply a small amount of fabric glue or adhesive into each recess. Ensure you use an adhesive that dries clear and is safe for fabric.
- Inserting the Eyes: Carefully insert the glass eyes into the prepared recesses, making sure they sit at the desired depth and angle. The adhesive will help secure them in place.
- Hold in Position: Hold the eyes in place for a short while until the adhesive begins to set. Be patient and ensure they are stable before proceeding.
Pros and Cons of Method 4
Pros:
- This method provides a smooth and seamless look, making the eyes appear as if they’re a natural part of the bear’s face.
- It’s a great choice if you want to maintain a more traditional or classic teddy bear appearance.
- Gluing eyes into felted recesses offers a secure and stable attachment method.
Cons:
- You need to be precise with the gluing process to ensure a neat and professional finish.
- If not done carefully, the eyes may not sit symmetrically or at the desired angle.
Tips:
- For better adhesion of the felted backing to your head, stuff your head with sheep wool.
- To add some life to the look, add felted eyelids to the bear.
Gluing glass eyes into felted recesses is an ideal technique for teddy bear artists who aim to maintain a classic and seamless look in their creations. It’s especially suitable for bears with felted faces, giving them a timeless charm.
While it may require a bit more attention to detail during the gluing process, the result is well worth the effort, as your teddy bear’s eyes will appear as though they were always a part of its endearing character.
If you’re looking to create teddy bears with a more traditional and understated appearance, this method should definitely be on your list of considerations.
Method 5: Crafting Eyes from Beads for Realism
Beaded eyes are more of an alternative to black glass eyes for small bears.
For teddy bears with intricate and highly realistic eyes, crafting them from beads is a delightful approach. This method allows you to mold eyelids and create a lifelike gaze, resulting in teddy bears that exude an extraordinary level of realism and personality.
Here’s how to craft eyes from beads and give your bears that extra touch of authenticity.
Selecting the Right Beads
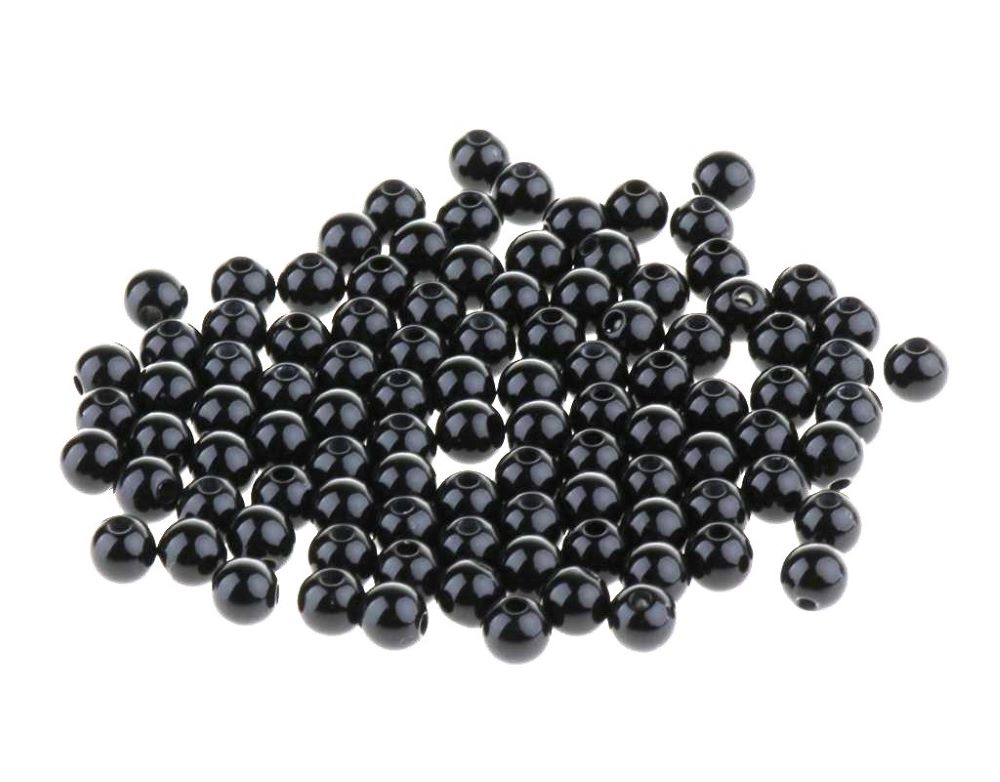
The key to crafting realistic eyes from beads is selecting the right beads. Look for beads that have the size, color, and texture that best match the expression and character you want to convey in your teddy bear. Small round black shiny beads look good.
The Crafting Process
- Attaching the Eyes: Sew on the beads, secure the threads, and hide the ends of the threads inside the bear’s head.
- Securing the Eyes onto the Bear: You can add a little bit of glue and create the eyelids.
Pros and Cons of Method 5
Pros:
- Beaded eyes offer an exceptionally realistic appearance, making them perfect for collectors or artists who seek to create one-of-a-kind, highly lifelike teddy bears.
- The level of customization is virtually limitless, as you can choose beads that precisely match the character and expression you desire for your bear.
- The creativity and artistry involved in crafting beaded eyes can be immensely satisfying.
Cons:
- Crafting beaded eyes requires more time and attention to detail compared to some other methods.
- Beginners may need to practice and refine their beadwork skills to achieve the desired level of realism.
Tips:
- Use the best quality beads.
- Black beads can be used as a pupil, and the white can be molded from white clay.
Crafting eyes from beads is a method that allows you to take your teddy bear-making to the next level in terms of realism and individuality. It’s a technique that demands patience and precision but rewards you with teddy bears that possess a unique charm and lifelike appearance.
If you’re aiming to create teddy bears that stand out with their extraordinary eyes and authenticity, this method offers endless creative possibilities.
Comparing the Results
Now that we’ve explored these five methods, it’s time to compare their results. Glass eyes on metal loops offer a classic, enduring look, while safety eyes provide ease and security.
Creating loops for glass eyes allows for customization, and gluing eyes into felted recesses gives a seamless appearance. Crafting eyes from beads offers exceptional realism but demands more time and precision.
In conclusion, the method you choose for attaching teddy bear eyes depends on your project’s style and your own preferences. Each method has its pros and cons, and experimenting with different techniques can help you find the perfect fit for your unique teddy bear creations.
Before you embark on your next teddy bear project, be sure to check out our comprehensive teddy bear-making guide for additional tips and inspiration.
We hope this guide has illuminated the world of teddy bear eyes and their role in bringing these cuddly companions to life. Happy bear crafting!
Read Also
1. How To Make Teddy Bear Eyelids: Advanced Techniques Included: When crafting adorable teddy bears and stuffed animals, there’s a tiny detail that can truly elevate your creations—their eyes. These little orbs are the gateways to a teddy bear’s soul, and becoming a pro at crafting realistic teddy bear eyelids can bring your projects to a whole new level.
2. 25 Teddy Bear Making Tips: Discover essential insights and tricks that will elevate your teddy bear crafting skills. From choosing the right materials to perfecting stitching techniques, these 25 tips are your key to creating adorable and huggable teddies.
3. How to make your own teddy bear: Dive into the world of teddy bear creation with this comprehensive guide. Learn step-by-step how to design your own teddy bear patterns, making each one a unique, cherished creation.
Get Free Patterns & Be the First to Know!
Want free teddy bear patterns, exclusive tutorials, and a chance to win craft supplies?
Sign up for our newsletter using the subscribe form in the middle of this article to receive new patterns, insider tips, and the latest news on teddy bear art. You’ll also automatically be entered into our annual giveaway for a chance to win teddy bear crafting materials.
Bonus entry: Save one of our pins on Pinterest to increase your chances of winning!
Let’s create, inspire, and craft beautiful teddy bears together!
Hey thank you for this post!
This post was really informative especially for those who are newbies like me. It contains all and more information needed. And answers any questions I have in my head. I really like the step by step instructions as well as the tips and pros and cons.
Thank you for this post and have a great day!
You’re very welcome! I’m delighted to hear that you found the post informative and helpful, especially as a newbie in the world of teddy bear making. If you ever have more questions or need further guidance, feel free to reach out. Wishing you a fantastic day filled with creative teddy bear adventures! 🐻✨
Hey, I would say attaching teddy bear eyes is an essential step in making a stuffed animal come to life.
These five methods provide a helpful guide for crafters, and I personally believe that the choice of eye attachment method should consider both aesthetics and safety for the finished teddy bear.
It’s a fun and creative aspect of teddy bear making that can add a lot of personality to your creation.
You’re absolutely right! Attaching teddy bear eyes is indeed a crucial step in giving your stuffed animal its unique personality. I couldn’t agree more about considering both aesthetics and safety when choosing the eye attachment method. It’s not just a technical step; it’s a chance to infuse character into your creation. Thanks for sharing your thoughts! 😊🐻
hey Hanna
thx for the article! it was really informative. i didn’t know there were so many ways to attach teddy bear eyes. i think i’ll try the safety eyes method for my next project, sounds like a good choice for beginners like me. i’ve only made a couple of teddy bears before, so having a simple and secure method is a big help. 😊
cheers 🙂
Hey there!
I’m glad you found the article informative and that it was helpful for your teddy bear making journey. Safety eyes are indeed a great choice, especially for beginners. They provide a secure and professional look to your teddy bears. If you have any more questions or need tips on your next project, feel free to ask. Cheers and happy teddy bear crafting! 😊🐻