Originally published on March 18, 2023, updated on November 10, 2025, with new tips and techniques.
Teddy bear making tips have been passed down through generations of bear artists. The art of creating teddy bears has a long and fascinating history where basic techniques stay the same, yet every maker adds something unique.
At first, it may seem simple, but true skill comes with knowing the right tricks and secrets. In this post, I’m sharing the most helpful ones I’ve learned, my 25 Teddy Bear Making Tips.
For The First Impression
One of the most important teddy bear-making tips is to start with the right materials. To make your bear look neat and harmonious, choose high-quality fur fabric with a firm, non-stretchy base, as this helps the bear maintain its shape.
The length of the pile should match the size of your future teddy: short or medium pile plush looks best on small bears, while larger ones allow you to experiment with longer or more textured fur.
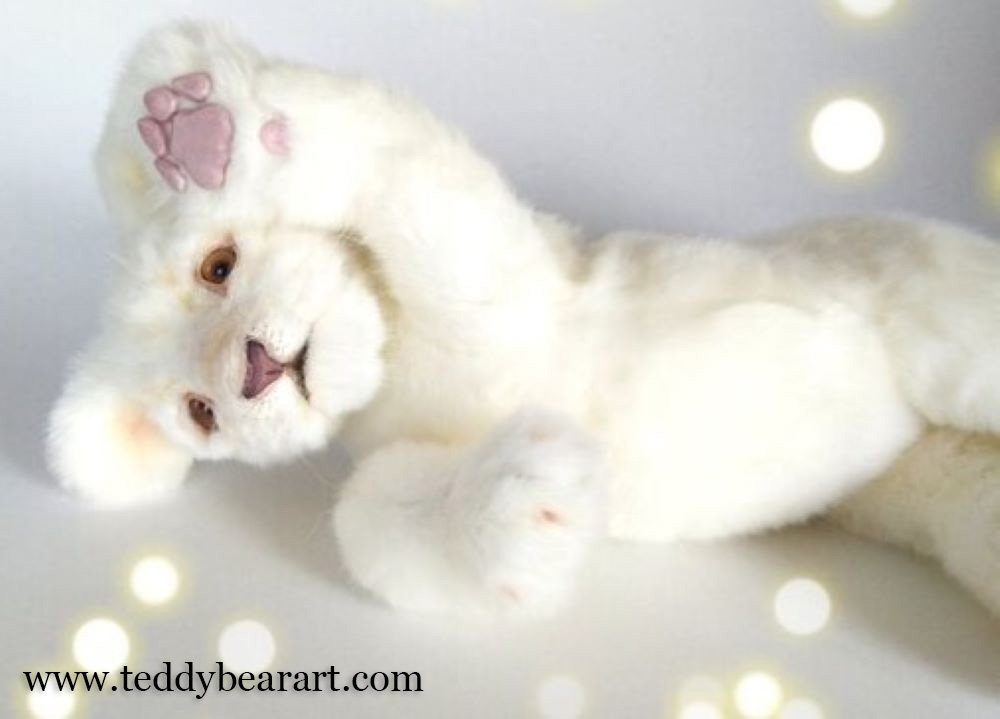
Pay close attention to color, as it sets the mood of your bear. Soft natural shades like beige, milk, light brown, or pale gray look the most charming and timeless. Black fur can look elegant in person, but it is tricky to photograph; details often disappear in pictures.
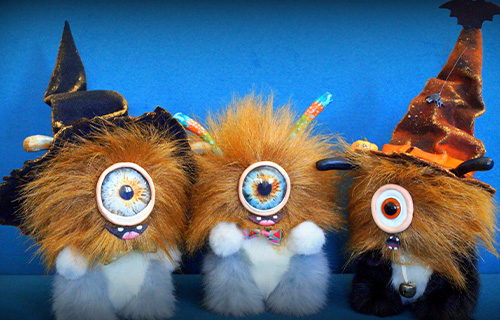
Bright or multicolored furs (pink, green, blue, etc.) are perfect for fantasy creatures like cute monsters, dragons, or whimsical teddies.
Face, Eyes, Paws
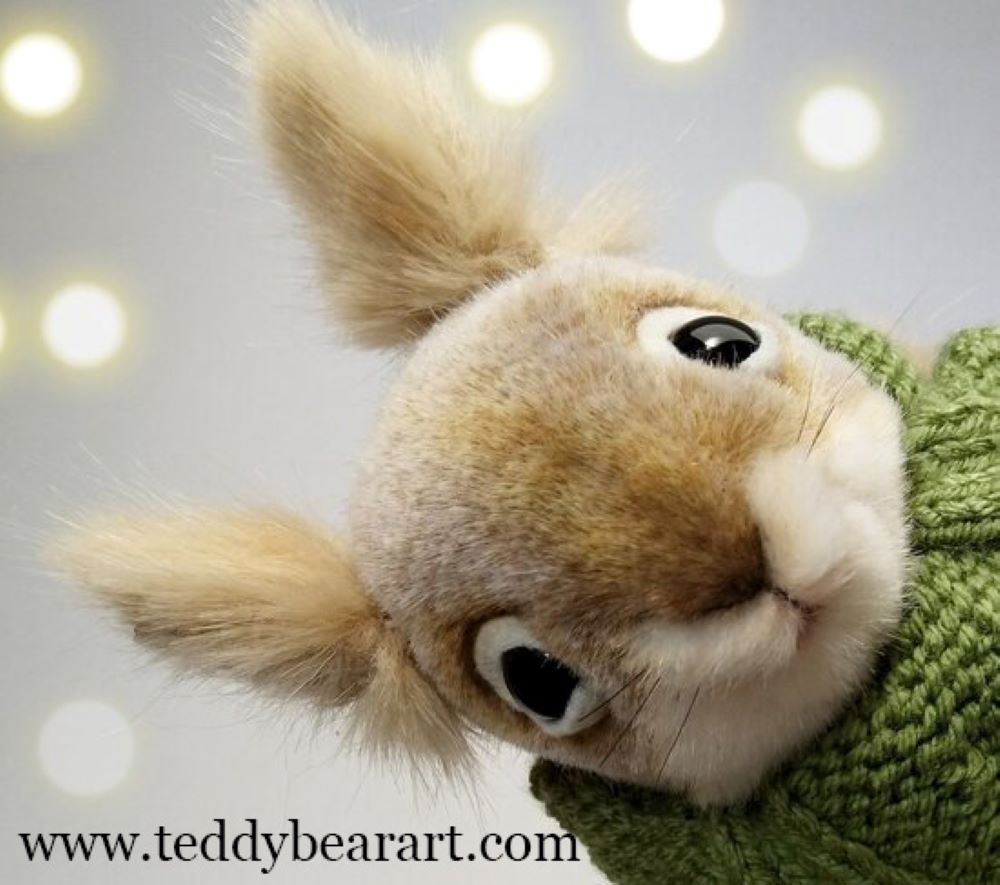
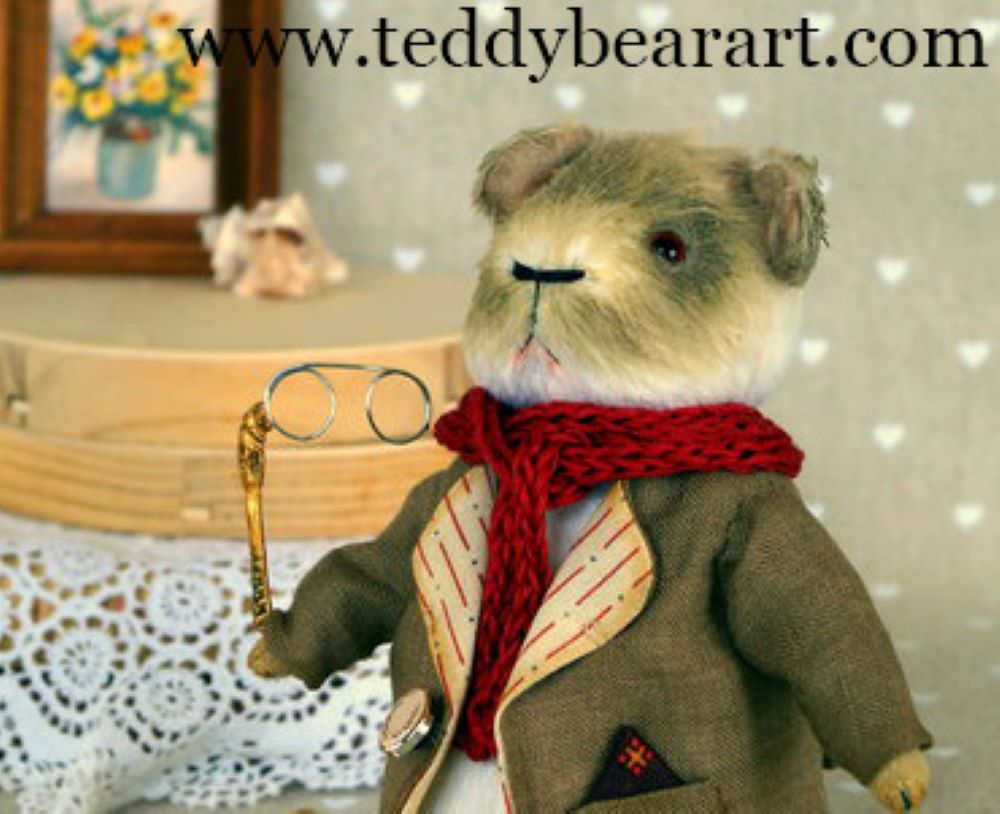
Another important teddy bear making tip is to pay special attention to your bear’s face design, which gives the toy its soul and personality. For a classic teddy, try to make the expression as cute and kind as possible; for a realistic animal, focus on lifelike proportions.
Always check that the eyes and ears are symmetrical. Before sewing, use pins to experiment with placement. This small step helps you find the perfect look.
To shape the muzzle or trim areas with long fur, a good fur haircut is often needed. After trying many tools, I’ve found that dog grooming scissors from a pet store work best; they’re sharp, precise, and easy to control.
Never pull glass eyes too tightly into the sockets to create indentations. They can crack and ruin your bear. Instead, always tighten the muzzle and eye sockets first with waxed thread before attaching the eyes.
Whenever possible, use glass eyes instead of plastic. Glass gives a warm, realistic sparkle, while plastic is more fragile and sensitive to glue. If you want colored eyes, buy transparent glass eyes with black pupils; they can be painted with acrylic paints (never nail polish!).
When the paint dries, cover it with a clear acrylic coating to protect it for years. Follow this detailed guide on how to attach teddy bear eyes to improve your skills.
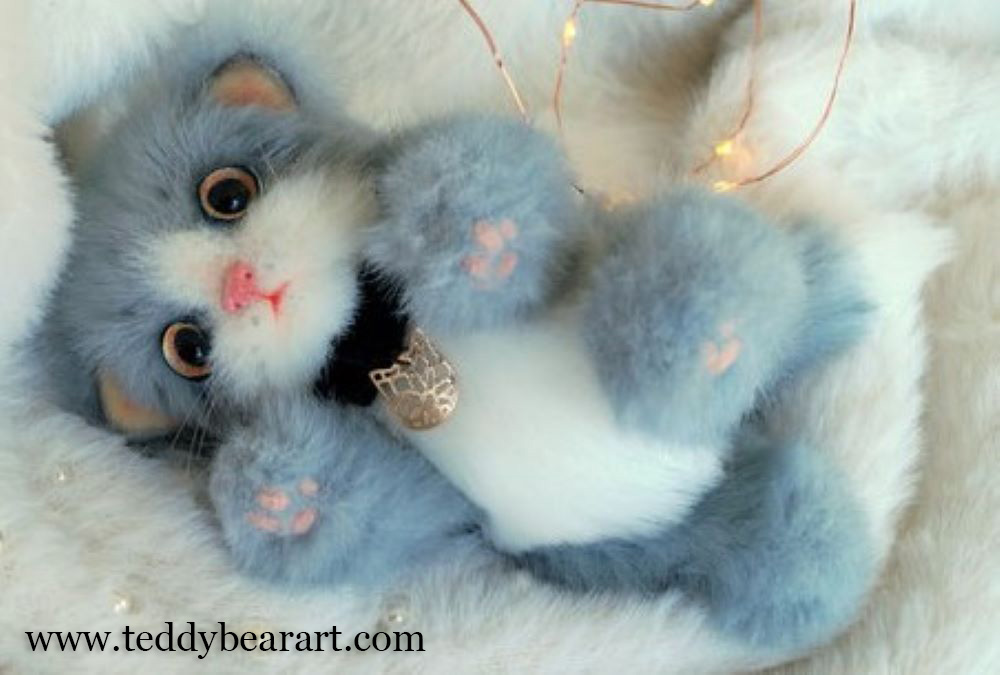
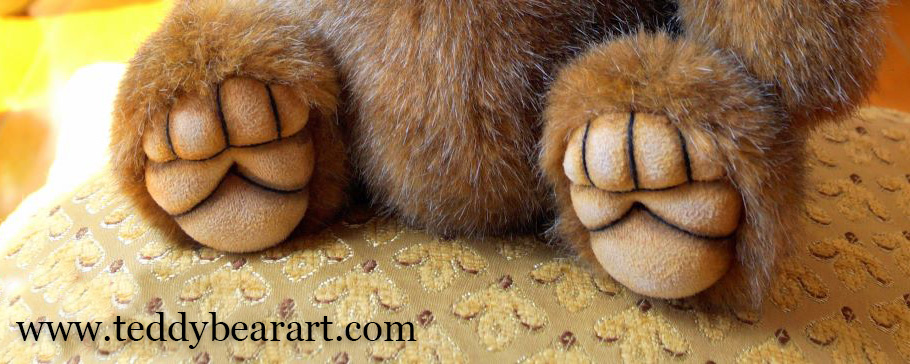
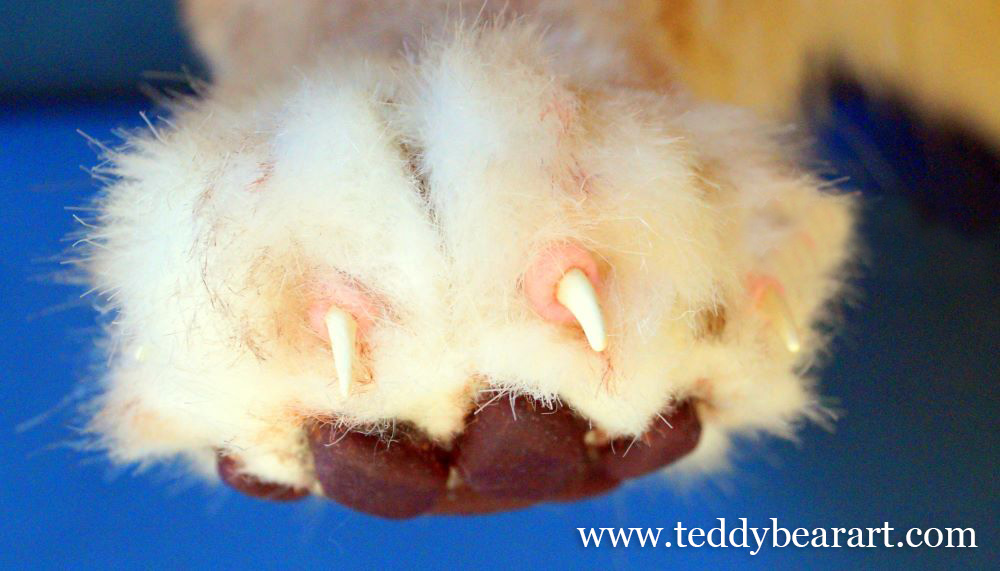
Now, let’s talk about paws. Teddy bear paws can be made from fabric, leather, faux suede, clay, wool (needle felting), or even silicone. Each method gives a different texture and character. Fabric paws are soft and traditional, while silicone or clay paws are great for realistic toys.
Stuffing
When it comes to teddy bear making tips, proper stuffing makes all the difference. The way you fill your bear determines its shape, balance, and even personality.
Traditional artists often use wood wool (also known as excelsior) or wood shavings, which give the bear a firm, old-fashioned feel. You can also use synthetic filling balls (pillow stuffing) or natural sheep’s wool for a softer, more flexible result.
The main rule, fill gently but firmly, especially around the head, nose, neck, and paw tips. These areas should be smooth and without empty spots. If you’re using wool, tear it into small pieces and add it gradually to avoid lumps.
To add weight and realism, you can place glass or metal pellets inside small fabric bags and sew them into the bear’s body or limbs.
After stuffing, always pull out the fur stuck in the seams. Use an awl, a needle, or even a toothbrush or a small metal brush (the kind sold in kitchen or craft stores). This little step gives the seams a neat, professional finish.
For a more detailed recommendation, take a look at this comprehensive guide, Top 10 Options of the Teddy Bear Stuffing Material.
General Tips
Here are some extra teddy bear-making tips that will make your work easier and more enjoyable.
If you can’t print your teddy bear pattern, just attach a sheet of baking paper to your computer screen and gently trace the lines; it works surprisingly well!

From a single pattern, you can create several unique bears or even different animals by changing proportions: lengthen or shorten the ears, tail, or nose, and adjust the shape of the belly or limbs. Small changes can completely transform your design.
If the fur fabric crumbles at the edges, lightly apply fabric glue along the seams and let it dry. It will stop shedding and make sewing easier. The best glue is white when applied and turns transparent after drying.
When cutting your pieces, trim the fur near the seam line. This keeps the seams neat and prevents fur from sticking out. Use tools like a wooden sushi stick, tweezers, or pliers to turn small pieces right side out carefully.
Before attaching the limbs, cut away a bit of fur around the cotter pin area. This helps the joint fit tighter and prevents visible gaps. When fastening the limbs or head, tighten the cotter pins firmly so they won’t loosen over time. Your bear will keep its pose beautifully.
If you paint your bear and make a mistake with oil paints, don’t worry, you can gently wipe away fresh paint using baby wipes. Painting and shading can be done with oil paints, pastels, fabric paints, or even an airbrush. Airbrushing gives a professional finish, but it takes practice, so don’t rush it.
If you’d like your teddy bear to have knitted clothes but can’t knit, sew them from ready-made knitted fabric; it looks just as cute!
To make your bear hold an object, such as a lollipop or lorgnette, insert a sewing needle into the stick and carefully place it inside the bear’s paw. For a stronger hold, you can also use small magnets, one inside the paw and another inside the accessory.
And one more very important thing: avoid plagiarism. Even a single copied idea can hurt your reputation as an artist. In the teddy bear community, everyone knows each other, and originality is truly valued.
If you plan to sell your teddy bears online, great photos are essential. Learn basic product photography and simple photo editing. Good lighting and composition will make your creations shine.
And finally, don’t give up if something goes wrong during the process. A “mistake” might turn into a new idea! Try changing the design, adding details, or rethinking the look. Creativity often comes from unexpected moments.
Develop your artistic taste by studying other artists’ works, examining illustrations, and gathering inspiration. Save small, “useless” materials; you never know what might spark your next idea!
Even if you’re not currently sewing a teddy bear, you can use your time to sculpt noses, practice embroidery, knit small clothes, or make claws. Keep learning new techniques, every small skill will make your future bears even better.
Before You Go
I hope these teddy bear-making tips inspire you to create your own unique bears filled with love and personality. Each stitch, each tiny detail carries a piece of your heart, and that’s what makes handmade bears so special.
Don’t be afraid to experiment, try new techniques, or even make mistakes; that’s how true creativity grows. Read our guide on How to Fix Common Teddy Bear Making Mistakes to avoid frustration and save hours of work.
I’m sure this list can always be expanded with new ideas and experiences.
If you have your own favorite teddy bear-making tips or want to share your results, please leave a comment below. I’d love to hear from you and help if you ever need advice.
Get Free Patterns & Be the First to Know!
Want free teddy bear patterns, exclusive tutorials, and a chance to win craft supplies?
Sign up for our newsletter using the subscribe form in the middle of this article to receive new patterns, insider tips, and the latest news on teddy bear art. You’ll also automatically be entered into our annual giveaway for a chance to win teddy bear crafting materials.
Bonus entry: Save one of our pins on Pinterest to increase your chances of winning!
Let’s create, inspire, and craft beautiful teddy bears together!
Hi Lovely Hanna
We use leather glue I bought it through Bear Essence in Victoria Australia. Just thought I would share this is what I use. So I mark the pattern out on the fabric backing with a pen that fades with washing and then I use the glue from the bottle on or around the line of the pattern, wait for it to dry (it is a little bit like rubber when it dries) and then I cut them out. It stops the small pieces from fraying at the edges. I will send you a photo when I find it.
Hi dear Liana,
Thank you for sharing this! That’s a great idea! I do not know about this glue. It’s seems to be nice way, because it’s like a rubber. Waiting to see the photo!
What an incredibly generous and helpful collection of tips! As someone who’s made a few bears but still considers themselves a beginner, this list is a goldmine. I especially appreciate the tip about trimming seams for a smoother finish, such a simple step that makes a huge difference. The advice on joining and choosing the right tools is also going to save me so much frustration. Thank you for compiling and sharing such valuable wisdom from your experience!
Thank you so much for your kind words! I’m really glad the tips were helpful, especially for beginner makers. Trimming seams really does work wonders, and the right tools and jointing techniques save a lot of time and effort. Wishing you the best of luck with your bears, I’m sure they’ll turn out amazing!
Hanna, this made more sense than most bear tutorials I’ve seen. Loved the practical bits on glass eyes, pre-tightening the muzzle with waxed thread, and using dog grooming scissors for precise trims. Your note on originality was spot on.
Quick questions: any photo tips for black fur so details don’t vanish. For beginners, do you prefer cotter pins or locknuts for cleaner jointing over time.
Thank you so much! I’m really glad you found the tips helpful. For photographing black fur, good lighting is key, I usually use soft daylight from the side or a ring light with a white reflector to bring out the texture without harsh shadows. You can also lightly brush the fur before shooting to make the surface catch more light.
As for joints, for beginners I usually recommend cotter pins, they’re easier to work with and give that classic bear feel. But if someone plans to handle their bears a lot, locknuts can be a better choice in the long run since they stay tight and neat over time.