
Updated February 2026
This jointed teddy bunny tutorial will guide you step by step through the sewing process. If you already downloaded the pattern, you’ll learn how to sew your teddy-style rabbit, install cotter pin joints, and sculpt the bunny’s face with confidence.
This page is a detailed sewing tutorial that accompanies the Free Jointed Teddy Bunny Pattern. If you are looking for the printable pattern file, download it here.
The List of Materials
1. 1/16 piece (25×35 cm) of German Steiff Schulte viscose with a fur length of 6 mm.
2. A small piece of white viscose with a fur length of 6 mm for the ears.
3. Strong threads, the same color as your fabric, and a needle for hand sewing.
4. Scissors for cutting fabrics.
5. A pair of glass eyes on a metal loop – 12 mm in diameter.
6. Waxed thread.
8. Synthetic filler.
9. Metal or glass pellets for the weight (small diameter).
10. Oil paints and brushes.
7. An awl.
11. Pins.
12. Discs 16 mm in diameter – 6 pieces (for the head and for the hands).
13. Discs 20 mm in diameter – 4 pieces (for the legs).
14. Washers 15 mm diameter – 10 pieces.
15. T-shaped cotter pins 2,0×20 – 5 pieces.
16. Pliers.
17. A small piece of felt for the eyelids.
18. A glue.
19. A small piece of white fluffy faux fur for the tail.
20. Black thick thread for the embroidery of the bunny’s face and her limbs.
21. Tweezers.
22. A long needle (10 cm – 15 cm) for setting the eyes.
Step-By-Step Pattern Tutorial
Follow the scale and print the pattern.
Arrange the pattern pieces on the fabric so that the direction of the fur matches the arrows.
Leave 5-7 mm for seam allowances.
Pluck a little lint at the ends of the arms, legs, 2 inside parts of the ears, and nose with tweezers.
Let’s start!
Step 1: Sew up all the tucks (marked in green).
Step 2: Sew the two sides of the head (1 + 1 mirror) along the marks from A to B.
Step 3: Sew up the head (face) with the head (nape) with seam 1. Then make the same with the mirror parts.
Step 4: Sew together the resulting head parts (1+1 mirror) with seam 2. Leave the opening for the eversion unsewn (highlighted with a red dotted line).
Step 5: Sew the outer and inner parts of the arms (1+1 mirror). Leave the opening for the eversion unsewn (highlighted with a red dotted line).
Step 6: Sew the outer and inner parts of the legs (1 + 1 mirror). Leave the opening for the eversion unsewn (highlighted with a red dotted line).
Step 7: Sew the ears (1 outside part + 1 p inside part).
Turn out the finished parts of the bunny using a wooden stick with a blunt end. Be careful not to pierce the fabric.
Stuff its head tightly with synthetic filler.
Insert the disc with a cotter pin into the hole and tighten with waxed thread and needle.
Insert discs with cotter pins inside the limb. Fill the limbs with the synthetic filler and sew up the holes.
Making The Head of The Bunny
Take out the pile from the seams using an awl or a needle. Brush the head.
With the help of a long needle and waxed thread, slightly tighten the places for the eyes (eye sockets). This is called sculpting and is necessary for the bunny’s face to look anatomically correct.
How to properly tighten? Fasten the thread to the point where the eye will be located. Then insert a long needle and pull it out from the bottom of the head, as close to the cotter pin as possible. Pull well to make a small indentation in the eye socket area, and fasten the thread. Do the same with the second eye socket.
Insert the eyes. Cut out 4 small pieces of felt for the eyelids. Glue 2 of them on the bottom and another 2 of them on the top of each eye. Note that we always start with fixing the bottom parts of the eyelids.
Embroider the nose and the mouth of the bunny.
Using oil paints, add some shadows around the eyes and inside the ears. Put some pink color on the top of the nose and some white one where the mustache should be.
Add some black color to the corners of the eyes.
Sew up the ears.

Making The Body
Put joints in the limbs and stuff them. Sew up the holes. Take out the pile from the seams.
Brush the hands and the legs of the bunny. Put some shadows and embroider the fingers.
Wait for them to dry and connect all the body parts, starting from the head, then set up the legs, and then the hands.
Put some metal or glass pellets inside the body and stuff it tight. Sew up the hole, take out the pile from the seams, and brush it.
Cut out a small round piece from white fluffy faux fur fabric and make a bunny tail.
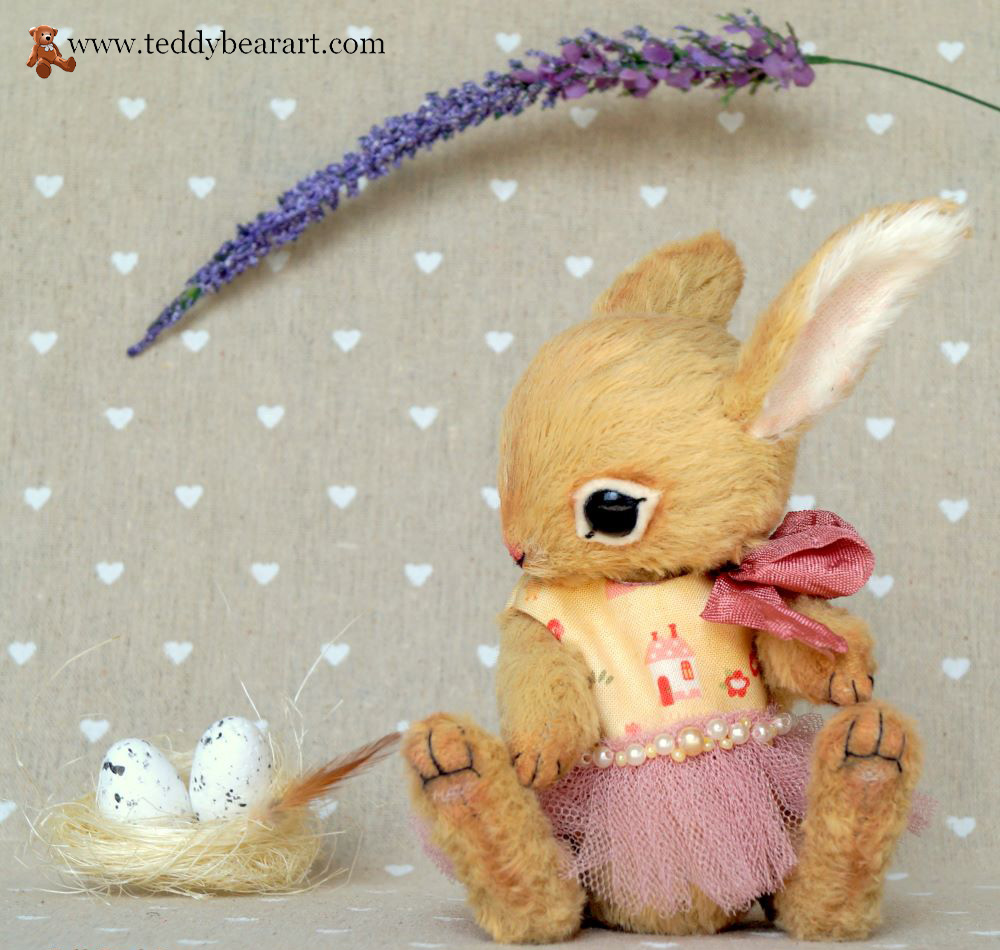
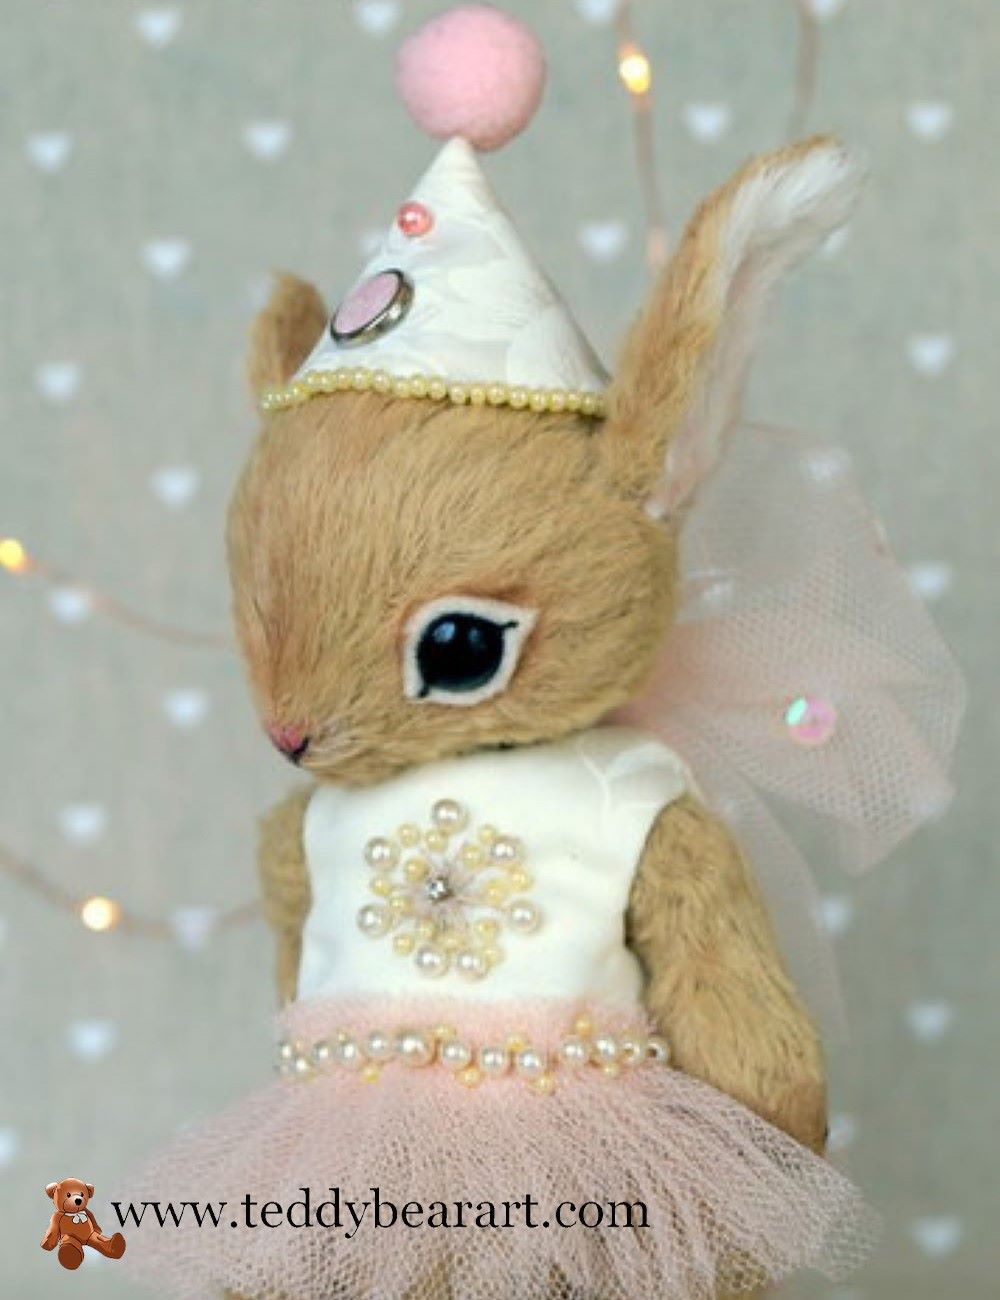
As for the final touches, you can put a ribbon on the bunny’s neck or make a dress or a jacket. How to make an outfit for this bunny, I will tell in my next posts. The free patterns will, as always, be included.
Frequently Asked Questions
Is this tutorial suitable for beginners?
This tutorial is best for intermediate makers who are familiar with basic sewing techniques and teddy bear construction.
What fabric works best for a jointed bunny?
Viscose, mohair, or plush fabrics are ideal for traditional teddy-style animals.
Before You Go
Congratulations! Your cute teddy bunny is ready.
In this tutorial, you have learned which materials you need to make a jointed bunny, how to work with the pattern, and how to actually create a teddy bunny.
One of the most important parts of making teddy bears and their friends is designing their faces. I hope the information I gave about it is detailed enough.
Feel free to sell bunnies made from this pattern. I will be pleased if you mention my name.
If you ever need a hand or have any questions, feel free to leave them in the comments below, and I will be more than happy to help you out.
Get Free Patterns & Be the First to Know!
Want free teddy bear patterns, exclusive tutorials, and a chance to win craft supplies?
Sign up for our newsletter using the subscribe form in the middle of this article to receive new patterns, insider tips, and the latest news on teddy bear art. You’ll also automatically be entered into our annual giveaway for a chance to win teddy bear crafting materials.
Bonus entry: Save one of our pins on Pinterest to increase your chances of winning!
Let’s create, inspire, and craft beautiful teddy bears together!
Thank you for sharing this amazing tutorial on creating a jointed teddy bunny! As someone who loves sewing and crafting, I am always on the lookout for new projects to work on. The step-by-step tips and bunny face designing guide included in the tutorial are especially helpful, and I can’t wait to get started on making my own sweet bunny. Thanks again for the great resource!
Thank you very much for your interest! Yes, you are right, the cute face of a teddy bear is the key to success.
On this site you can find many free teddy bear patterns and tutorials.
I will be happy to help with any questions at any day and time.
Welcome to the world of teddy bears!