Surely you have seen plush stuffed teddy bears that bring a smile to your face, and you admired the talent of the artists who created them. And deep down, you would also like to try to create such an adorable bear, but you are afraid even to try because you don’t know how to sew or don’t know where to start. Explore how to build their own teddy bear kit and how to make a cute teddy bear.
How To Sew Two Pieces of Fabric – Backstitch
Before you start stitching, it’s important to secure your thread with a simple knot. Watch the short video below to see how to do it easily—this will keep your stitches neat and prevent the thread from slipping.
You need thread, needles, scissors, and a small piece of plain fabric. The fabric should not be synthetic, stretchy, too thin, or too thick. Ideally, let it be cotton. Cotton is a natural fabric that is obtained from the special plant, cotton, using its seeds.
The fabric has two sides: front and back. The front side is the side that will be visible, usually the brighter side. The back side will not be visible.
Pull the thread into the needle and make a knot at the end of the thread. Hold the fabric in your left hand, and the needle with the thread in your right hand. Look at the picture and follow the steps.

- Insert the needle at point 1 from the backside. Your thread is now on the front side of the fabric.
- Insert the needle at point 2.
- Bring the needle out at point 3.
- Insert the needle at point 1 from the front side.
- Repeat.
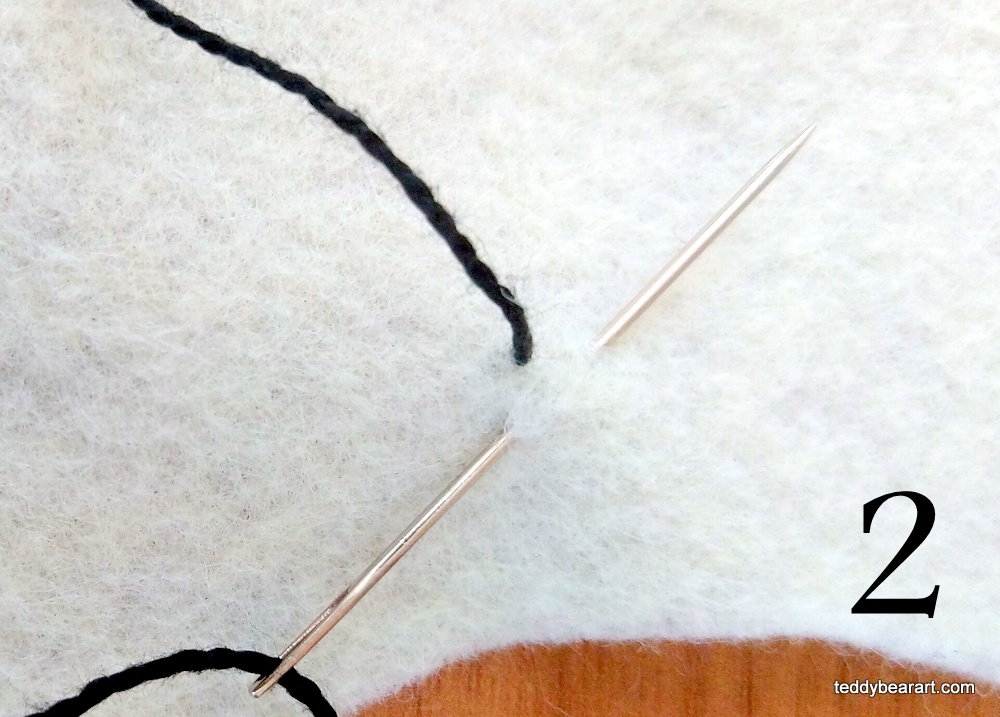
Now you can see how the seam is gradually obtained. Make a loop to finish the seam. To do this, slip the needle under the last stitch and pull it out on the other side until a loop is formed from the thread on the needle.
Then tie a knot with a needle. To do this, carefully pass the needle through the loop and tighten it. You will have a knot. To securely fix the thread, repeat tying the knot several times. Now cut off the rest of the thread.
Congratulations! Now you know the basic sewing that you will always use in your future projects. For practice, take two pieces of cotton, attach them with the front (bright) sides, draw a straight line on the back side using a pencil or pen, and sew.
In order for the seam to be straight, observe the dimensions from points 1, 2, and 3. They must be the same. Also, watch the thread tension. Don’t tighten the stitches too tightly.
How to Close an Opening with the Ladder Stitch
I would like to show you another type of seam that we will use when sewing up a part hole after stuffing it with synthetic filler.
These will be the arms, legs, and torso of the elephant. Also, with the help of such a seam, ears, tails, and wings are sewn.
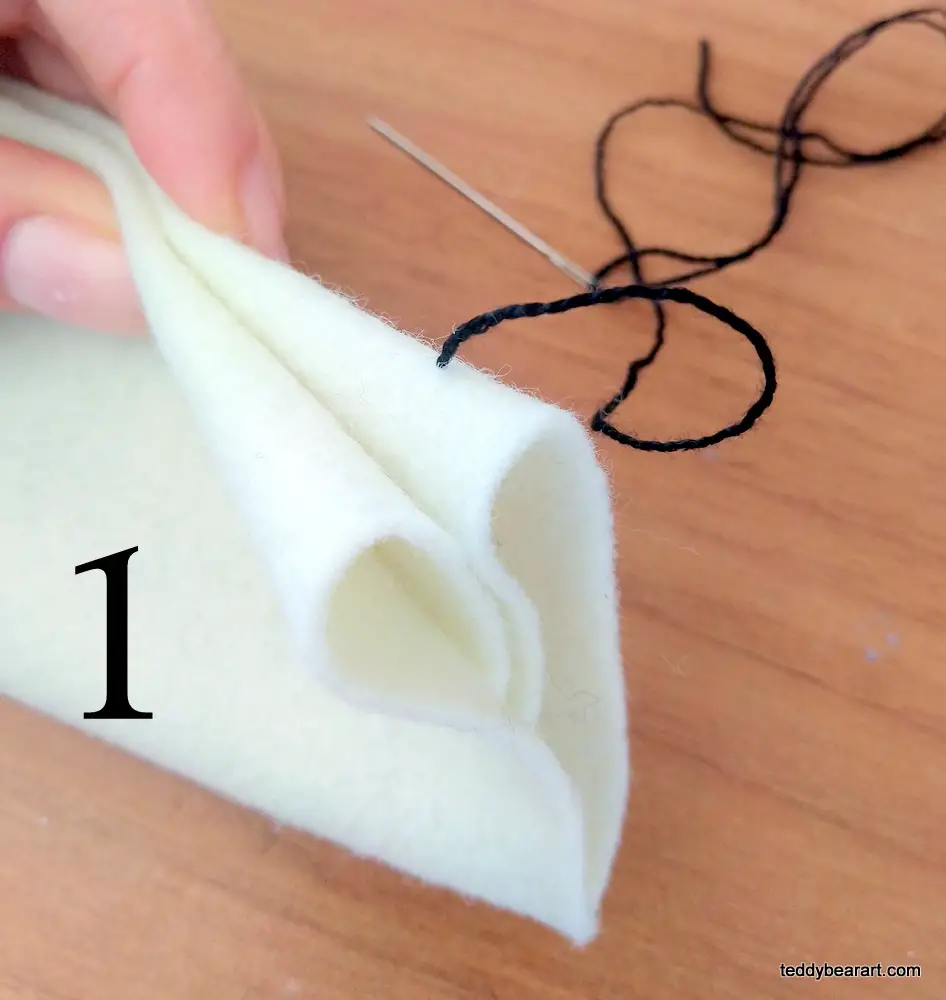
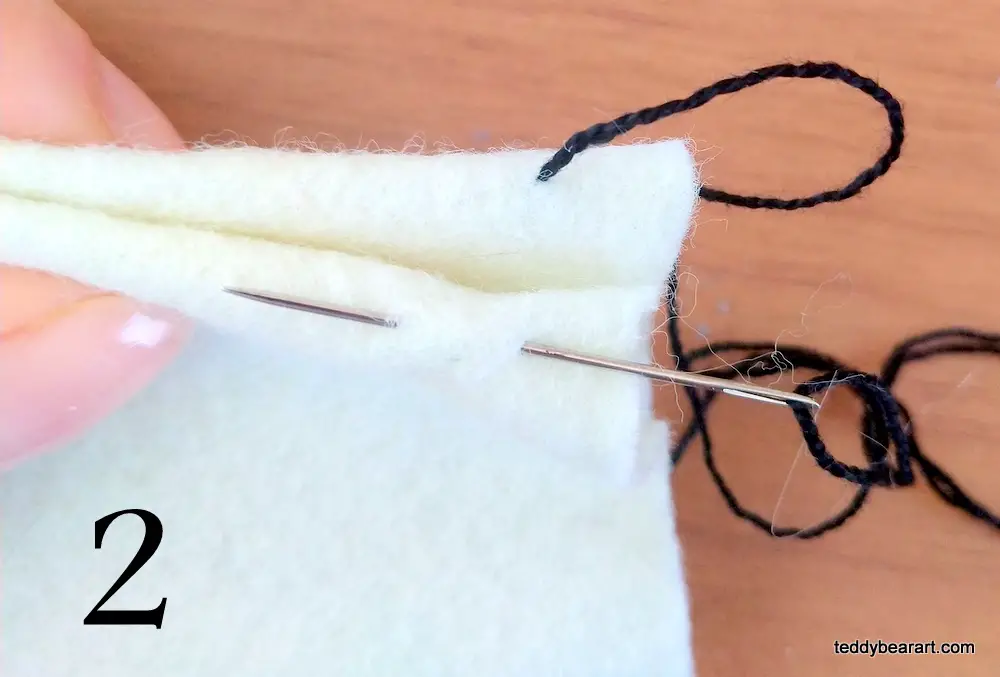
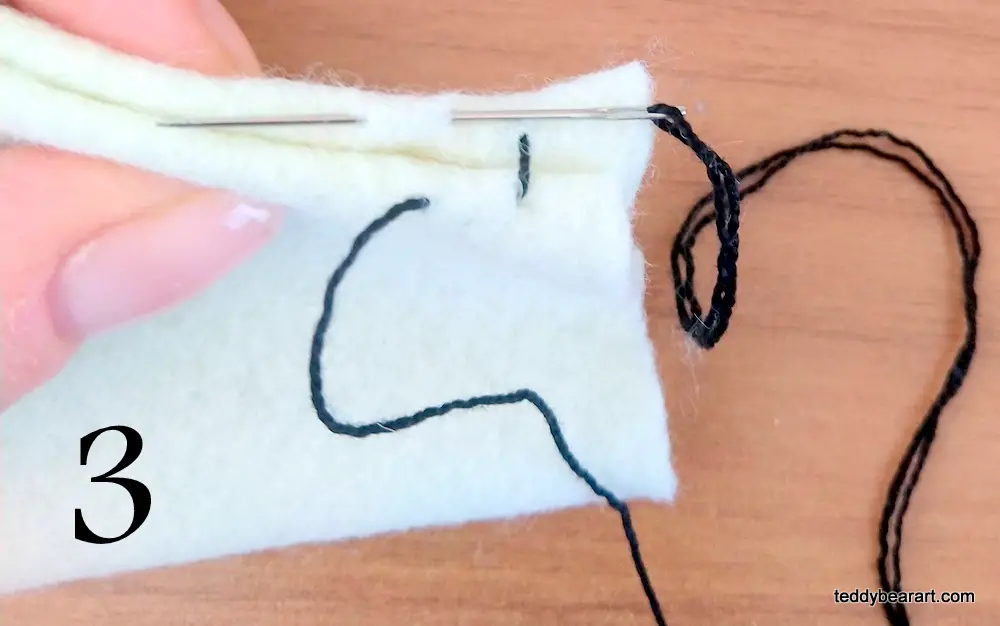
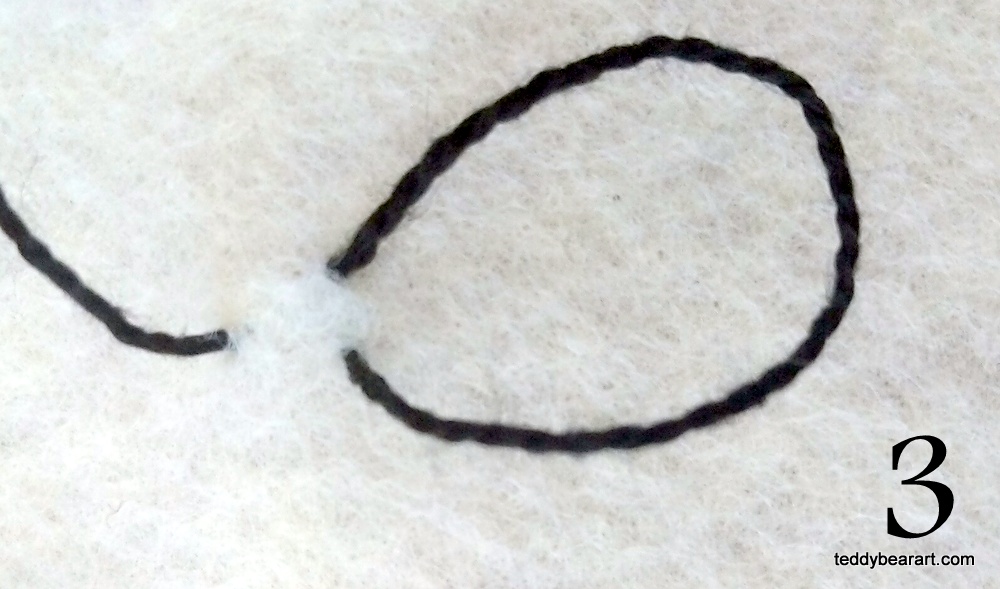
So, we make an invisible seam: we insert the needle from the back side into the fold of the fabric on one side of the hole so that the knot is not visible. We insert the needle into the fold of the fabric on the opposite side of the sutured area.
You need to get as close as possible to the hole through which the needle was pulled out. Pull the needle inside the fabric, and after 1-2 mm, bring it out through the fold. Continue until the hole is completely closed.
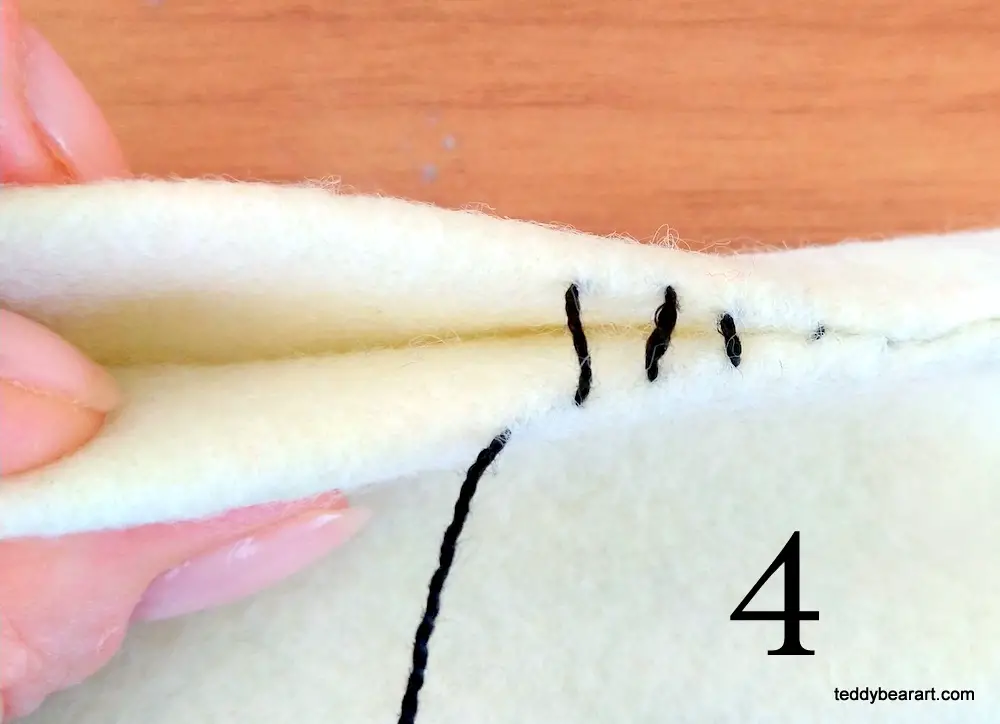
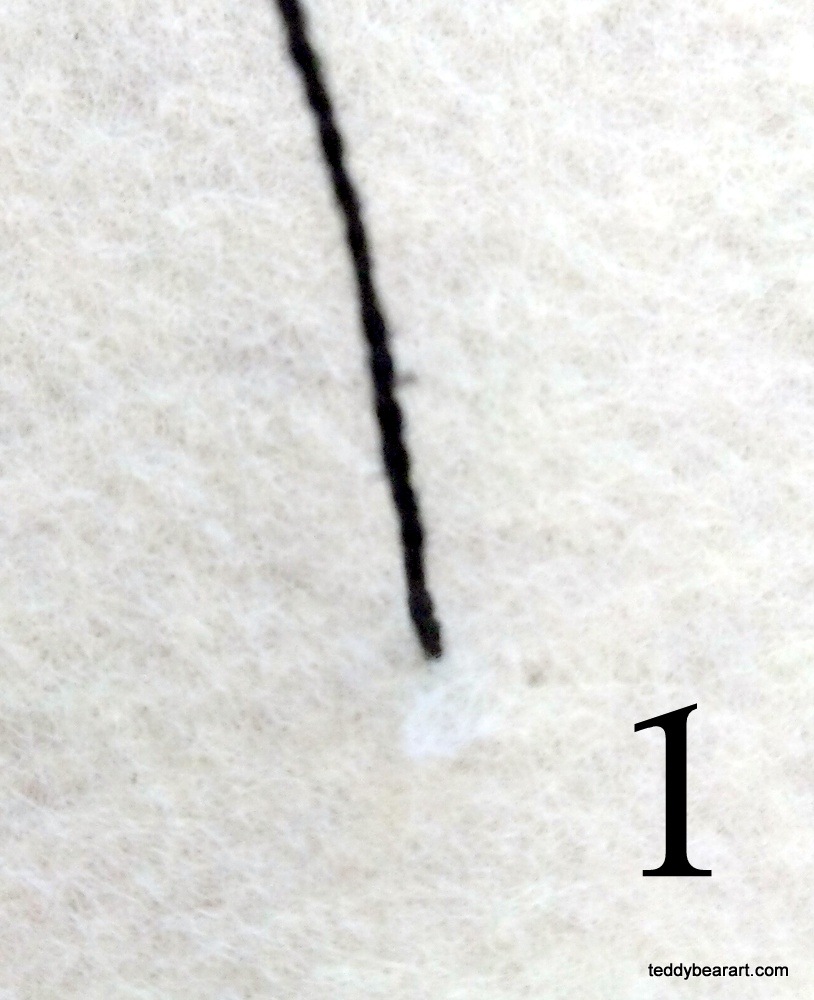
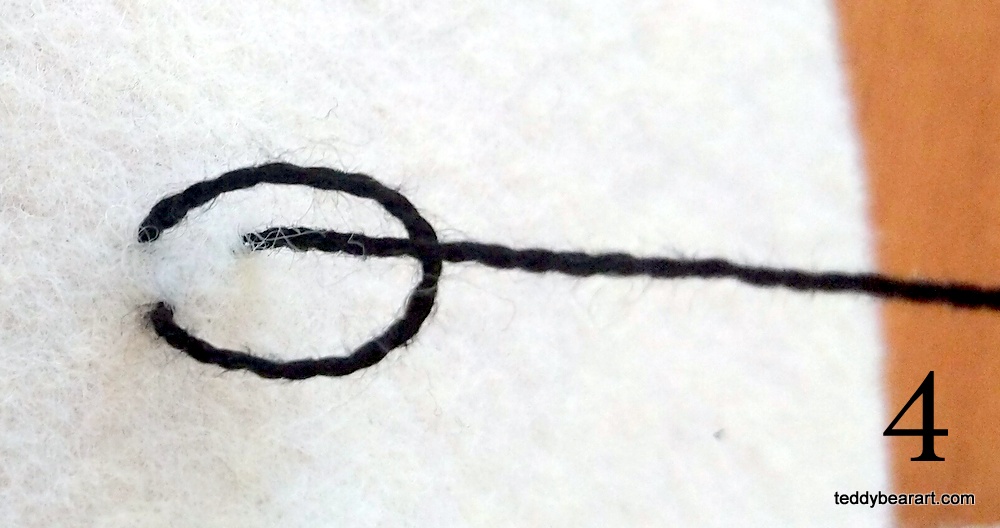
How To Make A Knot
When we finish our sewing, we need to make a knot or better few of them, and to hide the end of the thread.
I have prepared step-by-step photos for you to clearly understand how the knot is made.

Choosing The Pattern For Your First Teddy Bear
There are many free teddy bear patterns you can find online, while others can be bought. A long time ago, when I decided to make my first teddy bear, I bought two patterns because I was afraid that free patterns might be incorrect.
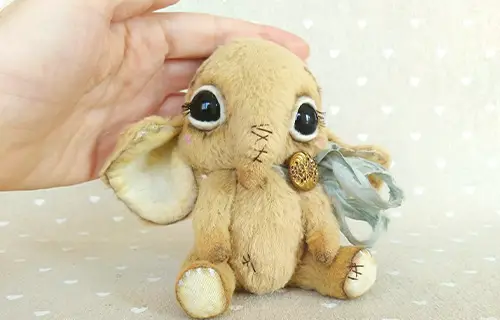
Now I can say that with most free patterns you will be Okay. I would suggest you choose something simple. For example, this teddy elephant is pretty good. We are going to make it together.

Now print this pattern on A4. If you do not have a printer, just put a piece of baking paper or other thin paper on your screen and circle the image carefully, including all arrows and marks. To see better, do it in a dark room.
Then cut out and transfer the pattern from the paper to the cardboard, again remembering to add all the marks and arrows. Cut it out again. This is done so that the pattern is stable and will serve you for a long time.
A Teddy Bear Kit
After you decide on the pattern, you have to choose a suitable fabric. I have made a special post about the fabrics, but for now, we will keep things simple.
Let’s think logically. An elephant cannot be fluffy, curly, or very long-haired. Only if it’s the author’s fantasy. But for now, we want to follow a more standard course in order to understand the basics.
Therefore, for such an elephant, I choose viscose with a short pile. In addition to viscose, you can take short-haired mohair or plush. The fabric should not be stretched.
I would suggest buying quality fabric and other stuff because the result depends on the quality of the fabric. And if you don’t like your first teddy bear, then there is a chance that you will no longer want to sew bears.
Conversely, if you yourself admire your creation, then this will give you great motivation and a burst of energy to create new bears.
In total, we need:
- 1/16 piece (25×35 cm) of viscose with a fur length of 6 mm.
- Strong threads, the same color as your fabric, and a needle for hand sewing.
- Scissors for cutting fabrics.
- A pair of black glass eyes on a metal loop. I will use a 16 mm in diameter.
- Waxed thread.
- A long needle, approx. 10 cm – 15 cm to attach the eyes.
- An awl.
- Synthetic filler to stuff the elephant.
- Metal or glass pellets for weighing.
- A piece of beautiful cotton fabric that you will use for the ears and feet.
- Oil paints 2-3 colors to start with (e.g., brown, white, black) and a couple of brushes with stiff bristles.
- Pins.
- Discs 18 mm diameter – 4 pieces. Discs 15 mm diameter – 6 pieces.
- Washers 12 mm diameter – 10 pieces.
- T-shaped cotter pins 1,6×20 – 5 pieces.
- Pliers.
Extra:
- Small piece of felt for eyelids.
- Fake eyelashes.
- Good general-purpose adhesive. I have UHU liquid glue.
- Glue for fabrics, which becomes transparent when dry.
Before You Go
So, we learned how to sew two pieces of fabric, decided which bear we would create, and figured out the list of necessary materials.
In the next post, we will start sewing our teddy elephant together. For each step, I will add my own photos for better visual guidance.
If you ever need a hand or have any questions, feel free to leave them in the comments below, and I will be more than happy to help you out.
Get Free Patterns & Be the First to Know!
Want free teddy bear patterns, exclusive tutorials, and a chance to win craft supplies?
Sign up for our newsletter using the subscribe form in the middle of this article to receive new patterns, insider tips, and the latest news on teddy bear art. You’ll also automatically be entered into our annual giveaway for a chance to win teddy bear crafting materials.
Bonus entry: Save one of our pins on Pinterest to increase your chances of winning!
Let’s create, inspire, and craft beautiful teddy bears together!