Why is so important to be able to make your own teddy bear? Because collectors from all over the world greatly appreciate the ability of artists to create their own teddy bears. I mean the teddy bears made from one-of-a-kind patterns, having unique styles and looks.
Learning to do this is not so easy, but real. You will need a lot of knowledge and practice. And here I am going to share with you my experience of working with free teddy bear patterns, building your own unique teddy bear patterns, and creating adorable characters.
Everything starts from practice. Let’s see what main steps you have to take on your way to creating an author’s toy.
Working With A Bear Head Pattern
Find free teddy bear patterns. Try to start sewing them, and then start modifying them to your liking.
Pay special attention to the head of the teddy bear. The muzzle can be made longer or shorter, narrower or wider. After you sew your first bears, you will understand what role every detail of the pattern plays. For example, what happens if you increase or decrease the size of the undercuts?
Also, pay attention to the proportions of the teddy bear. So, if this is a cub, then the head should be slightly larger in relation to the body, and if it is an adult bear, then the head should be made smaller.
How do I make a bear head pattern? When working with a head pattern, I usually use one of two methods of measurement.
The first one is to use a tape measure.

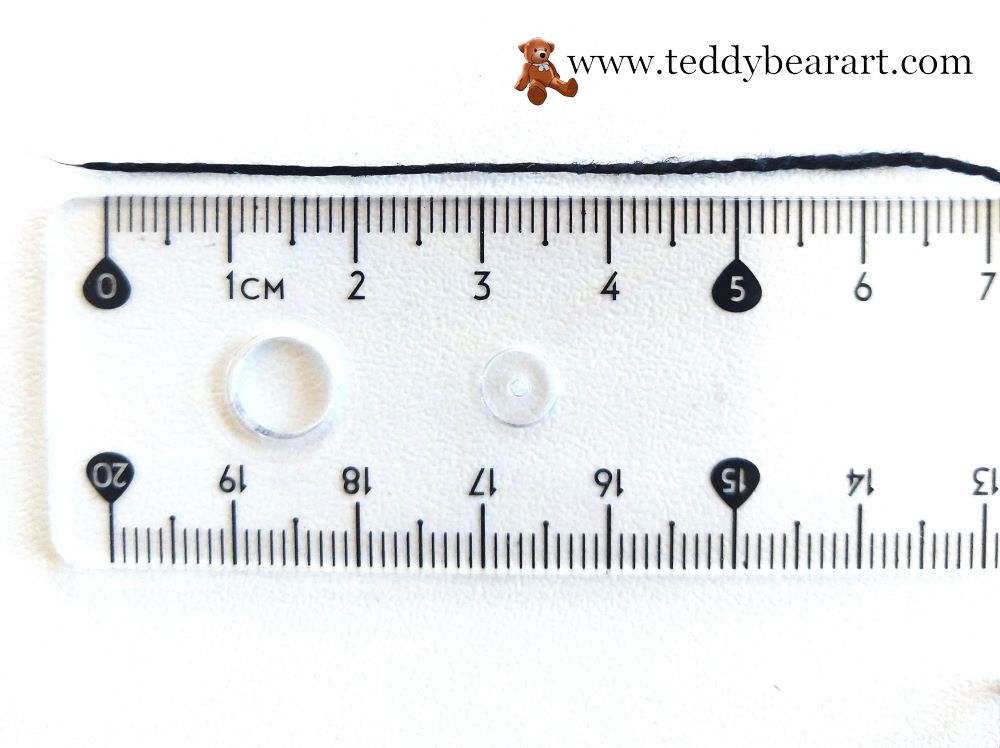
If you do not have a tape measure there is a second way. You need a thread and a ruler.
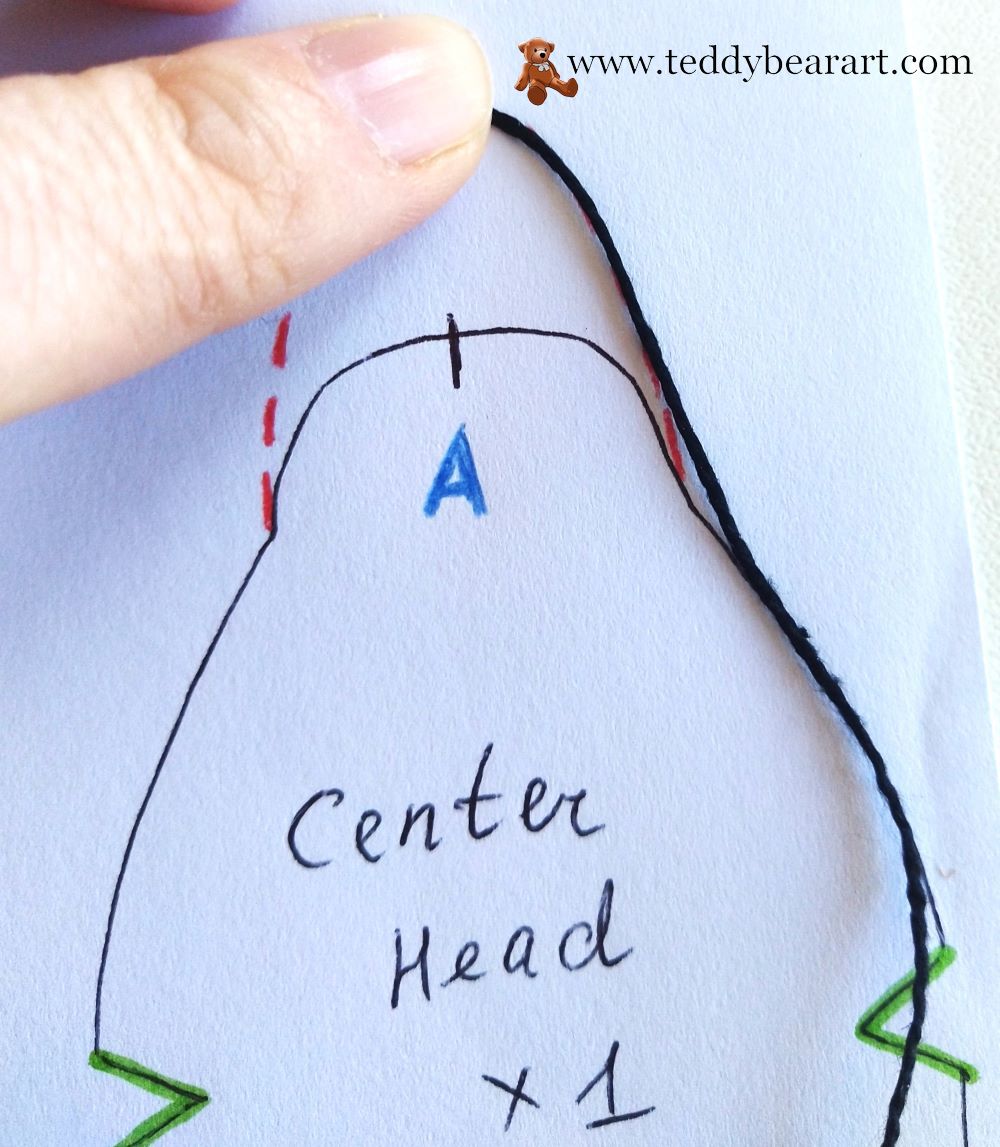
Knowing the length from the nose to the back of the head, I build the central part of the head. It should have the same length.
It is very convenient to build the central part of the head on a piece of paper folded in half. Because after cutting out you get a perfectly symmetric pattern.

Working With A Bear Torso And Limbs Patterns
Сhange the proportions of the body: increase or decrease the stomach, and experiment with the length and shape of the paws.
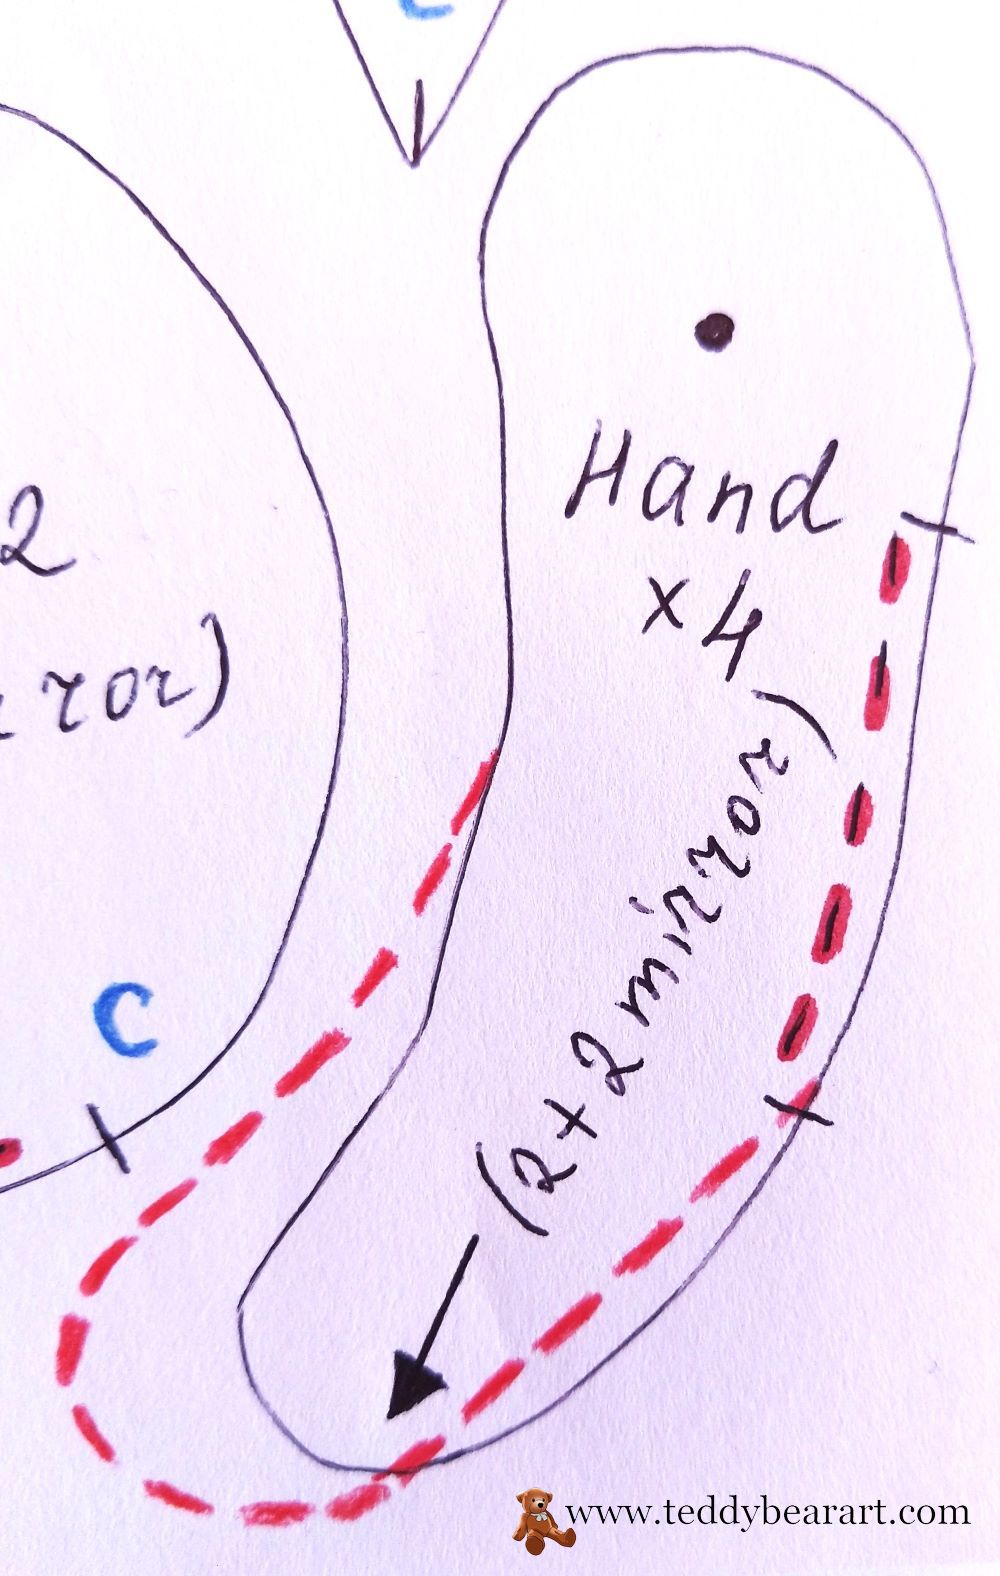
Pay attention to the places of attachment of future limbs. In a sitting position, the bear must have three points of support. Only in this way will he be able to sit steadily and not fall forward or backward. The fulcrum is the lower part of his body and two legs.
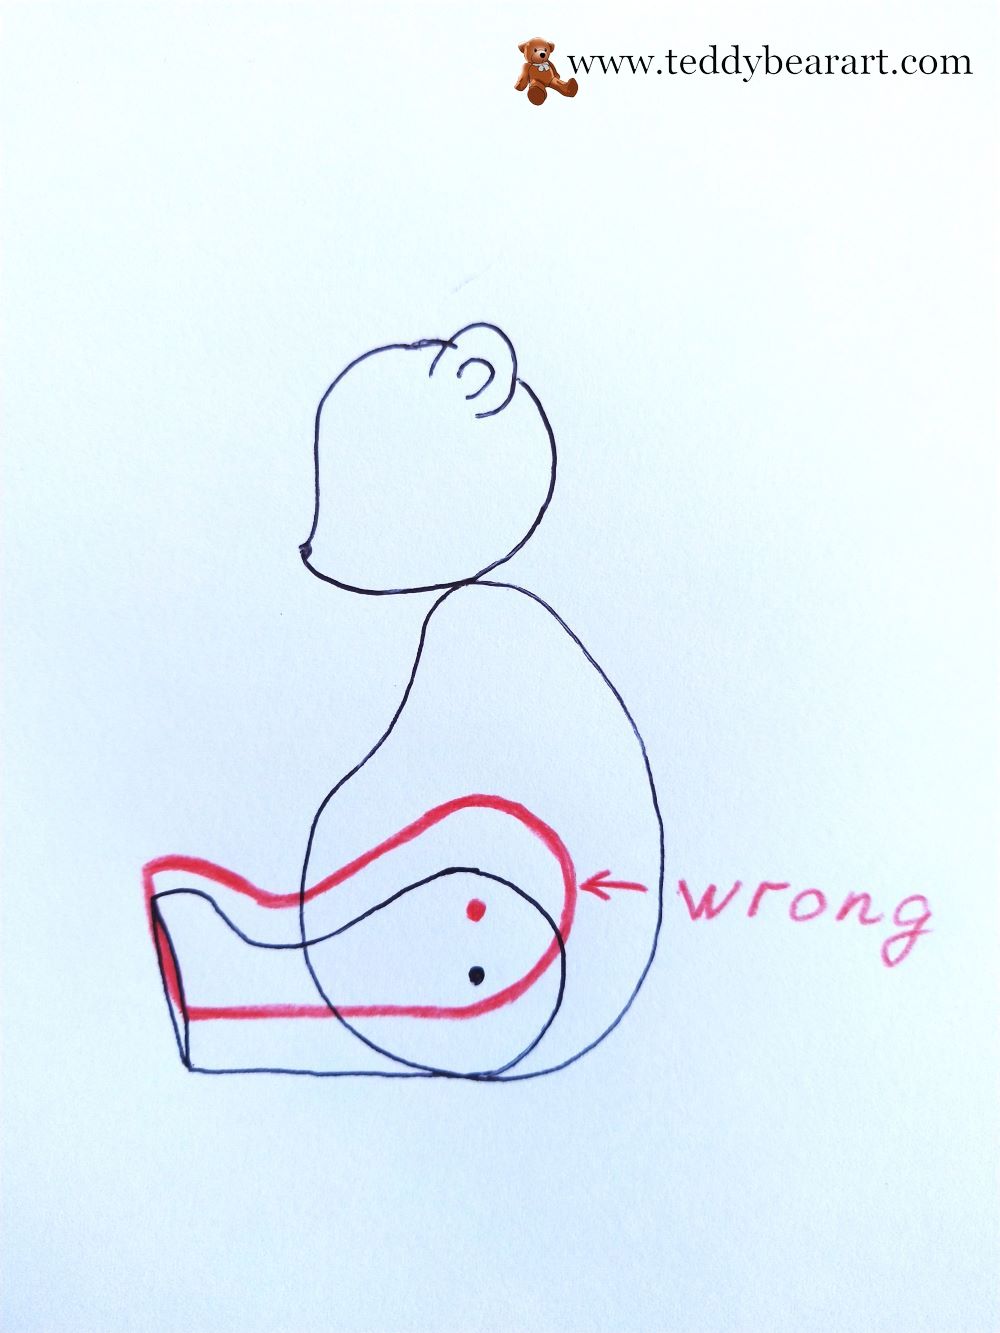
If you attach the legs too low, then the bear will have only two points of support – these are his legs, and the body will not even reach the bottom.
If you attach the legs too high, the bear will only sit on the torso. This means that he will have only one fulcrum.
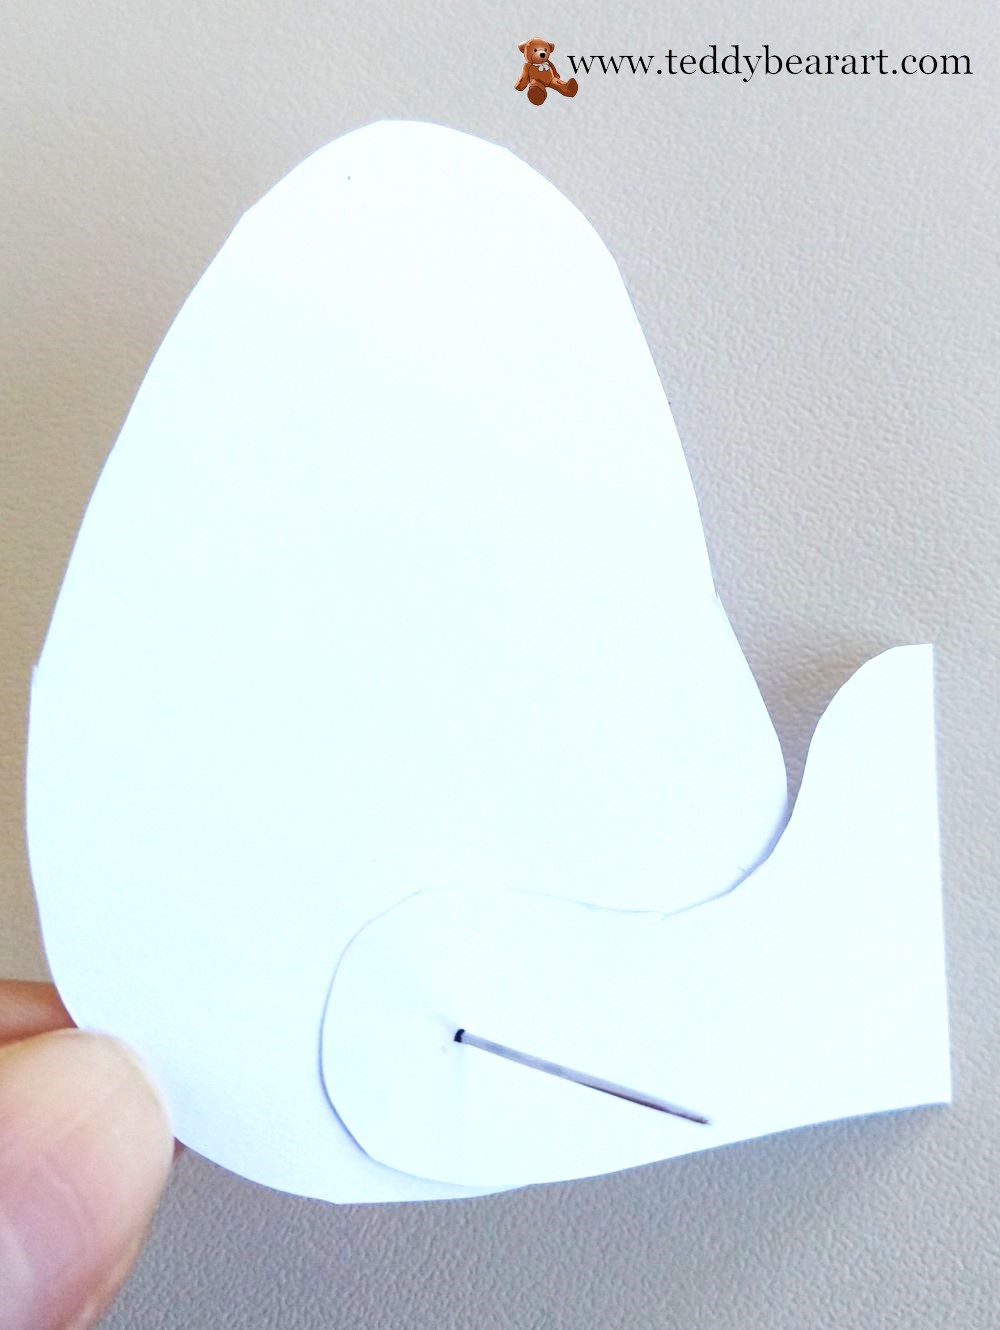
I think simple mathematical calculations can be applied here, but I never do this, because I don’t really like math 🙂 I just put the cut-out pattern of the leg on the pattern of the torso, make sure that the bear gets three points of support, and with the help of a needle, I pierce both parts at the place of future attachment.
Now let’s see what changes if we make tucks on the bear’s body to make it more rounded.
Because when we make darts, the length of the torso is shortened, so I had to move the attachment point of the leg. If I had not done this, then in a sitting position the body would not have reached the bottom, and the bear would not have been able to sit steadily.
Bild Your Own Teddy Bear Pattern
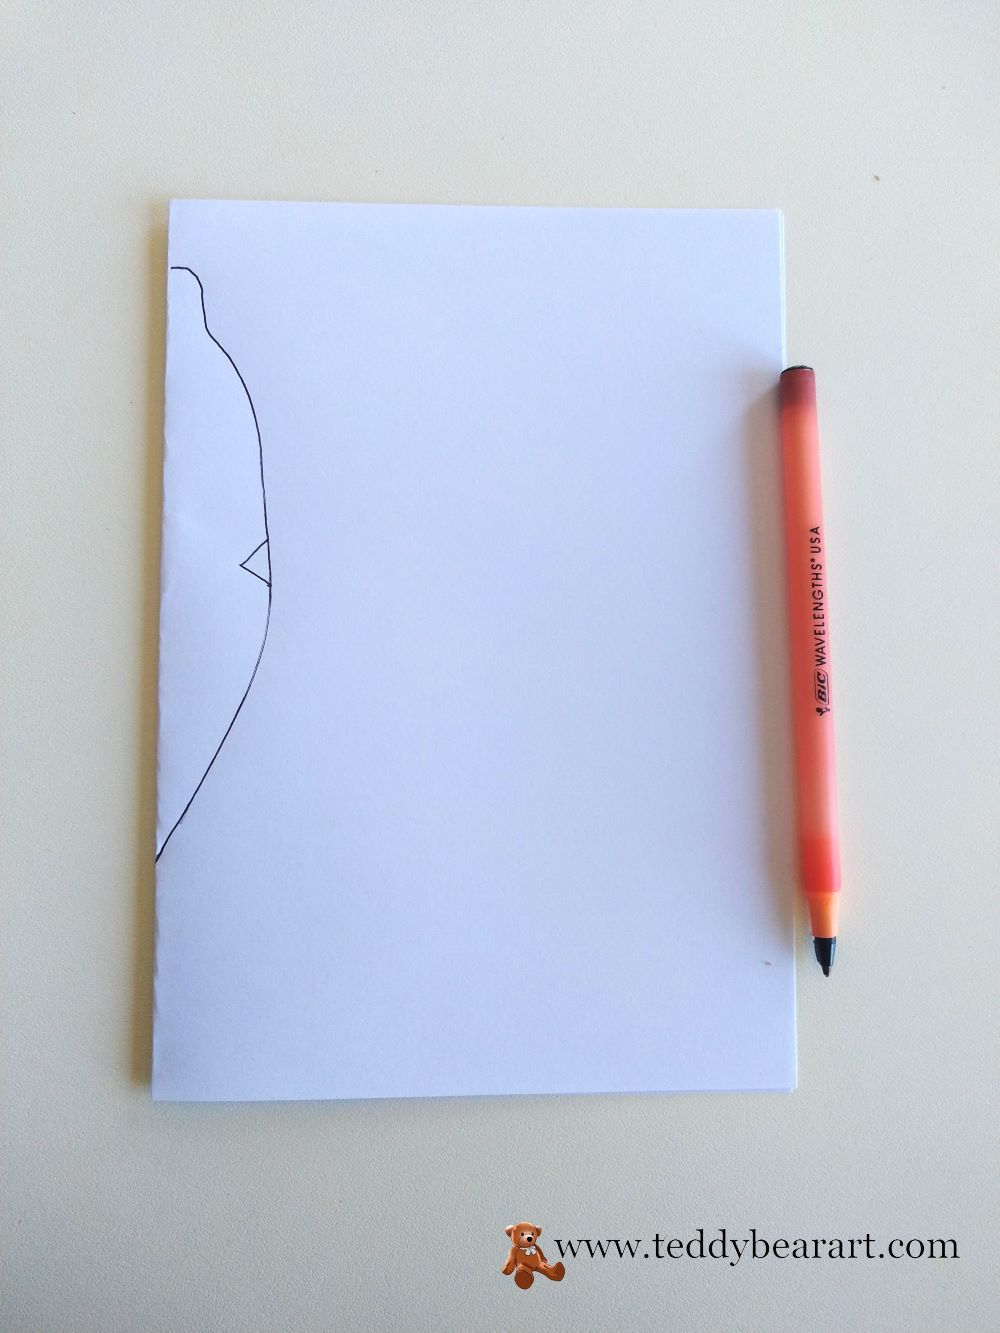
I know two ways to construct a teddy bear pattern. The first is when an artist sculpts a bear from plasticine and makes a pattern from this layout. I have never done this, so I will tell you in detail about the second way to build a pattern on paper.
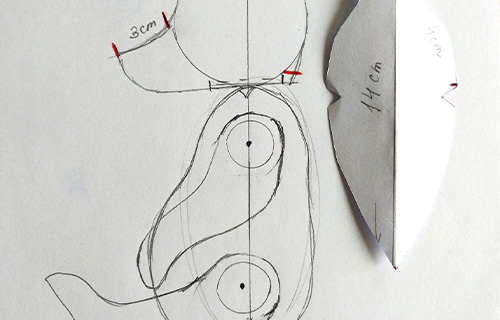
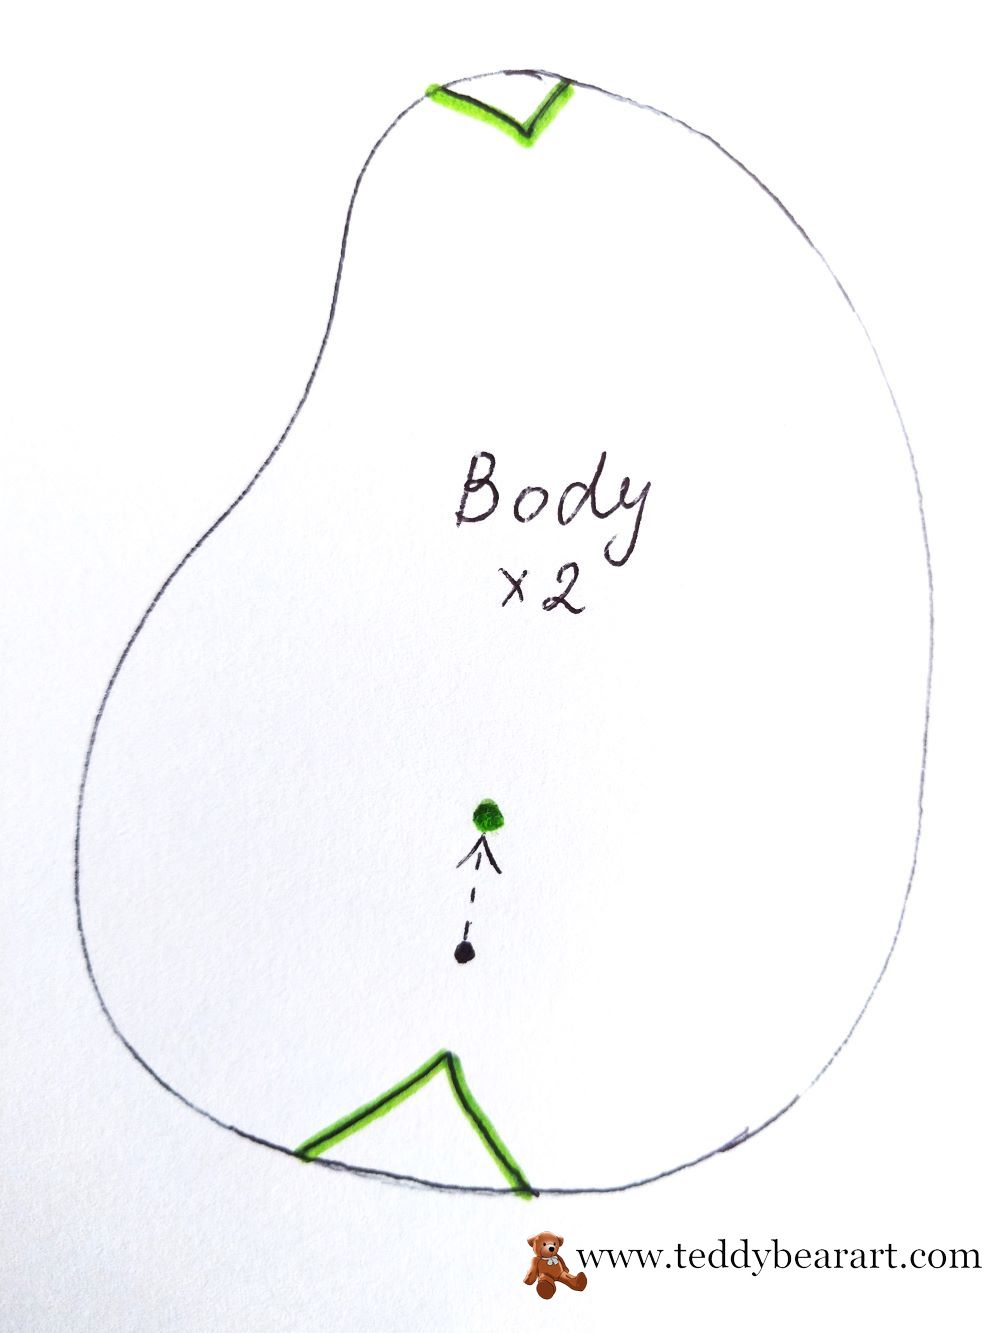
Draw a circle and an oval – these are the future head and torso of the bear. Then give the oval a shape – draw a tummy, back, and darts.

The next step is very creative. Just use your imagination and play with different shapes.
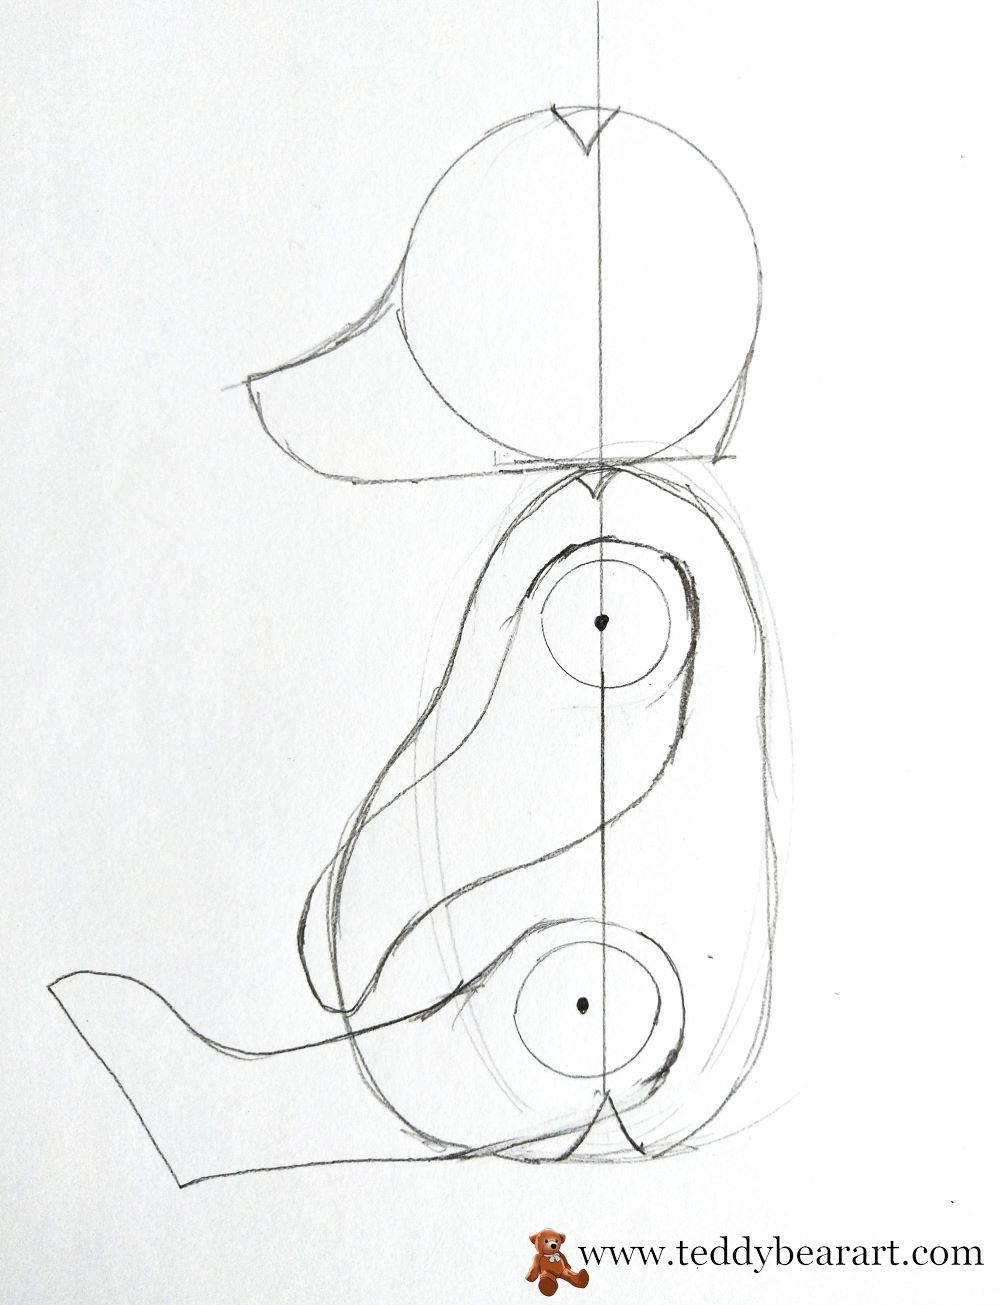
We turn to the construction of the central part of the head. Using a tape measure, we measure part of the head from the nose to the back of the head (I have 14 cm) and conditionally divide it into parts (I have 3 cm on the nose, 4 cm on the frontal part, and, accordingly, 7 cm on the rest).
Next, take a new blank sheet of paper, fold it in half, and on one half draw the central part of the head (wedge). At the same time, we make sure that the nose is also 3 cm, the frontal part is 4 cm, and the remaining 7 cm. Do not forget to draw a tuck.

Now take baking paper, put it on top of our drawing, and transfer the head separately, the torso separately, the arm, and the leg separately. Cut it out and, for convenience, transfer it again to thick paper or cardboard so that this pattern will serve you for a long time. All is ready!
A simple pattern of the bear’s ears can be made in the same way as the center part of a head to be symmetrical. Choose the size at your discretion, taking into account the image of your bear.
As for me, I draw the ears in the very last turn, when the head is completely ready and the eyes are already installed. This makes it easier for me to try on different sizes and shapes of paper ears and then decide which ones work best.
Work With The Unique Image Of Your Bear
The most common mistake among beginner artists is copying other artists’ teddy bears. This is because people are simply fascinated by other bears and forget that their goal is not to imitate, but to create their own style.
Copying and imitation can play a trick on a novice artist – he can be accused of plagiarism, and besides, he will not develop his creative abilities and remain low.
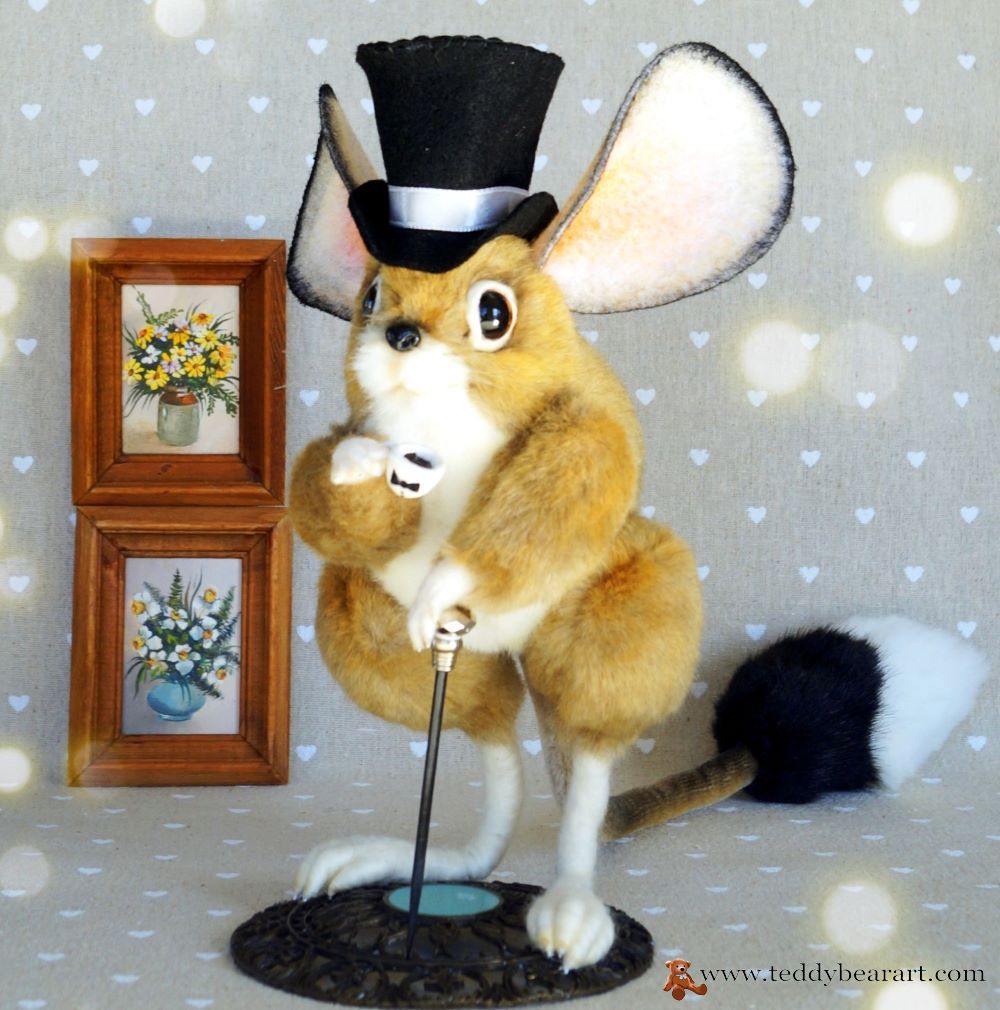
Some artists like to reproduce copies of characters from popular films. These are, for example, Paddington Bear, Pikachu, Niffler from “Fantastic Beasts and Where to Find Them” and many others.
Personally, I have never done this and never will. This is a licensed product, and I don’t like to go around the rules.
I have found another alternative when I really like the illustration of some artist, then I just write him a letter asking him to allow me to sew the same character. And no one has ever turned me down. In such a way few teddy characters were born.
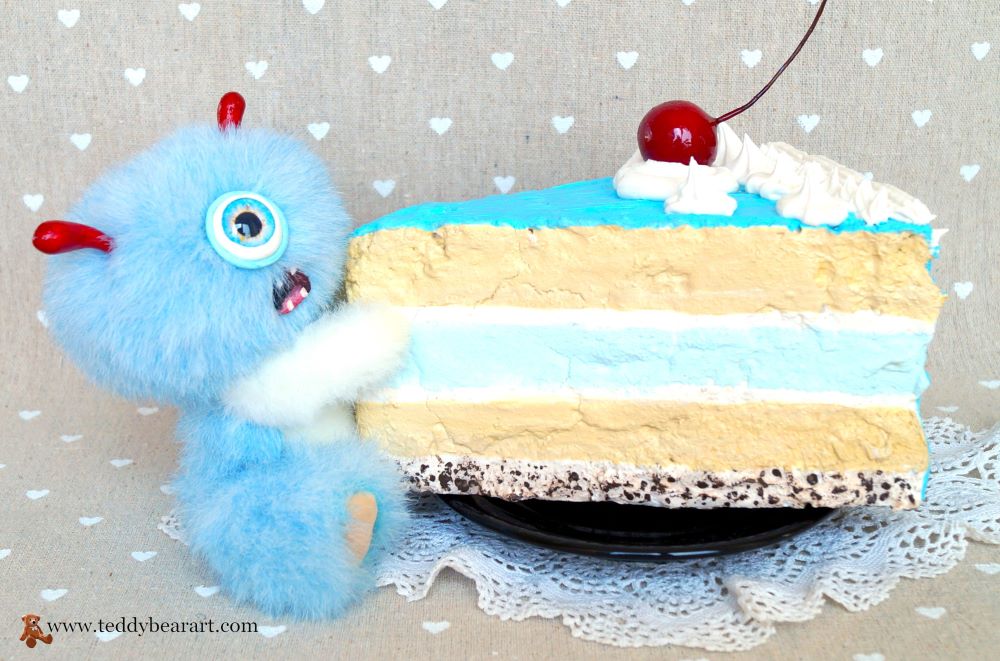
Also, I drew a lot by myself, and they were fun characters. The drawing skill came in handy – I drew a character, then I built a pattern and made a teddy toy using it.
An important point in creating a bear is the color scheme in which it is created and the muzzle of the bear. The most pleasant is natural light shades, such as milky, beige, honey, light brown, and light gray. The red fox, shades of brown, caramel, and dusty pink are also considered good.
Artists often refer to the color wheel to determine which color combinations work best. As a teddy bear artist, you can also do it. It is really helpful.
Now, as for the face of a teddy bear or teddy bear friend. Pretty faces have always been liked by everyone. To get such a face, you need to choose big eyes and add a smile. Be sure to observe symmetry.
Teddies in this style evoke the warmest emotions, you want to hug them.

If you are going to make a classic-style teddy bear, then the rules for making a classic bear apply here. It is often made from mohair, so it turns out very fluffy, so you want to hug him. The nose is embroidered, and the body is stuffed with sawdust.
As for clothes and accessories for teddy bears. This is where your imagination comes into play.
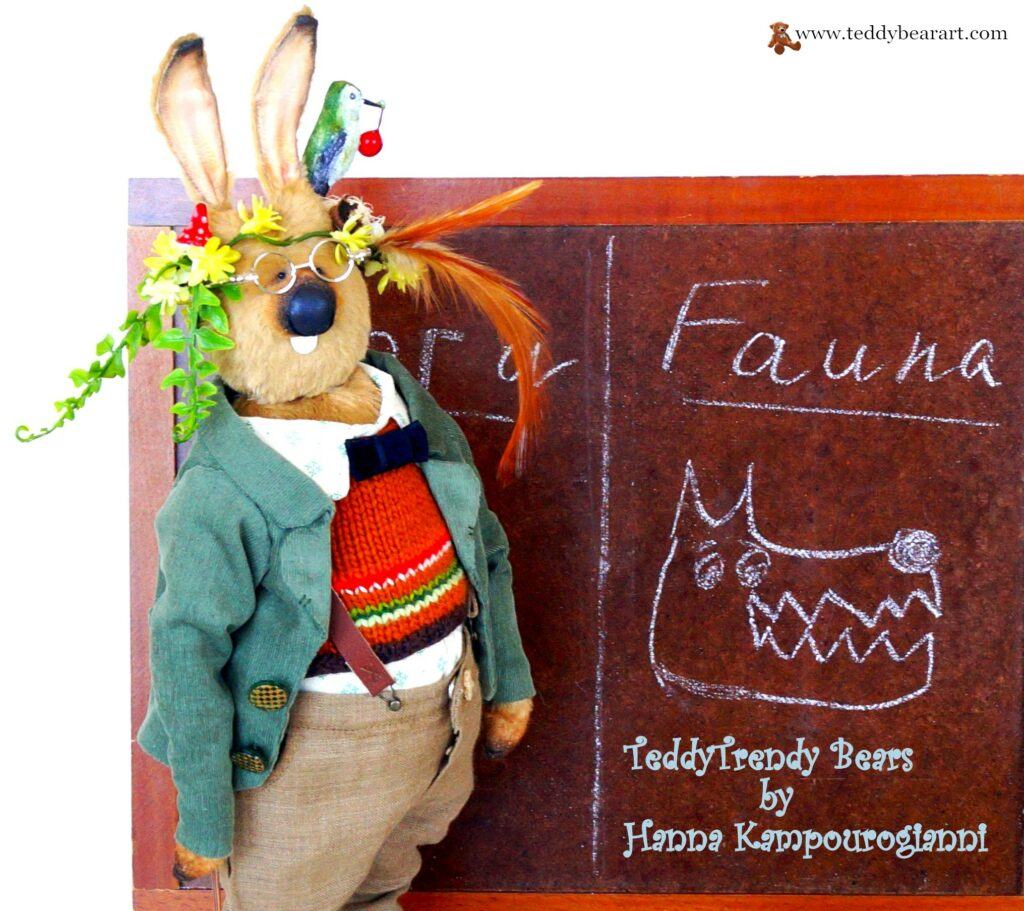
You can get away with one ribbon tied around his neck, or you can create a whole set of clothes (headpiece, dress, shirt, jacket, trousers, shoes, etc.). Of course, to create clothes you need more knowledge, experience, and time.
Personally, I’ve made fully dressed teddies only a few times when it was necessary to create a certain image.
Well, the last step is to create atmospheric photos of your teddy bear. Usually, I take about 5-7 photos and one video. Among them, there is a portrait, a full-length photo, several photos from different angles, and photos of details.
The background is usually white or light if it is a home shoot. Sometimes I add a few accessories that are a continuation of the image and history of my teddy bear and fit the meaning.
I would like to add something more valuable for beginners.
If something didn’t work out for you or didn’t work out the way you planned, don’t despair and in no case quit your job. Because you have already wasted your resources (these are materials, energy, and time).
Put your teddy bear away for a few days, and then give it a second chance.
Look at it with fresh eyes again. Perhaps you will find a way to remake something, change it, come up with some other creative image, dress it up, change the color somewhere, change the eyes, remake the ears, etc.
Conclusion
In this article, I have shared some of my skills about practice for beginners with free teddy bear patterns, my own experience with building unique teddy bear patterns from zero, and gave some advice about the image of the bear.
If you know some other techniques for making your own teddy bear, ever need a hand, or have any questions, feel free to leave them in the comments below and I will be more than happy to help you out.
We’re dedicated to being your primary source for everything related to teddy bears and the art of plush crafting. Keep an eye out for additional captivating content and creative projects, as we journey together through the realm of handmade treasures!
If you ever need a hand or have any questions, feel free to leave them in the comments below and I will be more than happy to help you out.
Get Free Patterns & Be the First to Know!
Want free teddy bear patterns, exclusive tutorials, and a chance to win craft supplies?
Sign up for our newsletter using the subscribe form in the middle of this article to receive new patterns, insider tips, and the latest news on teddy bear art. You’ll also automatically be entered into our annual giveaway for a chance to win teddy bear crafting materials.
Bonus entry: Save one of our pins on Pinterest to increase your chances of winning!
Let’s create, inspire, and craft beautiful teddy bears together!
I am not an artistic type, but your article seems well written. If I were to design a bear, It would probably be mini design of myself. Bears seem to mimic the personality of their creators.
Drawing is something I’d need to perfect. I do like the use of symmetry in your designs. Unlike you, I do like math and to a fault, I might have to use some in my design work if I did try to make a teddy.
Making a mascot bear sounds like it might be a real treat. Have you ever created one like this? I imagine there is probably a market for it.
Thanks for your interest in my article! Yes, you are right, teddy bears carry a part of their creator, his mood, character, and his handwriting.
To create bears, it is not necessary to be able to draw at all, you can work on ready-made patterns. You need to learn basic sewing skills. On this website, I offer free teddy bear patterns and step-by-step tutorials.
I made a bear mascot for myself many years ago, or rather it was a teddy elephant. It was the first teddy that started my journey in the teddy world.
I so loved making stuffed animals when I was younger. Of course we had to learn as part of Home economics in school. Yes I am that old. But this site makes me want to explore this again. You made this seam easy and fun even though it takes a lot of concentration and patience to get it right. The site is easy to read and understand, thank you for sharing this with us.
I’m glad you liked my article and website. Thank you for your interest! I think sewing teddy bears is something that any person at any age can learn. I myself started this business as a hobby, and then I began to sell my bears. Among my colleagues from all over the world – many have been doing this for about 40 years. So, I will be very glad if I become useful to you. The site is constantly updated with new free patterns and tutorials, and I’m always online and ready to answer any question. Welcome back to the world of teddy bears!)