
Making a bird plush can be wonderfully simple, and that’s exactly what makes this free bird stuffed animal pattern so special. The sewing itself is quick and easy, perfect even for beginners. What truly transforms the bird, though, are the details you choose to add—eyes, legs, crest, tail, or beak.
Each element gives the toy its own personality, so no two birds ever look the same. This tutorial will guide you through the basic sewing steps and show how small touches can turn a simple pattern into a one-of-a-kind creation.

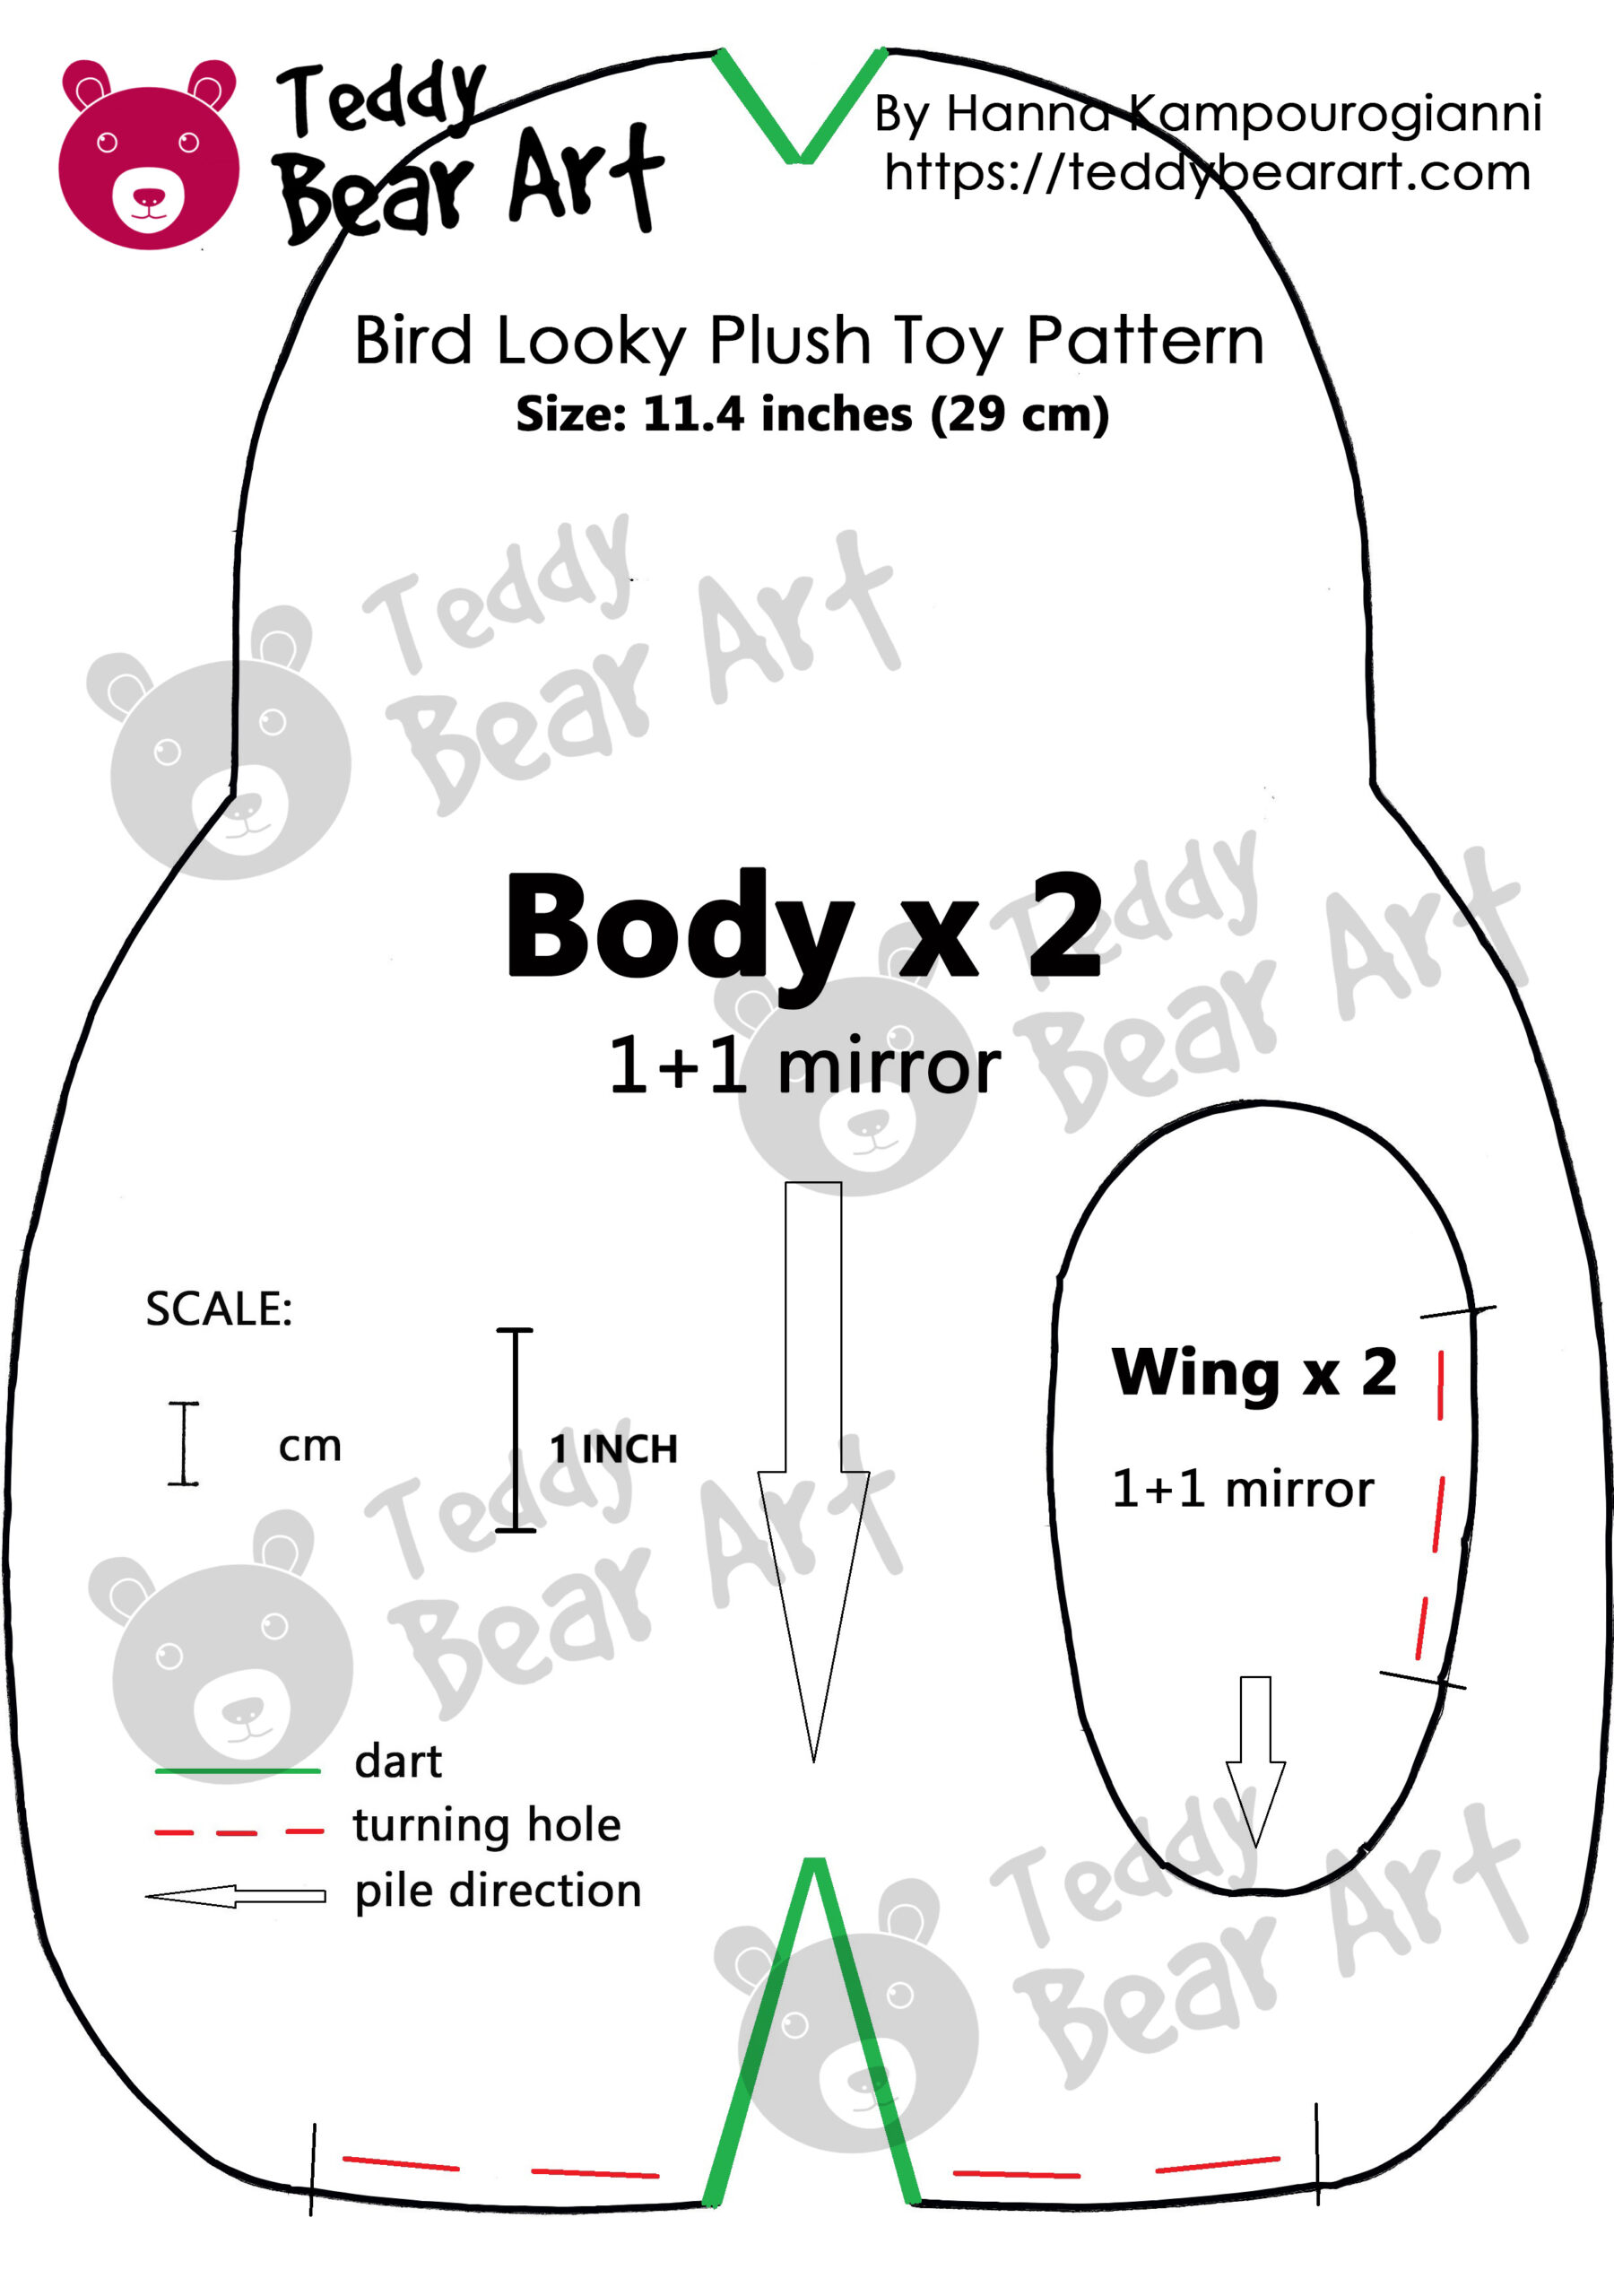
Download Bird Plush Pattern
Notice that seam allowances are not included.
To download the pattern, follow the instructions below:
From a phone or tablet: There should be a similar option for mobile devices with Android or iOS. Click on the image. Save it by holding your finger on the image and selecting the “Save Image” option. Then, go to your photo gallery and print it (an option available).
From a computer: Click on the photo of the pattern you see below. In the new tab that will open, you press the right mouse button and select the “Save image as …” option. Then, you choose where the image will be saved on your computer.
Materials and Tools You’ll Need
- Faux fur fabric with a pile of 1.5 cm or a little bit longer, faux fur with a long pile for the crest and tail
- Felt fabric for the break
- Glass eyes of approximately 14 mm diameter
- Polimer clay
- Matching thread and sewing needles
- Strong thread
- Long needle
- Synthetic or other stuffing
- Metal or glass pellets for weight
- Awl
- Wire
- Chenille wire (fluffy)
- Sheep wool
- Strong glue
- Pastels or oil paints
Step-by-Step Sewing Tutorial
Step 1: Sew the Bird
First, sew all the darts, then place the body and wing pieces right sides together and stitch them. After that, turn the piece right side out and carefully stuff the body with polyester filling; you can add a little weight inside for stability. Close the opening with an invisible stitch, then gently pull out the fur from the seams with an awl and brush it.
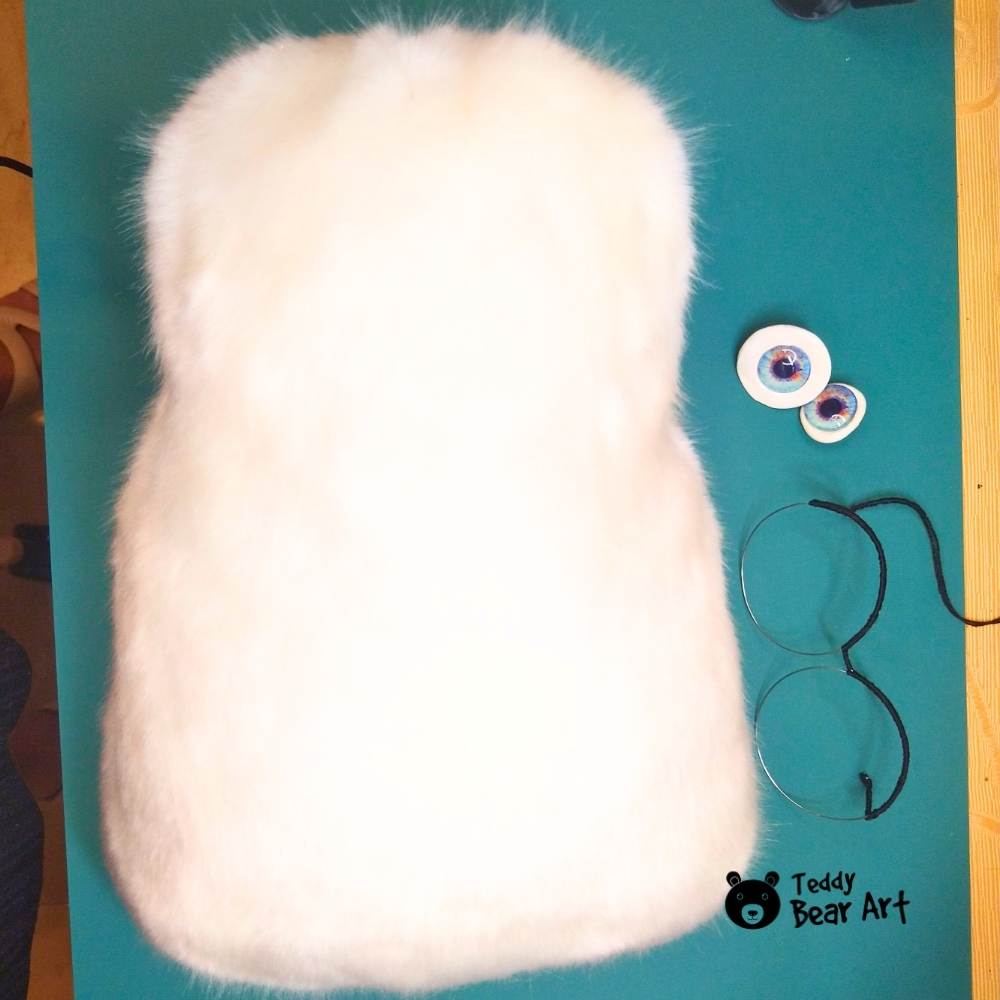
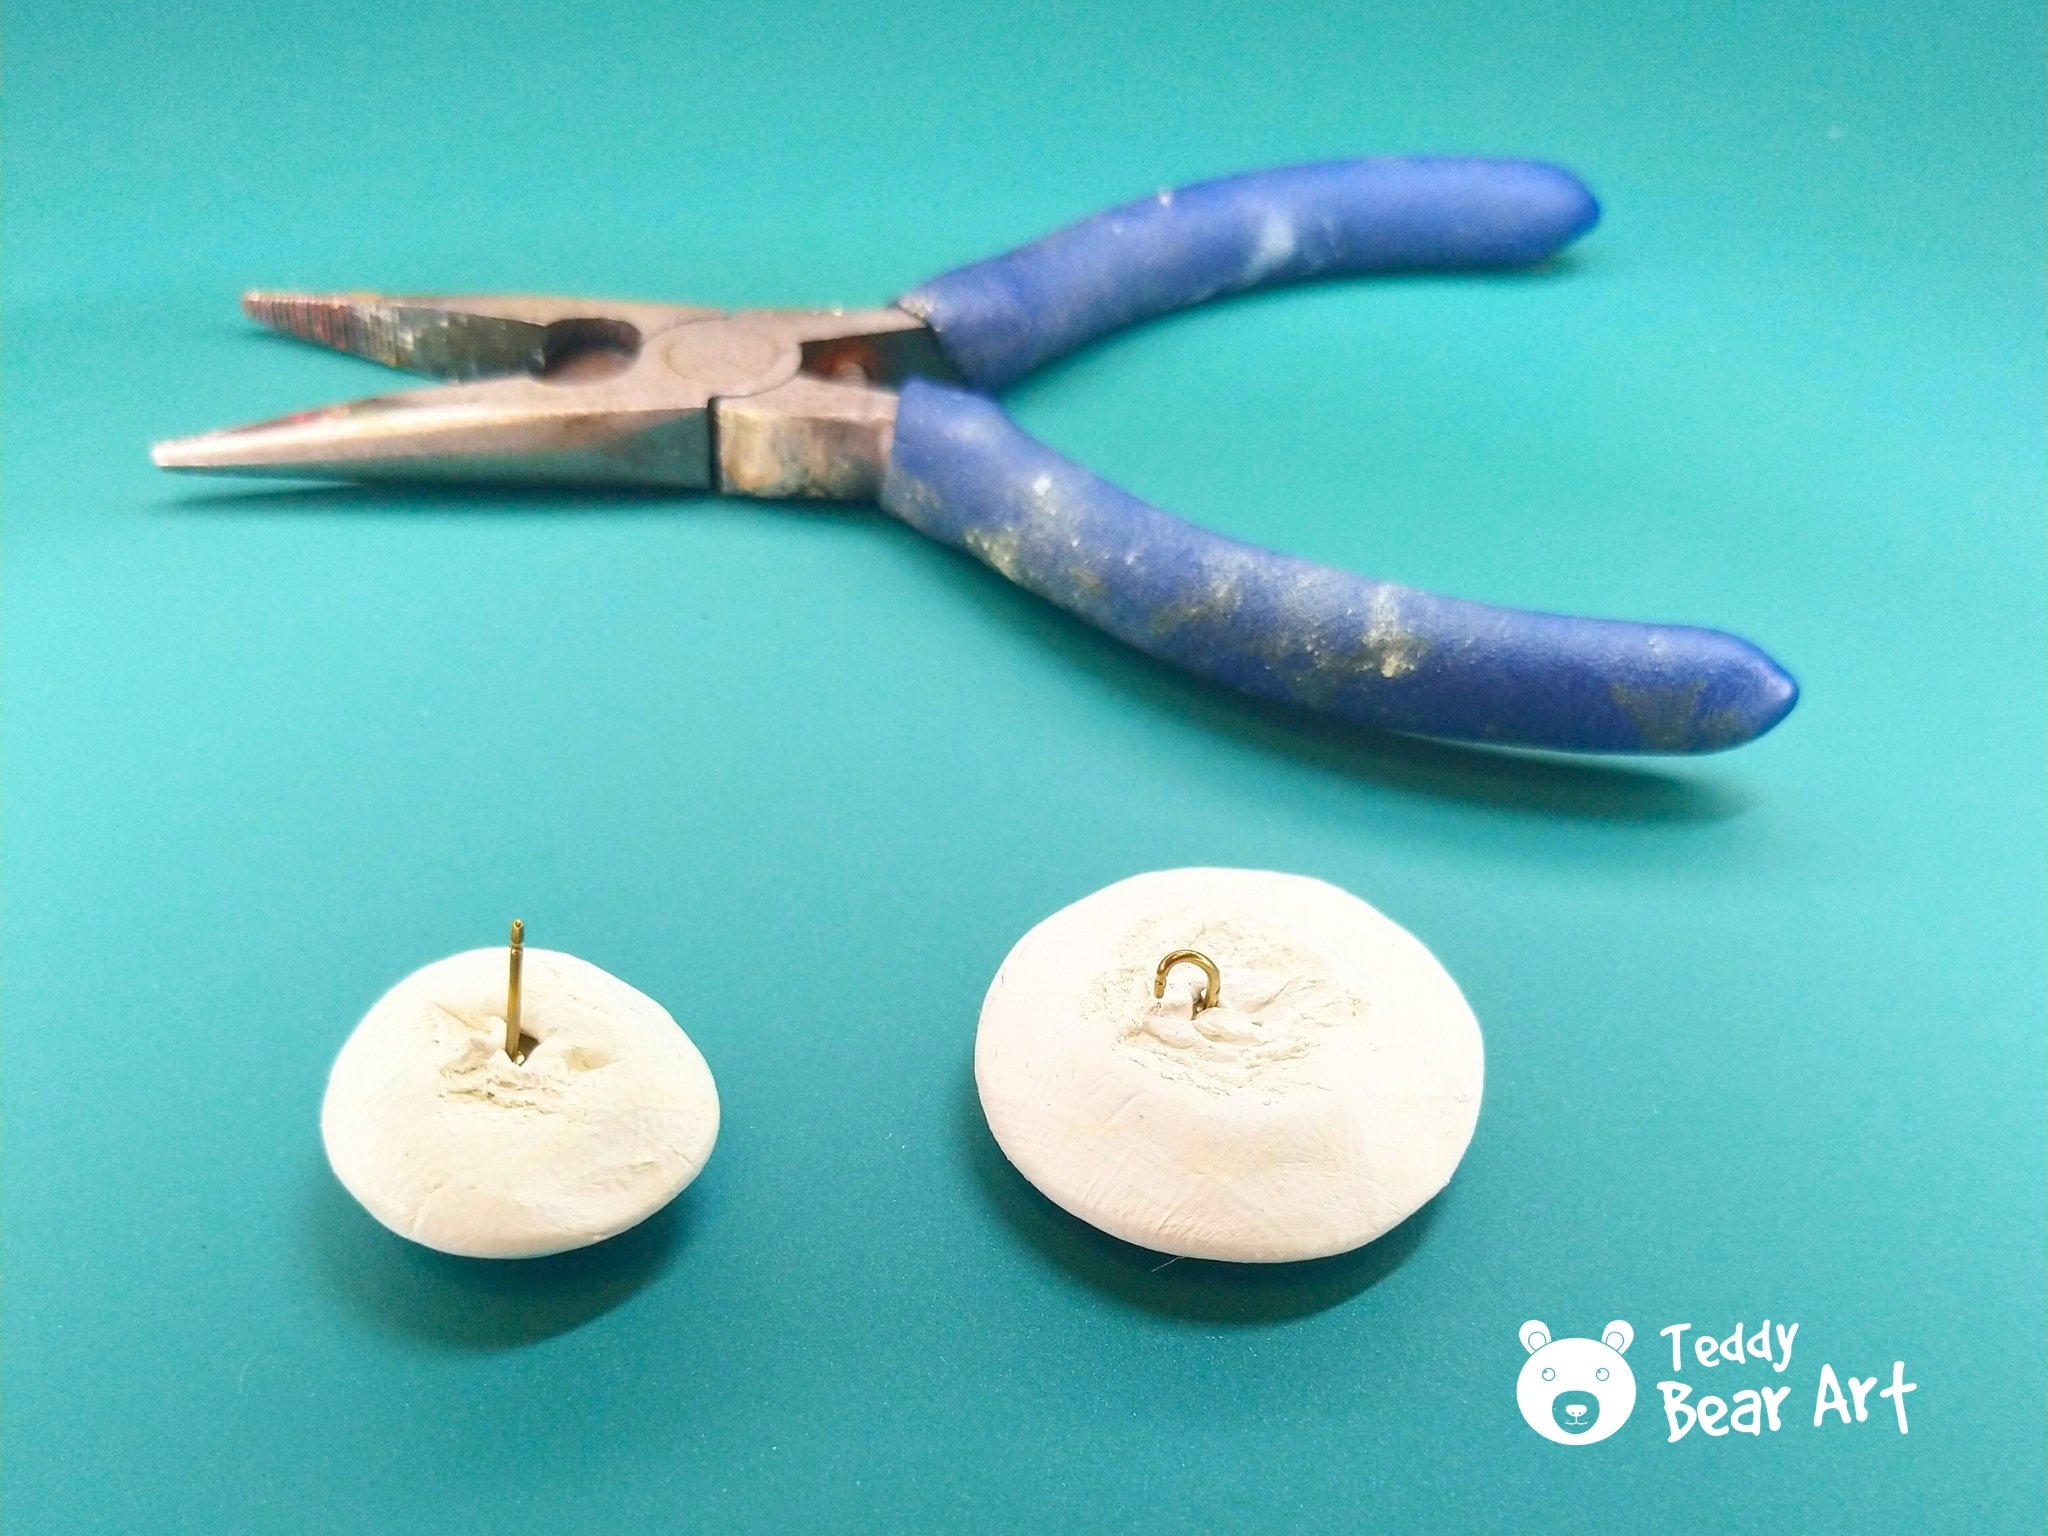
Step 2: Making and Attaching the Eyes
Use glass eyes to give your bird a lively expression. Sculpt the eye whites from polymer clay or another suitable material—make one slightly larger than the other for a fun, whimsical look. If the eyes already have a metal loop, perfect. If not, take a jewelry headpin with a loop or an earring stud base and form a loop yourself.
To attach the eyes, make a small hole in the head with an awl, gently spreading the fabric without breaking the stitches. Thread a strong string through the eye loop, insert it into a long needle, and push it through the hole, bringing the needle out at the bottom of the body. Secure the thread with a knot. Repeat the same process for the second eye, keeping them symmetrical.
Step 3: Making the Beak and Wings
The beak is very simple: cut a small square of felt and sew it to the front of the head. The wings are sewn the same way as the body, but you can leave them without stuffing so they look lighter. Attach the wings neatly to the sides of the body.
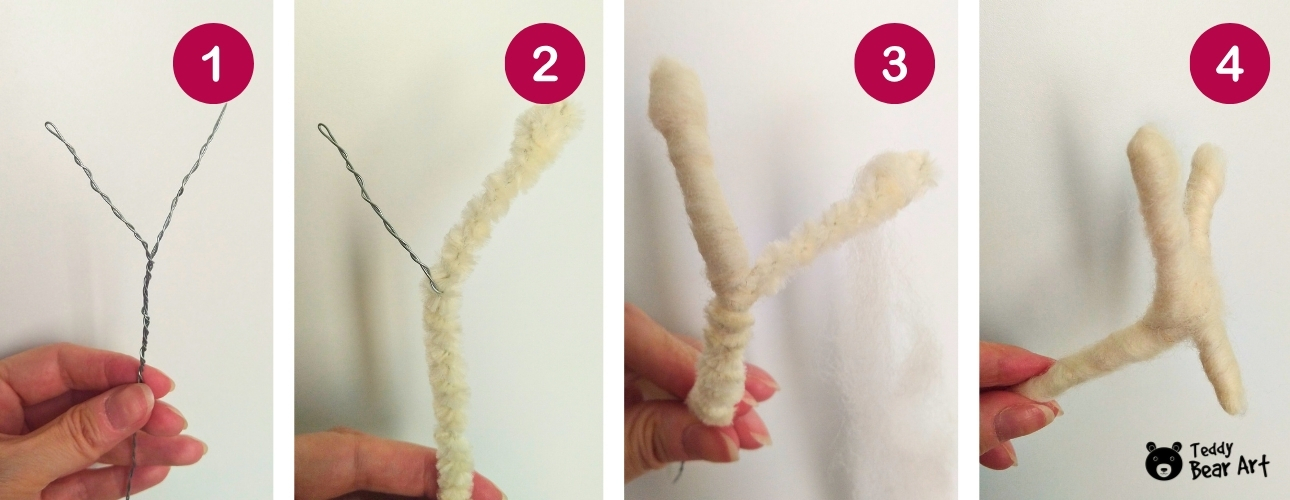
Step 4: Making the Legs
Shape a base from wire and wrap it with chenille wire (fuzzy). Then cover it neatly with sheep wool. Make small holes in the body with an awl, insert the legs, and glue them in place. Let the glue dry completely before moving on.
Step 5: Final Touches
All that’s left is to add some character: sew on the tail and a small crest from a long pile faux fur, lightly shade the area around the eyes, and add a touch of blush. Now your bird has come to life with its own unique personality!
Frequently Asked Questions
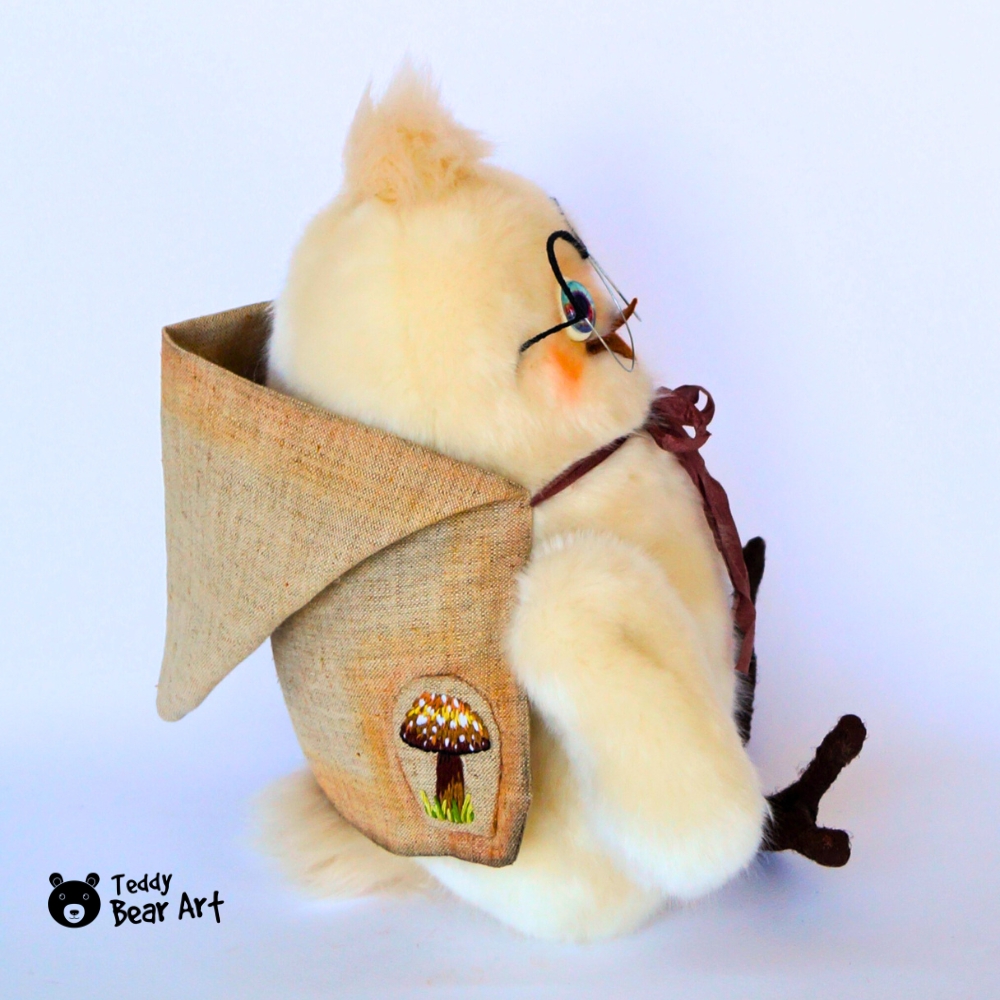
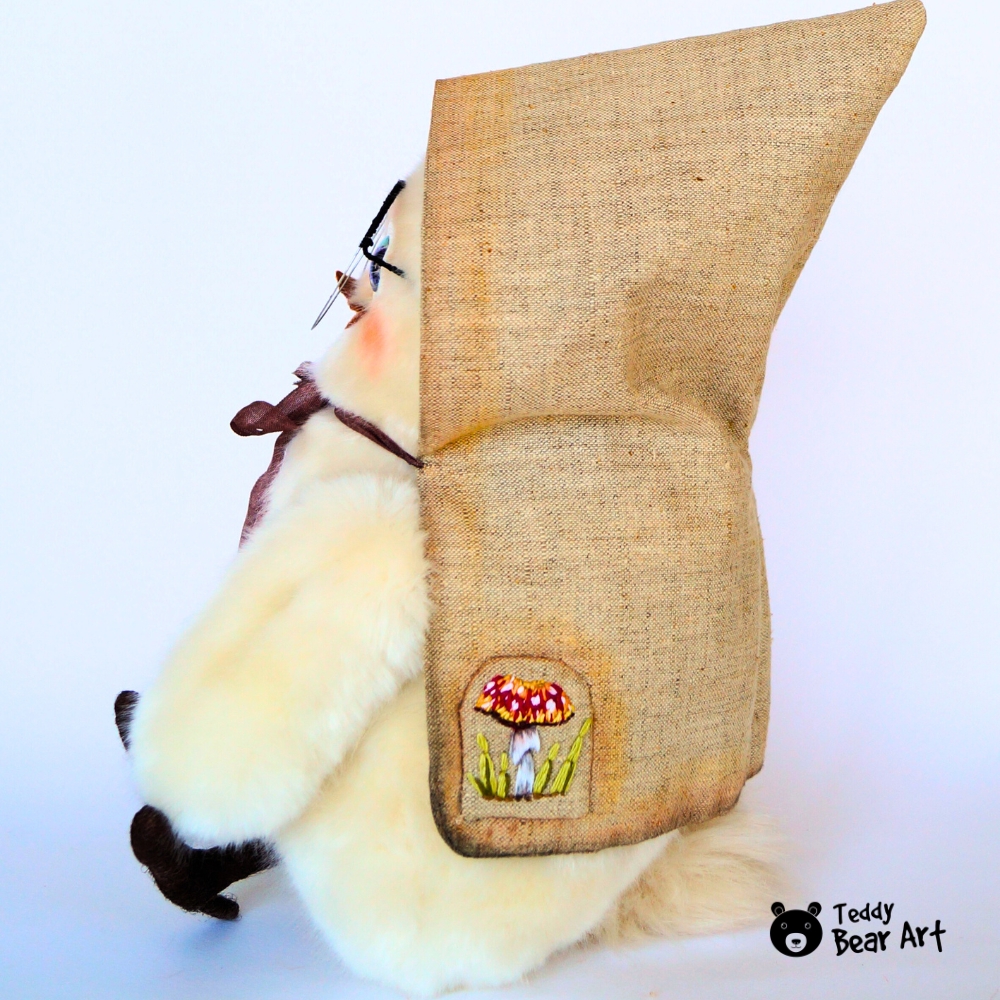
How can I sew a little cloak for the bird?
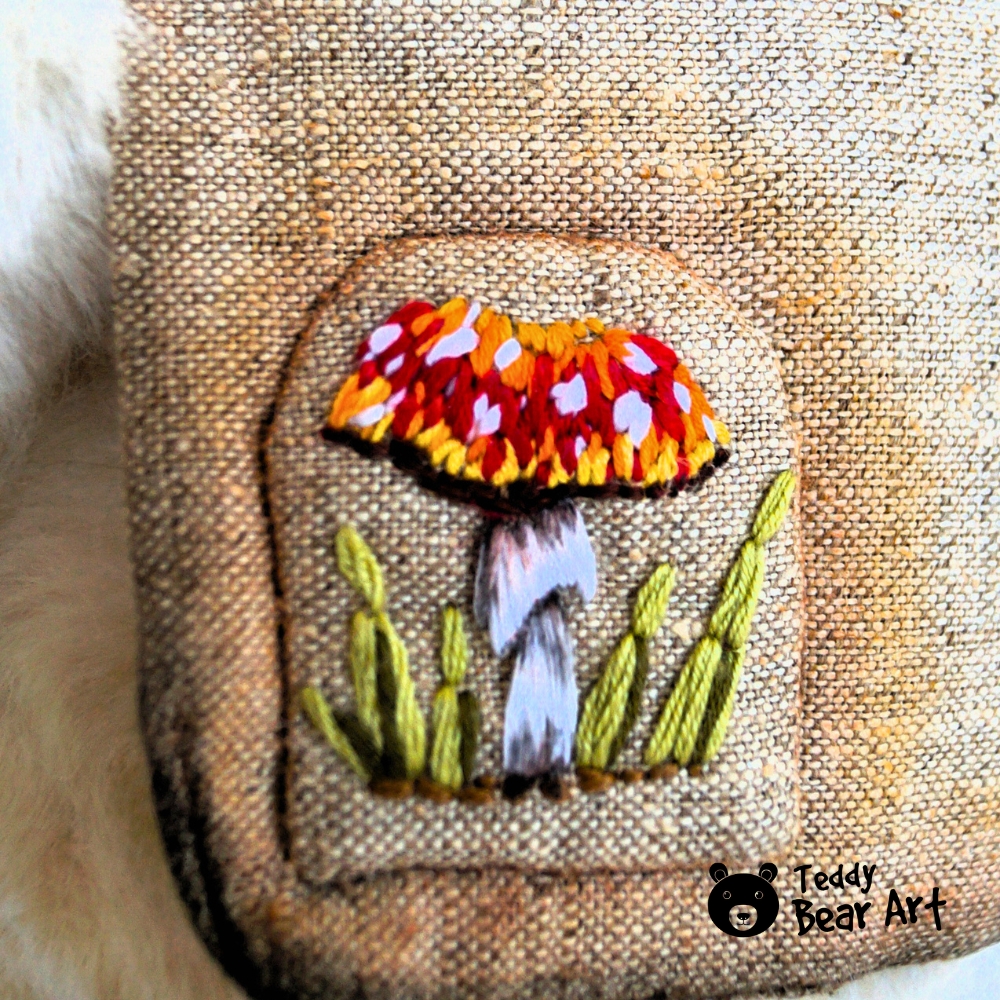
Cut two rectangles of cotton fabric, sew them together, and turn them right side out. You’ll have one neat rectangle. Fold it in half and stitch along one side using a ladder (invisible) stitch. This forms a simple cloak with a hood. Add ties at the front so it can be fastened. You can customize the cloak with embroidery, beads, or other decorations to match your bird’s style.
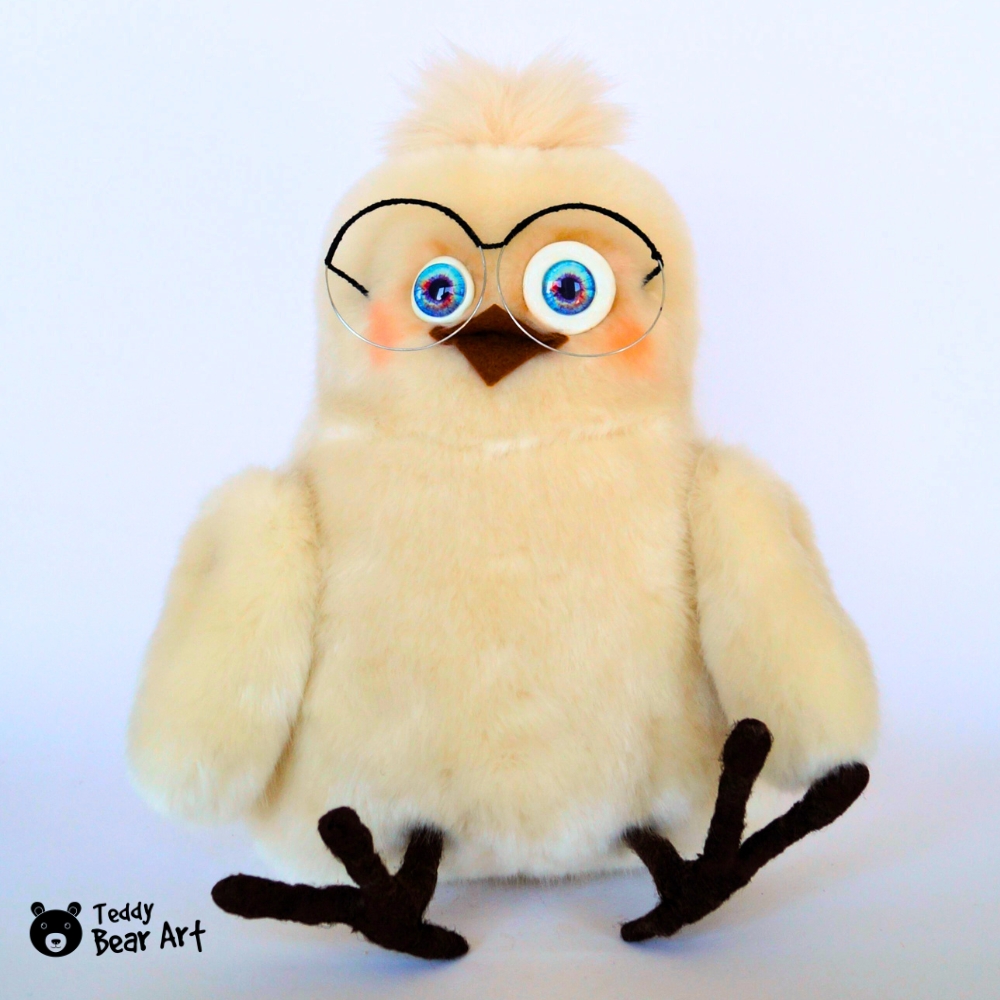
How can I make tiny glasses for the bird?
You can create glasses from wire. Shape the wire into two circles connected with a bridge, then wrap the frame with black embroidery floss. Once the glasses are ready, sew them securely to your bird so they stay in place.
How can I make the bird more stable so it stands upright?
Place a small metal or glass weight at the bottom of the body before sewing it shut. This will keep the bird balanced and help it stand securely. It’s best to enclose the weight in a little fabric pouch so it stays in place inside.
Can I use different types of eyes?
Yes, you can use any kind of eyes you like—plastic, button, embroidered, or even felt. Just place them on the face before attaching to see how they look. The size and style of the eyes will change the bird’s expression, so pick the ones that match the personality you want your plush to have.
Before You Go
Now you’ve got everything you need to bring your little bird plush to life. This free bird stuffed animal pattern is a fun way to practice sewing skills and experiment with details that make your creation unique.
Share your finished bird with fellow crafters, gift it to someone, or keep it as a cheerful decoration. If you enjoyed this tutorial, explore more of our free patterns and guides—you might just find your next favorite project.
Get Free Patterns & Be the First to Know!
Want free teddy bear patterns, exclusive tutorials, and a chance to win craft supplies?
Sign up for our newsletter using the subscribe form in the middle of this article to receive new patterns, insider tips, and the latest news on teddy bear art. You’ll also automatically be entered into our annual giveaway for a chance to win teddy bear crafting materials.
Bonus entry: Save one of our pins on Pinterest to increase your chances of winning!
Let’s create, inspire, and craft beautiful teddy bears together!
I truly appreciate your easy to follow steps for creating the bird stuffed animal. Being I have never sewed before this is something new I am going to have to learn. This project is perfect for me without any experience to gain the skills that I need to create this lovely project.
Awesome that you provided the free bird animal pattern to download, so by doing this you have made it even easier for us to accomplish this project
I can’t wait to get started on my own cute bird to give to my niece for Christmas
Jeff
That’s wonderful to hear, Jeff! Starting with a simple project is the best way to ease into sewing, and I think your niece will treasure the bird you make for her. Have fun with the process—you’ll be surprised at how quickly your skills grow once you get going!
This tutorial is so clear and inspiring—I love how you’ve shown that little details like the beak, eyes, or even tiny glasses can give each bird its own personality. It makes me want to try a whole flock of different styles!
If someone is brand new to sewing plush toys, which step would you recommend focusing on first to build confidence before adding the more detailed features?
I’m so glad it sparked your creativity! For a beginner, I’d suggest starting with the basic body shape—getting comfortable with cutting and stitching the main pieces together builds a lot of confidence. Once that feels natural, it’s much easier (and more fun!) to experiment with the little extras that make each creation unique.