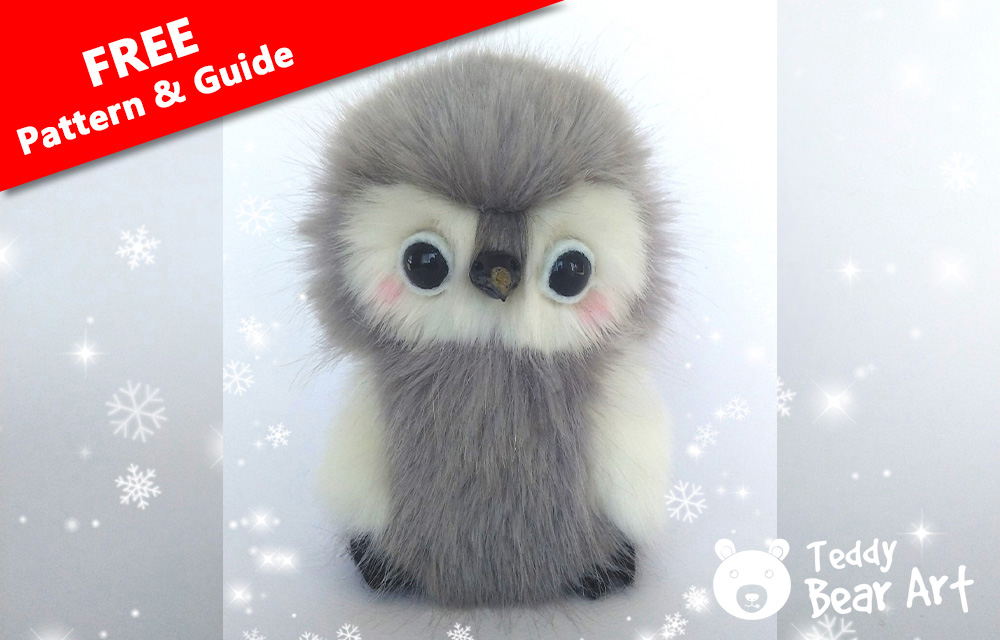
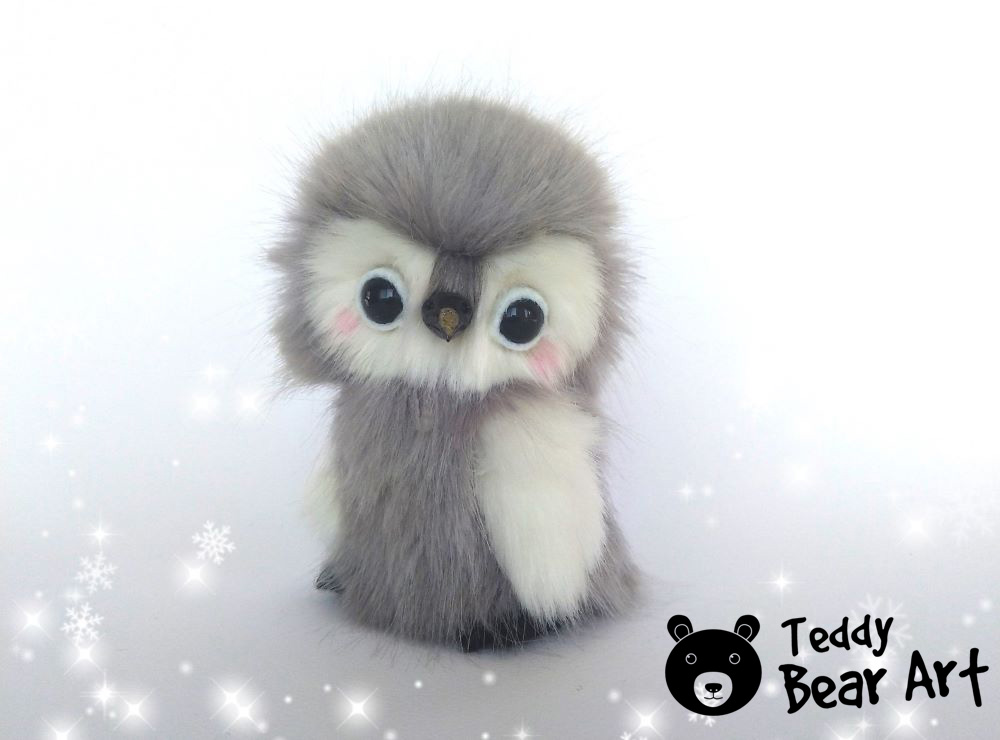
Looking for a heartwarming and unique gift idea? Consider the charm of a handmade penguin teddy! Crafting your stuffed animal adds a personal touch to gift-giving, making it a special and memorable experience. In this guide, we’ll walk you through the process of creating your very own handmade penguin teddy using our free pattern. Whether you’re a seasoned crafter or a beginner, this project is bound to bring joy to both the creator and the recipient.
Why Choose a Handmade Penguin Teddy as a Gift
When it comes to gift-giving, handmade items hold a special place in the heart. A handmade penguin teddy goes beyond a generic store-bought gift—it carries the warmth of your effort and creativity.
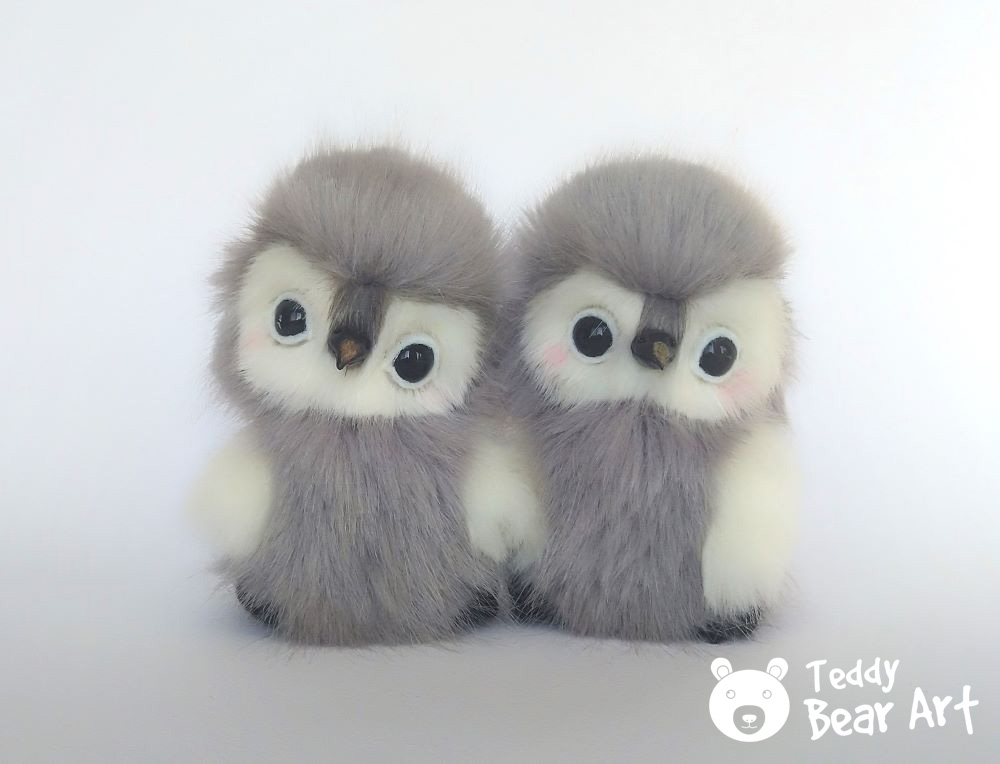
You can tailor the teddy to suit the recipient’s preferences, from choosing the colors to adding personalized touches. The act of crafting itself becomes a heartfelt gesture, and the result is a one-of-a-kind treasure that will be cherished for years to come.
Downloading the Penguin Pattern
- From a computer (Windows).
Click on the photo of the pattern you see below. In the new tab that will open, you press the right mouse button and select the “Save image as …” option. Then you choose where you want the image to be saved on your computer. - From a phone or a tablet (Android). There should be something similar for mobile devices with Android or iOS.
Click on the image. Save it by holding your finger on the image and selecting the “Save Image” option. Then go to your photo gallery and print it (there is an option).

Materials Needed
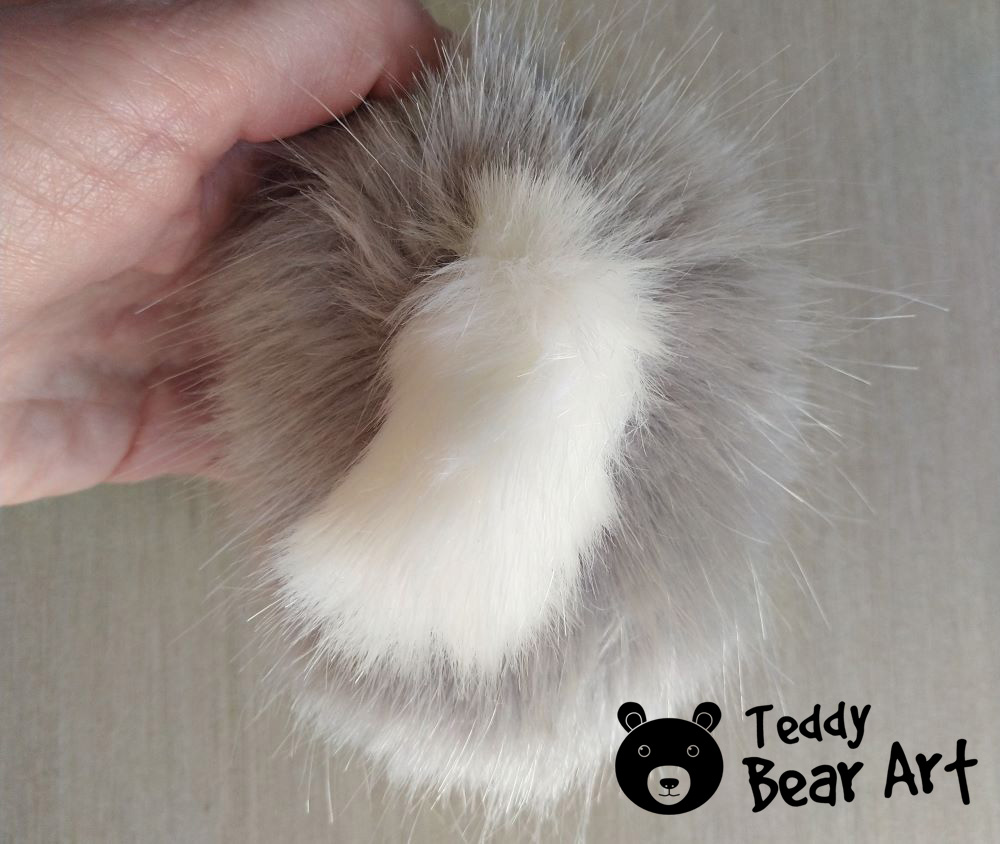
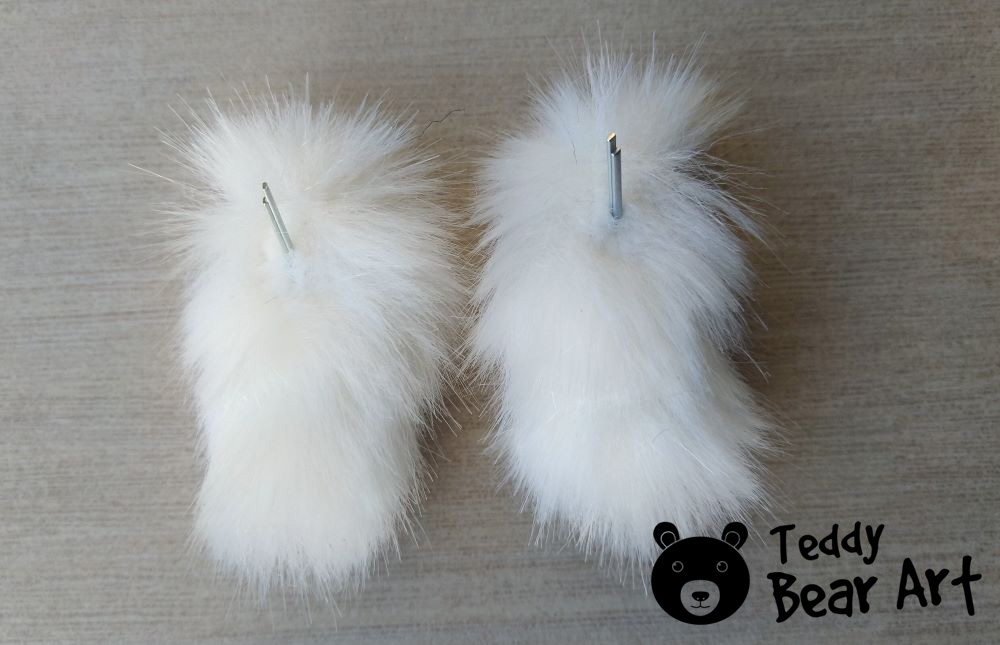
- White faux mink fur with a pile length of 1.5 cm for the head and the wings.Grey faux mink fur with a pile length of 2-2.5 cm for the head and the body.
- Strong threads and a needle for hand sewing.
- A pair of black glass eyes on a metal loop 12 mm in diameter.
- Waxed thread.
- Metal pellets or glass pellets for weight.
- Long needle.
- Scissors.
- A piece of felt fabric for the eyelids.
- Discs: 12 mm in diameter – 6 pieces.
- T-shaped cotter pins 1.6×20 – 3 pieces.
- Synthetic filler.
- Acrylic and paintbrushes.
- Glance varnish for acrylic paint.
- Any materials you use for tinting fabric (oil paints, pastels, textile paints, markers, etc.)
- Milliput White, a two-part, cold setting, non-shrinking epoxy putty.
- Pliers.
- An awl.
- Strong glue UHU.
- Black chenille wire.
- Black merino sheep wool and needles for felting.
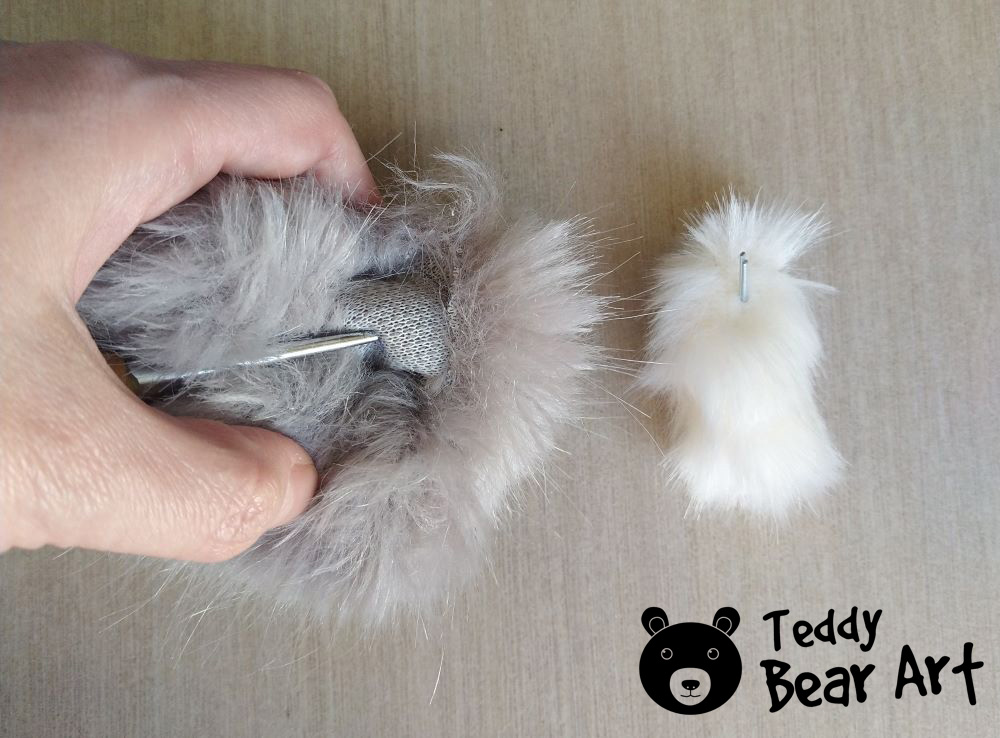
Preparing Fabric Pieces
If printing the pattern is not an option, a workaround is to place a sheet of baking paper on your screen and carefully trace the image, capturing all arrows and markings.
It’s crucial to consider the fur direction of our fabric. The pattern features arrows indicating the desired fur direction. Align the pattern pieces with the backside of the fabric, making sure the arrows align with the fur’s direction.
Next, use a pen or pencil to trace the penguin’s sewing pattern. When cutting out the details, maintain a 7 mm distance from the edges.
When trimming the details, aim to position the scissors beneath the fur, cutting only at the fabric’s base without snipping the fur itself. This precaution ensures that when we invert the sewn sections, the fur lies smoothly and elegantly along the seams.
With this method, we meticulously cut out all components of the pattern.
Read more about sewing and stitching here.
Step-by-Step Sewing Guide
- Sew all the darts (highlighted in green).
- Stitch the forehead to the muzzle of the penguin.
- Stitch the muzzle and the back of the head.
- Sew the body.
- Sew the wings.
Completing Assembly and Joint Work
- Use pliers and a rounded-tip wooden stick to turn out the finished pieces.
- Fill the head with synthetic stuffing.
- Insert the disk with the cotter pin.
- Securely sew and close the head’s opening with waxed thread. Fasten the thread and conceal its ends within the head.
- Insert the disk with the cotter pin and stuff the wings. Sew up the opening.
- Use a needle or an awl to release the fur from the seams. Then, comb the fur along the seams in different directions to minimize their visibility.

Crafting the Muzzle of the Penguin
Given the substantial length of the fur employed for this penguin teddy, the pattern is intentionally crafted to allow sufficient white space on the face. To enhance realism, consider manually incorporating a touch of grey color to the bridge of the penguin’s nose. This addition contributes to a more lifelike appearance, adding nuanced details to your creation.
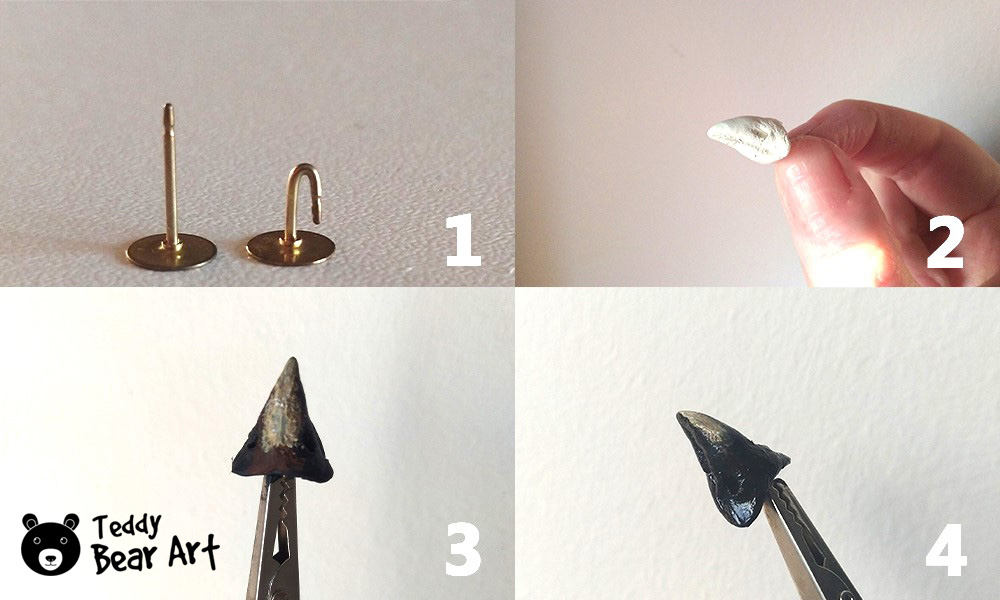
Crafting the Beak
- Using pliers, shape a loop from the steel earring base.
- Form a beak shape and insert the loop into it. If you’re working with bakeable clay, bake accordingly. For self-hardening clay, allow it to air-dry.
- Apply a coat of black acrylic paint and let it dry. Enhance the realism by adding a touch of white to the tip, followed by a blend of yellow and brown. Let the colors meld and dry.
- Finish with a protective layer of glossy acrylic paint varnish.
- Add some gray color to the middle of the penguin’s face, starting from the forehead and below where the beak will attach.
- Affix the beak to the penguin’s face using the same method employed for attaching the eyes. This meticulous process ensures the seamless integration of the beak, contributing to the overall lifelike appearance of your creation.
Installing the Eyes and Fashioning the Eyelids
To ensure precision, gather three sewing pins. Place one at the center of the penguin’s muzzle on the nose bridge and position the other two symmetrically on the sides where the eyes will be located. Use an awl to create tidy holes in the fabric.

With a long needle and waxed thread, carefully thread the eyes through these holes. Secure the threads at the base of the head near the cotter pin, discreetly concealing their ends within the head.
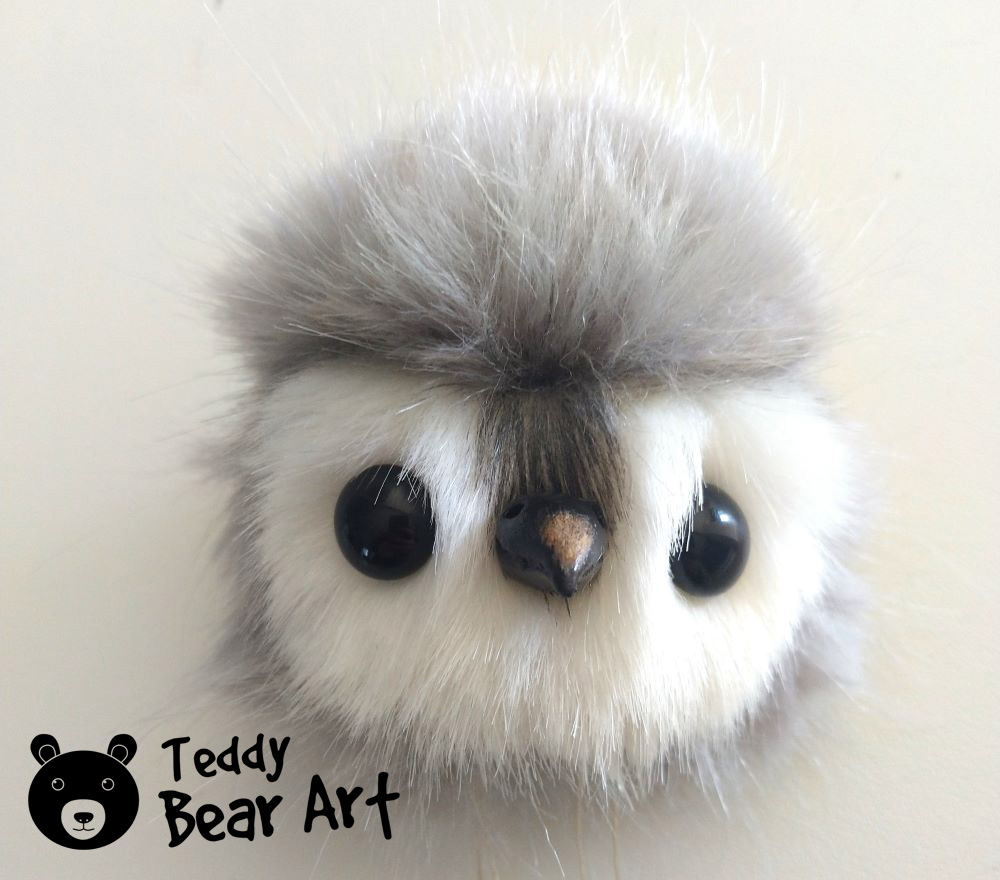
Cut out eyelids from felt and adhere them to the eyes, starting with the lower lids and then affixing the upper ones. This careful process imparts a lifelike quality to your penguin’s facial features, enhancing its overall charm and appeal.
Read more about inserting the eyes and making the eyelids here.
Creating Felted Paws for Your Penguin Teddy
- Begin by cutting the blue wire into six equal pieces, each approximately 3 cm long, to serve as the penguin’s toes.
- Group three wire pieces together.
- Now, using a slender strand of merino wool, carefully encase each wire, ensuring to add extra wraps where additional thickness is required. Proceed to felt the wool, applying gentle pressure to shape and secure the fibers around the wire structure.
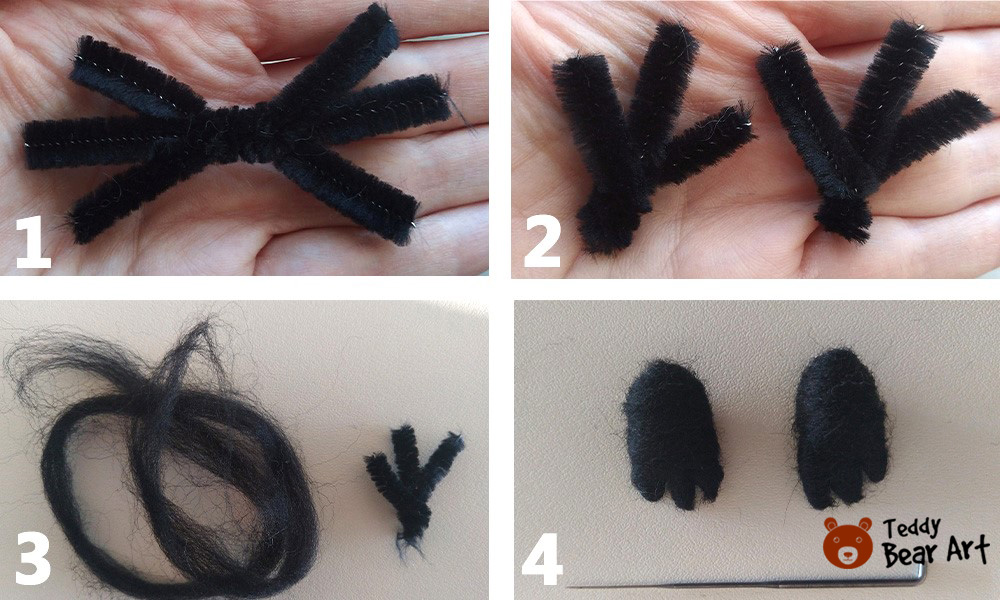
This process not only adds durability but also provides a soft, realistic texture to your penguin’s paws.
Crafting Articulation: Connecting Components and Adding Weight
In this stage, connect the head to the body and secure the wings in their designated positions.

Enhance the overall feel by incorporating a petite fabric pouch filled with metal granules for added weight within the body. Proceed to fill the body with synthetic stuffing, skillfully closing the opening.
Ensure a neat finish by delicately removing any surplus fluff from the stitches and gently combing the surface.
Sew, glue, or use needle needle-felted method to attach the paws seamlessly to the body, achieving a cohesive and well-integrated look for your creation.
For further insights and detailed instructions on perfecting joint creation, explore additional tips on making joints.
Adding Personality: Dressing Up Your Penguin Teddy
Elevate the appeal of the region surrounding the penguin’s eyes with a gentle application of light oil paint.
To perfect your technique, commence by practicing on a small fur swatch. Confirm that the brush is nearly dry by wiping it on white paper, ensuring only delicate shadows, not bold strokes, adhere to the fur.
For an extra touch of charm, consider incorporating a hint of blush into your penguin if you wish.
As an alternative you can use grey and pink markers for textiles to create shades around the eyes and blush.
Part of the joy of creating a handmade penguin teddy is the opportunity to dress it up! Along with our free penguin teddy pattern, we offer complimentary clothing patterns and tutorials for you to download.
Explore the possibilities of adding a tiny wardrobe to your teddy. Whether it’s a miniature scarf, a dapper bowtie, or a cute accessory, dressing up your penguin adds a delightful touch to your creation.
Crafting Tips and Techniques
Encountering challenges is a natural part of any crafting journey. In this section, we’ll address common issues beginners might face and provide practical solutions to ensure a smooth experience.
Refine Wing Fit and Ensure Stability
- Carefully trim excess fur around the cotter pin on the wing and the corresponding area on the penguin’s body where the wings will be inserted. This precision ensures the optimal fit of the wings to the body.
- Before closing the opening on your penguin’s back, confirm its secure standing position. Strategically position the weight to impart stability to the penguin.
- When affixing the legs, ensure a secure attachment that allows the penguin to stand confidently, resulting in a well-balanced and robust final creation.
Keep in mind that the ultimate appearance of your penguin is significantly influenced by your choice of fur and eyes, as well as the placement of the eyes and beak. Feel free to experiment to discover your ideal combination!
The Process of Needle Felting the Paws
- Poke with Needle: Hold the foot in one hand and, with the other, repeatedly poke it with the felting needle. The needle’s barbs push the fibers into each other, creating a solid structure.
- Build and Sculpt: Continue poking and shaping the wool until you achieve the desired shape and density.
- Protection: Use a foam pad as a work surface to protect both your needle and your tabletop.
- Be patient: needle felting is a gradual process that builds up over time.
Conclusion
Crafting a handmade penguin teddy is not just a creative endeavor; it’s a gesture of love and thoughtfulness. As you embark on this crafting journey using our free pattern and guide, remember that the joy lies not only in the result but also in the process itself. Share the warmth of handmade gifts, and let your creativity flourish.
More Goodies
Discover more free, easy, perfect patterns and guides:
- Adorable Penguin Sewing Pattern: A Step-by-Step Guide for Beginners: This comprehensive guide will lead you through each stage, transforming a delightful Teddy Penguin into reality using our meticulously designed penguin sewing pattern.
- Cozy Creations: Striped Teddy Bear Scarf Knitting Patterns: Within this guide, we’ll delve into the craft of knitting striped scarves specifically tailored for your cherished stuffed companions.
- Elevate Your Teddy Bear Wardrobe with this Bucket Hat Making Guide: If you’re a teddy bear enthusiast eager to enhance your teddy bear’s wardrobe, you’re in the perfect spot. In this guide on creating bucket hats, we’ll walk you through the process of crafting charming and fashionable bucket hats for your lovable companions.
Get Free Patterns & Be the First to Know!
Want free teddy bear patterns, exclusive tutorials, and a chance to win craft supplies?
Sign up for our newsletter using the subscribe form in the middle of this article to receive new patterns, insider tips, and the latest news on teddy bear art. You’ll also automatically be entered into our annual giveaway for a chance to win teddy bear crafting materials.
Bonus entry: Save one of our pins on Pinterest to increase your chances of winning!
Let’s create, inspire, and craft beautiful teddy bears together!
Hey Hanna! Your guide on crafting a handmade penguin teddy is absolutely delightful! I’m curious. What inspired you to create this adorable penguin pattern. The addition of dressing up the penguin is a charming touch. Any recommendations for accessories to add that extra flair? Thanks for spreading the joy of handmade gifts!
Hey there! 🐧 Thanks a bunch for your sweet words! I’m thrilled you enjoyed the handmade penguin teddy guide. Penguins just have this natural charm, right? 🌟 As for the inspiration, it came from the idea of bringing a bit of Antarctic cuteness into our crafting world!
For accessories, you can’t go wrong with a tiny scarf or a beanie – adds that cozy winter vibe. A mini pair of glasses or a bow tie could also give your penguin some extra personality. Get creative, and most importantly, have fun crafting! 🧵✨ If you have any specific ideas, feel free to share, and we can brainstorm together. Happy crafting! 🎨💖
I absolutely loved reading through your detailed guide on crafting a handmade penguin teddy! As someone who enjoys DIY projects, I find the idea of a personalized penguin teddy a delightful and unique gift choice. In my own crafting experiences, I’ve learned that adding personal touches not only makes the creation process more enjoyable but also makes the gift more meaningful.
The comprehensive steps and tips you provided are incredibly helpful, especially the nuanced details like crafting the muzzle and the beak, which can really bring the teddy to life. It’s these little details that transform a simple craft into a cherished keepsake.
Your guide inspires me to embark on this project, and I’m excited to add my own flair, perhaps with a custom-made accessory or two. Thank you for sharing this wonderful idea and for spreading the joy of handmade gifts! 🧸✨
Hey there! 🌟 Thank you so much for your lovely comment! 😊 I’m thrilled to hear that you enjoyed the guide on crafting a handmade penguin teddy. DIY projects are such a fantastic way to add a personal touch, and I totally agree – those nuanced details can make all the difference in bringing a teddy to life! 🐧💕 Best of luck with your own project, and feel free to get creative with those custom-made accessories. It’s all about making something special and meaningful. Happy crafting! 🧸✨
Crafting a handmade penguin teddy is not only a delightful creative endeavour but also a gesture of love and thoughtfulness. The article provides a detailed and comprehensive guide, including a free pattern, for crafting a unique and personalized penguin teddy. The emphasis on handmade gifts and the joy of the crafting process adds a sentimental touch to the gift-giving experience. The inclusion of tips, techniques, and troubleshooting advice ensures that both beginners and seasoned crafters can embark on this project with confidence. The article encourages creativity, experimentation, and the exploration of additional clothing patterns to enhance the teddy’s charm. Overall, it’s a heartwarming and practical guide for those looking to create a special and memorable gift. Thanks and Cheers
Hey there! 🐧 Thanks a ton for your heartwarming words! I’m thrilled to hear you enjoyed the guide for crafting a handmade penguin teddy. It’s all about spreading love and joy through the art of crafting. If you have any questions or need more tips for your creative endeavors, feel free to ask. Happy crafting and cheers to making special and memorable gifts! 🎨✨