
Embarking on the delightful journey of creating your very own stuffed penguin is an immensely rewarding craft. If you’re a beginner eager to dive into the world of soft toy making, you’re in the right place! In this step-by-step guide, we’ll walk you through the process of bringing to life an adorable Teddy Penguin using our carefully crafted penguin sewing pattern.

Download the Pattern
- From a computer (Windows).
Click on the photo of the pattern you see below. In the new tab that will open, you press the right mouse button and select the “Save image as …” option. Then you choose where you want the image to be saved on your computer. - From a phone or a tablet (Android). There should be something similar for mobile devices with Android or iOS.
Click on the image. Save it by holding your finger on the image and selecting the “Save Image” option. Then go to your photo gallery and print it (there is an option).

Materials Needed
- White faux fur with a pile length of 1.5 cm for the muzzle and the belly. Colored faux fur with a pile length of 1.5 cm for the forehead, the back of the head, the wings, and the sides of the body.
- Strong threads and a needle for hand sewing.
- A pair of blue glass eyes with a black pupil on a metal loop 10 mm in diameter.
- Waxed thread.
- Metal pellets or glass pellets for weight.
- Long needle.
- Scissors.
- A piece of felt fabric for the eyelids, paws, and beak.
- Discs: 25 mm in diameter – 6 pieces.
- T-shaped cotter pins 2.5×28 – 3 pieces.
- Washers 20 mm – 6 pieces.
- Synthetic filler.
- Any materials you use for tinting fabric (oil paints, pastels, textile paints, markers, etc.) and paintbrushes.
- Pliers.
- An awl.
- Strong glue UHU.
Cutting and Preparing Fabric Pieces
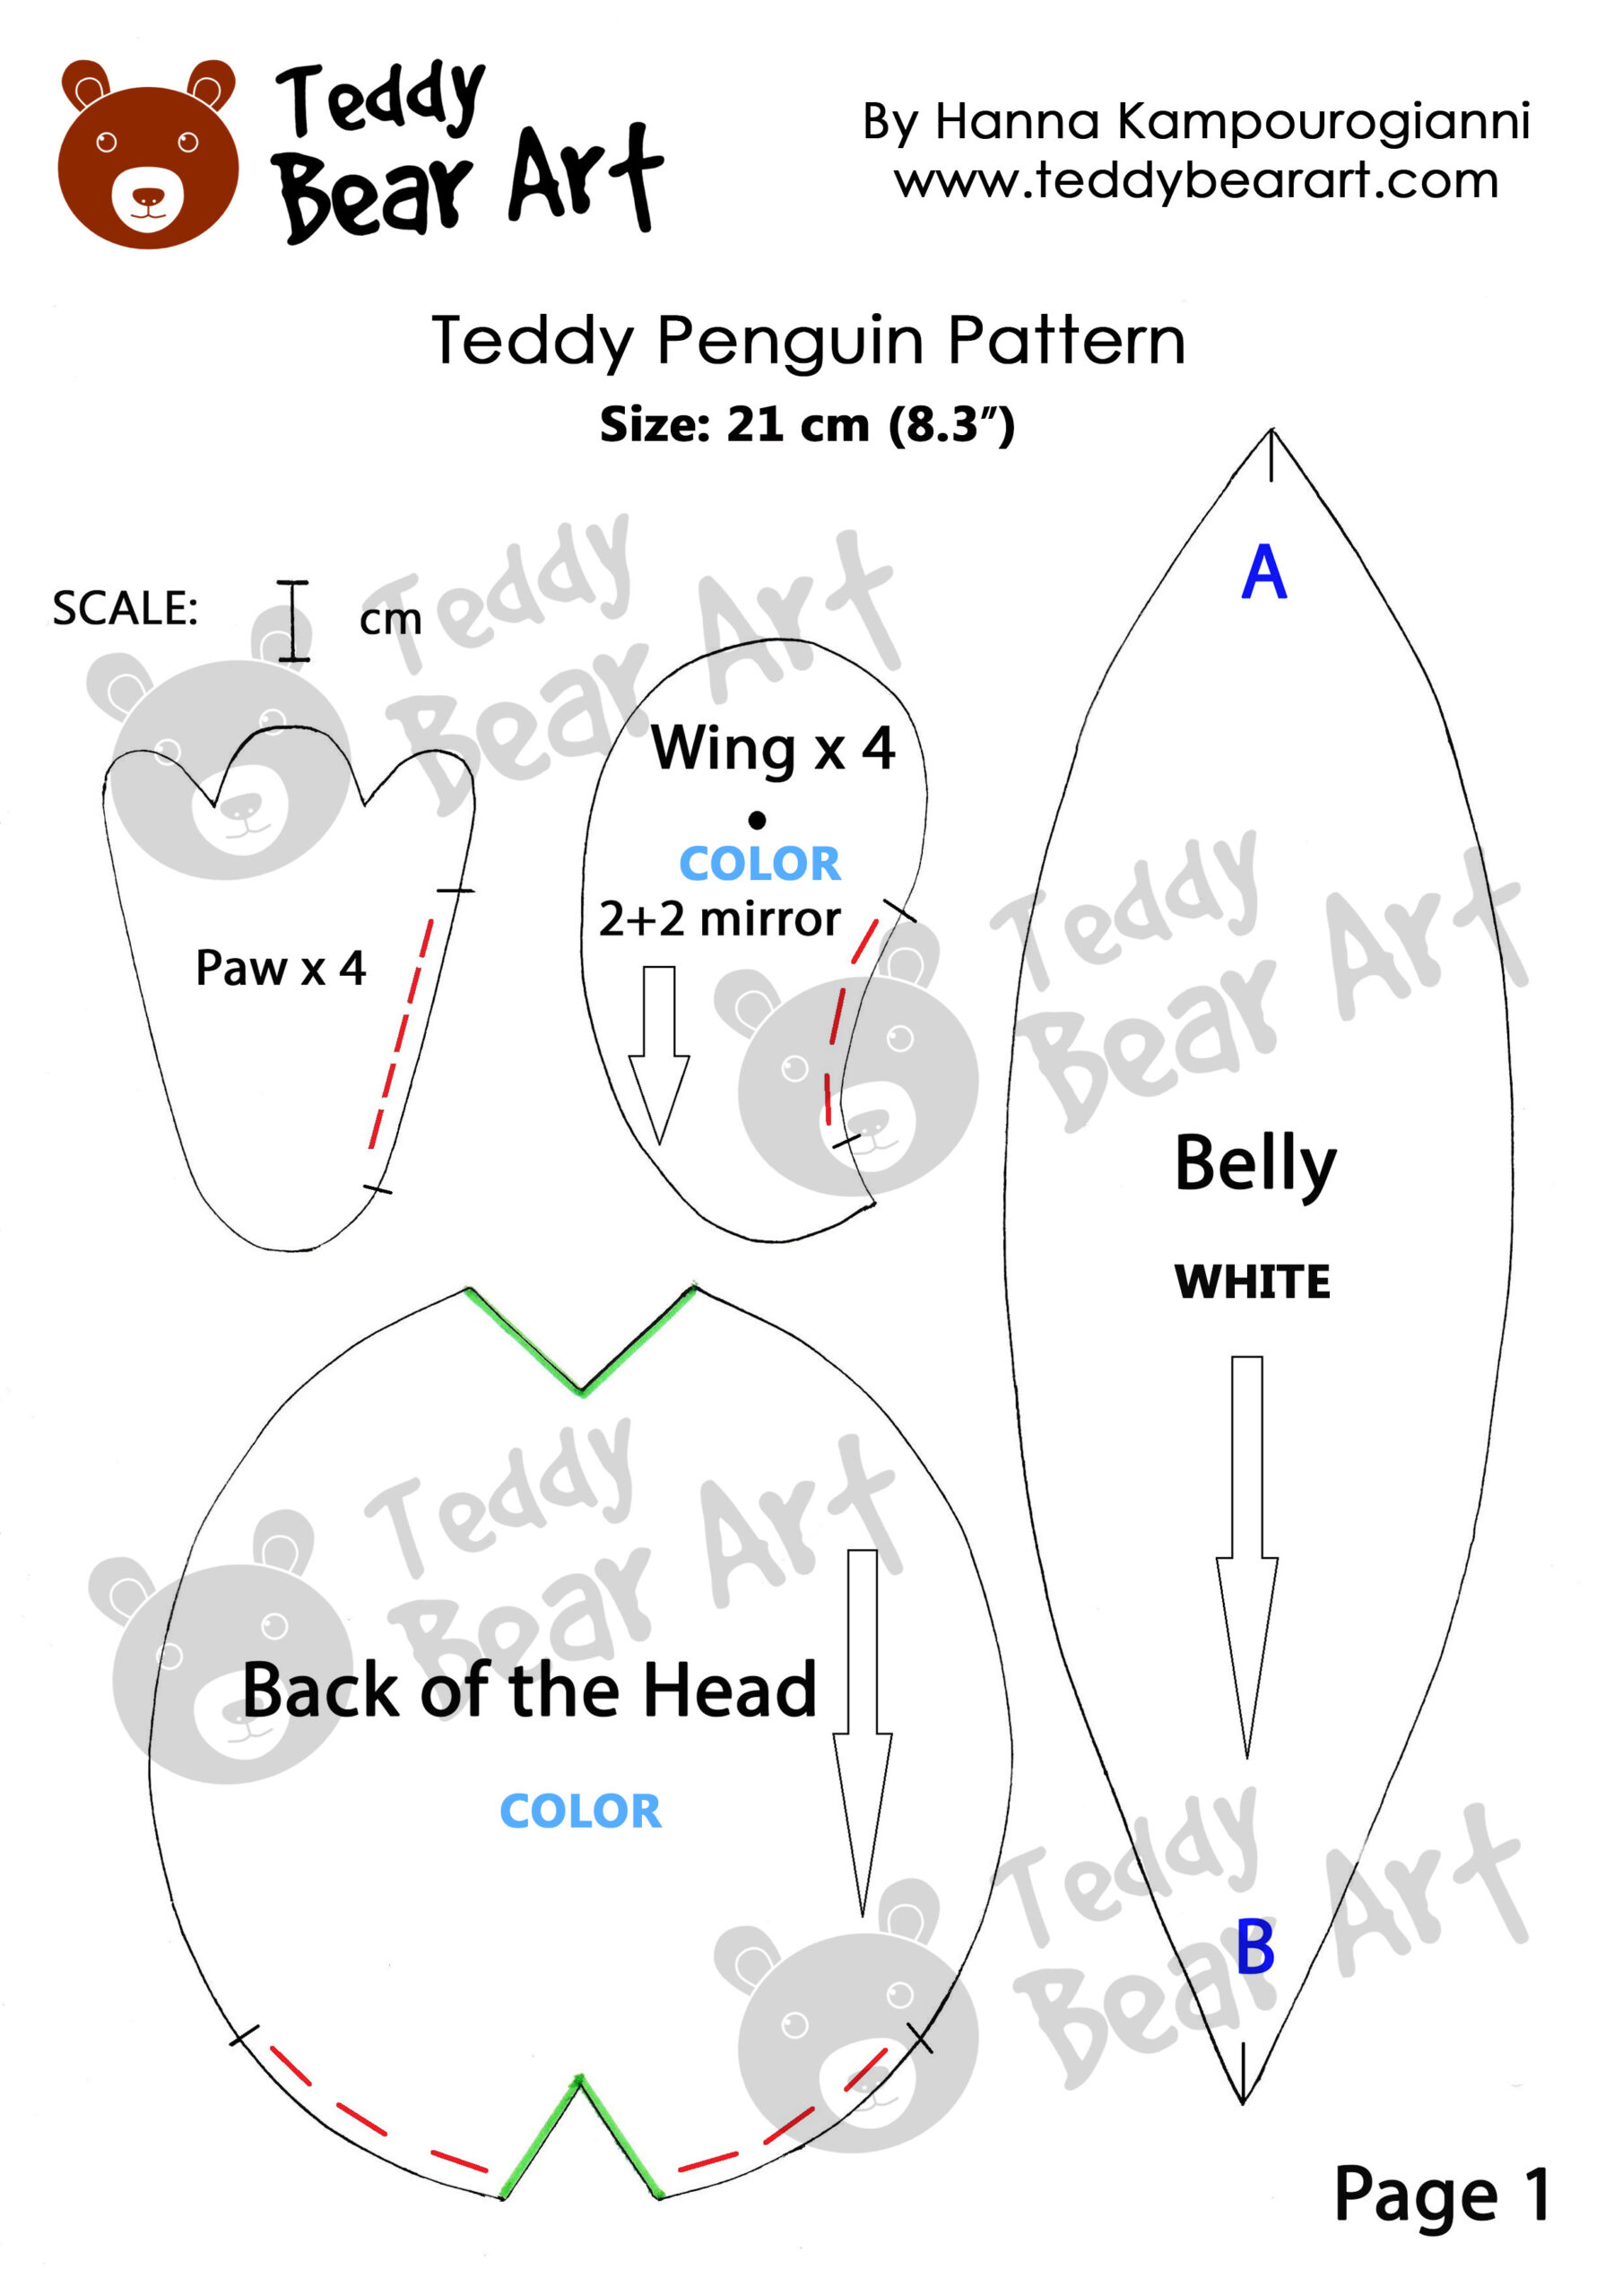
If you don’t have the option to print the pattern, simply place a sheet of baking paper on your screen and meticulously trace the image, encompassing all arrows and markings.
Considering our fabric’s fur direction is essential. The pattern displays arrows indicating the desired fur direction. Align the pattern pieces with the backside of the fabric, ensuring the arrows correspond with the fur’s direction.
Proceed to trace the penguin sewing pattern using a pen or pencil. When cutting out the details, be sure to maintain a 5-7 mm distance from the edges.
When trimming the details, aim to position the scissors beneath the fur to cut solely at the fabric’s base without snipping the fur itself. This precaution ensures that when we invert the sewn sections, the fur lays smoothly and gracefully along the seams.
With this approach, we meticulously cut out all elements of the pattern.
Read more about sewing and stitching here.
Step-by-Step Sewing Guide
- Sew all the darts (highlighted in green).
- Stitch the muzzle and the forehead of the penguin according to the purple line.
- Sew the resulting muzzle to the back of the head, leaving an opening for turning inside out.
- Sew the body: stitch the sides of the body with the belly according to the marks A to B. Then sew the sides of the body together, leaving an opening for turning.
- Sew the wings, leaving an opening for turning.
- Sew the paws, leaving an opening for turning.
- Sew the beak, leaving an opening for turning.
Stuffing and Assembling Joints
- Turn out the finished pieces using pliers and a wooden stick with a rounded tip.
- Stuff the head with the synthetic filler.
- Insert the disk with the washer and a cotter pin.
- Tighten and sew up the hole of the head with waxed thread. Fasten the thread and hide its ends inside the head.
- Stuff the wings. Insert the disk with the washer and a cotter pin, and sew up the hole.
- Utilize either a needle or an awl to release the fur from the seams. Subsequently, comb the fur along the seams in various directions to diminish its visibility.
Read more about how to insert discs and cotter pins here.
Crafting the Muzzle of the Penguin
So, it’s time to start the most creative part of creating a plush penguin, which will determine how cute it will turn out.
Inserting the Eyes and Crafting the Eyelids
Grab three pins for precision. Position one at the center of the penguin’s muzzle on the nose bridge, and place the other two symmetrically on the sides where the eyes will be situated. Employ an awl to create neat holes in the fabric.
Using a lengthy needle and waxed thread, carefully thread the eyes through these holes. Fasten the threads at the base of the head near the cotter pin and discreetly conceal their ends within the head.
Craft eyelids from felt and glue them to the eyes, starting with the lower lids and then attaching the upper ones. This meticulous process adds a lifelike quality to your penguin’s facial features, enhancing its overall charm and appeal.
Read more about inserting the eyes, making the eyelids here.
Crafting the Beak
- Lightly stuff the penguin’s felt beak with synthetic stuffing and sew the hole closed.
- In places where the nostrils spread, make them tighten.
- You can also tint the beak with dark paint.
- Sew the beak to the penguin’s face.
Creating Penguin’s Paws
- Lightly stuff the penguin’s felt paws with synthetic stuffing and sew the hole closed.
Making Joints
- Connect the head to the body and affix the wings in place.
- Introduce a small fabric pouch containing metal granules for weight inside the body, then proceed to fill it with synthetic stuffing. Seam up the opening, carefully removing excess fluff from the stitch, and gently comb the surface.
- Sew the paws to the body.
Read more about how to make joints here.
Personalization
Enhance the area around the penguin’s eyes by shading it with light oil paint and then add a little bit of dark brown or black shades. Begin by practicing on a small piece of fur.
Ensure that the brush is practically dry; wipe it on white paper to confirm that only subtle shadows, not vivid marks, remain on the fur.
Additionally, if you desire, add a touch of blush to your penguin.
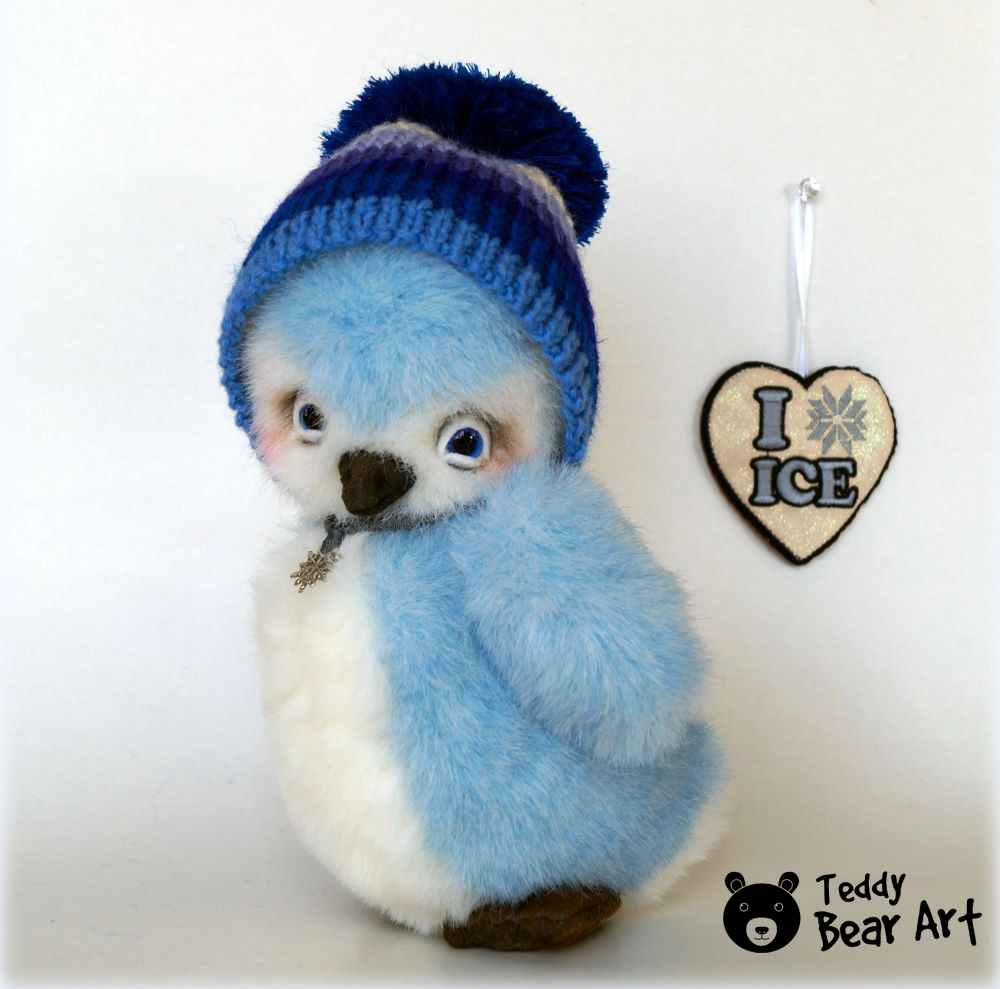
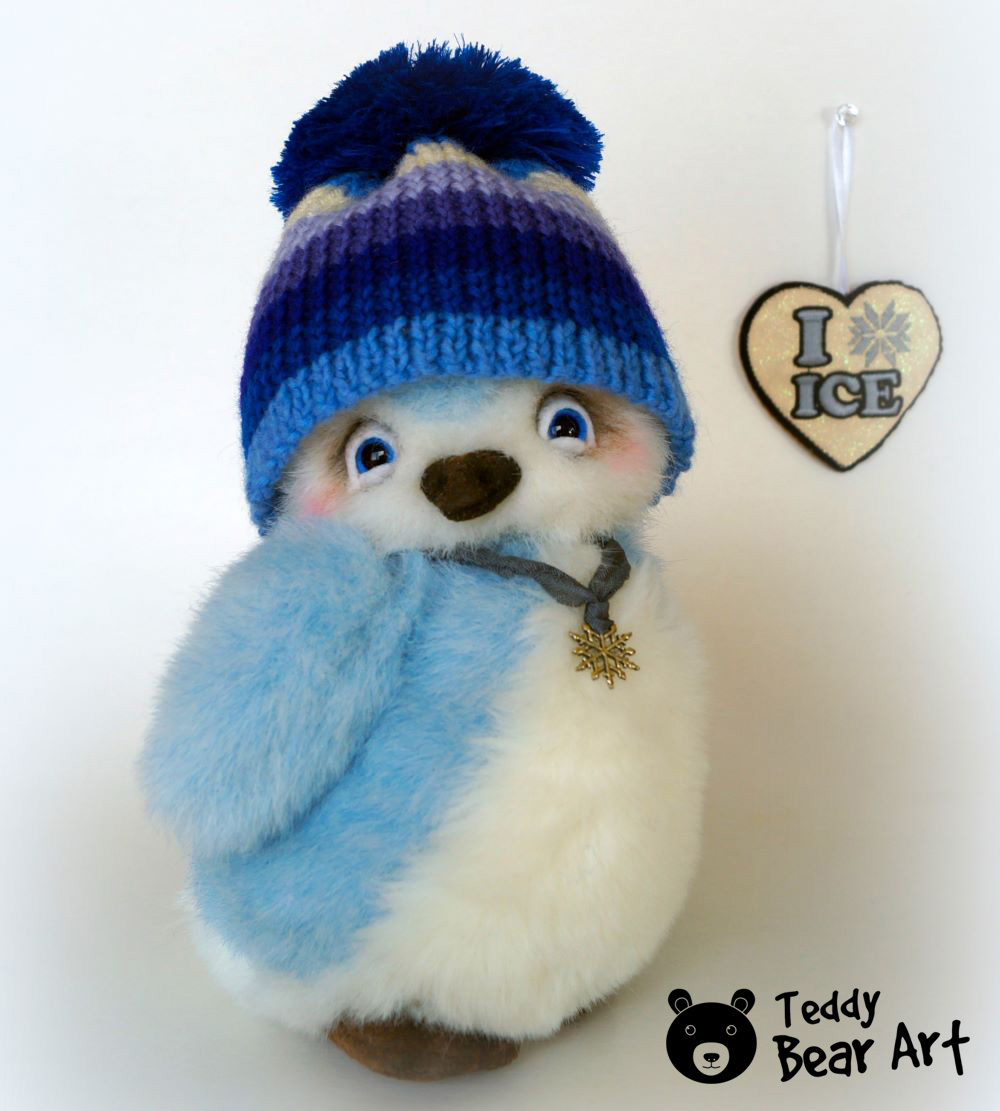
Craft an adorable hat for your teddy penguin using medium-sized knitting needles and yarn. Begin by casting on a total of 105 stitches.
Elevate your creation by including a scarf or a ribbon, along with a complementary winter accessory for an extra touch of coziness.
Troubleshooting Common Issues
Encountering challenges is a natural part of any crafting journey. In this section, we’ll address common issues beginners might face and provide practical solutions to ensure a smooth experience.
- Trim off some fur on the wing around the cotter pin and on the penguin’s body where the wings will be inserted. This will ensure the best fit of the wings to the body.
- Before closing the opening on your penguin’s back, ensure it stands securely. Position the weight to provide stability to the penguin.
- When attaching the legs, confirm that they are sewn in a way that allows the penguin to stand confidently. This ensures a well-balanced and sturdy final result.
- Remember that the final appearance of your penguin depends largely on the fur and eyes you choose, as well as the placement of the eyes and beak. Experiment to find your perfect option!
Conclusion
Crafting your adorable Penguin using our penguin sewing pattern is not just a creative process; it’s a journey filled with joy and satisfaction. Summing up the key steps, we hope this guide sets you on a path to becoming a confident and skilled soft toy maker.
Get Free Patterns & Be the First to Know!
Want free teddy bear patterns, exclusive tutorials, and a chance to win craft supplies?
Sign up for our newsletter using the subscribe form in the middle of this article to receive new patterns, insider tips, and the latest news on teddy bear art. You’ll also automatically be entered into our annual giveaway for a chance to win teddy bear crafting materials.
Bonus entry: Save one of our pins on Pinterest to increase your chances of winning!
Let’s create, inspire, and craft beautiful teddy bears together!
Wow, what a beautiful and adorable penguin, I didn’t know it was possible to make something like this from scratch, you are so creative! I love the way you described the materials that one needs and the step-by-step tutorial, thanks for doing this! How did you learn to make patterns like this, because I think it is more advanced than beginners haha!
Hey there! Thanks a bunch for your sweet words! 🐧 I’m thrilled you liked the penguin tutorial. It’s awesome to hear you found the materials and steps helpful.
As for creating patterns, it did take some time to get the hang of it, but practice makes perfect, right? 😄 Over the years, I’ve picked up tricks and techniques through trial and error. The key is not to get discouraged and have fun experimenting with different shapes and sizes.
If you ever decide to give it a shot, start with simpler patterns and gradually challenge yourself. Before you know it, you’ll be crafting intricate designs like a pro! Feel free to reach out if you have any questions along the way. Happy crafting! 🧸✨
Hi there This post I find very interesting.
I like it because you explain step by step how to make this Penguin teddy and you shear all your expertise.
I think kids must work more with there hands and do more stuff like this in schools.
Thanks for letting me view your post
Hey! Thanks a bunch for your awesome comment! 🐧 I’m thrilled you found the post interesting and that the step-by-step guide on making the Penguin teddy was helpful. Totally agree with you on kids getting hands-on and creative in school – it’s such a fantastic way to learn. Thanks for checking out the post! If you have any more ideas or suggestions, feel free to share. 😊