Updated March 2026
Creating clothes for teddy bears doesn’t have to be complicated. This beginner-friendly teddy bear clothes sewing pattern shows how to sew a jacket for your teddy anteater. The guide includes a full list of materials, step-by-step instructions, and practical tips for assembling a neat, professional-looking outfit, even if you’ve never sewn teddy bear clothes before.
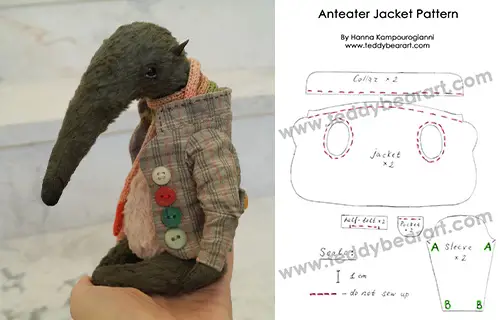
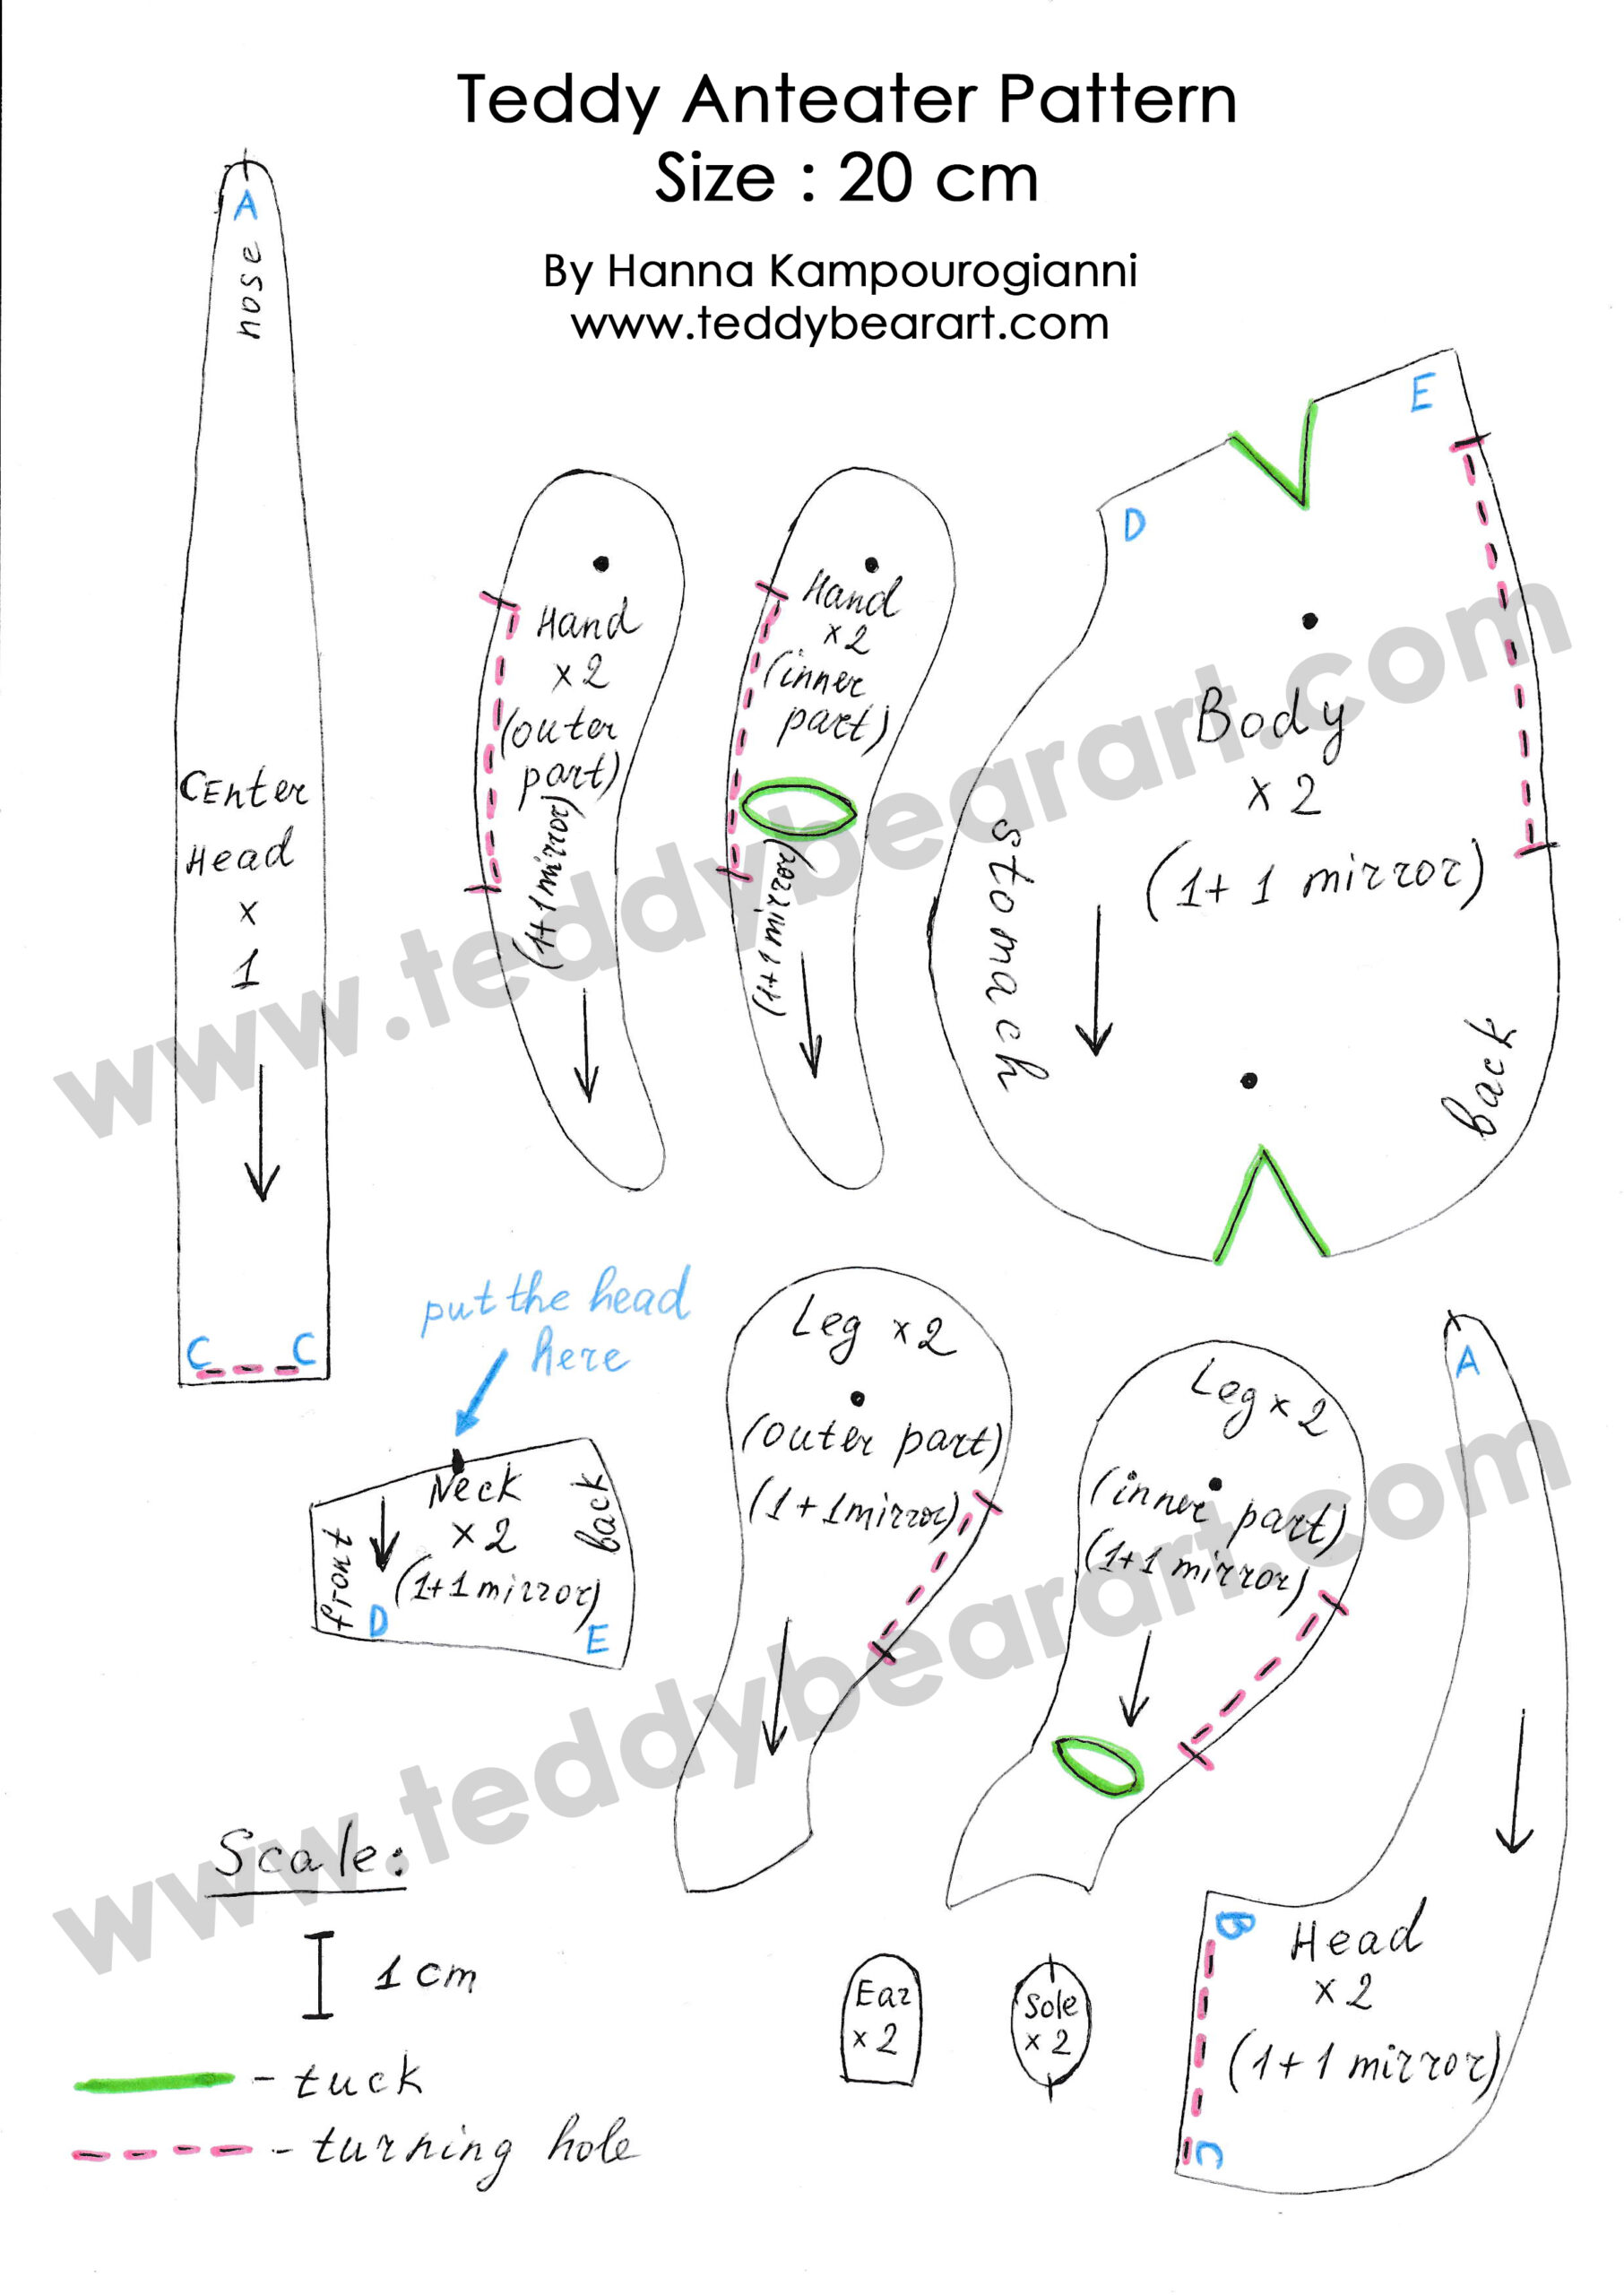
Along with this tutorial, you can download the anteater pattern and its jacket pattern for free.
Download the Patterns
Notice that seam allowances are not included.
To download the pattern, follow the instructions below:
From a phone or tablet: There should be a similar option for mobile devices with Android or iOS. Click on the image. Save it by holding your finger on the image and selecting the “Save Image” option. Then, go to your photo gallery and print it (an option available).
From a computer: Click on the photo of the pattern you see below. In the new tab that will open, you press the right mouse button and select the “Save image as …” option. Then, you choose where the image will be saved on your computer.


Step-by-Step Sewing Guide
The jacket pattern includes all essential pieces: jacket body, sleeves, collar, pocket, and half-belt.
- Prepare two pieces of thin cotton fabric—one inner side, one outer side.
- Place the jacket, collar, pocket, and half-belt patterns on fabric. Fold pieces with wrong sides out, sew along the edges, and leave areas for turning and attaching sleeves unsewn (marked in red).
- Transfer the sleeve pattern to fabric, cut, tuck the bottom twice, and sew along the marks (A to A, B to B). Finish edges with overlock or hand-overlock stitch.
- Turn all finished parts (except sleeves) inside out, iron, and close openings with a blind stitch. Leave the collar area open.
- Insert the collar between the jacket parts, turn up, and sew.
- Sew sleeves from the back side, stitching through three layers (two jacket layers + sleeve). Repeat for the second sleeve. Finish edges.
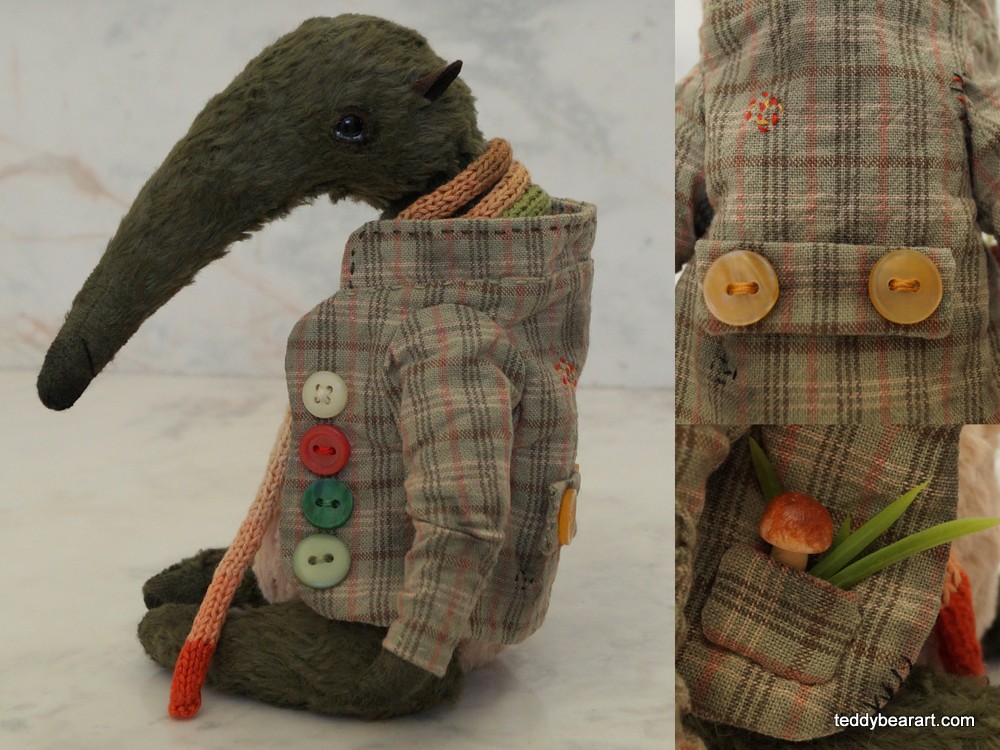
- Turn the jacket inside out, sew a half-belt with buttons, and optionally age it slightly with fabric paints or pastels.

FAQ
Do I need experience sewing human clothes?
No, this method is designed for beginners. Basic hand-sewing skills are sufficient.
Which fabrics work best?
Non-stretch fabrics, such as thin cotton, give the neatest results.
How to give a vintage or aged look?
Light shading with fabric paints, pastels, or oil paints, plus small accessories or patches.
Before You Go
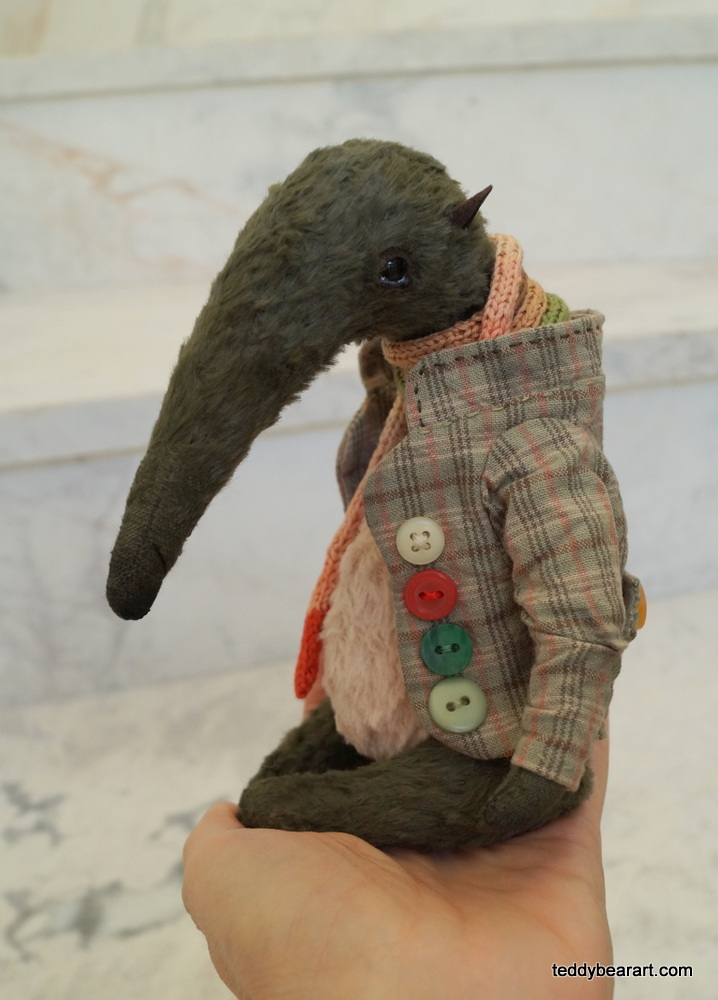
Congratulations! Your teddy anteater and his jacket are complete. This simple method allows anyone to create professional-looking outfits for teddy bears without complex tailoring.
Unusual animals like the anteater bring charm and personality. This design has quickly become a favorite among collectors.
Get Free Patterns & Be the First to Know!
Want free teddy bear patterns, exclusive tutorials, and a chance to win craft supplies?
Sign up for our newsletter using the subscribe form in the middle of this article to receive new patterns, insider tips, and the latest news on teddy bear art. You’ll also automatically be entered into our annual giveaway for a chance to win teddy bear crafting materials.
Bonus entry: Save one of our pins on Pinterest to increase your chances of winning!
Let’s create, inspire, and craft beautiful teddy bears together!