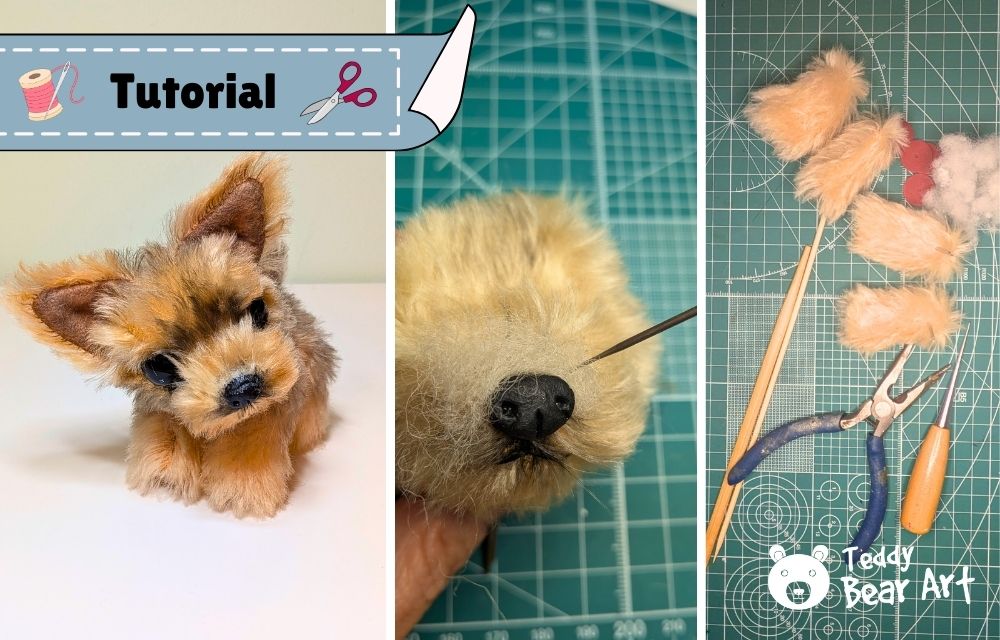
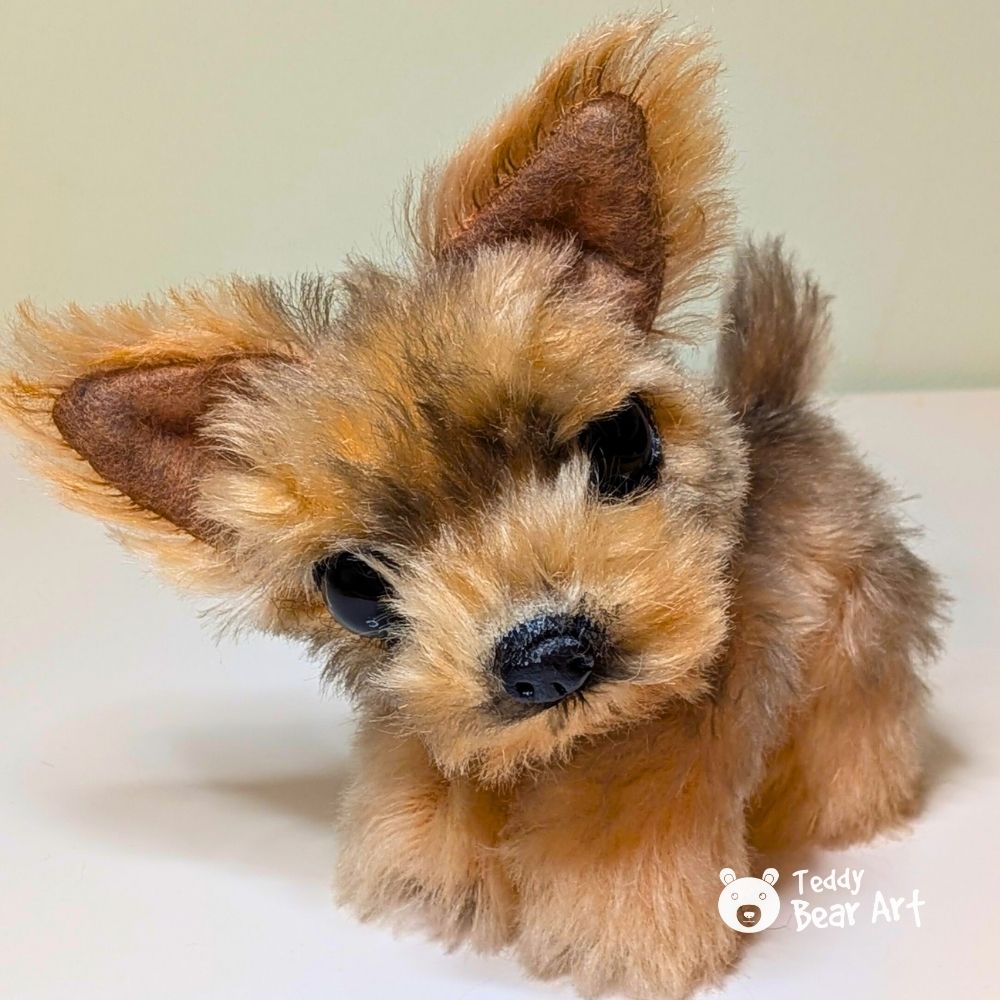
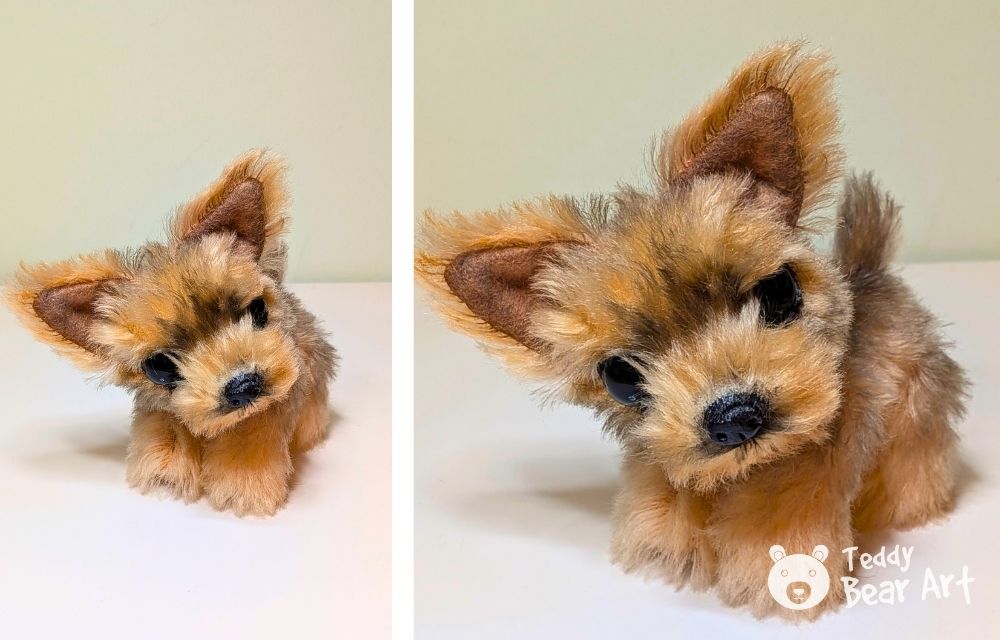
Creating a realistic dog plush is always a special experience, especially when the breed is as expressive and elegant as a Yorkie puppy. In this guide, we show you how to make a Yorkshire terrier plush step by step, with photos that clearly demonstrate every important stage.
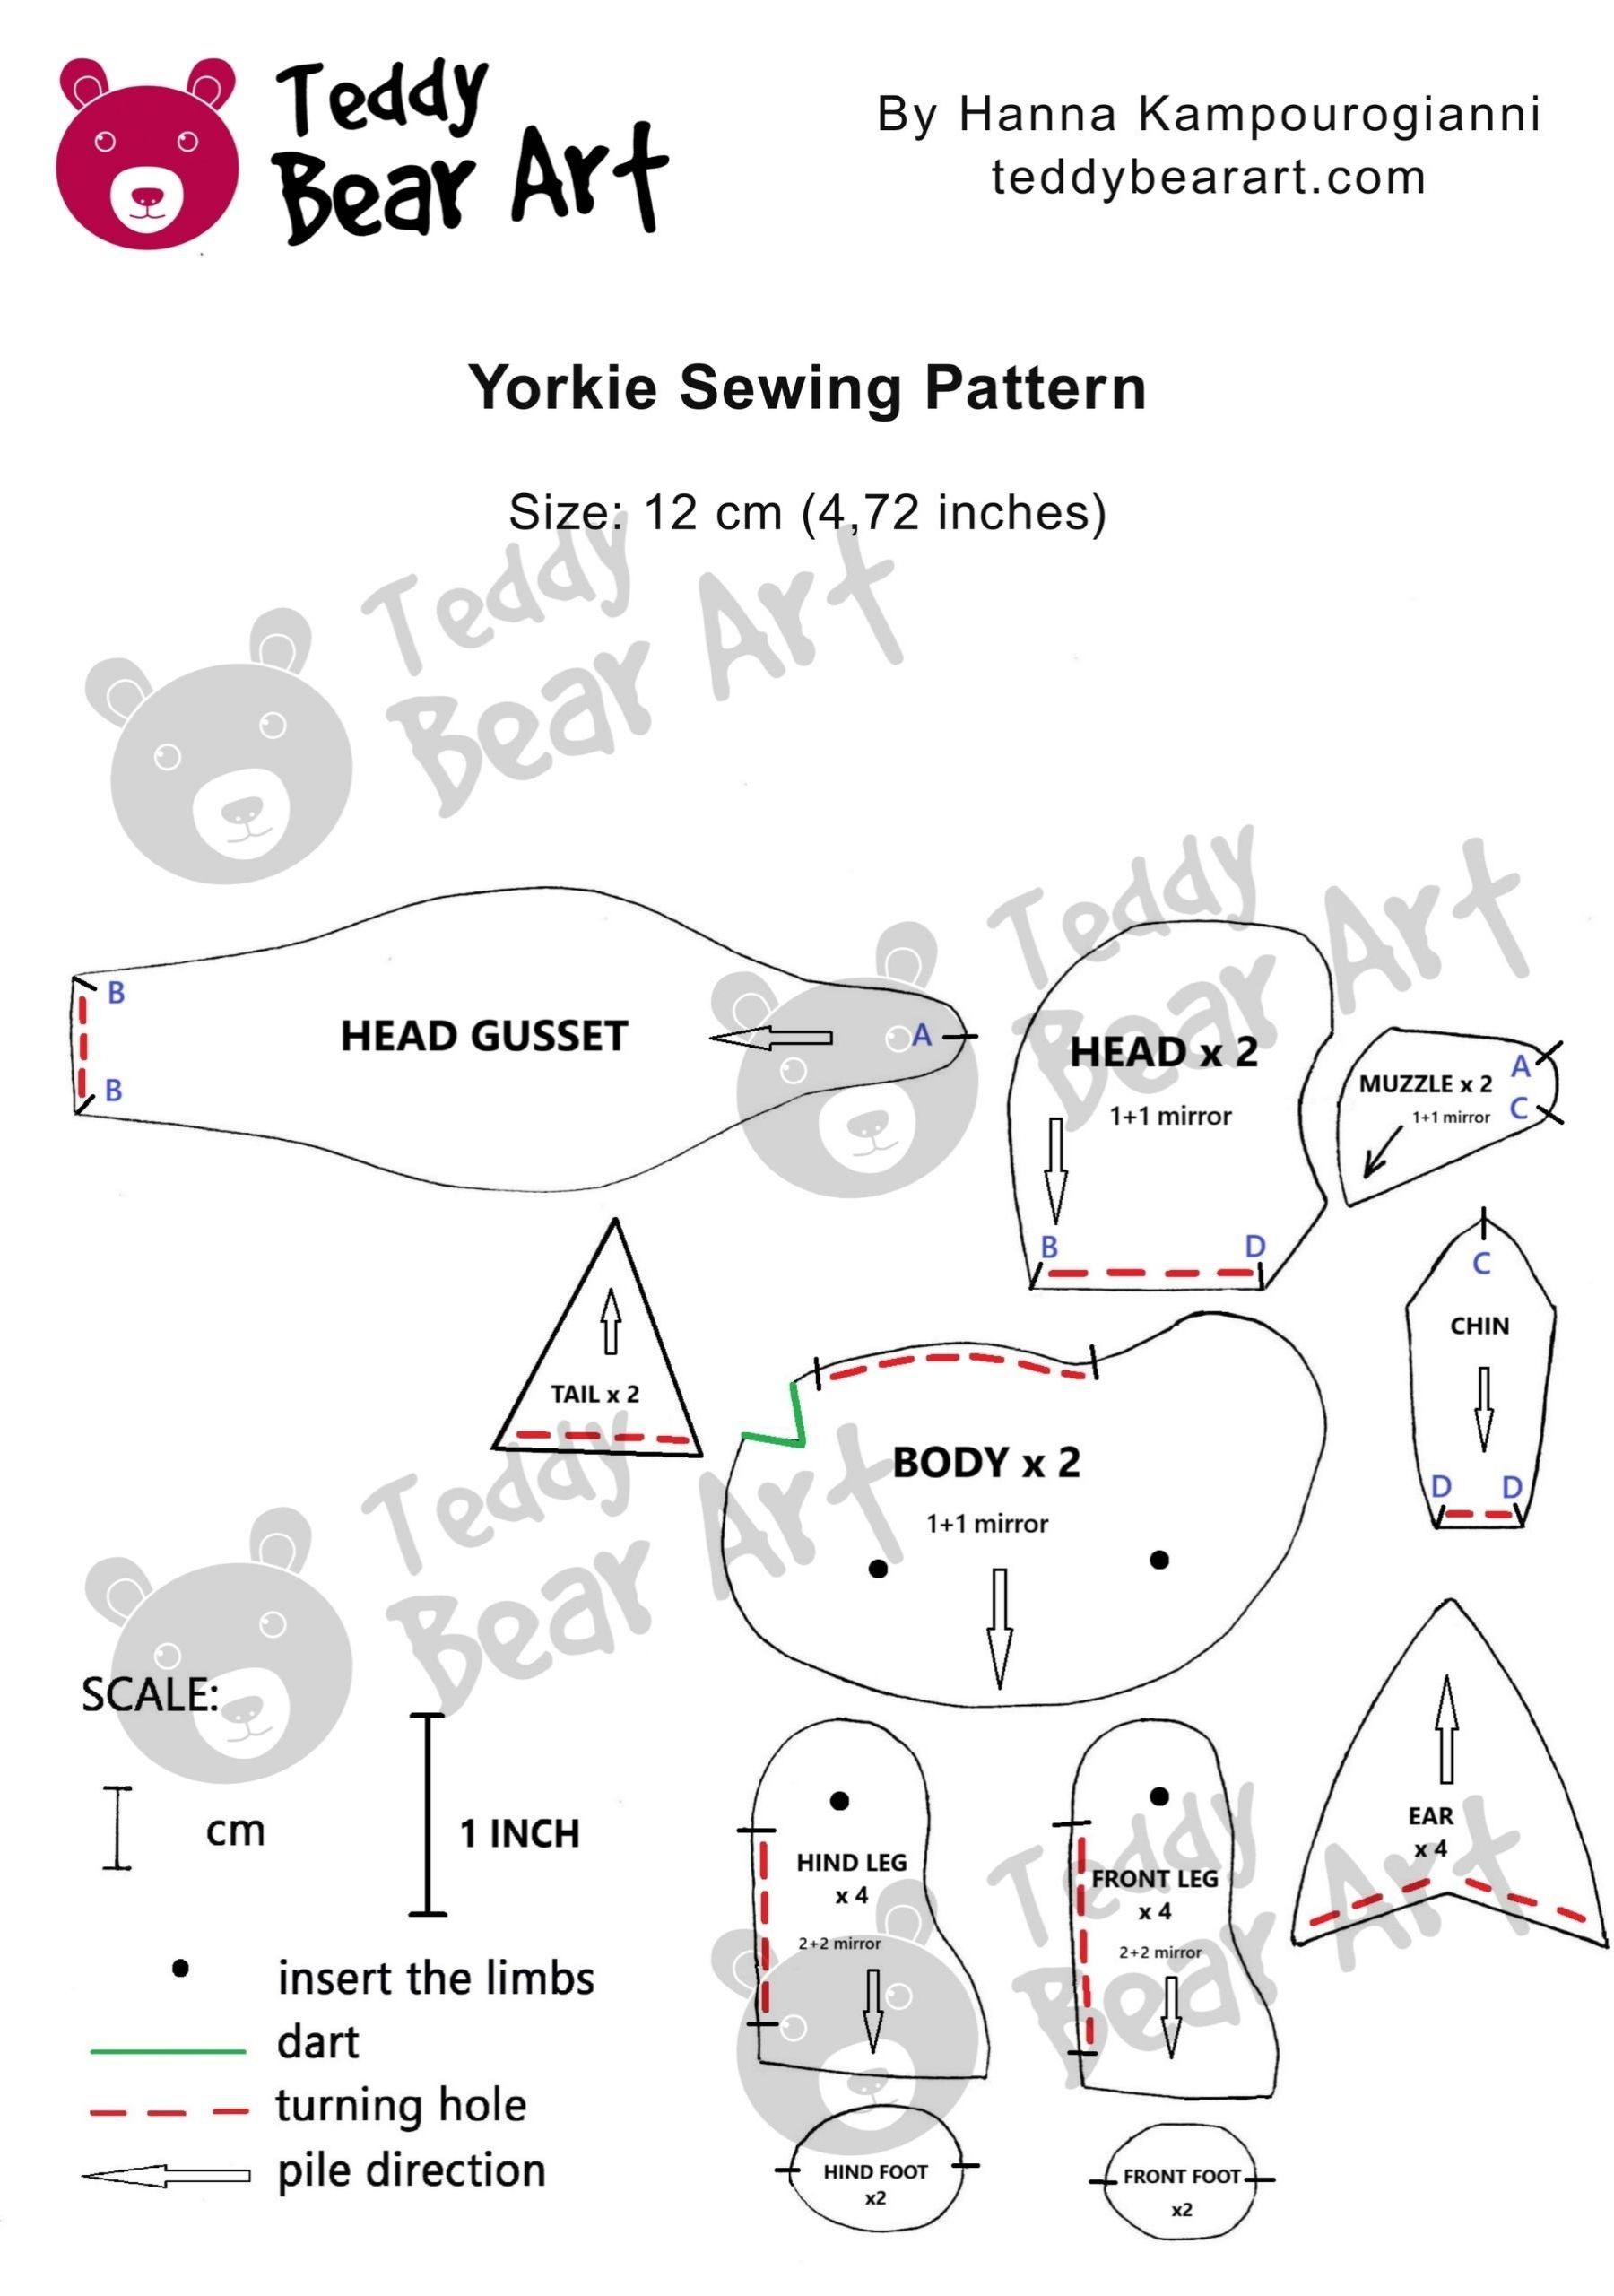
Download the Pattern
Notice that seam allowances are not included.
To download the pattern, follow the instructions below:
From a phone or tablet: There should be a similar option for mobile devices with Android or iOS. Click on the image. Save it by holding your finger on the image and selecting the “Save Image” option. Then, go to your photo gallery and print it (an option available).
From a computer: Click on the photo of the pattern you see below. In the new tab that will open, you press the right mouse button and select the “Save image as …” option. Then, you choose where the image will be saved on your computer.
Materials and Tools
- Mohair fabric with a pile length of 1.5 cm
- A pair of small glass eyes with a pupil on a metal loop (12 mm or 14 mm in diameter)
- Strong threads and a needle for hand sewing
- Waxed thread
- Black sheep wool merino
- Felt fabric for paws and ears
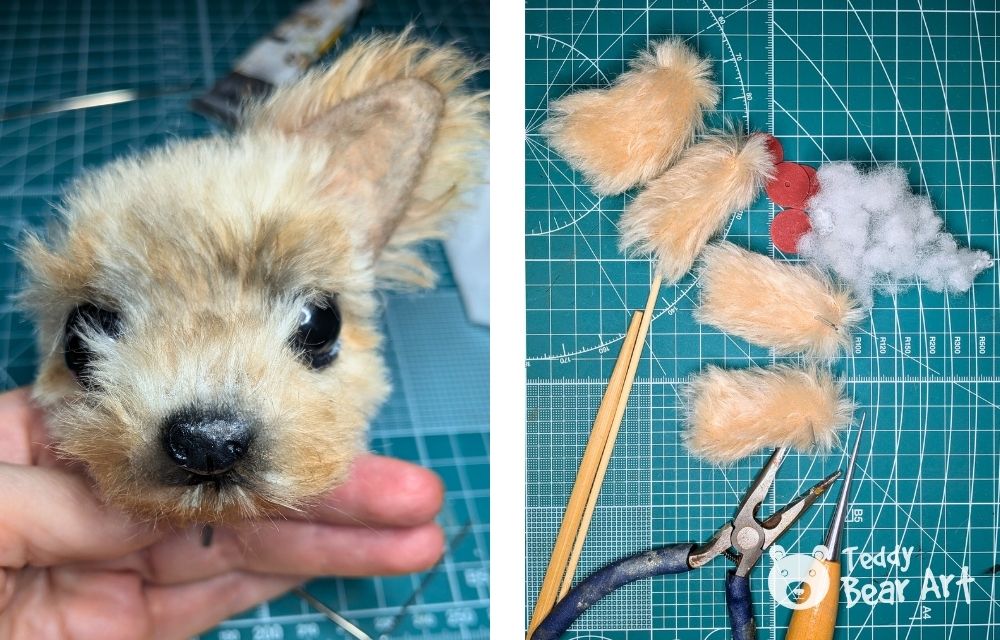
- Metal pellets or glass pellets for weight
- Discs 15 mm – for the legs – 4 pieces, 12 mm for the arms, and the head – 6 pieces
- Washers – 10 pieces
- T-shaped cotter pins – 5 pieces
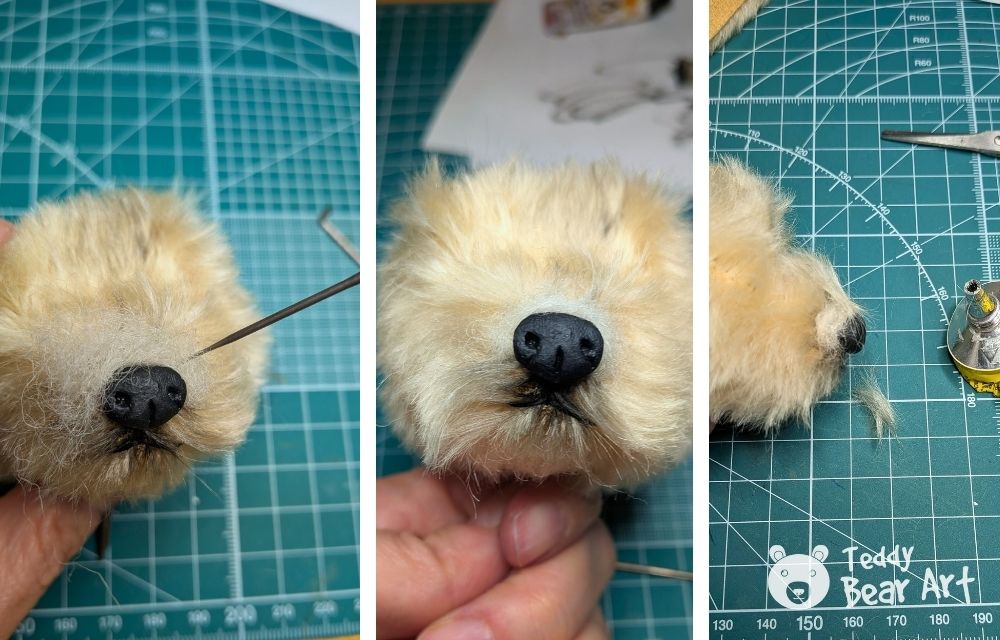
- Clay for the nose
- Glue
- Synthetic filler or sheep wool filler
- Paints and brushes
- Long doll needle
- Scissors
- An awl
- Pliers
Crafting Tutorial
Sew the muzzle to the head pieces. Next, insert and sew the head gusset, matching the points from A–A to B–B. After that, sew the section from A to C. Finally, insert and sew the chin, matching the points from C–C to D–D.
Sew the body: begin by sewing the darts. Then sew the two body pieces together. Sew the front and hind legs, then attach the feet to each leg. Sew the ears. Sew the tail.
Turn all the pieces right side out, then begin working on the head.
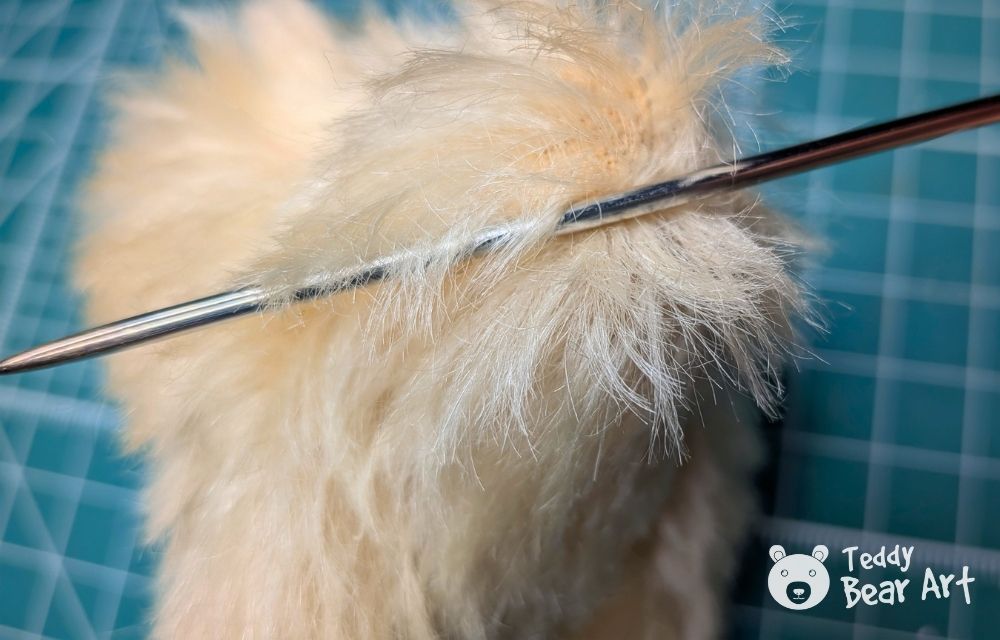


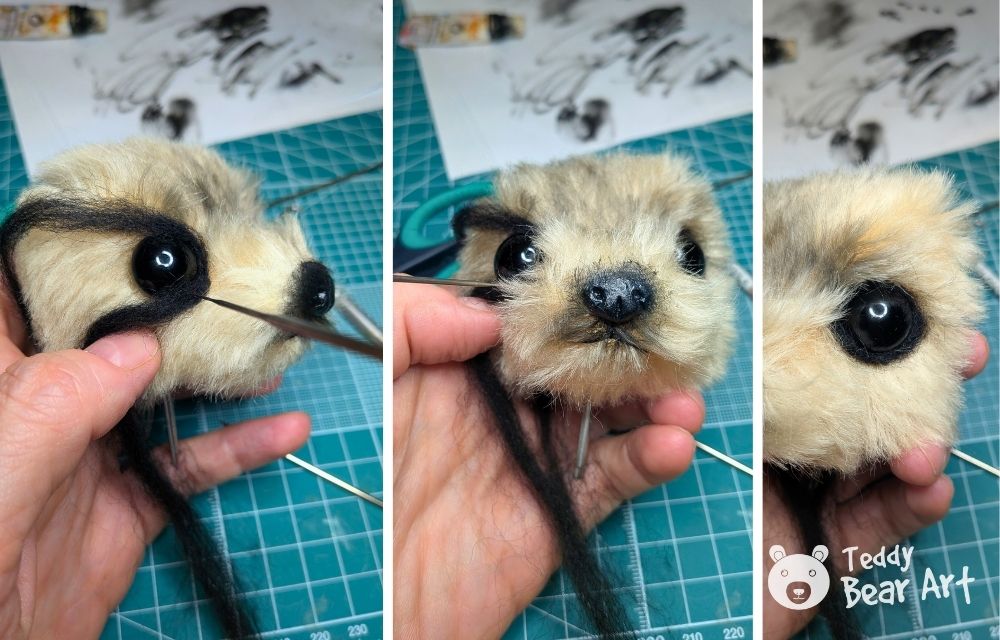
Insert the eyes using this technique. Note, the eyes can also be inserted earlier, before working on the nose.

Frequently Asked Questions
How do we tint plush details using oil paints?
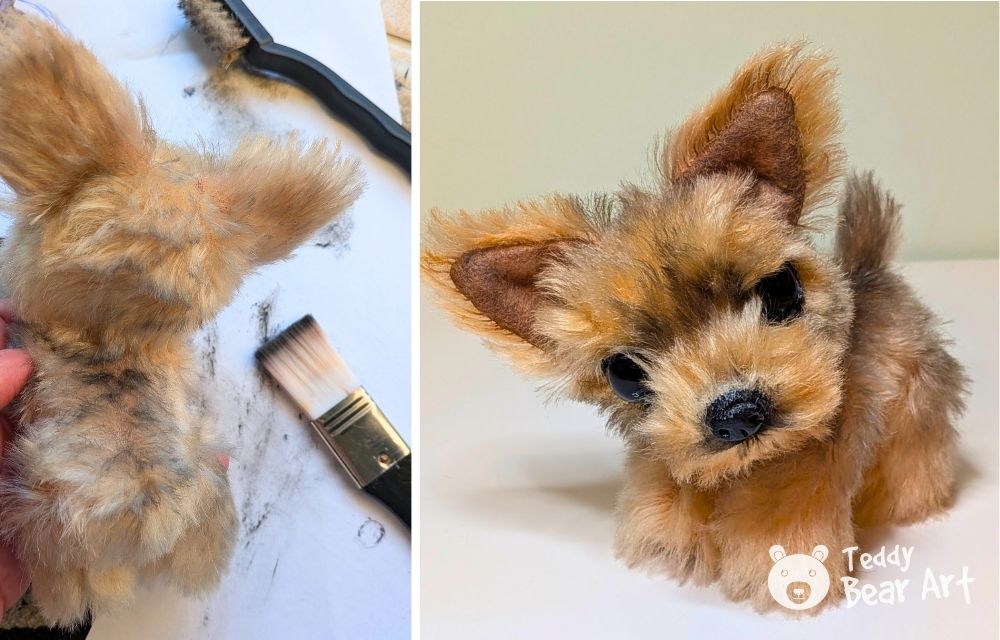
Tinting is done using the dry brush method. The brush should first be wiped very thoroughly on a sheet of white paper until it leaves almost no visible mark, only a very soft shadow. Only after that should the surface be gently tinted. Always test the color on a small scrap of mohair first. A wide, flat brush works best for this technique, the same type shown in the photos, because it distributes color evenly and softly.
What can we do if we do not have wool or do not know how to felt eyelids?
In this case, there are alternative eyelid techniques that can be used. Follow this detailed tutorial to learn them.
Before You Go
This full photo tutorial shows how careful shaping, soft tinting, and attention to small details bring a Yorkshire terrier plush to life. Take your time with each step, refer back to the photos often, and enjoy the process. With patience and practice, every new plush becomes more expressive and more personal.
Get Free Patterns & Be the First to Know!
Want free teddy bear patterns, exclusive tutorials, and a chance to win craft supplies?
Sign up for our newsletter using the subscribe form in the middle of this article to receive new patterns, insider tips, and the latest news on teddy bear art. You’ll also automatically be entered into our annual giveaway for a chance to win teddy bear crafting materials.
Bonus entry: Save one of our pins on Pinterest to increase your chances of winning!
Let’s create, inspire, and craft beautiful teddy bears together!