
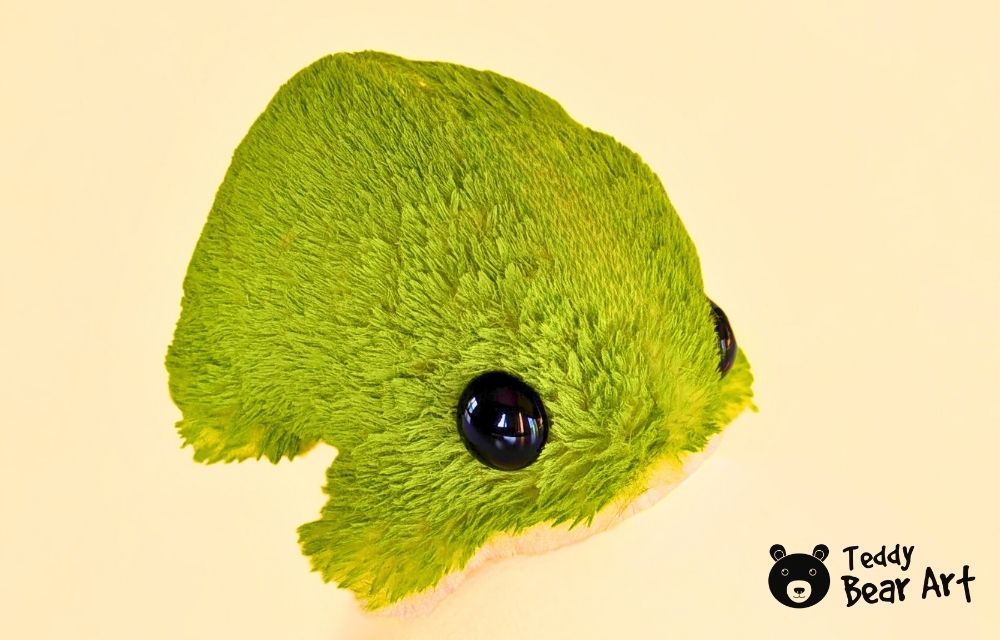
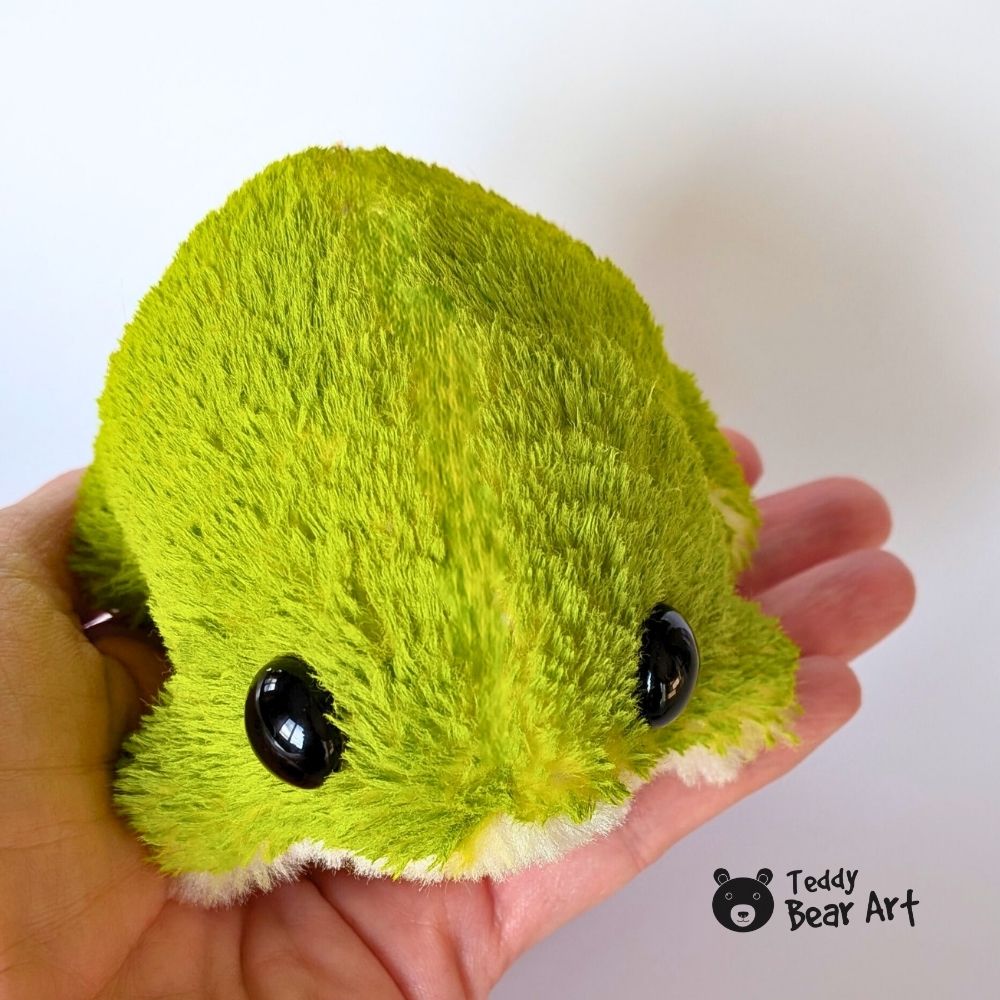
Creating a cute frog plush doesn’t have to take hours or cost a fortune. In this guide, we will show exactly how to sew a frog plush in just 30 minutes or less, giving you a fun, budget-friendly project that even beginners can enjoy. By following simple steps and using easy-to-find materials, it’s possible to make a cuddly frog toy that’s perfect for gifts, decorations, or adding to a plush collection.
Download the Pattern
Notice that seam allowances are not included.
To download the pattern, follow the instructions below:
From a phone or tablet: There should be a similar option for mobile devices with Android or iOS. Click on the image. Save it by holding your finger on the image and selecting the “Save Image” option. Then, go to your photo gallery and print it (an option available).
From a computer: Click on the photo of the pattern you see below. In the new tab that will open, you press the right mouse button and select the “Save image as …” option. Then, you choose where the image will be saved on your computer.

Materials Needed
- Short-pile plush fabric with approximately 0.9 mm pile length in your preferred color (alternatively, fleece, felt, or minky)
- Beads or black glass eyes on a metal post, 14 mm in diameter
- Stuffing (polyfill or leftover soft fabric)
- Thread in a matching color
- Hand sewing needle
- Scissors, pins, and a fabric marker
Note: Safety eyes can be used, but they must be inserted before stuffing the plush to ensure they are secure.
Step-by-Step Instructions
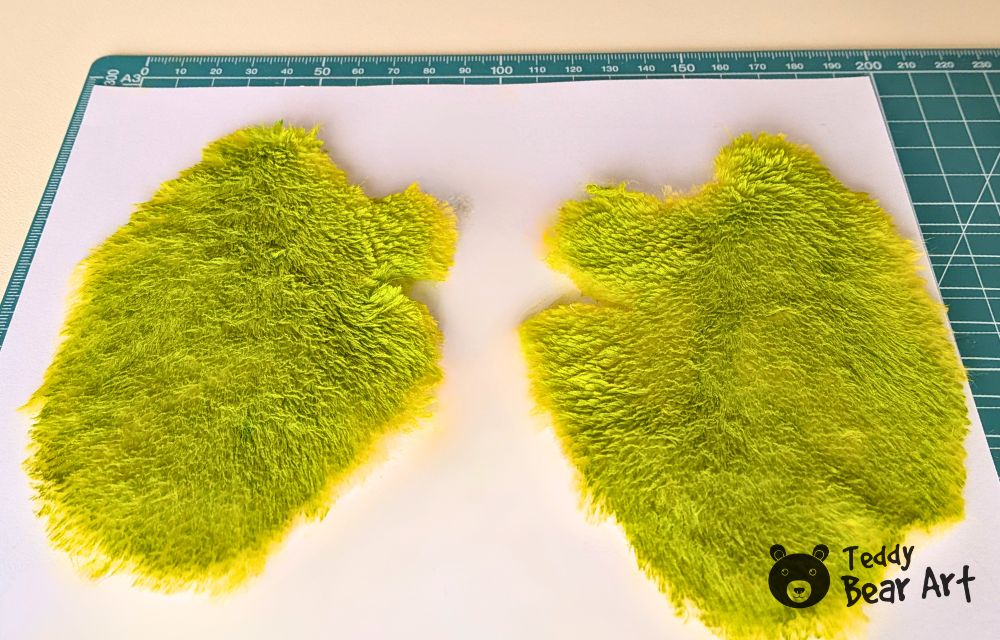
Step 1 – Cut Out Your Pieces
Pin the printed pattern to your fabric and cut out the two body halves and the belly piece.
Step 2 – Sew the Body Halves Together
Place the body halves together with the right sides facing each other. Sew along the edges using small, consistent backstitches from point 1 to point 2, leaving a small opening for stuffing. A sewing machine can speed this step considerably, but hand stitching works just as well.

Step 3 – Attach the Belly
Align the belly piece with the body and stitch it from point 1 to point 3.
Step 4 – Stuff the Frog Plush
Carefully fill the frog with stuffing, making sure it is evenly distributed to avoid lumps. Light stuffing will create a soft, huggable plush, while slightly firmer filling will give the frog a more structured shape.
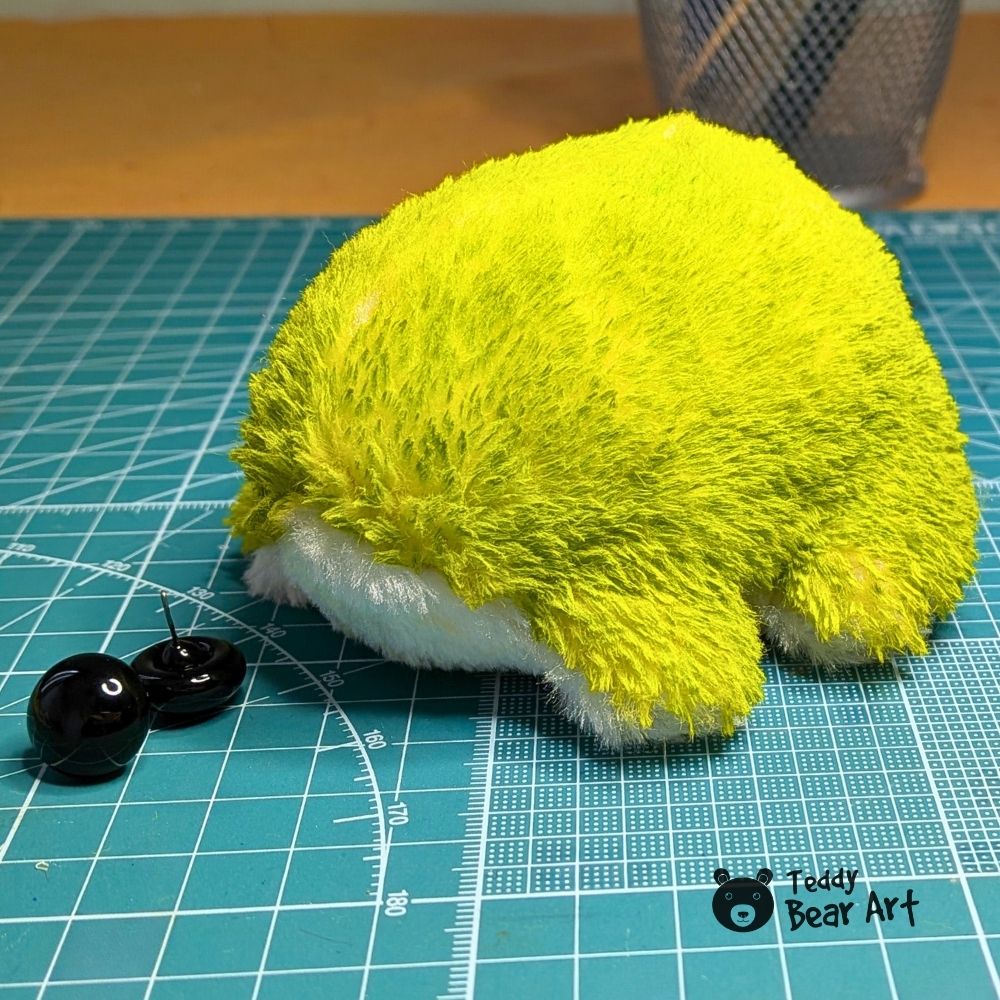
Step 5 – Insert Eyes and Finish
Attach glass eyes or sew on beads for eyes, and close the opening with a ladder stitch.
Frequently Asked Questions
I don’t know how to insert glass eyes into the plush. What should I do?
After stuffing the plush toy, mark the spot on the frog’s head and carefully make a small hole with an awl or thick needle. Thread a strong thread through the eye’s metal post and push the post through the hole into the head, securing the thread in the most hidden spot, such as the back, This ensures the eyes stay firmly in place and look natural. For more detailed instructions, see this guide on attaching glass eyes.
Can I use other fabrics besides plush for this frog?
Yes, fleece, felt, or minky work well. Just make sure the fabric is soft but not too slippery, so stitching stays neat and the frog keeps its shape.
How much stuffing should I use to make the frog soft but still hold its form?
Fill the body evenly without overstuffing. A lightly stuffed frog will be soft and cuddly, while slightly firmer stuffing gives it a structured shape. Balance is key to keep it looking cute and easy to handle.
Before You Go
Making a frog plush is an enjoyable, fast, and budget-friendly project that brings instant satisfaction. From gathering materials to the final touches, this simple process ensures a successful sewing experience. With minimal investment and a little creativity, it’s possible to craft a cuddly frog in just half an hour, creating a gift or keepsake that’s both personal and delightful. This project proves that fun, handmade plush toys don’t have to be complicated or expensive, making it an ideal activity for sewing enthusiasts of all ages.
Get Free Patterns & Be the First to Know!
Want free teddy bear patterns, exclusive tutorials, and a chance to win craft supplies?
Sign up for our newsletter using the subscribe form in the middle of this article to receive new patterns, insider tips, and the latest news on teddy bear art. You’ll also automatically be entered into our annual giveaway for a chance to win teddy bear crafting materials.
Bonus entry: Save one of our pins on Pinterest to increase your chances of winning!
Let’s create, inspire, and craft beautiful teddy bears together!
I really love your tutorial, everything is explained so clearly that it makes me want to try sewing this frog myself. I’m a beginner, so I’m a bit nervous about the eyes. I don’t have glass eyes or black beads, but I do have plastic safety eyes in 14 mm, just like you recommend. I’m worried about placing them incorrectly. What if they end up too close or too far apart, and I won’t be able to fix it because the backs are so tight and almost impossible to remove. Could you please advise how to find the right placement before attaching them?
Thank you so much for your question, it’s a very important one, and I completely understand your concern. Here’s what I would recommend. First, stuff your frog, but don’t close the opening yet. Then place the eyes on the face and position them so that you can visually fit about 2.5 more eyes in between them. In numbers, if your eyes are 14 mm, the distance between the eyes should be about 35 mm.
After that, carefully make small, symmetrical marks on the face in relation to the seam. You can use an awl or a thick needle to gently mark the spots. Then remove the stuffing and turn the frog inside out so you can see the marks from the wrong side. That’s exactly where you should insert the eyes.
I hope I explained it clearly, but if you have any questions, feel free to ask!
This is a really fun guide. I like how simple you made it, especially using easy materials so beginners can actually follow along without overthinking it.
The stuffing and eye placement tips are helpful too, those little details really make a difference in how it turns out.
Do you think this is better to start by hand, or should beginners try a sewing machine right away?
Hi! For beginners, I usually recommend starting by hand. It helps to better understand the process and gives more control over small details. A sewing machine can be used later, once the basics feel more comfortable.