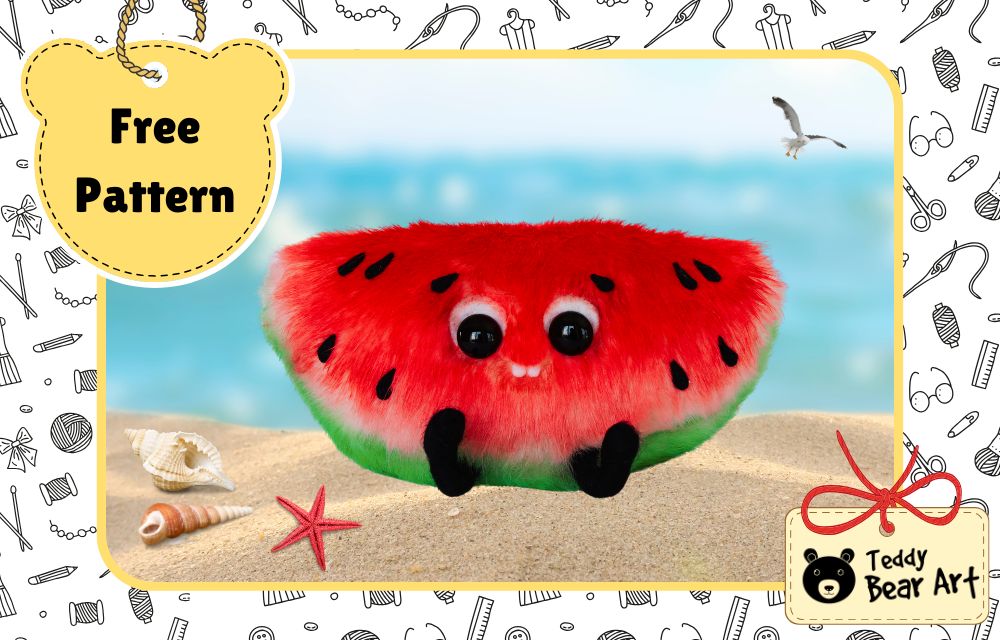
Is there anything more summery than a juicy slice of watermelon? This DIY watermelon plushie brings all that sunny energy into a cute, soft, and beginner-friendly sewing project! This is your moment if you’re looking for a fun way to spend an afternoon and create something cheerful. In this tutorial, we’ll walk you through every step of sewing your fruity friend, with a free printable pattern to make it even easier. Brand new to plushie-making or already a seasoned crafter looking for a quick summer project? This sweet little softie is sure to bring joy to your sewing time.
Materials You’ll Need for Your Watermelon Plushie
This isn’t your average sewing list—here we’re bringing a touch of artistry into plushie-making! Here’s what I used to create my realistic watermelon plushie, along with a few easy substitutions in case you have different materials on hand.
- White faux fur with a 1.5–2 cm pile (this will be painted)
- Oil paints
- Flat, wide paintbrushes
- Polyester stuffing (regular plush toy filling)
- Small bag of weighting pellets (optional, but adds a nice heft)
- Glass eyes on metal loops, 14 mm diameter (black)
- White felt (for eyelids and cute little teeth)
- Black felt (to create watermelon seeds)
- Black merino wool and chenille wire (for shaping the legs)
- Strong thread, regular sewing thread, and a long needle (especially helpful for inserting the eyes)
- Awl or stiletto tool (to help place features)
- Strong glue
Tip: If you already have red or pink fur for the inside and green fur for the rind, go ahead and skip the painting part. Using pre-colored fabric can save time and give your plushie a super vibrant look right away!
Download the Free Watermelon Plushie Sewing Pattern
Getting started is super simple—just click the button below to download the free watermelon plushie pattern file. No sign-up, no hassle! The file is lightweight and ready to use, so you can print it out or even trace it directly from your screen. Designed with beginners in mind, this pattern is a breeze to follow and works perfectly with soft fabrics like fleece or faux fur.
To download the pattern, follow the instructions below:
From a phone or a tablet: There should be something similar for mobile devices with Android or iOS. Click on the image. Save it by holding your finger on the image and selecting the “Save Image” option. Then go to your photo gallery and print it (there is an option).
From a computer: Click on the photo of the pattern you see below. In the new tab that will open, you press the right mouse button and select the “Save image as …” option. Then, you choose where the image will be saved on your computer.
Step-by-Step: How We Made This Cute Watermelon Plushie Slice
Let’s walk through each step we used to create this vibrant watermelon plushie! It’s a fun process that combines sewing, crafting, and a bit of painting too.
1. Cut and sew the basic shape
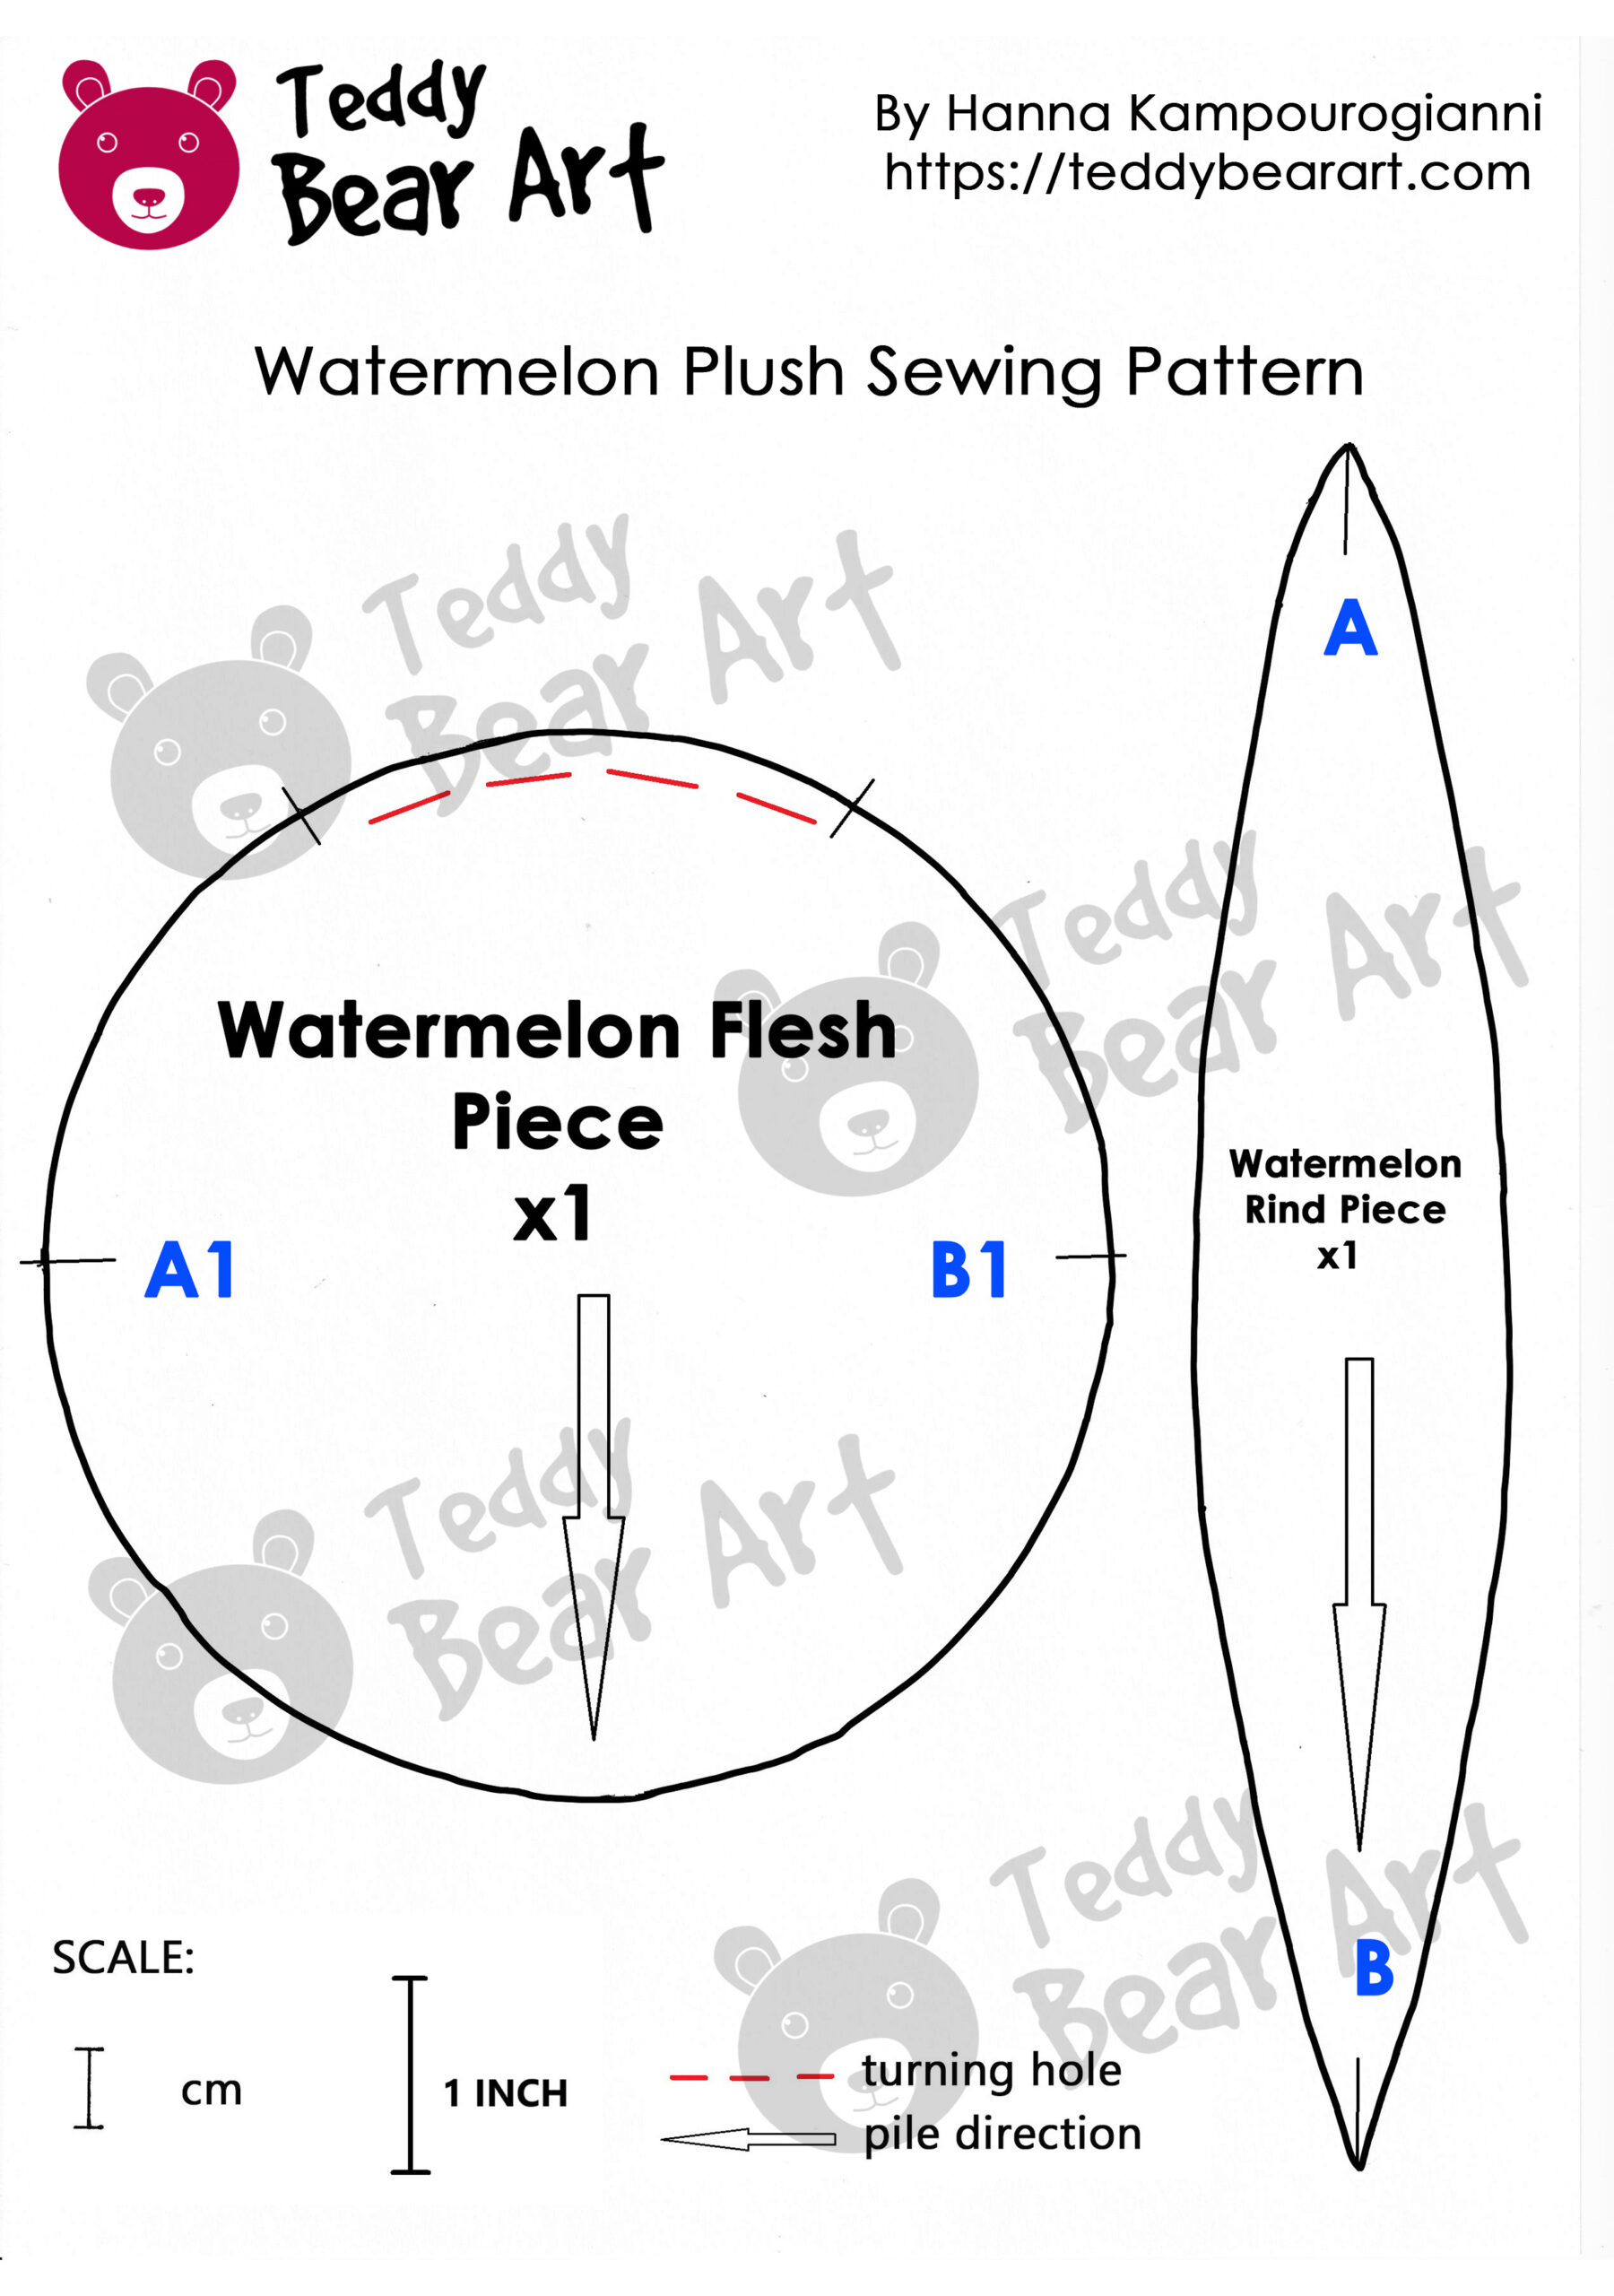
The pattern consists of just two parts:
- A circle for the watermelon flesh
- A strip for the rind
Pin the strip to the circle’s edge, matching the marks A to A1 and B to B2, and sew them together, leaving a small opening for turning. This part comes together quickly, and you’ll already see the watermelon shape forming.
2. Turn, stuff, and add weight
After sewing, turn the plushie right side out through the opening. Fill it with polyester stuffing, and don’t forget to add some weighting pellets at the bottom to give it a satisfying heft. Then, carefully stitch the opening closed.
3. Paint (and make it easy!)
Now it’s time to paint! We use oil paints to create the natural watermelon flesh color. After painting, let it dry for a few days. Once it’s dry, brush out the fur again!
Before you begin, take a moment to prep your brush properly. Load a small amount of oil paint onto a wide flat brush, then wipe it thoroughly on a sheet of white paper until only a dry trace of color remains. This dry-brush method helps avoid clumps and keeps the fur texture soft and natural-looking.
Always practice on a scrap piece of faux fur before moving to your plushie. Start at the top of the slice with rich red tones to mimic the juicy watermelon flesh, blending downward into lighter shades as you approach the rind. For the green rind, switch to a clean brush and use two tones—light and dark green—blending them gently for a natural, striped effect. Once you’ve finished painting, give the fur a final gentle brushing and set the plushie aside to dry completely.

4. Insert the eyes
To insert the eyes, use an awl to make small holes in the right spots. Then, using a long needle and strong thread, carefully insert the eyes, threading the thread through the loop. Afterward, glue on the white eyelids.
5. Cut and glue the mouth and teeth
Next, trim the pile to create cut out the mouth and glue on small felt teeth. This adds even more character and completeness to the watermelon.
6. Make the seeds
For the seeds, use black felt. Cut small oval shapes and glue them onto the watermelon flesh.
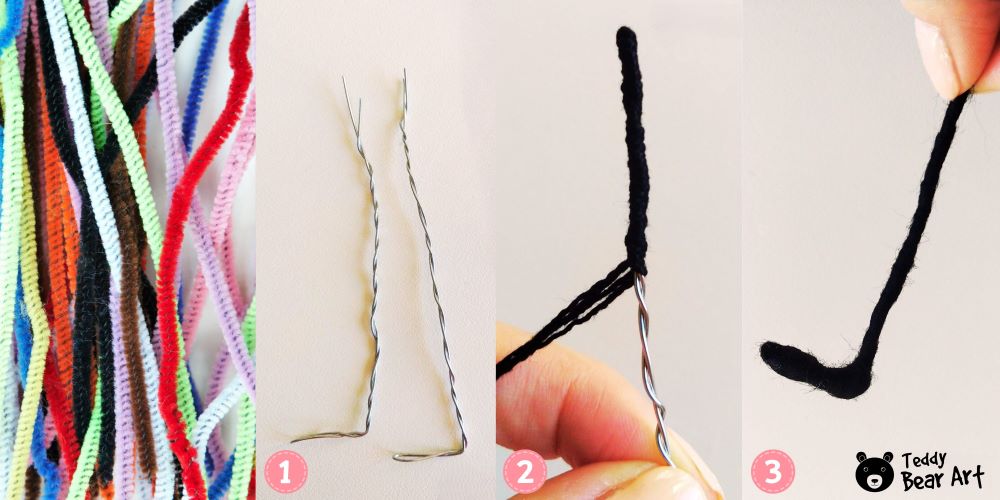
7. Make the legs
For the legs, we use black chenille wire and black merino wool. Wrap the wool around the wire, forming tiny toes and heels. Then, use the awl to make holes where the legs will be attached, and glue them in place.
Instead of chenille wire, you can use any other flexible wire. Wrap it first with black embroidery floss, then cover it with wool. The wool clings well to the thread base, creating a smooth and even texture. It’s important to keep everything in the same color. For a more polished finish, you can refine the surface using a felting needle at the end.
8. Finish the project
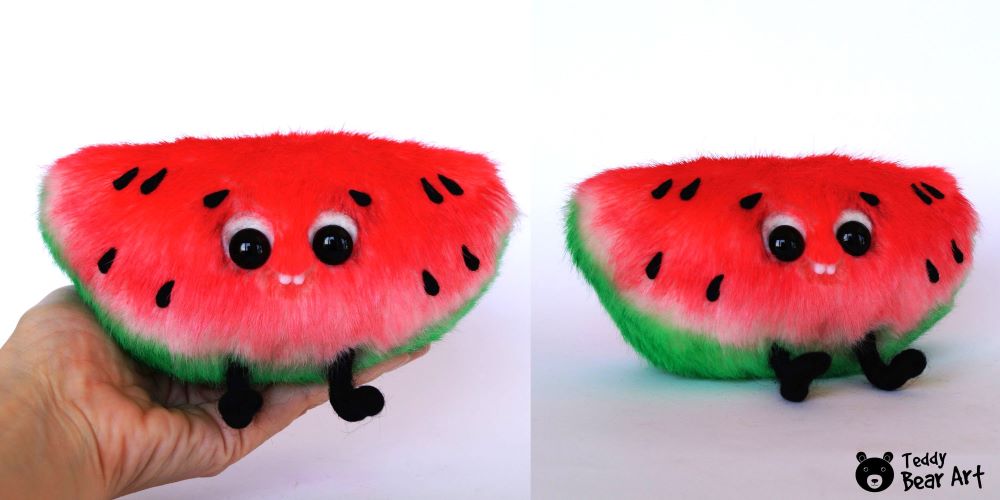
After all these steps, our watermelon plushie is ready! Now, you can enjoy the final result, and if you like, add extra details or create a stand for the plushie.
Common Questions from First-Time Plushie Makers
Can I sew this plushie by hand?
Absolutely! While a sewing machine makes it faster, this project is totally doable with a needle and thread. Just use a tight backstitch for durability.
Is this pattern beginner-friendly?
Yes! There are no complicated curves, closures, or tricky joints. It’s an ideal first project for adults just getting into plush-making.
What’s the best fabric for plushies?
Soft fleece or minky fabrics work best.
Final Thoughts: Try More Easy and Fun Sewing Projects
This DIY watermelon plushie is one of those joyful little projects that brings color, charm, and a hint of summer to your craft table. If you enjoyed making it, we’ve got more cheerful creations to keep your sewing inspiration flowing!
Looking for something equally quick and satisfying? Try our Free Chicken Sewing Pattern – Easy DIY for Beginners. Or add a buzz of summer energy with our Bumblebee Plush Toy Pattern – Tips and Tricks for a Flawless Finish.
There’s always something new and delightful to sew—so keep your fabric and thread close!
Get Free Patterns & Be the First to Know!
Want free teddy bear patterns, exclusive tutorials, and a chance to win craft supplies?
Sign up for our newsletter using the subscribe form in the middle of this article to receive new patterns, insider tips, and the latest news on teddy bear art. You’ll also automatically be entered into our annual giveaway for a chance to win teddy bear crafting materials.
Bonus entry: Save one of our pins on Pinterest to increase your chances of winning!
Let’s create, inspire, and craft beautiful teddy bears together!
What a great idea — the plush watermelon looks absolutely adorable and would make a charming addition to any handmade collection or display. I really appreciate how clear and detailed the instructions are; they make the whole process feel approachable and fun. I also noticed that the materials list is pretty standard, which is great because it means most crafters can jump right into the project without needing anything too fancy. Keep the creative ideas coming — this one is definitely inspiring!
Thank you so much! I’m glad you liked the plush watermelon and found the instructions clear. I try to keep the materials simple so anyone can give it a try without stress. More fun patterns and ideas are on the way — stay tuned!
This is honestly a really cute design! I’ll be sure to share this with all my friends who do sewing or light crafts like this. I’m sure that my children would enjoy this as well. Just wish I was a little bit more nimble with my fingers. Any tips or advice you can give someone who feels a little clumsy around sewing needles and thread? I just seem to lack the coordination to do this well.
Thank you for such a lovely comment! I’m so glad you like the design!
As for sewing, don’t worry if you feel a bit clumsy—it’s totally normal, especially at first! Here are a few tips that might help:
Practice with simple projects: Start with small details or easy projects to get used to working with a needle and thread. It’ll help you build coordination and confidence.
Use a specialized needle: If you feel like a regular needle is too thin or uncomfortable, try using needles with larger eyes for the thread. This will give you more control.
Get a feel for the fabric: Before starting to sew, practice just holding the fabric and the needle. Once you get a feel for the material, it’ll be easier to guide the needle.
Take your time: Give yourself time to get used to the process. Don’t rush—sewing is a meditative activity, and over time, you’ll feel much more confident.
And most importantly, don’t worry if things don’t go perfectly right away. Sewing is an art, and like any skill, it comes with practice. Good luck!
This plushie looks adorable. I like the fact that you can paint on the fabric. It is easy to get the colours right. Also you don’t need to have a lot of experience in sewing to do this. It looks fairly simple and easy to do. Do you have to use any kind of fixative for the oil paint?
Thank you so much! No fixative is needed — the oil paint holds well on the fabric by itself.
This watermelon plushie is absolutely adorable! I love how much character you packed into every detail—from the fluffy texture to the tiny felt teeth. If I had little ones in my life, I’d be sewing one up right now. Honestly, this would be such a fun and unique item to sell on Etsy or gift to friends who appreciate quirky, handmade goodness. Thanks for sharing such a cheerful and creative project!
~JarieLyn~
Thank you so much, JarieLyn! I’m really glad you liked the watermelon plushie. It did turn out quite fun! Just a small note — the technique used to make it is more suitable for adult collectors or as a gift for friends, rather than for young children. It includes small parts and isn’t designed for active play. But as a cheerful and unique decorative gift, it’s perfect.
Thanks again for your kind words!
This blog post is such a refreshing mix of creativity and practical tips. It makes the idea of sewing a watermelon plushie feel both achievable and exciting, even for beginners! I especially loved the inclusion of oil painting on faux fur to create a realistic texture such a clever touch that adds a professional, artsy flair. The step-by-step breakdown is super clear, and the option to substitute materials is thoughtful for crafters working with limited supplies. The dry-brushing technique for color blending is something I hadn’t seen before in plushie-making, and it’s definitely something I’d love to try.
One question I had: how durable is the oil-painted fur over time—especially if the plushie is handled often or meant for kids?
Thank you so much for your lovely comment! I’m so happy to hear that you found the tutorial inspiring and packed with useful tips — and it’s wonderful that the dry-brushing technique caught your eye!
As for your question: this plushie is absolutely NOT intended for children. It’s a collectible art doll rather than a toy. The piece includes glass eyes, wire inside the limbs, and of course, oil paint, which makes it unsuitable (and unsafe) for play.
These types of plushies are meant for display, usually kept away from direct sunlight. When stored and cared for properly, the oil-painted fur will remain vibrant and beautiful for many years to come. The paint becomes permanent on the faux fur once fully cured, so no worries there — it stays put!
Thanks again for your thoughtful feedback and curiosity!