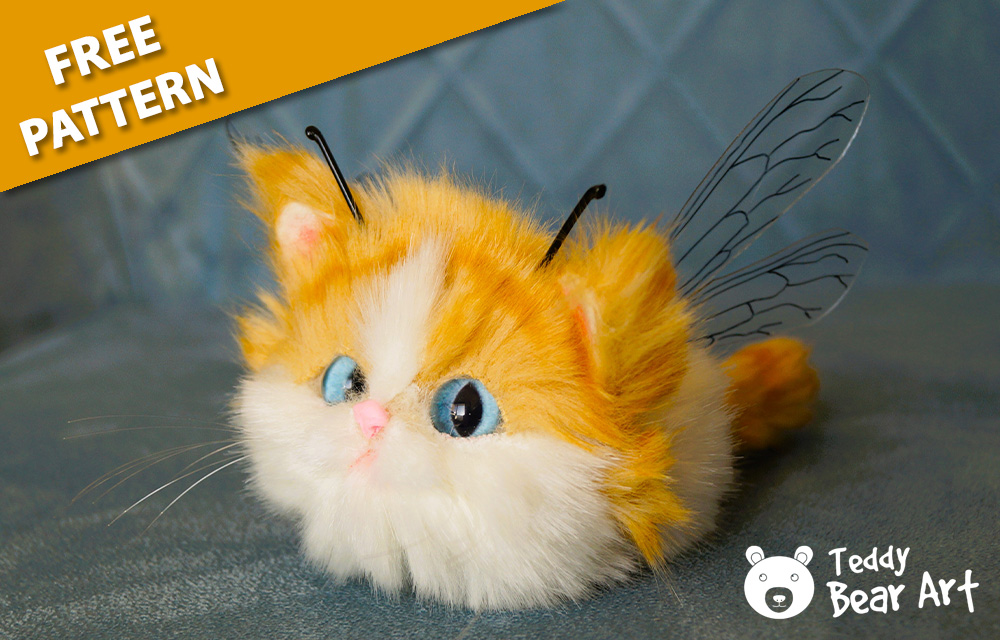
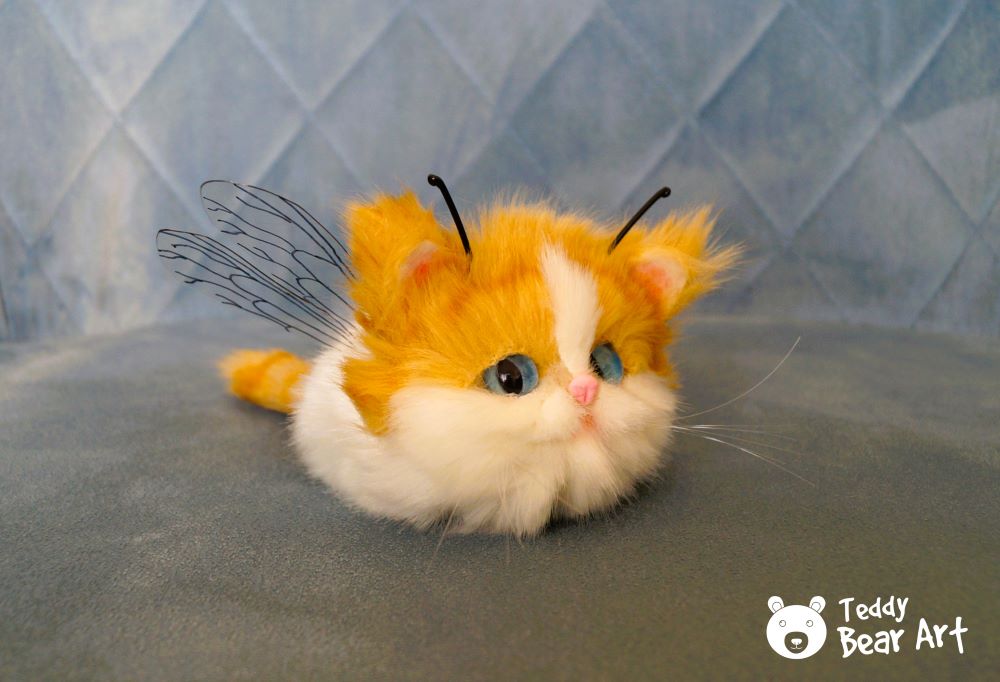
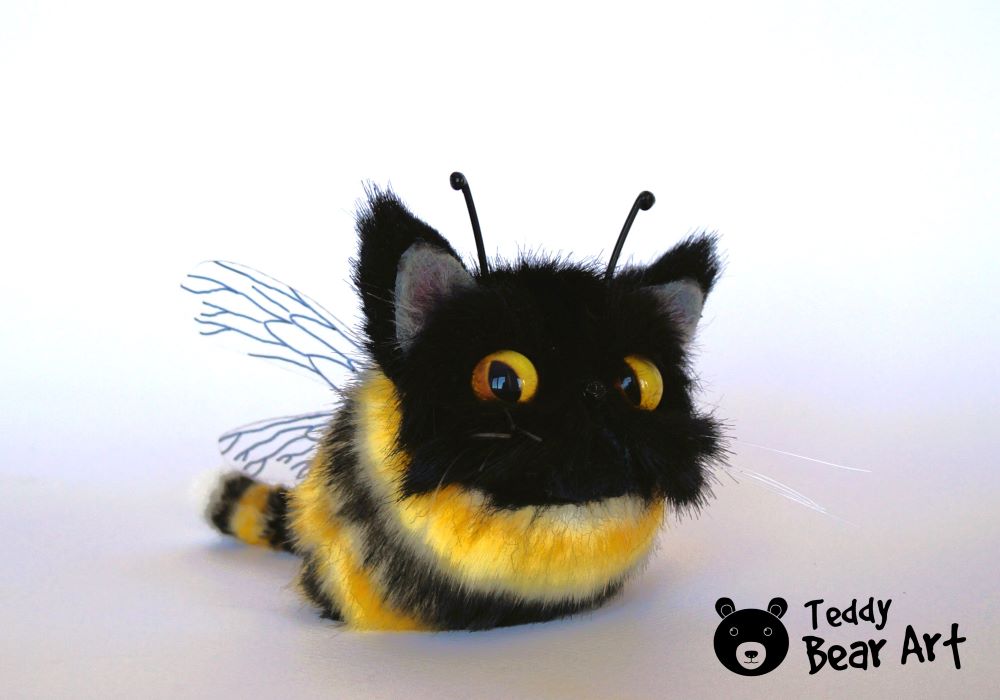
You’ll love this unique craft project if you love cats and fantasy creatures. In this guide, we’ll show you how to create a fantasy orange tabby cat stuffed animal using a combination of sewing and felting techniques. This charming little cat will be a delightful addition to your collection or a perfect gift for a loved one.
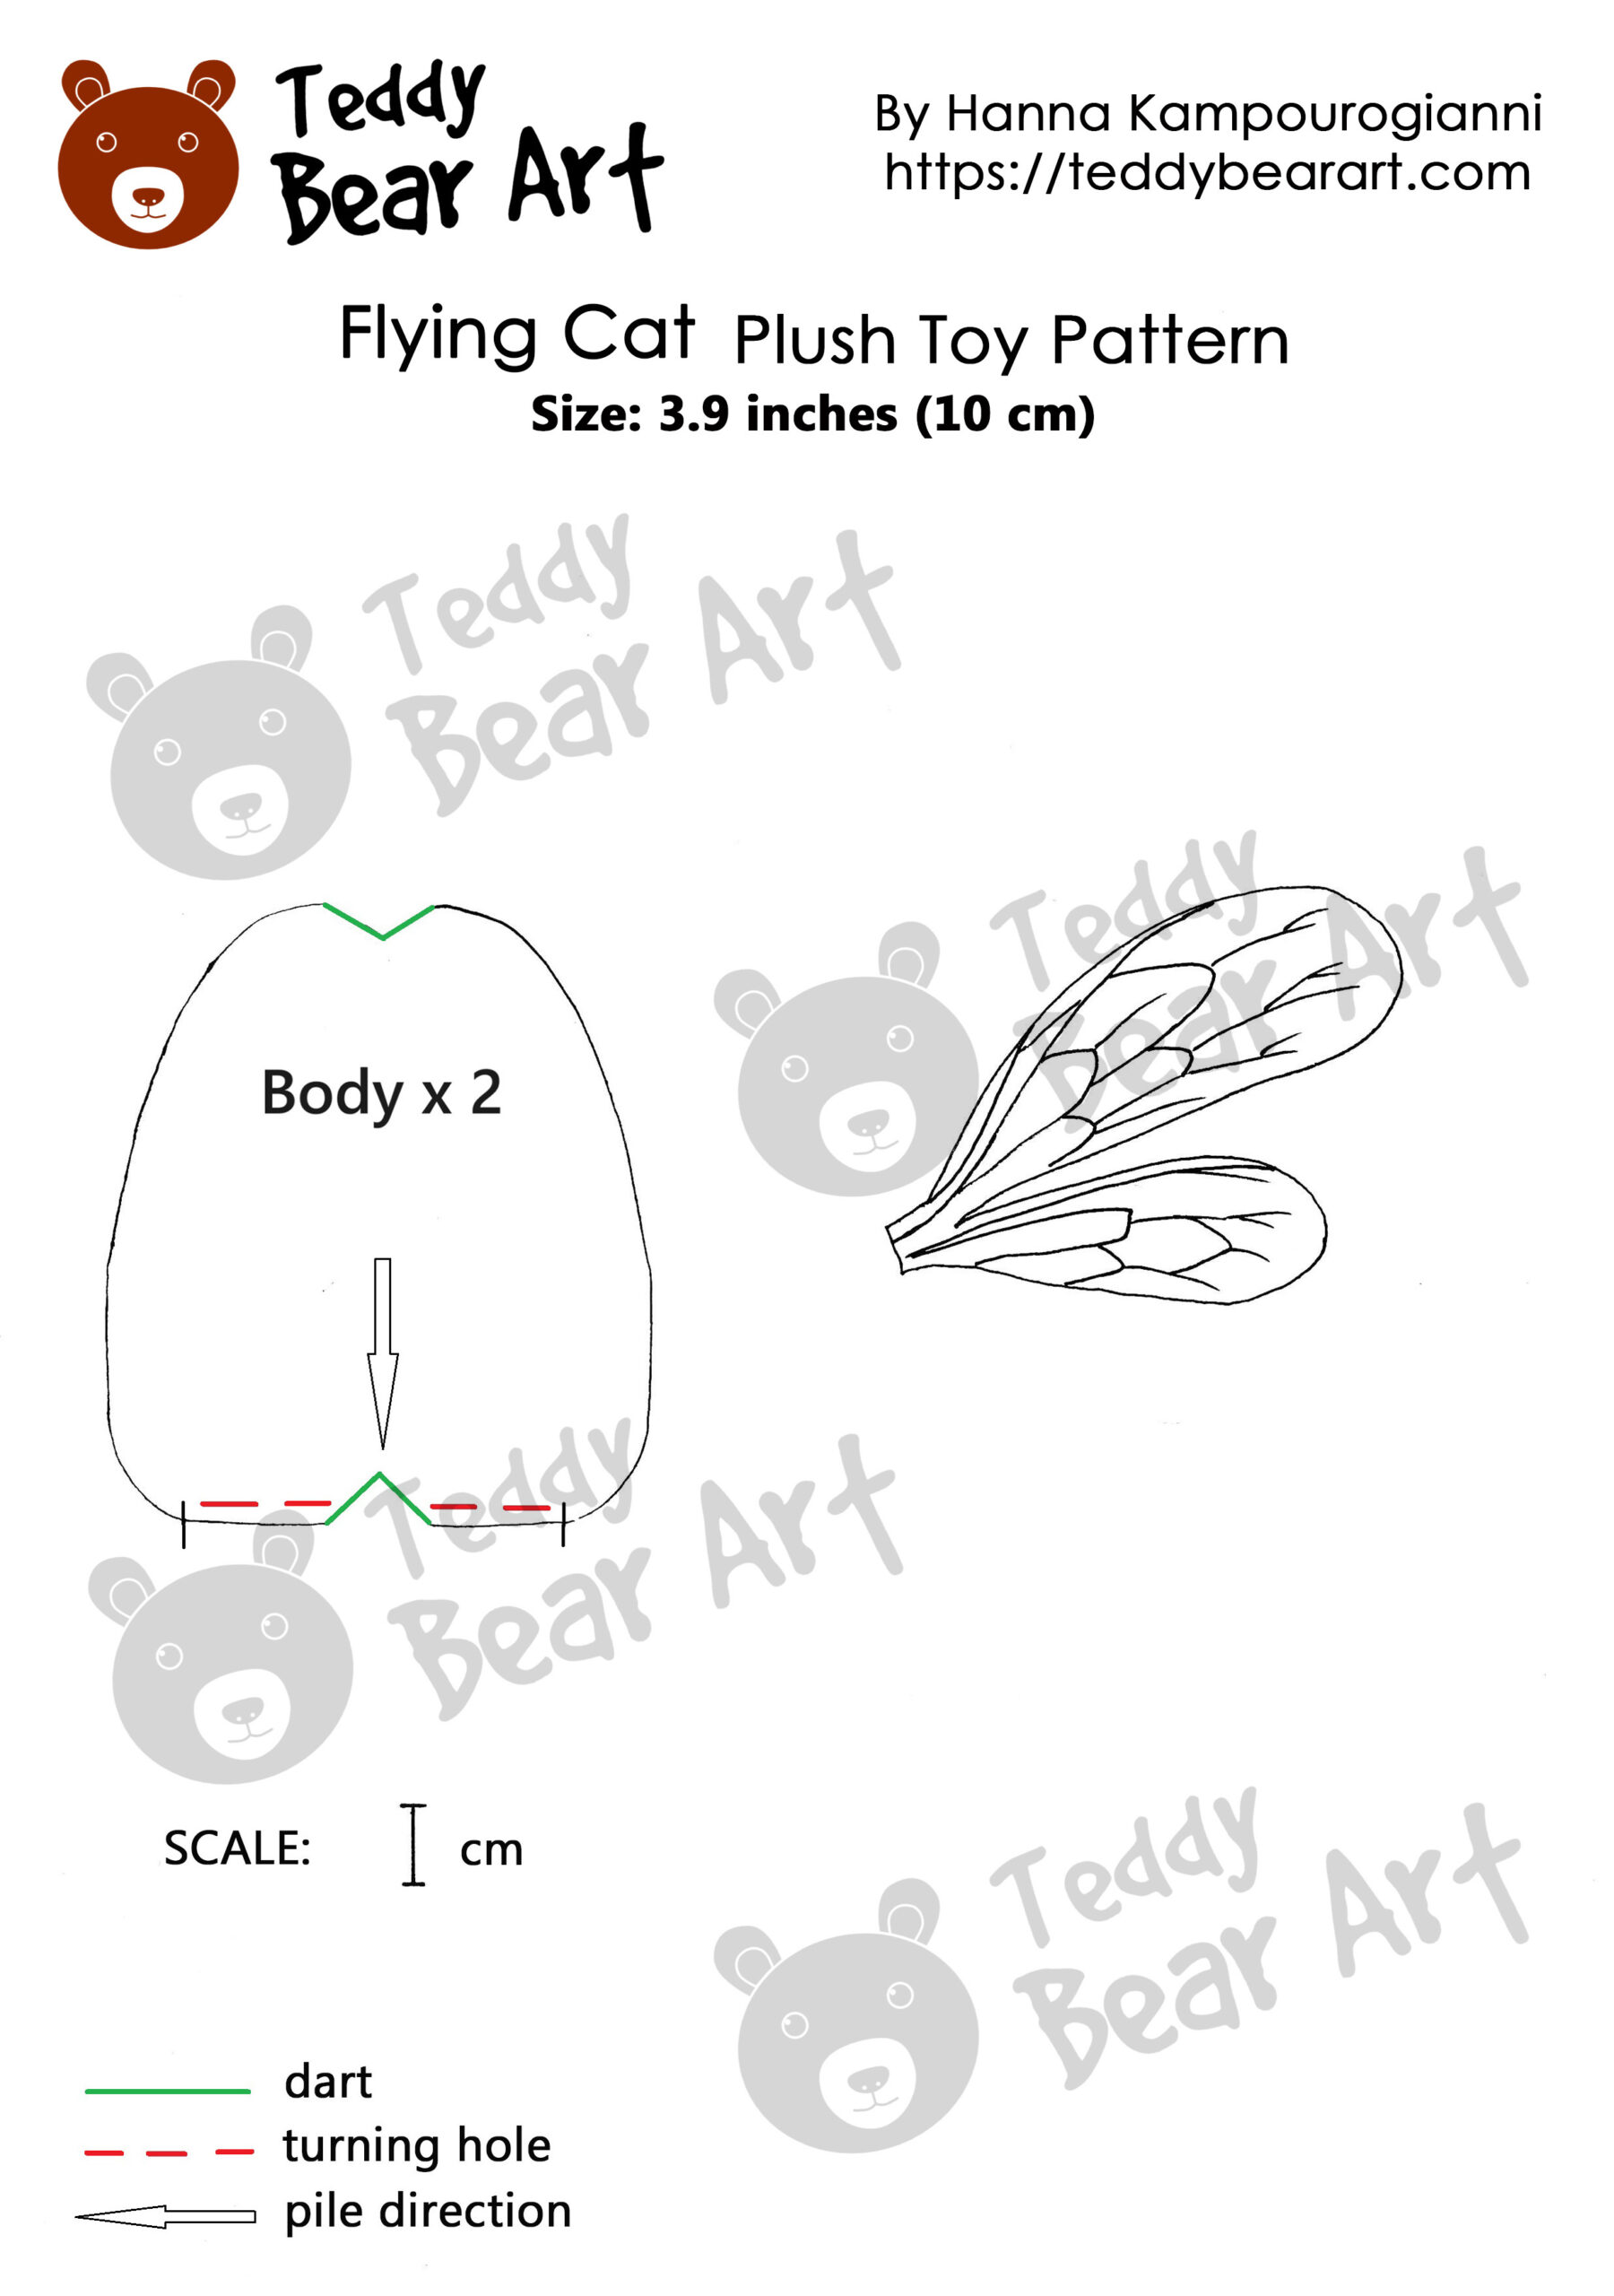
Download the Orange Tabby Cat Stuffed Animal Pattern
Download the pattern following the instructions below:
- From a computer (Windows). Click on the photo of the pattern you see below. In the new tab that will open, you press the right mouse button and select the “Save image as …” option. Then you choose where you want the image to be saved on your computer.
- From a phone or a tablet (Android). There should be something similar for mobile devices with Android or iOS.
Click on the image. Save it by holding your finger on the image and selecting the “Save Image” option. Then go to your photo gallery and print it (there is an option).
Materials Needed
To get started on your fantasy orange tabby cat stuffed animal, you’ll need the following materials:
- White faux fur fabric with a pile length of 2 cm
- Orange faux fur scraps
- White wool roving
- Glass eyes in diameter of 14 mm
- Needle felting tools
- Craft felt (for ears)
- Needle and thread
- Scissors
- Strong glue
- Stuffing material
- Weight material (e.g., metal pellets)
- Transparent plastic for wings
- Sculpting material for the nose
- Black rubber cord or wire
- Fishing line
- CD/DVD/BD Black Marker
Step-by-Step Instructions
1. Sewing the Body
Begin by cutting out the main body pieces from the white faux fur fabric. Ensure the fur direction is consistent across all pieces for a neat finish.
Stitch all the tucks. Sew the two pieces of the body together, leaving an opening for stuffing.
Fill the body with sheep’s wool or synthetic filler until it is firm and evenly packed. To add some weight to give the plush a substantial feel.
Close the opening with a ladder stitch for a seamless finish.
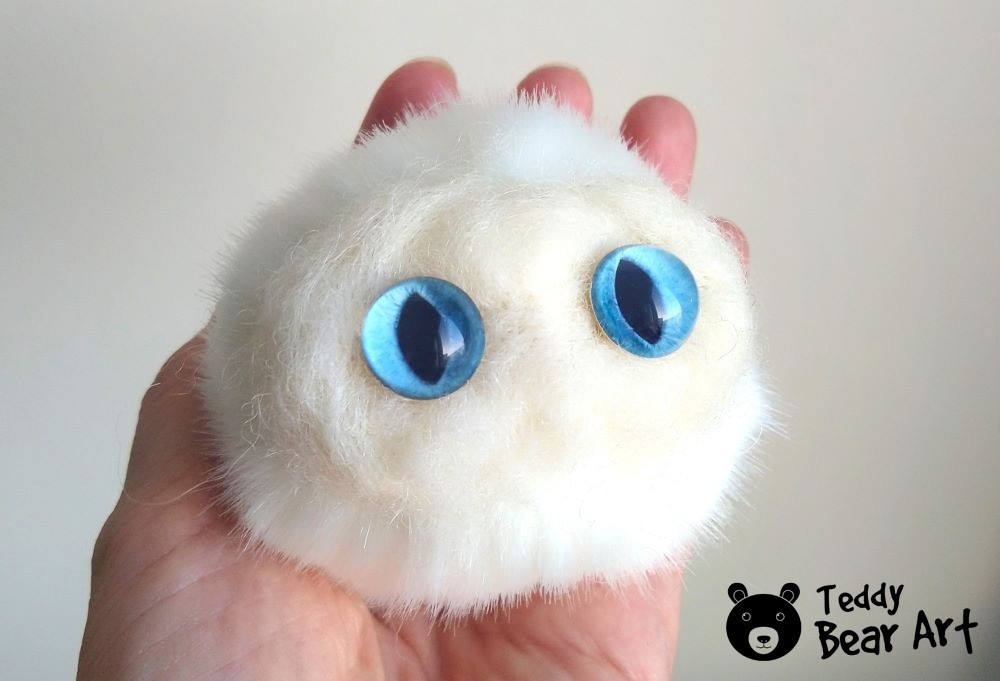
2. Felting the Face
To create a cute, detailed face for your cat, start by needle felting the muzzle using white wool roving. Attach the felted face to the body using felting needles.
Shape the wool into a small, rounded muzzle and attach the glass eyes securely into the felted wool. Follow this technique to attach the eyes.
Additionally, check out these five methods for attaching various types of toy eyes.
Once the eyes are in place, continue to felt around the eyes to integrate them smoothly into the face.
Next, cut small pieces of orange faux fur and carefully glue them onto the felted muzzle. This will give your cat a distinctive orange tabby look.
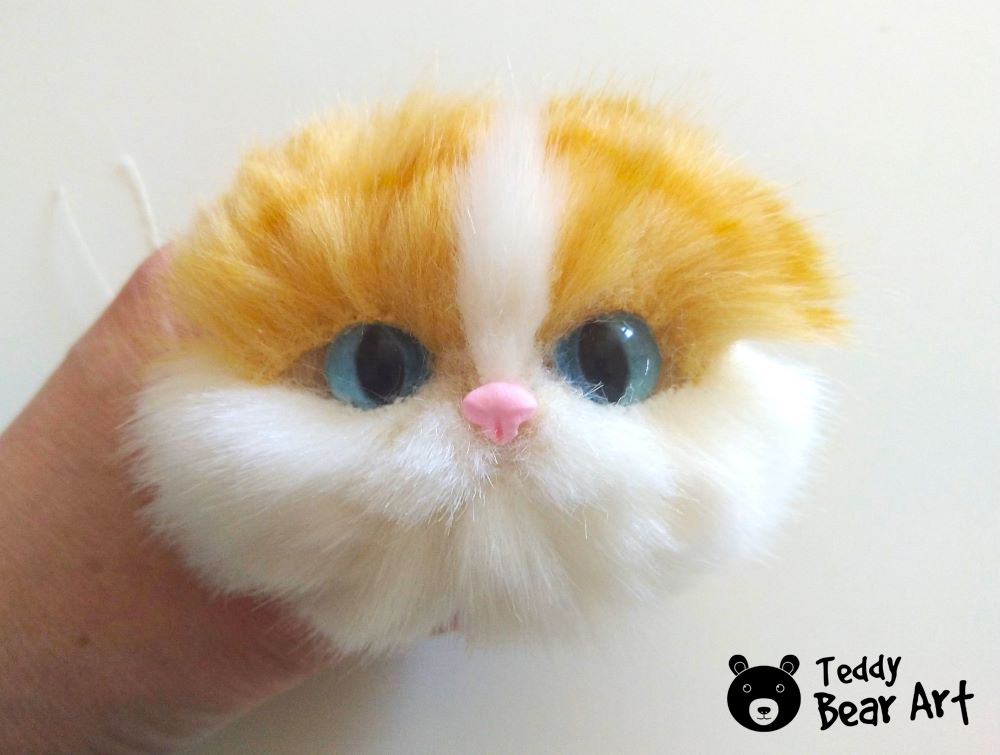
Attach the molded nose using the glue.
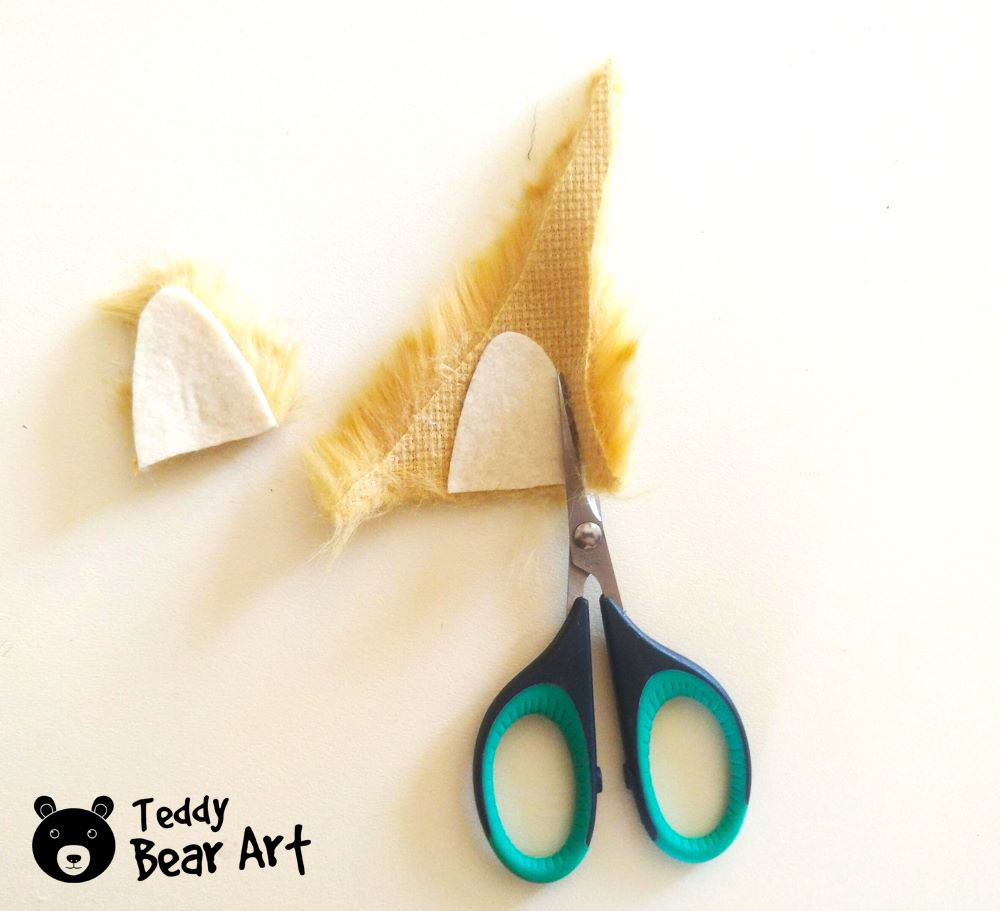
3. Creating the Ears
For the ears, cut two ear shapes from craft felt. Then, glue small pieces of orange faux fur onto the felt ears, covering them completely. Attach the ears to the head, positioning them securely with glue.
4. Making the Tail
Cut the tail pieces from orange faux fur. Sew the pieces together, turn the tail right side out, and stuff it lightly. Attach the tail to the body using a strong stitch or fabric glue.
If the fabric is too thick to turn inside out, sew the tail on the right side using a ladder stitch for a neat finish.
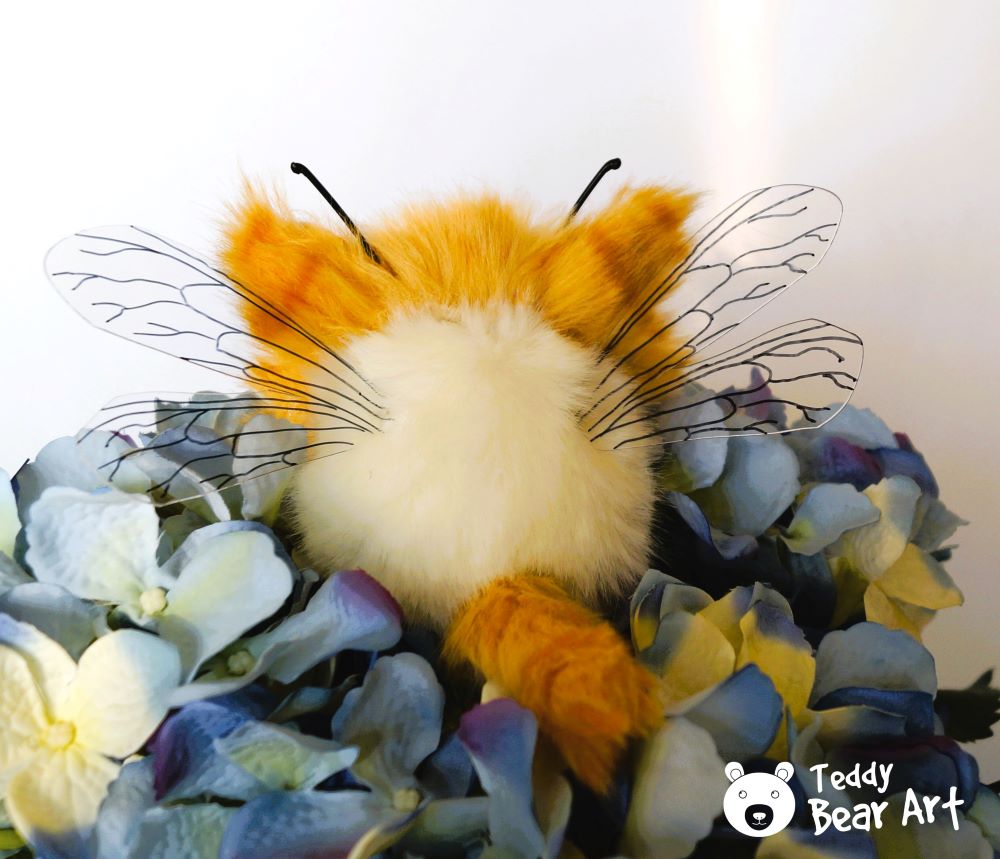
5. Creating the Wings
Fold the transparent plastic in half and cut out a pair of wings. Paint bee-like patterns on them using a CD/DVD/BD black marker, and let them dry. Securely attach the wings to the back of the body, making sure they are evenly aligned.
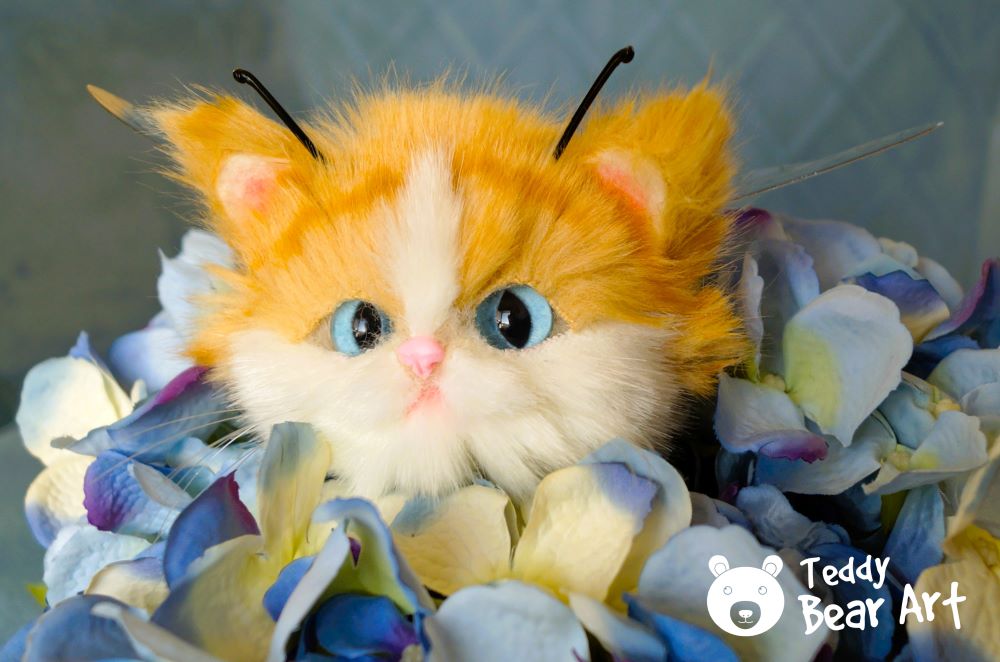
6. Adding the Final Touches
Add a mustache made from a fishing line.
Craft the antennas using a black rubber cord or wire. Follow this brief guide to learn how to securely attach them to the body.
Tips for a Professional Finish
Follow these recommendations to ensure your fantasy orange tabby cat stuffed animal looks professional:
- Choose High-Quality Materials: Invest in good-quality faux fur, wool roving, and glass eyes. Quality materials not only enhance the look and feel of your creation but also contribute to its longevity.
- Secure Attachments: When attaching features like eyes, ears, and wings, use strong glue or secure stitching to prevent them from loosening over time. This ensures durability and longevity.
- Attention to Proportions: Maintain consistent proportions throughout the crafting process. Ensure that features like ears, tail, and wings are appropriately sized and positioned relative to the body to create a harmonious look.
- Fine-Tune Details: Pay attention to small details such as whiskers and facial expressions. Use fine materials like fishing lines for whiskers and carefully shape facial features to add character and charm.
- Final Inspection: Once completed, perform a thorough inspection of your stuffed animal. Check for loose stitches, uneven fur trimming, or any other imperfections that can be corrected before finalizing.
By incorporating these tips into your crafting process, you can elevate the quality of your fantasy orange tabby cat stuffed animal, ensuring a professional finish that showcases your skills and attention to detail.
Conclusion
Creating a fantasy orange tabby cat stuffed animal is a delightful and rewarding project. With a combination of sewing and needle felting techniques, you can craft a unique and charming stuffed animal that will capture hearts.
Whether you’re an experienced crafter or a beginner, this step-by-step guide will help you bring your fantasy feline to life.
Happy crafting!
Similar Projects
Explore these related crafting projects to expand your creative repertoire:
- DIY Bee Cat Plush: Easy Mixed Techniques
Dive into creating a whimsical blend of bee and cat with this DIY project. Learn how to combine different techniques to craft a unique plush toy that charms. Read more here. - Bumblebee Plush Toy Pattern: Tips and Tricks for a Flawless Finish
Discover the art of making a bumblebee-inspired plush toy with expert tips for achieving a flawless finish. Perfect for enthusiasts of both insects and cuddly toys alike. Explore the project.
Get Free Patterns & Be the First to Know!
Want free teddy bear patterns, exclusive tutorials, and a chance to win craft supplies?
Sign up for our newsletter using the subscribe form in the middle of this article to receive new patterns, insider tips, and the latest news on teddy bear art. You’ll also automatically be entered into our annual giveaway for a chance to win teddy bear crafting materials.
Bonus entry: Save one of our pins on Pinterest to increase your chances of winning!
Let’s create, inspire, and craft beautiful teddy bears together!
I just went through this amazing guide on crafting a fantasy orange tabby cat stuffed animal, and I’m absolutely in love with it! The combination of sewing and felting techniques to bring this charming creature to life is both creative and inspiring.
I love how detailed the instructions are, making it easy for both beginners and experienced crafters to follow along. The use of high-quality materials like faux fur, wool roving, and glass eyes is a great tip it really adds to the professional finish of the final product.
this project seems like a delightful way to spend some creative time, and I can already think of a few loved ones who would adore receiving this as a gift. Can’t wait to try it out myself!
Thank you so much for your lovely comment! I’m thrilled to hear that you enjoyed the guide and found it inspiring. It’s wonderful to know that the detailed instructions and tips on materials were helpful for you. Crafting a fantasy orange tabby cat stuffed animal is indeed a delightful project, and I’m sure your loved ones will adore the beautiful creation you make. Have a fantastic time bringing your tabby cat to life, and feel free to share your progress or finished project – I’d love to see it! Happy crafting! 🐾✨
This guide on crafting a Fantasy Orange Tabby Cat Stuffed Animal is great. The step-by-step instructions seem easy to follow, and the comprehensive list of materials ensures every crafter has what they need. The combination of sewing and needle felting techniques creates a unique and charming piece. The tips for a professional finish are particularly useful. It’s clear that many will look forward to trying this out.
Thank you so much for your lovely comment! I’m thrilled to hear that you enjoyed the guide on crafting a Fantasy Orange Tabby Cat Stuffed Animal. It’s great to know that the step-by-step instructions and material list are helpful. Combining sewing and needle felting does create such a special charm, doesn’t it? And I’m glad the professional finishing tips stood out to you. Happy crafting, and I can’t wait to see how your Tabby Cat turns out! Feel free to share pictures or ask any questions if you need further assistance.