
Embroidering a teddy bear nose can be a fun and rewarding way to give your handmade bear its own unique personality. In this guide, we’ll explore how to embroider teddy bear nose using various shapes and techniques, ensuring that even beginners can achieve professional-looking results.
In this article, you’ll find information on the best threads to use, including recommended brands, along with practical tips to help you achieve the perfect teddy bear nose. Additionally, we’ll provide advice on avoiding common mistakes, ensuring that your embroidery project goes smoothly from start to finish.
Different Teddy Bear Nose Shapes
The shape of your teddy bear’s nose can significantly impact its overall look and expression. Here are some popular nose shapes you can try:
Classic Oval Nose
It has a simple oval shape perfect for a traditional teddy bear. This nose shape provides a timeless and gentle appearance, making it ideal for bears with a classic and charming look. It’s a versatile choice that complements a wide range of teddy bear designs, adding a touch of warmth and familiarity.

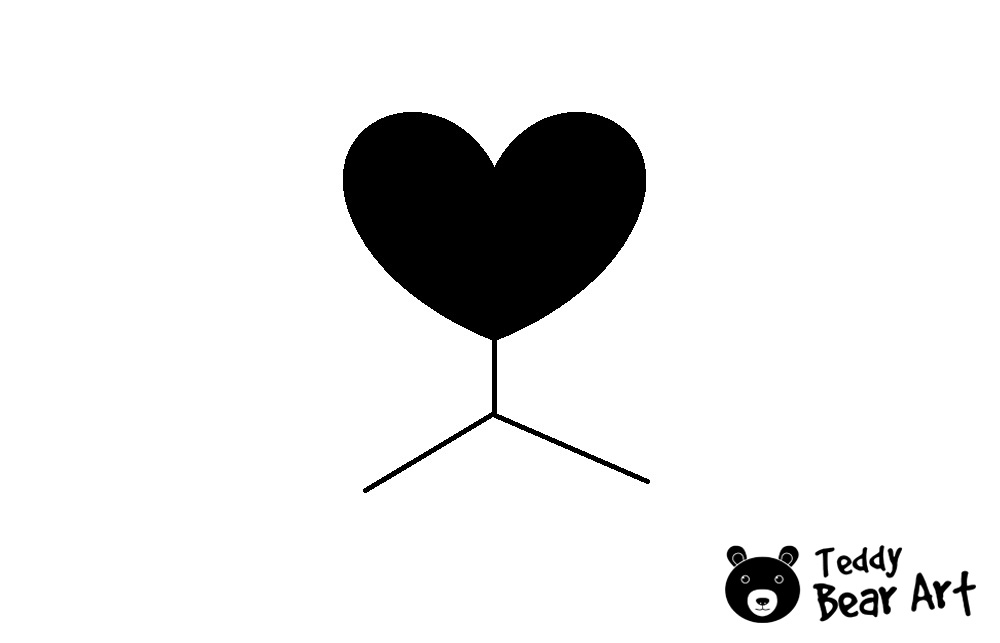
Heart-Shaped Nose
This shape adds a cute and loving touch to your bear’s face. It’s perfect for teddy bears meant to convey affection and warmth. The heart-shaped nose is especially popular for bears given as gifts for special occasions like Valentine’s Day or anniversaries, adding an extra layer of charm and sentimentality.
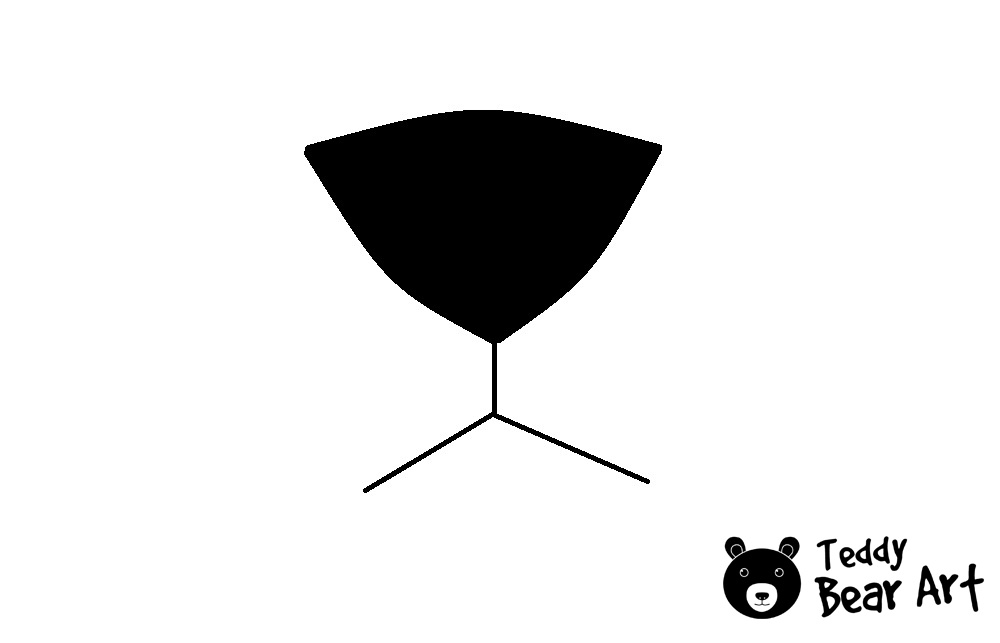
Rounded Triangle Nose
A balanced and friendly appearance can be achieved with this shape. The rounded edges soften the triangular form, making the teddy bear look approachable and gentle. It’s an excellent choice for bears that are meant to have a playful yet comforting expression.

Wide Smile Nose
Extends slightly outward to mimic a smiling expression. This nose shape gives your teddy bear a cheerful and inviting look, perfect for creating a happy and positive character. It’s ideal for bears that are meant to bring joy and comfort, making them extra endearing.
Rectangular Nose
This shape is typically used for teddy bears with a more modern or stylized look. It offers a sleek and geometric appearance that can add a contemporary touch to your bear’s face. This nose shape is often chosen for teddy bears with a minimalist design or for those aiming for a unique and unconventional aesthetic.
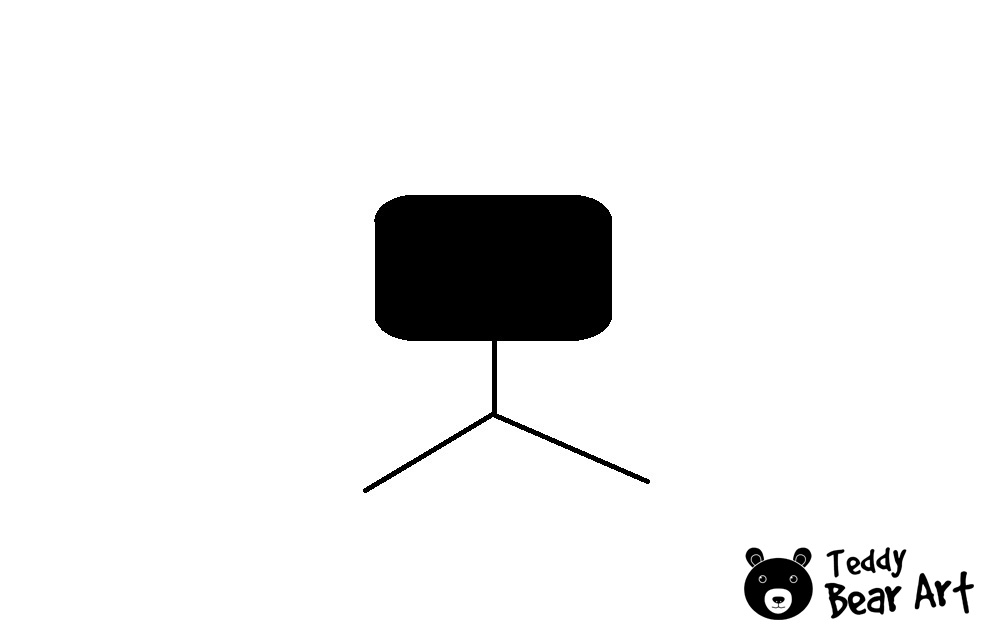
Rounded Rectangle Nose
A rounded rectangle nose is ideal for teddy bears that blend classic and modern styles. This shape combines the sleek lines of a rectangle with the soft edges of an oval, creating a balanced and approachable look. It’s perfect for bears that need a touch of sophistication while maintaining a friendly and warm expression.

Rectangle Nose with Nostrils
A rectangle with nostrils nose is used for teddy bears that aim to have a more realistic or detailed facial expression. This nose shape adds depth and character to the bear, making it appear more lifelike. It’s an excellent choice for bears that are meant to resemble real animals or for those that require an added touch of personality.

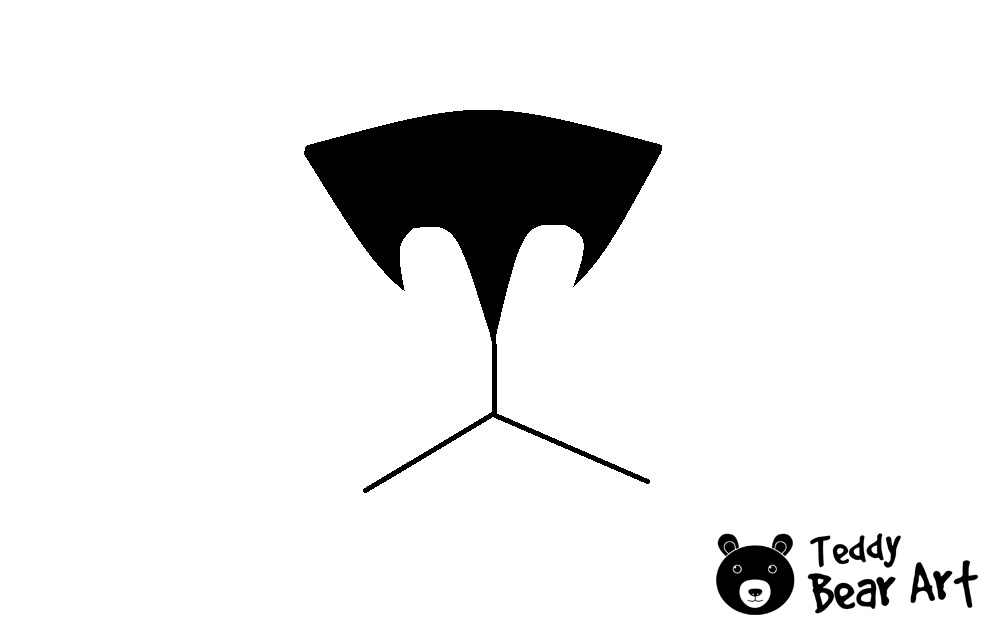
Wide Triangle Nose with Nostrils
A wide triangle with nostrils nose is perfect for teddy bears that need a bold and expressive look. This nose shape emphasizes the bear’s features, making it stand out and appear more animated. It’s a great choice for bears that are meant to have a strong presence or for those designed to have a whimsical and playful character.
Each of these shapes can be created using different embroidery techniques, which we’ll cover next.
Embroidery Techniques for Teddy Bear Noses
To achieve the perfect teddy bear nose, you’ll need to master a few basic embroidery techniques. Here are some methods you can use:
Curved Line Technique
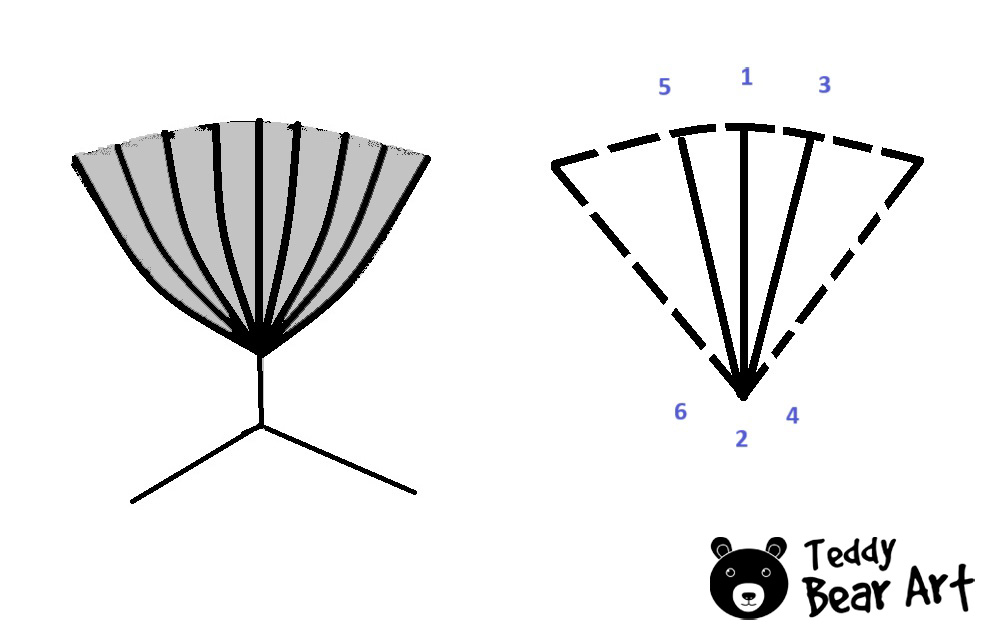
In the Curved Line Technique, you embroider curved lines starting from a central point to create the shape of the teddy bear’s nose. This method is particularly effective for achieving a smooth and natural look, as the curves mimic the contours of a real bear’s nose.
By starting from a central point and stitching outward in curved lines, you gradually build up the shape of the nose, ensuring symmetry and balance. The gentle curves create a rounded appearance, giving the nose a soft and lifelike quality.
This technique allows for flexibility in shaping the nose, as you can adjust the curvature of the lines to suit your desired aesthetic. Whether you’re crafting a small button nose or a more prominent snout, the Curved Line Technique offers precision and control in your embroidery work.
With practice and attention to detail, you can create beautifully sculpted noses that add charm and character to your teddy bear creations.
Parallel Line Technique

In the Parallel Line Technique, you embroider parallel lines closely together to form the shape of the teddy bear’s nose. This method is all about creating a solid, uniform appearance for the nose.
By stitching the lines close to each other, you fill in the space and build up the nose with a sleek and professional finish. The closely spaced parallel lines give the nose a smooth surface, perfect for teddy bears with a polished appearance.
This technique allows for precision and control, as you can adjust the spacing and angle of the lines to achieve the desired shape and size for the nose. With attention to detail and patience, you can create beautifully defined noses that enhance the overall look of your teddy bear creations.
Crosshatch Technique
In the Crosshatch Technique, you create a crosshatch pattern by stitching intersecting lines to form the shape of the teddy bear’s nose. This method adds texture and detail to the nose, making it appear more realistic and interesting.
By stitching lines that intersect at various angles, you create a grid-like pattern that fills in the space and adds depth to the nose. The intersecting lines create areas of light and shadow, giving the nose a three-dimensional quality.
This technique offers flexibility in creating different nose shapes and sizes, as you can adjust the angle and spacing of the lines to achieve the desired effect. With practice and experimentation, you can master this technique and create beautifully textured noses that bring your teddy bears to life.
Vertical Stripe Technique

In the Vertical Stripe Technique, you use vertical stripes of stitching to build up the shape of the teddy bear’s nose. This method is ideal for creating a bold and structured appearance for the nose.
By stitching vertical lines closely together, you fill in the space and define the contours of the nose with precision. The vertical stripes add height and dimension to the nose, giving it a strong and prominent presence on the teddy bear’s face.
This technique offers versatility in shaping the nose, as you can adjust the thickness and spacing of the stripes to achieve different effects. Whether you’re crafting a small button nose or a more elongated snout, the Vertical Stripe Technique allows for creativity and control in your embroidery work.
With attention to detail and patience, you can create beautifully defined noses that complement the overall look of your teddy bear creations.
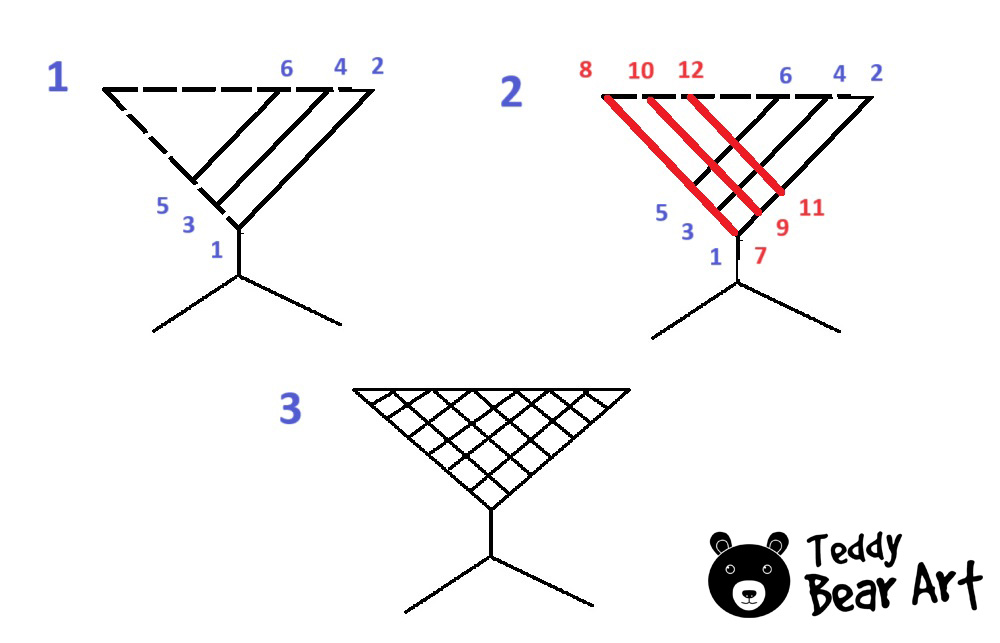
Layered Lines Technique

In this technique, you start by embroidering wide lines at the base of the nose. These wider lines serve as the foundation, establishing the shape and structure of the nose. Think of them as the base layer of your embroidery.
Once you’ve created the base layer, you layer thinner lines on top of it. These thinner lines add depth and dimension to the nose, enhancing its appearance and making it look more realistic. You can vary the thickness and spacing of these lines to achieve the desired effect.
By layering the lines, you create a sense of texture and dimensionality, mimicking the subtle contours and shadows of a real bear’s nose. This technique allows you to build up the nose gradually, adding detail and complexity to your embroidery work.
Experiment with different thread colors and stitch lengths to create depth and shading in your nose design. With practice and patience, using the Layered Lines Technique, you can achieve beautifully textured and lifelike noses for your teddy bears.
Horizontal Stitches Technique
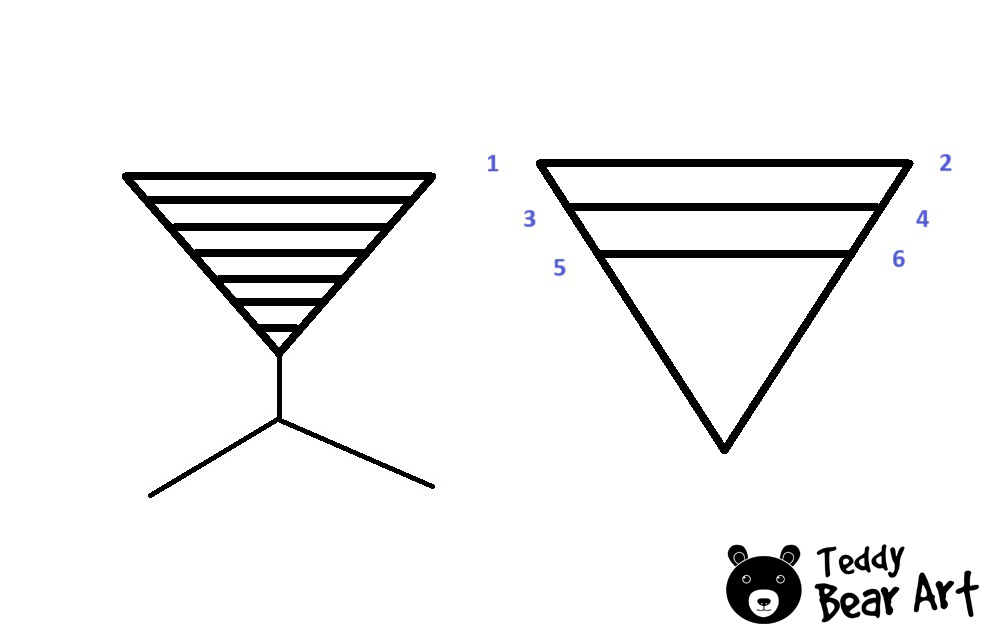
It isn’t as common as some other embroidery methods for teddy bear noses, but it’s certainly a viable option for achieving certain effects. In this technique, you would embroider horizontal lines or stitches to form the shape of the teddy bear’s nose.
This method could be used to create noses with a specific texture or appearance, such as a smooth and uniform surface, by using closely spaced horizontal stitches
By stitching horizontally, you can create a nose that appears flat or gently rounded, depending on the angle and spacing of the stitches. While this technique can produce interesting results, it may not offer the same level of detail or dimensionality as some other methods like Layered Lines Techniques.
However, it can still be a valuable tool in your embroidery repertoire, particularly for creating noses with a specific aesthetic.
Combining these techniques with different shapes can create various expressive and charming noses for your teddy bears.
Combining Shapes and Techniques
You can create unique and expressive noses for your teddy bears by combining various shapes and techniques. For example, you might use the parallel line technique to create a sleek, heart-shaped nose or the crosshatch technique for a textured, rounded triangle nose.
Experimenting with these combinations will allow you to find the perfect look for each of your teddy bear creations.
Mouth Shape and Smiles
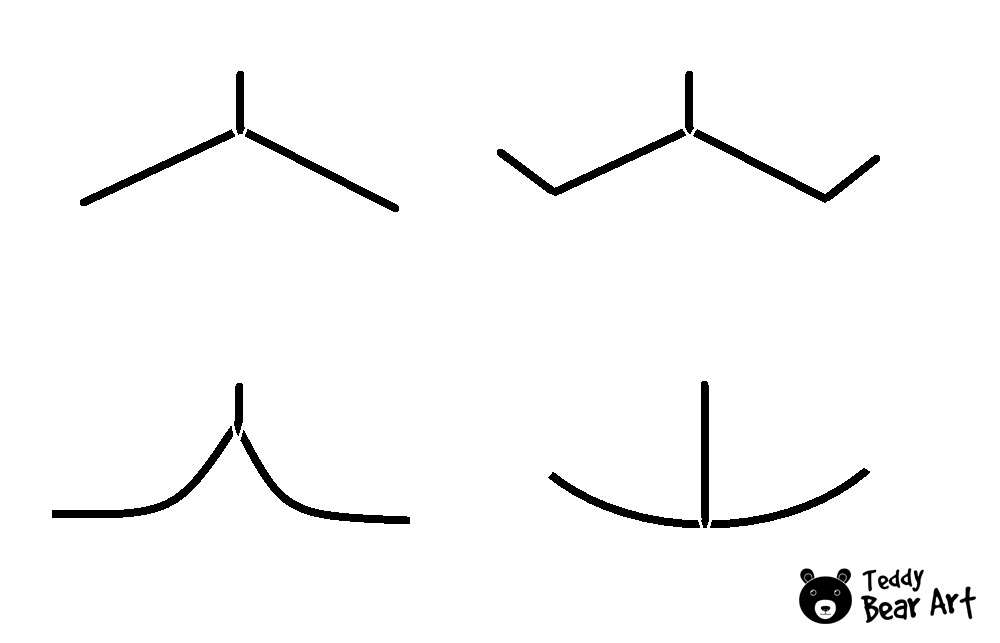
The shape of the mouth and different types of smiles can significantly alter the expression of the teddy bear’s face. Consider adding various mouth shapes, such as a sad mouth or different styles of smiles (soft, wide, etc.), to convey different emotions. Experiment with different embroidery techniques to create these mouth shapes and smiles.
Best Threads for Nose Embroidery
Here are a few recommended types and brands:
- DMC Embroidery Floss: A high-quality, six-strand cotton floss that is widely used for embroidery. It’s strong, comes in a variety of colors, and gives a smooth finish. The most popular colors are:
Black (310): This is a popular choice for creating dark noses, providing a bold contrast against lighter-colored fur.
Brown (801 or 838): These shades of brown are commonly used for teddy bear noses, offering a natural and warm appearance.
Beige (3861): For lighter-colored teddy bear noses, this soft beige shade can create a subtle and understated look. - Anchor Embroidery Floss: Similar to DMC, Anchor provides a robust and reliable six-strand cotton floss available in numerous colors, ensuring durability and vibrancy.
- Perle Cotton: For a slightly thicker and shinier finish, perle cotton (sizes 5 or 8) from brands like DMC or Anchor can be an excellent choice. It’s twisted and doesn’t separate into strands, making it easier to work with for some crafters.
- Cosmo Lecien Embroidery Floss: Known for its silky texture and high-quality fibers, Cosmo floss is another great option for achieving a polished look on teddy bear noses.
These brands offer consistent quality and a wide range of colors to match or contrast with your teddy bear’s fur, helping you create beautifully embroidered noses.
Practical Tips for Embroidering Teddy Bear Noses
Here are some practical tips to help you get started with embroidering teddy bear noses:
Setting up:
- Make sure the bear’s muzzle is well-filled.
Selecting Materials:
- Use high-quality embroidery thread and a sharp needle to ensure clean and precise stitches.
Preparing the Fabric:
- Mark the desired shape lightly on the fabric with a self-erasing marking pen or water-soluble pen, or tailor’s chalk. This will guide your stitches and ensure symmetry.
Final Touches:
- Some crafters choose to coat the embroidered nose with wax after finishing the embroidery. This technique is used to give the nose a polished and slightly shiny appearance, enhancing the overall look of the teddy bear. Additionally, waxing helps to protect the threads, making the nose more durable and resistant to wear over time.
Avoiding Common Pitfalls
- Stitch Placement: Ensure that you place your stitches evenly and symmetrically. A misplaced stitch can throw off the entire look of the nose. Take your time to plan the placement of each stitch before you start embroidering.
- Size Proportion: Consider the size of your teddy bear’s head when embroidering the nose. A nose that is too small can look disproportionate, while one that is too large may overpower the face. Aim for a size that complements the bear’s features.
- Stitch Tightness: Avoid pulling your stitches too tightly, as this can cause the fabric to pucker around the nose area. Maintain a consistent tension throughout your embroidery to achieve a smooth and uniform finish.
- Choice of Stitch: Select a stitch that suits the style of your teddy bear and provides the desired texture for the nose. Common choices include satin stitch, backstitch, or a combination of both. Experiment with different stitches to find the one that best enhances your bear’s appearance.
- Color Selection: Choose a thread color that contrasts nicely with the fur of your teddy bear. A dark nose on light-colored fur or a light nose on dark-colored fur will help the nose stand out and add depth to the bear’s face.
- Practice: Like any skill, embroidering teddy bear noses takes practice. Don’t be discouraged if your first attempts don’t turn out perfectly. Keep practicing, and soon you’ll develop the technique and confidence to create beautiful noses every time.
By following these tips, you’ll be well on your way to embroidering flawless teddy bear noses that add charm and personality to your creations.
Conclusion
Learning how to embroider teddy bear noses using different shapes and techniques can transform your teddy bears, giving them unique expressions and personalities. Don’t be afraid to experiment with various combinations to find the perfect look for your creations. Happy crafting, and be sure to share your embroidered teddy bear noses with us!
More Goodies
- 5 Ways to Attach Teddy Bear Eyes and Bring Them to Life: Discover various techniques to securely attach eyes to your teddy bear, enhancing its expression and personality.
- How to Make Teddy Bear Eyelids (Advanced Techniques Included): Learn advanced methods for crafting realistic eyelids, adding depth and character to your bear’s face.
- How to Make Teddy Bear Eyelashes and Eye Whites: Follow this guide to create detailed eyelashes and eye whites, giving your teddy bear a more lifelike and expressive look.
Get Free Patterns & Be the First to Know!
Want free teddy bear patterns, exclusive tutorials, and a chance to win craft supplies?
Sign up for our newsletter using the subscribe form in the middle of this article to receive new patterns, insider tips, and the latest news on teddy bear art. You’ll also automatically be entered into our annual giveaway for a chance to win teddy bear crafting materials.
Bonus entry: Save one of our pins on Pinterest to increase your chances of winning!
Let’s create, inspire, and craft beautiful teddy bears together!
This comprehensive guide on embroidering teddy bear noses is fantastic! The detailed descriptions of various nose shapes and the step-by-step techniques make it easy for beginners and experienced crafters to achieve professional results. I appreciate the practical tips, recommendations for the best threads to use, and advice on avoiding common mistakes. The section on combining shapes and techniques inspires creativity in every project. Thank you for sharing such valuable information—I’m excited to try these methods on my next teddy.
Thank you so much for your wonderful comment! I’m thrilled to hear that you found the guide helpful and inspiring. Embroidering teddy bear noses can really add that special touch, and it’s great to know the detailed descriptions and tips are making a difference for both beginners and experienced crafters like yourself. I’m excited for you to try out these methods on your next teddy—happy stitching! If you have any questions or need more tips, feel free to reach out.
Hanna Kampourogianni’s guide on embroidering teddy bear noses was incredibly informative! As someone who enjoys crafting, I found her explanations of different shapes and techniques particularly helpful. I’ve always admired the attention to detail in handmade teddy bears, and learning how to embroider their noses adds a whole new dimension to my projects. I’m eager to try out the classic oval nose shape and see how it transforms the appearance of my bears. Thanks for the inspiration!
Thank you so much for your kind words! I’m thrilled to hear that the guide on embroidering teddy bear noses was so helpful for you. It’s amazing how such a small detail can make a big difference in the overall look of your bears. The classic oval nose shape is a fantastic choice – it really adds a charming touch. I can’t wait to see how your bears turn out with this new skill. Happy crafting, and thanks again for your lovely comment!
Great nose embroidery guide, never too late to keep learning, been doing bears for 20 odd years and you give a very fine description of creating the best noses! Thank you. This is the most crucial part for me and still put it off till last. Trying the extra description closer to end makes me feel more confident to try those. Been cheating sometimes with added noses, but those bears go to children. Thanks.
Thank you, Sue! I’m so glad you found my guide helpful, especially as an experienced artist like yourself. I also often leave nose embroidery for last since it’s such an important part. It’s great to hear that my tips gave you more confidence. And don’t worry about the added noses—what matters most is that the bears bring joy to the children. Best of luck with your new creations! ?