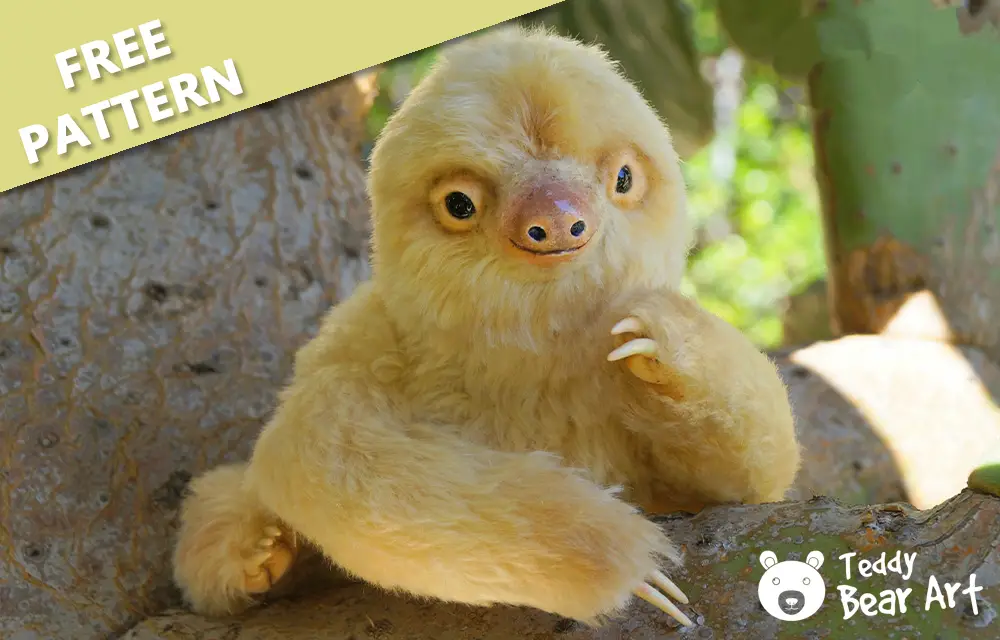
Crafting a plush sloth stuffed animal is a delightful and creative endeavor. What makes this journey even more special is the unique offer we have for you – a sloth stuffed animal pattern that sets itself apart in the world of crafting.
In this guide, we’ll unveil the intricacies of this pattern and show you how to turn it into your very own collectible sloth plush. It is suitable for advanced teddy bear makers.
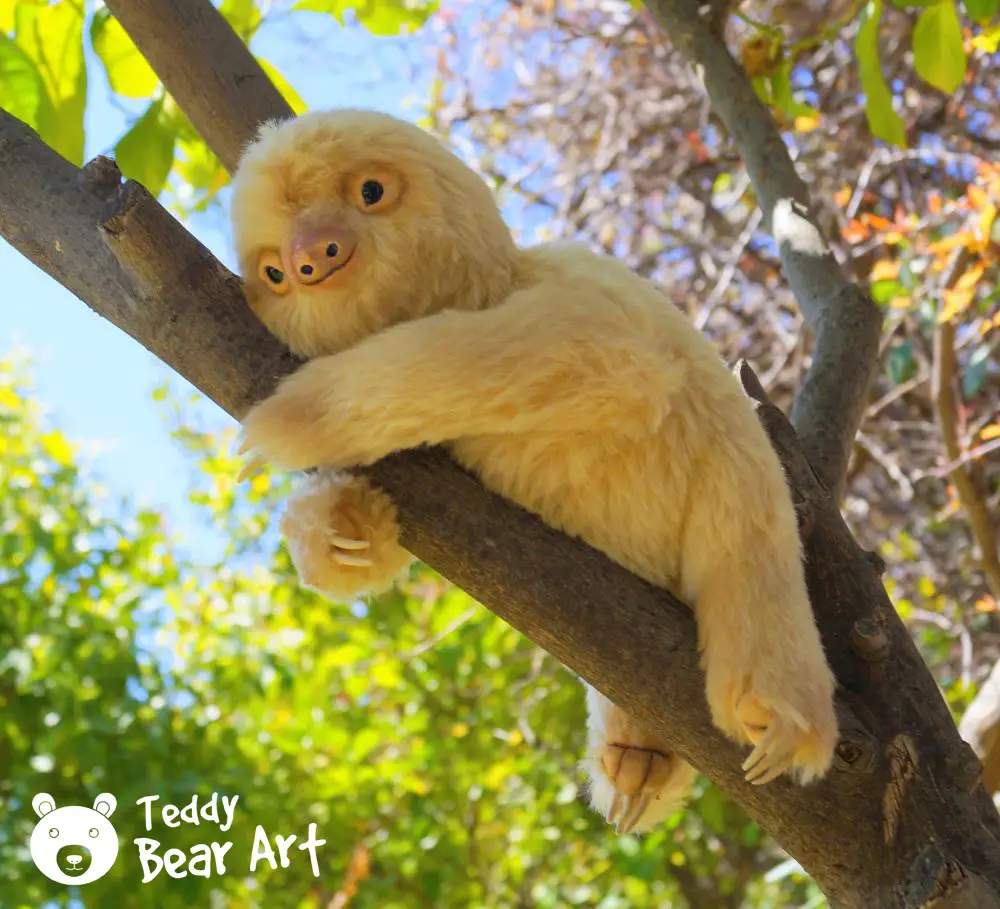
Unveiling the Unique Offer
What sets our sloth stuffed animal pattern apart from the myriad crafting patterns available? It’s the essence of uniqueness woven into every stitch. Crafting a collectible Linnaeus’s two-toed sloth with our pattern is not just about making a stuffed toy; it’s about creating a one-of-a-kind masterpiece that reflects your passion for craftsmanship.
Our pattern is a labor of love, meticulously designed to capture the charm and personality of real sloths. Each element, from the sloth’s endearing facial expression to its cuddly proportions, has been thoughtfully crafted to ensure that your finished plush is not just adorable but truly special.
But what truly makes this pattern a unique offer is the attention to detail and personalization. So, we provide an exact list of materials and tools for creating an albino sloth.
The result? A sloth stuffed animal that’s more than just a toy, it’s a collectible. It’s a piece of art that you can proudly display or gift to a fellow sloth lover. It’s a testament to your creativity and dedication to the craft.
With our pattern, you’re not just creating a plush sloth; you’re crafting a unique treasure that embodies the joy of handmade artistry.
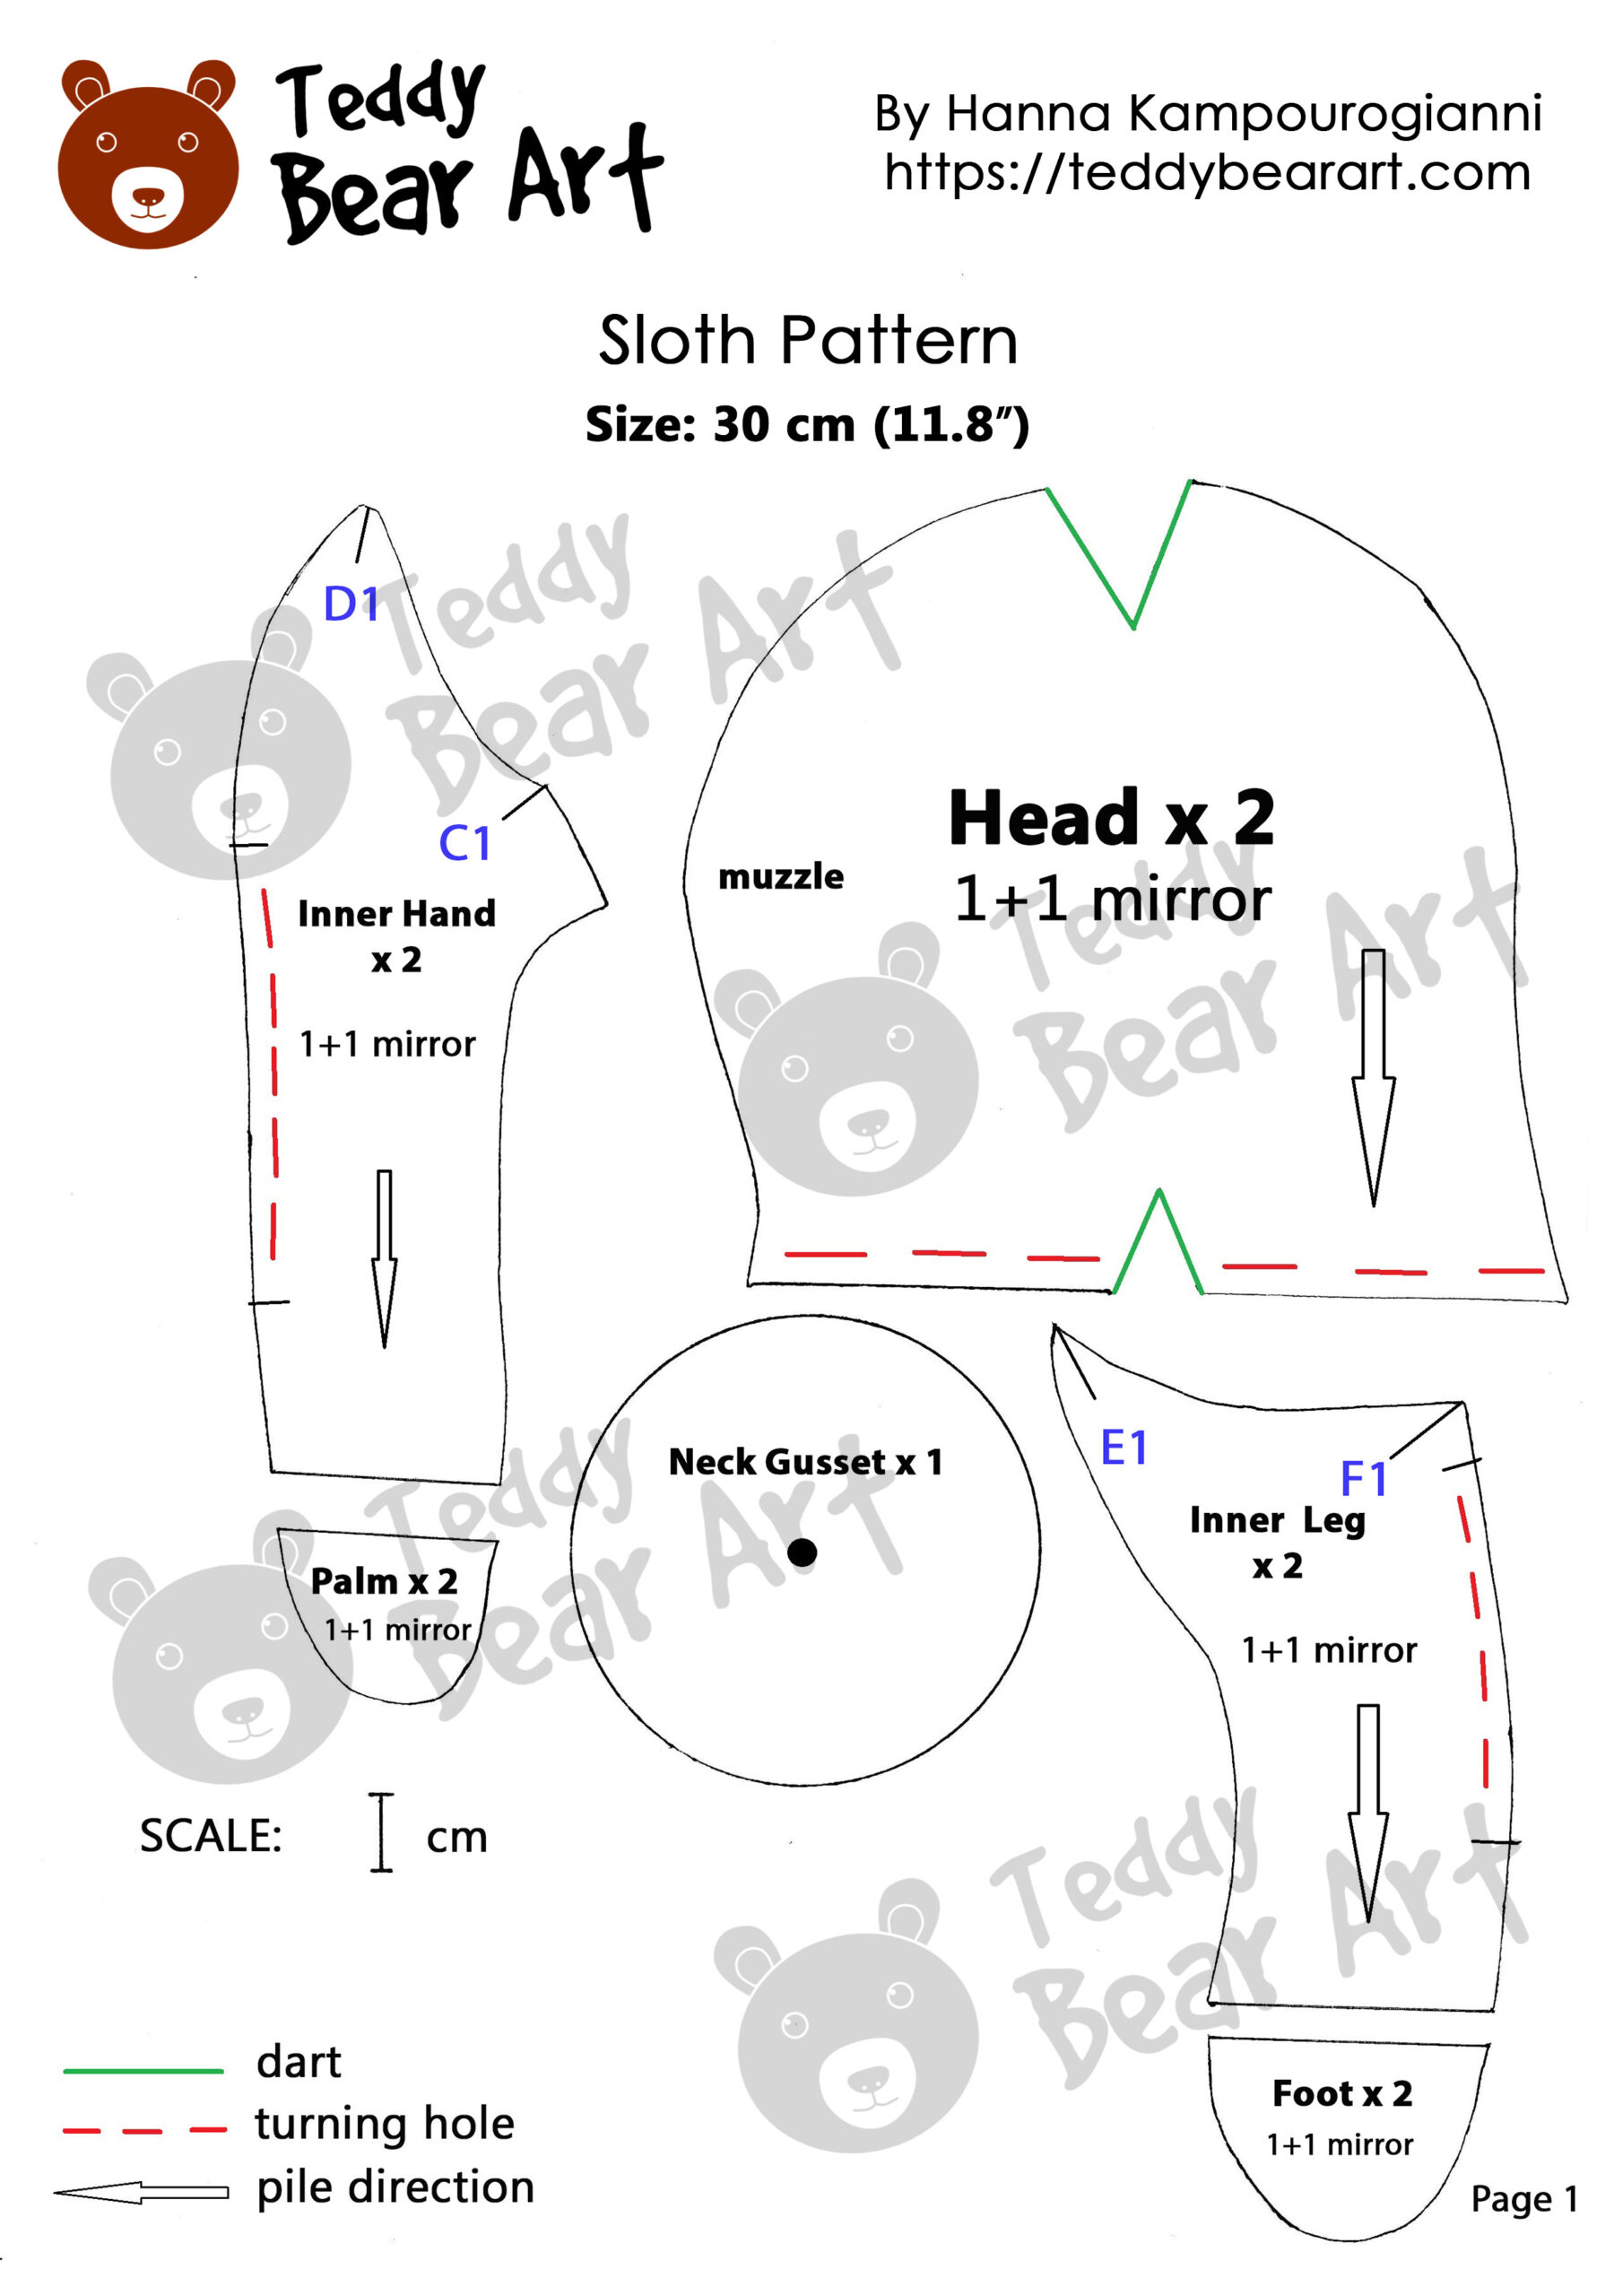
Download the Pattern
Follow the instructions below:
- From a computer (Windows).
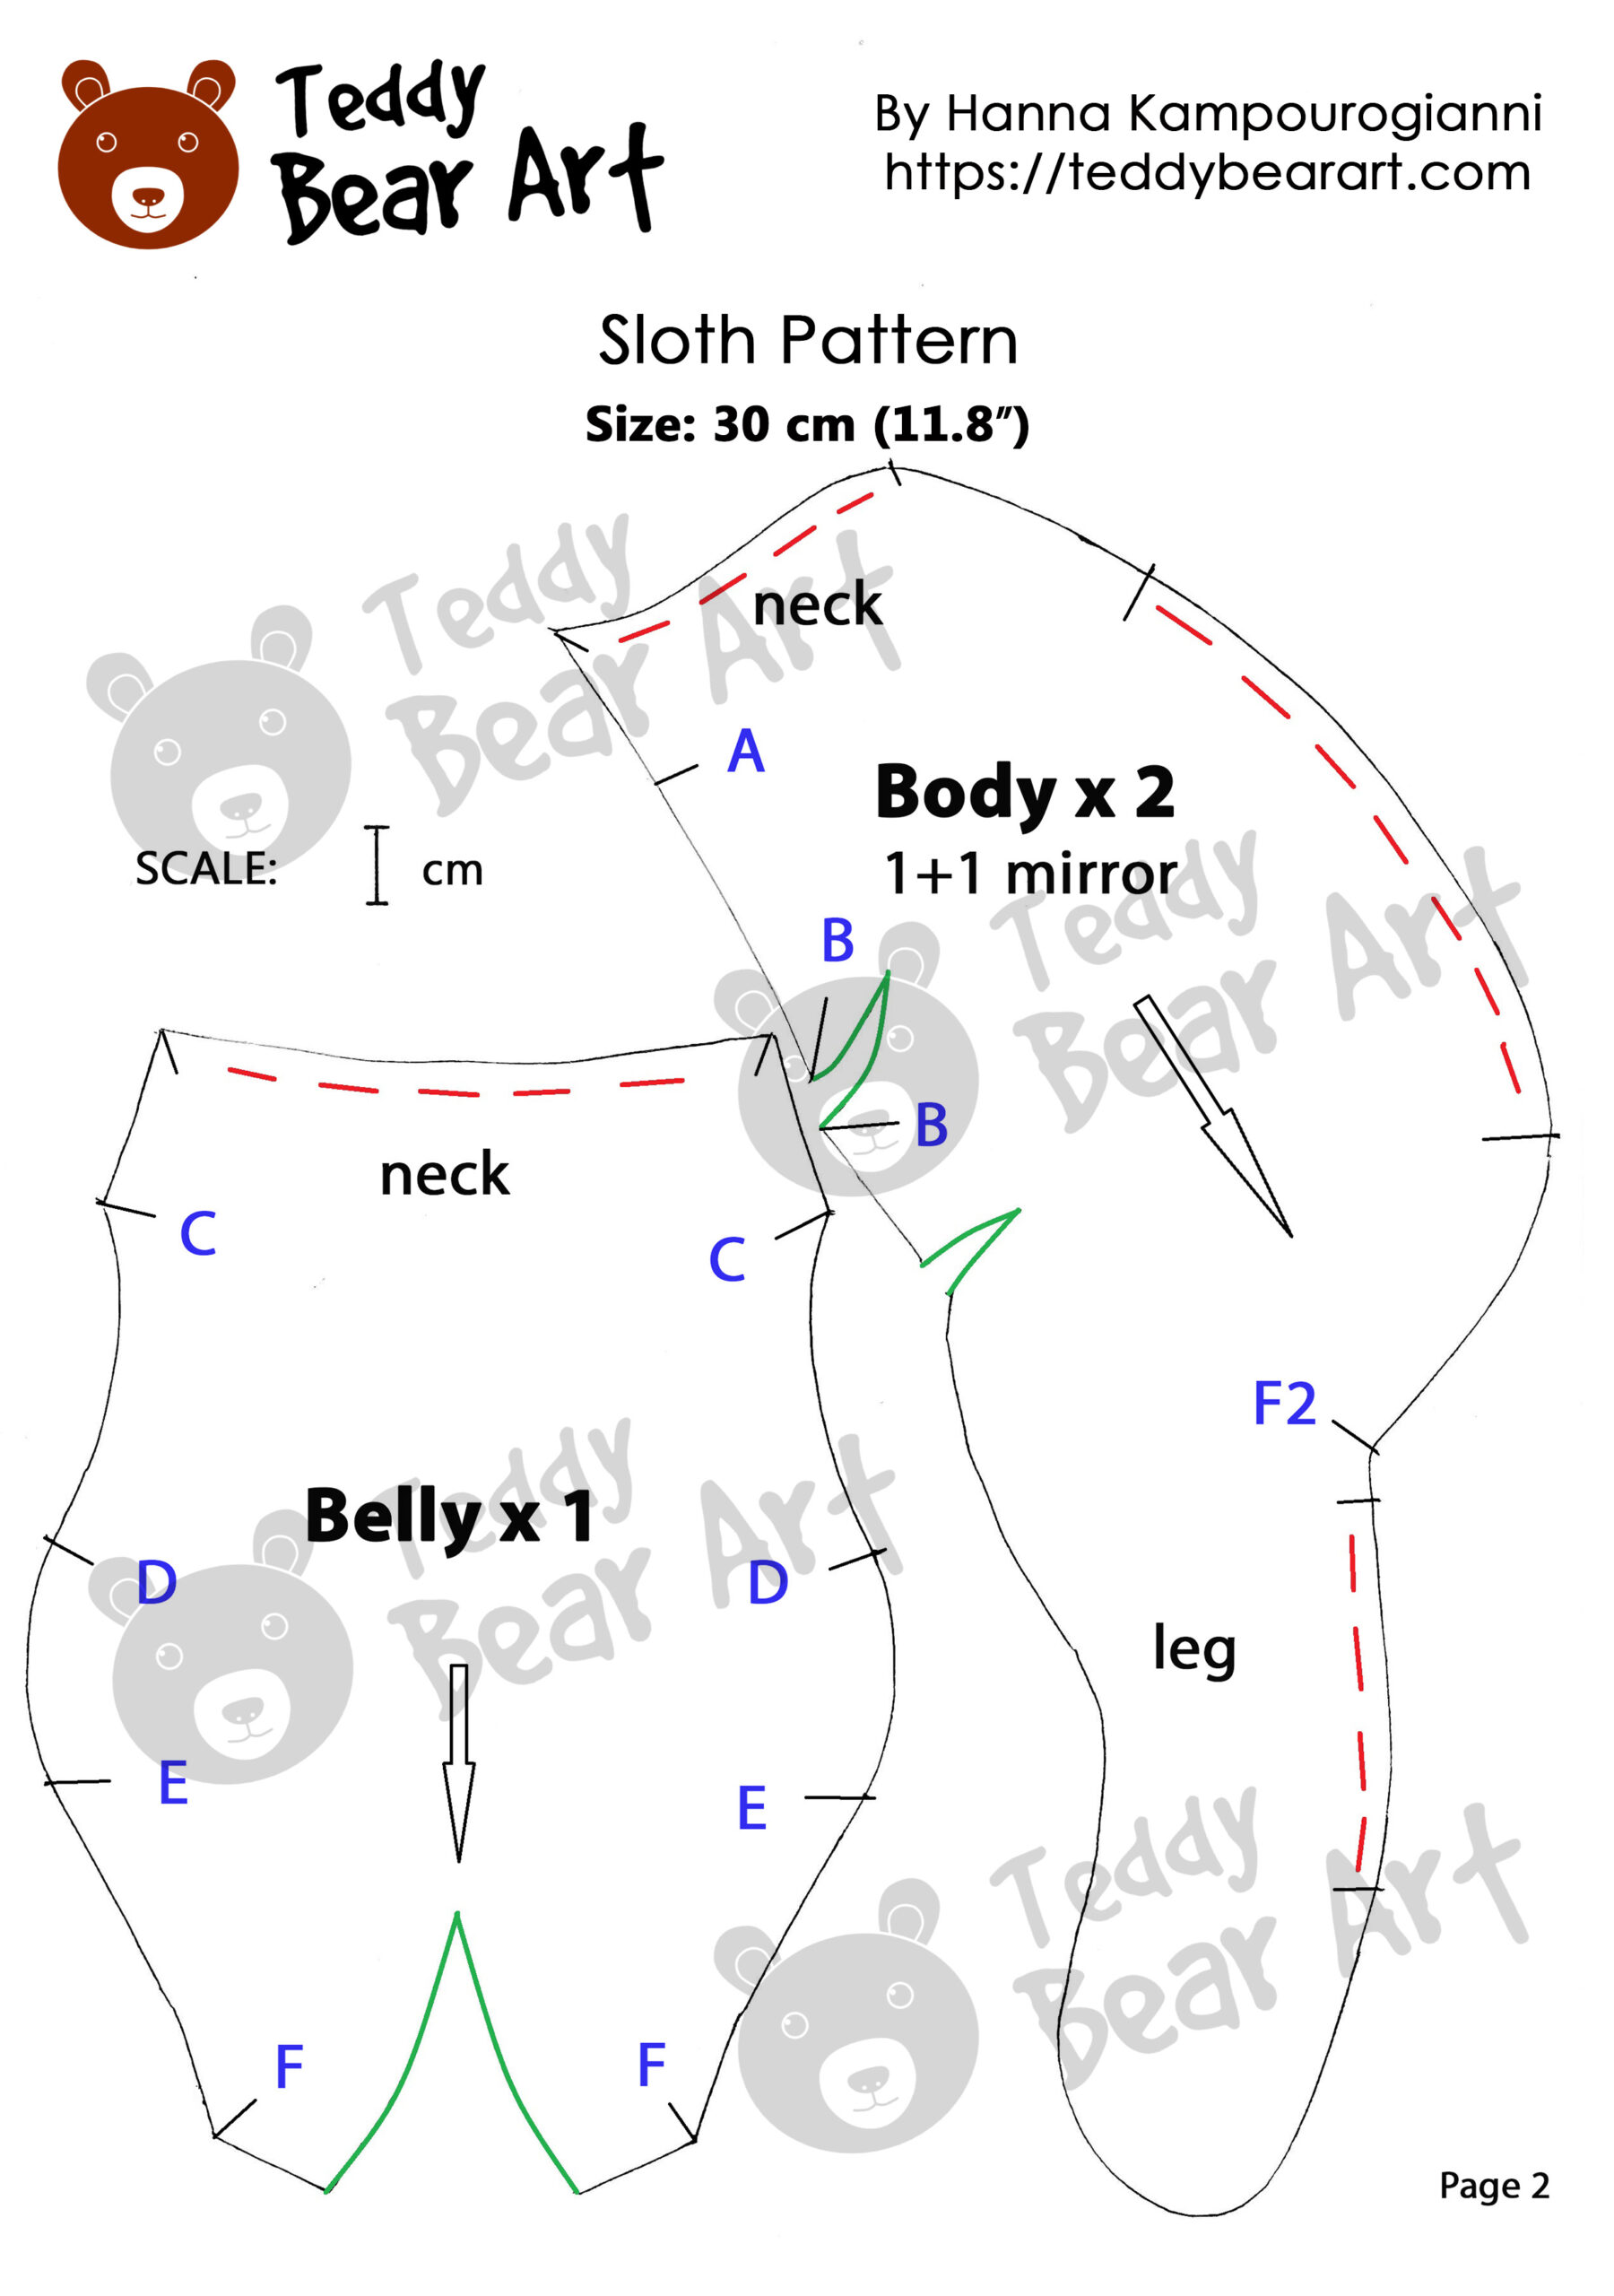
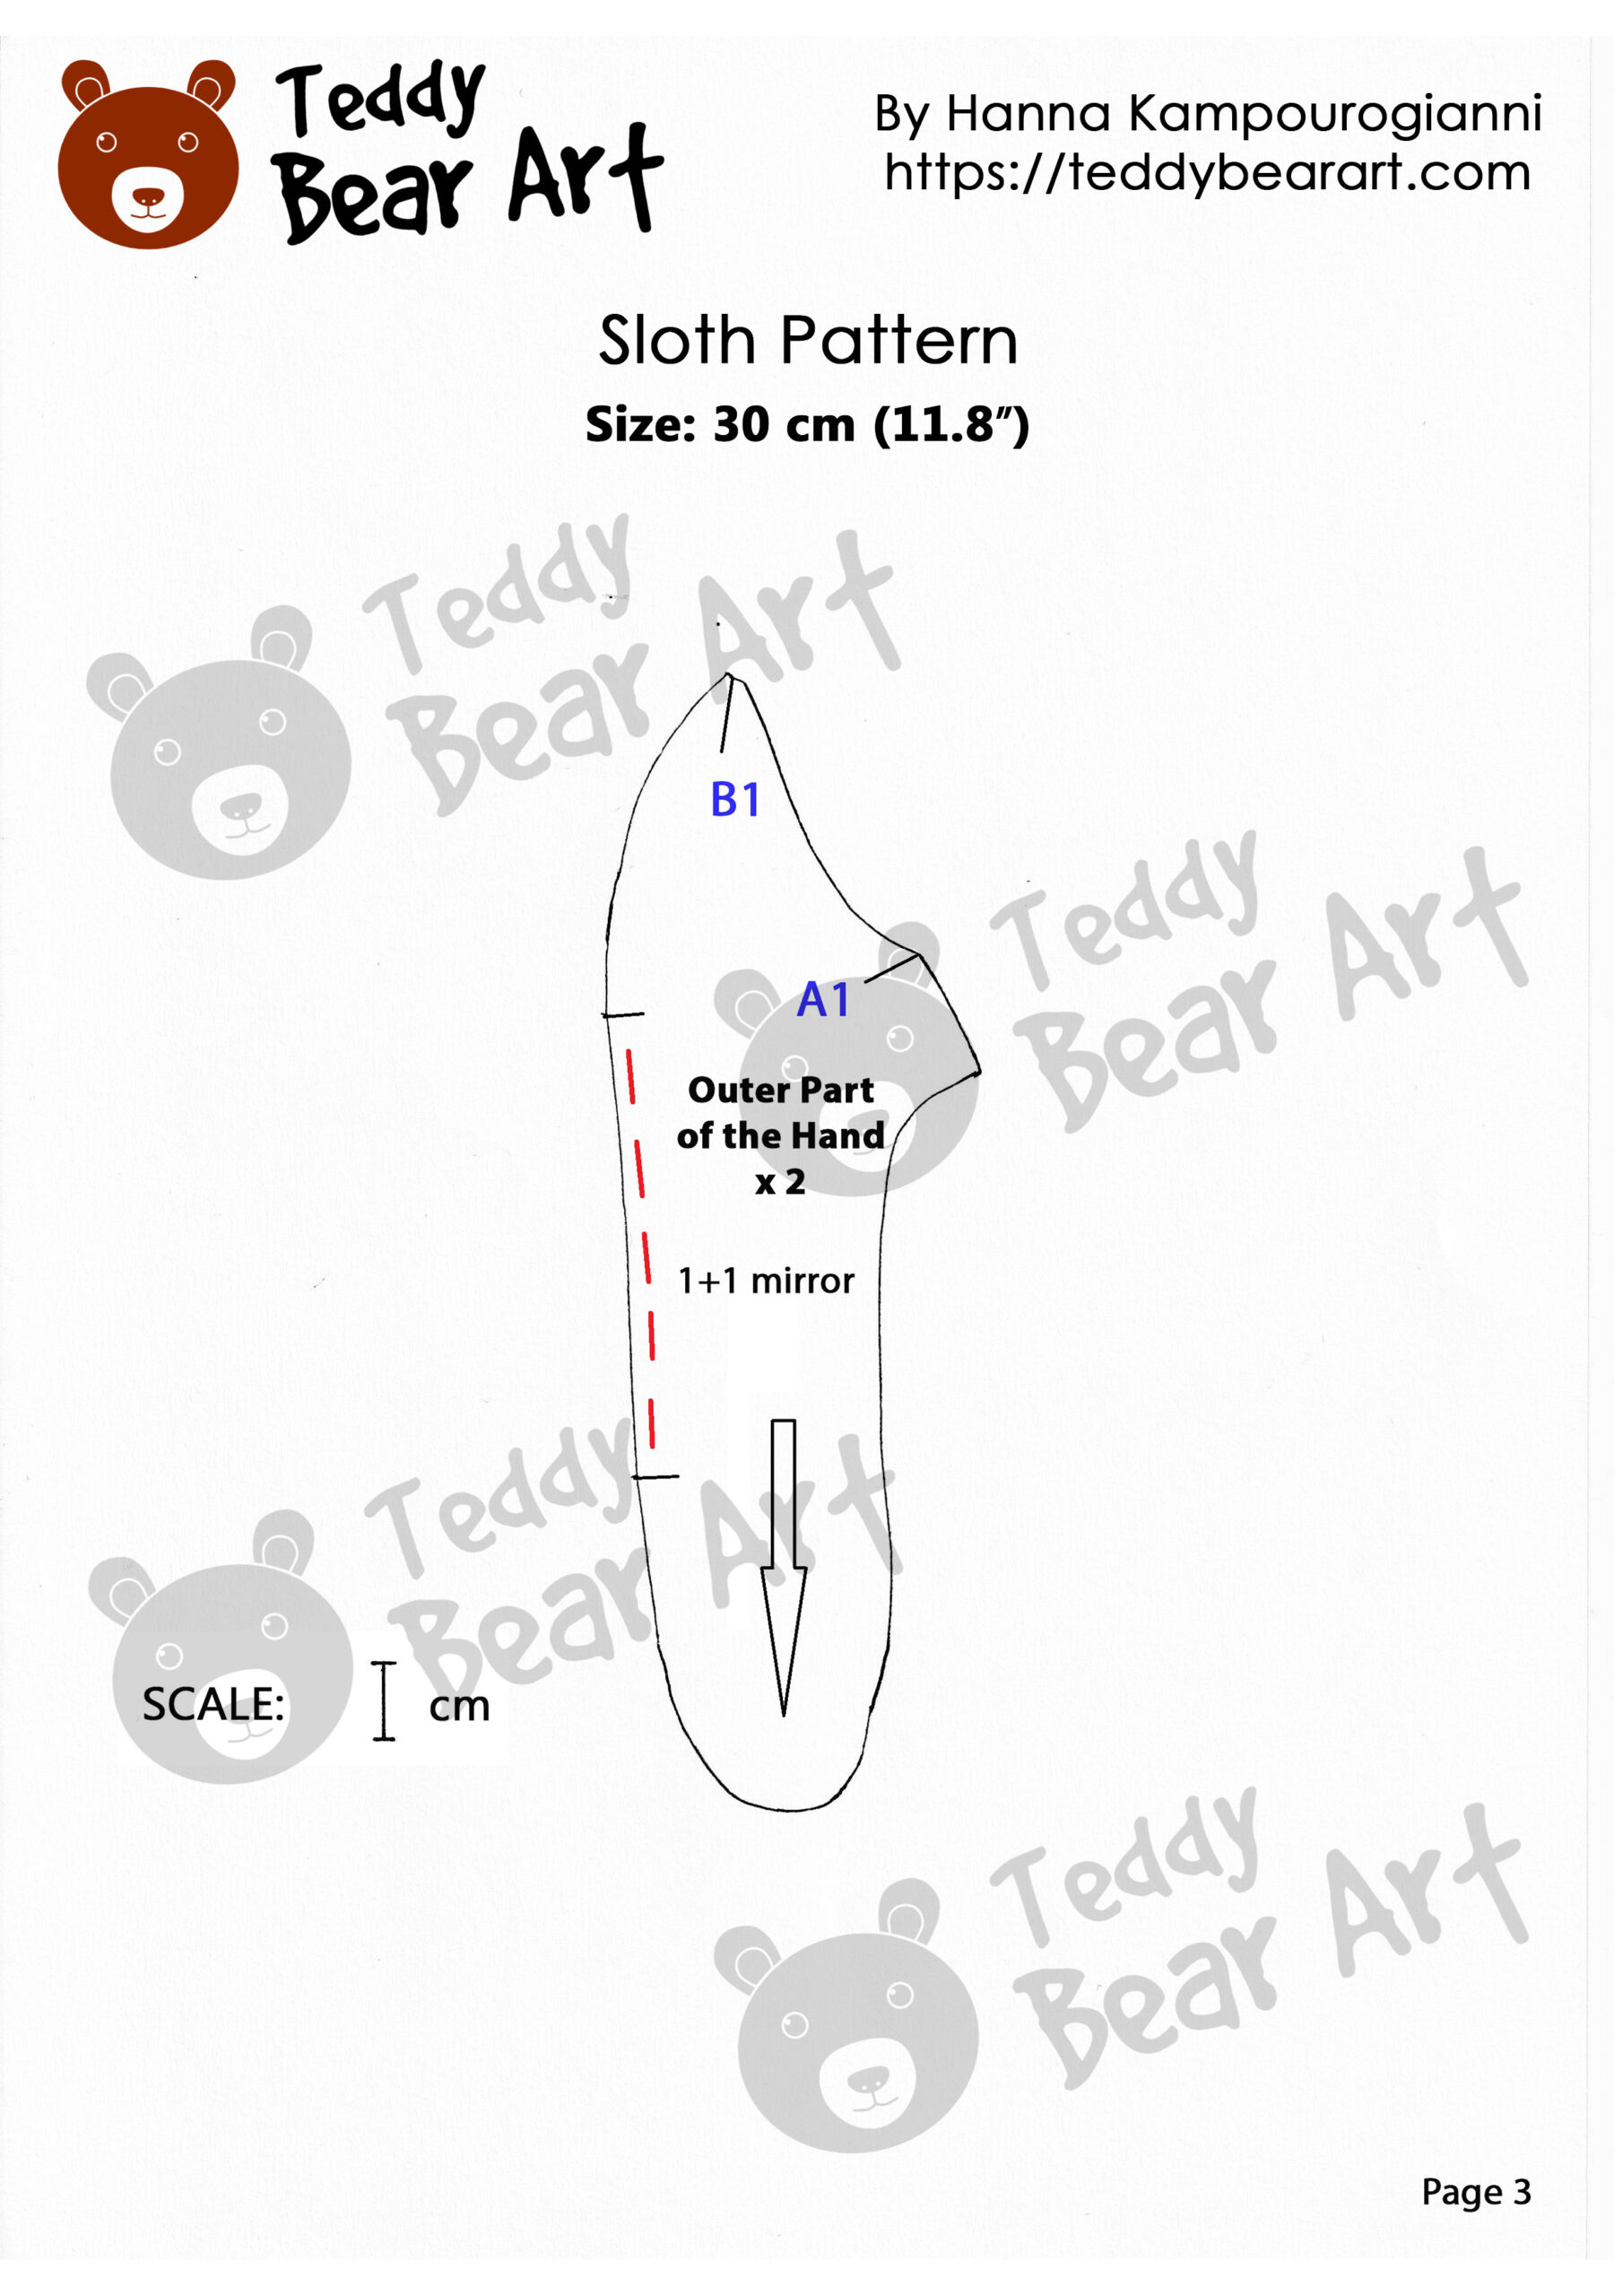
Click on the photo of the pattern you see below. In the new tab that will open, you press the right mouse button and select the “Save image as …” option. Then you choose where you want the image to be saved on your computer. - From a phone or a tablet (Android). There should be something similar for mobile devices with Android or iOS.
Click on the image. Save it by holding your finger on the image and selecting the “Save Image” option. Then go to your photo gallery and print it (there is an option).
Gathering Your Materials
- Mohair Helmbold with a 1.5 cm pile length.
- Strong threads.
- Scissors.
- A pair of 10 mm black glass eyes on a metal loop.
- A long needle for setting eyes.
- Faux suede fabric for paws.
- Felt fabric for eyelids.
- An awl.
- Plastic doll lock-line armature 9 mm in diameter or one size bigger, and doll armature assembly pliers for it.
- Male Fitting – 1 piece, doll armature adapter 2M1F – 1 piece.
- Synthetic or sheep wool for stuffing.
- Metal or glass pellets for weight.
- Milliput White modeling clay.
- Paints, top varnish, and brushes.
- Glue UHU.
Choosing Fabrics and Colors
Choosing the right fabrics is essential to creating a sloth plush that’s adorable and irresistibly soft.
Opt for fabrics that mimic the gentle fur of real sloths. Earthy tones and soft greys work beautifully to capture the sloth’s natural charm. For an albino sloth, it is better not to choose white color, but more like light honey and beige ones.
Our pattern is designed with these fabric choices in mind, ensuring that your finished creation looks and feels like a real sloth.
Step-by-step Sewing Guide
- Sew up all darts.
- Sew the 2 parts of the head, sew in the head gusset, stuff the head, and insert the armature.
- Sew the feet and palms to the sloth’s limbs.
- Sew the outer hands at points A-A1 to B-B1 to the side of the body.
- Sew the inner hands to the belly at points C-C1 to D-D1.
- Sew the inner legs to the belly at points E-E1 to F-F1.
- Sew together the belly with the sides of the torso. When stitching, gather the fabric in area D-E.
- Insert the eyes.
- Craft and insert a sculpted muzzle of the sloth into his head, using this technique.
- Sew the head to the body.
- Insert the armature into the body and limbs, stuff it, and add some weight. Finally, sew up the hole on the back.
In the short video below, I show exactly how I use a plastic doll armature and X/Y connectors to create a poseable soft toy like this sloth.
Finishing Touches and Caring for Your Sloth
Cut and glue felt eyelids to the sloth. Embroider the toes and insert the sculpted claws using an awl and glue.
Using an awl, carefully make holes and glue the claws into them. Remember that the two-toed sloth has 2 claws on its hands and 3 claws on its feet. Add some shadow to the eyes and limbs.
As you near the completion of your sloth, pay attention to the finishing touches. Ensure that all seams are secure, and any additional features are firmly attached. Taking care during this step ensures the longevity of your collectible sloth.
Remember that gentle handwashing is the best way to keep your sloth looking fresh and cuddly over the years.
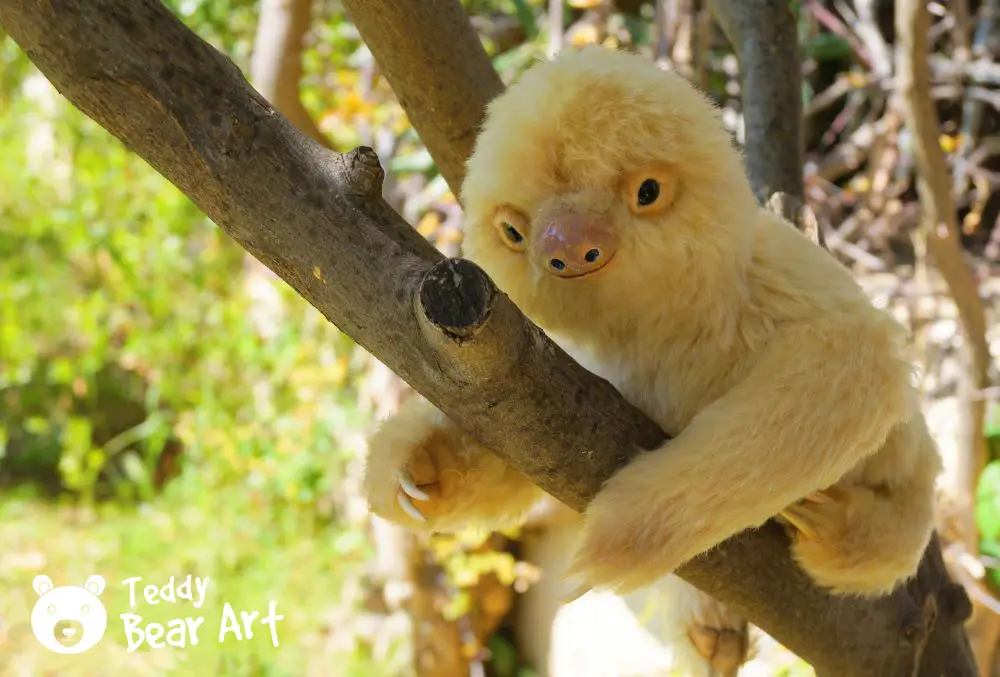
In Conclusion
Our sloth stuffed animal pattern offers a unique and exceptional opportunity to create your very own collectible sloth plush. With attention to detail and a touch of personalization, your sloth will become a cherished companion and a testament to your crafting skills. So, download our pattern today and embark on a crafting journey like no other. Your unique sloth awaits!
Additional Resources
For more crafting inspiration and tips, be sure to explore our related blog posts right here. We have a treasure trove of valuable content to enhance your crafting journey:
- Top 3 Unique Free Stuffed Animal Patterns for a Teddy Hippo, Tapir, and Anteater: Explore three beautiful exotic animal patterns.
- How To Make Teddy Bear Eyelids: Advanced Techniques Included: Learn unique advanced techniques.
Get Free Patterns & Be the First to Know!
Want free teddy bear patterns, exclusive tutorials, and a chance to win craft supplies?
Sign up for our newsletter using the subscribe form in the middle of this article to receive new patterns, insider tips, and the latest news on teddy bear art. You’ll also automatically be entered into our annual giveaway for a chance to win teddy bear crafting materials.
Bonus entry: Save one of our pins on Pinterest to increase your chances of winning!
Let’s create, inspire, and craft beautiful teddy bears together!

Hi Hanna,
Seeing how crafting can create such original projects, like the sloth-stuffed animal pattern, is incredibly inspiring. This offer is unique in that it takes great care to make a collectible plush that accurately captures the essence and character of actual sloths. It is especially intriguing because of the focus on customization and the careful selection of materials, which aim to produce a treasured and realistic creation. This raises some questions: How can the suitable fabric and color choice improve the plush’s authenticity? What inventive ways have makers incorporated their own touches to make their plush animals genuinely unique in terms of personalization?
I’m thrilled you found the sloth-stuffed animal pattern inspiring! Crafting truly allows for boundless creativity, doesn’t it? Selecting the right fabric and colors is key to capturing the essence of these adorable creatures. Opting for textures that mimic a sloth’s fur and choosing earthy tones can enhance its authenticity.
As for personalization, makers have ingeniously added their own flair through various means. Some create unique facial expressions, while others incorporate personalized accessories like miniature glasses or scarves. It’s these imaginative touches that truly make each plush a one-of-a-kind creation, reflecting the maker’s personality and style. The possibilities are as endless as one’s imagination!
OH MY! How cute is this pattern.
This sloth pattern is such a unique design. It would make an adorable plush.
I love that this article has not only catered for the highly experiences. You have created suitability for everyone and I appreciate this more than you know.
Thank you! I am going to try it!
Hey there! Thank you so much for your lovely comment! We’re thrilled to hear you’re loving the sloth pattern – they’re just the cutest, aren’t they? We’re all about making crafting accessible for everyone, so we’re super glad you appreciate that! Can’t wait to see how your plush sloth turns out! If you have any questions along the way, feel free to reach out. Happy crafting!