
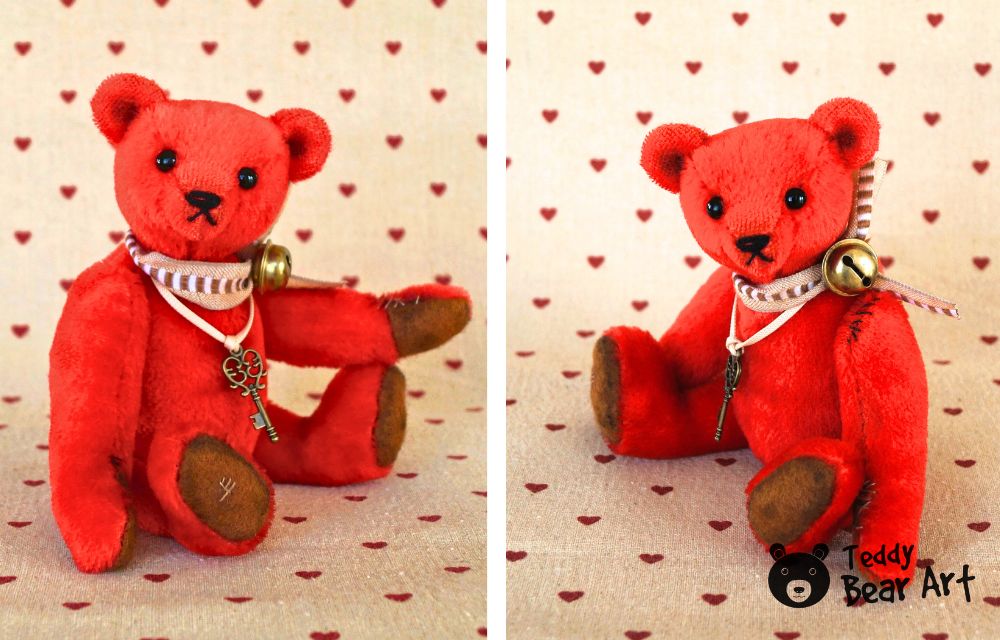
Creating a mohair teddy bear is a delightful project for anyone who enjoys crafting and handmade toys. This mohair teddy bear making tutorial provides all the instructions needed to make a charming, fully jointed teddy bear from soft mohair fabric. From preparing materials to adding detailed facial features, this guide ensures a beautiful finished bear with movable limbs and a personality of its own.
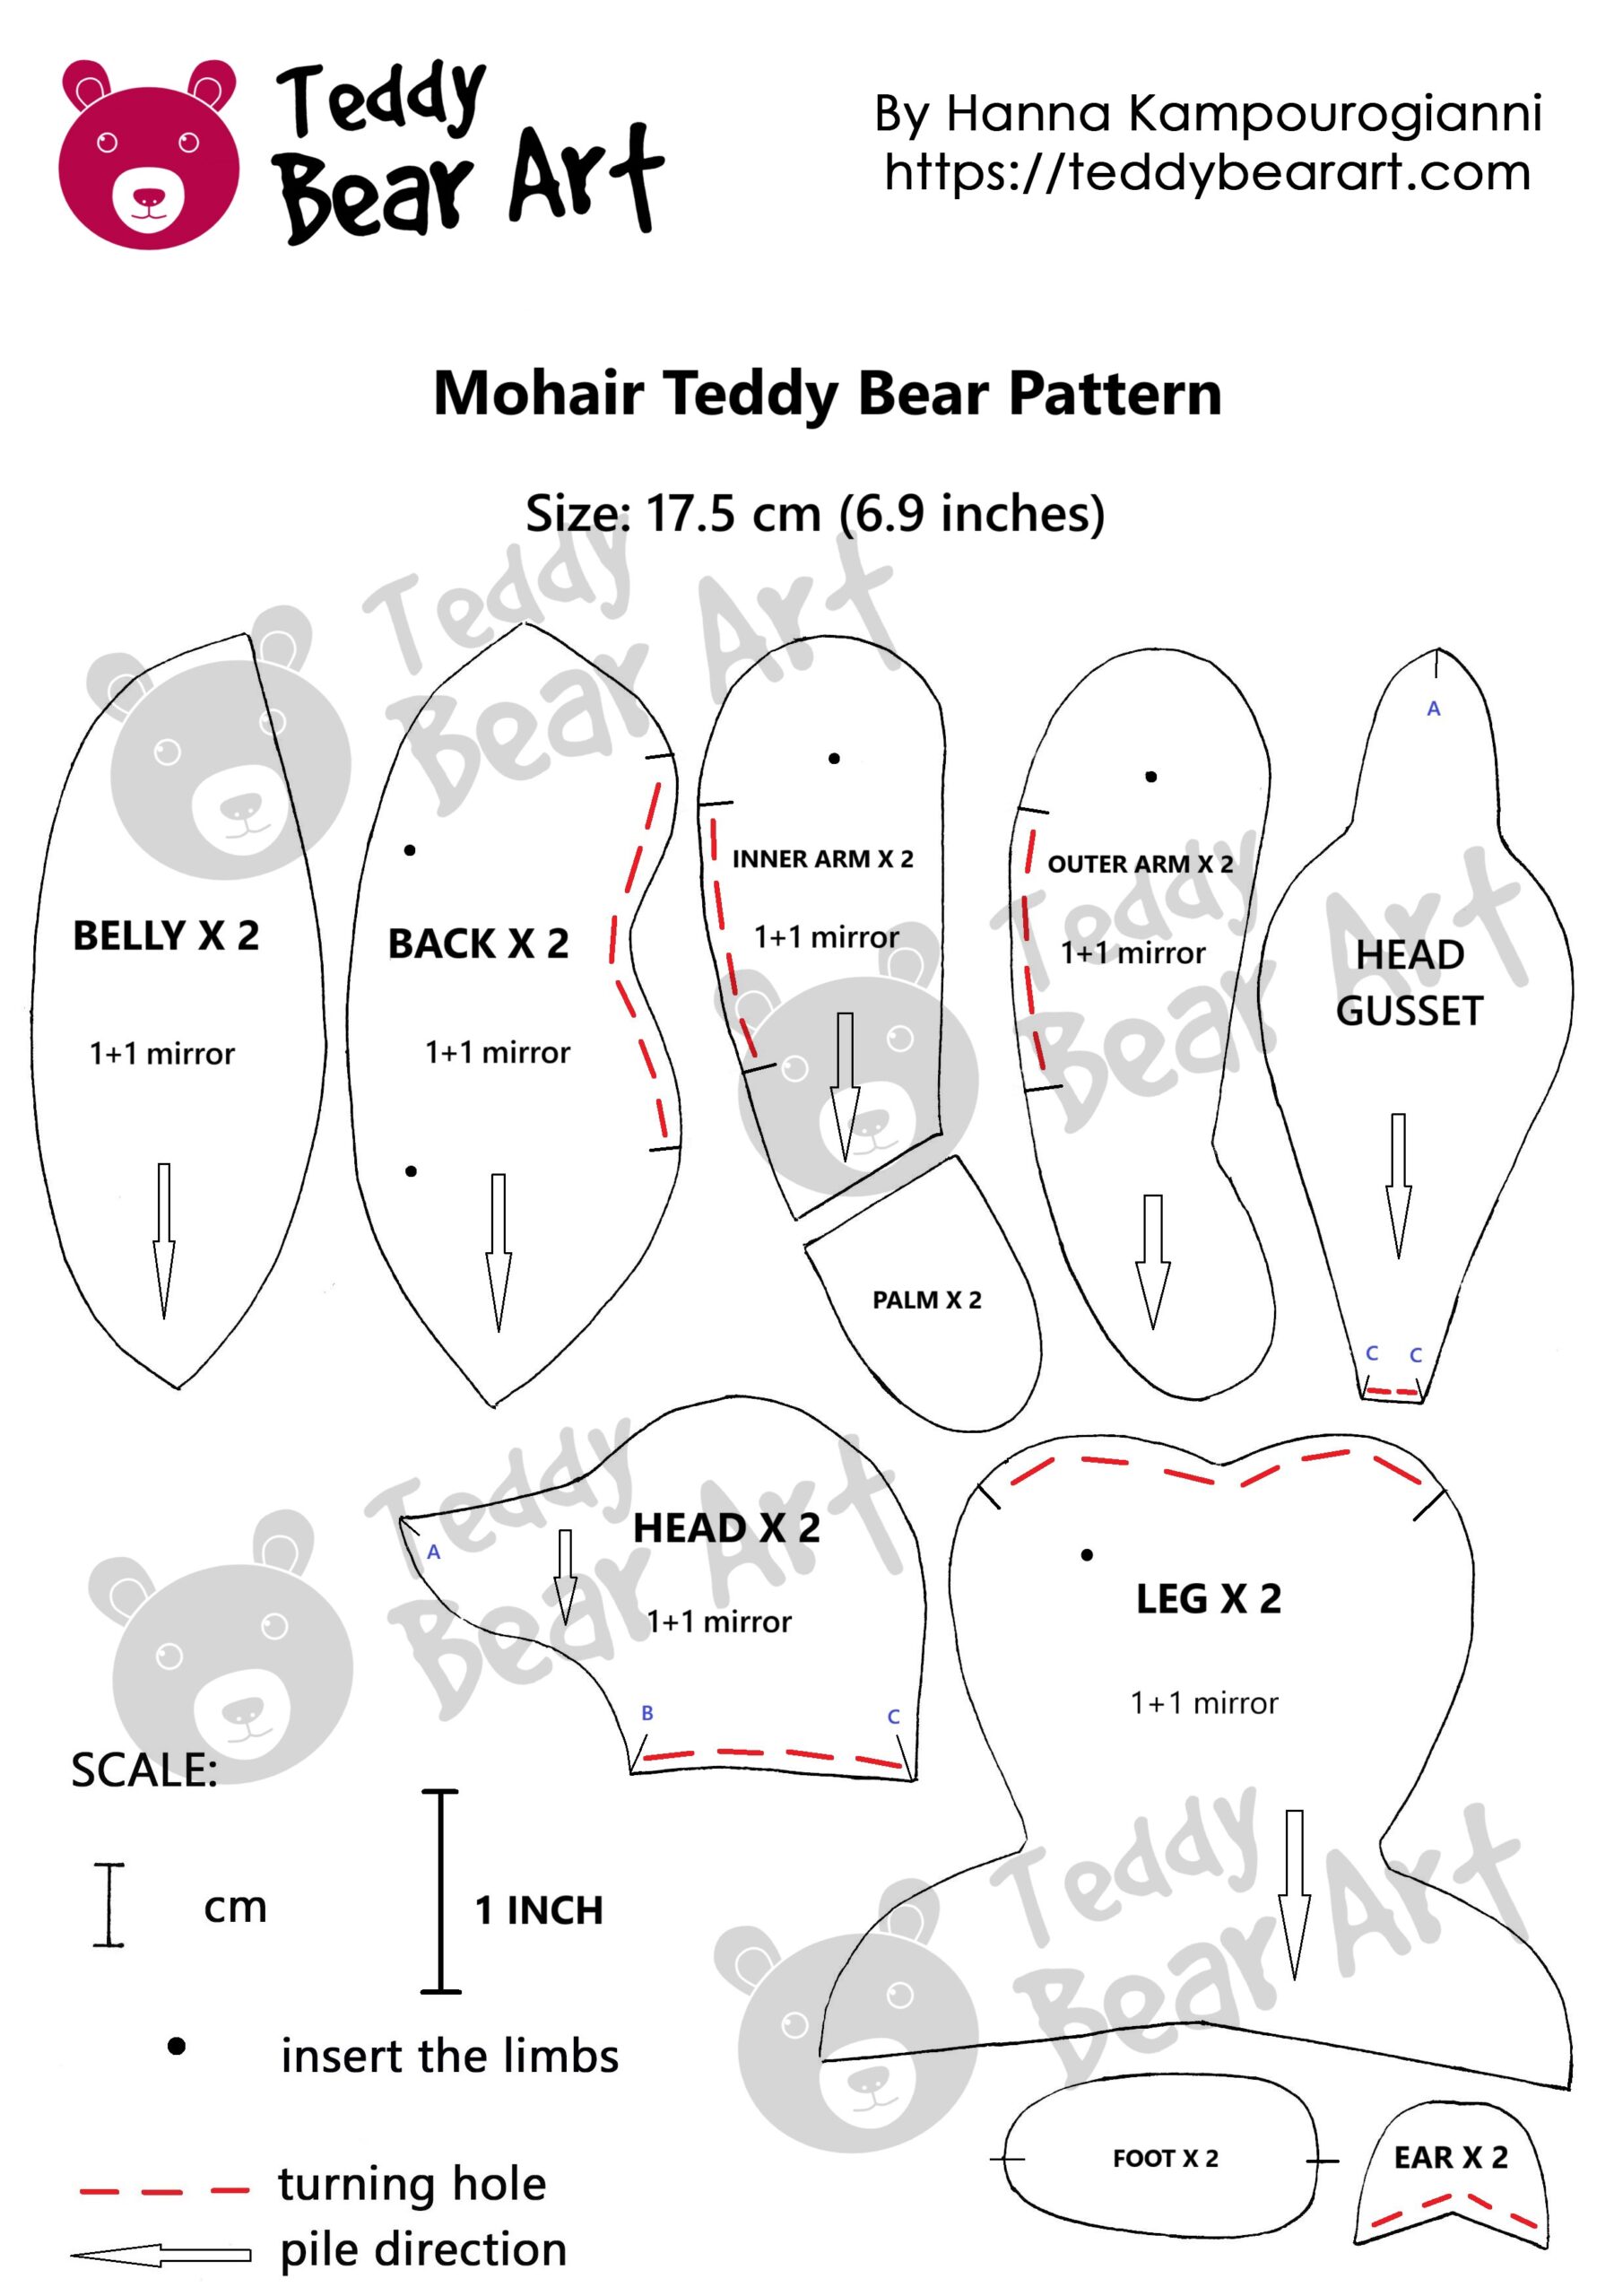
Download the Pattern
Notice that seam allowances are not included.
To download the pattern, follow the instructions below:
From a phone or tablet: There should be a similar option for mobile devices with Android or iOS. Click on the image. Save it by holding your finger on the image and selecting the “Save Image” option. Then, go to your photo gallery and print it (an option available).
From a computer: Click on the photo of the pattern you see below. In the new tab that will open, you press the right mouse button and select the “Save image as …” option. Then, you choose where the image will be saved on your computer.
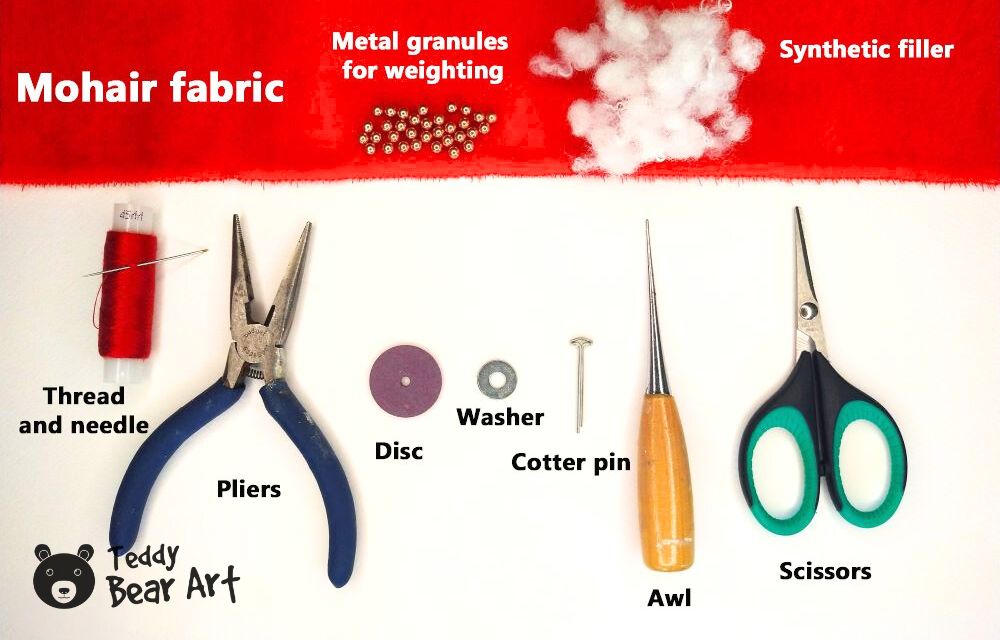
Materials and Tools
- Short pile mohair fabric
- Strong threads and a needle for hand sewing
- A pair of black glass eyes on a metal loop, approximately 7-8 mm in diameter
- Waxed thread
- Black floss thread
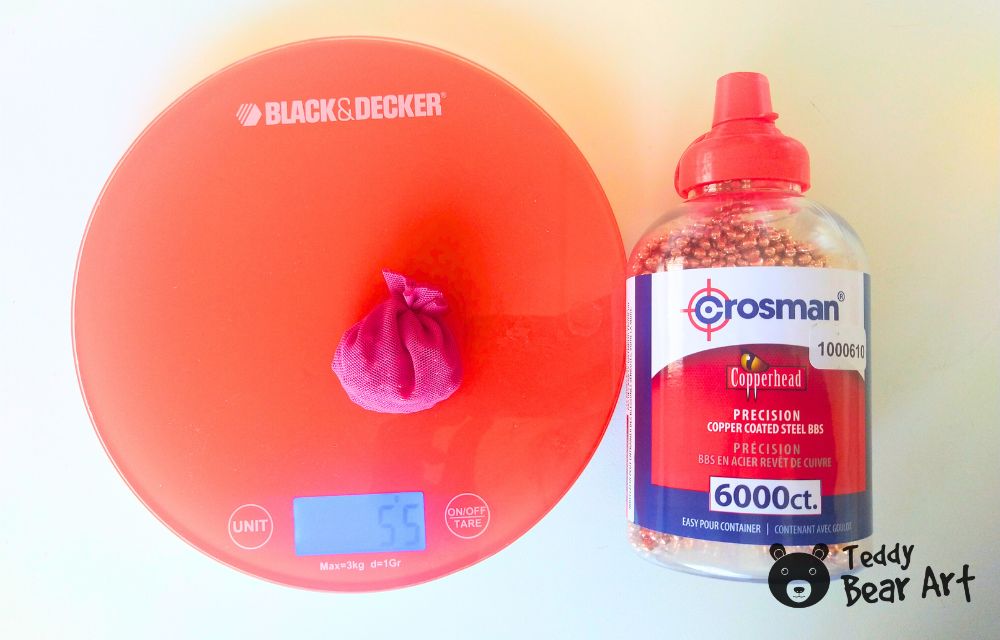
- Metal pellets or glass pellets for weight
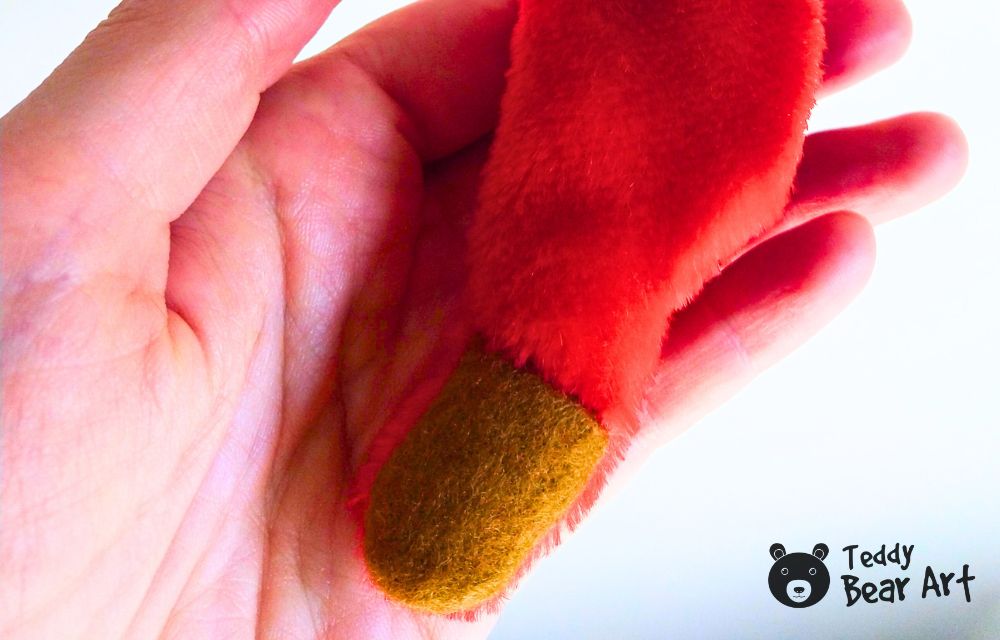
- Felt fabric for paws
- Discs 18 mm in diameter – 10 pieces
- T-shaped cotter pins 2.0×20 – 5 pieces
- Washers – 10 pieces
- Synthetic filler or sheep wool filler
- Long doll needle
- Scissors
- Pliers
- An awl
Step-by-Step Sewing Instructions
All pattern pieces are transferred onto the mohair fabric with careful attention to pile direction. Seam allowances are not included in the pattern and must be added before cutting. Once all pieces are cut, the sewing process can begin.
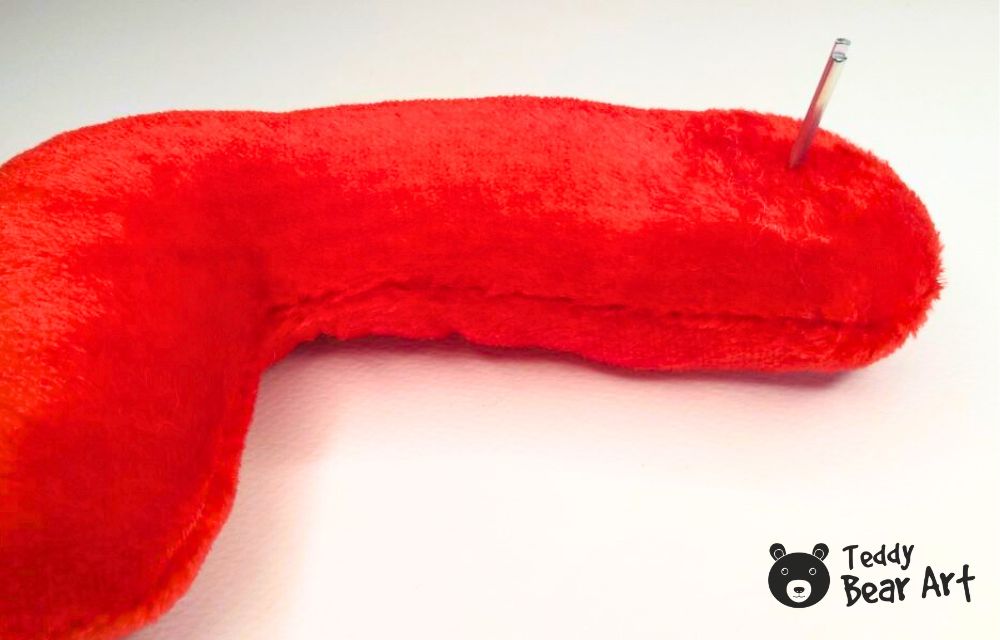
We start with the head. Two headpieces are sewn together following the markings from point B to point A. After that, the head gusset is inserted. The gusset is sewn carefully from point A to point C, shaping the head and giving it volume.

Next, the body is assembled. The belly pieces are sewn together with the back pieces, and then between them.
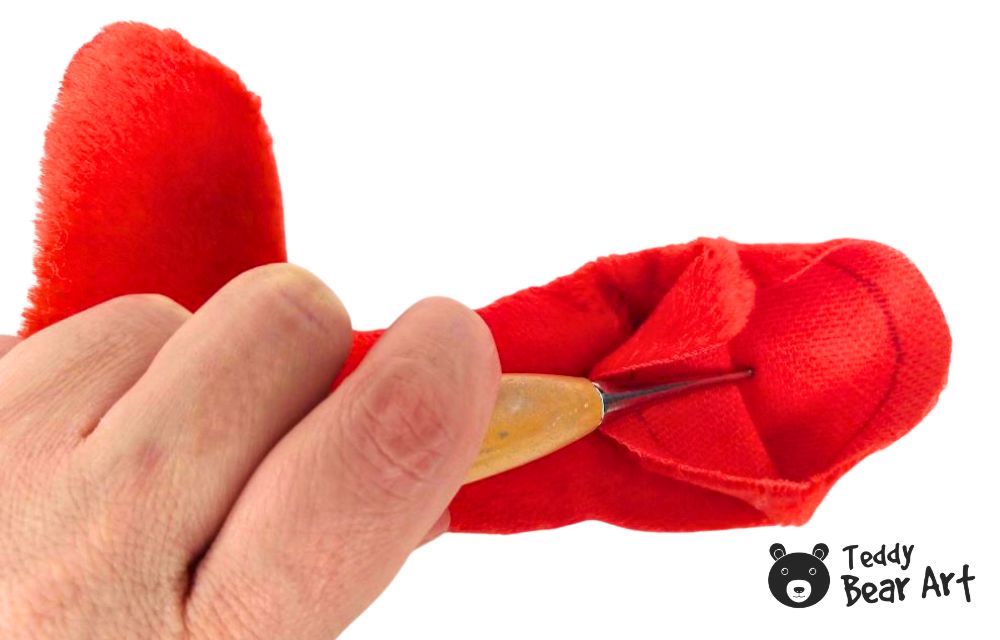
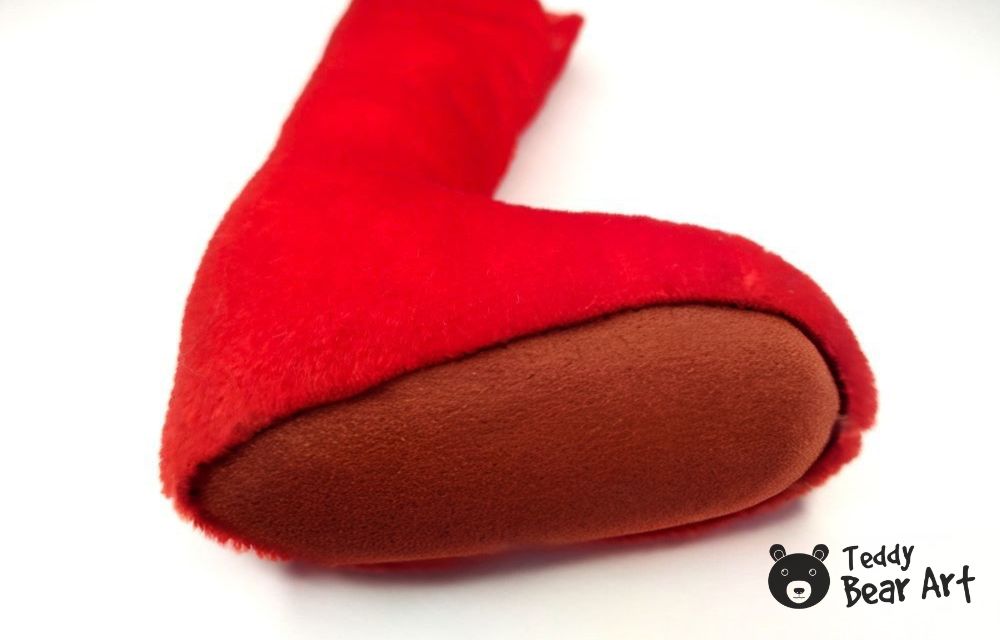
The legs are sewn, and the felt foot pads are stitched into each leg. The palms are sewn onto the arm pieces, after which the arms are assembled.
Finally, the ears are sewn.
All sewn parts are then turned right side out through the turning openings.
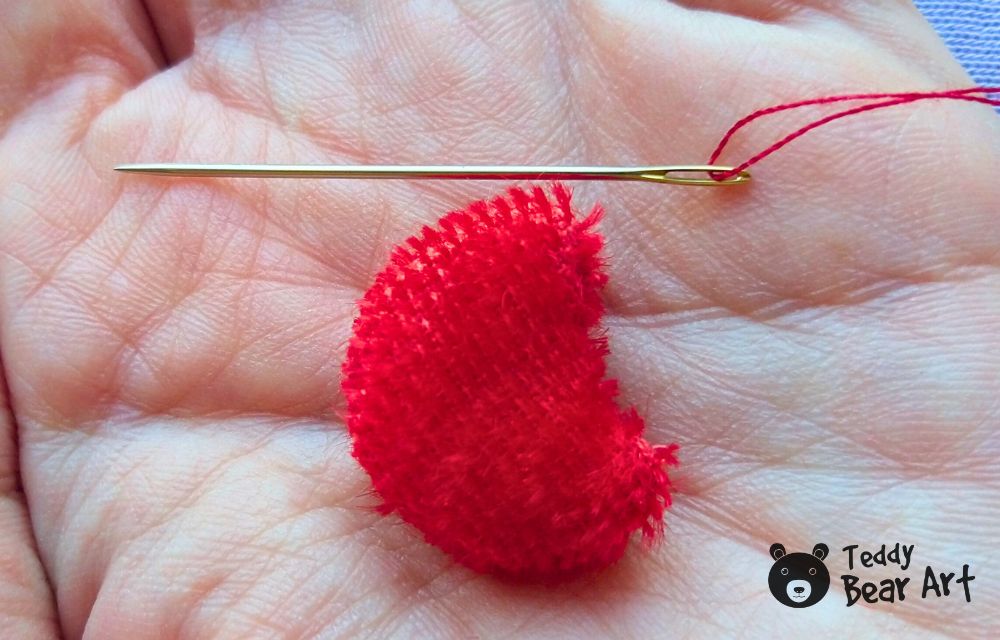
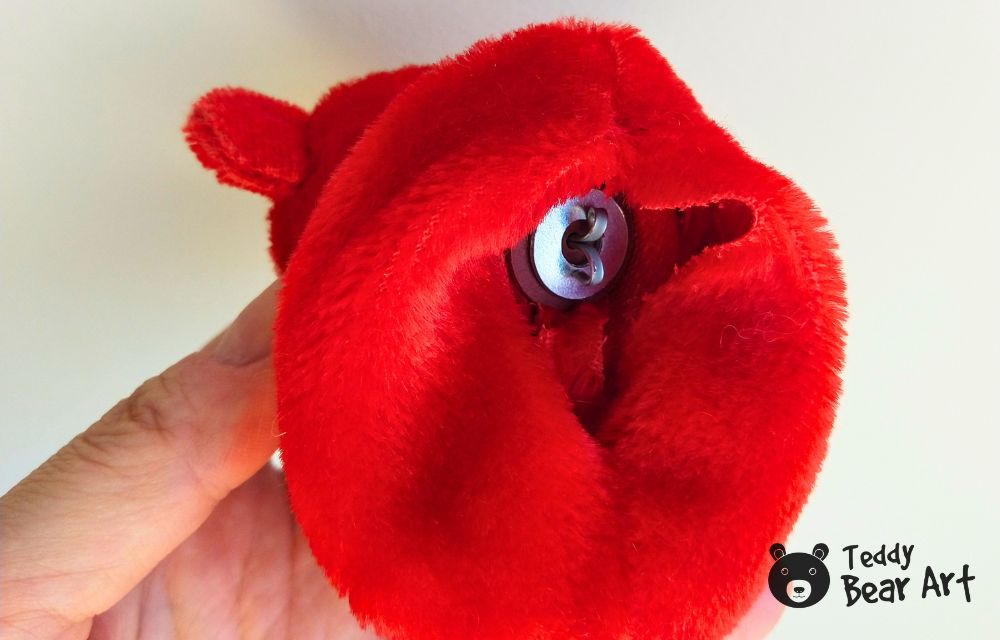
We move on to assembling and stuffing the head. The head is firmly stuffed with synthetic filler to achieve a smooth and rounded shape.
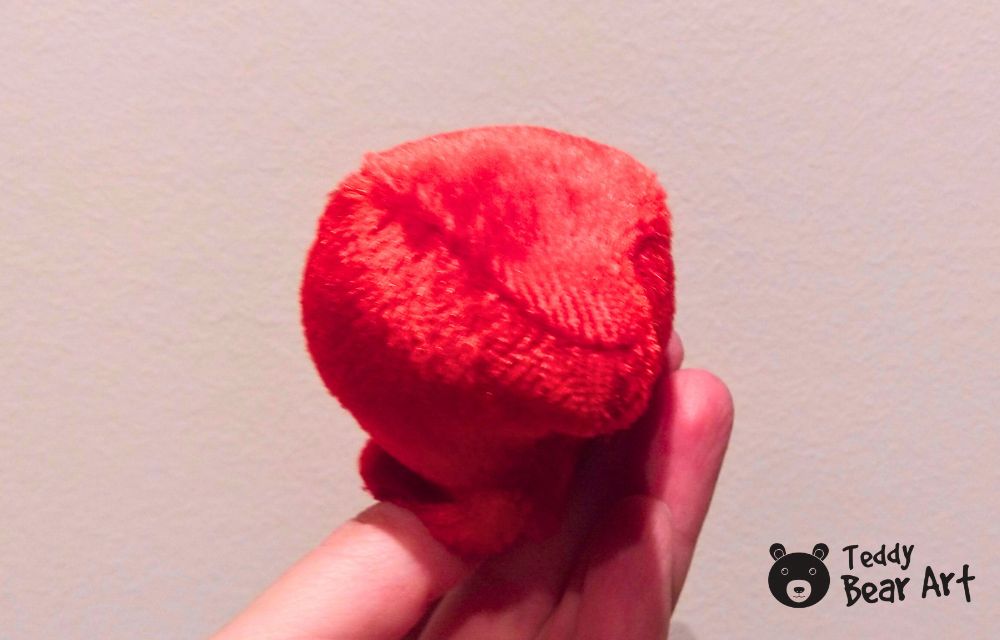
A disc with a T-shaped cotter pin is inserted into the neck area. The opening is closed tightly using a strong thread (waxed thread works best).


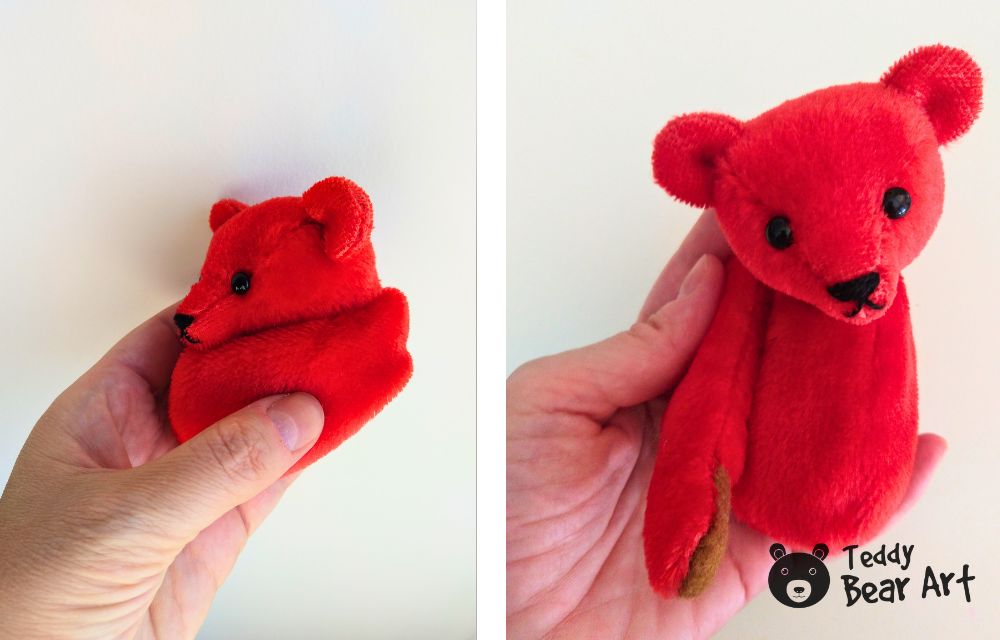
Then the nose and mouth are embroidered with black floss thread. The detailed process of embroidering the teddy bear nose, including different shapes and stitching techniques, is explained step by step in this guide on how to embroider teddy bear nose shapes and techniques.

Glass eyes are inserted and fixed securely.
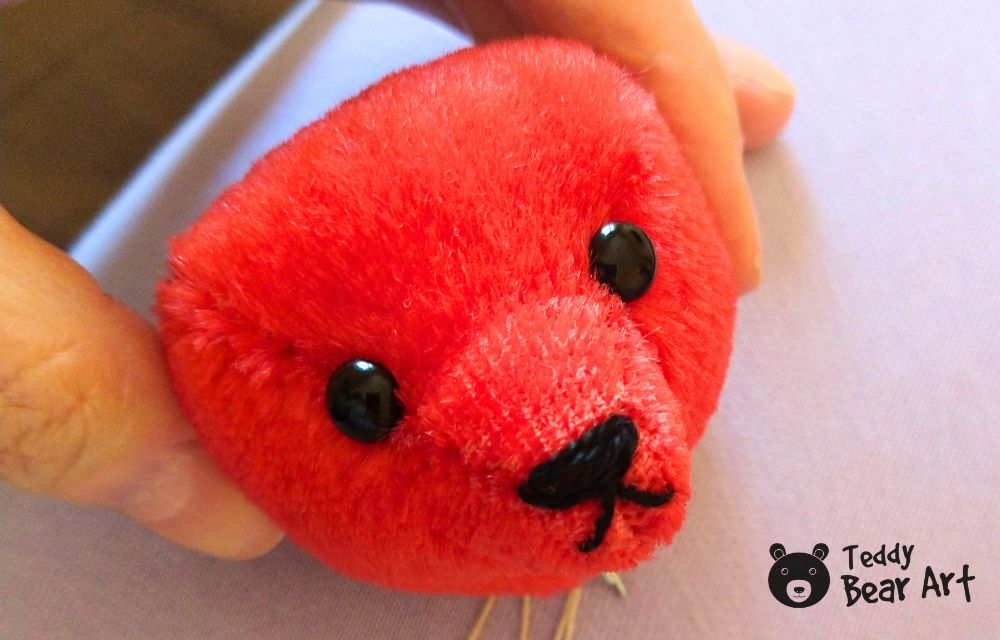
The detailed process of inserting and securing teddy bear eyes is explained step by step in this guide on how to attach teddy bear eyes and bring them to life.
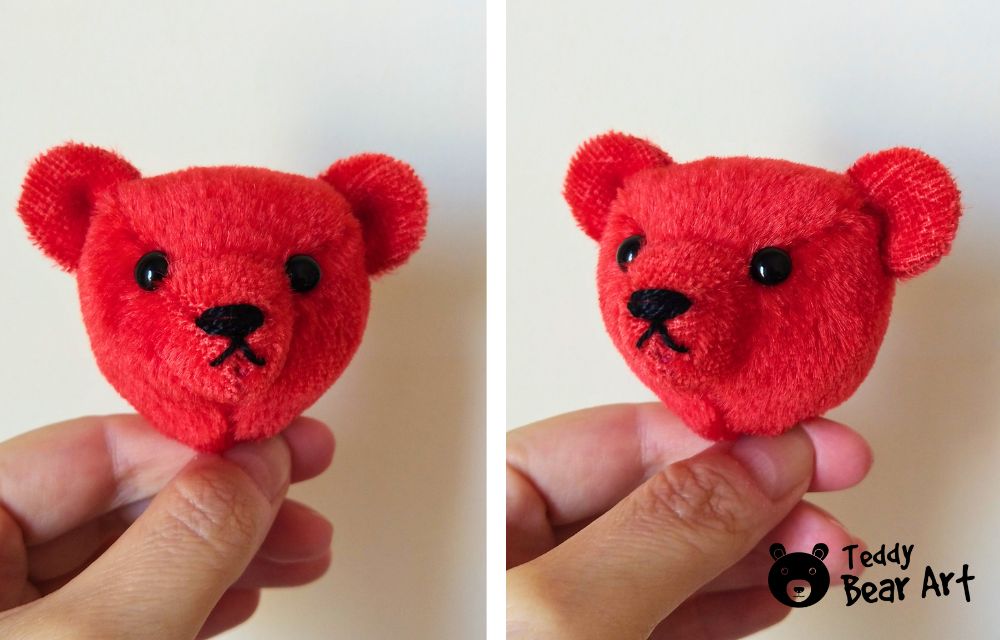
The ears are positioned symmetrically and sewn onto the head.
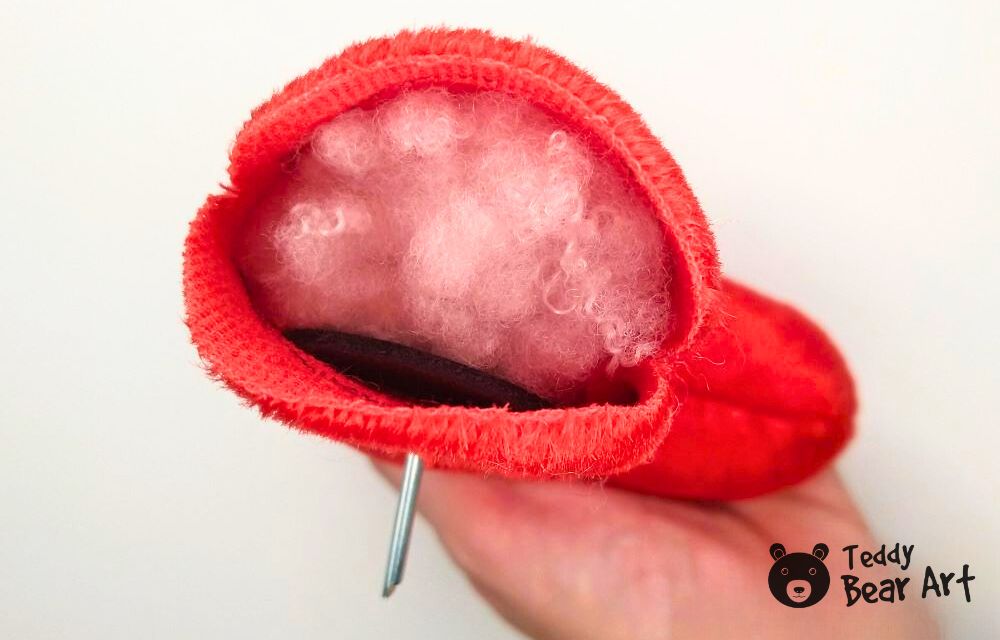
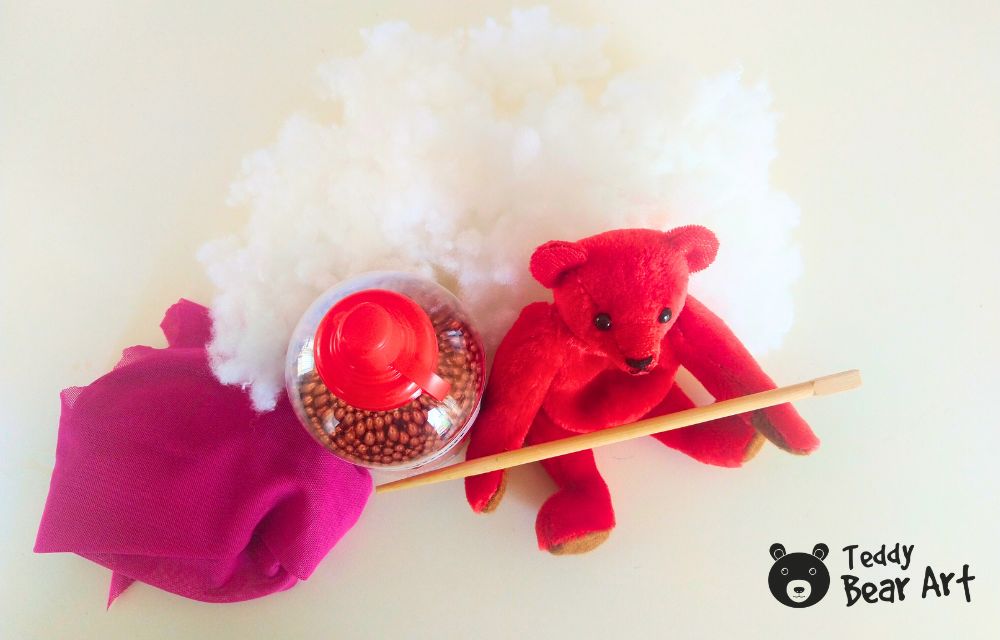
The limbs are stuffed next. Each arm and leg is filled evenly, ensuring a balanced shape. Disc joints are inserted into the limbs, fixed with cotter pins and washers, and the openings are closed securely.
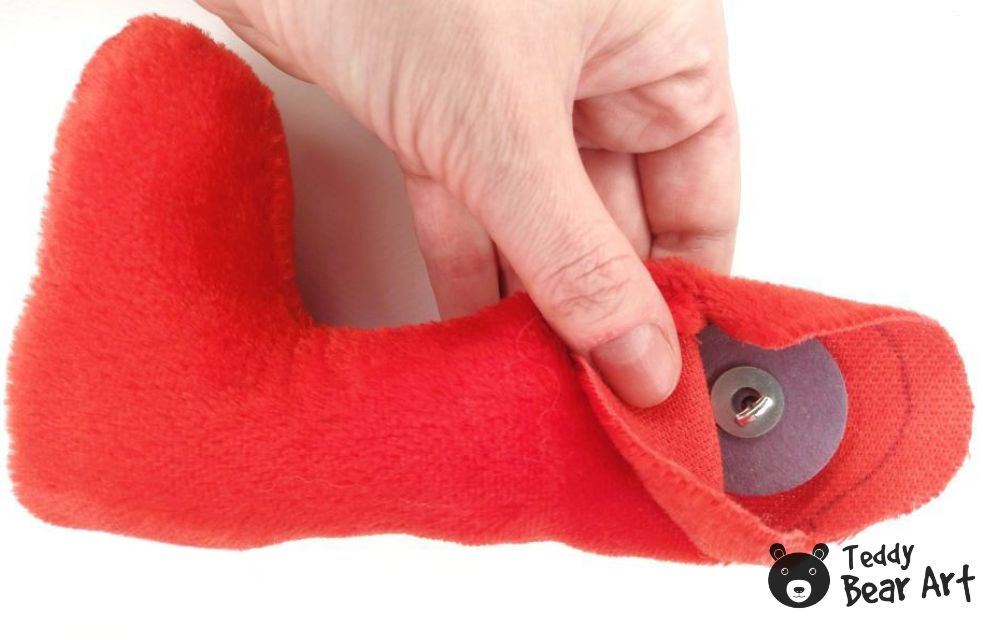
Assembly begins with attaching the head to the body using the disc joint. The limbs are inserted into the body next. All joints are tightened carefully using pliers to ensure smooth movement without looseness.


Before closing the body, a small fabric pouch filled with metal or glass pellets is placed inside for weight and stability. The remaining space is filled with synthetic stuffing, shaping the teddy bear evenly. The opening on the back is closed with a neat ladder stitch.

The final step is decoration. The mohair pile can be gently brushed, and any additional details, such as ribbons or accessories, may be added to complete the teddy bear.

Before You Go
This mohair teddy bear making tutorial brings together traditional techniques and thoughtful details that make a handmade teddy bear truly special. Working with mohair requires patience and attention to pile direction, joint placement, and balanced stuffing, but the result is a teddy bear with character, movement, and lasting quality. Taking time to shape the head carefully, secure the joints properly, and add expressive facial features will always elevate the final look of the bear.
Each finished teddy bear becomes a unique piece, even when the same pattern is used. Small choices such as eye placement, nose shape, firmness of stuffing, and added weight inside the body can completely change the personality of the bear. Exploring these details helps develop confidence and skill, making every new project more refined than the last.
This mohair teddy bear making tutorial is designed to be both practical and inspiring, encouraging experimentation and creativity while preserving classic teddy bear making traditions. With practice, these techniques can be adapted to other patterns, sizes, and styles, opening the door to endless possibilities in handmade teddy bear creation.
Get Free Patterns & Be the First to Know!
Want free teddy bear patterns, exclusive tutorials, and a chance to win craft supplies?
Sign up for our newsletter using the subscribe form in the middle of this article to receive new patterns, insider tips, and the latest news on teddy bear art. You’ll also automatically be entered into our annual giveaway for a chance to win teddy bear crafting materials.
Bonus entry: Save one of our pins on Pinterest to increase your chances of winning!
Let’s create, inspire, and craft beautiful teddy bears together!