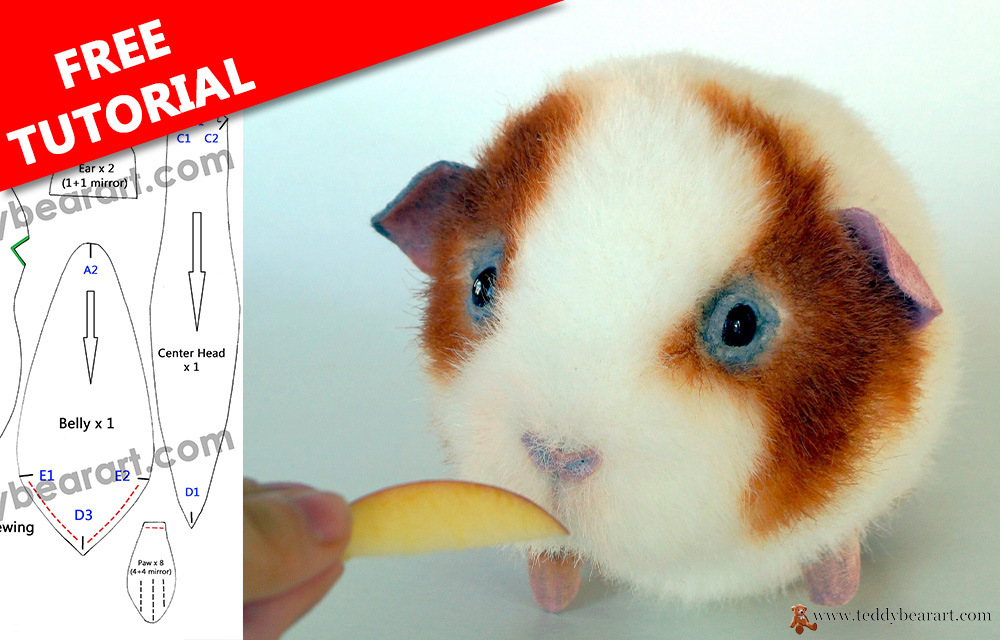
Are you ready to embark on a delightful crafting journey, transforming plush fabric into a lifelike stuffed guinea pig? In this comprehensive guide, we’ll explore every step of the process, from selecting the perfect materials to adding those charming guinea pig features. By the end of this article, you’ll be well-equipped to craft your own adorable guinea pig companion.

Creating a stuffed animal that captures the essence of a real guinea pig is a rewarding endeavor. These cuddly creatures make wonderful gifts, home décor, or keepsakes. Whether you’re a seasoned crafter or a beginner looking for a new project, this guide will walk you through the steps to bring a lifelike stuffed guinea pig to life.
Choosing the Right Fabric
Selecting the perfect fabric is the essential first step in creating a lifelike stuffed guinea pig. To achieve an authentic and cuddly result, it’s crucial to pick materials that mimic the texture and appearance of guinea pig fur.
Start by considering soft and furry options, such as faux fur or minky fabric. These fabrics provide the ideal plushness needed to capture the essence of a real guinea pig. Pay attention to the color and pattern of the fabric, as well. Guinea pigs come in various colors and markings, so choose a fabric that matches the guinea pig you want to recreate.
When shopping for fabric, visit your local craft store or browse online fabric shops. Look for materials that come in guinea pig-like colors, such as shades of brown, white, or black, depending on your desired guinea pig’s coloration.
By selecting the right fabric, you’re setting the foundation for a lifelike and huggable guinea pig stuffed animal that will bring joy to any crafting project.
Gathering Materials
Before you start crafting, gather all the necessary materials and tools. Here’s what you’ll need:
- Soft and furry fabric (faux fur or minky) in guinea pig-like colors approx. 40 x 22 cm with a pile length of 1.5- 2 cm
- Fabric scissors for precise cutting.
- Hand-sewing needles and thread.
- Fiberfill stuffing.
- Metal or glass pellets for weight.
- Pins to hold fabric pieces together while sewing.
- Glass eyes on a metal loop 10 mm in diameter.
- Long needle (10-15 cm).
- Waxed thread.
- Liquid glue UHU.
- Floss threads.
- Oil paints or fabric paints and paintbrushes.
- An awl.
- Wire.
- Felt fabric for the ears (a small piece).
- Medium-weight cotton fabric for the paws (a small piece).
Download a Guinea Pig Sewing Pattern
Download and print the pattern according to the provided instructions.
- From a computer (Windows).
Click on the photo of the pattern, and select the “Save image as …” option. - From a phone or a tablet (Android). There should be something similar for the iPad.
Click on the image. Save it by holding your finger on the image and selecting the “Save Image” option. Then go to your photo gallery and print it (there is an option).
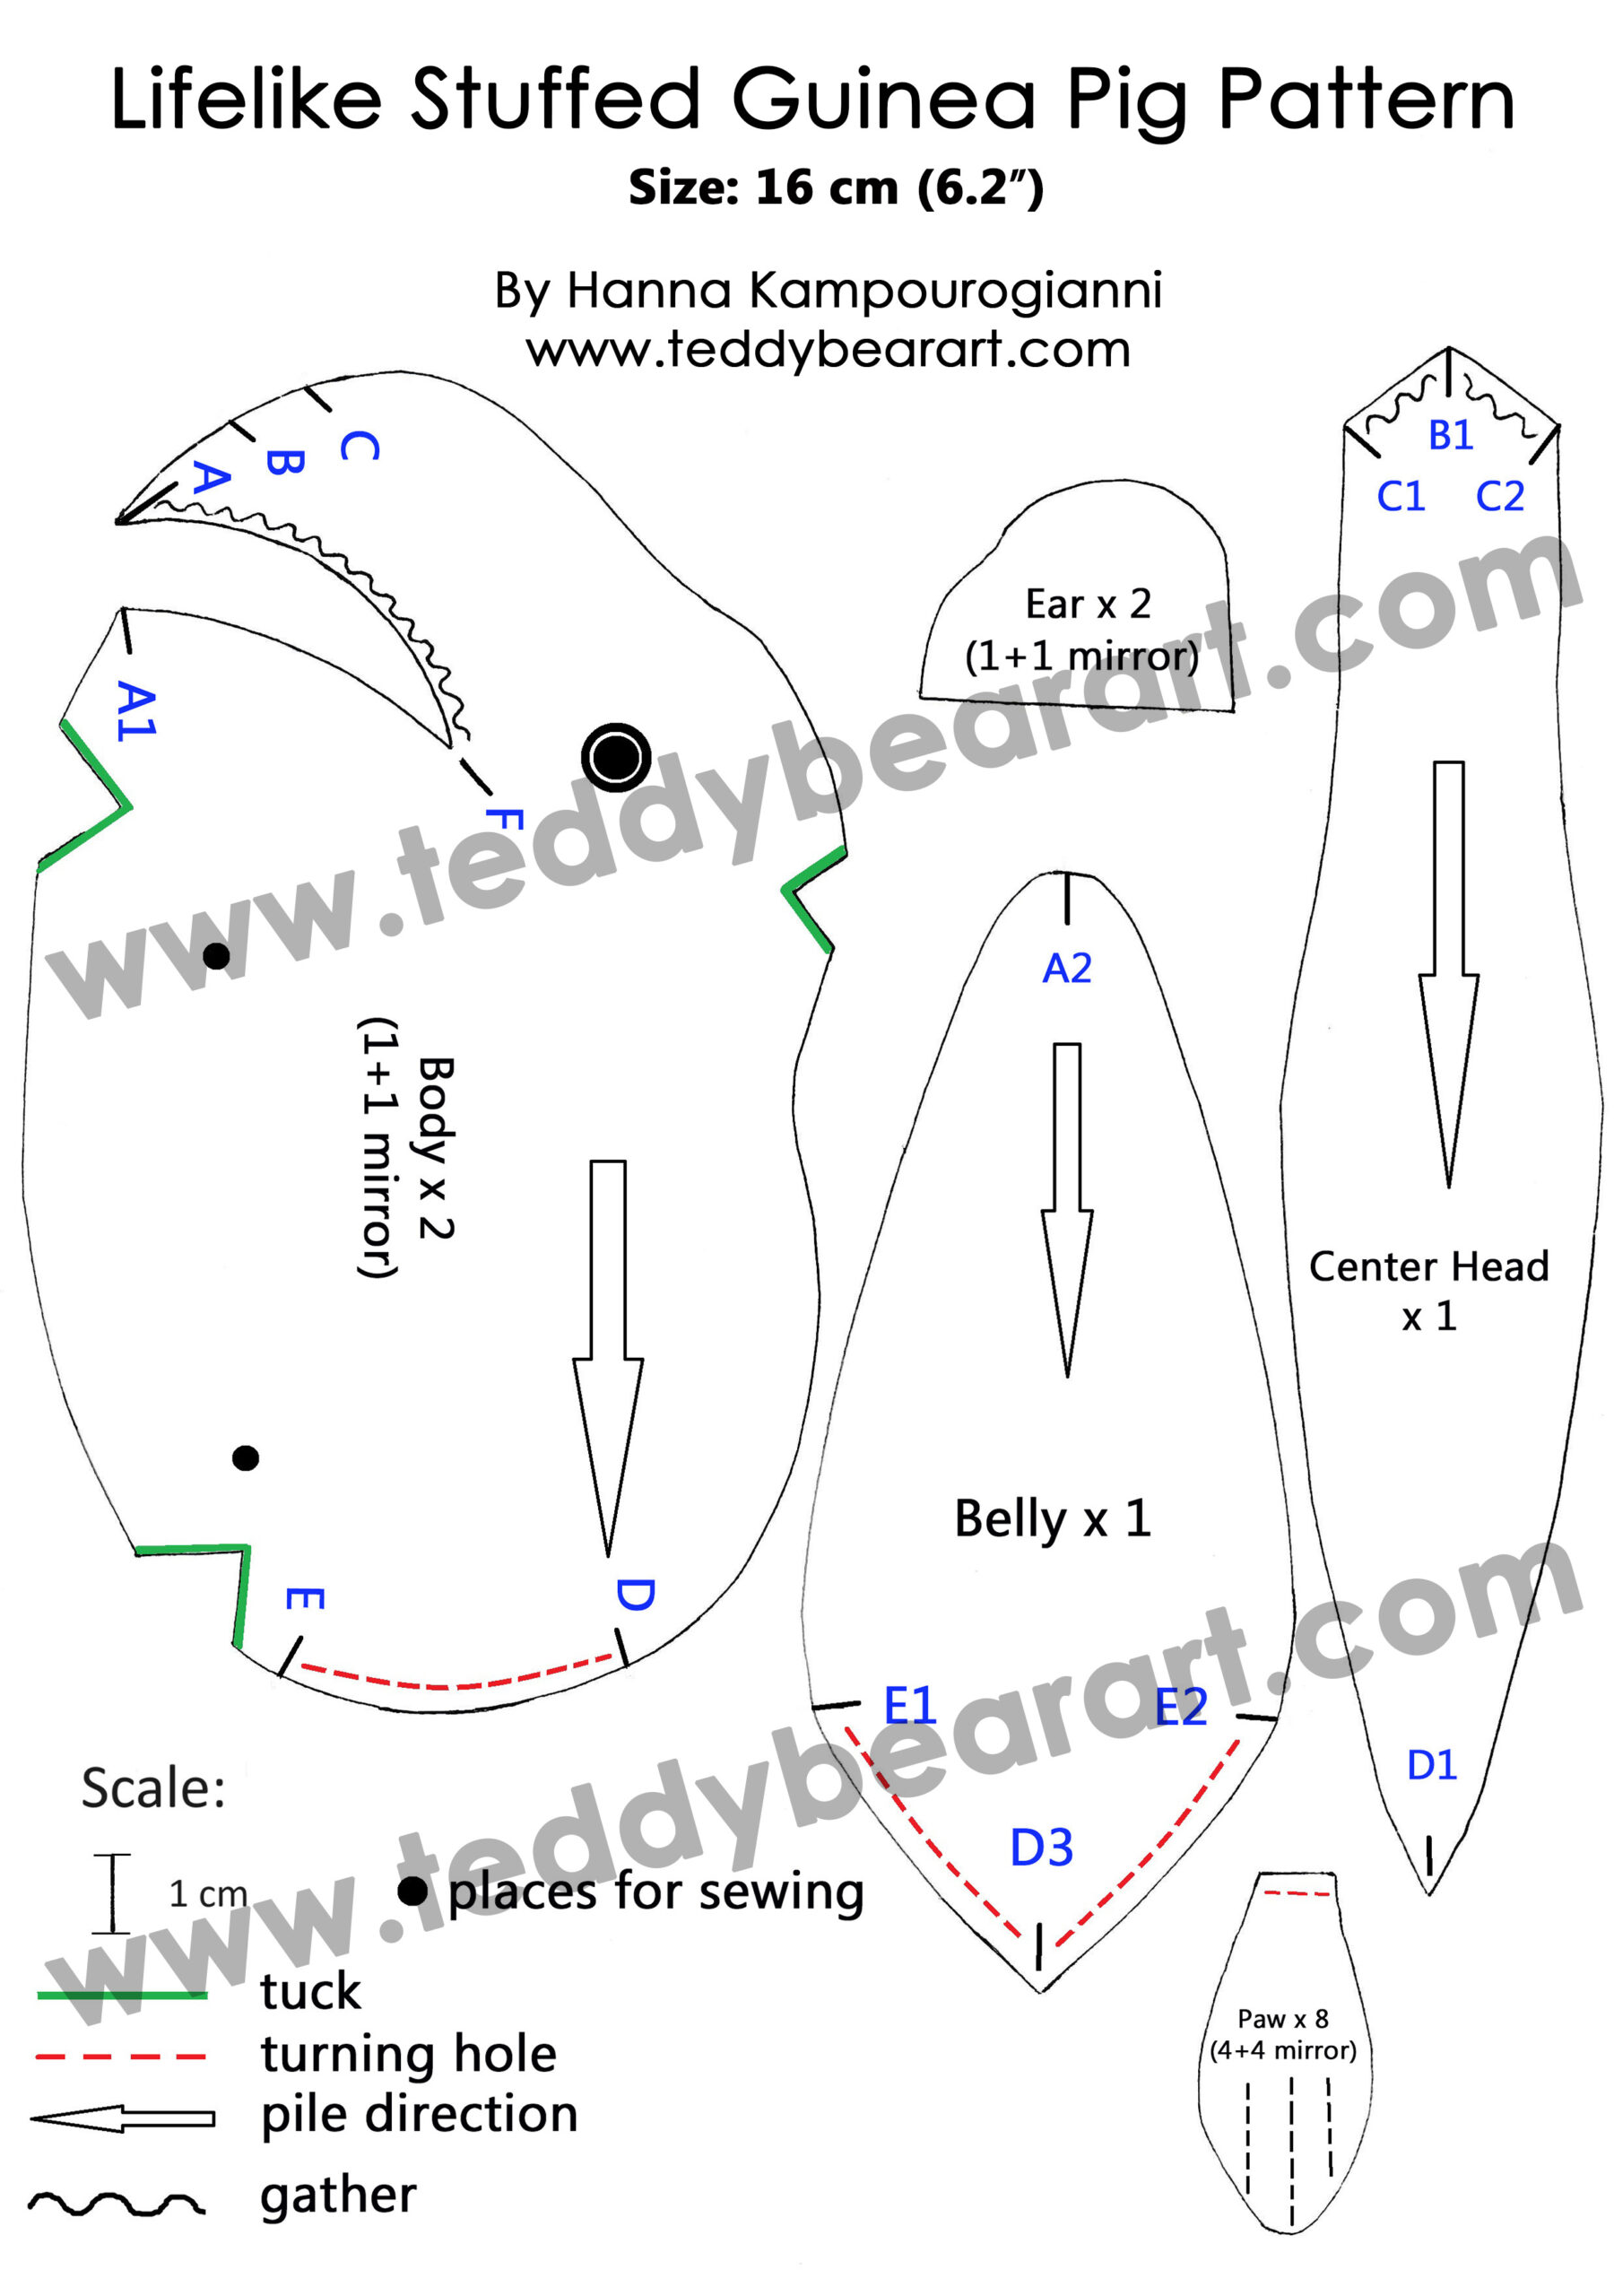
Pattern Guide
Follow the pattern guide carefully, as it will provide you with the templates and instructions needed to create your lifelike stuffed guinea pig. Pay attention to the layout of the pattern pieces on your fabric to maximize fabric usage and minimize waste. Cut out the fabric pieces according to the pattern guide, making sure to transfer any markings or notations onto the fabric as indicated.
Step 1: Sew all the darts (highlighted in green).
Step 2: Sew along points from A-A1 to F. Then sew the two mirror parts of the body from A to B.
Step 3: Sew the center head: from B-B1 to C1, and to D-D1, then from B-B2 to C2, and to D-D1.
Step 4: Sew the belly: from A-A1-A2 to E-E1 and from A-A1-A2 to E-E2.
Step 5: Sew the paws.
Step 6: Cut out the ears from felt.
Creating Realistic Features
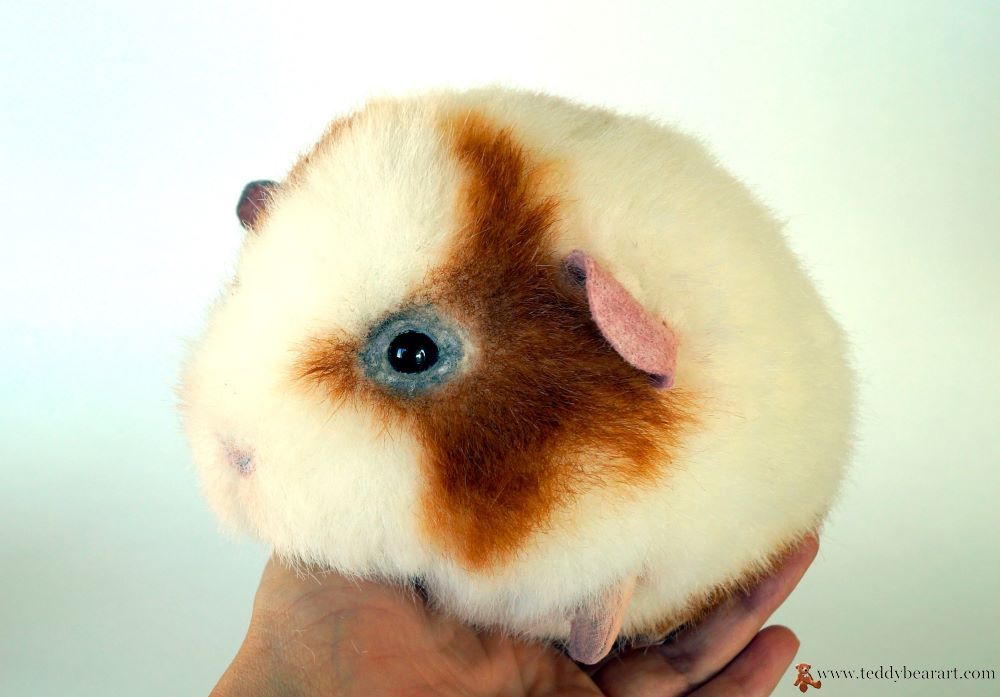
Now that all the pieces are sewn together, it’s time to dive into the fascinating world of creating lifelike features for your stuffed guinea pig. Paying attention to the small details will make a significant difference in achieving a realistic appearance.
First, fill it with synthetic filler and add weighting material, sew up the hole from E-E1 to D-D3 and from E-E2 to D-D3.
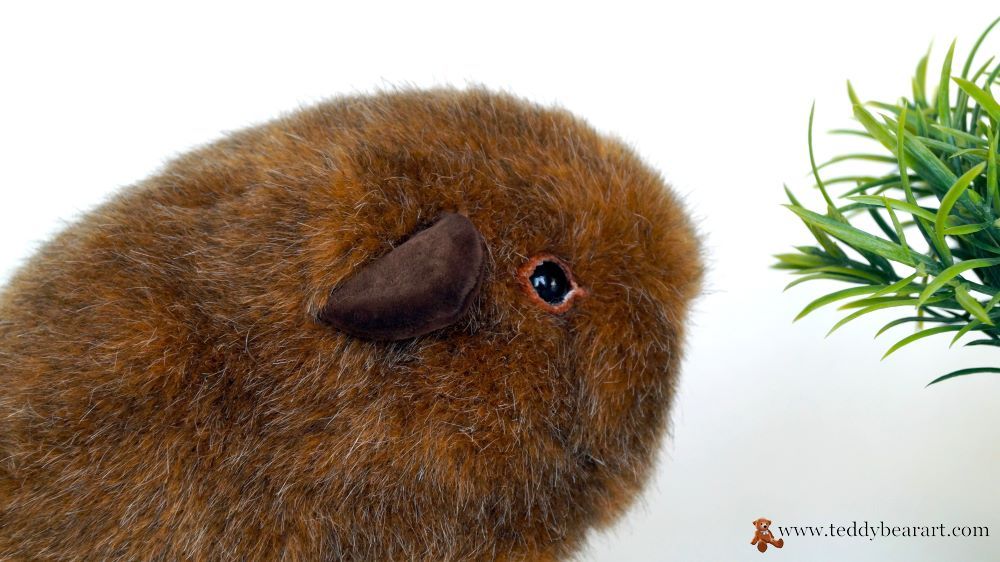
1. Inserting Glass Eyes
To truly capture the lifelike essence of a guinea pig, consider using glass eyes. Glass eyes provide a realistic gleam and depth to the stuffed animal’s gaze. You can find glass eyes designed specifically for stuffed animals at craft stores or online. Follow these steps to insert them:
- First, decide on the location of the eyes. In guinea pigs, the eyes are usually located on the sides of the head, slightly forward. Mark the location of the eyes on the front of the guinea pig’s face with a disappearing fabric marker.
- Using an awl, carefully make small holes in the marked areas for the eyes. The holes should be large enough to fit the stems of the glass eyes.
- Using a long needle and strong waxed thread, insert the glass eyes into the holes, bring the ends of the threads to the area where the ears will be located, and secure them.
Cut out eyelids from felt and glue them onto the eyes. First the lower ones, and then the upper ones.
Glass eyes bring a lifelike sparkle to your guinea pig’s expression, and their slight sheen adds a touch of realism that can’t be achieved with other materials.
2. Shaping the Ears
Let’s continue about the ears – a distinctive feature of guinea pigs. Using a pattern, cut out ear shapes from felt and paint them a color that matches your guinea pig.
3. Making the Paws
Embroider the guinea pig’s fingers and insert the wire inside. Sew the paws to the body.
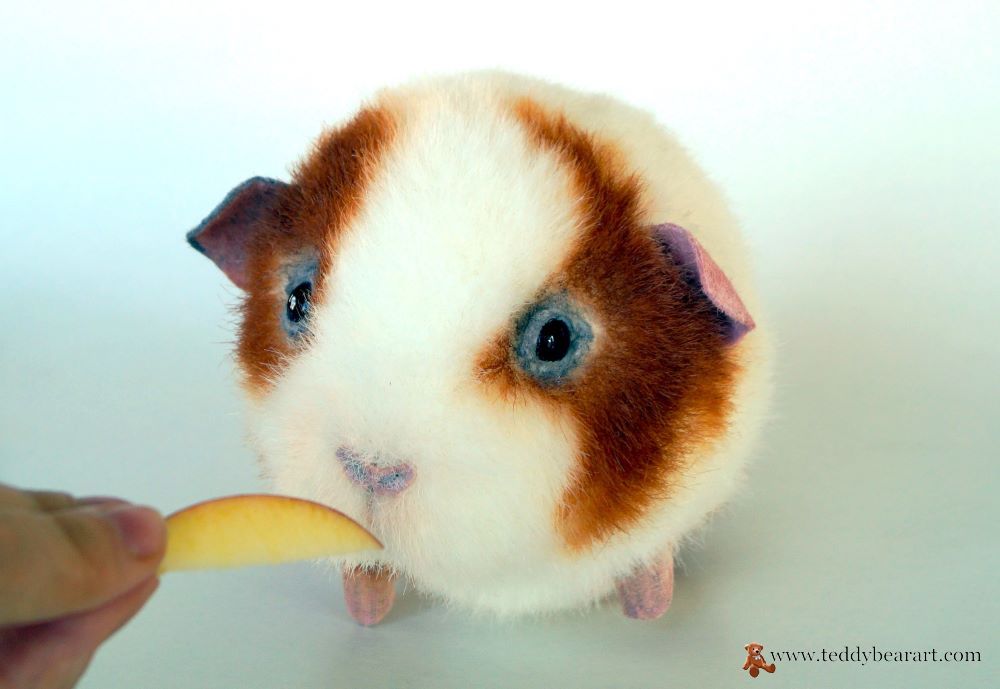
4. Adding Whiskers and Mouth
As finishing touches, you can add a few mustaches from the fishing line. You can use floss to create a tiny mouth, giving your guinea pig an adorable expression.
Taking the time to create these realistic details will make your stuffed guinea pig look truly lifelike and cute. Attention to detail makes your creation stand out and brings it closer to capturing the essence of these adorable pets.
5. Fur Tinting
Paint the guinea pig. During the dyeing process, carefully blend the paint and comb the fur in different directions so that it does not stick together. Leave it to dry for a few days.
6. Sew Up the Ears
Sew on the ears in the places where you secured the threads you used to sew on the eyes. This way the threads will be hidden.
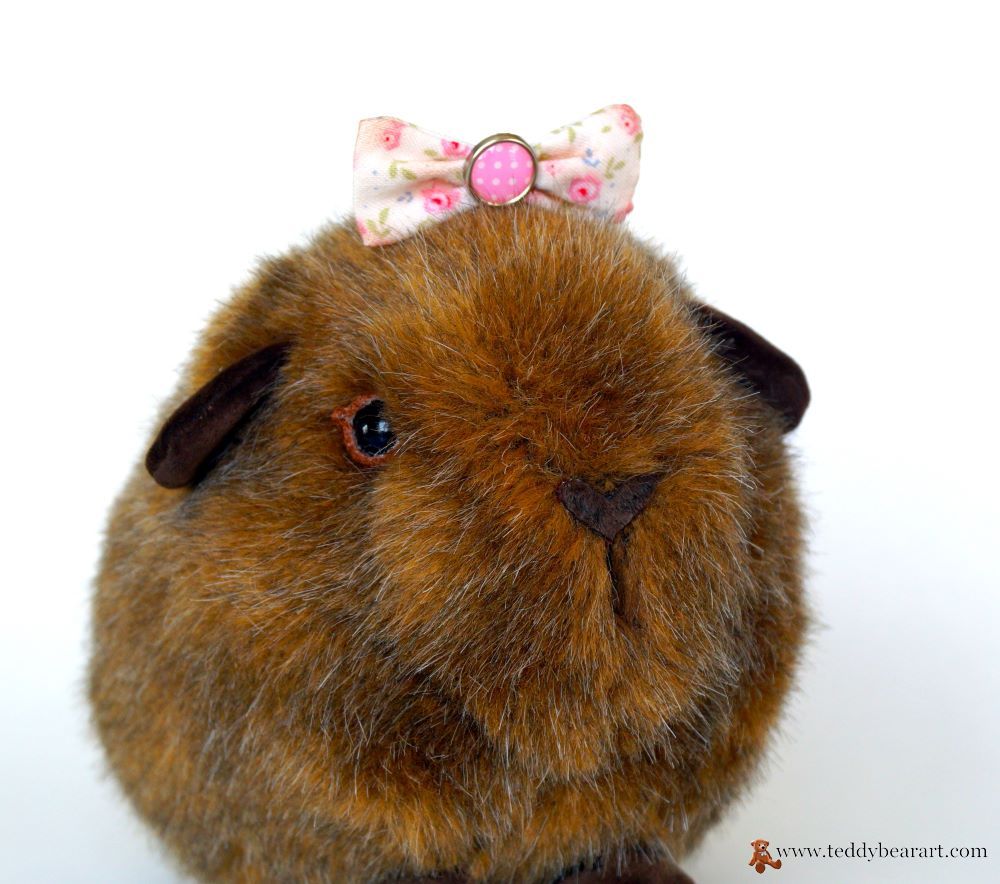
Adding Personality
Every guinea pig has its unique personality, and you can infuse that into your stuffed animal. Consider adding playful details like a tiny bow, a ribbon collar, or even a miniature toy for your guinea pig to “hold.” These personal touches make your creation special and unique.
Tips for Achieving Realism
Crafting a lifelike stuffed guinea pig requires attention to detail and a keen eye for realism. Here are some valuable tips to help you achieve that authentic guinea pig appearance:
- Realistic Fur Texture: Guinea pigs have short, dense fur. Comb the fur gently with a pet brush to fluff it up after sewing.
- Color Accuracy: Pay close attention to the coloration of guinea pigs. They come in a variety of shades, so choose a plush that closely matches your desired guinea pig’s color.
- Facial Expression: Embroidering the eyes and nose is crucial for conveying a lifelike expression. Study images of real guinea pigs to capture their unique facial features accurately. Use thread colors that match the natural colors of a guinea pig’s nose.
- Proportions: Ensure that the proportions of your stuffed guinea pig are accurate. Guinea pigs have a characteristic body shape with a plump midsection and short legs. Adjust the stuffing to achieve the right proportions.
- Tailoring Details: Pay attention to the small details like whiskers. You can add these using fishing lines, thread, or thin pieces of yarn. Whiskers contribute to the guinea pig’s adorable charm.
- Experiment and Learn: Creating a lifelike stuffed guinea pig may take practice. Don’t be discouraged by initial attempts; each project is a chance to refine your skills. Keep experimenting with different fabric textures and colors until you achieve the realism you desire.
- Reference Images: Keep reference images of real guinea pigs handy while crafting. These images will serve as a visual guide to help you capture the nuances of guinea pig anatomy and appearance.
By following these tips and infusing your creativity, you’ll be on your way to crafting a lifelike stuffed guinea pig that will be cherished for its realism and charm. Remember that the journey itself is as rewarding as the finished creation, so enjoy every moment of crafting your guinea pig companion.
Additional Internal Resources
As you continue your journey in creating lifelike stuffed animals, make the most of the resources available right here on teddybearart.com/. We offer a variety of valuable internal resources to support your crafting endeavors:
- Pattern Library: Explore our extensive pattern library to kickstart your projects with precision.
- Exclusive Tips: Access exclusive tips and techniques to enhance your stuffed animal crafting skills.
With these internal resources, you’ll find the inspiration and guidance you need to create lifelike stuffed guinea pigs that capture hearts and imagination. Explore, learn, and enjoy the art of crafting with us!
Conclusion
Crafting a lifelike stuffed guinea pig is a delightful and fulfilling project that allows you to express your creativity. With the right materials, attention to detail, and a dash of personal flair, you can create a guinea pig companion that will capture hearts and spread joy.
Embrace the joy of crafting, and let your imagination run wild as you bring your guinea pig to life. Happy crafting!
If you ever need a hand or have any questions, feel free to leave them in the comments below and I will be more than happy to help you out.
Get Free Patterns & Be the First to Know!
Want free teddy bear patterns, exclusive tutorials, and a chance to win craft supplies?
Sign up for our newsletter using the subscribe form in the middle of this article to receive new patterns, insider tips, and the latest news on teddy bear art. You’ll also automatically be entered into our annual giveaway for a chance to win teddy bear crafting materials.
Bonus entry: Save one of our pins on Pinterest to increase your chances of winning!
Let’s create, inspire, and craft beautiful teddy bears together!
What a gorgeous looking little guinea pig. You have a real talent to be creating stuffed animals. I am a crafter myself, but do sewing, knitting and crocheting, and have never actually tried to make a stuffed animal.
Your detailed instructions makes me want to start this project. I am sure it will make a fantastic present for my granddaughter. Do you think this is suitable for an absolute beginner? Or do you have a different project that would be easier for a beginner? Thank you.
Thank you so much for your kind words! I’m thrilled to hear that you’re interested in giving teddy bear making a try. It’s a wonderfully creative and rewarding craft. As a fellow crafter, you already have some skills that can be very helpful.
For an absolute beginner, I’d recommend starting with a simple teddy bear pattern. The key is to begin with the basics and gradually work your way up to more complex designs. You can find some easy patterns on my website, like the classic bear design. I’ve also got step-by-step tutorials to guide you through the process.
If you’re looking for something even simpler as a first project, you might want to consider making teddy bear clothes. It’s a great way to dip your toes into teddy bear crafting without tackling a full bear. You can find free patterns for dresses and jackets on my website.
I’m sure your granddaughter will adore the handmade gift. Remember, the most important thing is to enjoy the process and have fun with it. Feel free to reach out if you have any questions or need more guidance. Happy crafting! 😊🧵🐻
Hi Hanna,
The step-by-step instructions you provided on creating a lifelike stuffed guinea pig, along with pictures and detailed explanations, were excellent. The post is well-written and easy to follow, making it an enjoyable read. I particularly enjoyed the section on choosing the right fabric for the project. It was helpful to learn about the various types of fabrics that can be used, along with their respective advantages and disadvantages. I highly recommend this post to anyone interested in crafts or stuffed animals.
Keep up the great work!
Marios
Hi Marios,
Thank you so much for your kind words! I’m thrilled to hear that you found the step-by-step instructions for creating a lifelike stuffed guinea pig helpful. Choosing the right fabric is indeed a crucial part of the process, and I’m glad you found that section informative.
I’m here to help and inspire fellow crafters and stuffed animal enthusiasts, so your recommendation means a lot. If you ever have more questions or need assistance with any craft-related topics, feel free to reach out. Your feedback encourages me to keep sharing more content like this.
Happy crafting, and thanks again for your support!
Best regards,
Hanna