Happy to share with you a free jointed teddy bear in the dress pattern tutorial. It includes a list of necessary materials, sewing tips, and a bear face designing guide (in addition – a rococo rose embroidery guide technique).
Download the Pattern
- From a computer (Windows).
Click on the photo of the pattern, and select the “Save image as …” option. - From a phone or a tablet (Android). There should be something similar for the iPad.
Click on the image. Save it by holding your finger on the image and selecting the “Save As” option. Then go to your photo gallery and print it (there is an option).

First of all, I would like to note that if you are going to make your first teddy bear, please read my posts about basic sewing and step-by-step tutorial “How To Make A Teddy Bear”.
List of Materials
I made this teddy bear from German viscose Steiff Schulte with a pile length of 6 mm.
Materials:
1. Viscose fabric with a fur length of 6 mm, size 1/16 piece (25×35 cm).
2. Strong threads, the same color as your fabric and needles.
3. A long needle for setting the eyes.
4. A pair of black glass eyes on a metal loop – 6 mm or 8 mm in diameter.
5. Waxed thread.
6. An awl.
7. Synthetic filler.
8. Metal or glass pellets for the weight (small diameter).
9. Black floss thread for the nose.
10. Oil paints and brushes.
11. Pins.
12. Discs 20 mm in diameter – 10 pieces.
13. Washers 15 mm diameter – 10 pieces.
14. T-shaped cotter pins 12,5×28 – 5 pieces.
15. Pliers.
16. Tweezers.
17. Scissors for cutting fabrics.
Step-By-Step Pattern Tutorial
Pay attention to the scale (indicated in the figure) and print the pattern.
Arrange the pattern pieces on the fabric so that the direction of the fur matches the arrows.
Leave 5-7 mm for seam allowances.
Before I start sewing, I pluck a little lint from the ends of the arms, legs, soles, 2 parts of the ears, nose, and both face sides with tweezers. Be careful with the face, do not delete many piles. You will do it later.
Let’s go!
Step 1: Sew up all the tucks (marked in green).
Step 2: Sew the two sides of the head (1 + 1 mirror) along the marks from A to B.
Step 3: Sew up the center part of a head from A to C. Leave the opening for eversion unsewn (highlighted with a red dotted line).
Step 4: Sew together body parts (1+1 mirror). Leave the opening for the eversion unsewn (highlighted with a red dotted line).
Step 5: Sew the outer and inner parts of the arms (1+1 mirror). Leave the opening for the eversion unsewn (highlighted with a red dotted line).
Step 6: Sew the outer and inner parts of the legs (1 + 1 mirror). Leave the opening for the eversion unsewn (highlighted with a red dotted line).
Step 7: Sew on the feet.
Step 8: Sew the ears (1 part with the pile + 1 part without the pile).
Turn out the finished parts of the bear using a wooden stick with a blunt end. Be careful not to pierce the fabric.
Stuff its head tightly with synthetic filler.
Insert the disc with a cotter pin into the hole and tighten with waxed thread and needle.
Insert discs with cotter pins inside of the limb. Fill the limbs with the synthetic filler and sew up the holes.
Designing The Face
Pluck a little more lint from the face of the bear.
With the help of a long needle and waxed thread, we slightly tighten the places for the eyes (eye sockets). This is called sculpting and is necessary for the elephant’s face to look anatomically correct.
How to properly tighten? Fasten the thread to the point where the eye will be located. Then insert a long needle and pull it out from the bottom of the head, as close to the cotter pin as possible. Pull well to make a small indentation in the eye socket area, and fasten the thread. Do the same with the second eye socket.
Make the same with the mouth to look like smiling.
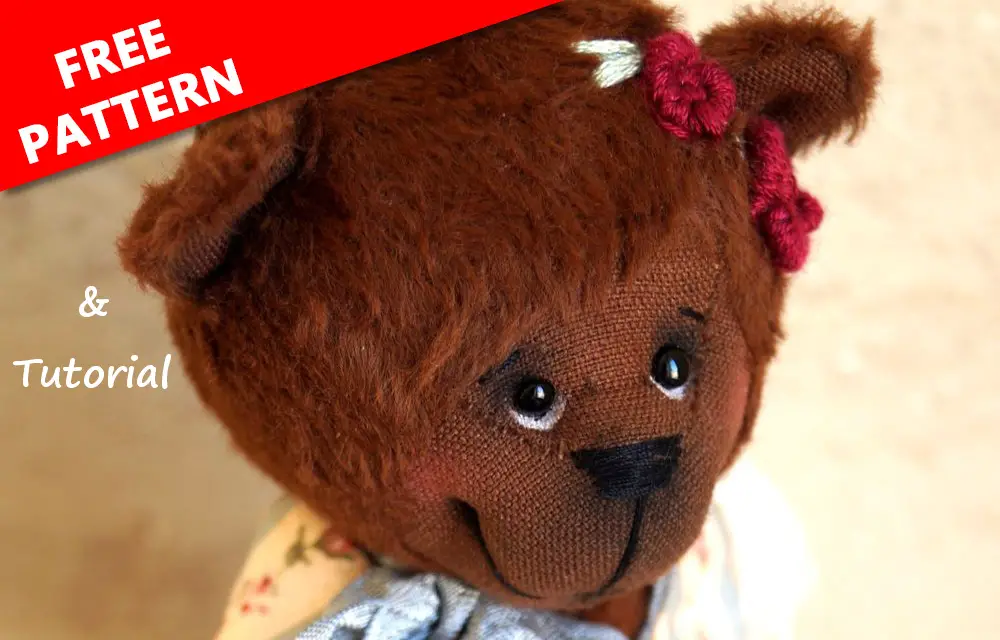
Insert the eyes. Add whites under the eyes. Add dark shadows on the top of the nose and the corners of the mouth.
Embroider the nose, the mouth, and the brows of the bear.
Sew up the ears.
We Are Going to The Finish Line
Attach the head to the body.
Put joints in the limbs and stuff them. Sew up the holes.
Attach the legs and the hands of the bear’s body. Stuff the body, and add some metal or glass pellets for weight. Sew up the hole.
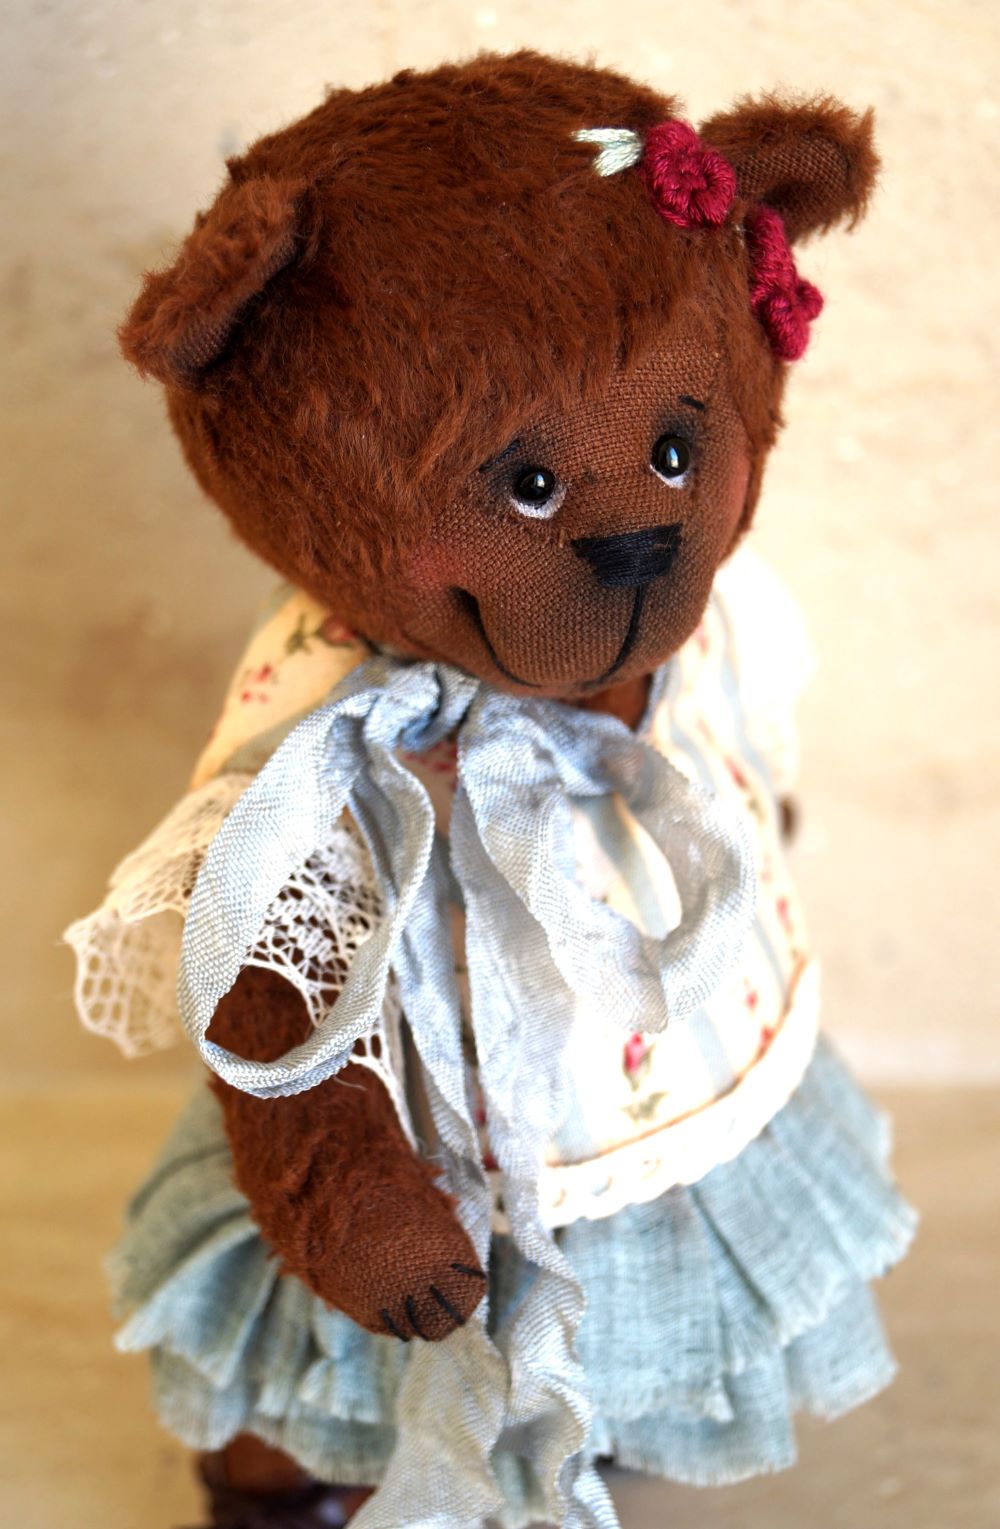
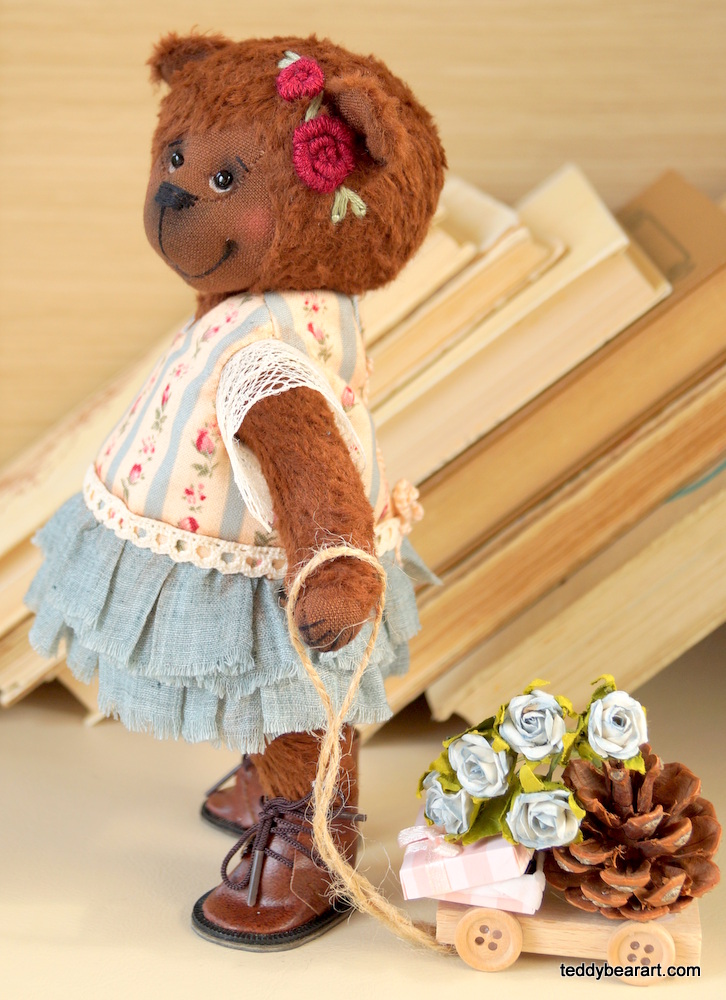
Please notice that my bear is wearing boots, which is why she can stand. Without them, it will not be possible. These boots I have bought are ready. But even in the sitting position, this bear is very cute.
Well, now add some more shadows to her ears, hands, and legs. Embroider the claws.
As an extra, I made two roses using a rococo embroidery technique. If you like can do the same.
Rococo embroidery uses several types of stitches with thread winding. Elements are formed depending on the way the thread is entwined and the number of turns.
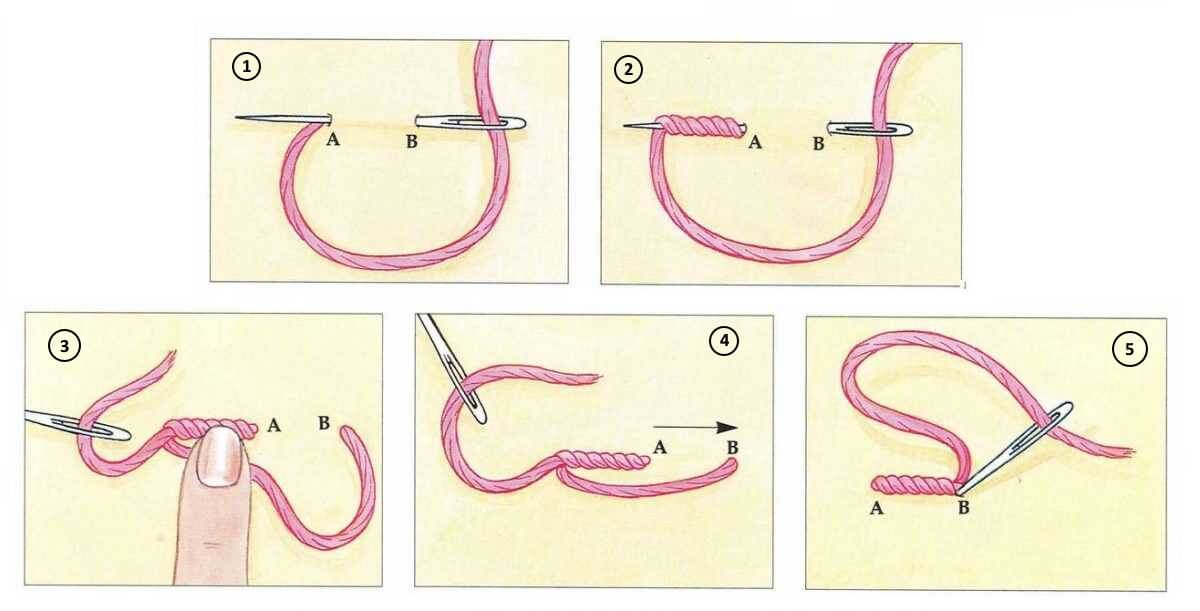
Do the following:
- Inserted the needle with the thread from the wrong side for the entire length of the thread (A). Decide which stitch size you want to make and stick the needle to B. Display a needle as two-thirds of the fabric. (B-A).
- Wind up the working thread, counting the curls.
- Gently pull the needle through the resulting column.
- Bring the needle to the wrong side, thereby securing the element.

To embroider a rose, you will need to make:
- A knot. It contains 1-2 turns of thread and has a minimum length. This seam is often used to make the core of the flower.
- A straight stitch. The amount of winding corresponds to the pitch of the working thread. Used to depict thin petals and twigs.
Download a teddy bear dress pattern and create a beautiful outfit for her.
Conclusion
Your teddy bear is ready!
In this tutorial, you have a list of necessary materials to make a teddy bear, step-by-step sewing tips, and a bear face designing guide. In addition, you learned how to make rococo rose embroidery.
Feel free to sell bears made from this pattern. I will be pleased if you mention my name.
If you ever need a hand or have any questions, feel free to leave them in the comments below and I will be more than happy to help you out.
Get Free Patterns & Be the First to Know!
Want free teddy bear patterns, exclusive tutorials, and a chance to win craft supplies?
Sign up for our newsletter using the subscribe form in the middle of this article to receive new patterns, insider tips, and the latest news on teddy bear art. You’ll also automatically be entered into our annual giveaway for a chance to win teddy bear crafting materials.
Bonus entry: Save one of our pins on Pinterest to increase your chances of winning!
Let’s create, inspire, and craft beautiful teddy bears together!