Teddy bears come to life when their limbs move freely, and mastering the art of jointing is key to achieving this lifelike quality. In this guide, we’ll delve into the intricacies of how to make a jointed teddy bear, focusing on the use of discs and cotter pins for articulating limbs.
Understanding Jointed Teddy Bears
Understanding jointed teddy bears is essential for teddy bear artists seeking to infuse life and personality into their creations. Unlike stationary counterparts, jointed teddy bears boast movable limbs that allow for a wide range of expressions and poses.
This articulation brings an enchanting realism to the teddy bear, captivating both creators and recipients alike. The process of jointing involves strategically placing discs at key points on the limbs and securing them with cotter pins, enabling smooth movement.
This understanding forms the foundation for crafting teddy bears that transcend the static nature of traditional plush toys, creating cherished companions with a dynamic presence.
Tools and Materials
Gathering the right tools and materials is pivotal when venturing into the world of crafting jointed teddy bears. To bring your creations to life, ensure you have quality essentials on hand.
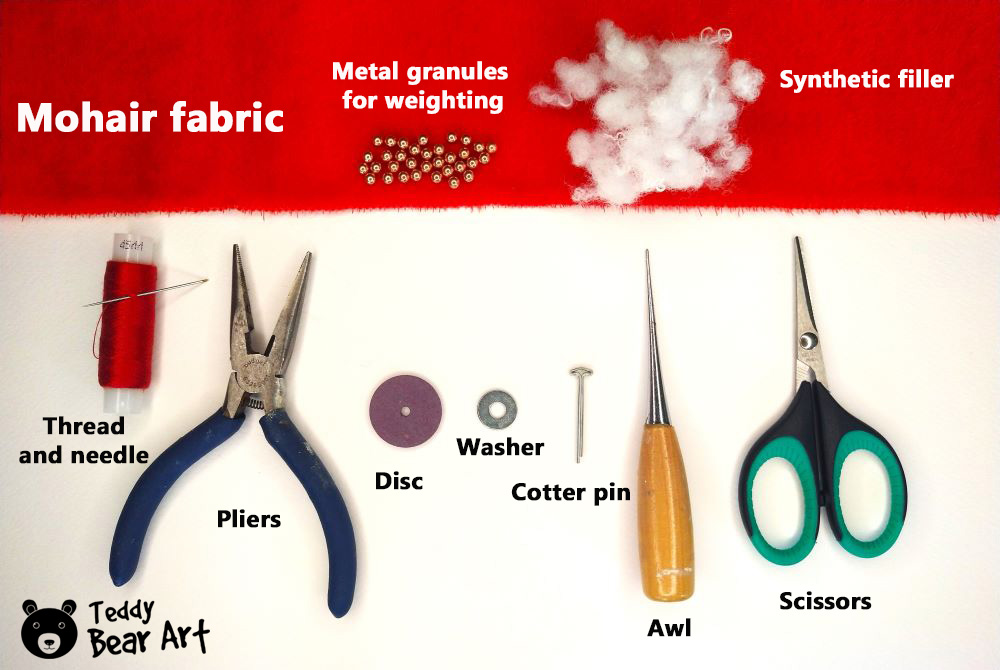
To make a jointed teddy bear, you’ll need:
- Quality discs – 10 pieces
- Washers – 10 pieces
- Sturdy cotter pins – 5 pieces
- Plush fabric
- A strong sewing needle
- Stuffing material for padding
- Material for adding weight
- Scissors
- Awl
- Pliers
Step-by-Step Guide
Embark on the enchanting journey of breathing life into your teddy bear with articulate limbs using discs and pins. Follow these carefully crafted steps to master the technique:
Step 1: Preparing the Limbs and Head of the Bear
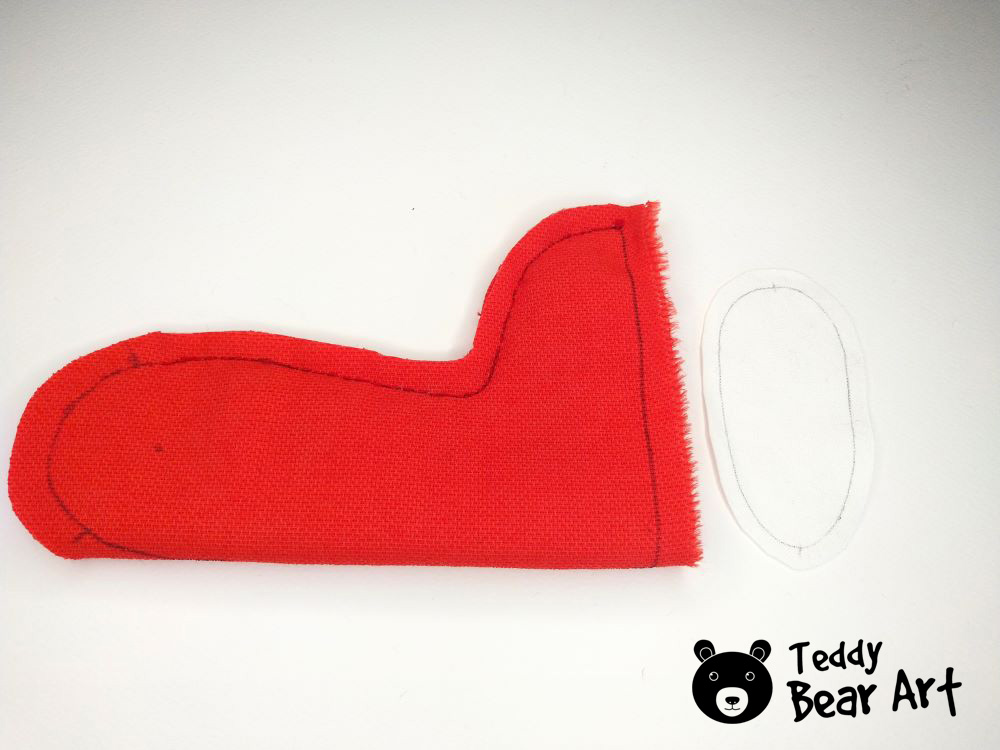
Start by transferring pattern parts onto the reverse side of your chosen fabric, aligning the pile direction with pattern arrows. Cut with precision, maintaining a seam allowance of 0.5cm – 0.7cm.
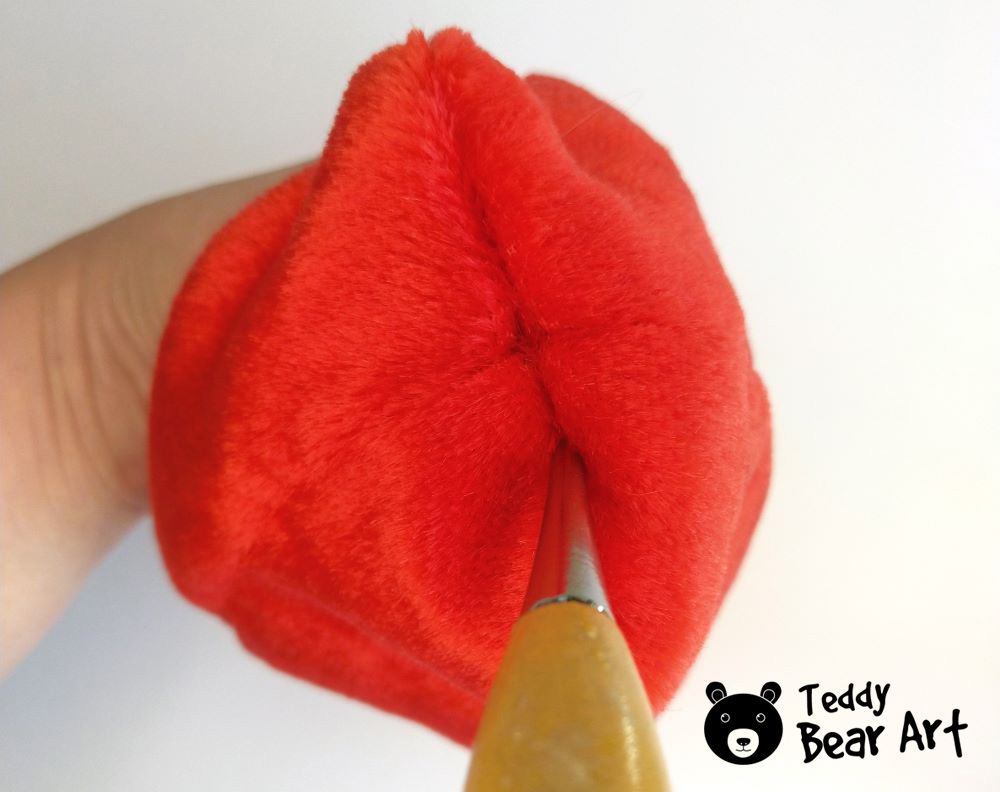
Seam together the head’s side parts, integrating the middle piece from the nose side. Fill the head firmly, securing the neck opening with basting.
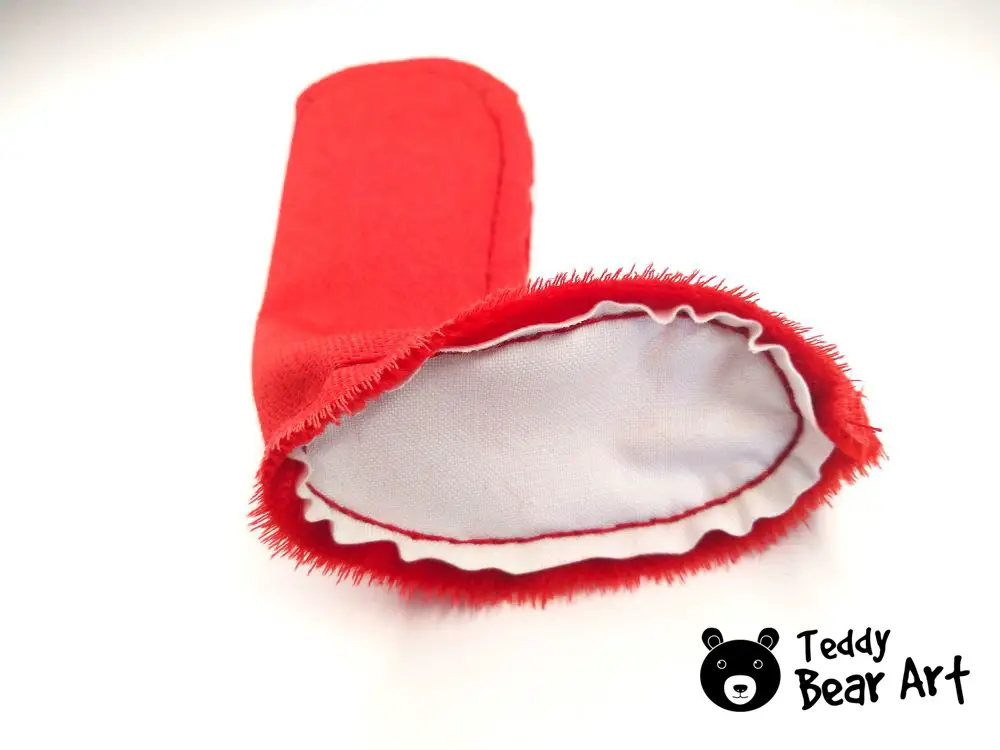
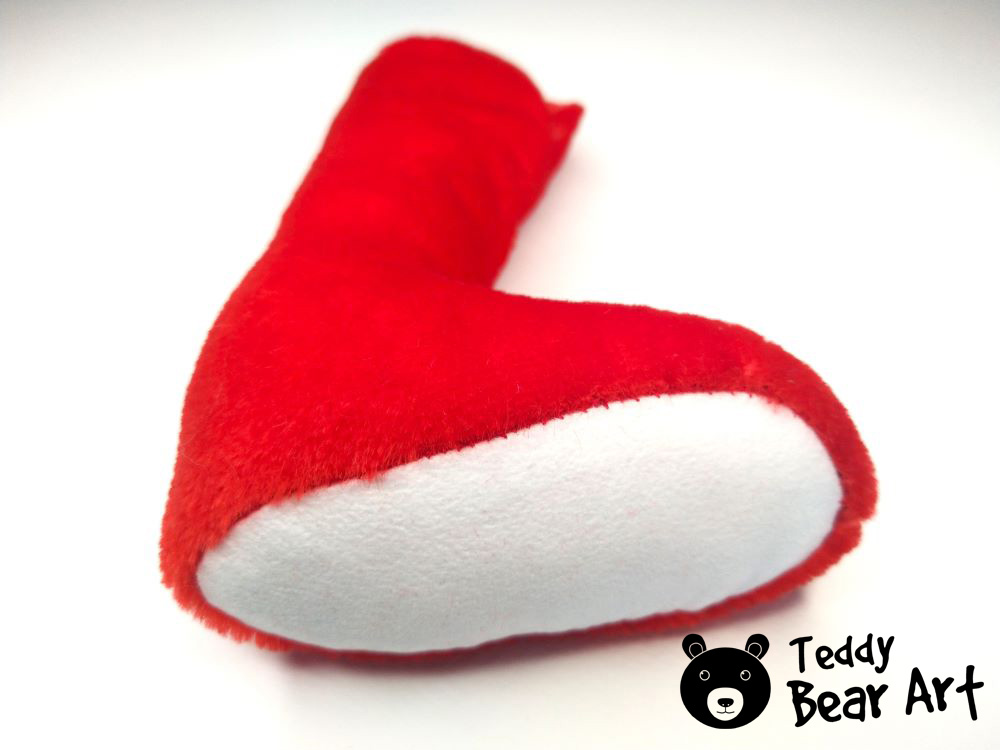
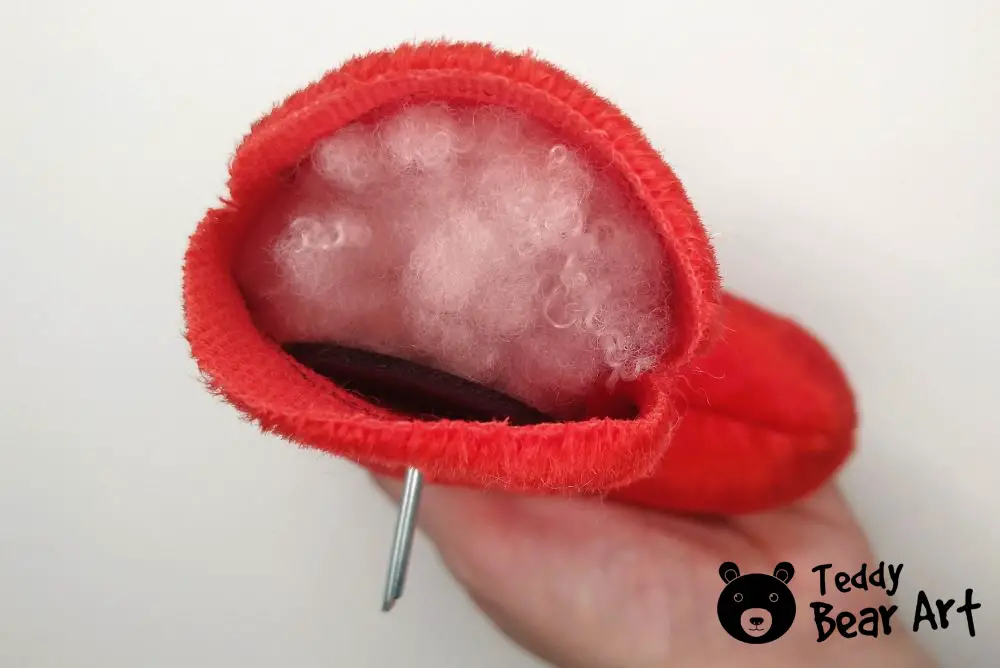
Stitch up the leg parts, leaving the filling opening accessible. Introduce the foot sole, sealing it with hand stitching, and invert the leg through the filling opening. Repeat the process for the arms.
Step 2: Integrating Discs to the Head
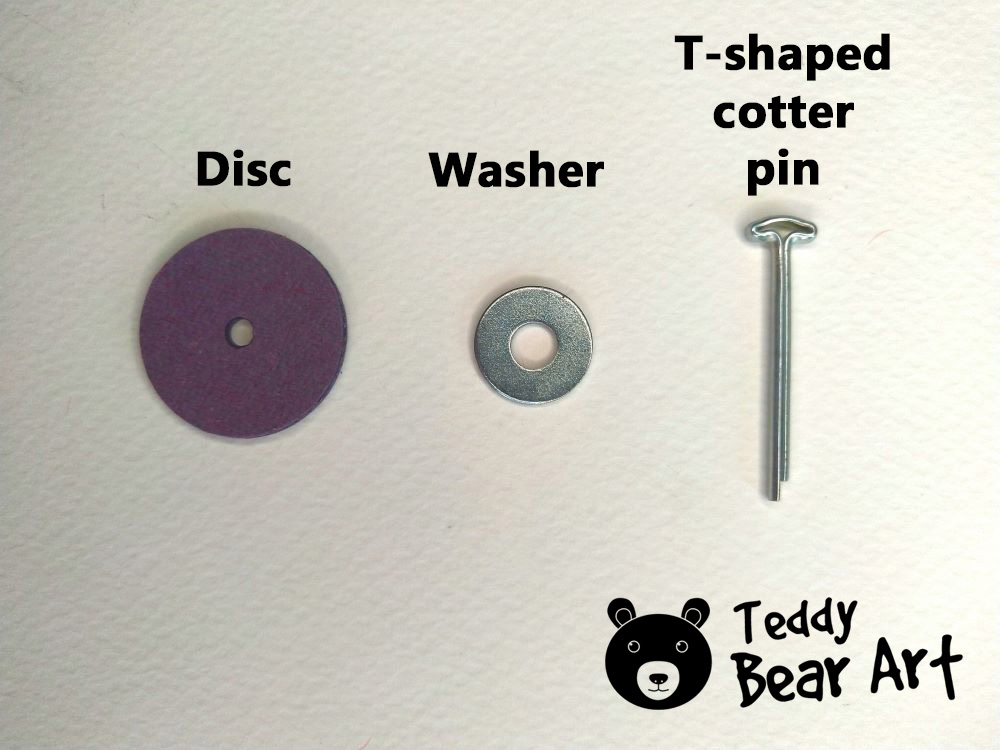
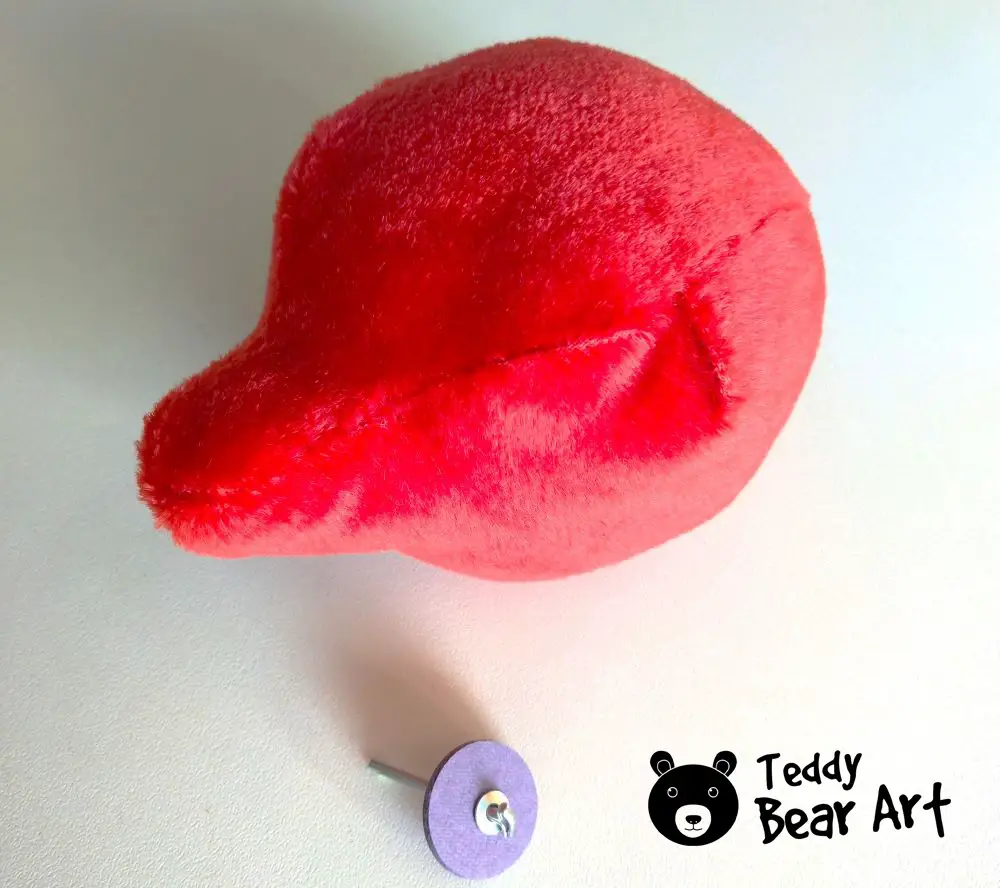
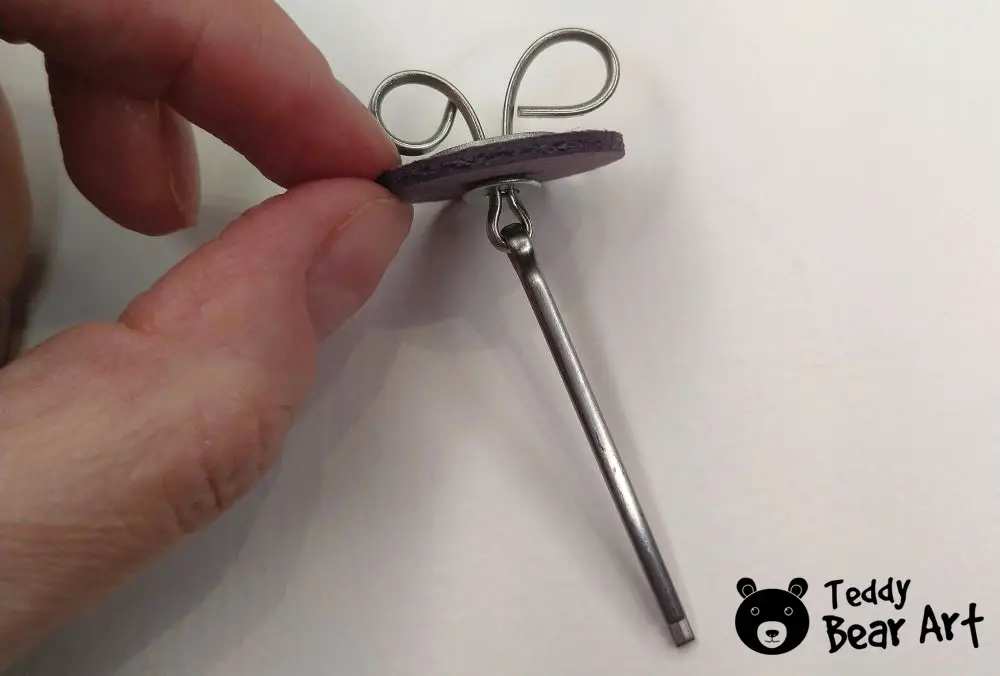
Combine a disc and washer, carefully inserting the cotter pin through their center, creating a hinge for free articulation.
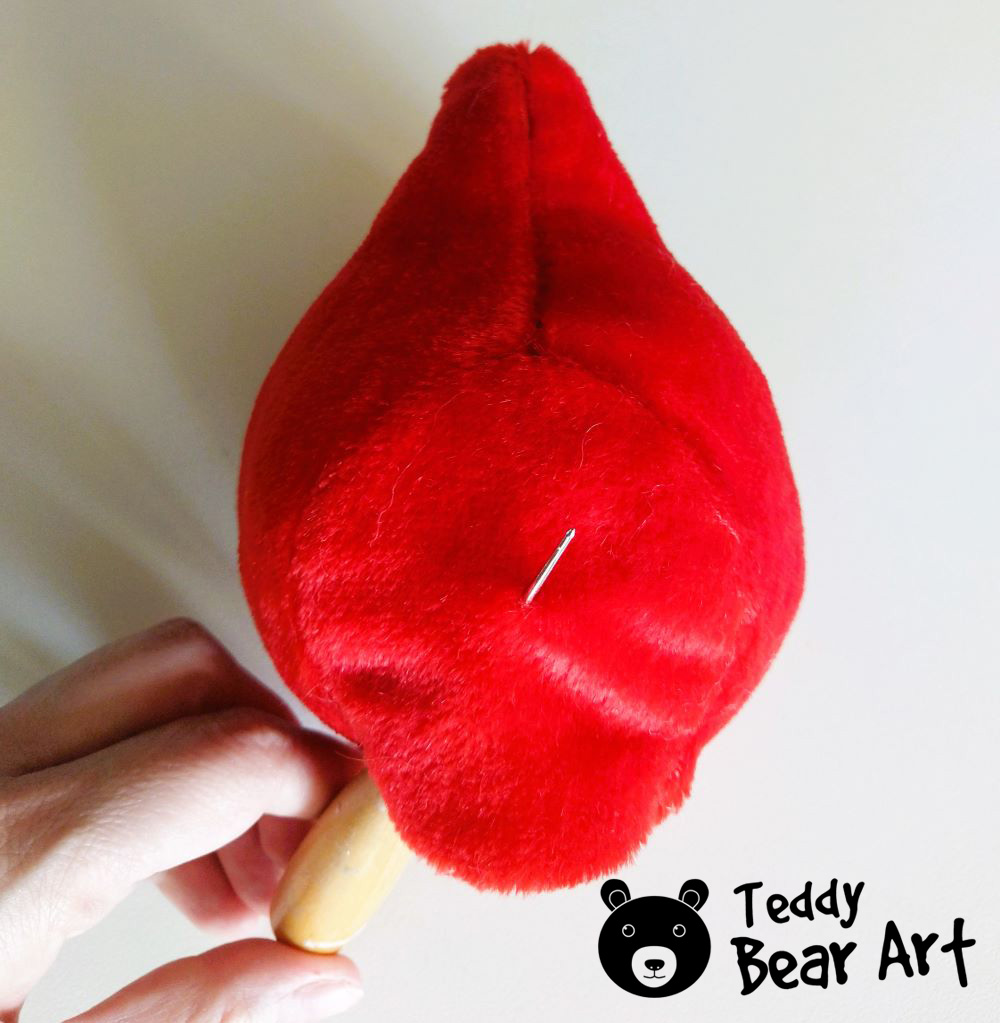
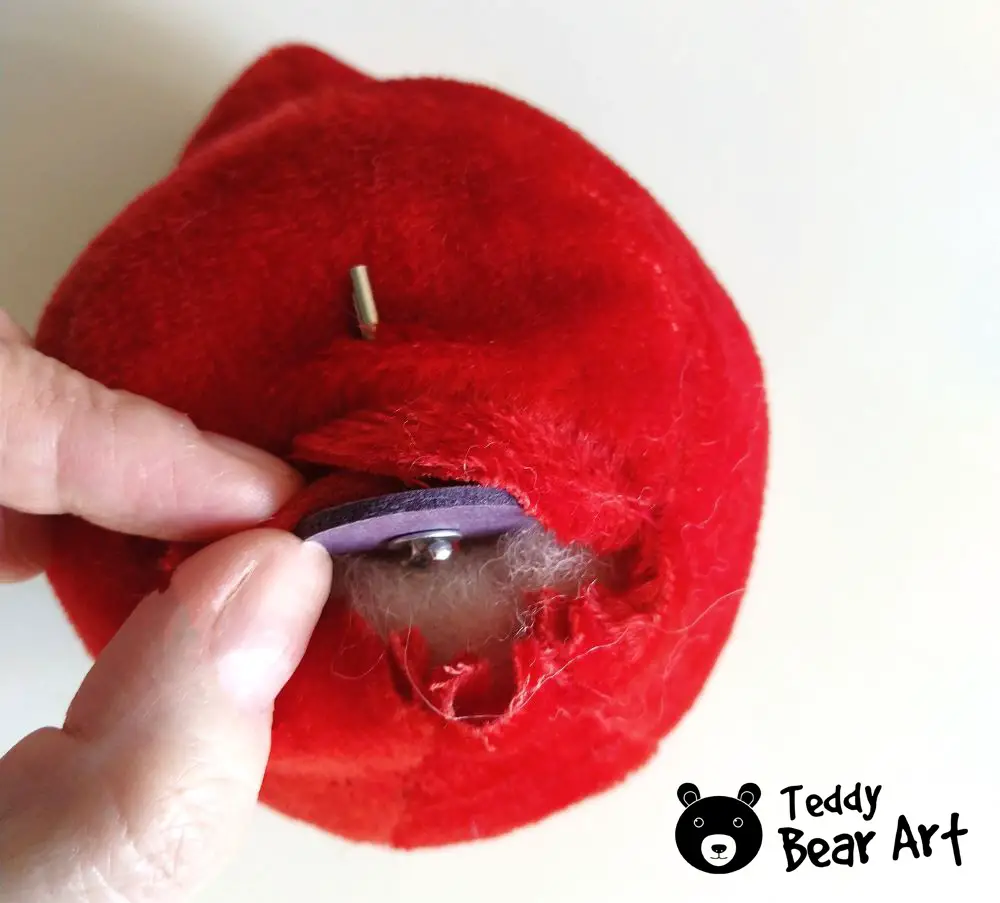
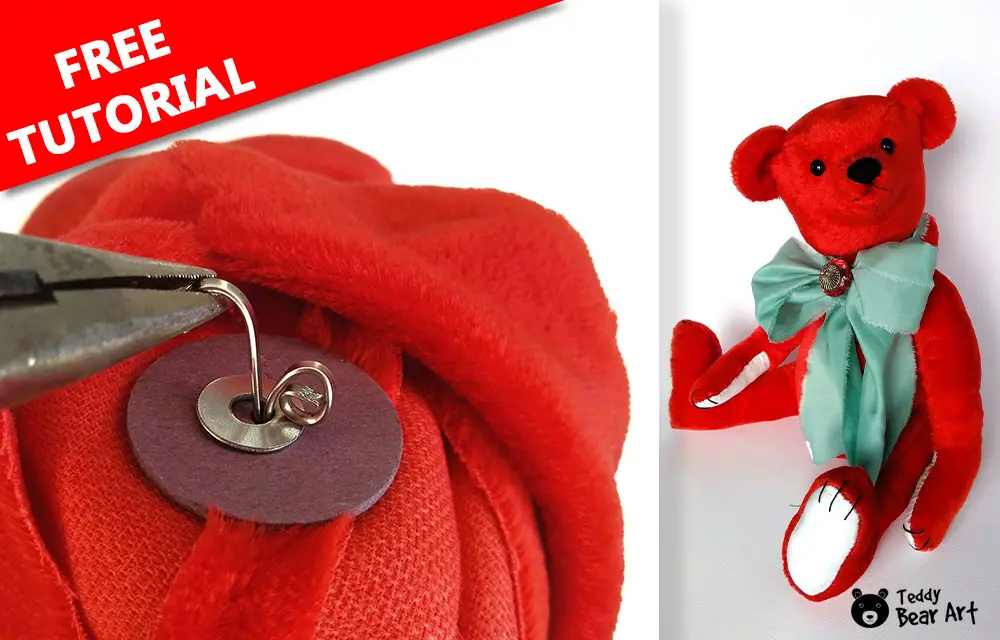
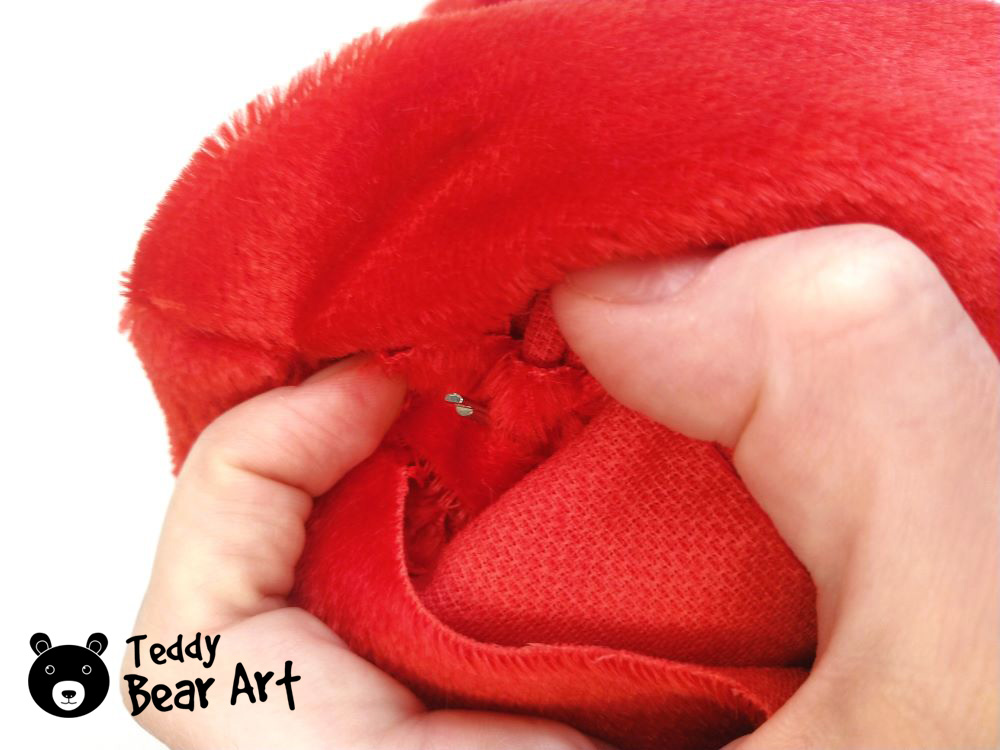
Ensure a snug fit without overtightening. Insert a disc into the head against the stuffing, sew up the hole, and use an awl to puncture a hole in the body’s top, guiding the cotter pin through it.
Thread a disc and washer onto the cotter pin through the body’s stuffing opening. Using the pliers, secure the connection by gently bending the ends of the cotter pin.

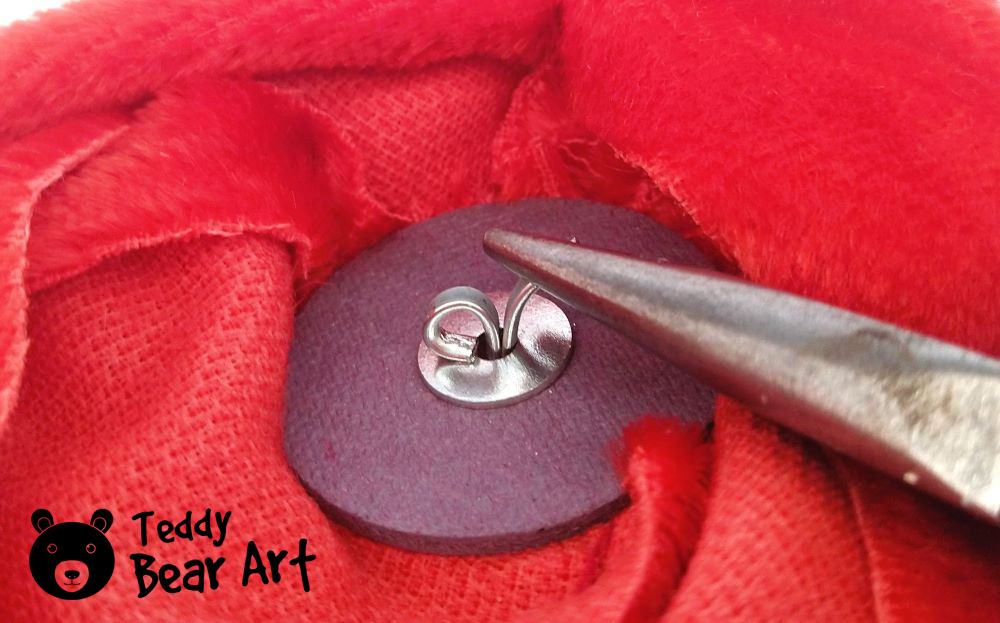
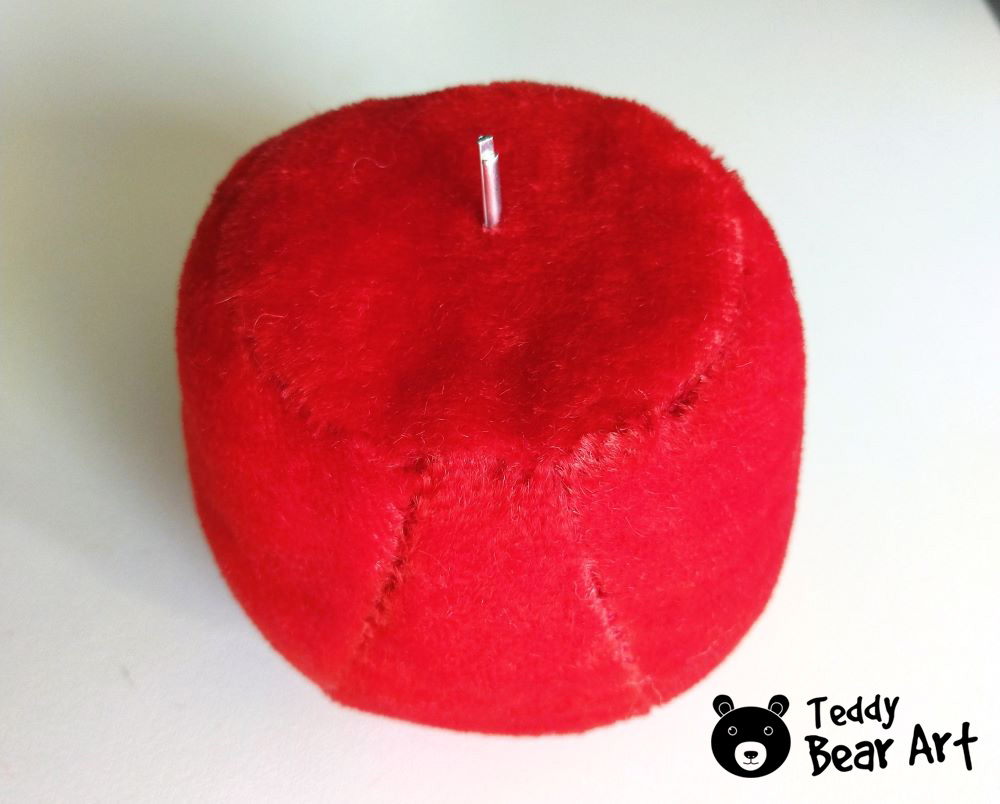
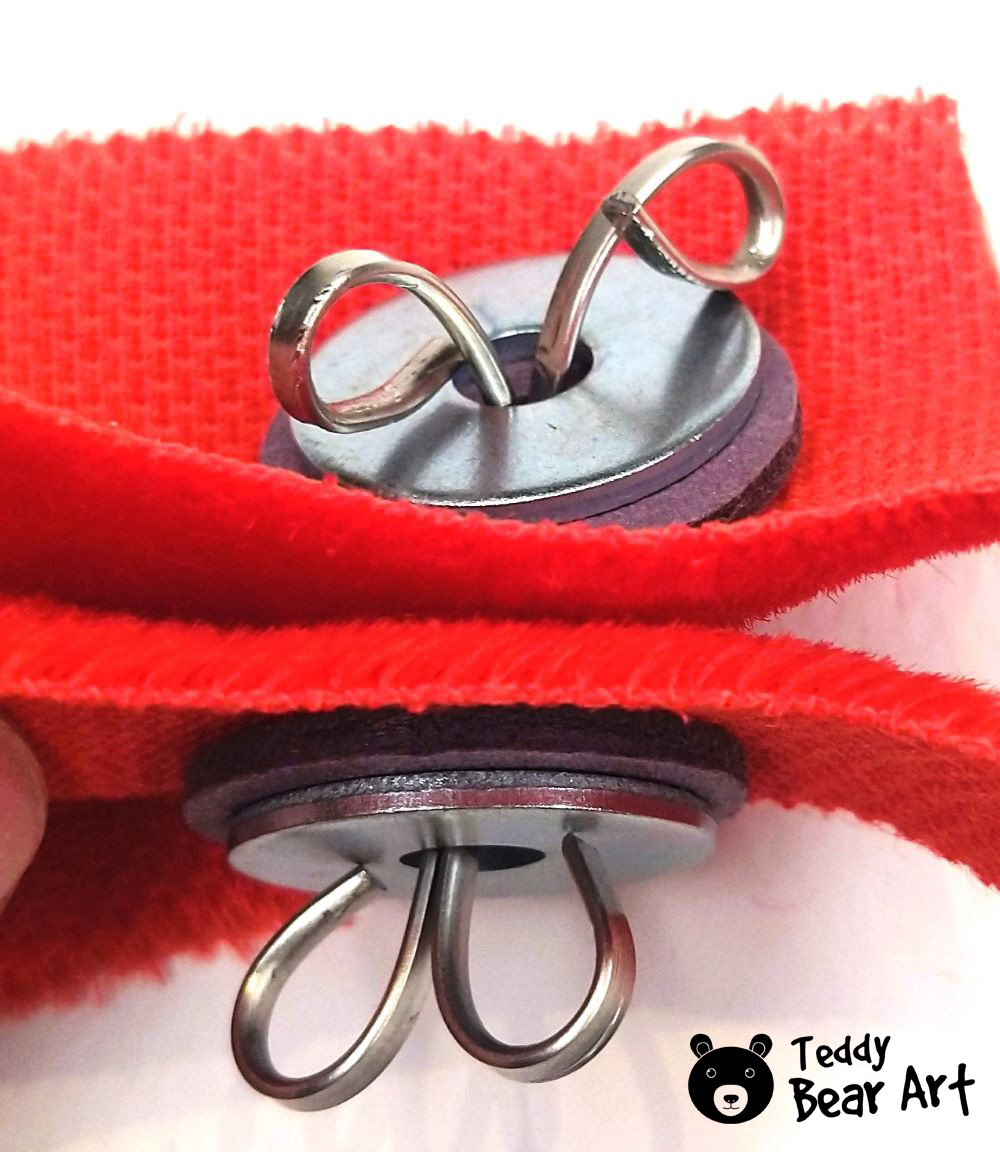
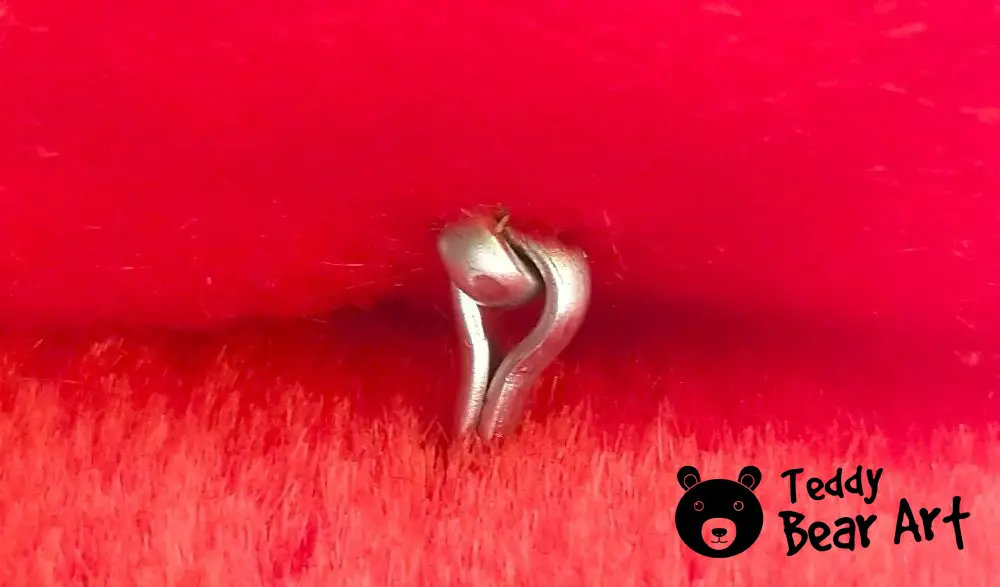
For the nodding head, use two O-shaped cotter pins. Connect them and position them so that one disc with the washer and twisted ends of the cotter pin is inside the head, and the loop is on the outside.
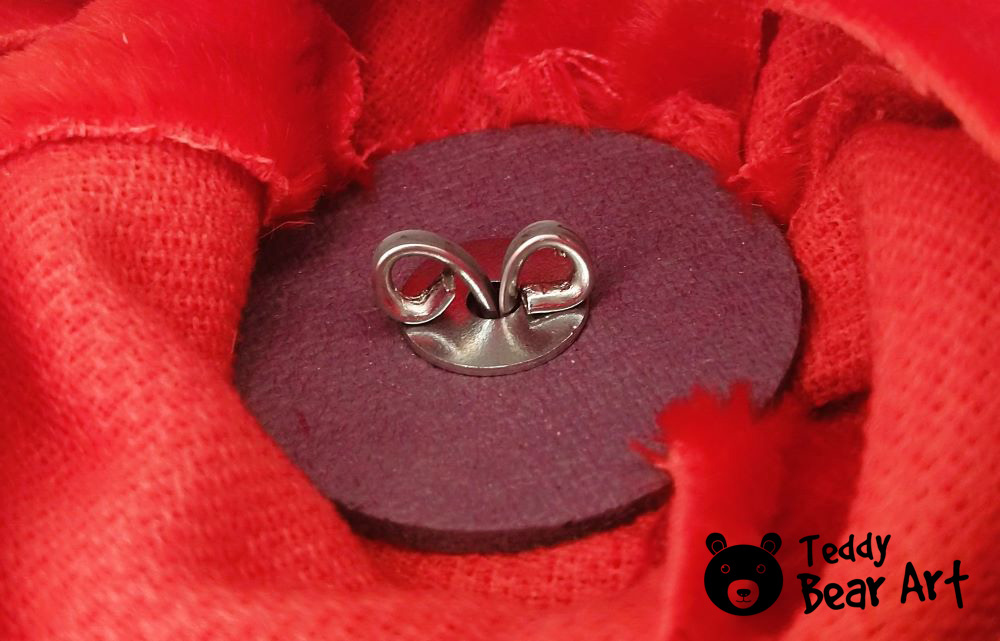
Insert the second cotter pin into the body and secure it inside using the second disc and washer, twisting the ends. Both loops should be on the outside, creating the head’s nodding mechanism.
Step 3: Integrating Discs to the Limbs
For jointing, gather 4 cotter pins, 8 washers, and 8 discs. Combine a disc and washer, carefully inserting the cotter pin through their center for a hinge joint.
Ensure a snug fit. Use an awl to create a hole according to the limb’s mark. Insert a disc with the washer and cotter pin inside the limb, stuff the limb, and sew up the hole.
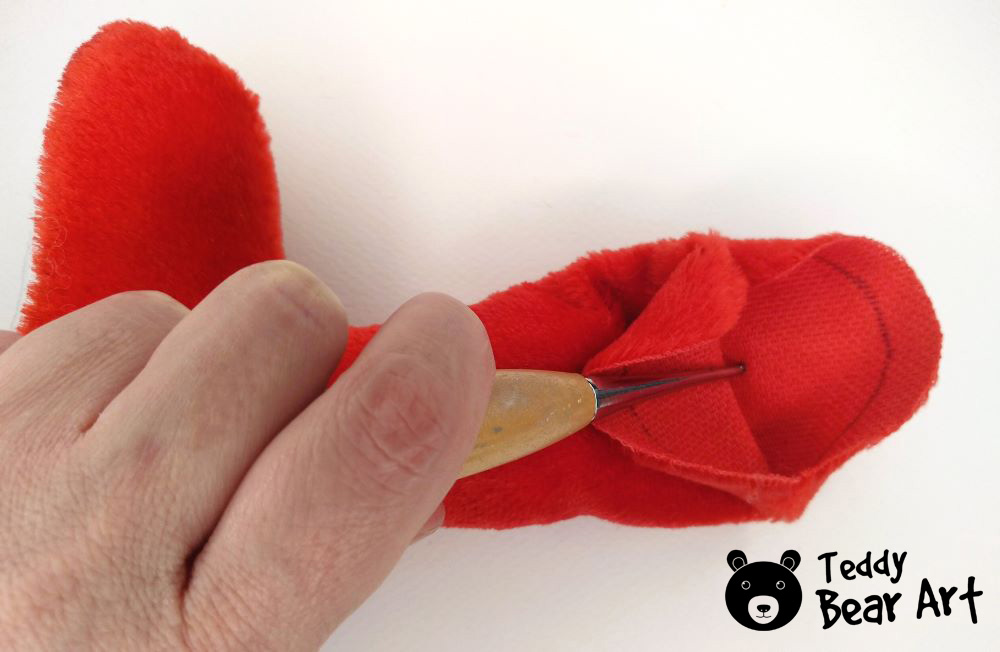
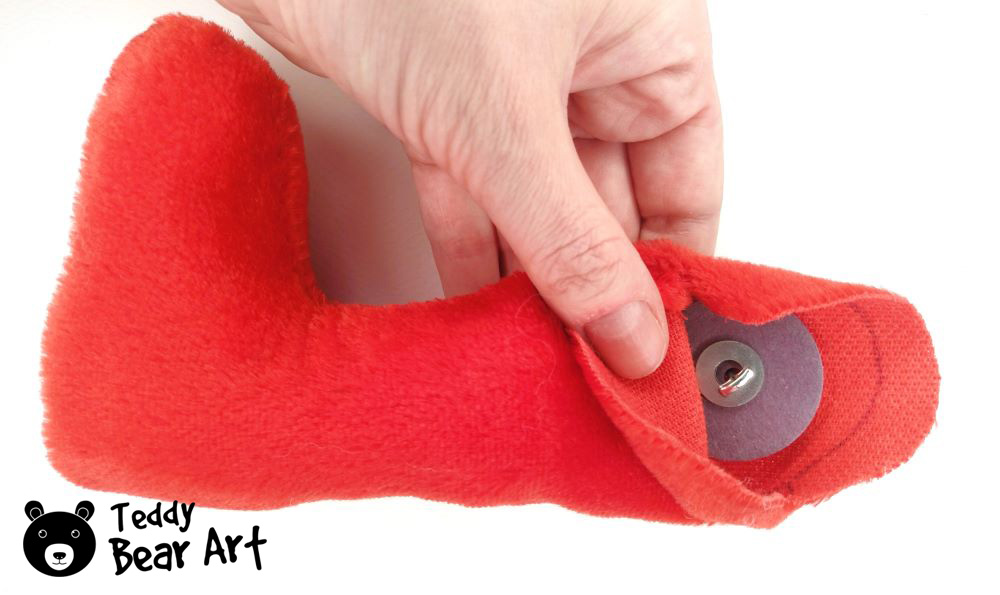
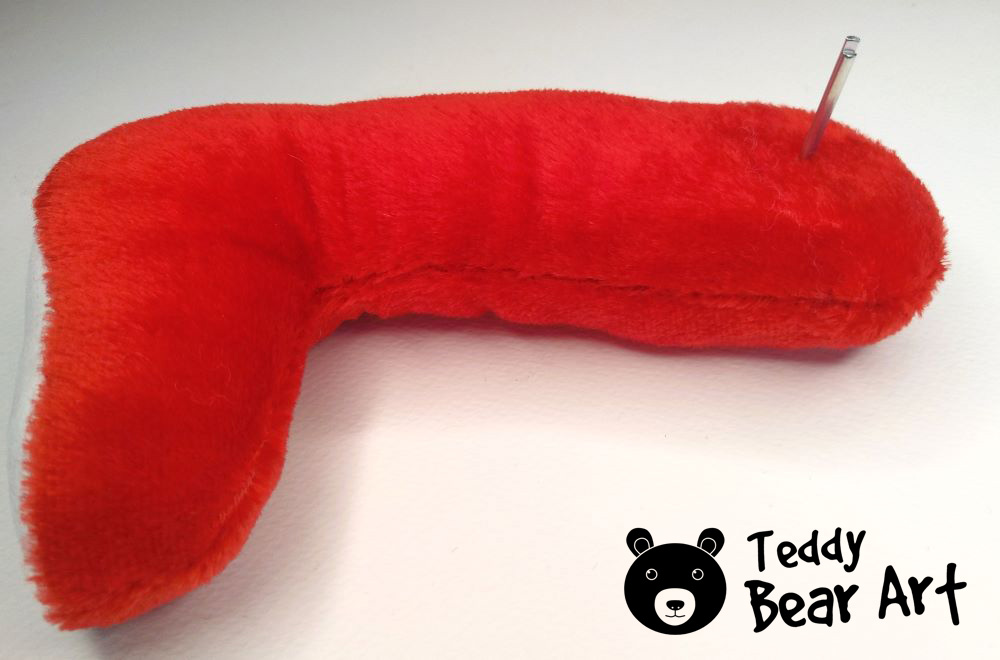
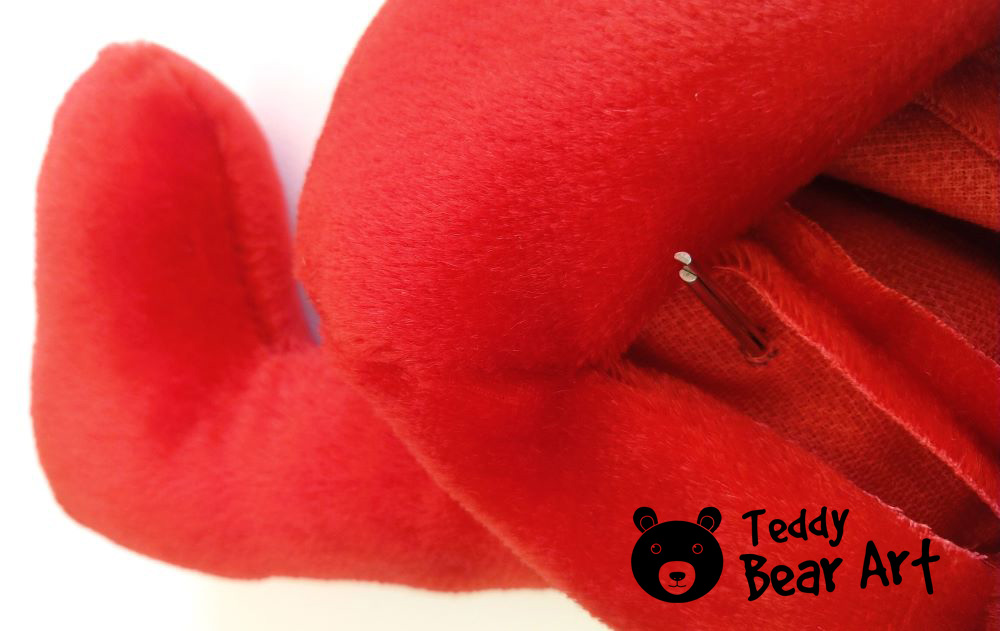
Make a corresponding hole in the body and insert the limb. Thread a disc and washer onto the cotter pin through the body’s stuffing opening. Confirm the connection by gently parting and twisting the legs of the cotter pin with pliers.

Step 4: Final Assembly
Meticulously stuff the body, add material for weight, and conclude the filling openings with a ladder stitch.
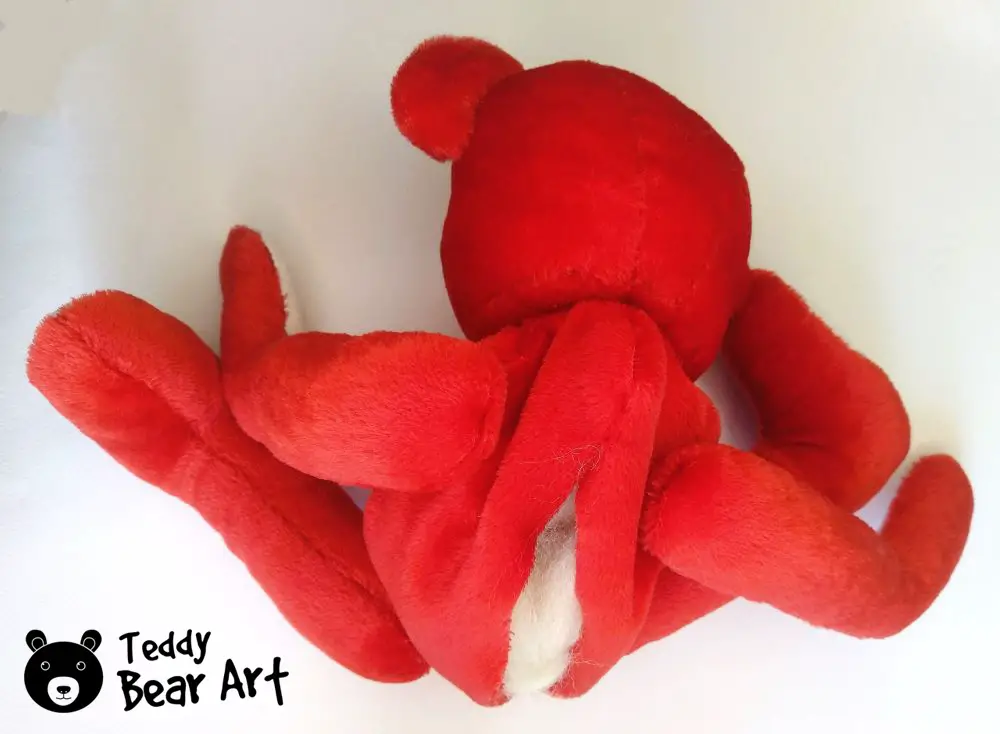
Following these steps, you’ll gracefully navigate the intricacies of crafting jointed teddy bear limbs, creating a charming companion with a delightful range of motion.
Tips and Tricks
Achieving perfect jointed limbs may take practice, so here are some tips to guide you:
Certainly! Here’s the information presented in a list format:
- Choose Quality Materials:
Opt for high-quality discs and cotter pins to ensure durability and seamless jointing, enhancing your teddy bear’s articulation. - Experiment with Disc Sizes:
Tailor the range of motion to your artistic vision by experimenting with different-sized discs, achieving the perfect balance for your bear’s joints. - Strategic Joint Placement:
Mark and create holes strategically before attaching limbs to ensure precise joint placement, contributing to the overall fluidity of movement. - Secure Joint Connections:
Strengthen connections by delicately bending the ends of cotter pins, providing a secure yet flexible joint for your teddy bear. - Balanced Stuffing:
Achieve the ideal balance between firmness for structural integrity and a touch of softness for that irresistible cuddle factor when stuffing your teddy bear. - Polished Finish with Ladder Stitch:
Conceal seams seamlessly with a ladder stitch, delivering a polished finish that enhances the overall aesthetic and longevity of your teddy bear.
Embrace these insider insights to transform your teddy bear crafting into an art form that resonates with both heart and skill, ensuring your creations withstand the test of time.
Conclusion
Congratulations, you’ve successfully mastered the art of making jointed teddy bear limbs using disks and cotter pins. Embrace the newfound movement in your teddy bear creations, and don’t hesitate to share your masterpieces with the world!
Remember, practice makes perfect, so enjoy the journey of crafting teddy bears that not only tug at the heartstrings but also move gracefully with every hug. Happy crafting!
More Goodies: Explore Further
- How To Make a Teddy Bear Part 2 (Step-by-Step Tutorial)
Discover how to craft your teddy bear from zero until you make its unique features. Read Now - 5 Ways to Attach Teddy Bear Eyes and Bring Them to Life
In this guide, we’ll explore five different methods for attaching teddy bear eyes and infusing your creations with that spark of personality. Learn the Techniques - How To Make Teddy Bear Eyelids: Advanced Techniques Included
Mastering the art of creating lifelike teddy bear eyelids can take your creations to a whole new level. Learn the Methods
Get Free Patterns & Be the First to Know!
Want free teddy bear patterns, exclusive tutorials, and a chance to win craft supplies?
Sign up for our newsletter using the subscribe form in the middle of this article to receive new patterns, insider tips, and the latest news on teddy bear art. You’ll also automatically be entered into our annual giveaway for a chance to win teddy bear crafting materials.
Bonus entry: Save one of our pins on Pinterest to increase your chances of winning!
Let’s create, inspire, and craft beautiful teddy bears together!
Hey,
Very thorough article on the ins and outs of making a homemade teddy bear. This could be a rewarding hobby, and it’s probably pretty unique too. I doubt a lot of people know how to do this by hand anymore, so it adds a layer of authenticity. I’m wondering where you get the stuffing from – can you get that at most arts and crafts stores, or will regular cotton balls work?
Hey there!
Thanks a bunch for your kind words! I’m thrilled you enjoyed the article. Making teddy bears by hand is indeed a rewarding and unique hobby. As for the stuffing, you can typically find teddy bear stuffing at most arts and crafts stores. It’s a bit different from regular cotton balls, offering a fluffier and more durable result. However, some crafters do use alternative materials based on personal preference. Feel free to experiment and find what works best for you! If you have any more questions or need tips, just give me a shout. Happy crafting! 🐻✨
The little teddy bears soft toys featured on this website are incredibly cute! I love how the guides for creating your project are simplified, providing a step-by-step process that makes the whole experience enjoyable and accessible. It’s not just about the adorable teddy bears; it’s also about the user-friendly guidance that ensures anyone can bring these cute creations to life. Kudos to the website for combining cuteness with clear, easy-to-follow instructions!
Best regards,
Dean
Hey Dean,
Thanks a bunch for your sweet words! 🐻💖 I’m thrilled to hear you find the guides easy to follow and the teddy bears adorable. Making these little pals should indeed be a joyful experience for everyone. If you ever decide to dive into teddy bear crafting, I’m here for any questions or if you just want to share your creations. Happy crafting!
Warm regards,
Hanna
I think this is a very cool website. In regards to the materials I was just wondering if you could recommend where I can buy them. I thought about Amazon but I think I would maybe prefer to go somewhere that’s in store. Just hoping to get your recommendation for that. Thanks a lot in advance. Have a good one.
Hey there! Thanks a bunch for checking out the website, glad you liked it! 😊 When it comes to buying materials for your teddy bear projects, hitting up a physical store can definitely be a fun adventure. If you’re looking for a variety of options, craft stores like Michaels or Joann Fabrics are fantastic spots to explore. They usually have a great selection of fabrics, stuffing, threads, and all the bits and bobs you might need. Plus, you get to feel the textures and see the colors in person, which is always a bonus! So, grab your shopping bag and enjoy your creative spree at a nearby craft store. Have a fantastic time crafting your new fuzzy friends! 🐻✨
Hi again, we were on your site previously and saw the post about the Plush Manatee Pattern which me and my wife really enjoyed. We came back again now and saw you have more information, you are busy eh? 🙂
We just read through this one on creating a jointed teddy bear, and we are quite impressed with the details you have given.
My wife and I are excited to try our hands at making one for our children, aiming to give it a personal touch that they can really cherish. The only thing is you have so many different options it is a struggle to choose.
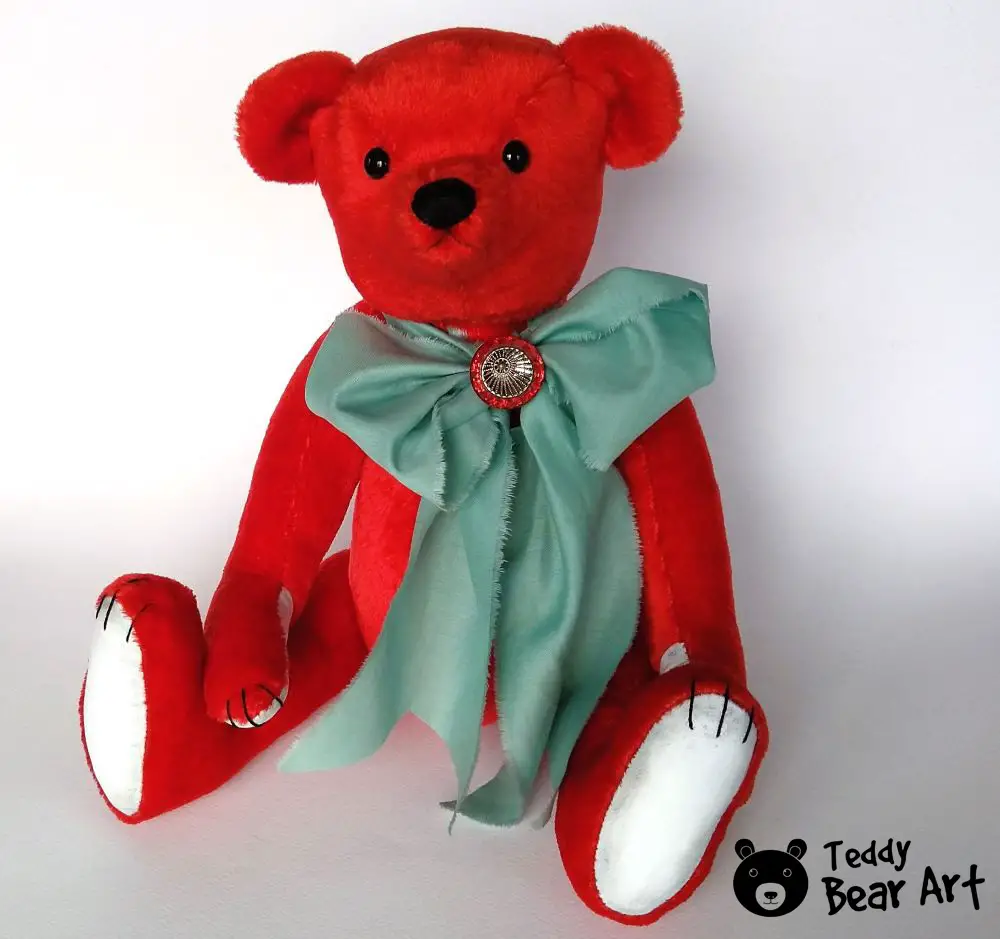
This teddy looks both durable and has that charming, classic teddy bear feel. So maybe we will choose this one.
I have another question – Do you have any recommendations for first-timers on choosing the right fabric that’s both durable and cuddly?
Thanks again.
Hey there!
I’m thrilled to hear that you enjoyed the Plush Manatee Pattern and found the post on creating a jointed teddy bear helpful! It’s awesome to know that you’re diving into teddy bear making with such enthusiasm.
Choosing the right fabric is definitely an important step, especially for first-timers. You’ll want something durable yet cuddly, a fabric that can withstand hugs and playtime adventures. I’d suggest looking for fabrics like mohair or alpaca, as they’re both durable and soft to the touch, perfect for crafting timeless teddy bears. Another option could be dense, high-quality cotton or faux fur, which also offer a good balance of durability and cuddliness.
Ultimately, it comes down to personal preference and what feels right for the teddy bear you envision creating. Have fun choosing your fabric, and feel free to reach out if you have any more questions along the way! Happy teddy bear making! 🧸✨