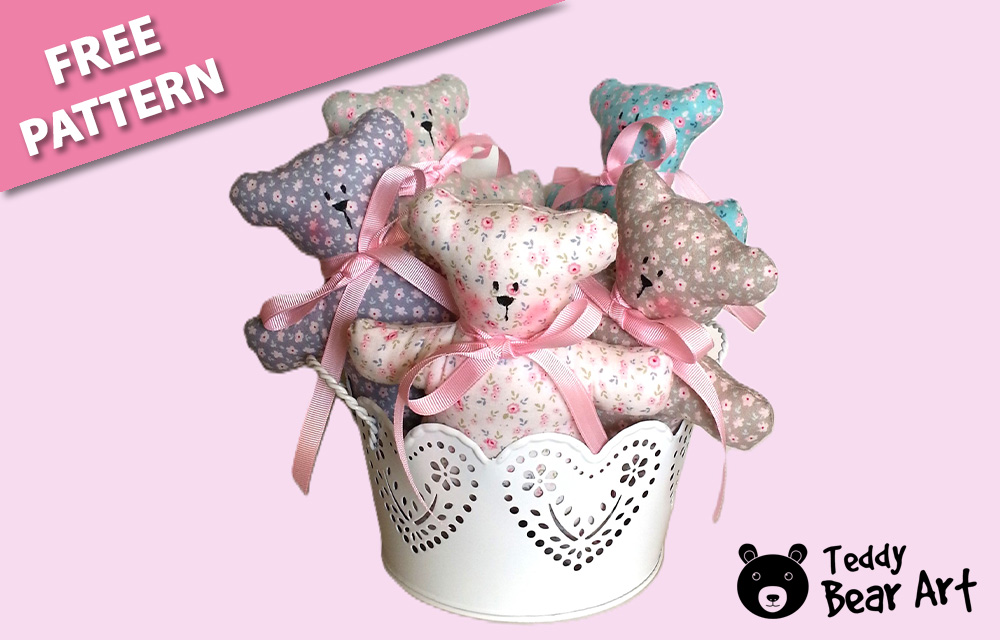
Today, we’re sharing a teddy bear sewing pattern for beginners that’s not only simple but also fun to make! This is the perfect project for anyone new to sewing, including kids who want to get creative with fabric. Plus, the teddy bear is so cute and customizable that you’ll want to sew a whole family of them!
Let’s start together with this easy guide, and we’ll walk you through every step from cutting the fabric to stitching the last seam. You’ll have your own handmade teddy bear to show off in no time!
Download Your Free Teddy Bear Sewing Pattern
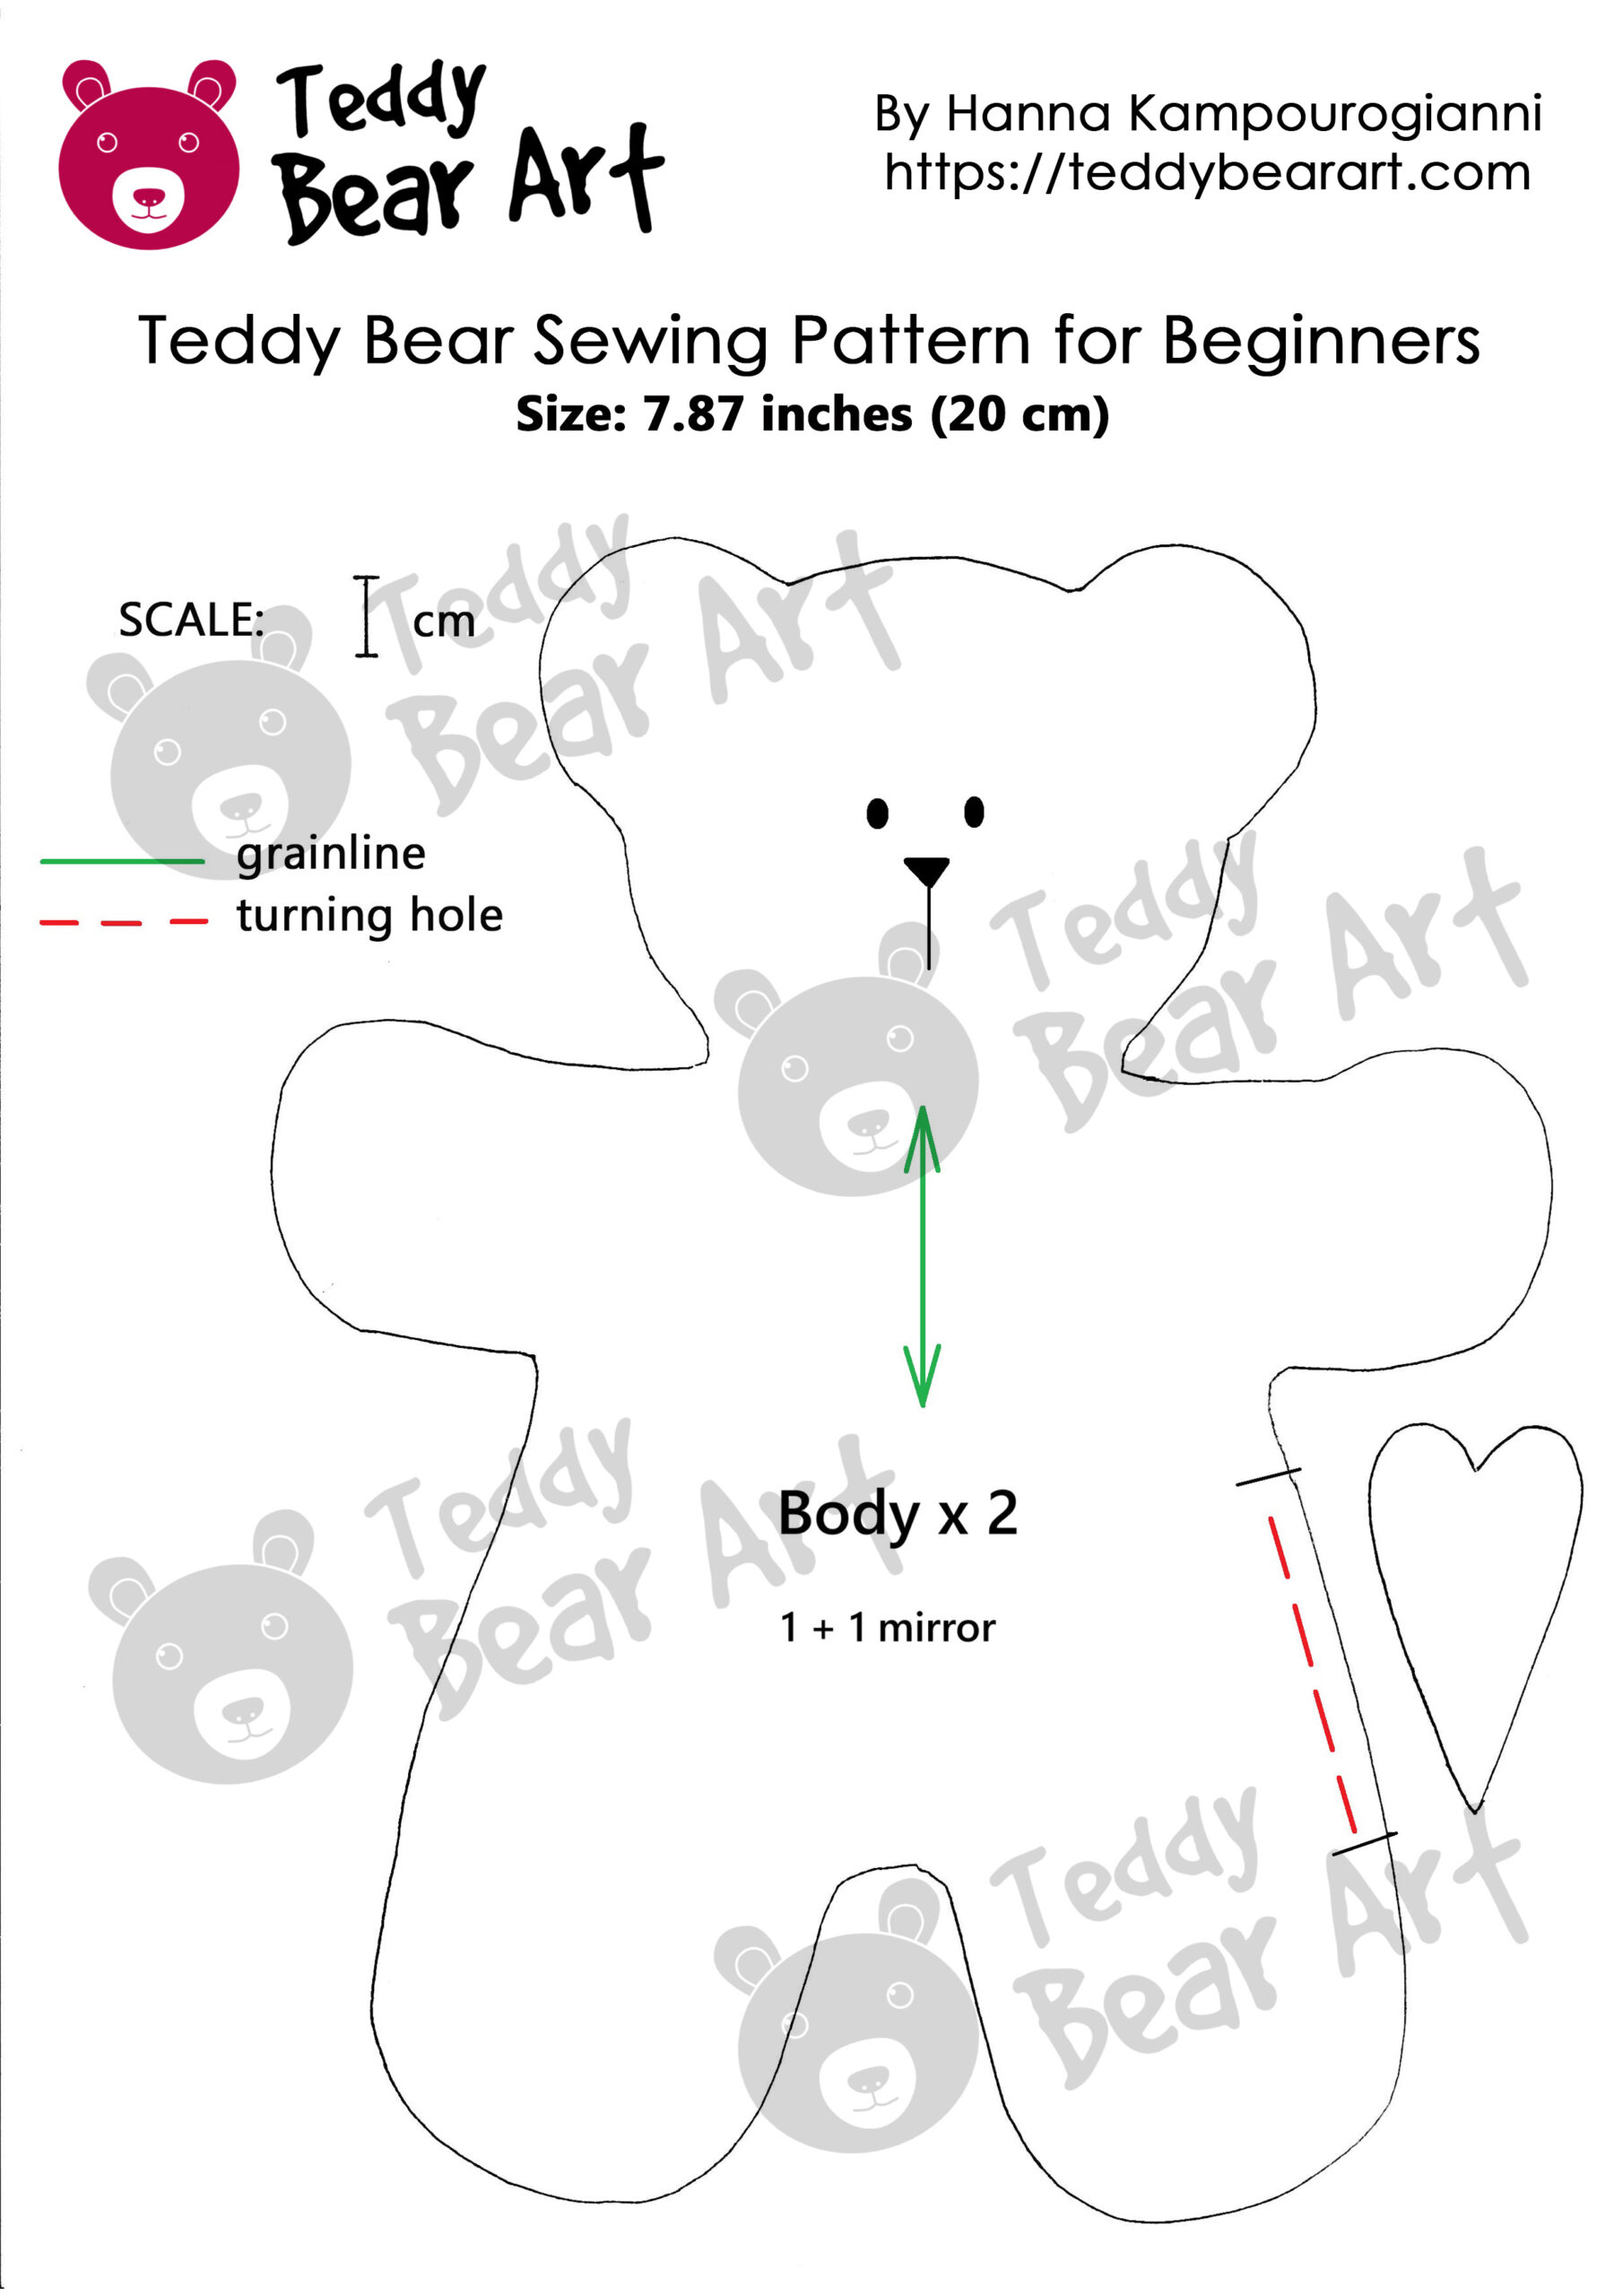
First things first, you need the pattern! We’ve designed a simple teddy bear sewing pattern for beginners that’s made from just two pieces of fabric.
To download the pattern, follow the instructions below:
From a phone or a tablet: There should be something similar for mobile devices with Android or iOS. Click on the image. Save it by holding your finger on the image and selecting the “Save Image” option. Then go to your photo gallery and print it (there is an option).
From a computer: Click on the photo of the pattern you see below. In the new tab that will open, you press the right mouse button and select the “Save image as …” option. Then you choose where you want the image to be saved on your computer.
Tools and Materials You’ll Need:
- Cotton fabric (or any beginner-friendly fabric you have), excluding stretching fabrics
- Scissors
- Needle and thread (black thread for the face stitching) or black acrylic paints
- Synthetic stuffing for filling your teddy bear
- Pins
- A ribbon for the neck (optional)
- A small fabric heart to sew onto the bear’s chest (optional, but adorable!)
- Zigzag scissors are optional, but great for trimming curves
Step-by-Step Sewing Instructions
Now that you’ve got your pattern and supplies ready, it’s time to start stitching! This section will cover all the details to help you create your bear with confidence, even if this is your first sewing project.
Cutting the Fabric
Place your pattern on the fabric, pin it down, and carefully trace the outline. You’ll need to cut two pieces—one for the front and one for the back of your teddy bear. But before you start cutting, it’s essential to understand the grainline.
The grainline refers to the direction the threads run in the fabric, and it’s important for making sure your bear holds its shape over time. Most fabrics have a lengthwise grain (parallel to the fabric’s finished edge, called the selvage) and a crosswise grain (perpendicular to the selvage). To get the best result, you need to align your pattern pieces with the grainline.
To do this:
- Look for the grainline marking on your pattern (a straight line with arrows at each end).
- Place your pattern on the fabric so the grainline runs parallel to the selvage.
- Use a measuring tape to ensure the grainline is evenly spaced from the selvage on both ends of the line. This ensures your teddy bear won’t twist or stretch once sewn.
Now, before cutting the fabric, you need to leave a seam allowance. After tracing the pattern, step back from the traced line and leave about 0.5 cm to 1 cm all around the edges. This seam allowance gives you enough space to stitch the pieces together without cutting too close to the outline, ensuring your stitches stay secure.
Once the seam allowance is marked, you’re ready to cut out the pieces. If you have zigzag scissors, they’ll help create a neat, wavy edge and reduce fraying. But if you don’t, regular fabric scissors will do the job just as well!
Stitching the Body
Start by placing your teddy bear’s front and back pieces together, with the right sides of the fabric facing each other. For beginners, it’s helpful to baste the pieces first using a simple running stitch with a contrasting thread. This allows you to temporarily hold the pieces together and spot any areas that may need adjustment. Make sure your basting stitches are large and loose enough to easily remove later.
Once you’ve basted the two pieces, it’s time to sew. We recommend using a backstitch with a thread that matches your fabric. The backstitch is a strong and durable stitch, perfect for securing the seams of your teddy bear. Carefully sew along the edges, leaving a small gap on the side for stuffing.
After you’ve finished sewing, you can remove the contrasting thread by gently pulling it out, leaving behind your neat backstitch. This method ensures that your final stitches are even and secure without any mistakes or uneven lines.
Trimming the Curves
To avoid having the fabric bunch up when you turn your bear inside out, you’ll need to snip tiny notches along the curved edges—around the ears, arms, and legs. This step is crucial because fabric tends to wrinkle or pull when flipped if it’s not properly trimmed.
Here’s how to do it:
- Make small, close snips along the curved sections, being careful not to cut too close to the seam. Each snip should be about 3 mm apart, but keep a safe distance from the stitching line.
- These notches allow the fabric to spread out evenly once you turn the bear inside out, ensuring a smooth, rounded shape without any awkward folds or creases.
- Or, if you used zigzag scissors, you’re already ahead of the game!
Turning the Bear Inside Out
Now, gently turn your teddy bear right side out. A chopstick or a pencil can help you get into those tight spots, like the ears or arms. Be careful not to stretch the fabric too much—you want your bear to maintain its shape.
Stuffing the Teddy Bear
The magic happens when you start stuffing your teddy bear. Take small pieces of stuffing and insert them into the ear, head, arm, and leg areas first. Make sure to distribute it evenly so your bear looks plump but not too hard. Remember, you want your bear to feel soft! When you get to the body, keep stuffing until you are happy with how soft your bear looks.
When you are done, close the opening with a ladder stitch, making sure the seam is hidden for a neat finish.
Adding the Final Details: Stitching the Face and Attaching the Heart
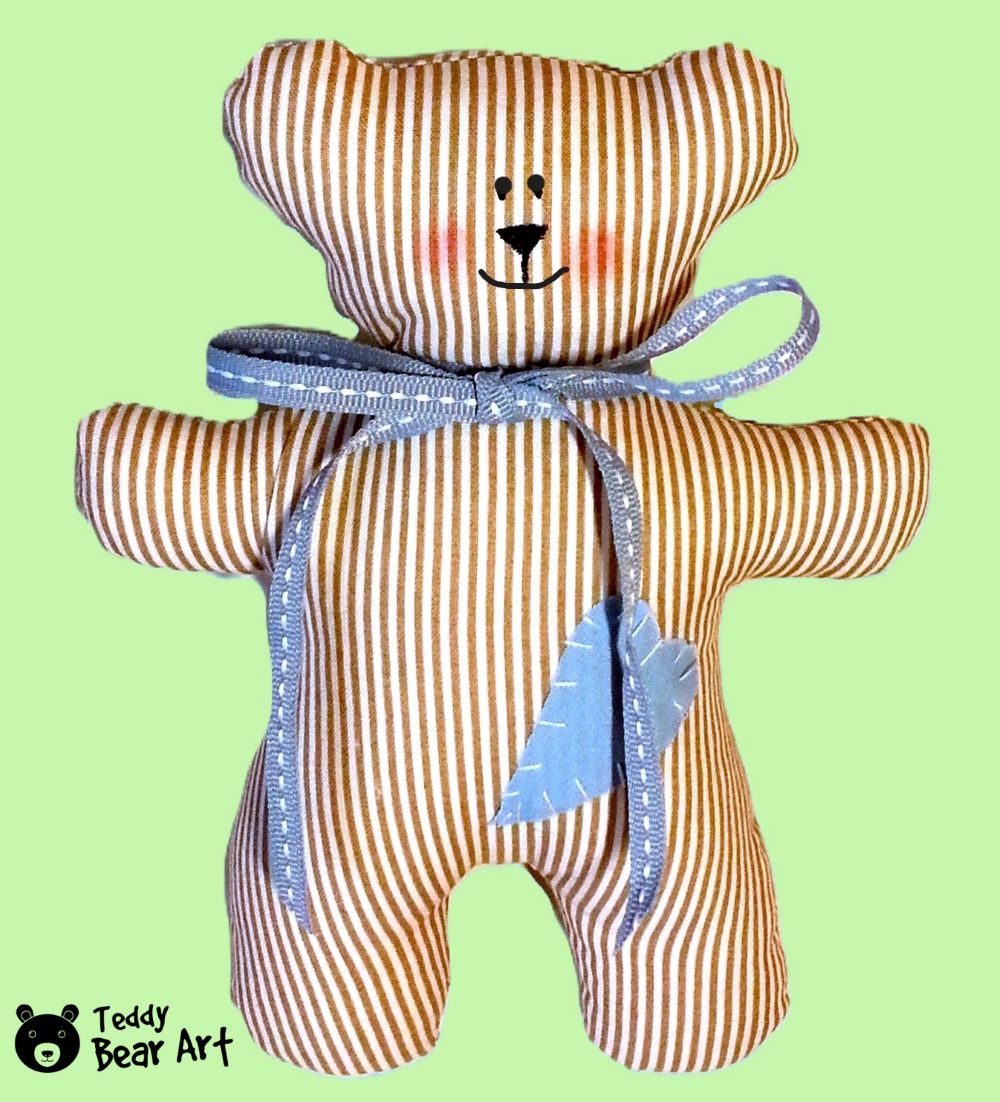
Now that your teddy bear has its body, it’s time to give it a face! Using black thread, you can stitch a simple face—two dots for the eyes and a cute little smile. You can also paint on the face using fabric-safe acrylic paint if sewing isn’t your thing. Keep it minimal and sweet; a teddy bear’s charm lies in its simplicity.
To give your teddy bear a bit of extra charm, you can add a touch of blush to its cheeks. Using either soft pastel chalks or fabric-safe blush, gently apply a small amount of color to the bear’s cheeks. Make sure to use light, circular motions to blend the color evenly.
This will give your bear a warm, rosy look and make its face even more adorable. You can build up the color gradually until you get the perfect soft blush effect. Just be careful not to overdo it—less is more for that cute, subtle glow!
Want to add a special touch? Sew a small heart onto the bear’s chest. This is a perfect way to personalize your creation. Lastly, tie a pretty ribbon around the bear’s neck to complete the look!
Conclusion
Congratulations! You’ve just sewn your very first teddy bear using a simple, beginner-friendly pattern. It’s an amazing feeling to make something from scratch, and now you’ve got a handmade treasure that you can cherish or give as a thoughtful gift.
The best part? This teddy bear sewing pattern for beginners is so easy to replicate that you’ll soon have a whole collection of bears. Keep practicing, and don’t be afraid to try new things as you grow your sewing skills.
Ready for your next project? If you’re interested in expanding your sewing repertoire, check out our free stuffed bunny sewing pattern for beginners and explore more free patterns and tutorials on our site to continue your creative journey!
Get Free Patterns & Be the First to Know!
Want free teddy bear patterns, exclusive tutorials, and a chance to win craft supplies?
Sign up for our newsletter using the subscribe form in the middle of this article to receive new patterns, insider tips, and the latest news on teddy bear art. You’ll also automatically be entered into our annual giveaway for a chance to win teddy bear crafting materials.
Bonus entry: Save one of our pins on Pinterest to increase your chances of winning!
Let’s create, inspire, and craft beautiful teddy bears together!
This tutorial is perfect for someone like me who’s just starting to explore sewing. The step-by-step guide is incredibly clear, and I love how you’ve explained the importance of details like the grainline and trimming curves. The small tips, like using zigzag scissors or a chopstick to turn the bear inside out, are super helpful! It’s also great that this project is customizable with little touches like a heart or ribbon. I can’t wait to give it a try and maybe even make a few bears as gifts. Thanks for sharing this easy-to-follow pattern!
Thank you so much for your wonderful comment! I’m thrilled to hear that you found the tutorial clear and helpful. It’s great to know you’re excited to try it out and add your own personal touches. Making bears as gifts is such a lovely idea! If you have any questions while you’re sewing, feel free to reach out. Happy sewing! 🧵✨
wow, this article was really cool! I enjoyed, even if I am not the best seamstress on earth. Indeed, I really enjoyed the step-by-step tutorial because it seems easy as hell! I think that your article will help those who are very interested in DIY crafts, and those who are gifted seamstresses! Unfortunately, I didn’t inherit my grandmother’s talent, but it’s not too late!
Thank you so much! We’re pleased you enjoyed the article and found the tutorial easy to follow. You don’t have to be an expert to create something special, and it’s great that you’re giving it a try! With practice, anyone can get better, so it’s not too late to discover your sewing talent. We’re sure you’ll make something amazing!