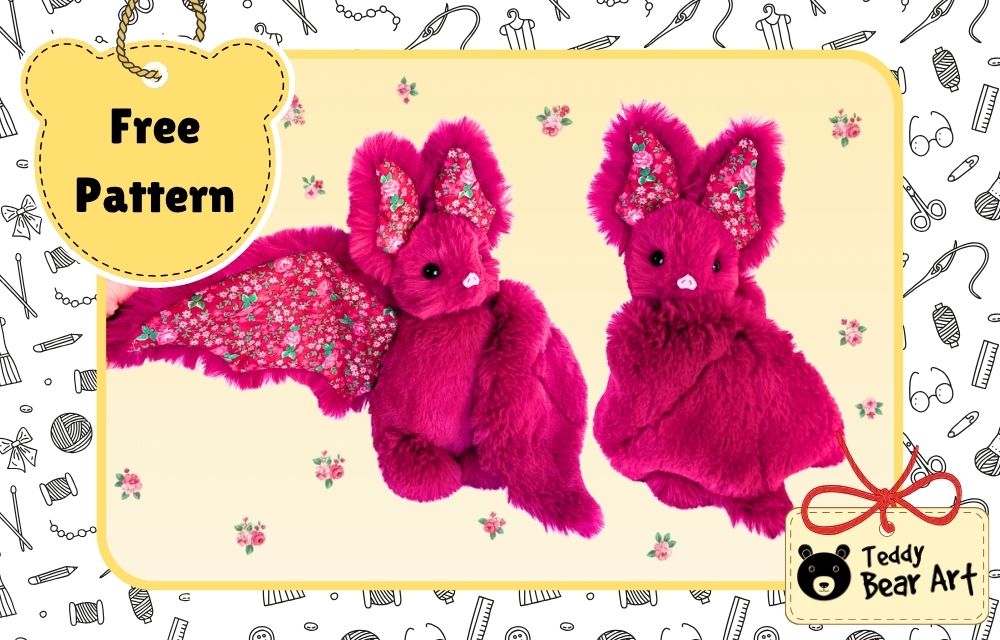
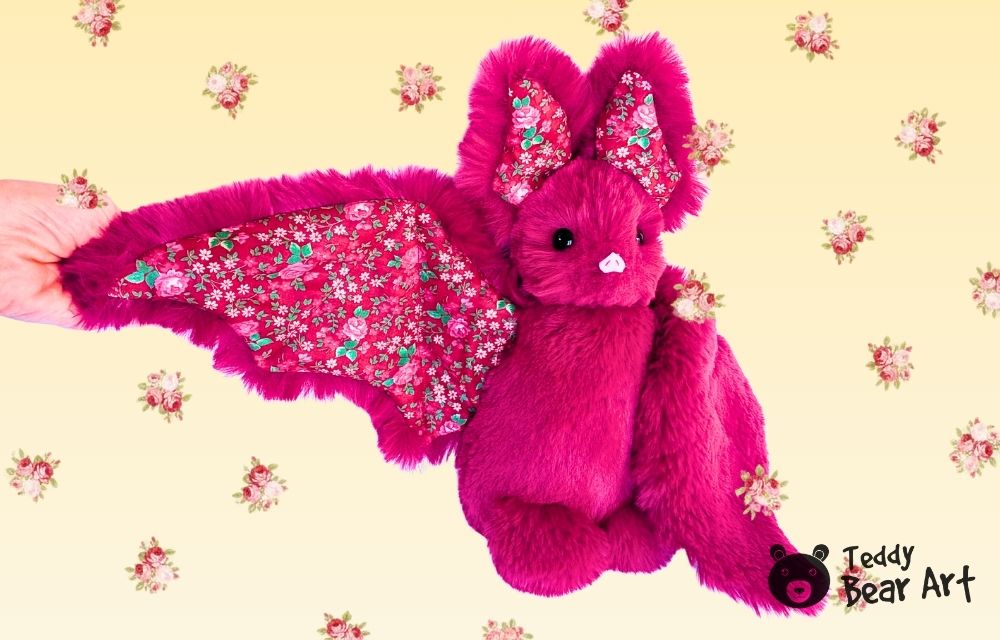
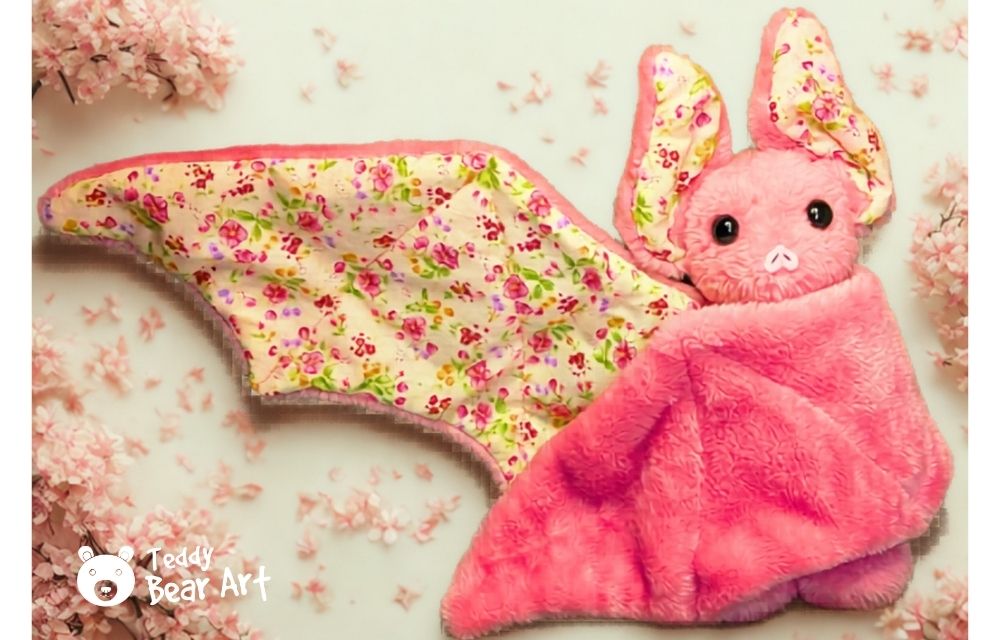
This bat stuffed animal pattern is for a larger, softer, and more decorative bat plush with fluffy faux fur, floral fabric wings, and a sweet handmade face.
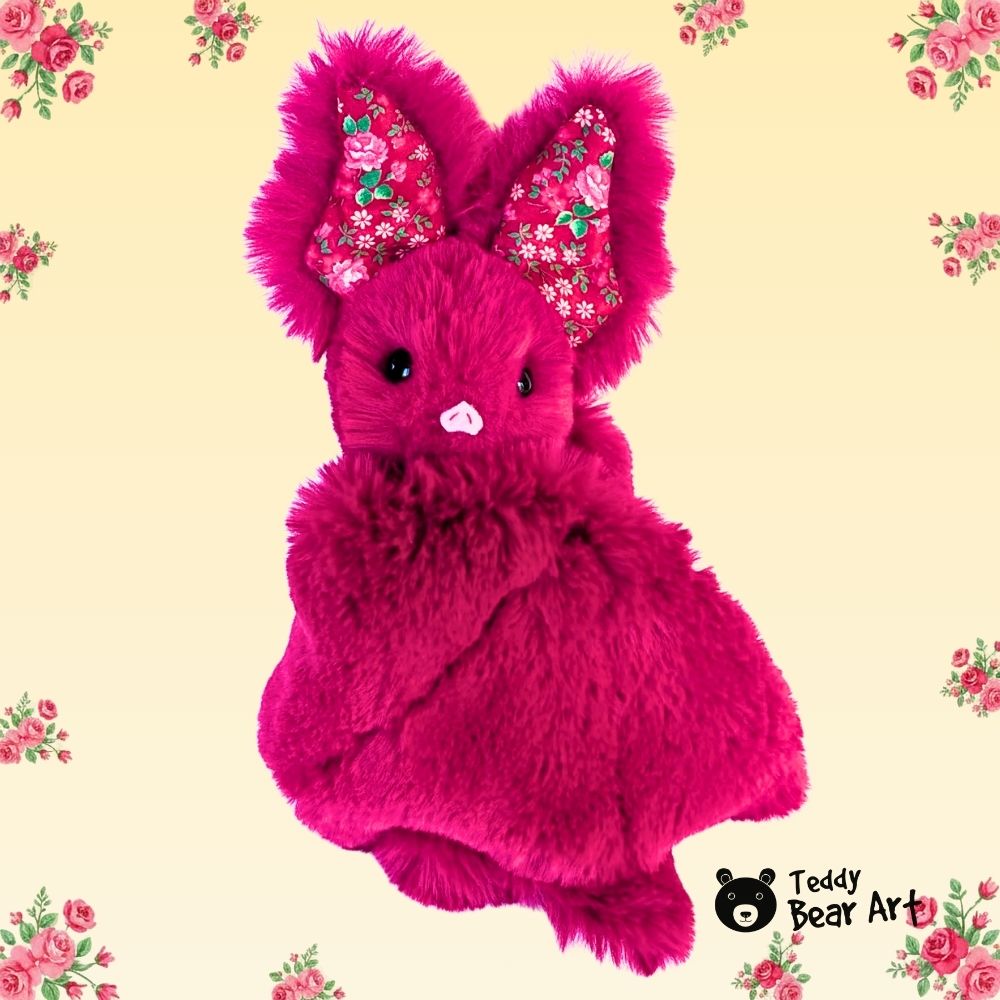
I made this bat from rich magenta faux fur and used floral cotton for the wings and inner ears. That little mix of fuzzy texture and printed fabric gives the bat a playful, almost storybook look. It is still a simple sewing project, but the fabric choice makes it feel more special, more expressive, and honestly, a little more dramatic.
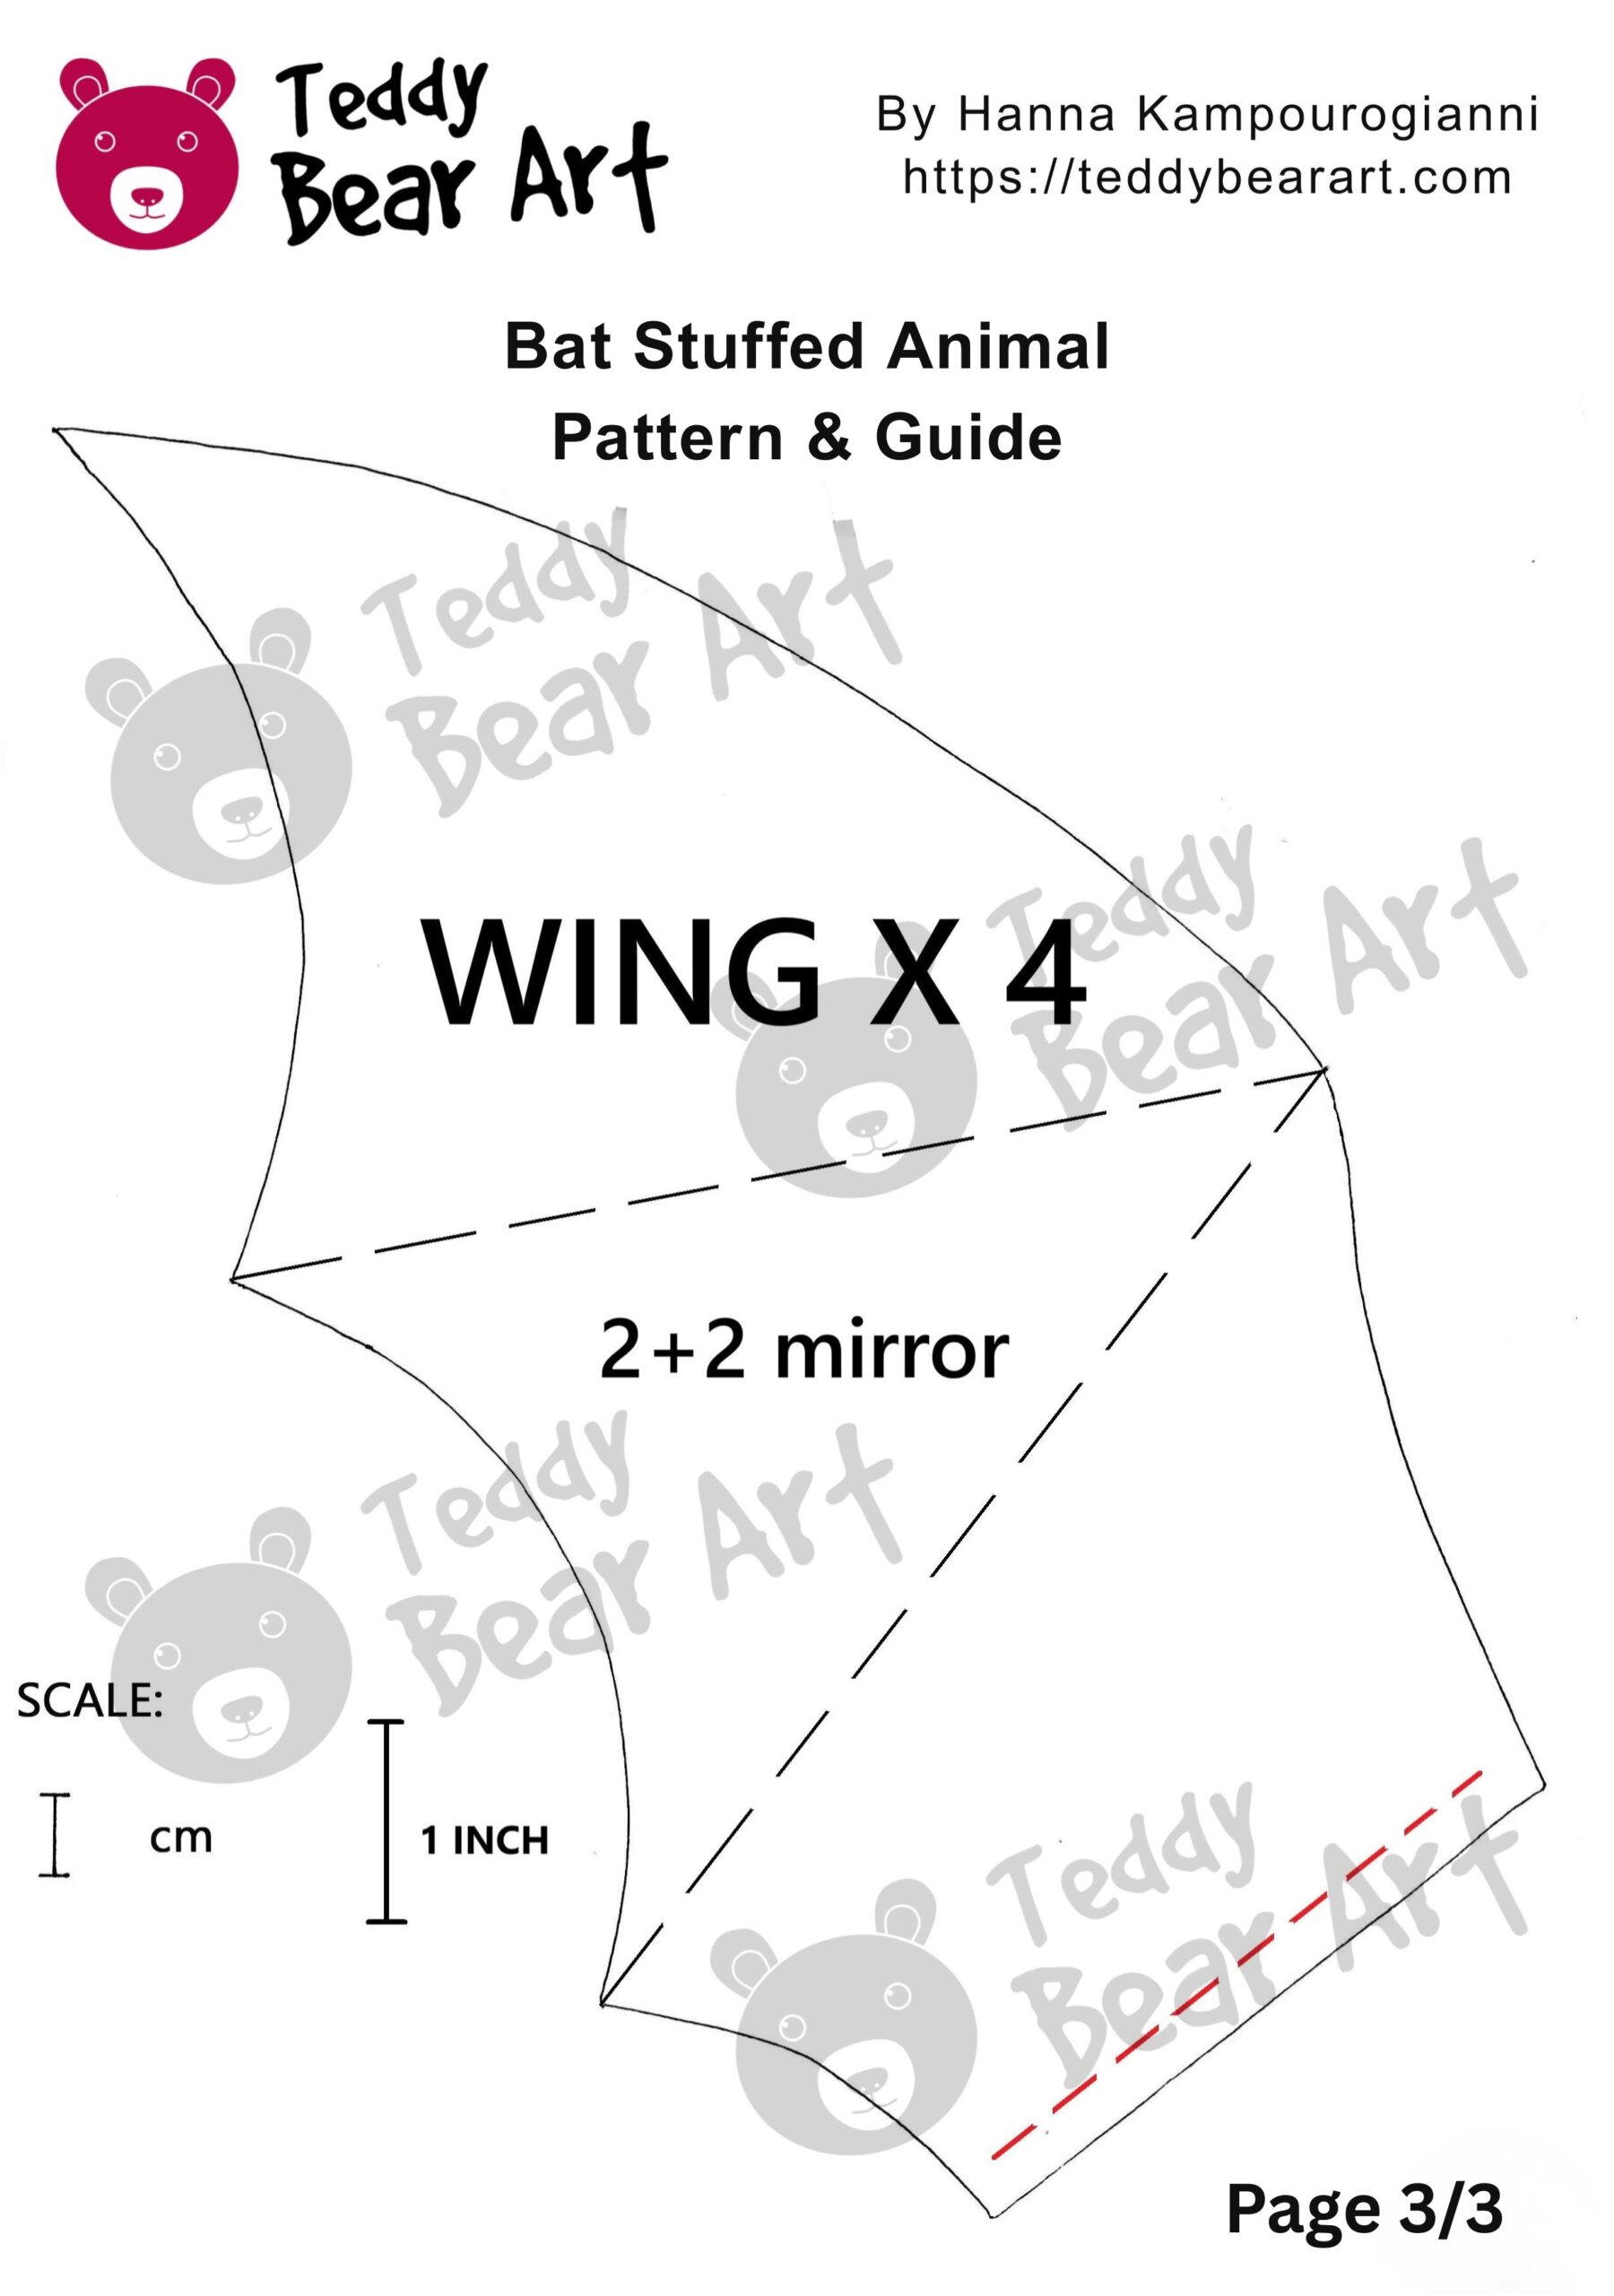
Download the Pattern
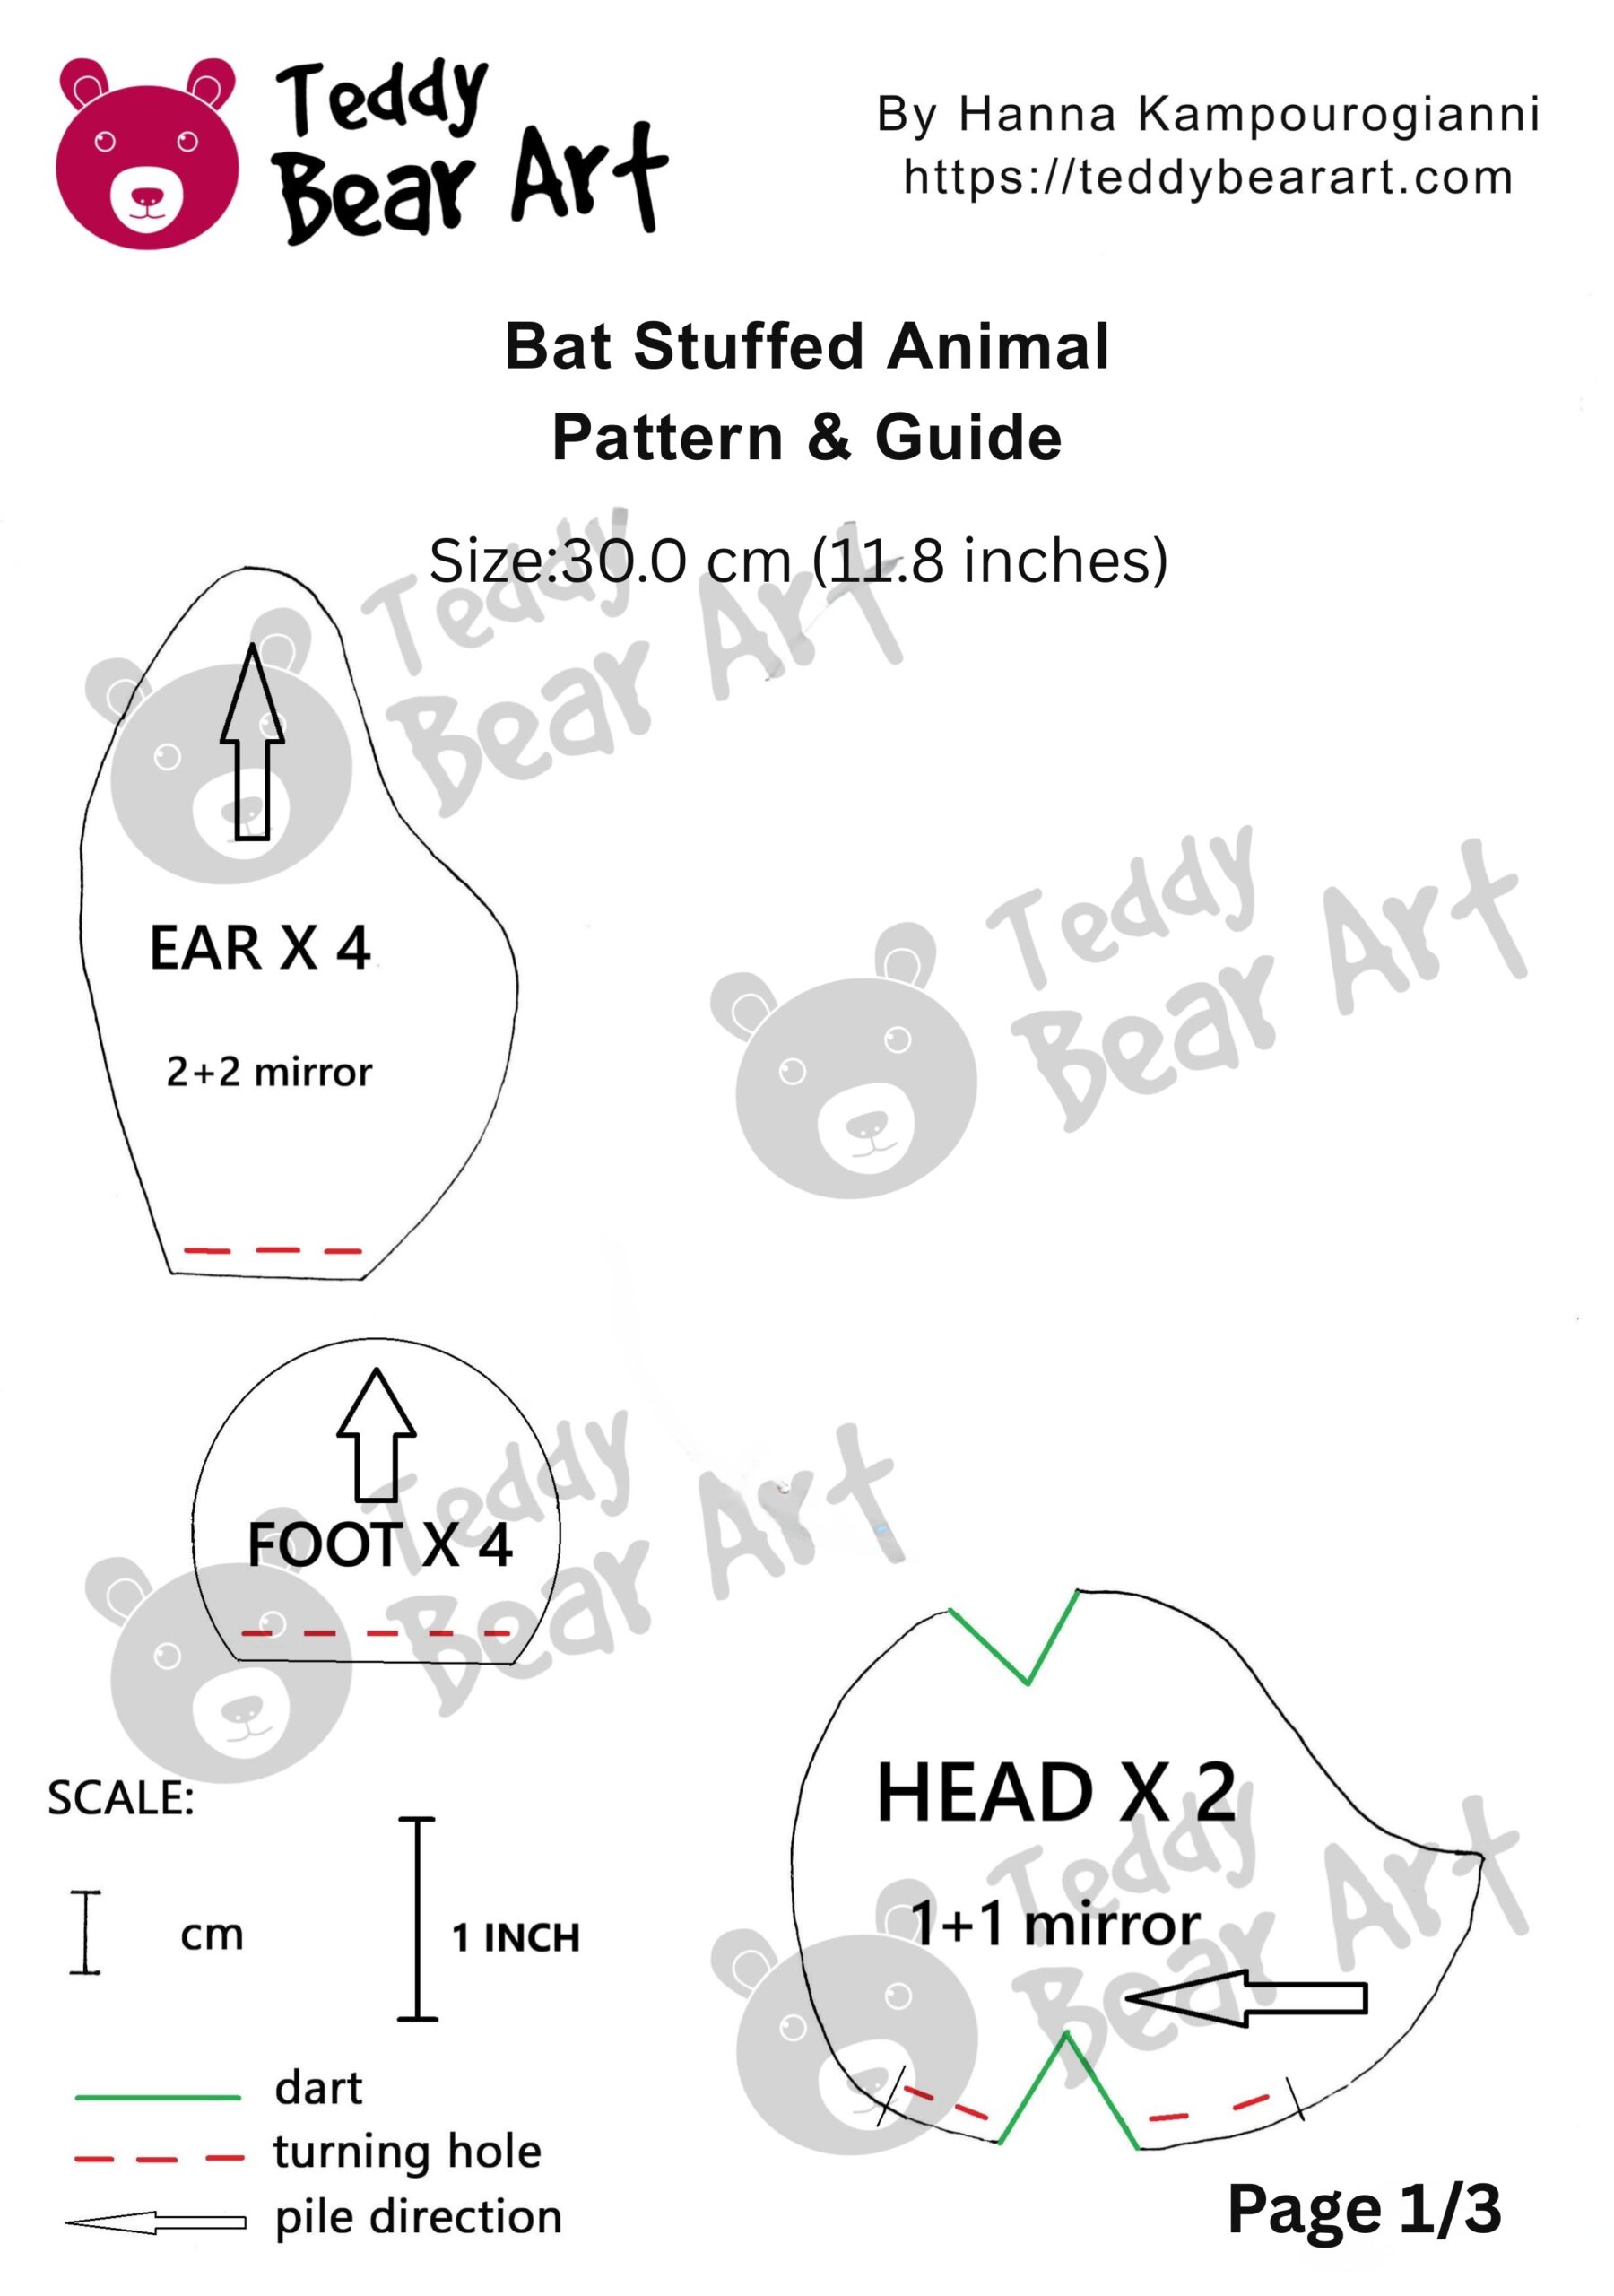
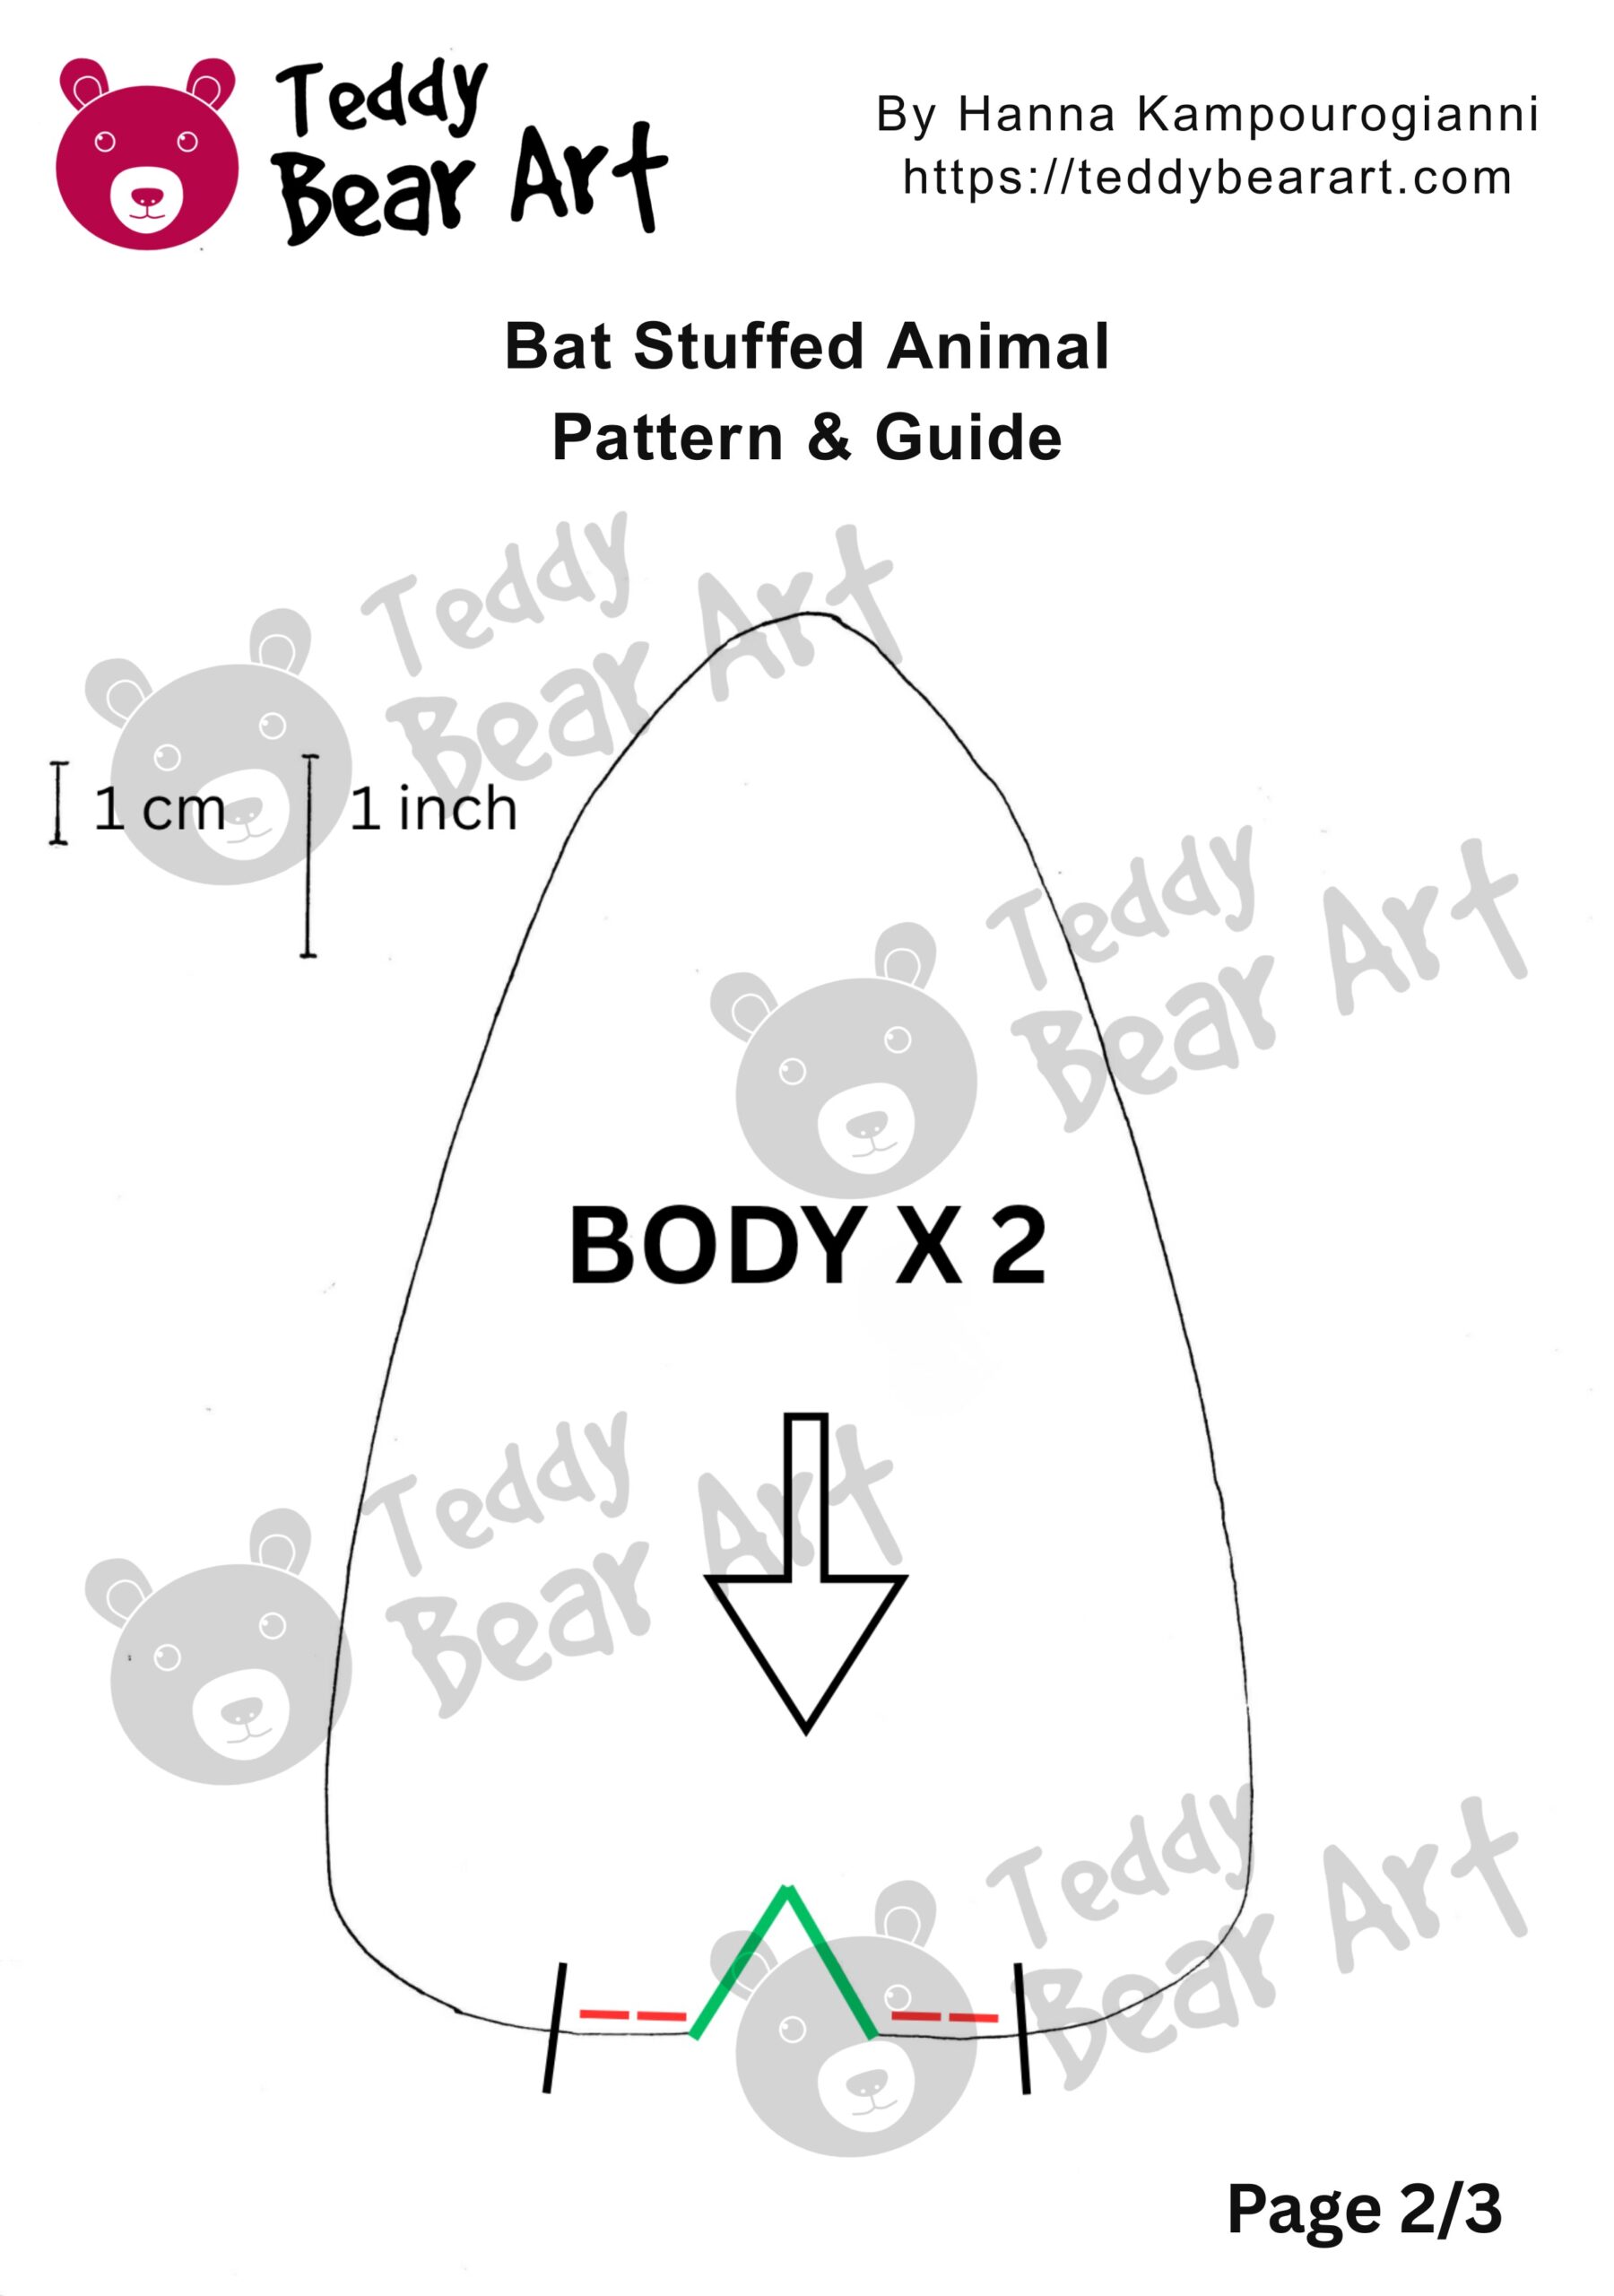
Notice that seam allowances are not included.
To download the pattern, follow the instructions below:
From a phone or tablet: There should be a similar option for mobile devices with Android or iOS. Click on the image. Save it by holding your finger on the image and selecting the “Save Image” option. Then, go to your photo gallery and print it (an option available).
From a computer: Click on the photo of the pattern you see below. In the new tab that will open, you press the right mouse button and select the “Save image as …” option. Then, you choose where the image will be saved on your computer.
Materials You Will Need
- Faux fur fabric, pile length about 2 cm
- Cotton fabric for the inner ears and wings
- Polyester stuffing
- Matching thread
- Sewing needle or sewing machine
- Scissors
- Pins or clips
- Glass or bead eyes approximately 12-14 mm in diameter
- A piece of fleece or felt fabric for the nose
- Optional joint for the head
Sewing Instructions
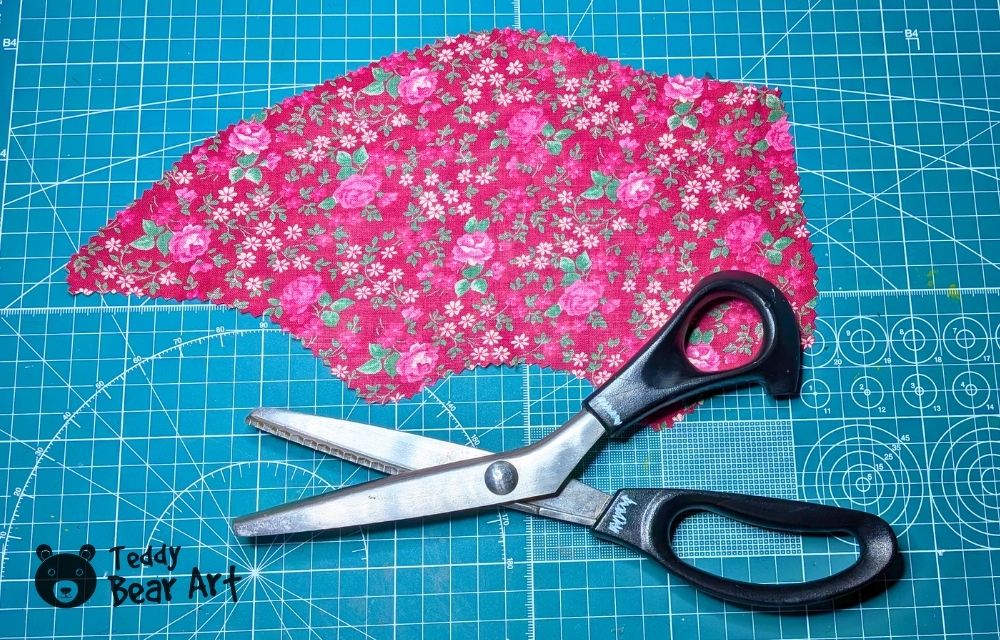
Start by cutting all pattern pieces from the correct fabrics. Cut the body and head from magenta faux fur. Cut the wings and inner ear pieces from floral cotton. If your faux fur has a clear pile direction, make sure the fur lies in the same direction on both sides of the toy. This small detail makes the finished bat look much cleaner.
First, sew the darts. Darts are small, but they do a lot of work. They help shape the head, body, and any rounded areas, so don’t skip them. Sew slowly and match the dart edges carefully.
Next, sew the main head pieces together. Place the faux fur pieces right sides together and stitch around the shape, leaving the opening shown on your pattern. After sewing, gently pull trapped fur out of the seam with a needle or pin. This makes the head look fluffy again instead of flat along the stitched edge.
Sew the body pieces in the same way. Keep the opening for turning and stuffing.
Turn the head and body right side out. Use a wooden stick or turning tool, but don’t push too hard. Faux fur can hide small wrinkles, but it can also stretch if you pull roughly.
Now stuff the head. Add stuffing in small pieces instead of one big lump. The head should feel firm enough to hold its shape, but still soft. Insert a disc with a joint if you want.
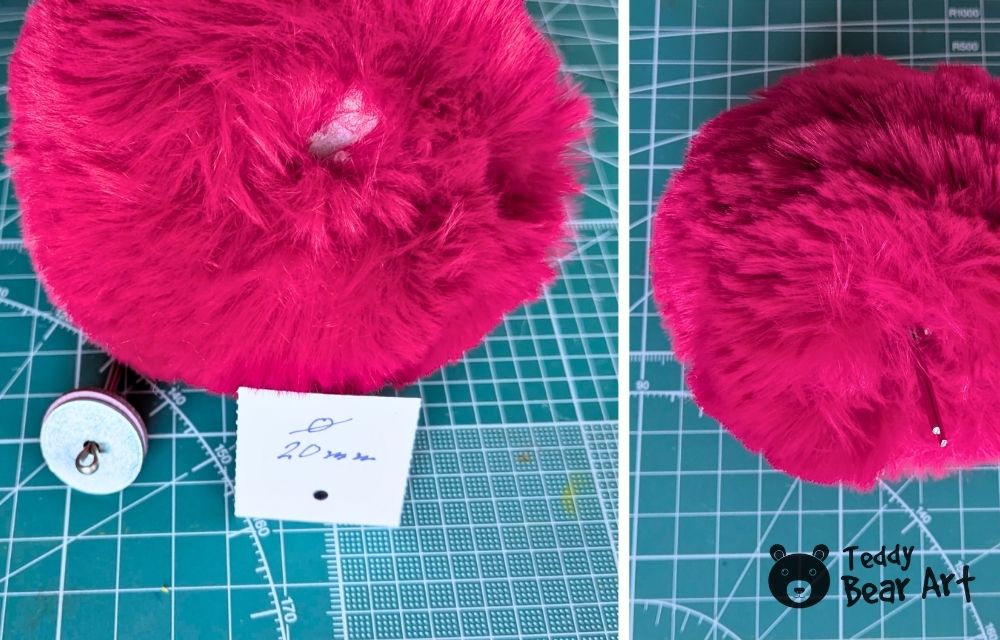
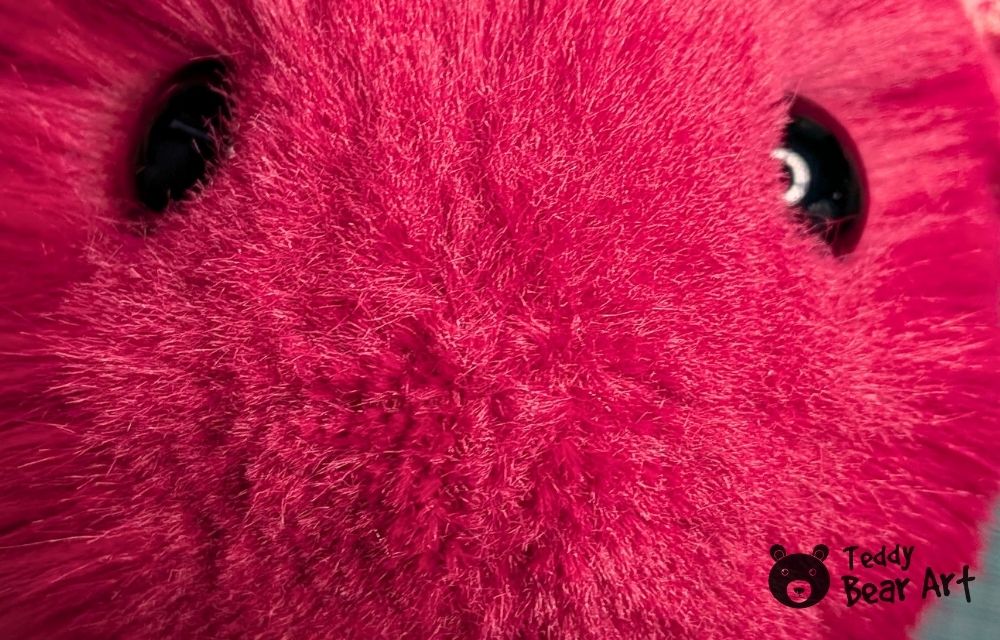
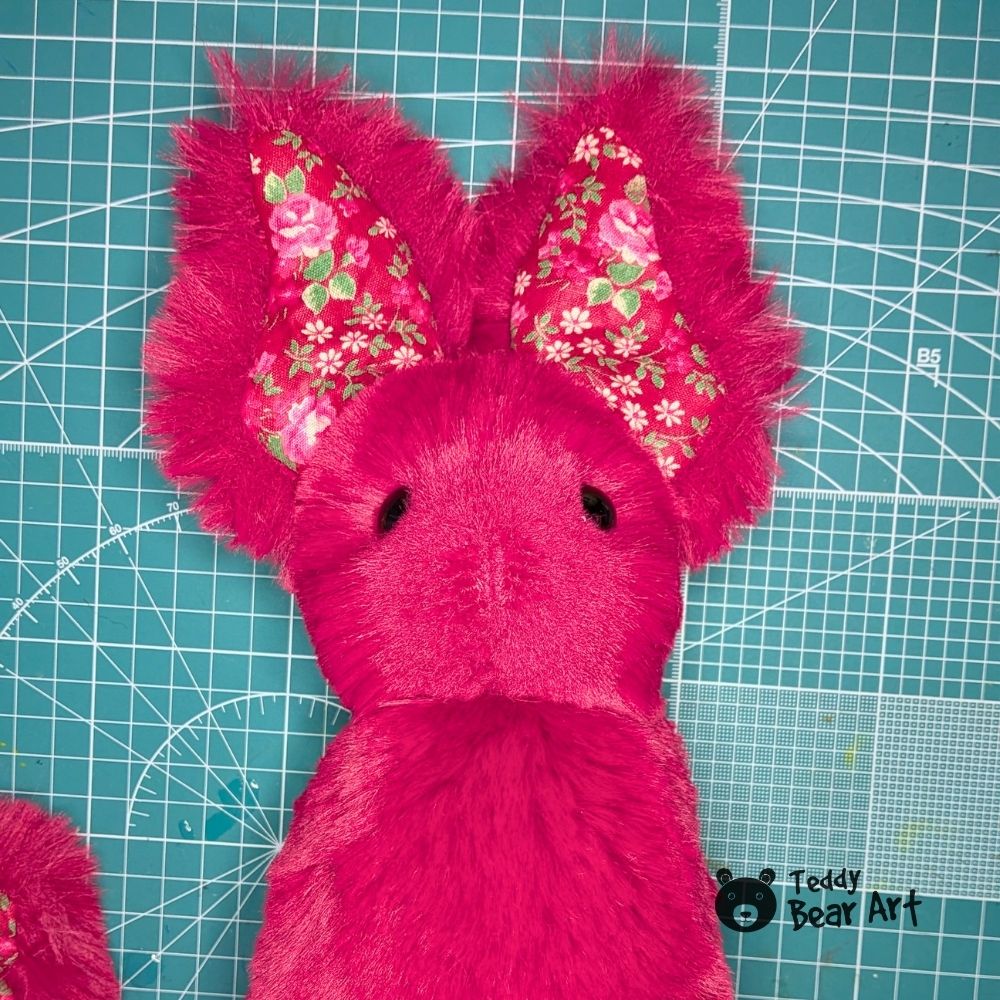
When the head is ready, trim the fur around the nose area. This step is especially helpful with 2 cm pile faux fur because the long fibers can cover the muzzle. Use small sharp scissors and trim only a little at a time. Don’t cut deep into the fabric backing. You only want to shorten the pile on the muzzle, especially where the nose will sit. After trimming, the nose and eyes will be easier to see, and the whole expression will look sweeter.
Insert or sew on the eyes. Before securing them, check the face from different angles. A tiny change in eye placement can make the bat look sleepy, curious, shy, or mischievous. I like this type of bat with a gentle, slightly funny expression.
Sew the ears next. Place the faux fur and floral inner ear pieces right sides together, stitch around the edges, turn them right side out, and shape them with your fingers. You can leave the ears unstuffed. The floral inside will already add enough detail.

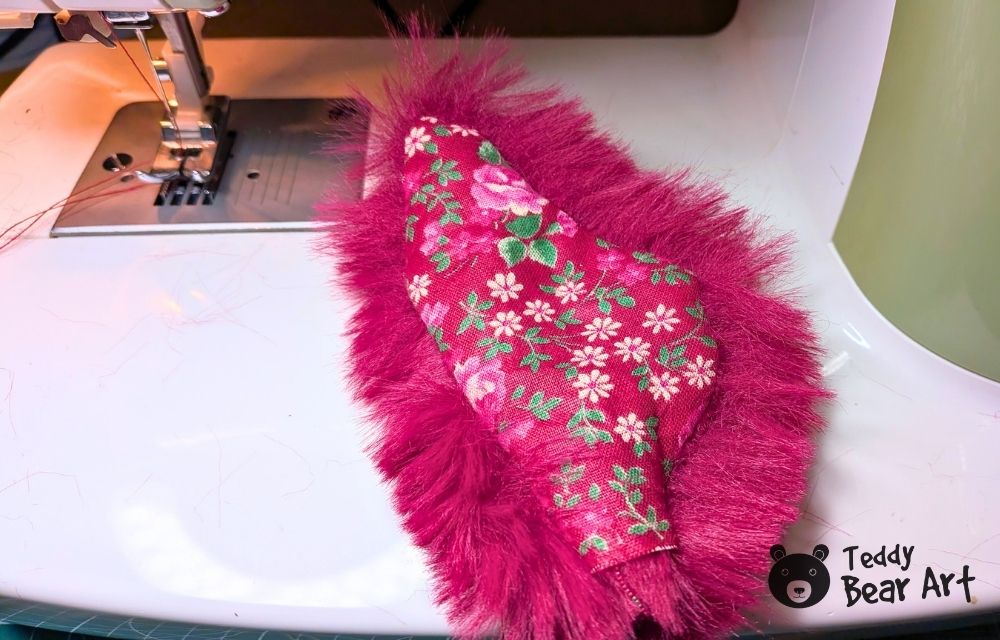
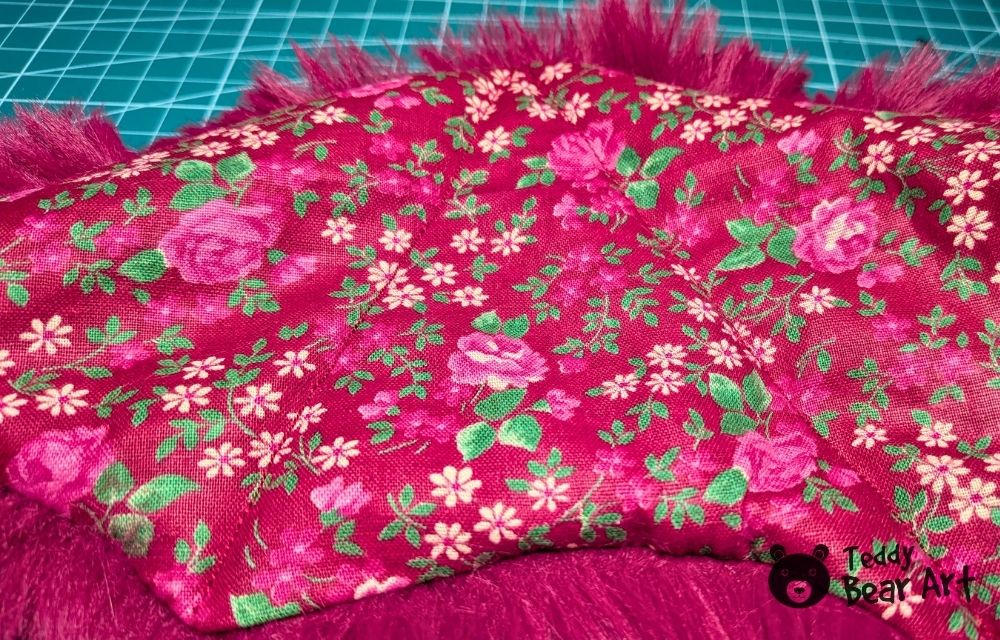
Now sew the wings. Place the wing pieces right sides together and stitch around the edge, leaving an opening for turning. Turn them right side out and press gently with your fingers. If your cotton fabric allows it, you can use a warm iron carefully, but avoid touching faux fur with the iron.
Add decorative stitch lines on the wings. These lines make the wings look more like bat wings and help the floral fabric sit flatter. Follow the wing shape and sew slowly. You can mark the lines first with a disappearing fabric pen if needed.
Attach the ears to the head. Pin them first and look at the bat from the front before sewing. With bats, ear placement changes everything. Higher ears look alert and playful. Slightly wider ears make the bat look softer and more baby-like.
Attach the head to the body and stuff the body. You can sew it directly with a strong ladder stitch, or use a disc and cotter pin if you want the head to turn. A movable head gives the bat more personality, but direct sewing is simpler and works perfectly for a soft decorative plush.
Attach the wings to the sides of the body. Use small hidden stitches and make sure both wings sit at the same height. Since these wings are floral and decorative, let them show nicely.
Sew, stuff, and attach the paws.
Finally, sew or glue the small nose in place. If you are using felt or fleece, cut a neat little nose shape and attach it with tiny stitches. You can also embroider the mouth if you want a more expressive face.
FAQ
Can I sew this bat by hand?
Yes, you can sew the whole bat by hand. Use small, strong stitches and take extra care around the wings and head. Hand sewing will take longer, but plush toys are very friendly to hand stitching.
Can I make this bat smaller?
You can resize the pattern, but I would not make this faux fur version too tiny. Small faux fur pieces are harder to sew and turn. If you want a small bat, minky may be easier. You can try my smaller bat plush pattern instead.
Before You Go
This large faux fur bat is a lovely project if you want something soft, bright, and a little unusual. The floral wings make every bat feel different, so even if you use the same pattern twice, the result can have a completely new personality.
Try dark faux fur with moon-and-star wings, white faux fur with pastel flowers, or black fur with tiny orange fabric. The pattern stays simple, but the fabric choices can change the whole mood.
If you enjoyed this bat stuffed animal pattern, you may also like our collection of bats:
Get Free Patterns & Be the First to Know!
Want free teddy bear patterns, exclusive tutorials, and a chance to win craft supplies?
Sign up for our newsletter using the subscribe form in the middle of this article to receive new patterns, insider tips, and the latest news on teddy bear art. You’ll also automatically be entered into our annual giveaway for a chance to win teddy bear crafting materials.
Bonus entry: Save one of our pins on Pinterest to increase your chances of winning!
Let’s create, inspire, and craft beautiful teddy bears together!
Hi Hanna,
I’m honestly obsessed with bats, so this pattern caught my eye right away. I love that it is not the usual cute plushie, but still looks soft and fun to make. The floral wings are my favorite part because they make the bat feel a little more special and different. I’ve been wanting to try sewing with faux fur, but I was nervous about the mess and the seams. Your tips make it feel much less scary. Thank you for sharing this pattern!
Hi!
Thank you so much! I love bats too, and that was exactly why I wanted this pattern to feel cute, but not too ordinary. Faux fur can look a little scary before you try it, but it gives the bat such a nice soft shape. I actually sewed 7 bats with different wing prints, not only floral ones. One of them was even inspired by Mexican culture, and it looked so fun and bright. I love how the same pattern can create completely different bats.
Hi Hanna, thank you for a great pattern! It’s such a cute bat! I have a question about the cotton pieces of the wings. If the cotton fabric is very thin, would you add a light interfacing before sewing the decorative stitch lines, or would that make the wings too stiff for this bat?
Hi! Honestly, I probably wouldn’t bother with interfacing for this bat. I like the wings to stay soft, and the decorative stitch lines already help them hold their shape a little. If the cotton is very thin, I would just choose a slightly firmer cotton next time rather than add extra steps.