
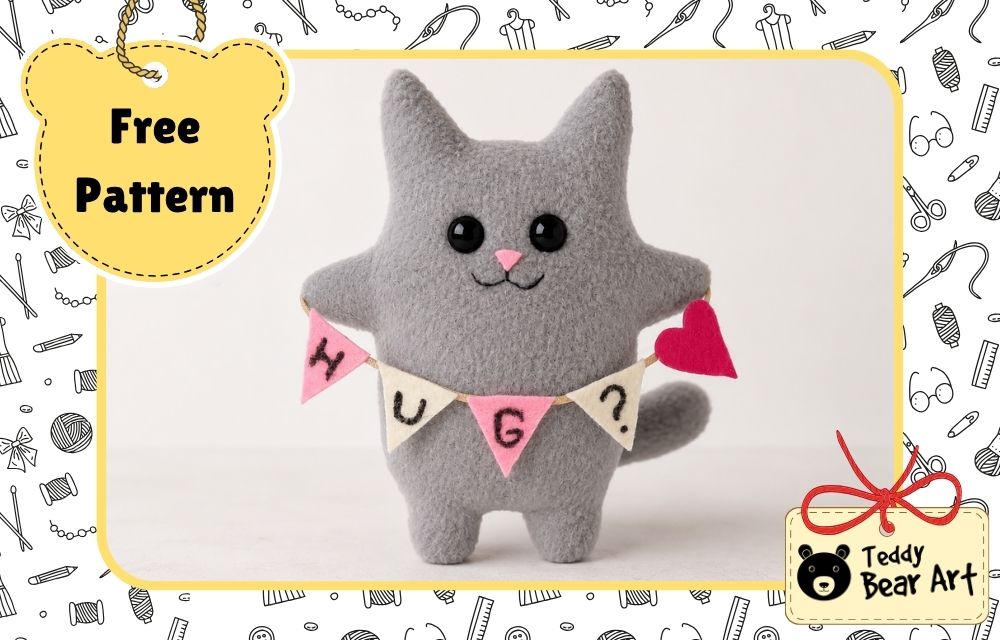

This fleece cat sewing pattern tutorial will show you how to make a soft gray cat with a simple one-piece body, a curved tail, and a tiny felt garland held between its paws. The raised arms create an open and welcoming pose, while the playful HUG? message gives the finished plush its own sweet personality.
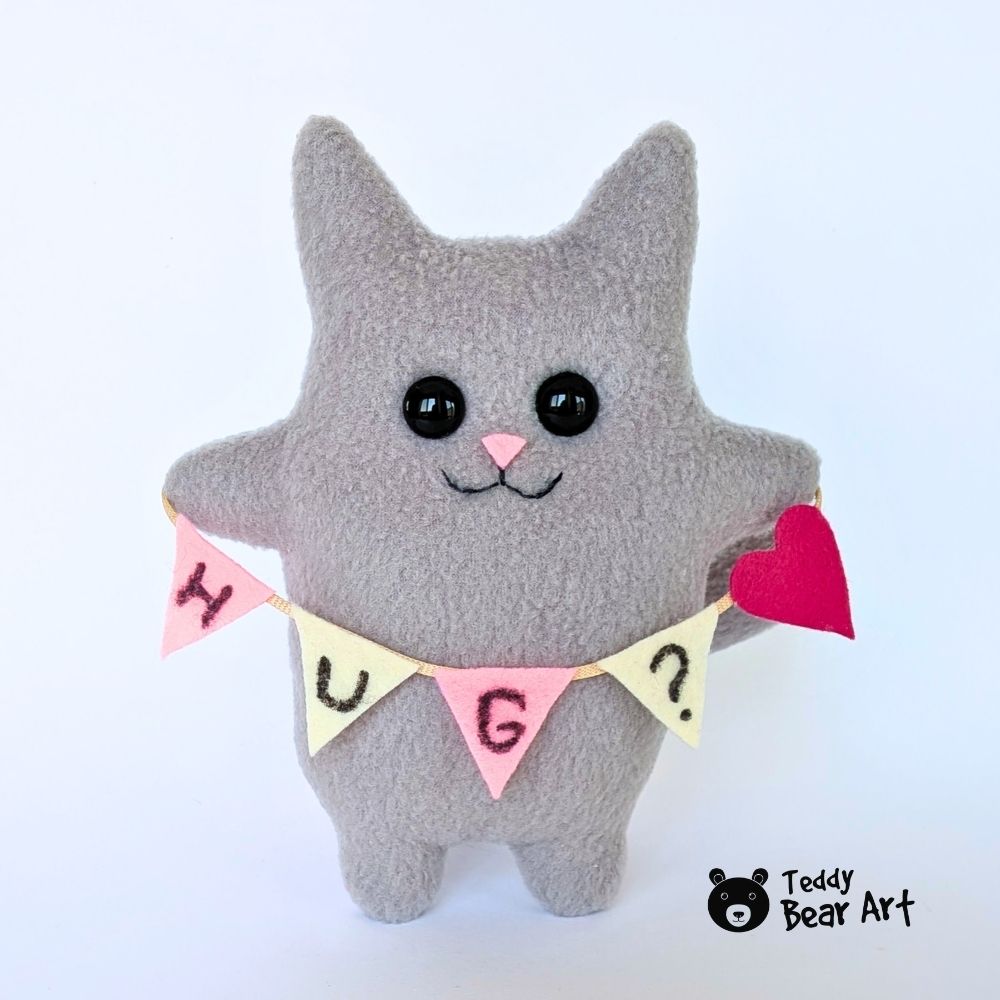
The head, ears, arms, body, and legs are included in one shape. Only the tail is sewn separately. This makes the project easy to follow, even for beginners who have not made many stuffed animals before.
You can recreate my gray and pink version or give your cat a completely different look. Try black fleece for a Halloween cat, warm cream for a softer style, or a bright color for a cheerful modern plush.
Download the Pattern
Notice that seam allowances are not included.
To download the pattern, follow the instructions below:
From a phone or tablet: There should be a similar option for mobile devices with Android or iOS. Click on the image. Save it by holding your finger on the image and selecting the “Save Image” option. Then, go to your photo gallery and print it (an option available).
From a computer: Click on the photo of the pattern you see below. In the new tab that will open, you press the right mouse button and select the “Save image as …” option. Then, you choose where the image will be saved on your computer.
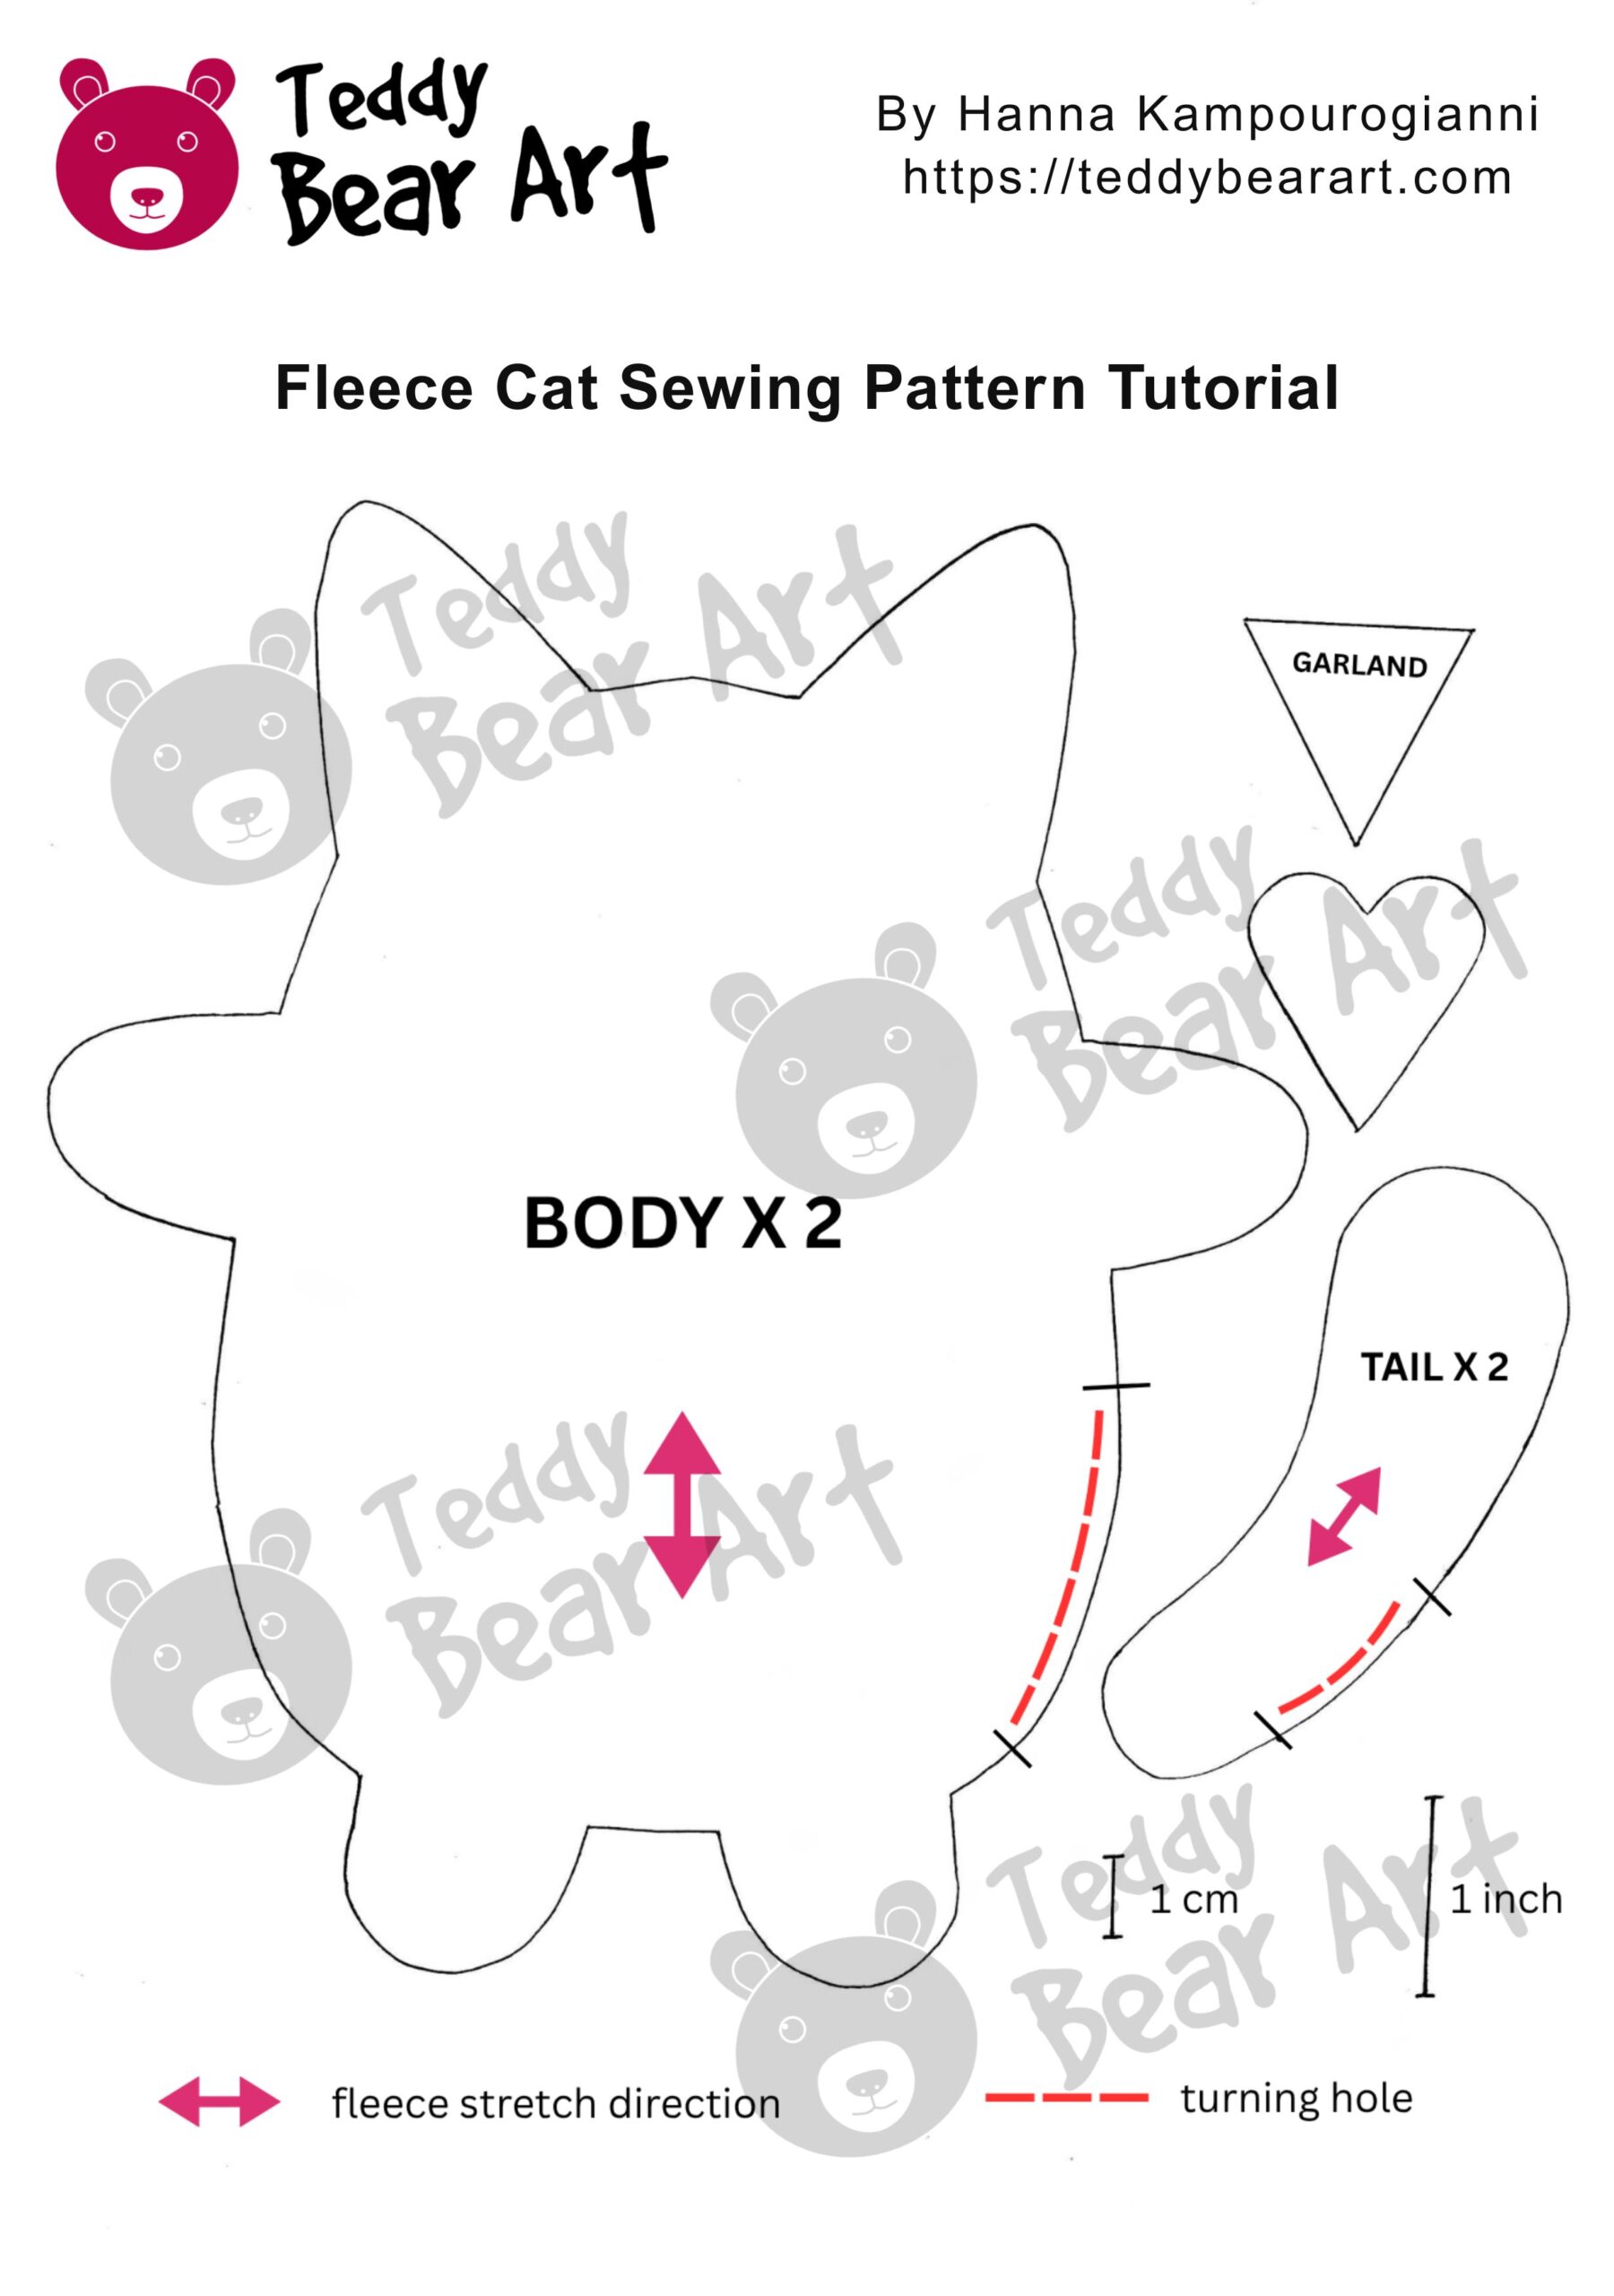
Want to make this fleece cat bigger or smaller? See how to resize a plush sewing pattern and adjust the pattern before cutting your fabric.
Materials
- Gray or another color of fleece
- Polyester stuffing
- Small pieces of felt
- Two eyes
- Sewing thread that matches the fleece and the black one for the mouth
- A sewing machine, or a needle for hand sewing
- Scissors
- Thin ribbon or cord
- Glue
- A black CD marker, thin drawing marker, or gel pen
I used black glass eyes with metal loops. You can also use beads, craft eyes, or safety eyes.
Safety eyes must be installed before stuffing because their locking washers are attached from inside the body. Glass eyes, beads, and craft eyes can be added later.
Fleece Cat Sewing Pattern Tutorial
Fold the fleece in half with the right sides facing each other. Place the body pattern on top and trace around it. Transfer the marks for the turning opening as well.
Trace the tail onto another folded section of fleece. Keep both layers smooth and flat so they do not shift while you sew.
Pin or clip the two fleece layers together inside the traced body shape. This helps prevent the soft fabric from moving while you sew.
Stitch directly along the drawn line. Begin at one side of the turning opening and stop at the other side.
A short regular machine stitch works well. If you prefer to sew the plush by hand, use small backstitches placed close together. You can watch my backstitch tutorial if you would like to see the technique first.
Cut out the body after sewing.
Make small clips around the entire perimeter. Add extra clips around the rounded arms, legs, ear tips, the dip between the ears, and all inward curves.
Do not cut through the stitching.
These clips help the fleece relax after turning. They also allow the small curves to open neatly without wrinkling or pulling.
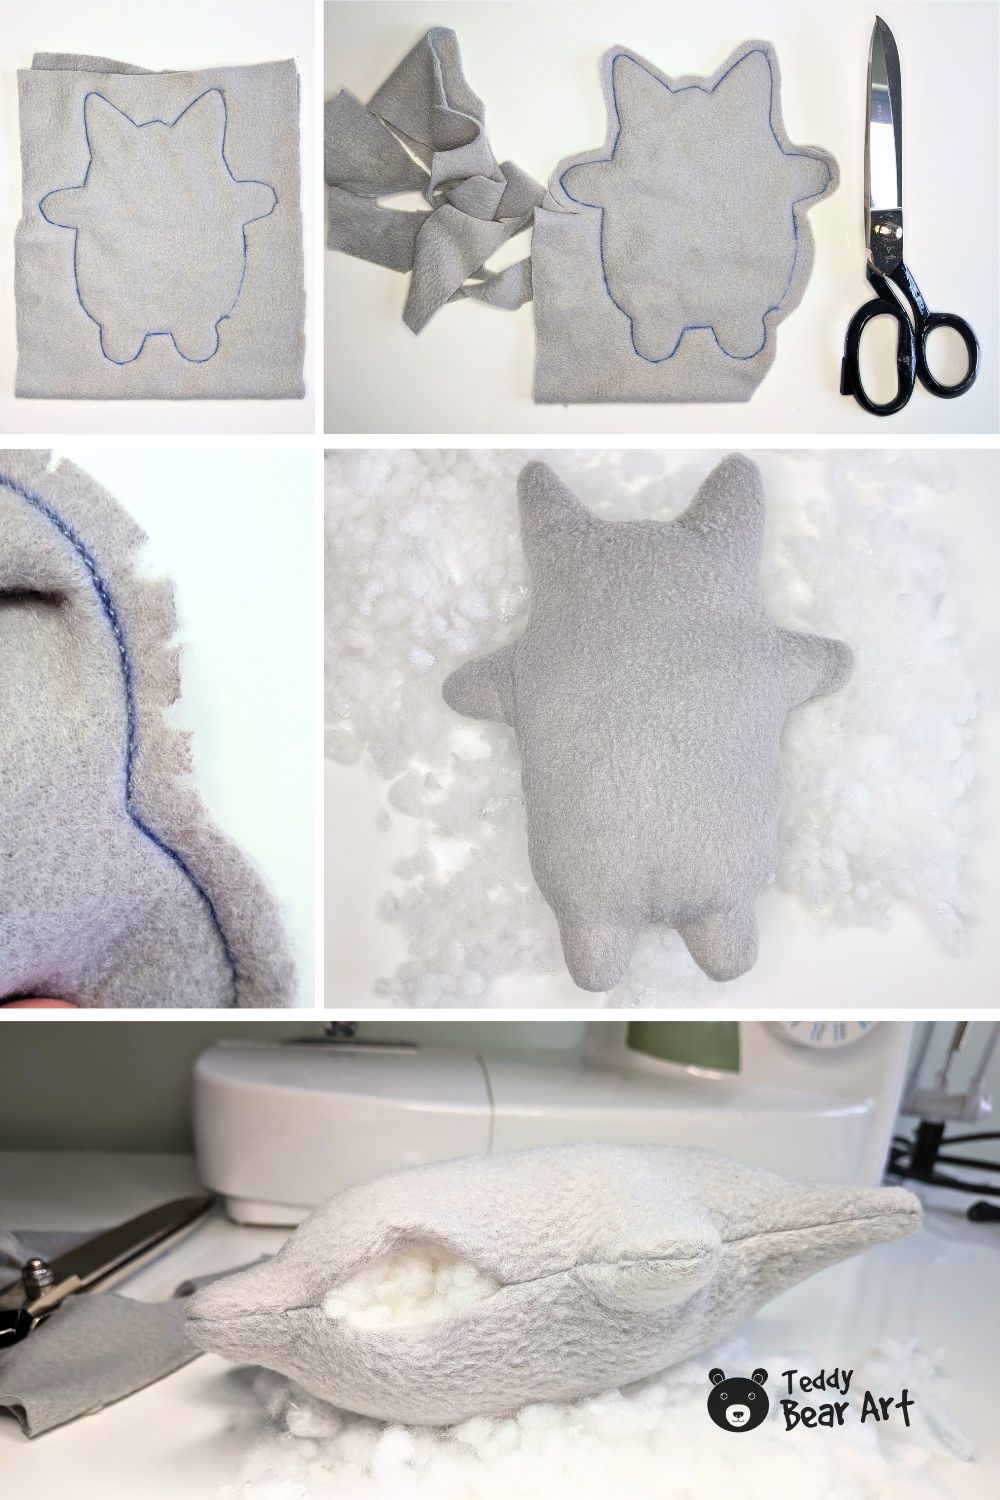
Turn the body right side out through the opening. Work slowly and pull out one section at a time.
Use a blunt turning tool to shape the ears, arms, and legs. Avoid pressing sharply against the seams.
Add the stuffing in small pieces. Begin with the parts that are hardest to reach:
- Fill both ears
- Push stuffing into the ends of the arms
- Shape both legs
- Fill the top of the head
- Continue through the body
Stuff the cat moderately firmly. It should hold its shape and stand upright, but it should still feel soft.
Check the ears, arms, and legs from both sides. These smaller areas can look full from the front while still needing more stuffing at the back.
Once the shape looks even, close the opening with a ladder stitch. Fold the raw edges inward, make small alternating stitches along both sides, and gently pull the thread until the seam closes.
You can see the full technique in my ladder stitch tutorial.
Fold the fleece in half and trace the tail pattern.
Pin the layers together, then sew directly along the traced line. Leave the marked opening unstitched.
Cut out the tail and make small clips around the entire perimeter. Pay particular attention to the inner curve.
Turn the tail right side out. Begin at the wider end and gently work the fabric through the opening. A blunt turning tool can help you shape the narrow curved section.
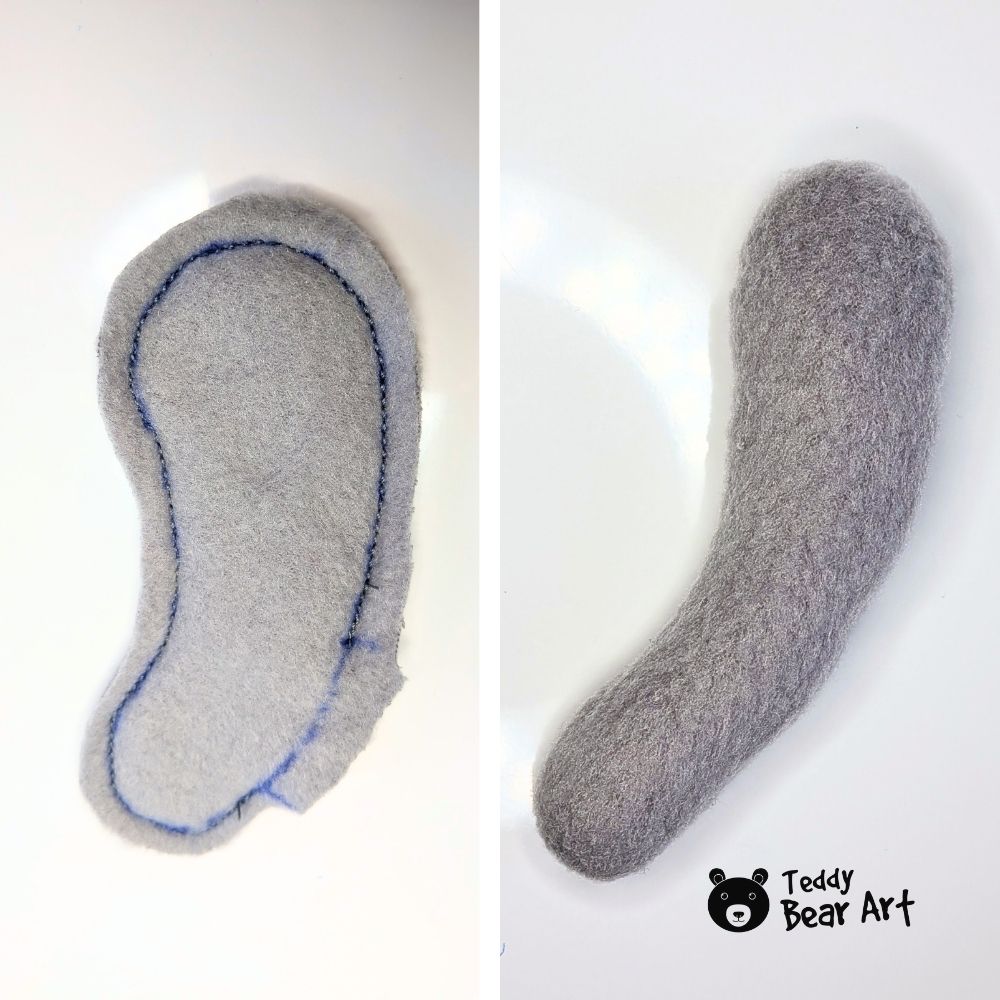
Add stuffing in small amounts and distribute it through the full length of the tail. Use your fingers to smooth the curved outline and remove any empty areas.
Close the opening by hand.
Choose a suitable position on the back of the cat and pin the tail temporarily. Look at the toy from the front, side, and back before attaching it permanently. The curved end should remain visible beside the body without stopping the cat from standing securely.
Sew the base of the tail firmly to the back with matching thread. Make several small stitches around the base, then hide the knot inside the body.
The felt garland is small, but it turns this very simple cat into a memorable little character.
Cut four small triangles from felt. I used two pink flags and two cream flags.
Cut one heart from dark pink or raspberry-colored felt.
Arrange the pieces in this order:
H U G ? ♥
Write one character on each triangle with a black marker. I used a permanent marker designed for labeling discs.
You can also use:
- A thin drawing marker
- A gel pen
- Black embroidery thread
Test the marker or pen on a scrap of felt first. Some inks spread through the fibers and make the letters look thicker than expected.
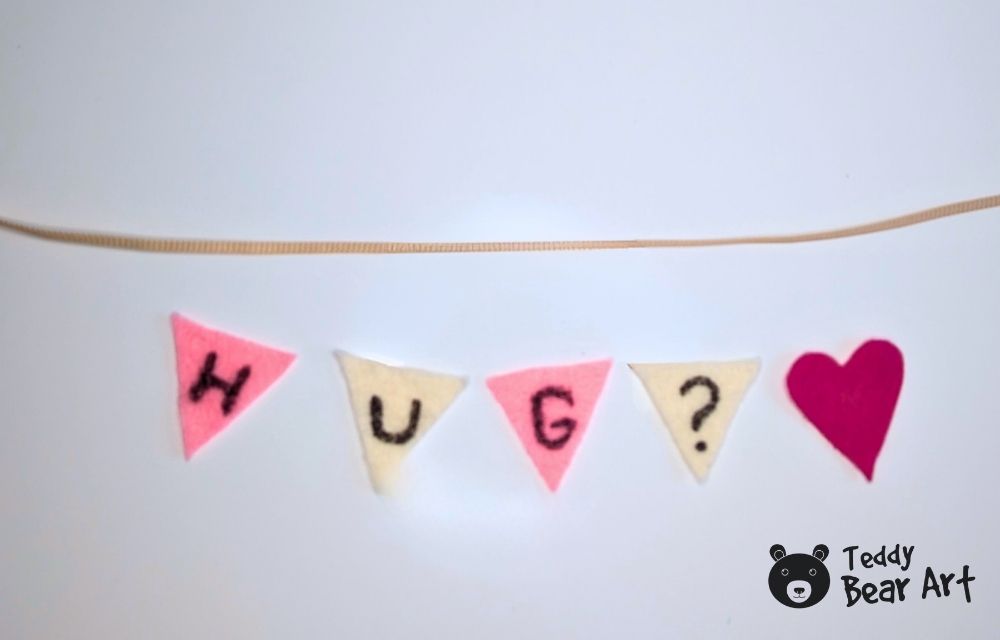
Cut a piece of thin ribbon or cord long enough to reach from one paw to the other, leaving a little extra at both ends.
Arrange the flags beneath the ribbon. Alternate the pink and cream colors, then place the heart at the end.
Glue the top edge of each felt piece to the ribbon. Leave the garland lying flat until the glue has dried completely.
Now we can finish the face.
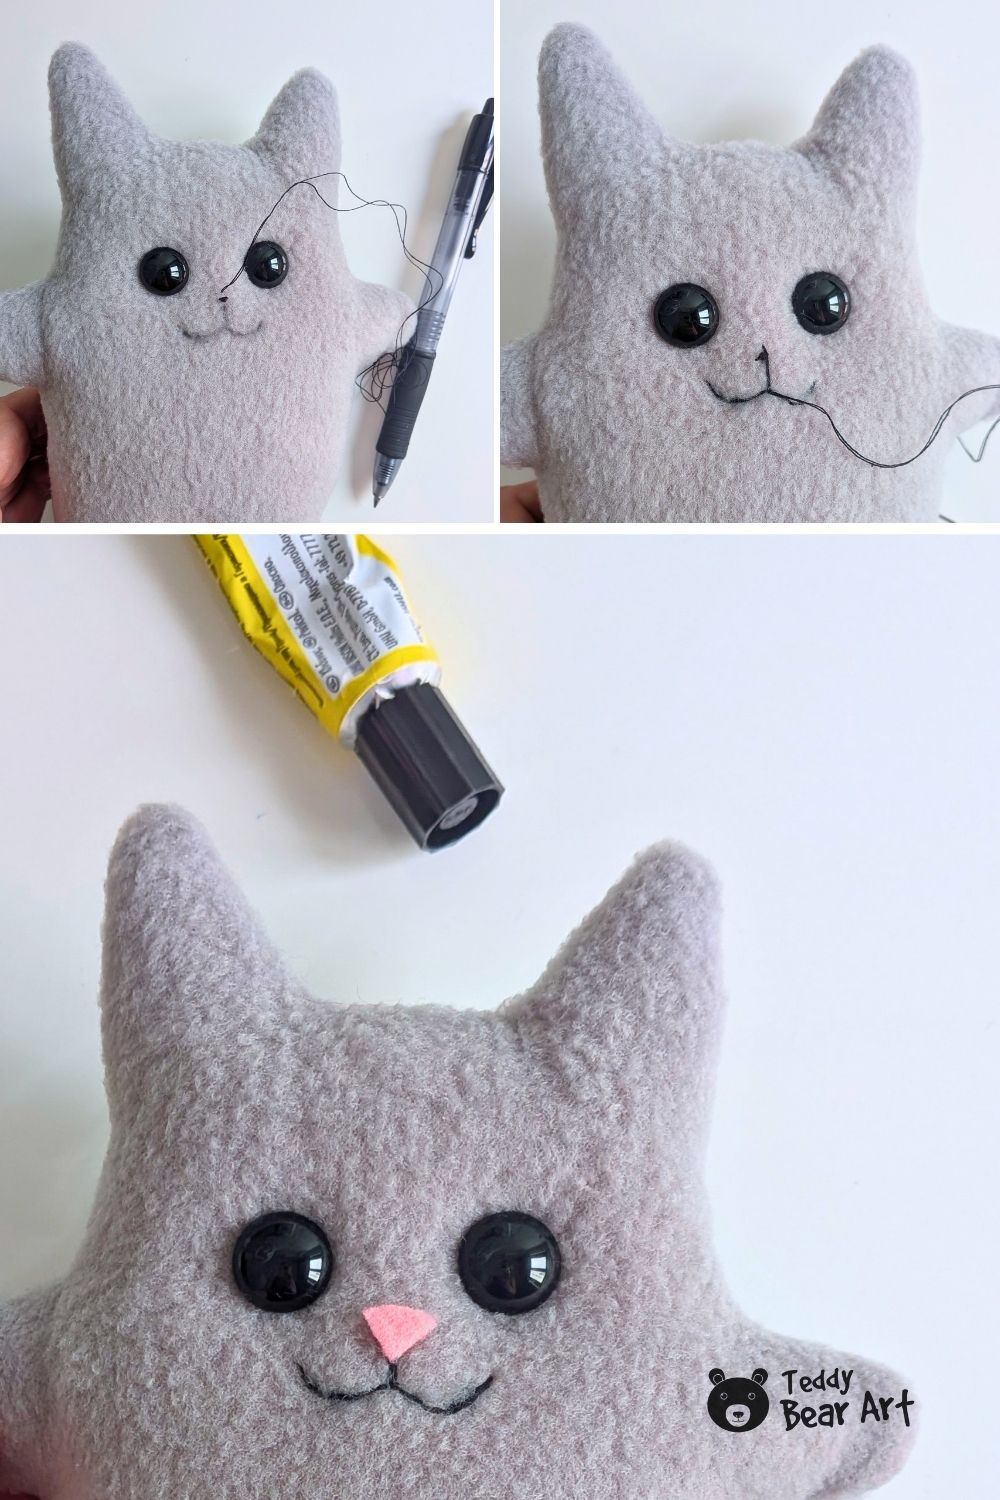
Choose the eye position before attaching anything. Place both eyes on the face and check that they are level and evenly spaced.
If you are using safety eyes, install them before stuffing the body.
Insert glass eyes with metal loops into the marked positions. Beads and craft eyes can be attached according to their type.
Embroider the mouth with black thread. Begin with a short vertical stitch below the future nose position. Add one gentle curved line on each side.
Keep the curves small and relaxed. A tiny change in their angle can make the cat look cheerful, shy, or slightly mischievous.
Cut a small triangle from pink felt and glue it above the embroidered mouth.
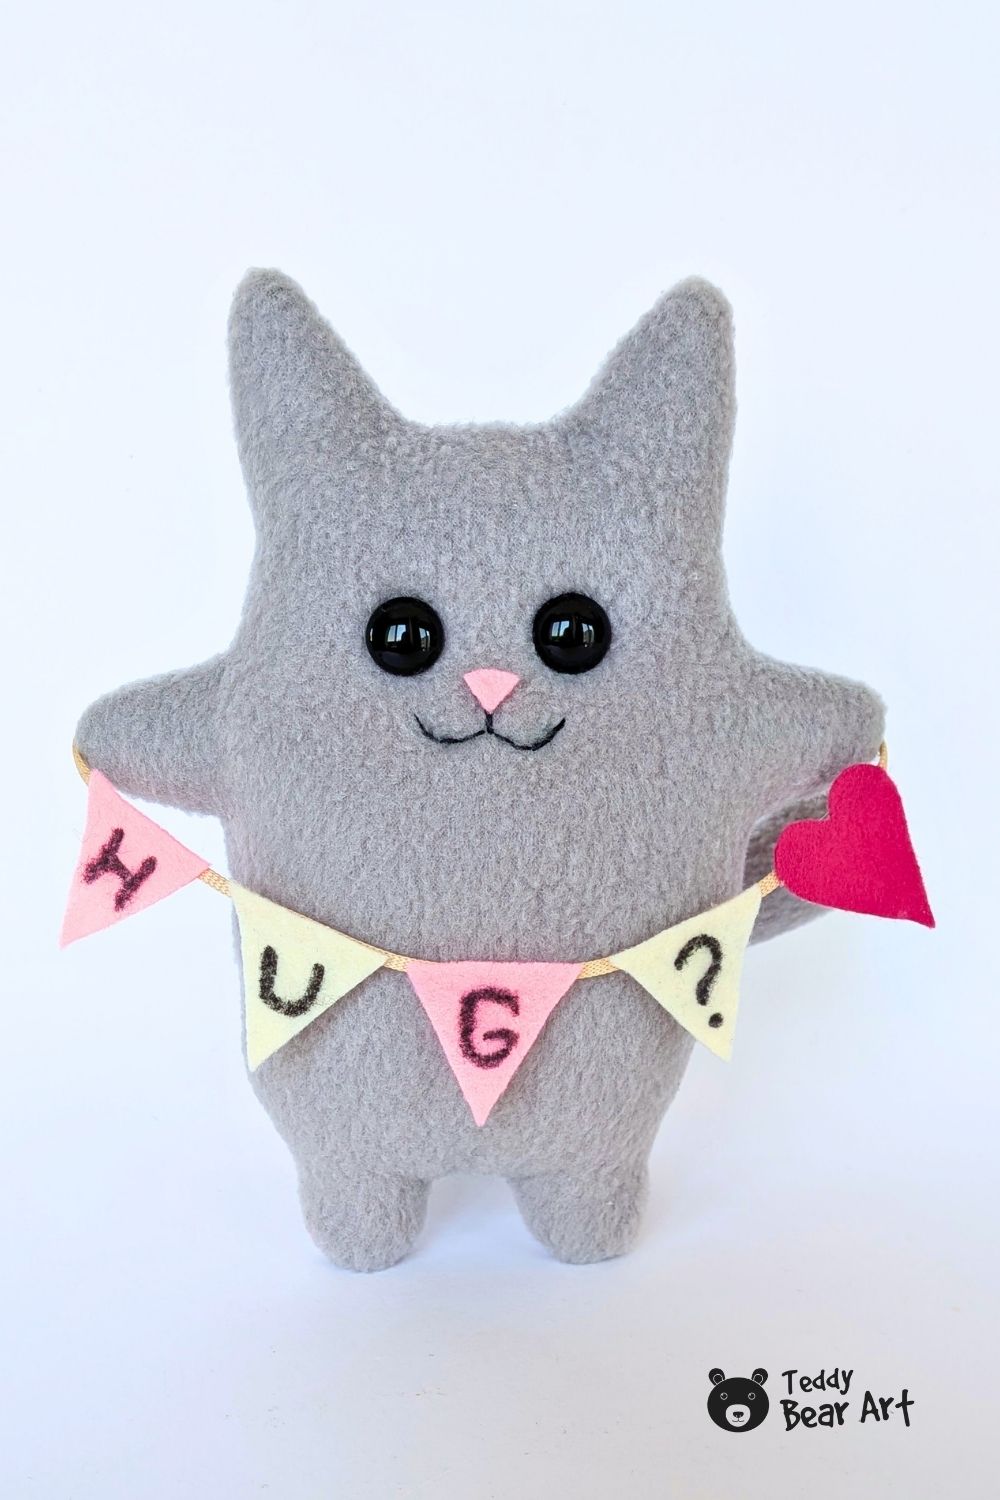
Place the finished garland across the cat’s front. Let the ribbon form a shallow curve, with the central flag hanging slightly lower.
Attach both ends to the paws with glue or a few small hand stitches.

The garland gives the open paws a clear purpose and makes the simple fleece shape feel much more expressive. The cat now looks as though it is holding out a small invitation for a hug.
Frequently Asked Questions
Can I sew this cat completely by hand?
Yes. Use small backstitches for the body and tail seams. Keep the stitches close together, especially around the ears, arms, and legs.
How firmly should I stuff the cat?
Use a medium amount of stuffing. The cat should hold its shape without becoming hard.
Pay extra attention to the ears, arms, and legs because empty areas are more noticeable there. Add the filling gradually and check the toy from several angles as you work.
When should I install safety eyes?
Install safety eyes after sewing and turning the body, but before adding the stuffing. Their locking washers must be attached from inside.
Glass eyes, beads, and craft eyes can be added later.
Can I use a different fabric?
Fleece is soft, easy to turn, and forgiving around curves. It is a good choice for this beginner-friendly pattern.
You can also try felt, minky, or short-pile plush. Felt will create a flatter and firmer shape. Minky and plush may shift more while sewing, so secure the layers carefully with pins or clips.
Before You Go
This simple cat is easy to personalize. Change the fleece color, move the eyes slightly closer together, alter the shape of the mouth, or design a new garland for a birthday, holiday, or handmade gift.
The HUG? message feels playful without becoming overly sweet or predictable. It also turns the wide open paws into the most recognizable part of the design.
Save the free pattern for your next sewing afternoon and create your own soft fleece cat, always ready to offer a hug.
Looking for a tiny friend for your cat? Sew this free fleece mouse with oversized pink ears and a long soft tail:
You may also enjoy sewing this easy fleece goose, another beginner-friendly plush made with a free pattern and simple steps.
Get Free Patterns & Be the First to Know!
Want free teddy bear patterns, exclusive tutorials, and a chance to win craft supplies?
Sign up for our newsletter using the subscribe form in the middle of this article to receive new patterns, insider tips, and the latest news on teddy bear art. You’ll also automatically be entered into our annual giveaway for a chance to win teddy bear crafting materials.
Bonus entry: Save one of our pins on Pinterest to increase your chances of winning!
Let’s create, inspire, and craft beautiful teddy bears together!
I already downloaded your mouse pattern with the huge ears, and now I’ve found this cat too. This is absolutely amazing, I’ve never seen anything quite like it! Now I have an idea to make them as a little pair of friends. Thank you so much for sharing your patterns. I’m a big fan of your work!
Thank you so much! You could also give the mouse a little heart, flower, or tiny accessory to make the pair even more special.
This little cat is absolutely adorable! I love how simple and beginner-friendly the pattern is, and the “HUG?” detail is such a sweet touch. I also really appreciate that the tutorial breaks the steps down clearly, especially for someone who doesn’t sew very often. The fleece makes it look so soft and cuddly too. Thank you so much for sharing the free pattern. I can’t wait to make one.
You are welcome! Happy sewing!
Hello Hanna,
This little cat is adorable, and I think the part I would have the most fun with is actually personalizing it for whoever I was making it for. Instead of always using “HUG?” on the garland, I could see changing it to “LOVE,” or even something like “BF” for a best friend. I’d probably change the fleece and accent colors to match the person too.
I also like that the actual construction isn’t overly complicated. Having the body as one main piece makes this feel much more approachable, especially for someone who sees a cute plush like this and immediately assumes there must be a ton of separate pieces to sew together.
Have you experimented with other little messages or items for the cat to hold? I could see this being really cute personalized for birthdays, holidays, or other occasions too.
Angela M 🙂
Hi Angela,
Thank you! I completely agree that this little cat is perfect for personalizing. The garland is such an easy detail to change.
I haven’t experimented with many different messages yet, but I really like the idea of adapting the cat for birthdays or holidays. Instead of a garland, it could even hold a tiny felt heart, flower, gift, or another small accessory.
And yes, keeping the body as one main piece was intentional. I wanted the pattern to stay simple and approachable while still giving plenty of room for creative details.
Hanna