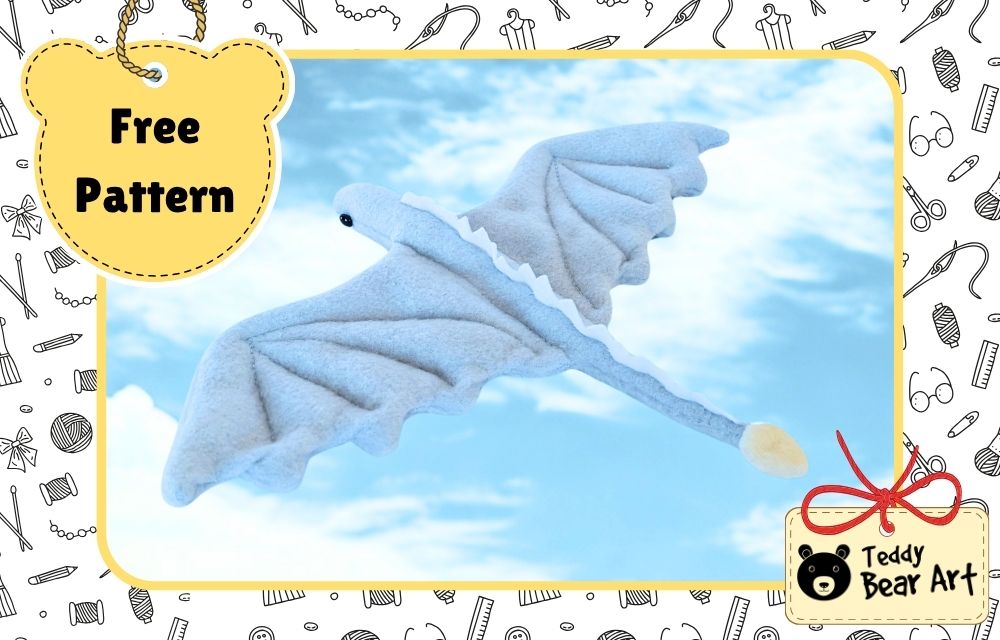
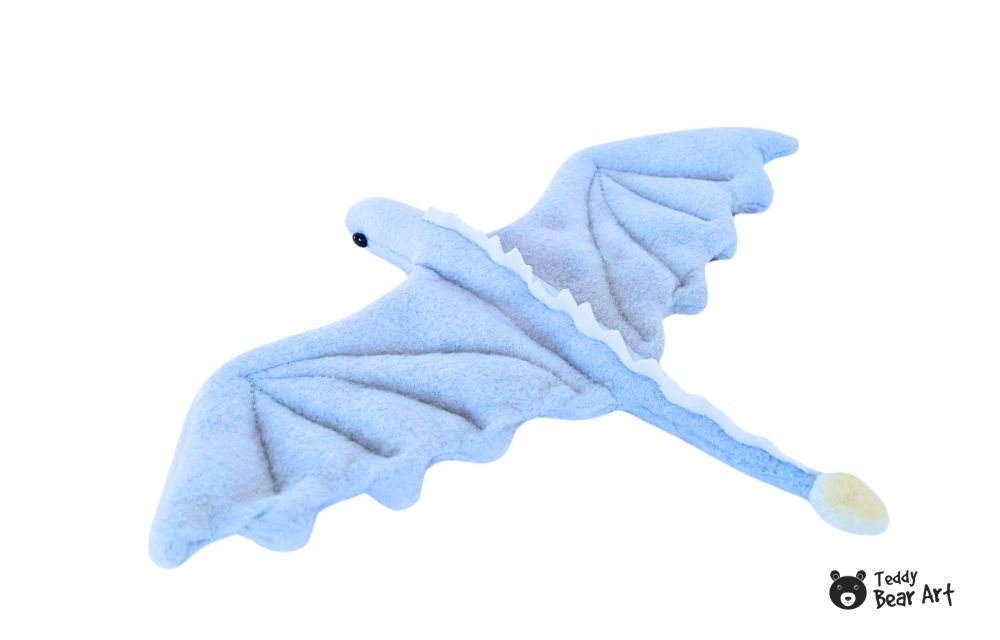
This dragon sewing pattern free project is a simple and clean design that’s surprisingly satisfying to sew. It uses a minimalist shape, soft fleece fabric, and an easy construction process, making it a great choice if you want a stress-free plush sewing project that includes a printable pattern. Perfect for beginners!
Download the Pattern
Notice that seam allowances are not included. For this project, it is fine to include 5 mm for seam allowances.
To download the pattern, follow the instructions below:
From a phone or tablet: There should be a similar option for mobile devices with Android or iOS. Click on the image. Save it by holding your finger on the image and selecting the “Save Image” option. Then, go to your photo gallery and print it (an option available).
From a computer: Click on the photo of the pattern you see below. In the new tab that will open, you press the right mouse button and select the “Save image as …” option. Then, you choose where the image will be saved on your computer.

Materials
- Fleece fabric
- Felt fabric for spikes along the back
- Polyester stuffing (polyfill)
- Beads for eyes
- Matching sewing thread and a needle
- Sissors
How to Sew an Easy Dragon Plush
Start by placing your two fabric pieces right sides together. Pin them carefully so nothing shifts, especially around the wings. Sew all the way around the shape, leaving a small opening for turning.
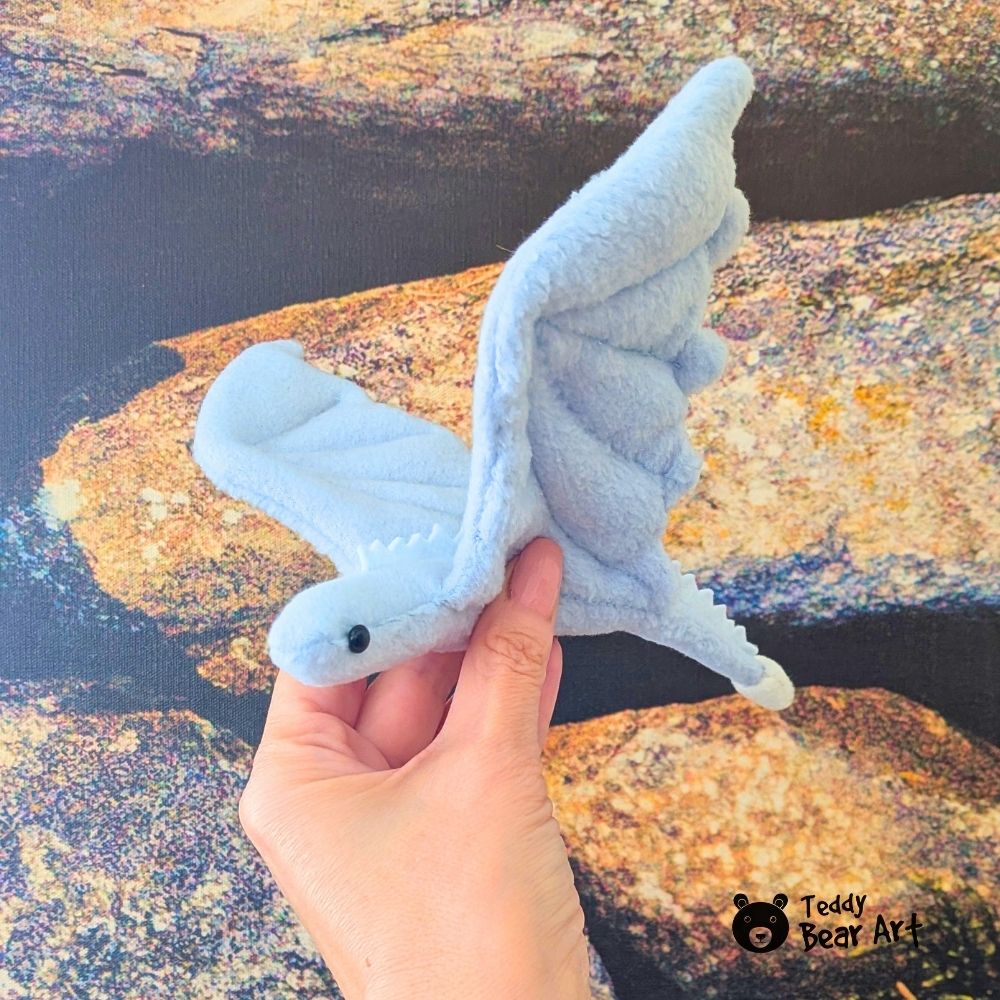
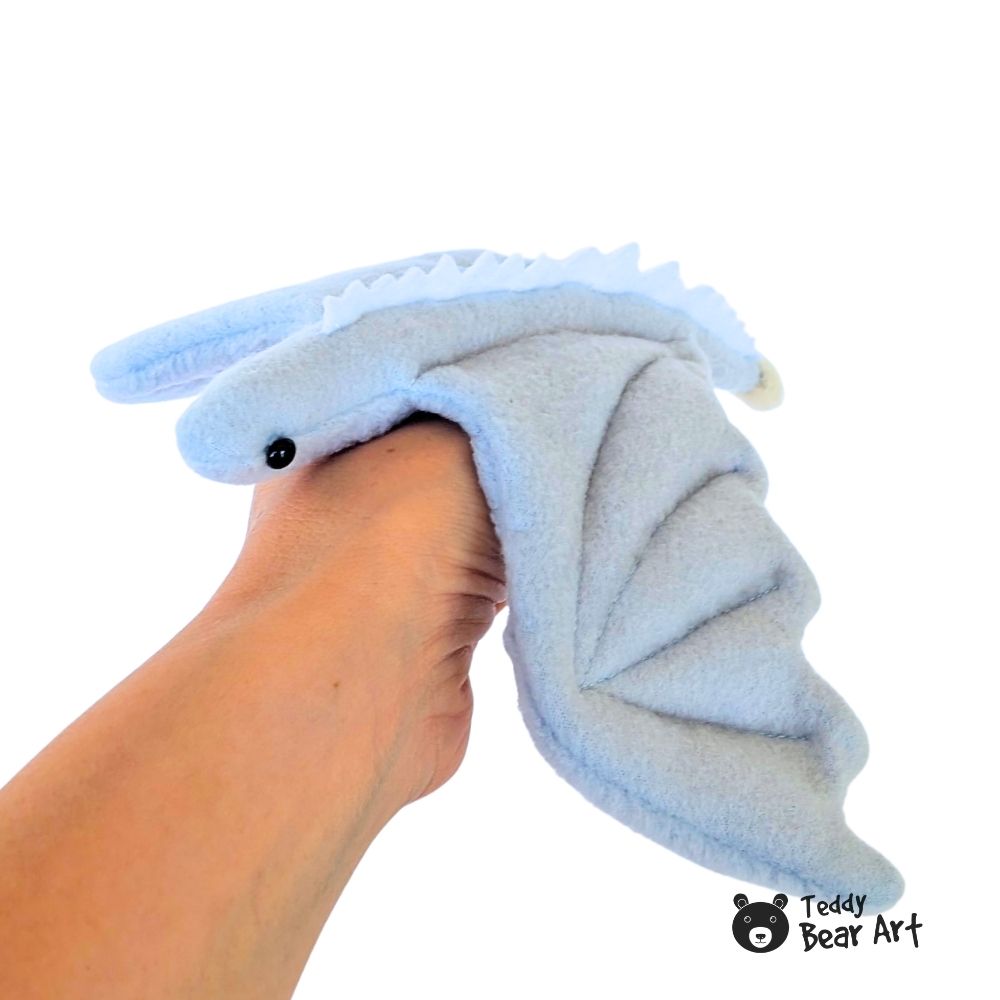
Once sewn, turn the dragon right side out. Take your time here. Gently push out the wing tips and tail so everything looks neat and defined. This step makes a big visual difference in the final result.
Now comes the part that gives this dragon its structure. Begin stuffing one wing. Add small amounts of fiberfill and spread it evenly so there are no lumps. When you’re happy with the shape, sew two lines across the wing to create the membrane effect. You can use a sewing machine for clean lines, but hand stitching works just as well if you prefer a slower pace.
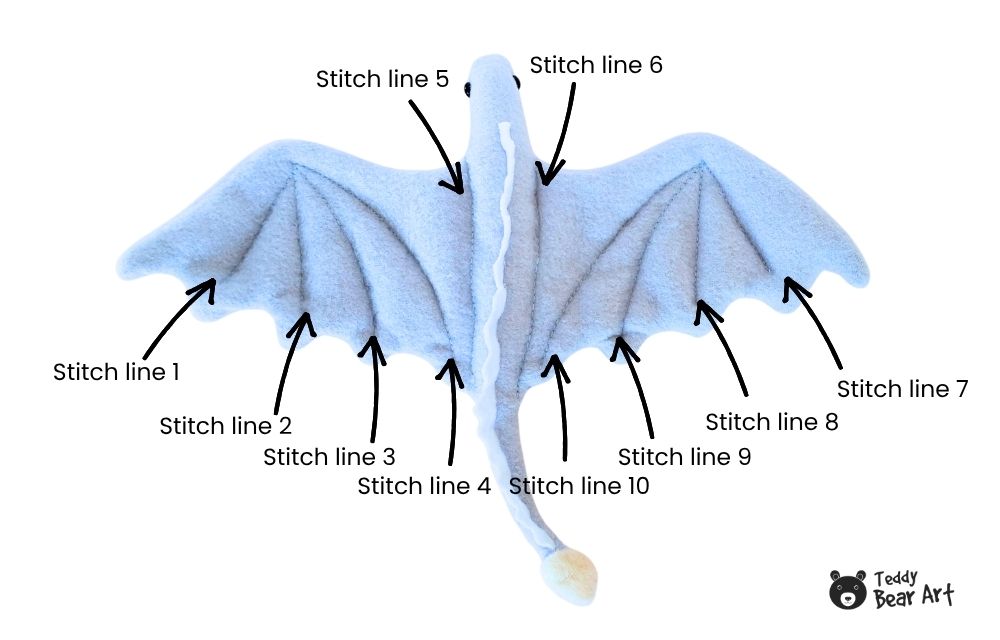
Next, define the body. Sew a line from the head down to the tail. This separates the first wing from the body and gives the dragon that minimalist sculpted look.
Continue by stuffing the body. Don’t rush this step. Add filling gradually and shape it with your fingers. Once the body feels balanced, sew another line on the opposite side to separate it from the second wing.
Now fill the second wing in the same way as the first. Again, keep the stuffing even, then sew two membrane lines to match the other side.
Close the turning opening with small, neat stitches. Try to keep this seam invisible so the finish looks clean.
Finally, add the details. Sew on the bead eyes, placing them slightly forward for a more expressive look. If you want to give your dragon a bit more character, cut from felt and sew spikes along the back and the tail tip made of fleece. This adds texture and a subtle decorative touch without making the design complicated.
Tips for a Clean Minimalist Look
This pattern works best when you keep everything simple and controlled. Fleece is a great choice because it’s soft, forgiving, and doesn’t fray, which makes it easier to handle.
Avoid overstuffing the wings. They should feel light and slightly flexible, not rigid. The body can be firmer, but still soft enough to keep that plush feel.
Straight stitching lines are key to the aesthetic. Even if you sew by hand, take your time and keep your lines smooth. These small details are what turn a simple project into something that looks intentional and polished.
You can also experiment with colors. Light grey, dusty blue, or even muted green tones give a modern look, very different from the typical “cute” plush style.
Questions You Might Have
Can I sew this dragon by hand only?
Yes, absolutely. Every step can be done by hand, just use small, even stitches for the best results.
What fabric works best besides fleece?
Felt and soft cotton can work, but fleece is the easiest, especially for beginners.
Can I make a larger version?
Yes, just scale up the template when printing.
Before You Go
This is one of those projects you’ll want to repeat. Once you’ve made one dragon, it’s hard to stop. Try different colors, adjust the size, or experiment with details to make each one unique.
If you enjoyed this tutorial, save it in your bookmarks so you can easily come back to it later. It’s a quick, relaxing project that’s perfect whenever you feel like creating something simple and satisfying.
You may also like this easy project – the dinosaur:
Get Free Patterns & Be the First to Know!
Want free teddy bear patterns, exclusive tutorials, and a chance to win craft supplies?
Sign up for our newsletter using the subscribe form in the middle of this article to receive new patterns, insider tips, and the latest news on teddy bear art. You’ll also automatically be entered into our annual giveaway for a chance to win teddy bear crafting materials.
Bonus entry: Save one of our pins on Pinterest to increase your chances of winning!
Let’s create, inspire, and craft beautiful teddy bears together!
This is such a wonderful tutorial! I’ve always been intimidated by dragon patterns because the wings and tails can be so complex, but your step-by-step breakdown makes it feel so achievable. Using fleece is such a smart recommendation for beginners, it’s so forgiving and hides those little hand-sewing stitches perfectly.
I really appreciate you sharing the free template. It’s rare to find a pattern that captures the “magical” look of a dragon while still being simple enough for a weekend project.
Thanks for the inspiration!
Thank you so much for your kind words! I’m really happy to hear that the tutorial made dragon sewing feel more approachable. That was exactly my goal: to keep the magic but remove the overwhelm.
Fleece really is such a beginner-friendly fabric, and it’s great for hiding small imperfections while still giving a soft, cuddly finish. I’m glad you noticed that too!
This is such a lovely beginner-friendly tutorial! Everything is explained in a calm and easy way, without making the project feel too complicated. I especially like that the plush is made with simple construction, but still looks neat, modern, and not childish at all. The stuffing and stitching tips are really helpful too, because those little details make such a big difference in the final shape and finish. Huge thank you for sharing this tutorial!
You are very welcome! Happy dragon sewing!