The first time I tried to sew a simple plush toy, I remember choosing something way too complicated and getting stuck halfway through. That is exactly why I love this project so much. If you are looking for how to sew a dinosaur plush that actually feels easy and achievable, this one is a great place to start.

This soft little dinosaur is made from fleece, has a clean shape, and uses only a few pattern pieces. It comes together quickly, and even if your stitches are not perfect, the fabric helps hide small imperfections. You end up with something cute, soft, and honestly quite addictive to make.
It is also a fast project. You can finish one in a relaxed afternoon, which is perfect if you want a quick win or a small handmade gift. And once you make one, you will probably want to try different colors or sizes right away.
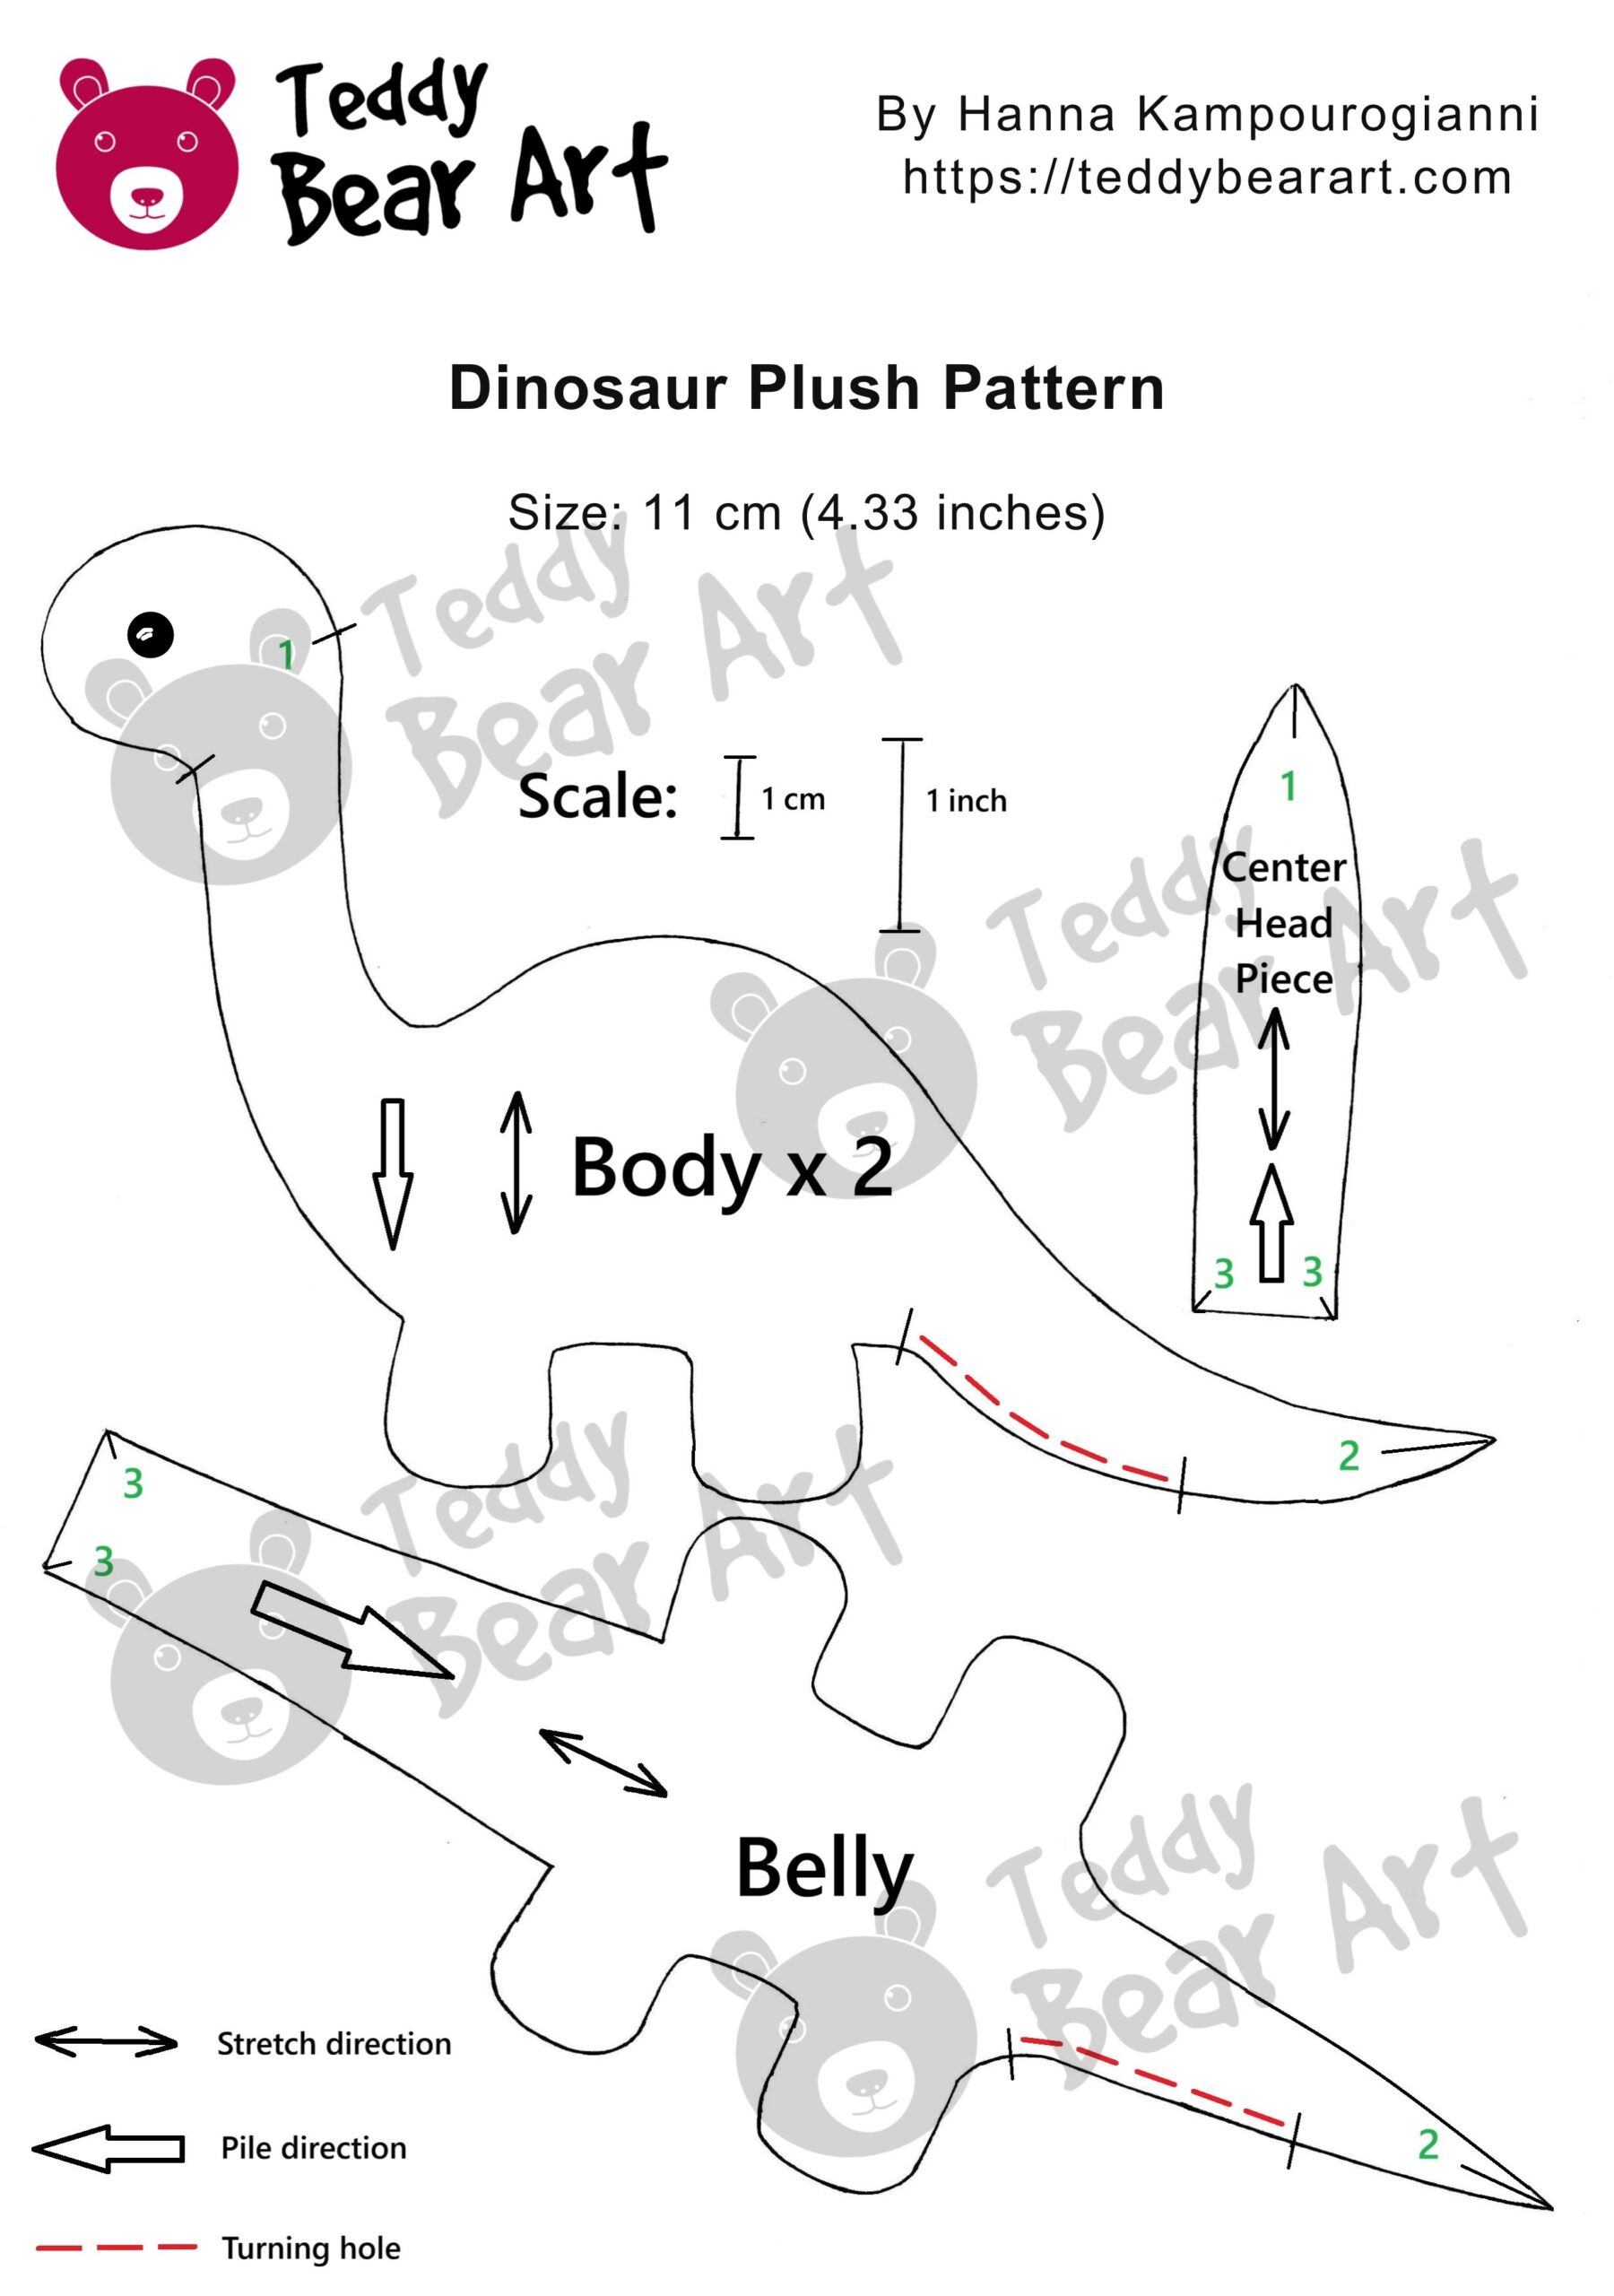
Download the Pattern
Notice that seam allowances are not included. For this project, it is fine to include 5 mm for seam allowances.
To download the pattern, follow the instructions below:
From a phone or tablet: There should be a similar option for mobile devices with Android or iOS. Click on the image. Save it by holding your finger on the image and selecting the “Save Image” option. Then, go to your photo gallery and print it (an option available).
From a computer: Click on the photo of the pattern you see below. In the new tab that will open, you press the right mouse button and select the “Save image as …” option. Then, you choose where the image will be saved on your computer.
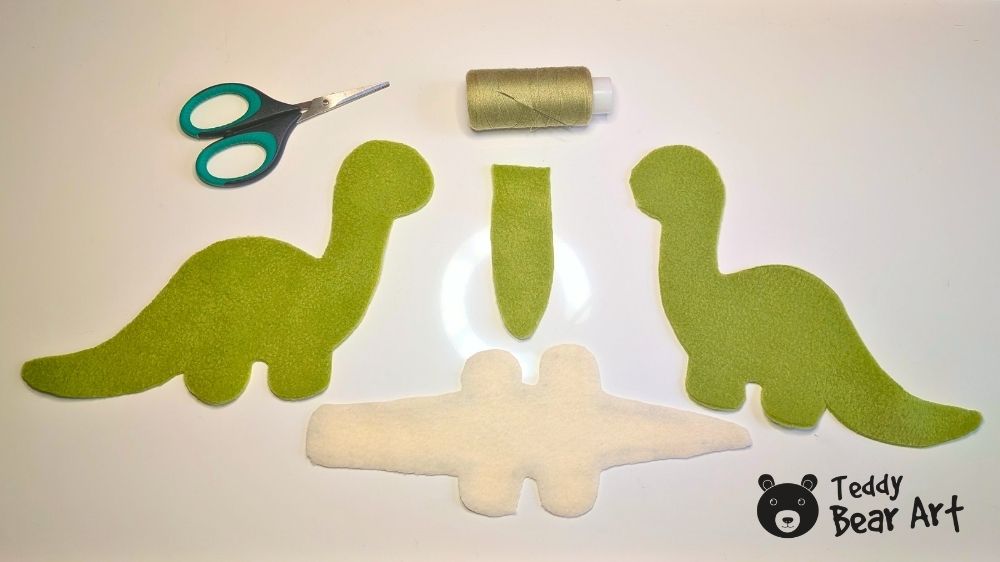
Materials
- Fleece fabric (main color)
- Fleece fabric (optional contrast for belly)
- Polyester stuffing (polyfill)
- Black beads (6–8 mm) for eyes or embroidery thread
- Matching sewing thread and a needle
- Sissors
How to Sew a Dinosaur Plush
Transfer the pattern pieces onto your fleece, following both the stretch direction and the pile direction shown on the pattern. This step really matters, it helps the plush keep its shape and gives a smoother, more professional finish.
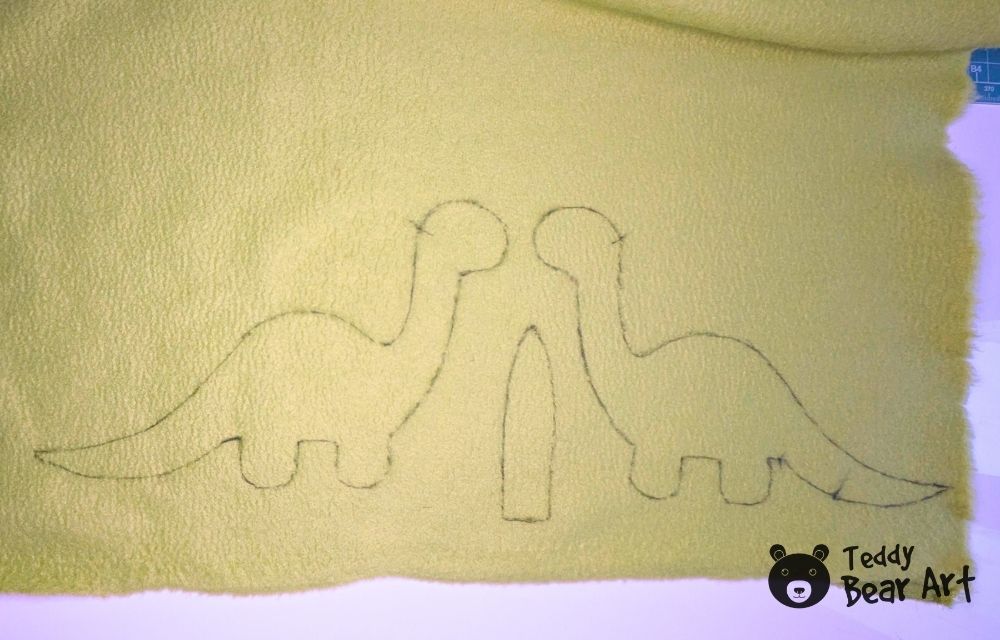
Cut out all the pieces, adding about 0.5 cm seam allowance around each one.
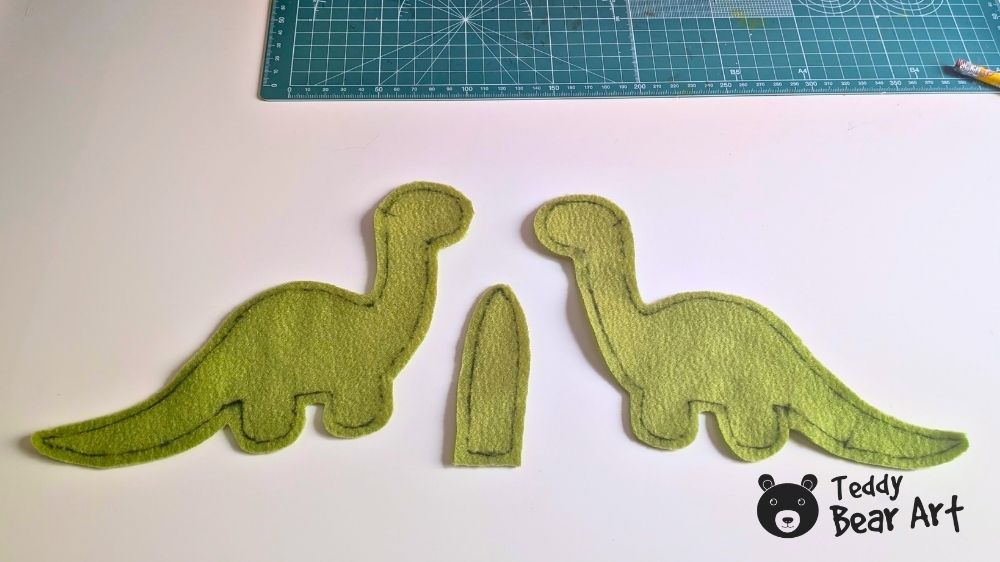
Start by sewing the two mirrored body pieces together along the marked lines from point 1 to point 2.
Next, take the belly piece and the center head piece and sew them together, matching the markings at point 3.
Now attach this combined section to the already sewn body pieces. Stitch from point 1 to point 2, and make sure to leave a small opening for turning and stuffing.
Turn the plush right side out, using a wooden stick or similar tool to gently shape the neck and tail.
Fill the toy with polyester stuffing, shaping it as you go. Once you are happy with the form, close the opening with a neat hand stitch.
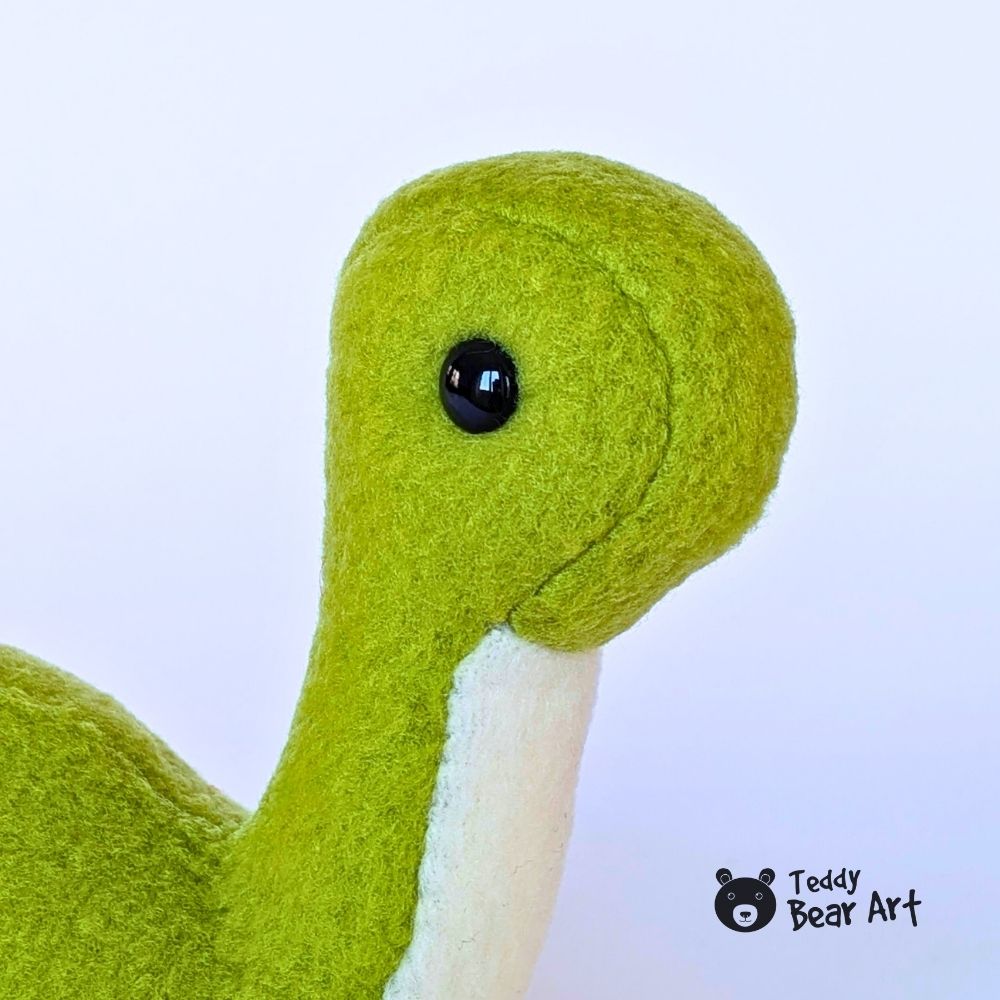
Finish by attaching the eyes, using black beads or your preferred method.
Tips, Mistakes, and Creative Ideas
Take your time around curves. Slow stitching gives you better control and cleaner shapes. Small cuts into the seam allowance along curves help the fabric turn smoothly without pulling.
Do not overstuff the neck area. It is tempting to make everything firm, but a slightly softer neck looks more natural and helps the shape stay balanced.
Watch the placement of the gusset. If it shifts too much while sewing, the head can look uneven. Pinning carefully before stitching really helps here.
Once you are comfortable with the basic version, you can start playing with variations. Try different fleece colors, add tiny spots or stripes, or make a smaller version as a keychain. You can also experiment with embroidered eyes for a softer, more handmade look.

FAQ
Is this dinosaur plush really beginner-friendly?
Yes, the pattern is designed with simplicity in mind. The small number of pieces makes it much easier to follow than more complex plush designs.
Can I use a different fabric instead of fleece?
You can, but fleece is recommended because it is easier to handle and gives a softer finish. Cotton fabric works too, but it requires more precision.
Do I need a sewing machine?
No, you can sew this plush entirely by hand. A machine will make it faster, but it is not required.
What size should the eyes be?
Black beads around 6 to 8 mm work well, but you can adjust the size depending on the look you want.
Before You Go
Learning how to sew a dinosaur plush does not have to feel complicated. This design keeps things simple but still gives you a result that looks polished and charming.
It is one of those projects that builds confidence quickly. After finishing one, you will understand how plush shapes come together, and that opens the door to more creative ideas.
If you enjoyed this pattern, save this page to your bookmarks so you can come back to it later. It is also a great reference if you decide to make more versions or try new fabrics.
You may also like:
Get Free Patterns & Be the First to Know!
Want free teddy bear patterns, exclusive tutorials, and a chance to win craft supplies?
Sign up for our newsletter using the subscribe form in the middle of this article to receive new patterns, insider tips, and the latest news on teddy bear art. You’ll also automatically be entered into our annual giveaway for a chance to win teddy bear crafting materials.
Bonus entry: Save one of our pins on Pinterest to increase your chances of winning!
Let’s create, inspire, and craft beautiful teddy bears together!
I downloaded your dinosaur pattern to give it to my 11-year-old daughter so she can try sewing it herself. She already has basic sewing skills, she can handle simple projects and sew quite neatly, but she hasn’t made stuffed toys before. I really like how clearly everything is explained step by step in the article, it makes it feel much more achievable. Do you think a child of this age could manage this project without too much adult help, or are there any parts we should pay special attention to?
Thank you so much, I’m really happy to hear you liked the pattern! I think your daughter should be able to manage it quite well, especially since she already has some sewing experience. The project is designed with beginners in mind, and most steps are quite simple and easy to follow. She may need a little help at the beginning with cutting or some trickier parts, but overall, it’s a great way to build confidence. Just pay attention to the small details and the stuffing stage, as those usually need the most care.
This is a really great tutorial. I made the dinosaur over the weekend, and it turned out much better than I expected. I’m a beginner and sometimes get confused with steps, but here everything is explained in a way that you just follow along and don’t get lost.
Thank you so much for sharing such clear and free patterns, it really helps to get started and not be afraid to try something new.
Thank you so much for such a kind comment, it really means a lot ????
I also made this dinosaur from fleece and tried different colors, and each time it gives the toy a completely different feel. That’s exactly why I love simple patterns like this, you can experiment and create something new every time.
I’m really happy everything worked out for you and that it was easy to follow, that’s the most important thing for me.