
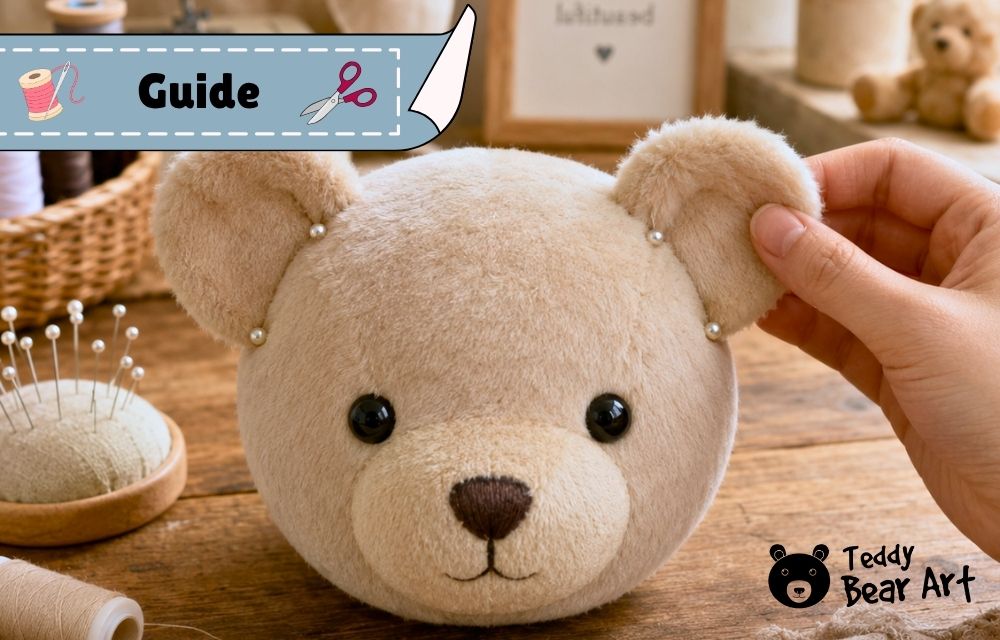

Learning how to place ears on a teddy bear is one of those small steps that can completely change the finished character. The same head may look young, curious, gentle, serious, or traditionally styled simply because the ears sit a little higher, lower, closer together, or farther apart.

Many makers concentrate on the eyes and nose, then attach the ears wherever the pattern seems to suggest. I prefer to treat ear placement as part of the facial design. Before sewing anything permanently, pin the ears in several positions and watch how the bear’s expression changes.
How to Place Ears on a Teddy Bear Before Sewing
Finish stuffing and shaping the head before deciding on the final ear position. An empty fabric head does not show its true proportions. Once the forehead, cheeks, and muzzle are firmly filled, the ears may need to sit higher, lower, or slightly farther forward than expected.
Start by finding the centre of the face. Use the centre head seam, nose, and space between the eyes as visual guides. These reference points help you position both ears evenly.
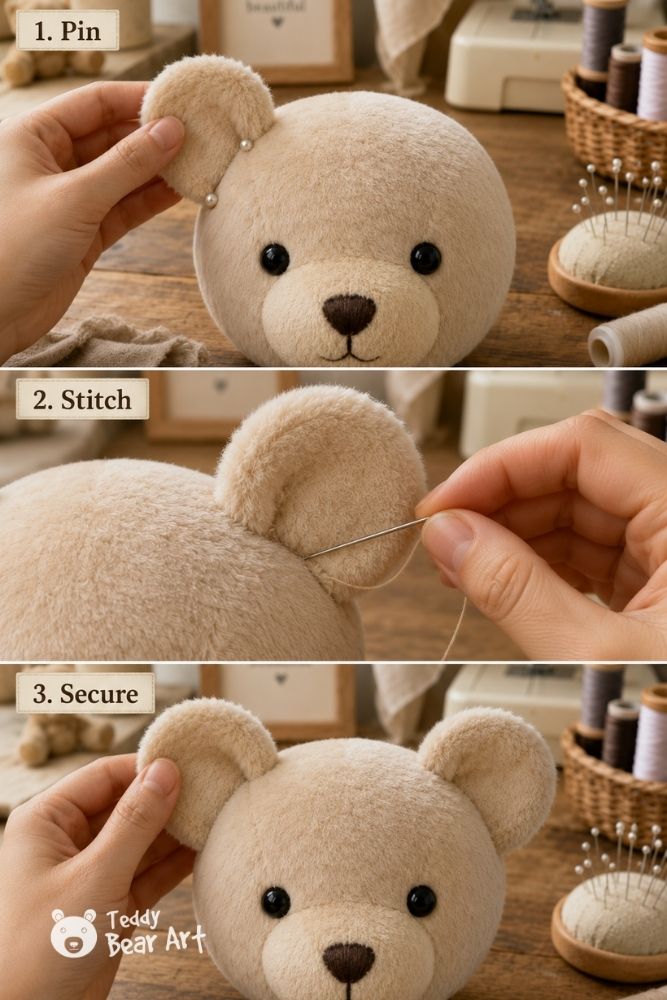
Pin each ear to the head using two or three pins across the base. One pin in the middle is rarely enough because the ear can rotate or lean backward without you noticing.
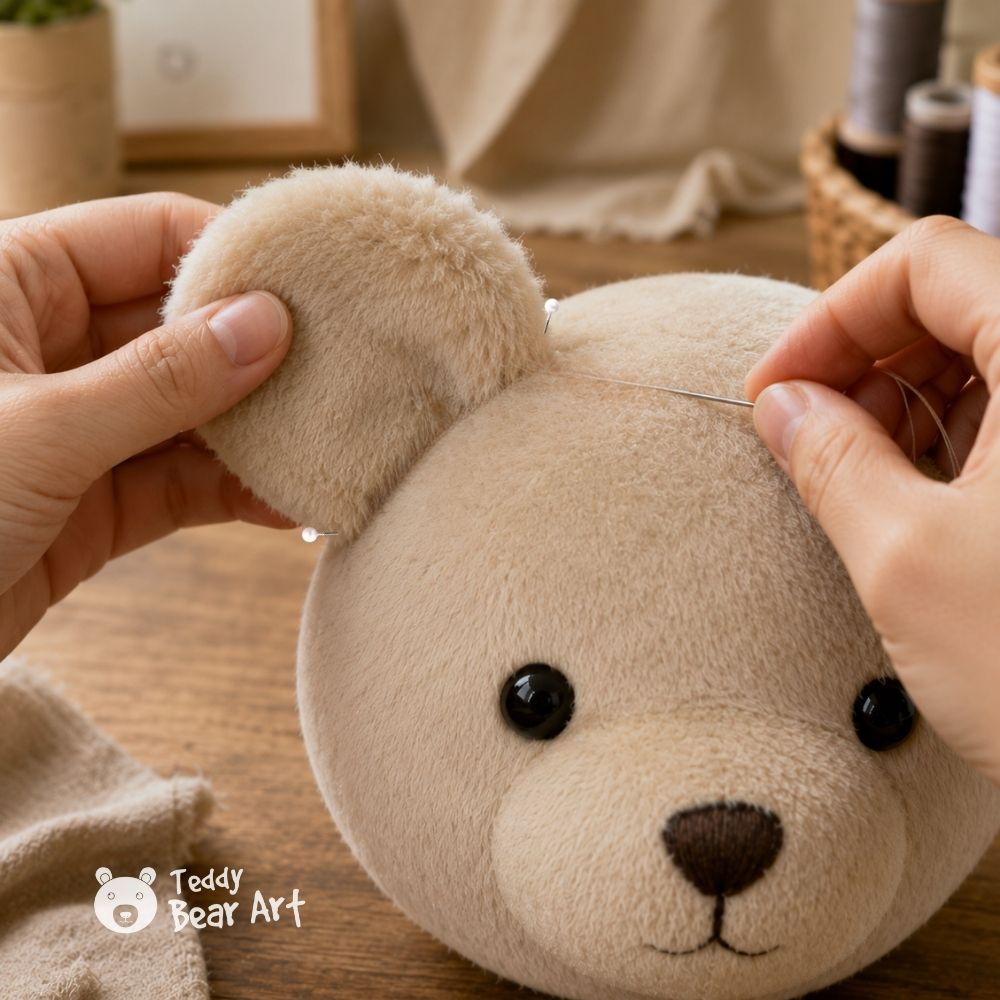
Now check the bear from several angles:
- directly from the front
- from both sides
- from slightly above
- from the back
- from a short distance away
The front view helps you compare the height and distance between the ears. The side view shows the angle. Looking from above makes it easier to see if one ear sits farther forward than the other.
Take a quick photograph of every position you like. When the pictures are placed next to each other, small differences become much easier to notice. Sometimes the position that looked perfect while holding the bear appears too high in a photograph.
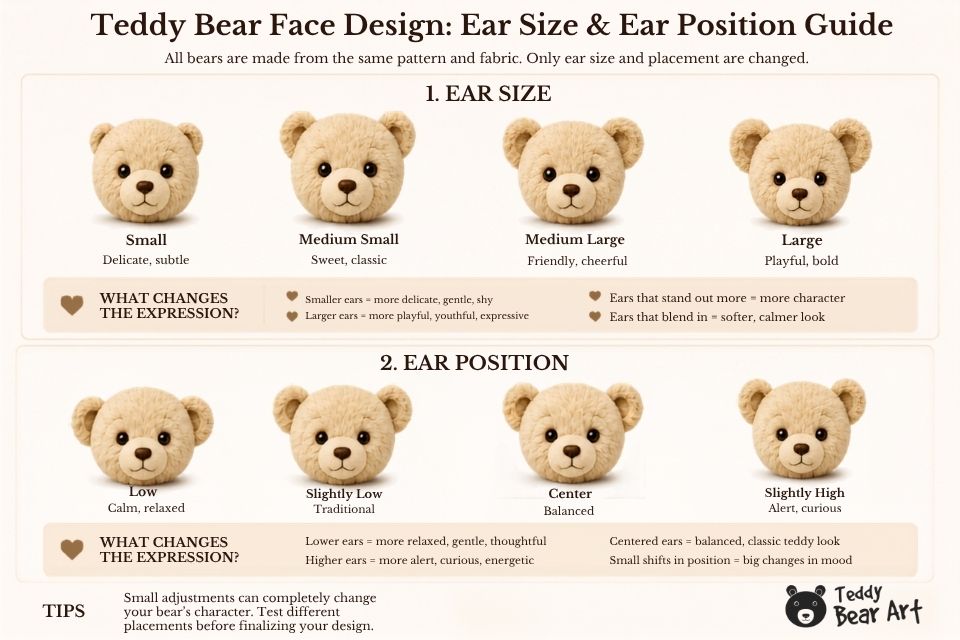
How Ear Position Changes a Teddy Bear’s Expression
There is no universal position that works for every teddy bear. The best choice depends on the head shape, muzzle length, eye placement, ear size, and the personality you want to create.
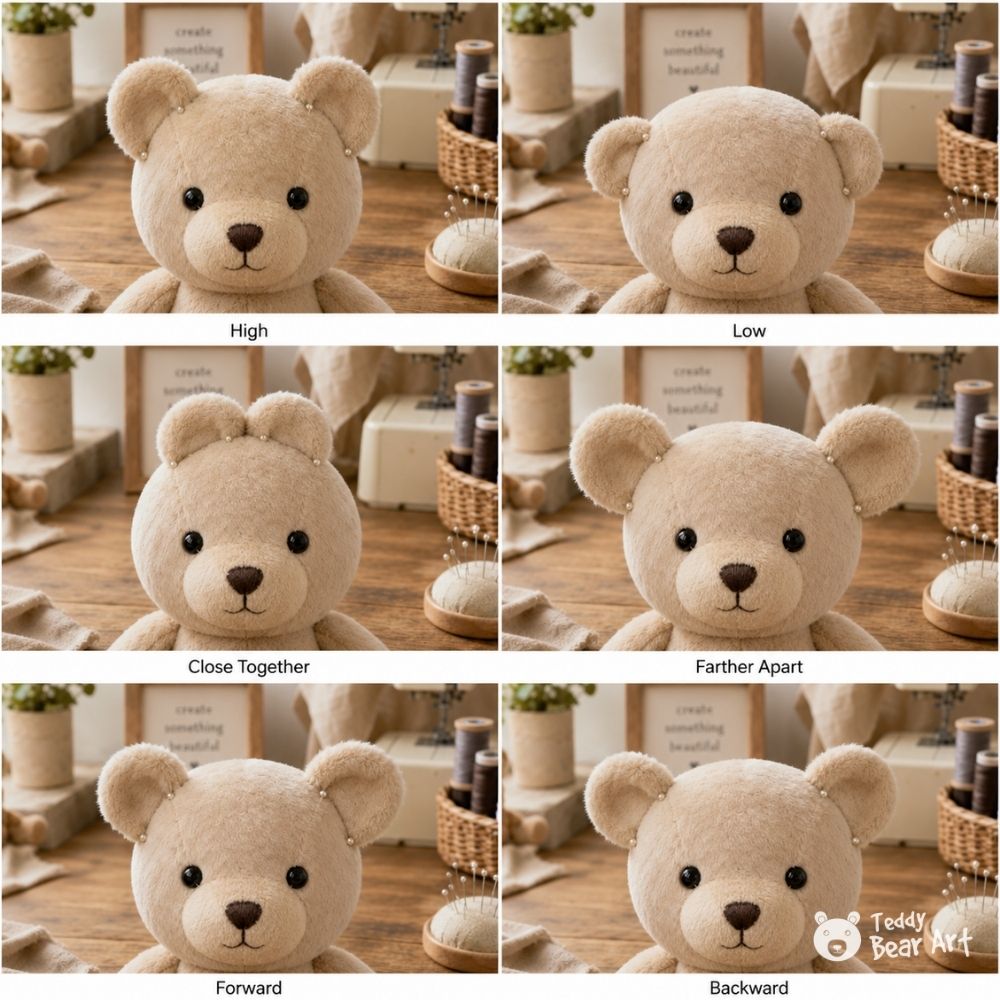
Ears placed high
High ears make a teddy bear look alert, young, and energetic. They work particularly well on playful characters with round heads, short muzzles, and larger eyes.
Avoid moving the ears too close to the top centre of the head. The bear may begin to resemble a mouse or another small animal.
Ears placed low
Lower ears create a softer and calmer expression. They can make the forehead appear wider and give the face a relaxed, slightly thoughtful look.
If the ears sit too low, the head may look flat or tired. Check that enough of each ear remains visible from the front.
Ears placed close together
A smaller space between the ears can make the bear look cute, youthful, and playful. This position is especially noticeable when the ears are large.
Move them gradually. Even a small adjustment toward the centre can change the whole silhouette.
Ears placed farther apart
Wide ear placement produces a more traditional teddy bear shape. It suits broader heads, longer muzzles, and classic artist bears.
When the ears sit very far apart, they may almost disappear from the front view. Turning them slightly forward can bring the inner ear back into view.
Ears angled forward
A gentle forward angle gives the impression that the teddy bear is listening. It often creates a curious, attentive, and lively expression.
This angle also shows more of the inner ear, which can be useful when you have added contrasting fabric or shading.
Ears angled backward
Ears turned slightly backward can make the character appear quieter, shy, or reserved. This position works best when the angle is gentle. Ears pressed completely against the sides of the head may look flat and unfinished.
Choosing the Right Ear Size and Shape
Ear placement cannot be considered separately from ear size. Large ears placed high create a very different character from small ears placed in the same spot.
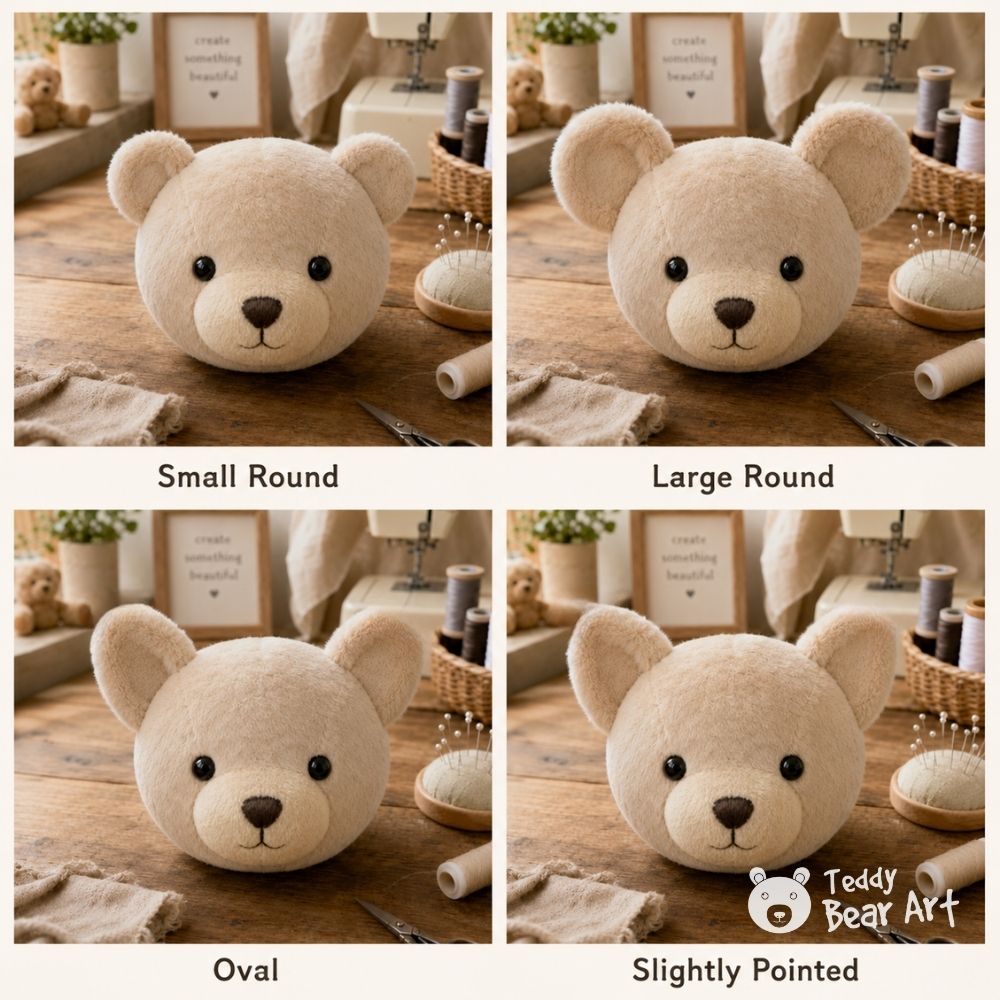
Small round ears usually look classic and understated. They suit traditional mohair bears and characters with longer muzzles.
Large ears add personality immediately. They can make a simple bear pattern look modern, playful, or slightly whimsical. Large ears also need stronger attachment because their weight can pull them downward.
Round ears create the most familiar teddy bear silhouette. Oval ears appear softer and slightly more natural. A lightly pointed shape can give an artist bear a distinctive character, but it may also move the design away from the traditional teddy bear look.
Fabric thickness matters too. An ear cut from dense faux fur often looks larger after turning and filling. Fleece keeps a cleaner outline, while long pile may hide much of the ear’s original shape.
Before changing your pattern, cover part of the pinned ear with your fingers. This lets you preview a smaller size without cutting a second pair.
You can also try turning the same ear in different directions. A slightly oval ear may look round when attached upright and longer when tilted outward.
How to Sew Teddy Bear Ears to the Head
Once you are happy with the position, mark both edges of each ear base before removing the pins. Use removable fabric chalk, small pins, or a few loose basting stitches.
Turn the raw lower edge of the ear inward. The fold should be neat, but it does not need to form a perfectly straight line. A gentle curve usually follows the shape of the head more naturally.
Choose a strong hand-sewing thread that blends with the fabric. A doubled thread provides extra support for large ears, thick faux fur, or tightly stuffed heads.
Begin underneath the ear so the knot remains hidden. Attach the ear using a ladder stitch, sometimes called an invisible stitch.
Here is my short video tutorial on how to make a ladder stitch:
Take a small stitch through the folded edge of the ear. Then take a matching stitch in the head directly opposite it. Continue alternating between the ear and head, pulling the thread gently every few stitches.
Do not pull so tightly that the head becomes dented. The seam should close neatly while the ear keeps its shape.
Sew around the complete base. Attaching only the front edge may allow the ear to flap backward or twist.
When the ear feels secure, make a small knot close to the fabric. Insert the needle beside the knot and bring it out a short distance away. Pull gently, cut the thread, and allow the end to disappear inside the head.
How to Shape Natural, Cupped Teddy Bear Ears
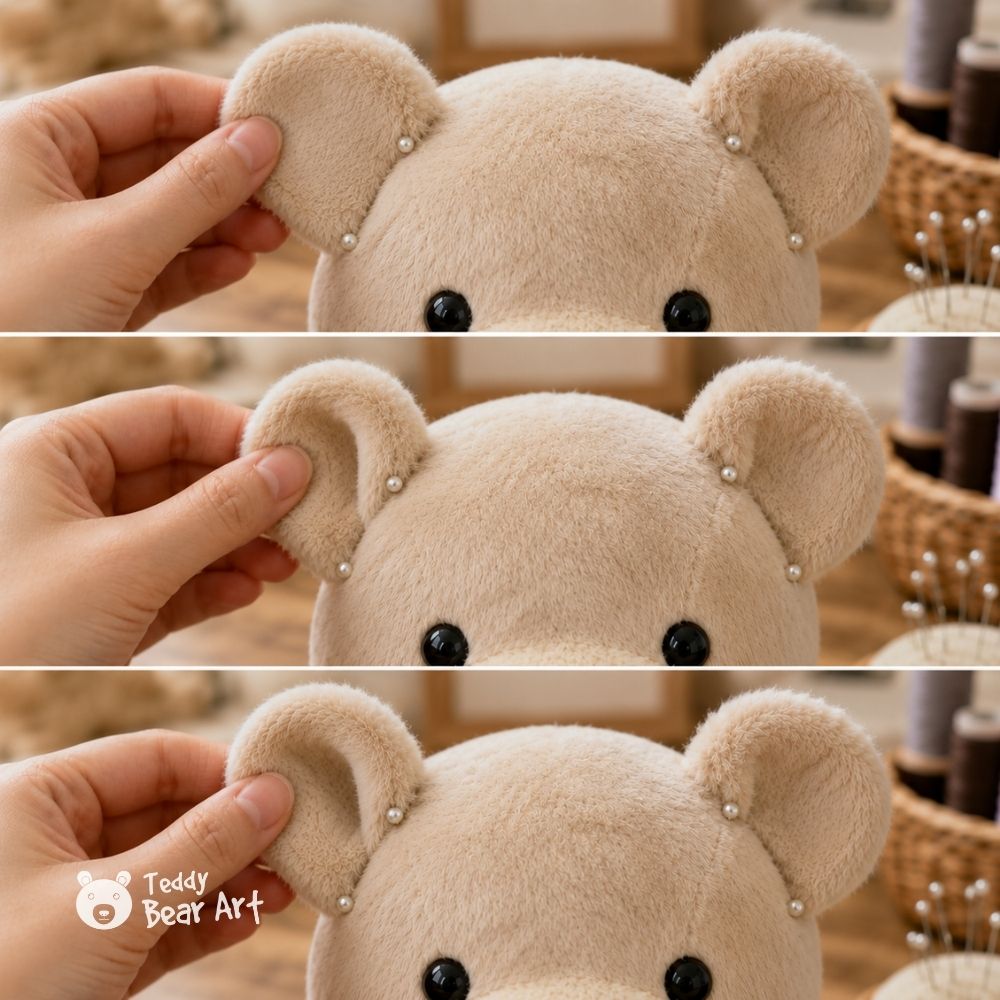
Flat ears can make a finished teddy bear look less expressive. Adding a shallow cup gives the ear depth and allows the inner section to remain visible.
Pinch a small fold at the lower centre of the ear before attaching it. Test several fold sizes. A tiny pinch creates a soft natural curve, while a deeper fold makes the ear stand more upright.
Secure the fold with one or two small stitches. Then pin the ear to the head and check the shape again.
You can also create the cup while attaching the ear:
- Sew the front section of the ear base.
- Pause at the centre.
- Form a small fold or curve with your fingers.
- Anchor the fold to the head.
- Continue sewing around the back section.
This method gives you more control, especially when working with soft fleece or long pile fabric.
Large ears may need an extra anchoring stitch through the lower centre. Keep this stitch hidden inside the fold so it does not flatten the ear.
Common Teddy Bear Ear Placement Mistakes
1. Attaching the ears before shaping the head
The final head shape determines where the ears will look balanced. Stuff and shape the head first.
2. Relying only on the centre seam.
The seam helps with symmetry, but the whole face should guide the final position. Look at the eyes, nose, muzzle, and forehead together.
3. Checking only the front
Two ears may look even from the front while pointing in completely different directions. Always inspect both side views.
4. Placing the ears too far back
Ears positioned too far behind the brow can disappear from the front. Move them forward or turn them slightly toward the face.
5. Pulling the thread too tightly
Strong tension can create dents in the head and flatten the ear base. Pull only until the gap closes.
6. Forgetting about the pile
Long fur can hide part of the ear and make it appear smaller. Part or carefully trim the pile around the attachment area before making the final decision.
FAQ
Should I attach the ears before or after the eyes?
It is often helpful to position the eyes first because they influence the proportions of the whole face. You can pin the ears temporarily while testing the eye placement, then make the final decision once the expression looks right.
Should teddy bear ears be sewn on before or after the nose and mouth?
It is usually better to sew the ears on after the eyes, nose, and mouth are finished. These features define the expression, so you can position the ears more accurately.
Before You Go
Knowing how to place ears on a teddy bear gives you much more control over the final character. Do not treat the pattern markings as the only possible answer. Pin the ears high, low, forward, and farther apart, then choose the position that gives your bear the expression you imagined.
A few minutes spent experimenting can turn a pleasant teddy bear face into one that feels truly alive.
Continue shaping your bear’s expression with our guides:
Get Free Patterns & Be the First to Know!
Want free teddy bear patterns, exclusive tutorials, and a chance to win craft supplies?
Sign up for our newsletter using the subscribe form in the middle of this article to receive new patterns, insider tips, and the latest news on teddy bear art. You’ll also automatically be entered into our annual giveaway for a chance to win teddy bear crafting materials.
Bonus entry: Save one of our pins on Pinterest to increase your chances of winning!
Let’s create, inspire, and craft beautiful teddy bears together!
Hello Hanna,
I honestly didn’t realize how much the placement of the ears could change the entire personality of a teddy bear! I would have assumed there was basically one “correct” place to put them, but seeing how the height, spacing, and angle can make the bear look younger, softer, or more alert really changes how I look at it.
When you’re designing a bear from scratch, do you normally decide on the ear placement after you’ve finished the rest of the face, or do you already have a general idea of where you want them while you’re creating the pattern?
Angela M 🙂
Hi Angela,
Thank you! Yes, ear placement can completely change the expression of a teddy bear.
When I design a bear from scratch, I usually already have a general idea of the look I want, but I don’t decide on the final ear placement until the head is finished and the main facial features are in place. I prefer to pin the ears temporarily first and move them around a little before sewing them on permanently.
Sometimes even a very small change in height or angle makes a surprisingly big difference.
Hanna