
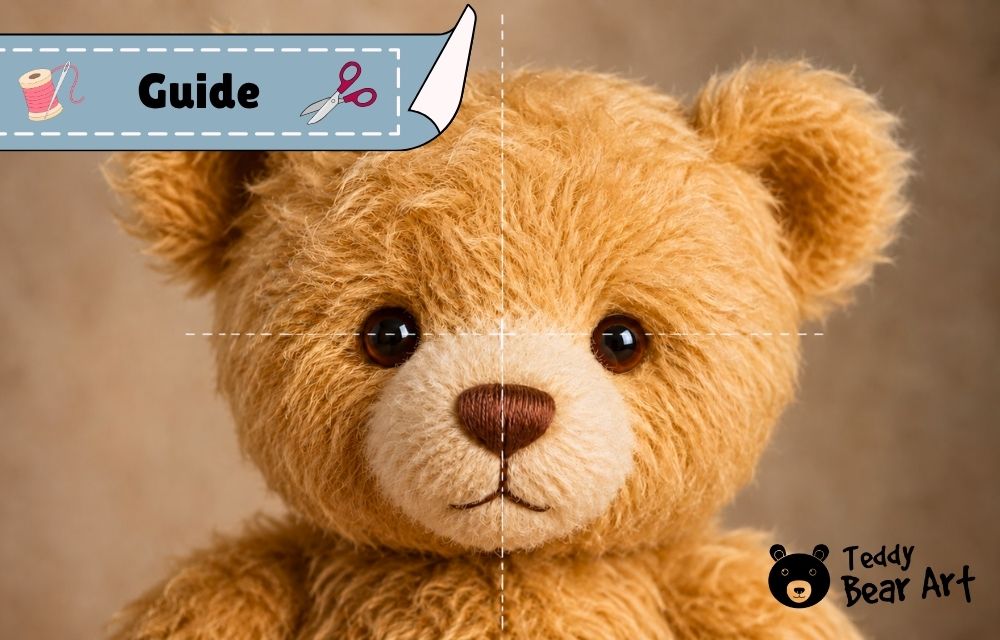

Learning how to sew a teddy bear face is not simply about adding two eyes, embroidering a nose, and attaching a pair of ears. Moving one detail by only a few millimeters can change the bear from sweet and gentle to surprised, serious, or slightly grumpy.
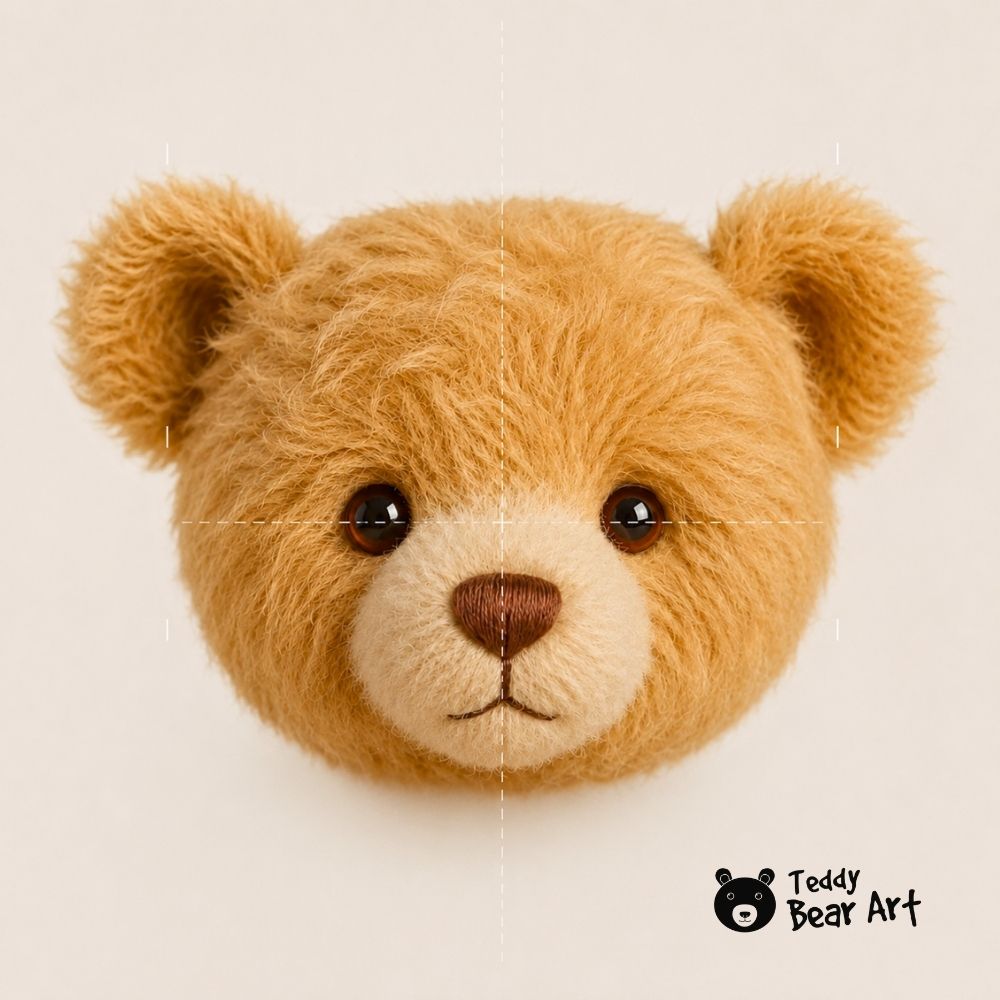
Shape the head first, find the facial center, and test every feature before attaching anything permanently. This makes it easier to notice when the eyes sit too high, the nose looks too large, or the ears make the head appear wider than intended.
Prepare the Head and Find the Center
Complete the stuffing and shaping of the head before deciding where the facial features should go. A loosely filled head can change when more stuffing is added, especially around the cheeks, forehead, and muzzle.
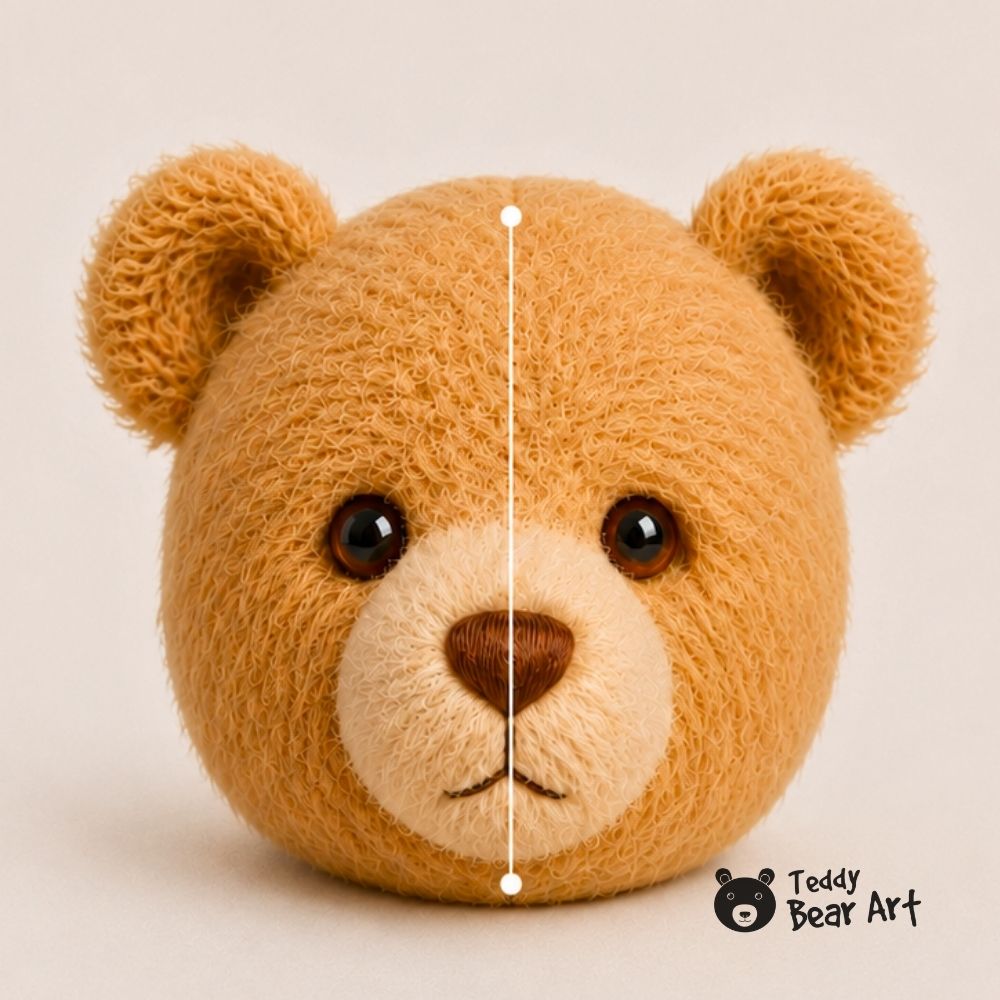
Add small amounts of stuffing and distribute them evenly. The muzzle should feel firm enough to hold its shape without becoming hard. Compare both cheeks.
If the head is made from two mirrored side pieces, use the front seam as a guide for the center of the face.
A head made with a gusset may not have a center seam across the forehead. Mark the midpoint of the gusset at the top of the forehead, then place another pin at the center of the muzzle or chin. Imagine a straight vertical line connecting these points.
If your bear has a separate muzzle piece, mark its center too. The muzzle center, nose center, and point between the eyes should follow the same vertical line.
Measurements help, but do not rely on them alone. Two eyes can measure equally from the center and still look uneven if one side of the head is fuller. A quick photograph often makes placement problems easier to notice.
How to Sew a Teddy Bear Face With Balanced Eyes
Before installing the eyes, use dark-headed pins, temporary beads, or small felt circles to test several positions.
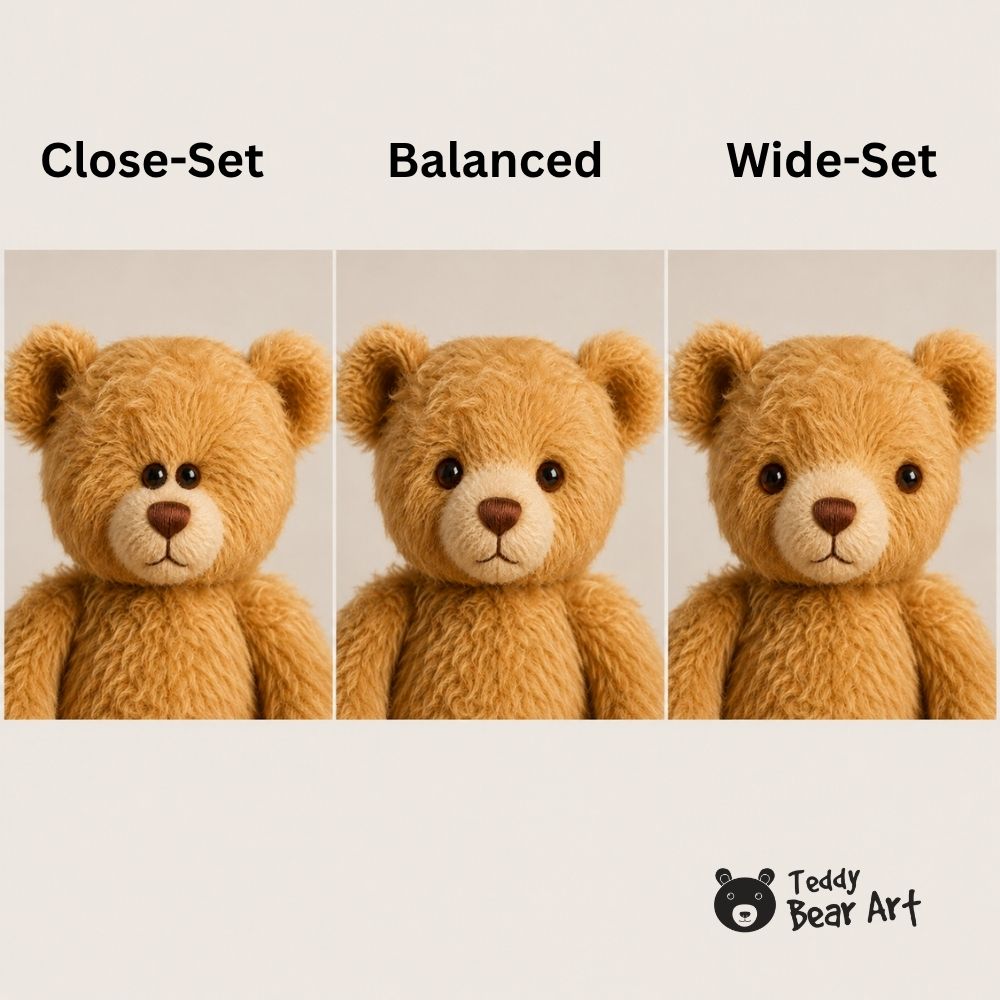
Start with the eyes at the same height and an equal distance from the centerline. Then move them slightly and watch how the expression changes. Eyes placed closer together often make a bear look younger and sweeter. Wider spacing creates a calmer or more traditional expression. Higher eyes make the muzzle appear longer, while lower eyes make the forehead look larger.
Eye size matters too. Large eyes can overwhelm a small muzzle, while tiny eyes often give a vintage, thoughtful, or realistic look. Choose a size that suits the entire head.
Always test the eyes together with the intended nose position. The space between the eyes and the top of the nose strongly affects the finished expression.
Safety eyes must be installed before the head opening is closed. Glass eyes with loops are usually attached with strong thread and a long needle. Embroidered or felt eyes are another option.
See our guide to five ways to attach teddy bear eyes for more details.
Shape the Nose and Mouth
The nose anchors the lower half of the face. If it sits off-center, even correctly positioned eyes may suddenly appear uneven.

Mark the middle of the muzzle, then decide on the width and height of the nose. A small triangular nose creates a delicate look. A broad nose feels more traditional, while a softly rounded nose can suit a modern or baby-faced bear.
Before embroidering, outline the shape with a removable fabric marker or temporary stitches. Check it from the front, then fill it gradually with close, even stitches. Keep the tension consistent because pulling too tightly can flatten or distort the muzzle.
After finishing the nose, bring a straight vertical stitch down from its center. This line connects the nose to the mouth and helps keep the lower face aligned.
Two small mouth stitches can change the mood immediately. Raised corners create a cheerful expression. A flatter line looks calm. Lowered corners make the bear appear thoughtful or sad. Start with short lines and lengthen them only after checking the whole face.
For nose shapes and embroidery techniques, read how to embroider a teddy bear nose.
Position the Ears and Check the Complete Face
Choose the final ear placement only after establishing the positions of the eyes and nose. The ears frame the face, so moving them can change the apparent shape of the entire head.
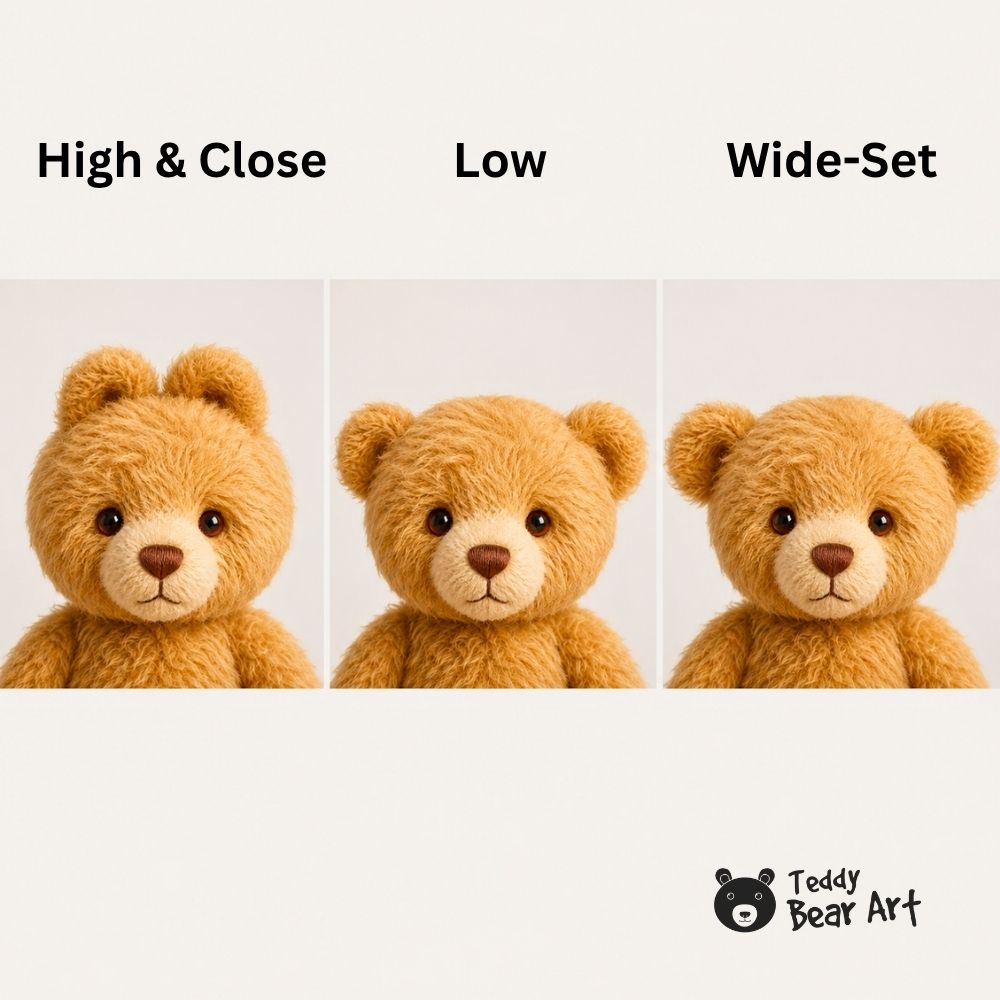
Pin both ears at the same time. Do not permanently attach the first ear before testing the second. Ears placed high and close together can make the bear look alert and youthful. Lower ears create a softer, traditional appearance. Wide-set ears make the head look broader.
Curve or cup each ear slightly before pinning it. Completely flat ears can look stiff, while a gentle curve gives them depth and helps them sit naturally.
Check the ear bases from the front, both sides, and above. From the front, the ears may appear level even when one sits farther back. When the position is correct, sew them with small, close stitches.
Before finishing, check the whole face. Make sure the eyes are level, the nose sits directly beneath them, the mouth suits the expression, and both ears are attached at the same height and angle. Make corrections before securing the final stitches.
Our illustrated guide on how to place ears on a teddy bear shows how ear size, height, spacing, and angle affect the finished expression.
Before You Go
A balanced teddy bear face starts with a well-shaped head. Uneven stuffing can change the position of the eyes, nose, and muzzle, even when your markings are correct.
Read How to Stuff a Teddy Bear for a Smooth, Professional Shape before finishing your next teddy bear head:
Get Free Patterns & Be the First to Know!
Want free teddy bear patterns, exclusive tutorials, and a chance to win craft supplies?
Sign up for our newsletter using the subscribe form in the middle of this article to receive new patterns, insider tips, and the latest news on teddy bear art. You’ll also automatically be entered into our annual giveaway for a chance to win teddy bear crafting materials.
Bonus entry: Save one of our pins on Pinterest to increase your chances of winning!
Let’s create, inspire, and craft beautiful teddy bears together!
This looks like so much fun. Such a helpful tutorial! I never realized how much just a few millimeters in the eye or ear placement could completely change a teddy bear’s expression. I especially like the tip about taking a photo before sewing everything permanently. Do you usually decide on the personality you want the bear to have first, or does the expression kind of develop naturally as you work?
Thank you! I usually have a general idea in mind, but the final expression often develops naturally as I adjust the eyes and ears.
I never really thought about how much personality goes into making a teddy bear’s face! I found the part about adjusting the mouth especially interesting. It’s amazing how a few small stitches can make a bear look happy, sad, or thoughtful. I also like your suggestion to pin both ears before sewing either one in place. That seems like such a simple way to avoid having to redo your work. Thanks for sharing these tips!
Angela M 🙂
Thank you so much, Angela! I’m glad you found the tips useful.