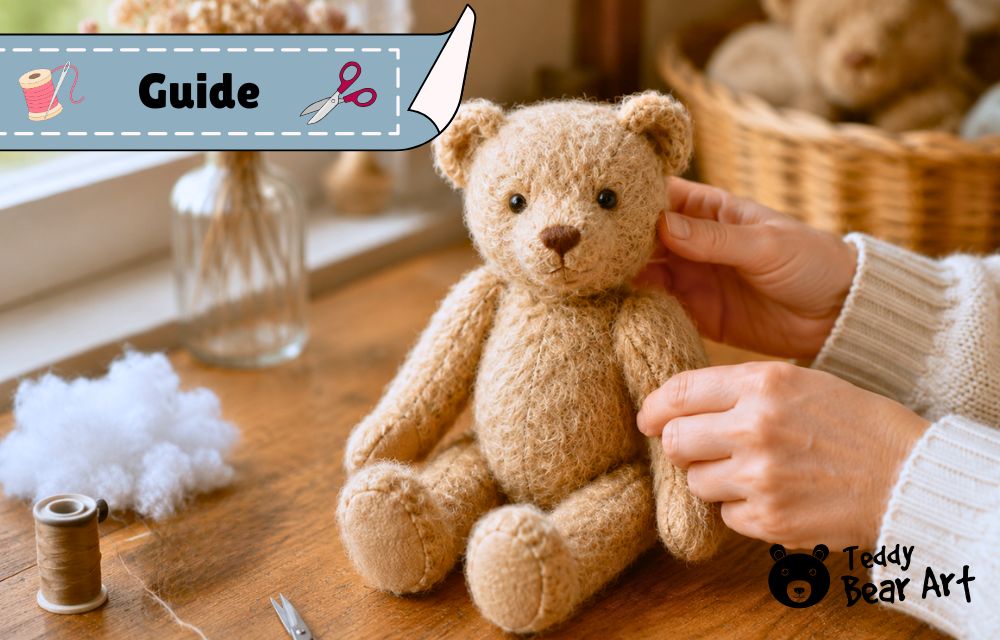
If you want to learn how to stuff a teddy bear to look professional, the secret is not pushing in more filling. It is using the right stuffing, in small pieces, and placing it exactly where the bear needs support. Stuffing is one of those quiet steps that nobody sees, but everyone notices in the finished bear.
A teddy bear can have a lovely pattern, neat seams, beautiful fabric, and a sweet face, but if the stuffing is rushed, the bear may look bumpy, flat, twisted, or tired before it is even finished. The good news is that this is very fixable. You do not need special factory tools. You need patience, your fingers, a simple stuffing stick, and the habit of checking the shape again and again as you work.
This teddy bear stuffing DIY tutorial will help you stuff the head, body, arms, legs, and paws more evenly, especially if you are still learning and want your handmade bears to look cleaner and more polished.
How To Stuff A Teddy Bear For A Smooth, Professional Shape
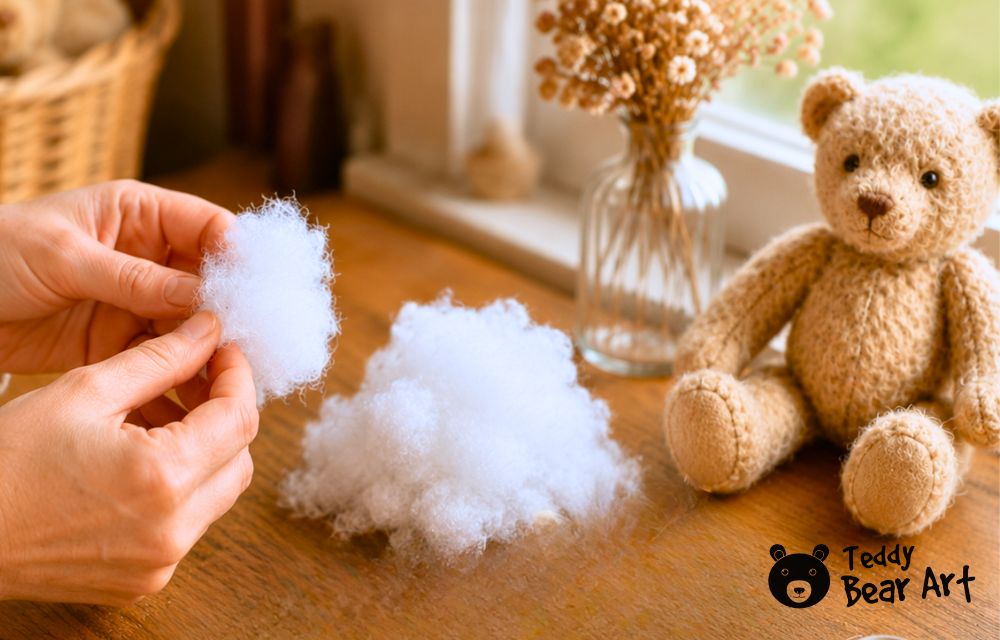
Start with small pieces. That is the rule I wish every beginner knew before stuffing their first bear.
Do not take one big cloud of fiberfill and push it inside the body. It looks faster, but it usually creates lumps. Pull the stuffing apart first. Make it light, fluffy, and loose in your hands. Then add it little by little.
Think of stuffing as shaping, not filling. You are building the bear from the inside.
The muzzle needs support. The cheeks need balance. The tummy needs roundness. The paws need enough firmness to keep their shape. Every part has a job, so every part needs a slightly different touch.
Before closing any opening, hold the bear in your hands and look at it from several angles. Turn it to the front, side, and back. Feel along the seams. If one side is harder than the other, adjust it now. Once the bear is closed, fixing it becomes much more annoying.
Best Teddy Bear Stuffing Options
The best teddy bear stuffing options depend on the fabric, size, and purpose of the bear.
For most handmade teddy bears, polyester fiberfill is the easiest choice. It is soft, light, washable, and beginner-friendly. It works well with fleece, cotton, faux fur, minky, and many simple teddy bear patterns. If you are making a bear for practice, gifts, or everyday crafting, start here.
Wool stuffing gives a firmer, more traditional feel. It can be beautiful for artist bears because it shapes nicely and gives the bear a warm, old-fashioned feeling in the hands. The downside is that it can be more expensive and less easy to wash.
Traditional artist bears are sometimes stuffed with wood wool or fine wood shavings, especially when the maker wants a firmer vintage feel. This type of stuffing can give a bear that old-fashioned crunch and structure, but it is not the easiest choice for beginners. It is also not suitable for washable bears or toys made for young children, so I would use it only for collectible bears.
Cotton stuffing sounds natural and lovely, but it can become heavy and may form lumps if it is packed too tightly. I would use it carefully, especially for small bears or tightly shaped heads.
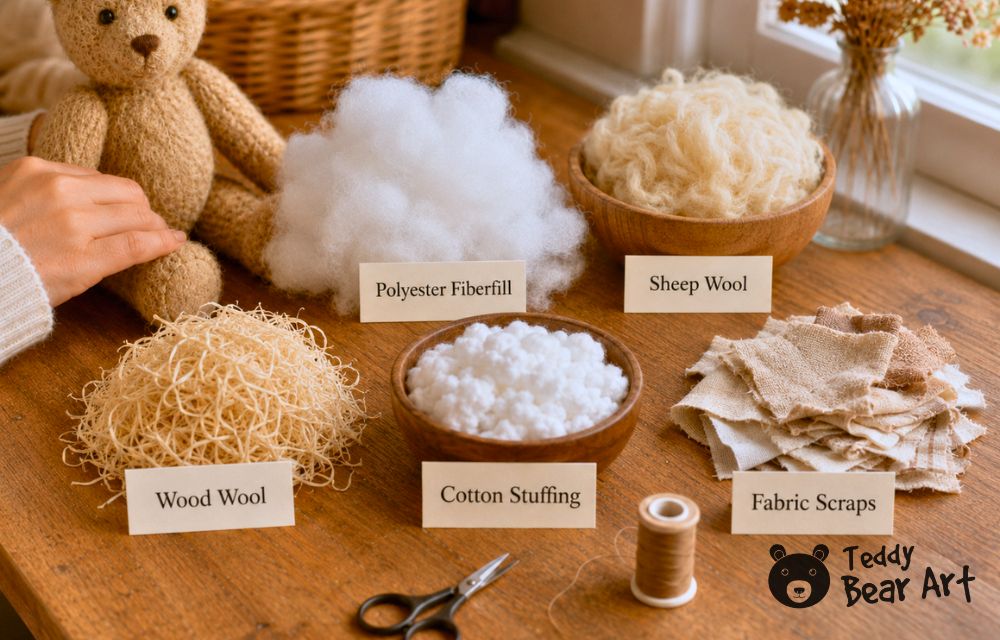
Fabric scraps are tempting because they feel practical, but they are not my favorite for a smooth teddy bear. They can make hard spots inside the bear, especially around the face, paws, and tummy. If you use scraps, keep them for hidden weight or decorative bears, not for the main shaping.
If you want to compare more materials before choosing, you may also like my guide to the top 10 teddy bear stuffing material options. It is useful when you want to understand the difference between soft, firm, natural, and traditional fillings.
How To Choose Stuffing For Teddy Bears
If you are wondering how to choose stuffing for teddy bears, look at the fabric first.
Fleece is forgiving, but it stretches. If you overstuff it, the seams can pull and the shape may become too round. Use soft fiberfill and build the shape slowly.
Cotton fabric does not hide lumps as kindly. Every uneven spot can show, so small pieces of stuffing are especially important.
Faux fur hides small imperfections, but that does not mean you can stuff carelessly. A lumpy faux fur bear may still look uneven in the head, muzzle, and body posture.
Mini bears need very tiny pieces of stuffing. A large piece that works for a big bear will create a hard knot inside a small arm or foot.
Collector bears usually need firmer stuffing than soft cuddle toys. The head should hold its shape well, the body should feel balanced, and the limbs should not collapse. But firm does not mean rock-hard. A bear should still feel pleasant in the hands.
If you prefer natural or more sustainable materials, you can also read my post about the best eco-friendly stuffing for teddy bears. It gives more ideas for makers who want something different from regular synthetic filling.
How To Stuff The Head, Body, Arms, And Legs
The head is the most important part. It creates the bear’s character.
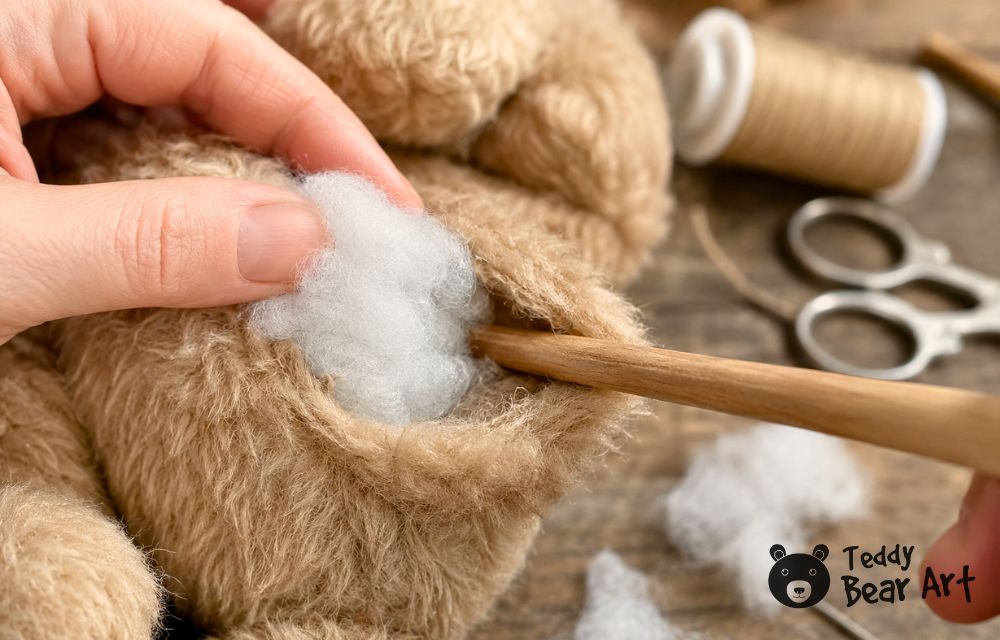
Begin with the muzzle. Push small pieces of stuffing into the front area first, using your fingers or a wooden stuffing stick. Then fill the cheeks evenly. Add more to the top and back of the head only after the face area has a good shape.
If your teddy bear will have an embroidered nose, I prefer to stuff the muzzle with sheep wool. Synthetic stuffing can sometimes pull out through the fabric while you are embroidering the nose, especially if you pass the needle through the same area many times. Wool holds together better and gives the muzzle a firmer base for neat nose embroidery.
Check the face often. A tiny difference in stuffing can make one cheek look fuller or one eye area look flatter. Do not wait until the head is completely full before checking.
For the body, start near the bottom and work upward. Add stuffing around the sides, back, and tummy. Avoid creating one hard ball in the middle. The body should feel even, with no empty corners near the seams.
For a handmade teddy bear, the body is usually stuffed from the back opening, not from the belly. This keeps the front of the bear clean and smooth. If you are taking photos for a tutorial, showing the back opening also looks much more professional and realistic.
Now let’s talk about how to stuff teddy bear arms. Start with the paw. Push tiny pieces into the paw corners first, then continue slowly up the arm. I like the paw to be slightly firmer and the upper arm a little softer. This keeps the shape nice but still natural.
Legs work the same way. Stuff the foot first, especially the toe area and heel. If the bear is meant to sit, do not overstuff the very top of the legs. Too much firmness there can make the bear stiff and awkward.
How To Stuff Teddy Bears Without Lumps
The best advice on how to stuff teddy bears for beginners is simple: slow down.
Lumps usually happen for three reasons. The stuffing pieces are too big, the filling is pushed in too quickly, or the maker closes the bear before checking the shape properly.
Use smaller pieces than you think you need. Massage the bear gently from the outside as you work. This helps the filling settle into corners and softens uneven areas.
If you feel a hard bump, do not ignore it. Pull some stuffing out and rebuild that area. It is not a failure. It is part of the process.
Also check the seams. Empty spaces near seams can make the bear look flat, even when the center feels full. This happens a lot in paws, shoulders, the lower body, and the muzzle.
A smooth teddy bear is not stuffed in one motion. It is adjusted, touched, turned, checked, and shaped.
Before you close the final opening, give your bear one last inspection. Is the head balanced? Are the paws filled to the corners? Does the body feel smooth? Can the bear sit the way you want? Are the seams relaxed, not stretched?
Stuffing is not just a hidden step. It is where your teddy bear gets its posture, softness, and personality. When you take your time with this part, even a simple pattern can look much more polished, expressive, and professional.
Before You Go
If you are fixing an old bear instead of making a new one, the stuffing process can be a little different. Old toys may have flattened filling, weak seams, stretched fabric, or areas that need gentle repair before you add anything new inside. For that situation, you can follow this guide:
And if you are sewing a new teddy bear, save this guide for the stuffing stage. It is easy to focus only on the pattern and the face, but the real magic often happens inside the bear. Small pieces, careful shaping, and a final check before closing can make your handmade teddy bear look smoother, softer, and much more professional.
Get Free Patterns & Be the First to Know!
Want free teddy bear patterns, exclusive tutorials, and a chance to win craft supplies?
Sign up for our newsletter using the subscribe form in the middle of this article to receive new patterns, insider tips, and the latest news on teddy bear art. You’ll also automatically be entered into our annual giveaway for a chance to win teddy bear crafting materials.
Bonus entry: Save one of our pins on Pinterest to increase your chances of winning!
Let’s create, inspire, and craft beautiful teddy bears together!
This was such a helpful article! I never realized how much the stuffing technique affects the final shape of a teddy bear. The tips about stuffing in smaller amounts and shaping as you go make a lot of sense, especially for getting that smooth, professional look instead of a lumpy finish.
I’ve tried making plush toys before, and getting the face and limbs evenly stuffed was always the hardest part for me. Do you have a favorite type of stuffing material that works best for beginners?
Thank you so much! I’m really glad the stuffing tips were helpful. For beginners, I usually recommend good-quality polyester fiberfill because it is easy to control, soft, and forgiving. The main trick is to add it in very small pieces, especially around the muzzle, paws, and limbs, and shape the bear as you go instead of pushing in one big lump.
When I first started making fabric toys, I thought stuffing was the easy part, just put enough filling inside and that’s it. But I quickly learned that this is exactly where things can go wrong. Lumpy legs, uneven arms, or a funny-shaped head can happen so easily if you rush.
I like your advice about using small pieces of stuffing and shaping the bear slowly. Checking it from different angles is such a simple tip, but it really helps. I wish I had known this when I made my first toys!
Thank you so much! I went through the same thing when I first started making toys. Stuffing looks simple, but it really takes practice to avoid lumps and get a smooth shape. I’m so glad these tips felt helpful!