
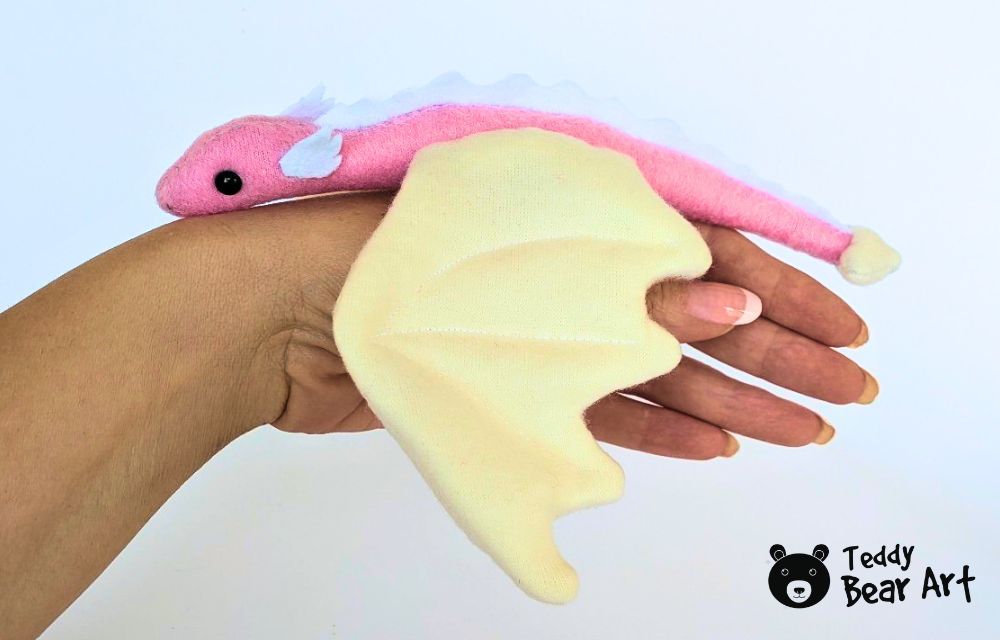
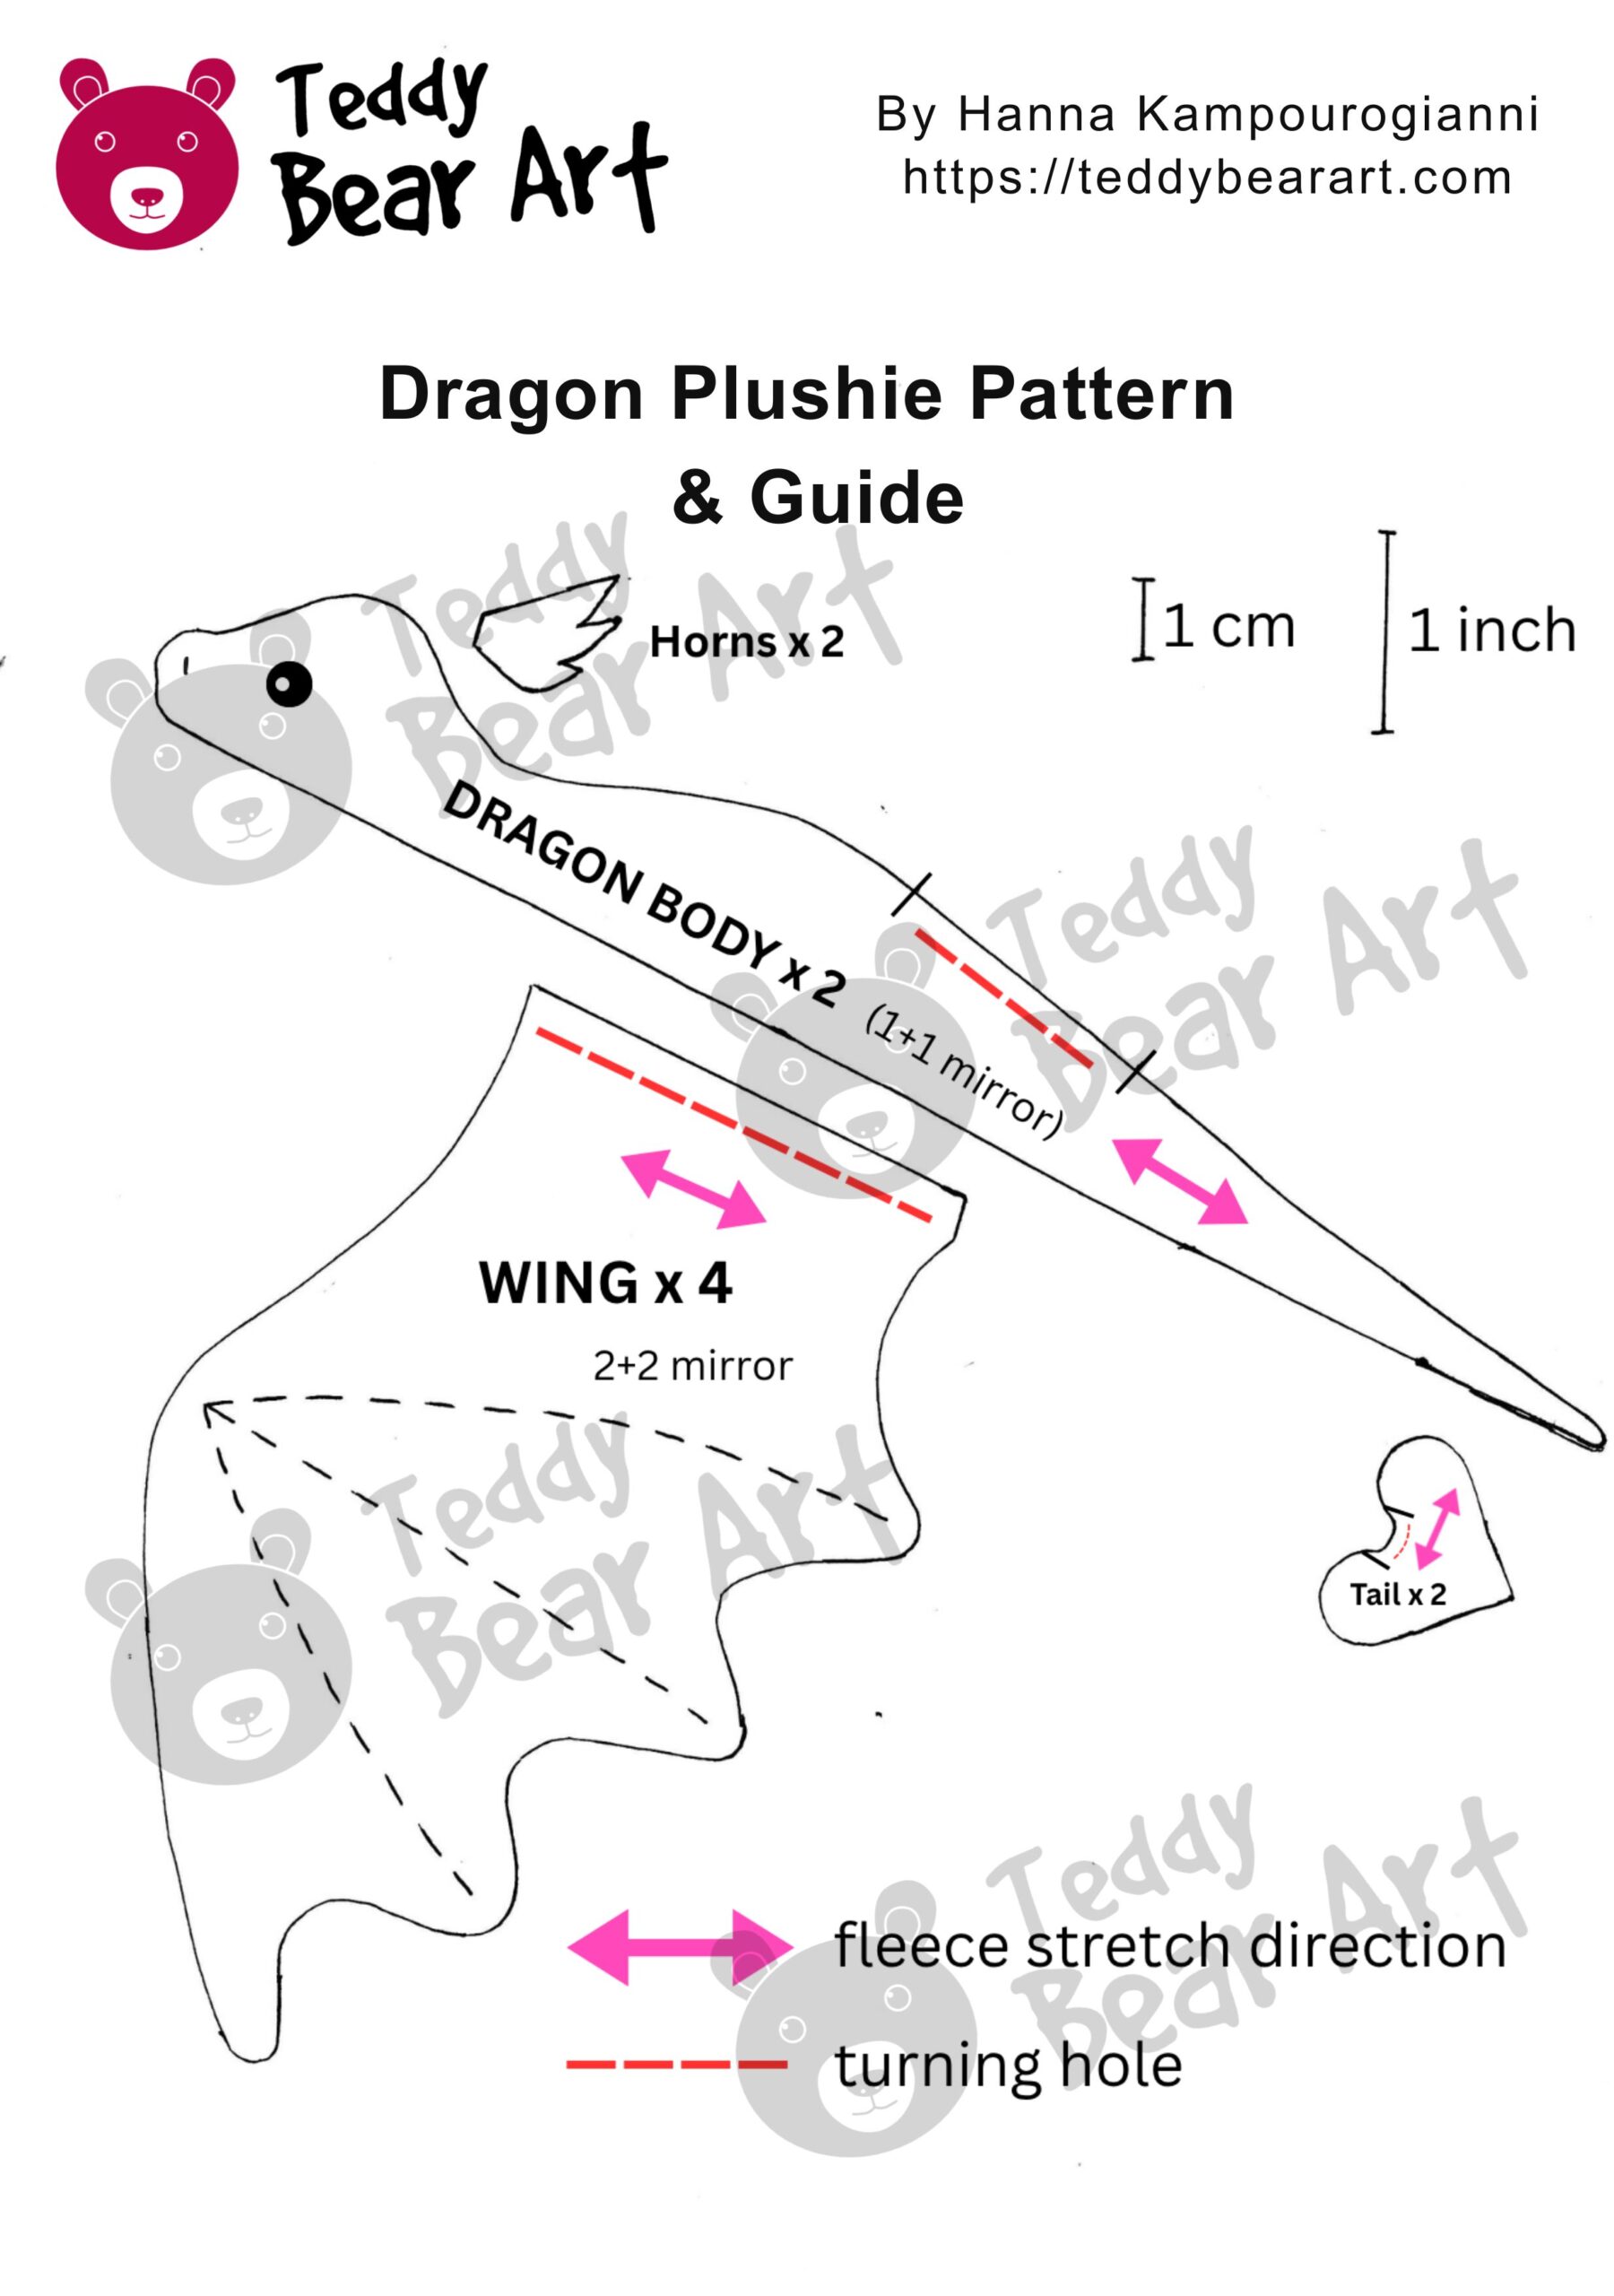
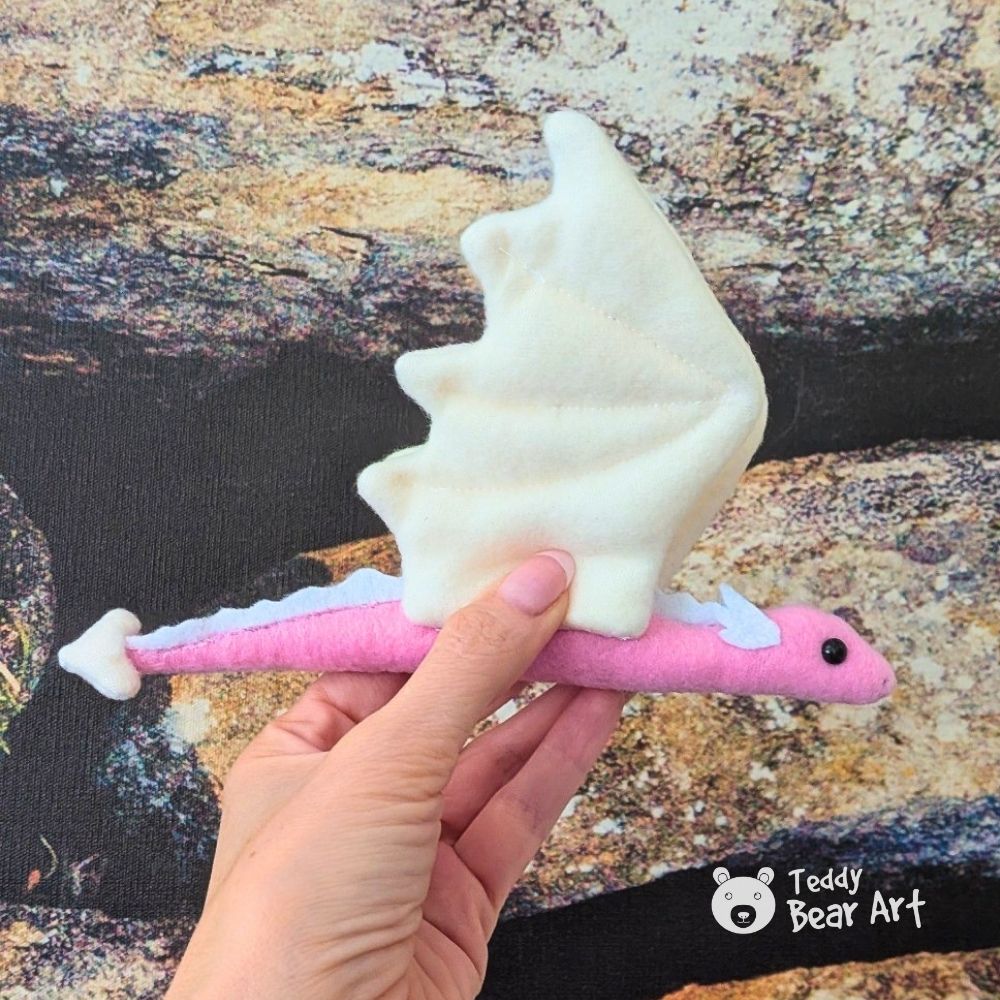
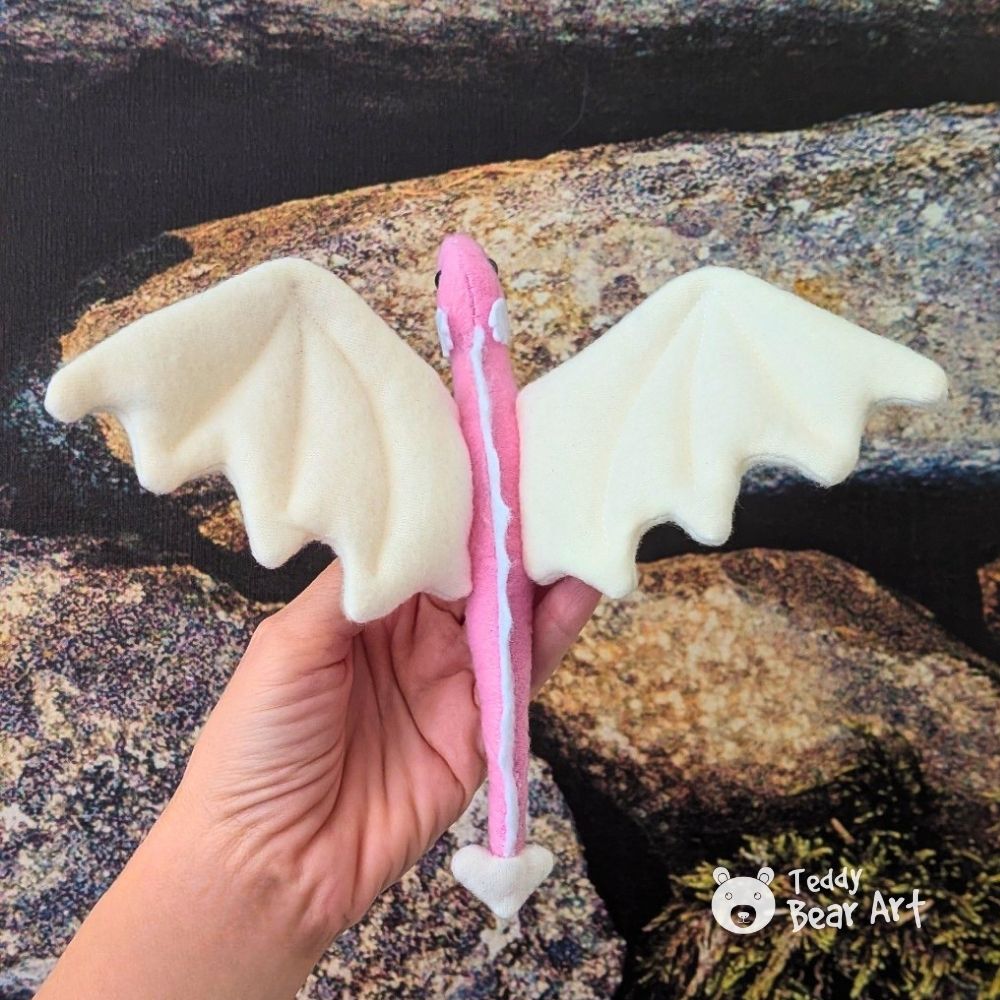
This dragon plushie pattern for beginners is a sweet little sewing project for anyone who wants to make a soft fantasy toy without complicated construction. The pink dragon is made from fleece, with the head and body sewn as one main shape, so you do not need to attach a separate head or work with difficult joints. The cute character comes from the small details: soft wings, little horns, a back crest, a tail tip, safety eyes, and an embroidered nose.
Download the Pattern
Notice that seam allowances are not included. For this project, it is fine to include 5 mm for seam allowances.
To download the pattern, follow the instructions below:
From a phone or tablet: There should be a similar option for mobile devices with Android or iOS. Click on the image. Save it by holding your finger on the image and selecting the “Save Image” option. Then, go to your photo gallery and print it (an option available).
From a computer: Click on the photo of the pattern you see below. In the new tab that will open, you press the right mouse button and select the “Save image as …” option. Then, you choose where the image will be saved on your computer.
Materials
- Fleece fabric
- Felt fabric for the horns and spikes along the back
- Polyester stuffing (polyfill)
- Beads for eyes
- Matching sewing thread and a needle
- Sissors
How To Sew The Dragon Plushie
Start with the two mirrored body pieces. Place them right sides together and sew around the shape, leaving the marked opening unstitched. Go slowly around the curves, especially near the face, belly, and tail. Small stitches help the rounded areas look smoother after turning.

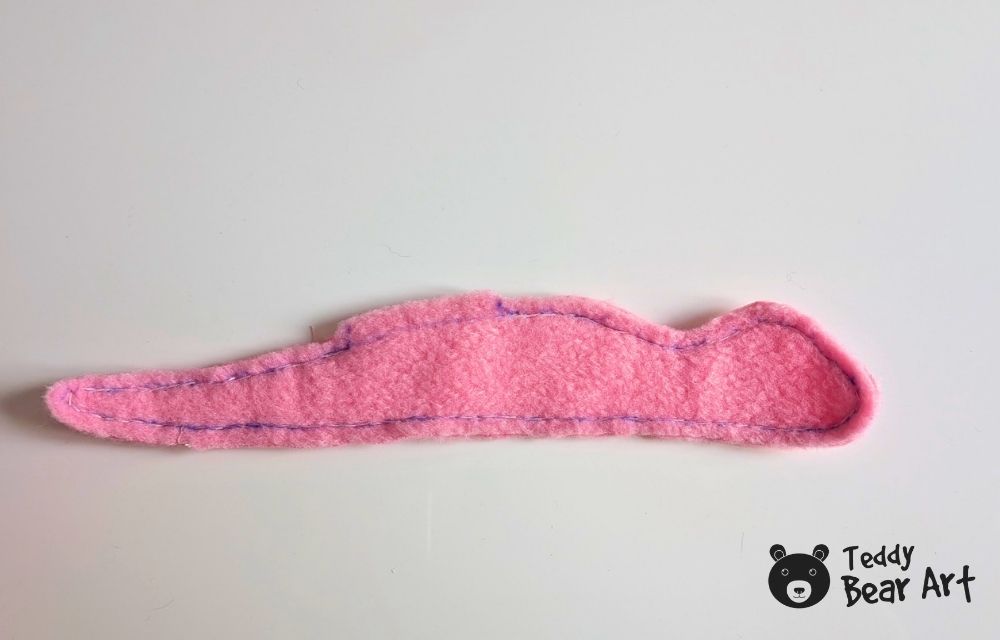
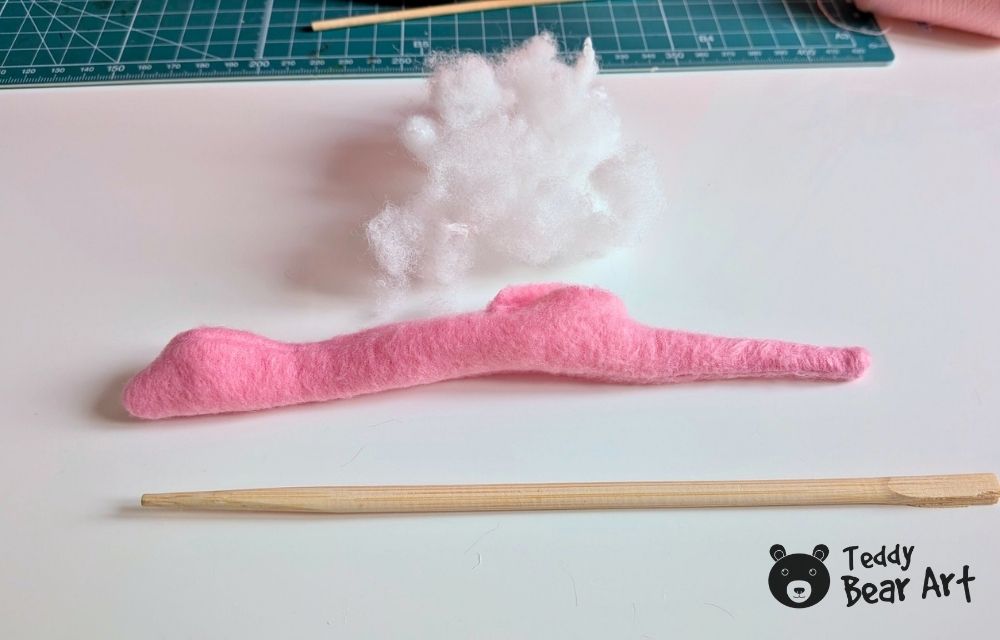
Trim the seam allowance a little where needed, especially around curves and narrow places. Do not cut too close to the stitching. Turn the dragon right side out and gently shape the corners and curves with a chopstick or turning tool.
Now stuff the body. Use small pieces of stuffing instead of one big lump. Push stuffing gently into the head, face, belly, and tail. Take your time here, because stuffing makes a huge difference in the final look. A well-stuffed plushie looks smooth, soft, and alive, while rushed stuffing can make the shape uneven.
After the body is filled, close the opening by hand with a ladder stitch or small hidden stitches.
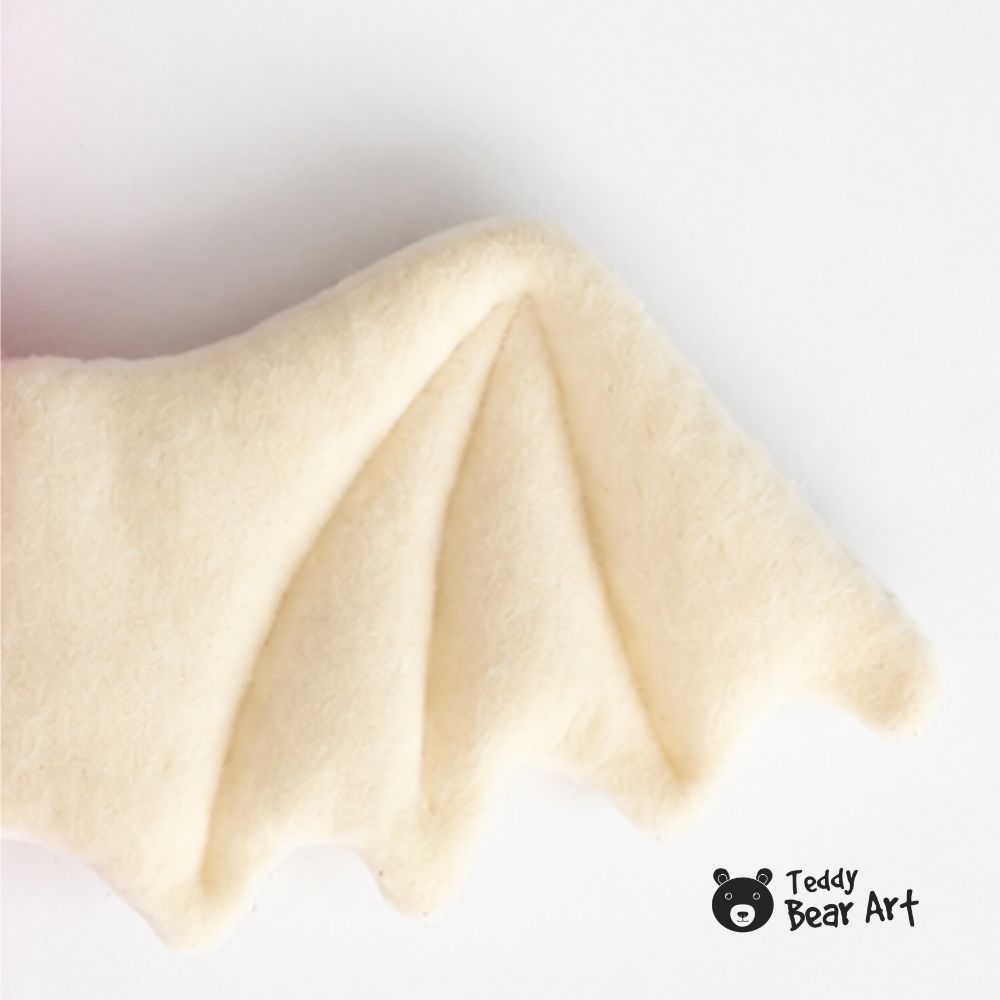
Next, sew the wings. Place the wing pieces right sides together, stitch around them, and leave a small opening for turning. Turn the wings right side out and add a very small amount of stuffing. They should look soft and slightly padded, not round like pillows.

Stitch the decorative lines on the wings. These lines are simple, but they add so much charm. They give the wings shape and make the dragon look more finished.
Close the openings in the wings and attach them to the body. Before sewing them permanently, place both wings on the dragon and check the position. Look from the front, back, and side. Once they look even, sew them securely by hand.
For the tail tip, sew the piece, turn it right side out, but do not stuff it. Place it over the end of the tail and stitch it around the base. This small detail makes the tail look more playful and finished.

Add the felt horns and crest. The horns can be sewn on by hand, or glued if your dragon will be used only as decoration. The crest is best sewn, because it follows the body and gives the dragon a cute fantasy silhouette.
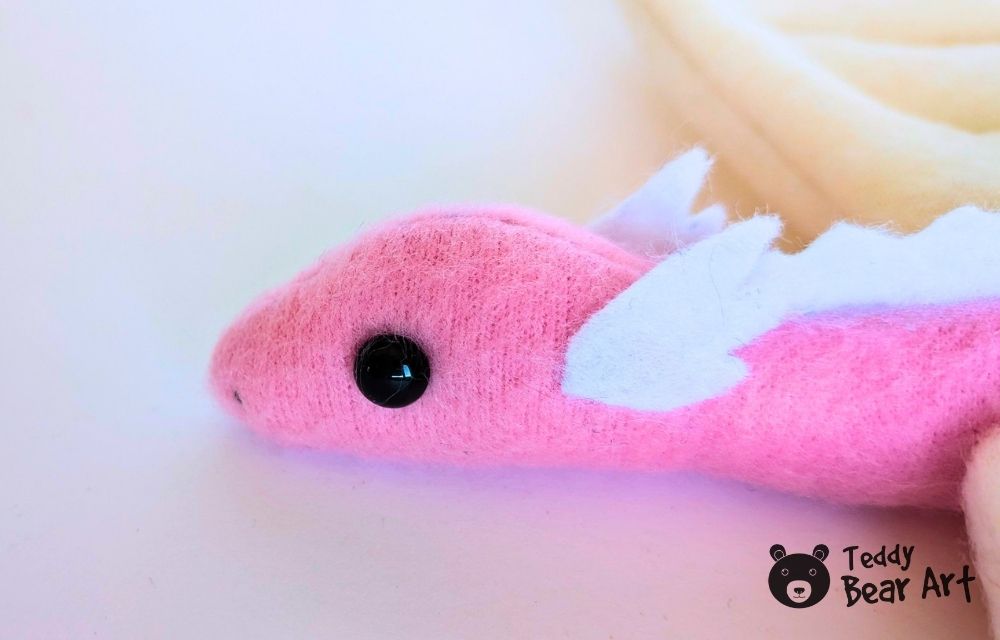
Finally, add the face. Insert the eyes according to the type you use, then embroider the nose. A tiny embroidered nose gives the dragon a handmade expression.
Beginner Tips And Dragon Plushie Variations
This dragon is simple, but a few small tricks will make it look much neater.
Cut mirrored pieces carefully. This is the most common beginner mistake with plush patterns. Always check that your two body pieces face opposite directions before sewing.
Do not stretch the fleece while stitching. Let the machine or your hand stitches guide the fabric naturally.
Stuff the body slowly. Add small pieces of stuffing and shape the dragon as you go. The head, belly, and tail all need a little attention.
Keep the wings lightly stuffed. If they are too full, they may look heavy and stand awkwardly on the body.
Check the placement of the wings before sewing. Even a small difference in height can make the dragon look uneven.
Use sewing clips if pins leave marks or if the fleece shifts too much.
You can make many different dragons from this same pattern. Try lavender fleece for a soft fairy-tale dragon, pale blue for a baby boy dragon, or cream fleece with pink wings for a gentle pastel look. You can make a pair of dragons, one in blue and one in pink, and they will look adorable together.
You can also change the mood with the face. Embroidered sleepy eyes make the dragon look calm and dreamy. Safety eyes give it a bright toy-like expression. A tiny smile can make it look friendly, while a smaller nose gives it a softer baby-dragon face.
For extra decoration, add little felt hearts, stars, cheek circles, or a tiny bow. Just keep the details simple if you want the dragon to stay beginner-friendly.
What I like most about this free dragon plushie pattern for beginners is that it teaches the basics of plush sewing without feeling boring. You sew a simple main body, then you add wings, horns, crest, tail tip, eyes, and embroidery. Each small step gives the dragon more personality.
By the end, you have a soft little handmade dragon that feels magical, cute, and completely your own.
FAQ
Is this dragon plushie pattern suitable for beginners?
Yes. The head and body are sewn as one main shape, so there is no separate head to attach.
Can I sew this dragon plushie by hand?
Yes. Use small backstitches for the seams and a ladder stitch to close the opening after stuffing.
What fabric is best for this free dragon plushie pattern?
Fleece works best because it is soft, easy to sew, and forgiving for beginners.
Before You Go
If you enjoyed sewing this little pink dragon, you may also like making my other fleece dragon plushie. It has a different shape and a simpler construction, so the two dragons look lovely together as a cute handmade pair.
The pink dragon from this tutorial has more little details, while the other fleece dragon has a softer, easier one-piece look. Sew them in matching colors, make one as a boy dragon and one as a girl dragon, or create your own tiny dragon family from different fleece scraps.
Click the image below to see the other free dragon pattern and choose which dragon you want to sew next.
Get Free Patterns & Be the First to Know!
Want free teddy bear patterns, exclusive tutorials, and a chance to win craft supplies?
Sign up for our newsletter using the subscribe form in the middle of this article to receive new patterns, insider tips, and the latest news on teddy bear art. You’ll also automatically be entered into our annual giveaway for a chance to win teddy bear crafting materials.
Bonus entry: Save one of our pins on Pinterest to increase your chances of winning!
Let’s create, inspire, and craft beautiful teddy bears together!
Thank you for sharing this adorable fleece dragon plushie pattern. I really like that the dragon is made from separate pieces, because it makes the construction easier to understand and follow step by step. The wings, horns, crest, and little tail detail give him such a sweet personality. I can imagine this little dragon looking cute in different fleece colors too.
Thank you so much! I’m really happy you noticed that. I wanted this pattern to be clear and beginner-friendly, so making the dragon from separate pieces felt like the easiest way to show each step. And yes, I agree, he would look adorable in many different fleece colors!
Oh, what a beautiful dragon! I really love how sweet and magical it looks. And the pattern seems simple and beginner-friendly, which is exactly what I was looking for. I was thinking of making the wings from felt, just cutting them out and sewing them on, without stitching two pieces together. Thank you so much for sharing this, it’s very inspiring!
Angela M 🙂
Thank you so much! I’m so happy you like the dragon. And yes, felt wings sound like a great idea, especially if you want to make it quicker and simpler. Just cutting them out and sewing them on should work nicely. I’d love to see your dragon when you make it!