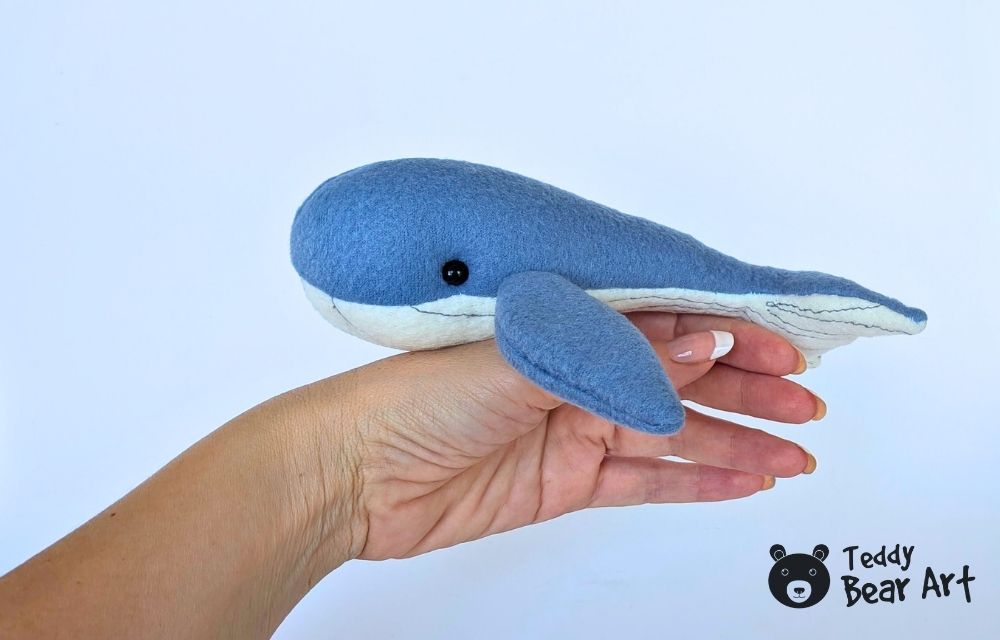
This whale plushie sewing tutorial is a soft and charming little project for anyone who enjoys making simple, handmade toys. I made my whale from blue fleece with a cream-colored belly, and I added a few grey stitched lines to the belly before sewing it into the body. That detail gives the whale a sweet, handmade character, but it is not required. A plain belly will also look lovely, especially if you want to keep the project very simple.
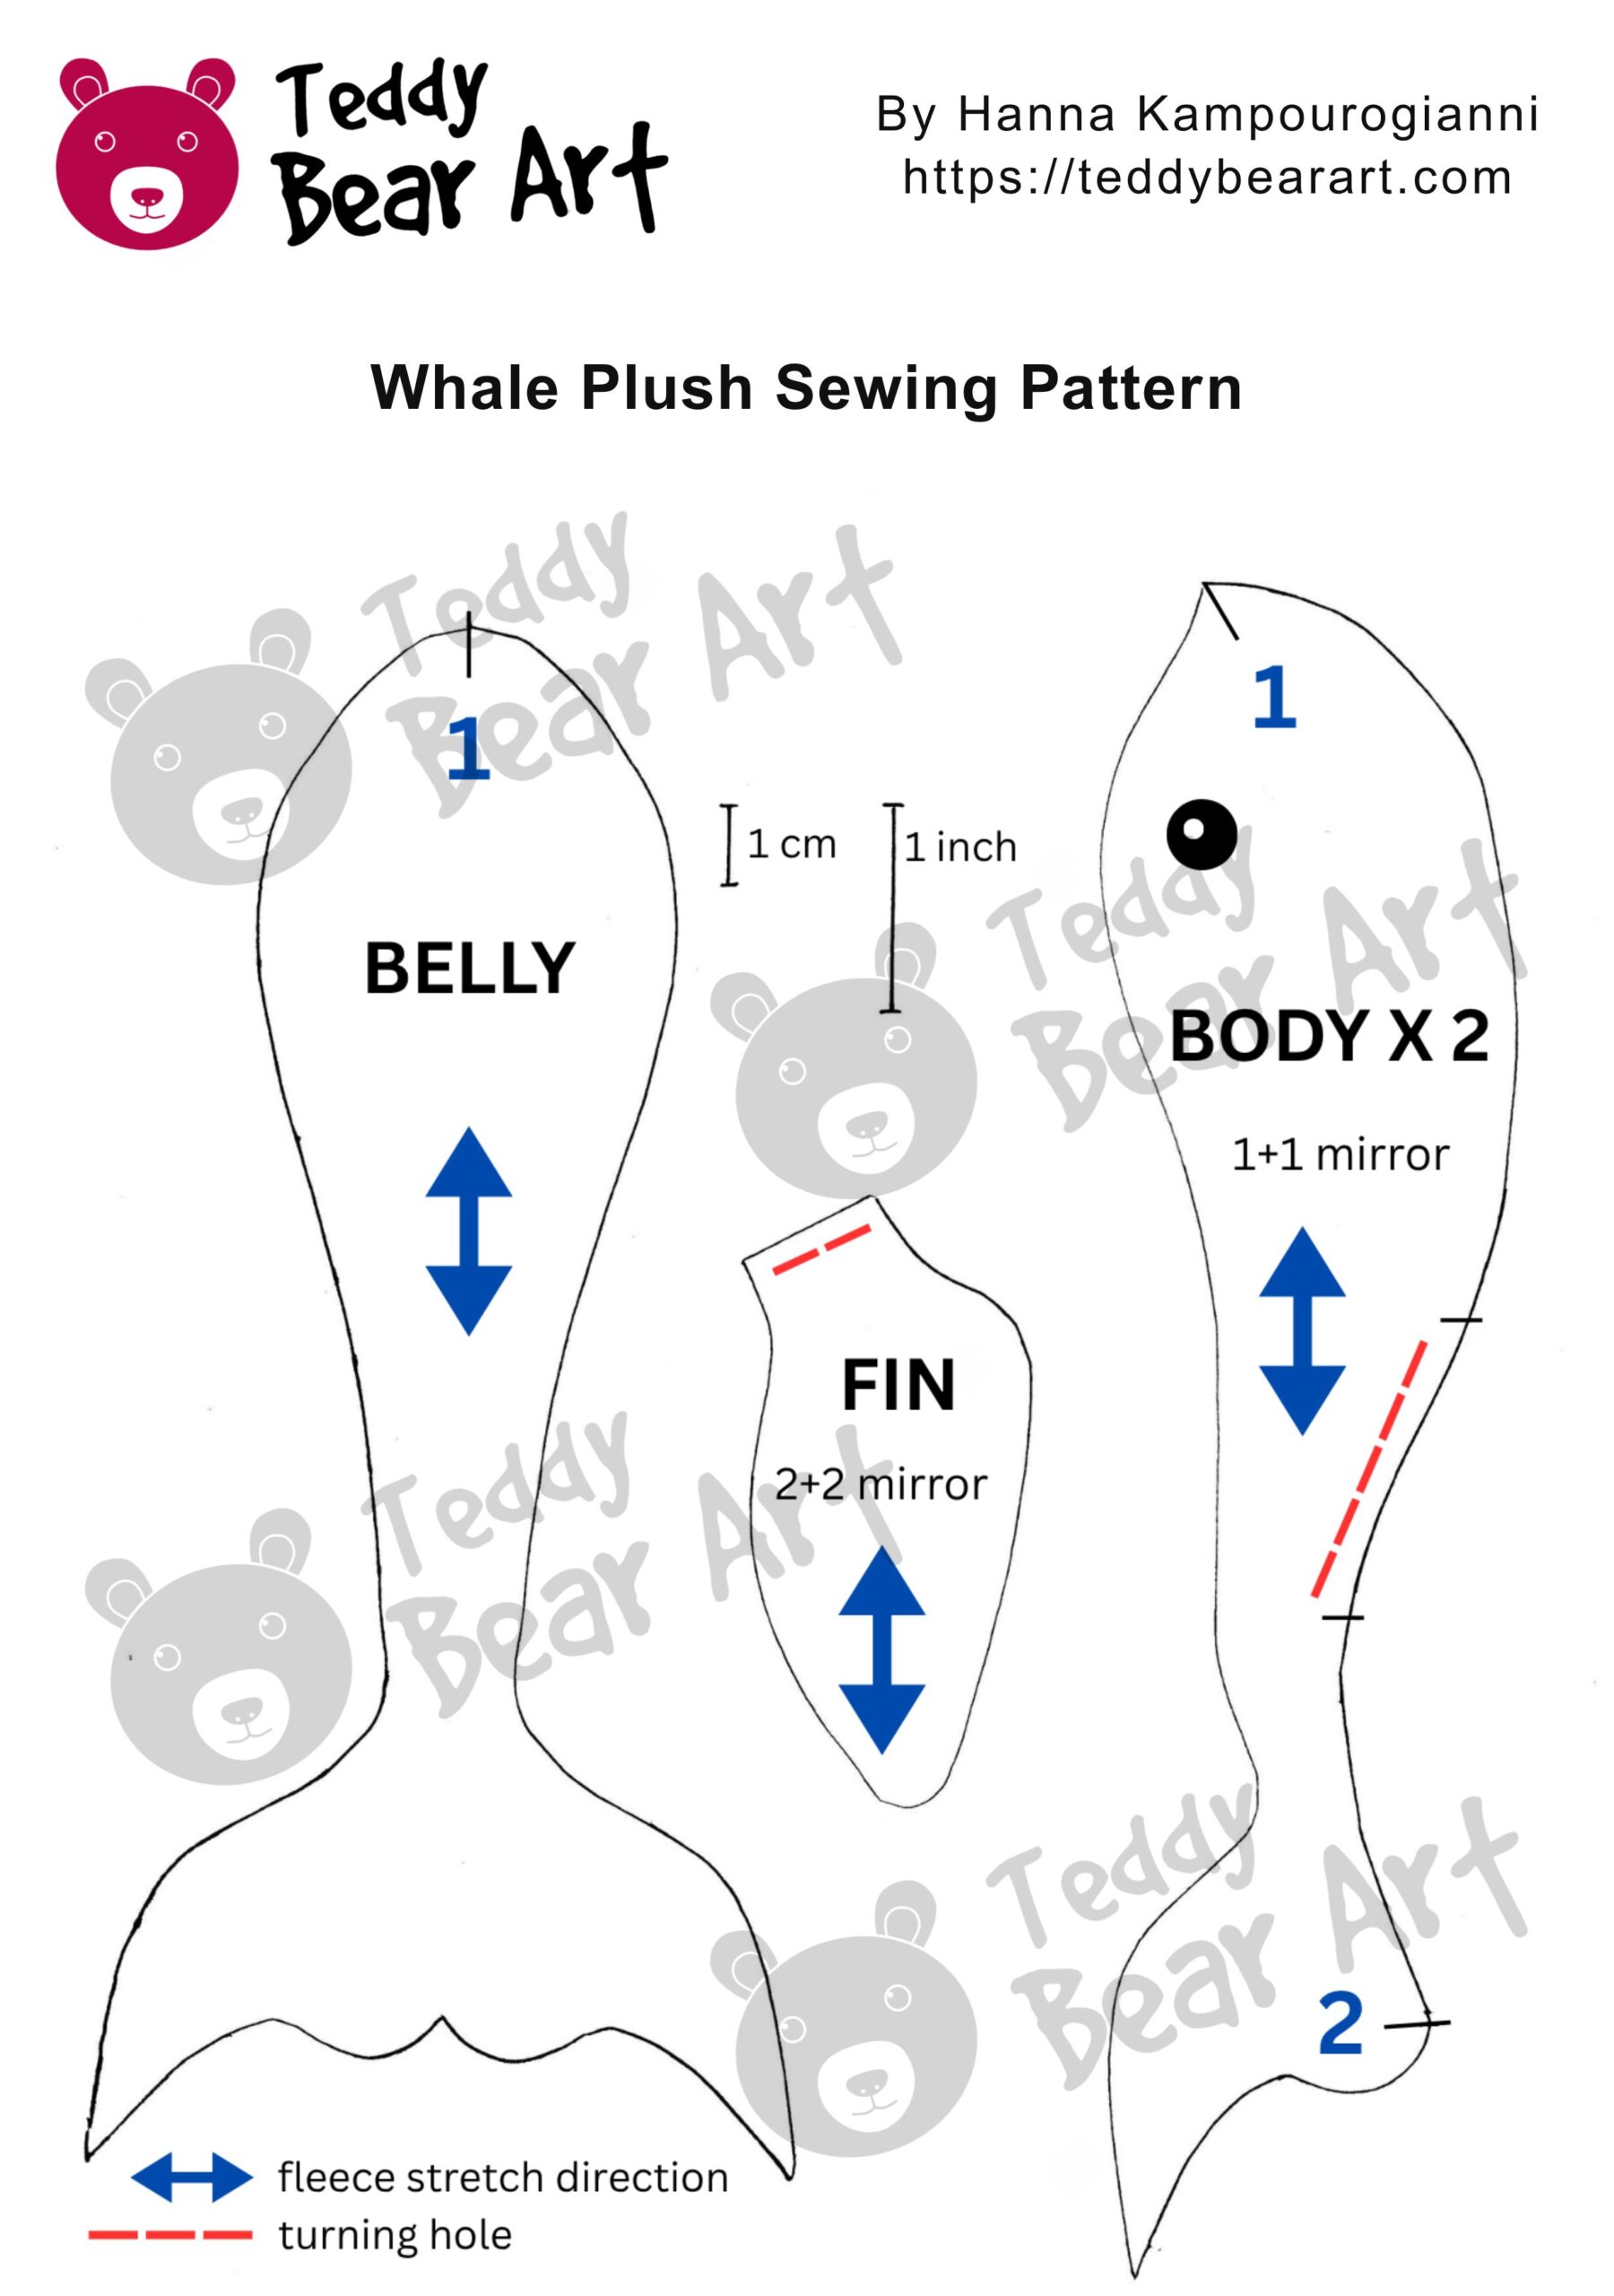
Download The Pattern
Notice that seam allowances are not included. For this project, it is fine to include 5 mm for seam allowances.
To download the pattern, follow the instructions below:
From a phone or tablet: There should be a similar option for mobile devices with Android or iOS. Click on the image. Save it by holding your finger on the image and selecting the “Save Image” option. Then, go to your photo gallery and print it (an option available).
From a computer: Click on the photo of the pattern you see below. In the new tab that will open, you press the right mouse button and select the “Save image as …” option. Then, you choose where the image will be saved on your computer.
Materials
- Soft fleece fabric for the whale’s body
- White or cream fleece for the belly
- Matching sewing thread
- Grey thread for the optional belly lines
- Polyester stuffing
- Black beads, or embroidery thread for the eyes
- Sewing needle
- Sewing machine, optional
- Scissors
- Pins or sewing clips
- A wooden stick or stuffing tool
Whale Plushie Sewing Tutorial
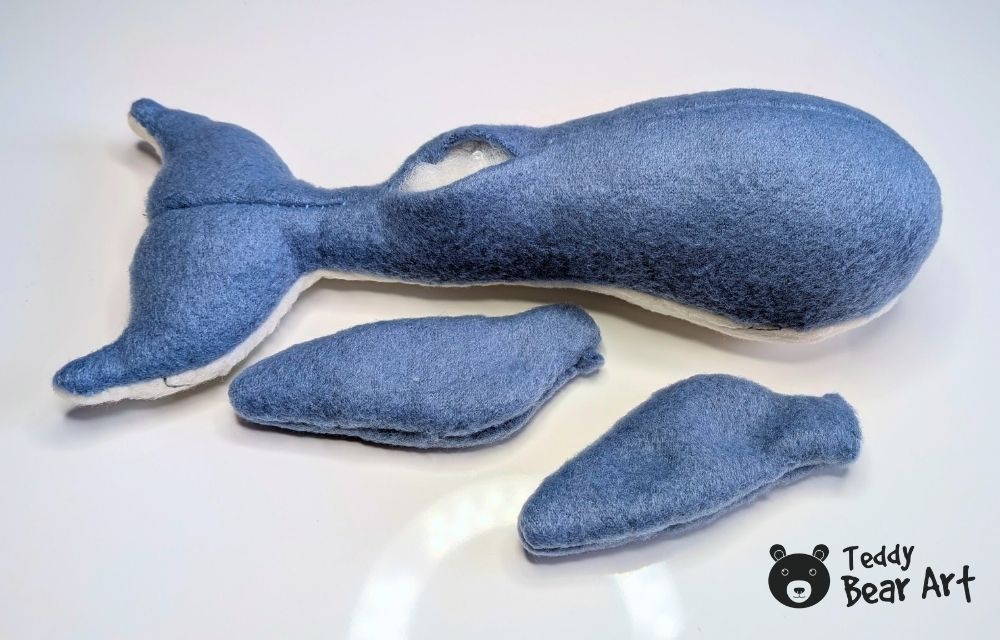
Start by cutting out two mirrored body pieces, one belly piece, and the fins. Make sure the body pieces face opposite directions before cutting, because you need a left and a right side.
Prepare the belly piece first. If you like the stitched detail, sew several soft grey lines along the belly before attaching it to the whale. This gives the finished plushie a more whale-like look and adds a little texture. For a faster version, leave the belly plain.


Sew the two mirrored parts of the body from point 1 to point 2, leaving the opening.
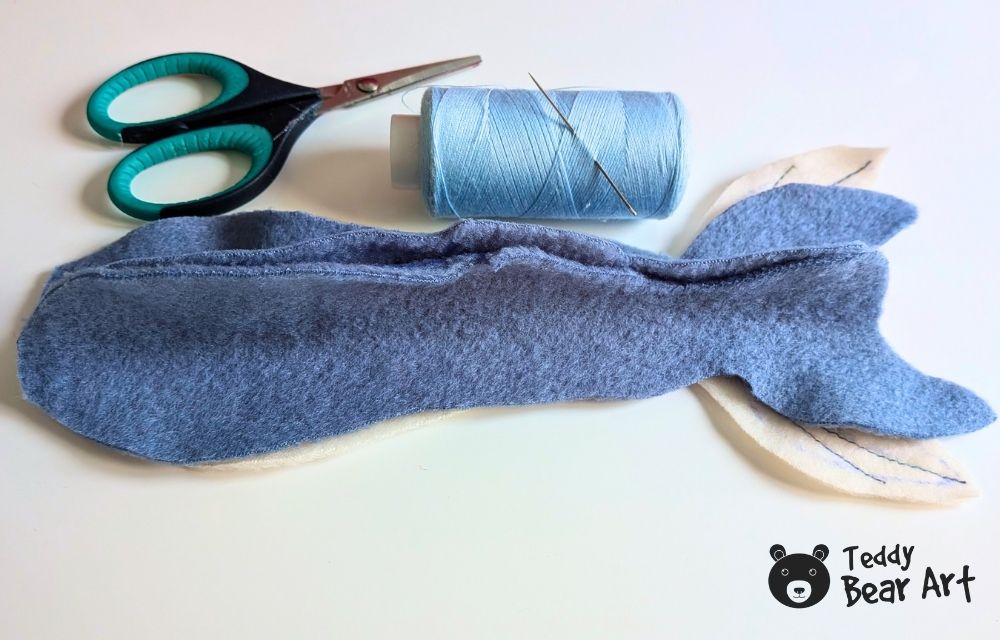
Sew the belly into the body slowly. After that, turn the whale right side out.
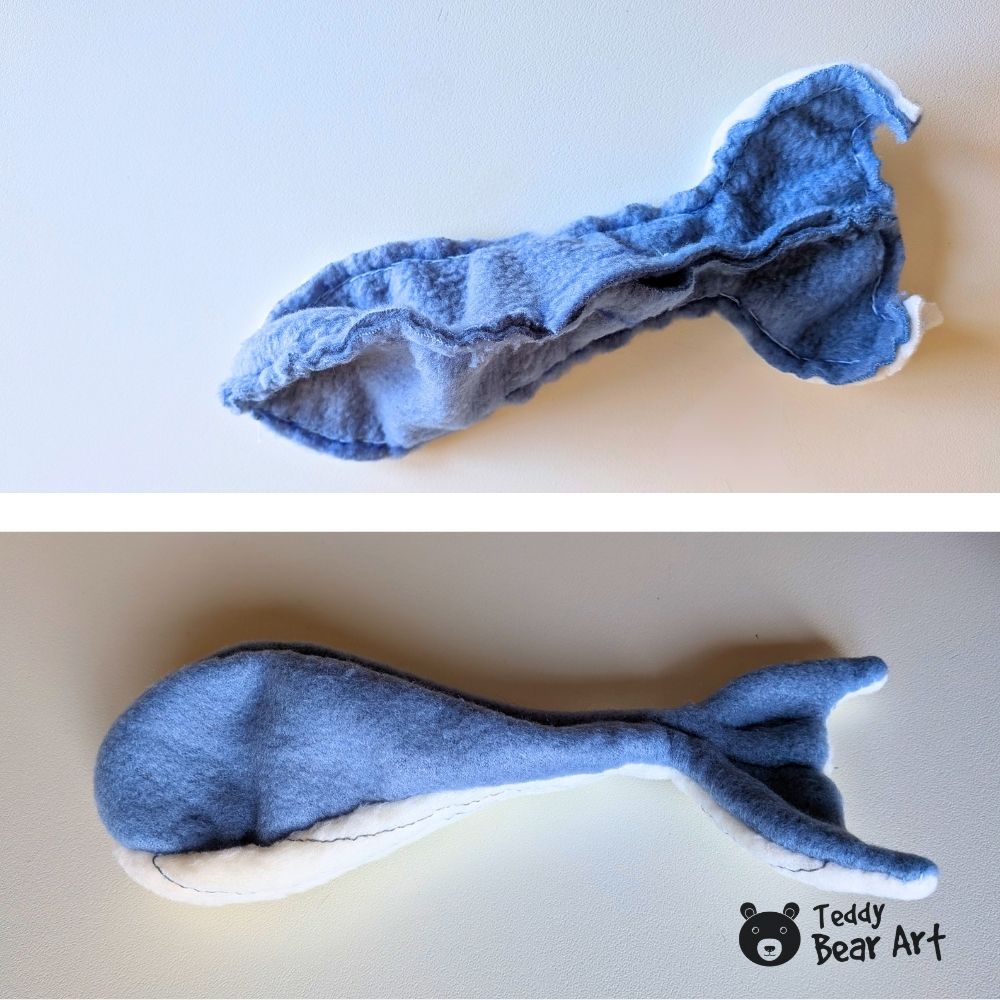
Stuff the body, close the hole with a ladder stitch, and sew the fins. The fins do not need stuffing.
Finally, add the eyes. You can use black beads or embroidery. Embroidered eyes are a good choice for toys made for very young children.
You can sew on the bead eyes before attaching the fins. This way, you can secure the thread ends in the area where the fins will be sewn later, hiding them neatly underneath.
Tips And Creative Variations
The most important part of this project is not speed, but softness and shape. Add stuffing slowly and smooth the whale with your hands as you go. Too much stuffing at once can create lumps, especially near the nose and tail.
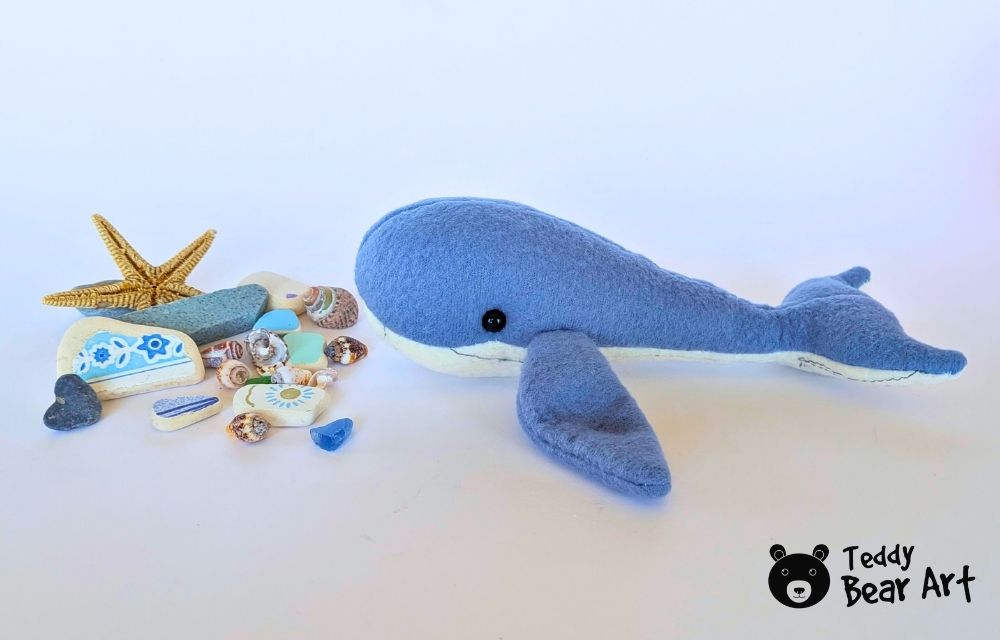
The belly can change the toy’s whole mood. A cream belly feels soft and classic. A white belly looks clean and bright. A pale blue belly gives a gentle ocean look. The stitched lines add extra charm, but the whale does not need them to be cute.
You can also play with the body color. Grey fleece makes the whale look more natural. Blue fleece feels calm and traditional. Lavender, mint, or pastel turquoise can turn it into a sweet fantasy plushie.
This whale plushie pattern can be resized, too. A small version would make a cute ornament or keychain. A larger version could become a nursery decoration or a soft ocean-themed pillow. Once you understand the basic shape, it is easy to make several whales in different colors.
FAQ
Is this whale plushie good for beginners?
Yes, this whale plushie is beginner-friendly, especially if you use fleece. T
What fabric is best for this whale?
Fleece is the easiest choice for beginners. It is soft, forgiving, and does not fray much. Felt gives a flatter look, while minky creates a very soft plushie, but it can be harder to sew.
Can I well finish whales made from this pattern?
Yes, you can. Finished handmade whales can be lovely for craft fairs, gifts, or small shops.
Before You Go
This little whale is a simple project, but it has a lot of charm. The rounded body, soft belly, and small fins make it feel sweet without making the sewing process too complicated. It is the kind of plushie that looks nice in photos, feels good in your hands, and can easily become part of a handmade ocean animal collection.
Save this whale plushie sewing tutorial so you can come back later. And if you enjoy sewing sea animals, try making a shark, manta ray, or hammerhead shark. A small collection of handmade ocean plushies would look adorable together.
Get Free Patterns & Be the First to Know!
Want free teddy bear patterns, exclusive tutorials, and a chance to win craft supplies?
Sign up for our newsletter using the subscribe form in the middle of this article to receive new patterns, insider tips, and the latest news on teddy bear art. You’ll also automatically be entered into our annual giveaway for a chance to win teddy bear crafting materials.
Bonus entry: Save one of our pins on Pinterest to increase your chances of winning!
Let’s create, inspire, and craft beautiful teddy bears together!
Hi Hanna, as you have probably already guessed, I have become a big fan of your simple patterns! I sewed the whale and just wanted to leave you a little review because it turned out so unusual and different from anything else I have made. I’m not sure if I can attach a photo here, probably not, so I’ll just say a huge thank you for sharing free patterns that you actually test yourself. It means a lot, because we don’t have to use a pattern blindly and hope it will work.
Thank you so much for such a lovely comment! I’m really happy that you sewed the whale and that he turned out special for you. This is exactly why I share my patterns, because I want people to feel confident.