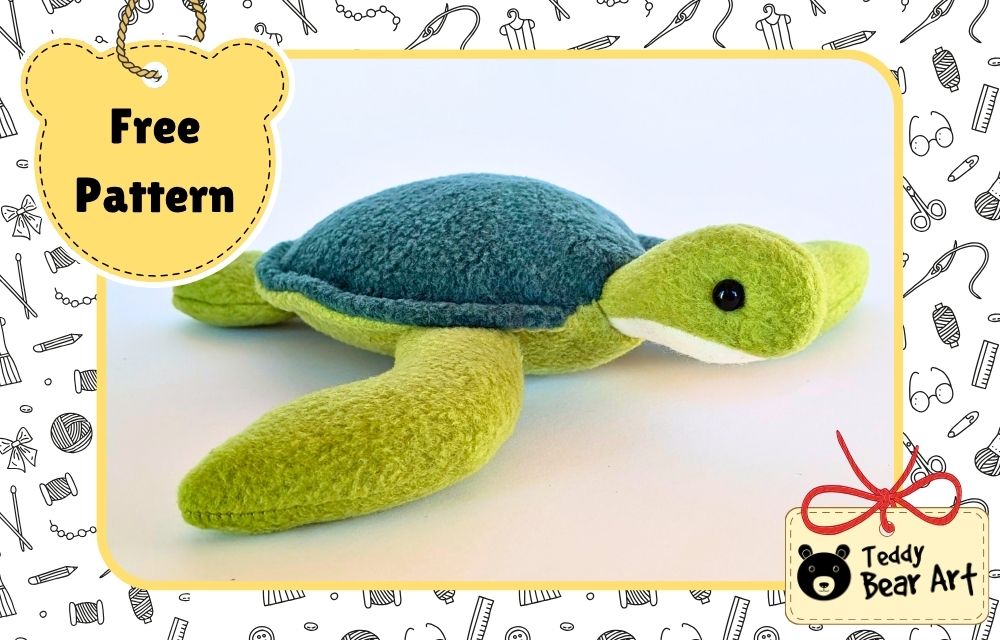
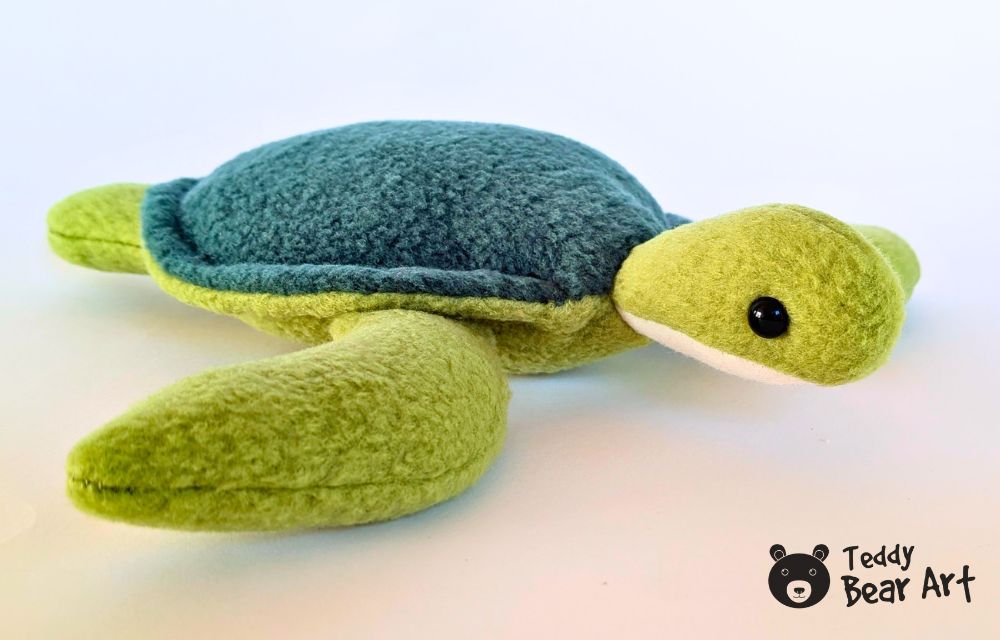
If you want to learn how to sew a turtle plush, this little project is a lovely place to start. I made this turtle from soft fleece, with a dark green shell, light green flippers, and a small white chin that makes the face look gentle and sweet. The pattern is simple, but the finished turtle looks cute, soft, and full of character. It is a nice sewing project for beginners, especially if you enjoy making sea animals and handmade plush toys.
Download The Pattern
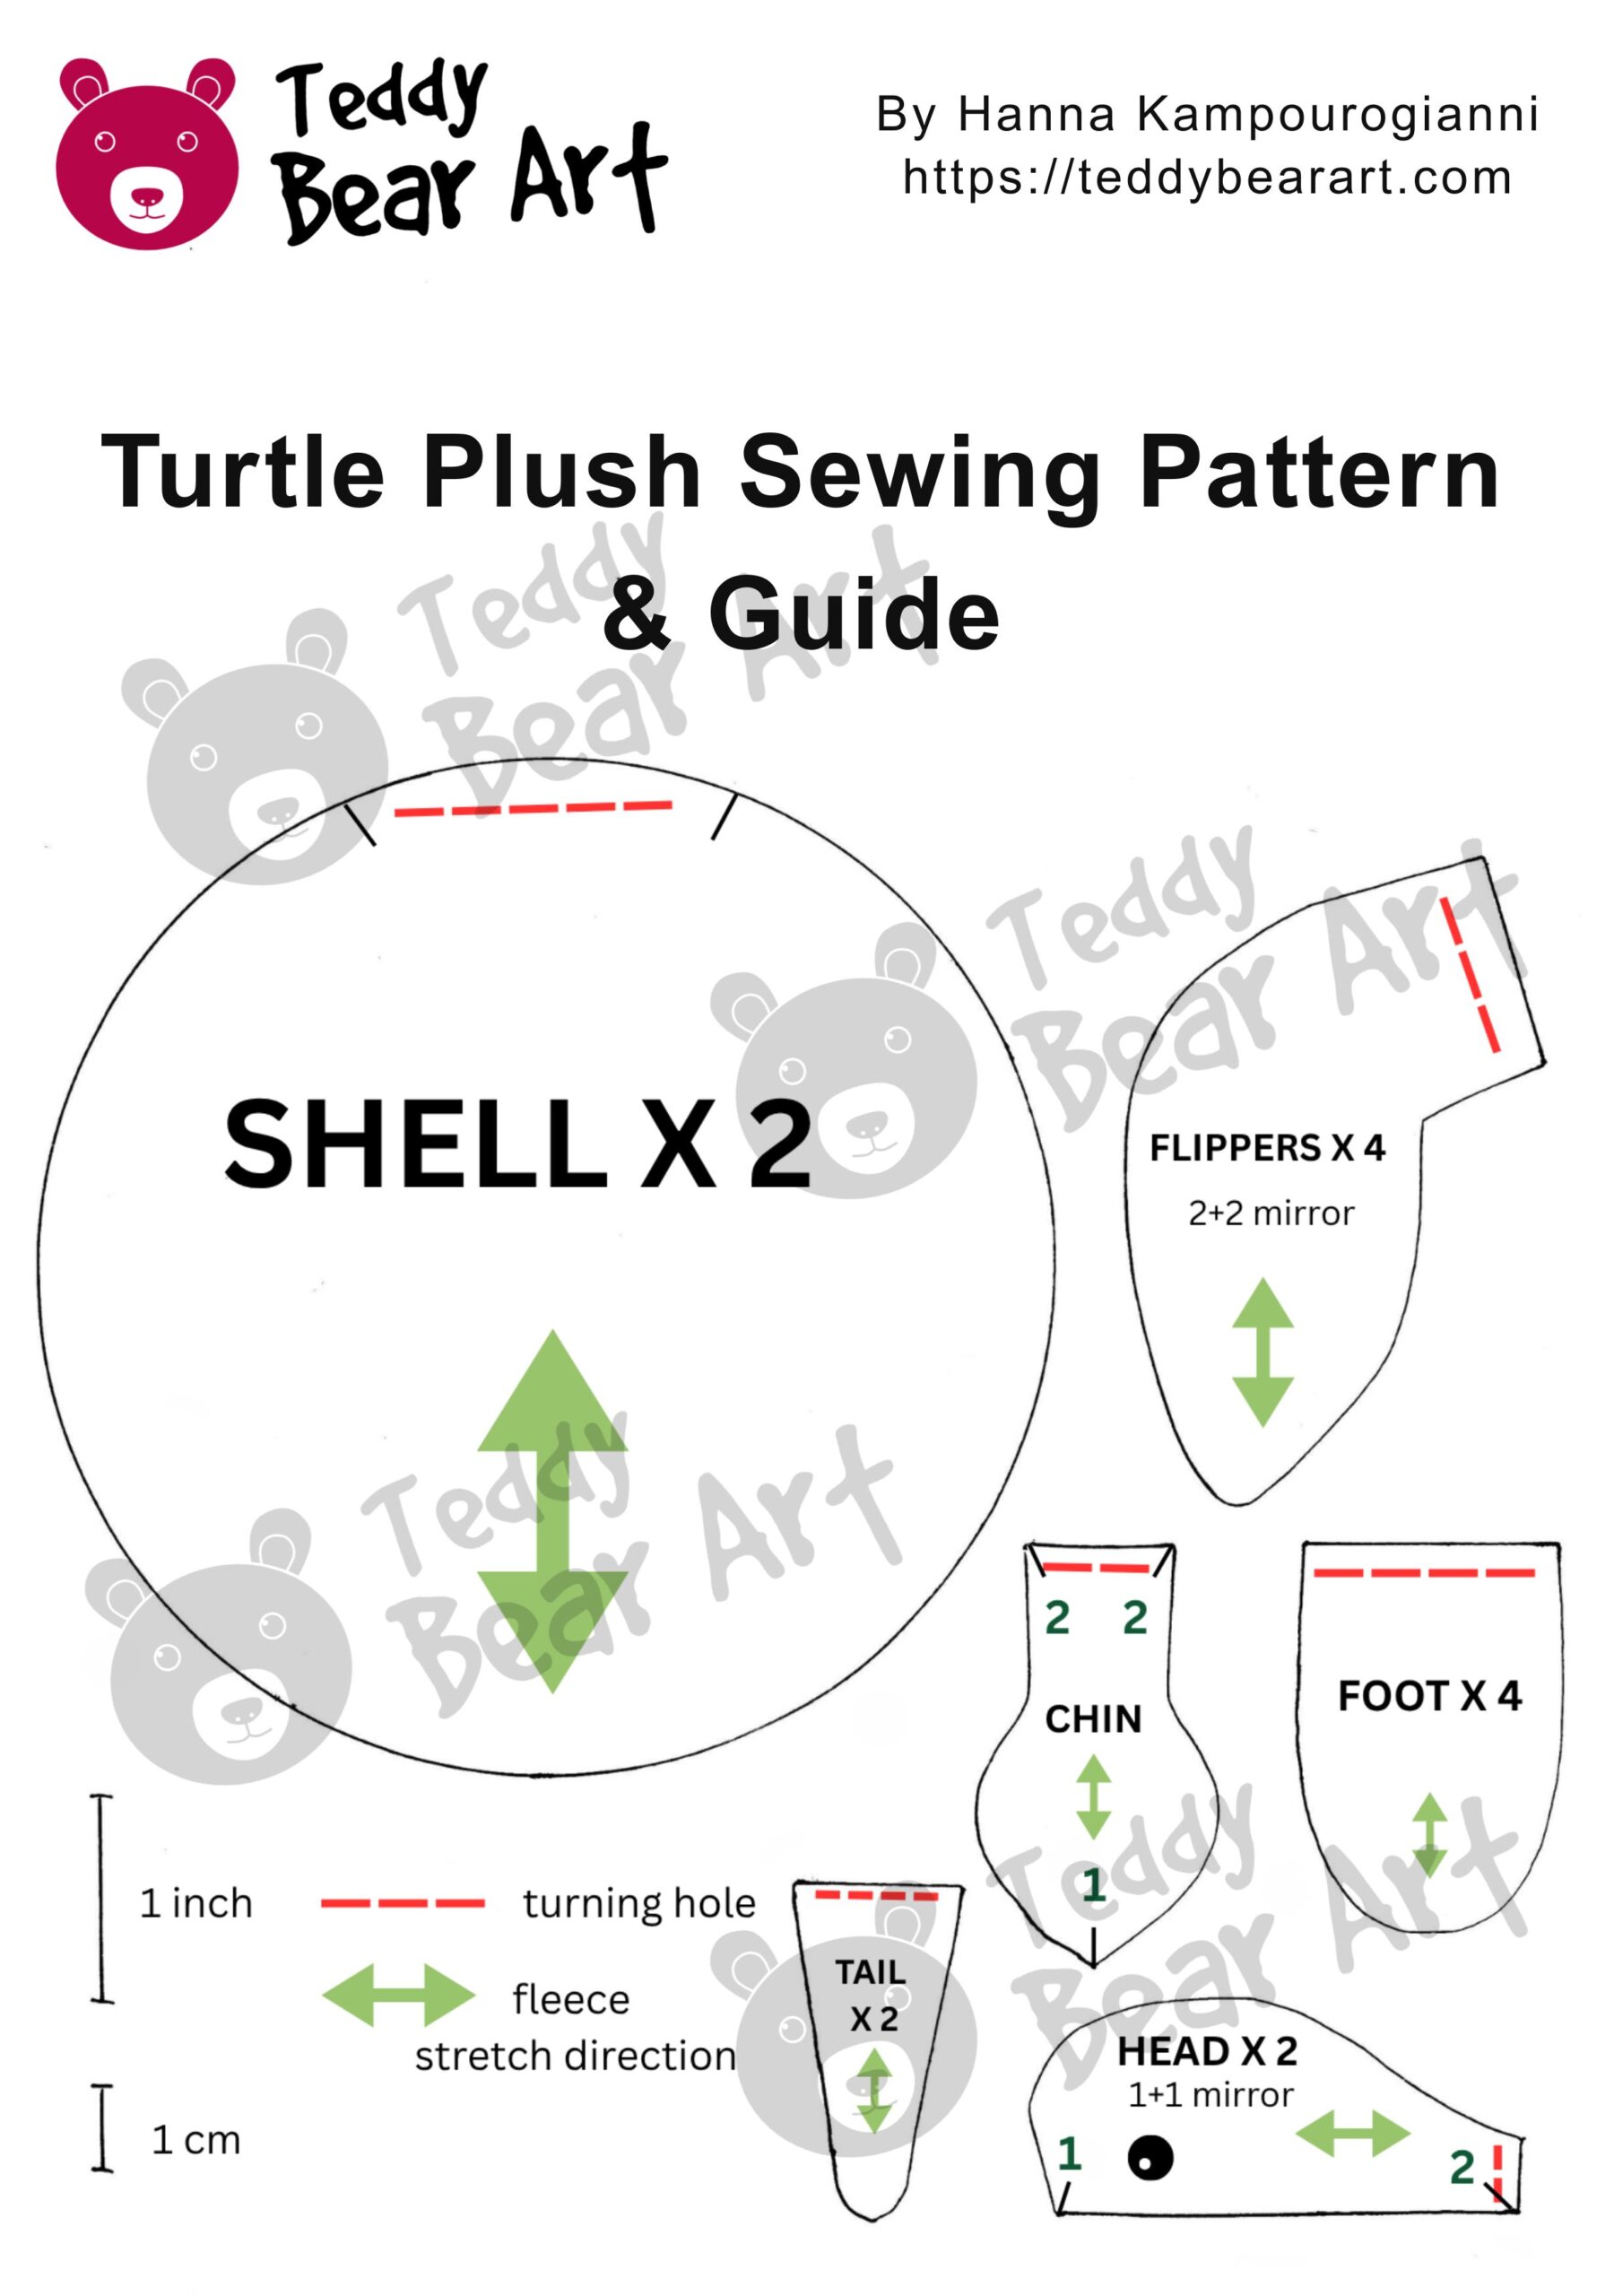
Notice that seam allowances are not included. For this project, it is fine to include 5 mm for seam allowances.
To download the pattern, follow the instructions below:
From a phone or tablet: There should be a similar option for mobile devices with Android or iOS. Click on the image. Save it by holding your finger on the image and selecting the “Save Image” option. Then, go to your photo gallery and print it (an option available).
From a computer: Click on the photo of the pattern you see below. In the new tab that will open, you press the right mouse button and select the “Save image as …” option. Then, you choose where the image will be saved on your computer.
Materials
- Soft dark green fleece for the shell
- Light green fleece for the head, flippers, tail, and lower body
- White or cream fleece for the chin piece
- Matching sewing thread
- Polyester stuffing
- Black beads, or embroidery thread for the eyes
- Sewing needle
- Sewing machine, optional
- Scissors
How to Sew a Turtle Plush
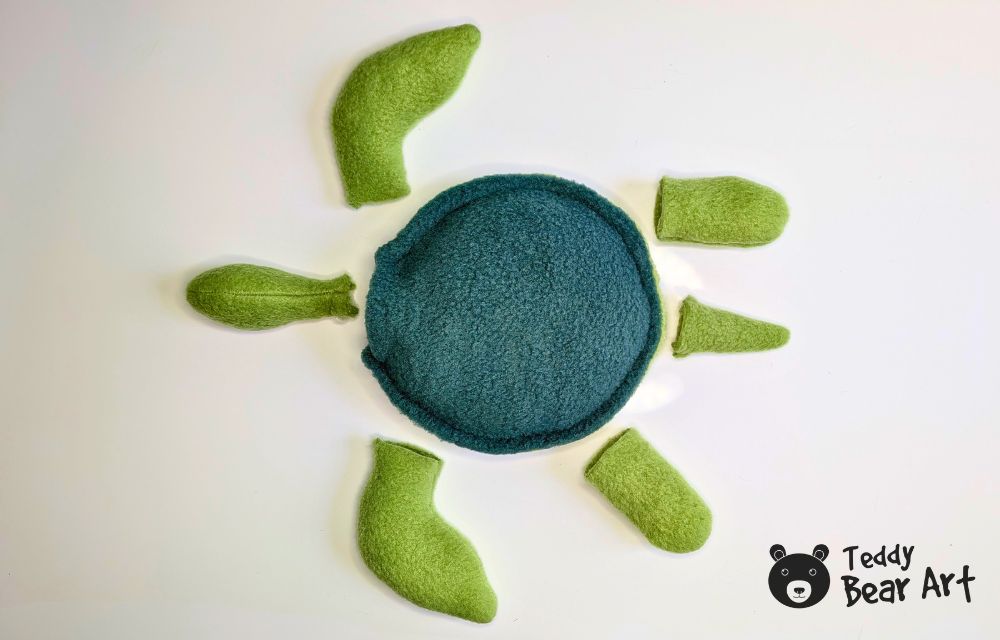
Start by cutting out all the pattern pieces. Before cutting, check the direction of the fleece nap. The pieces will look neater if the fabric pile runs in a similar direction, especially on the shell and head.
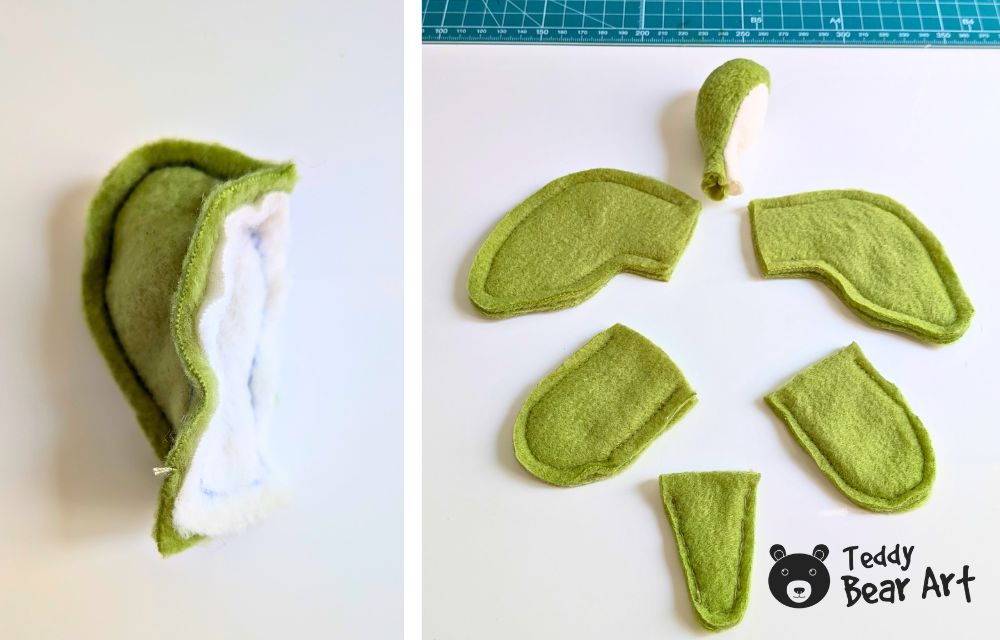
Sew the flippers and feet first. Place the matching flipper pieces right sides together and stitch around the curved edge, leaving the straight edge open for turning. Trim the seam allowance slightly on the curves, turn the flippers right side out, and smooth the edges with a wooden stick or your fingers. Stuff them. Do the same with the tail.

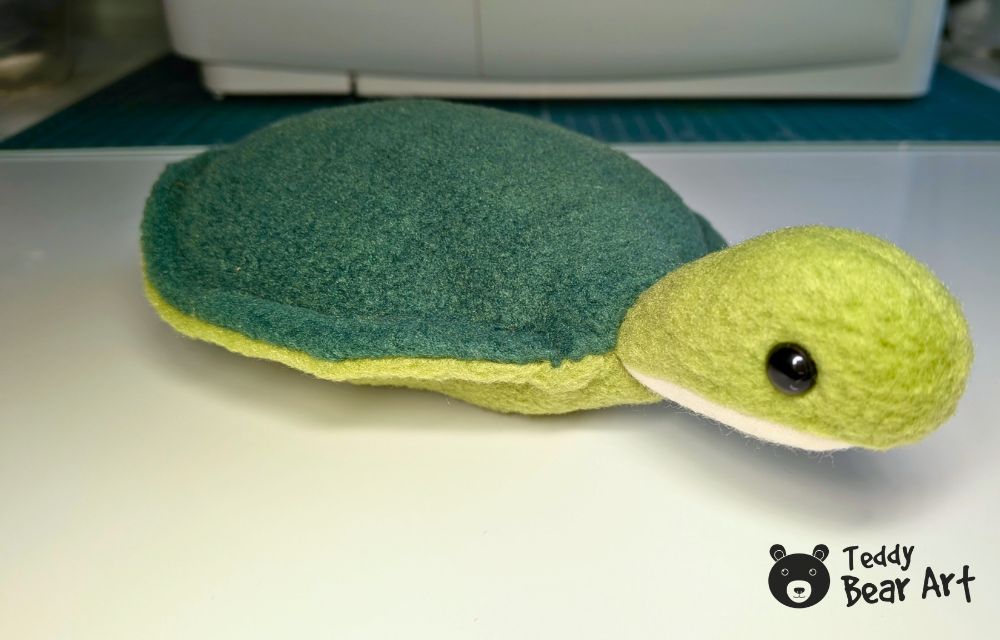
The head is the most expressive part of the turtle. First, sew the two mirrored head pieces together along the upper line. Then sew in the chin piece, matching the marks from 1 to 2. After sewing, turn the head right side out and stuff it gently. The head should be firm enough to hold its shape, but not so hard that it becomes stiff. Attach the eyes.
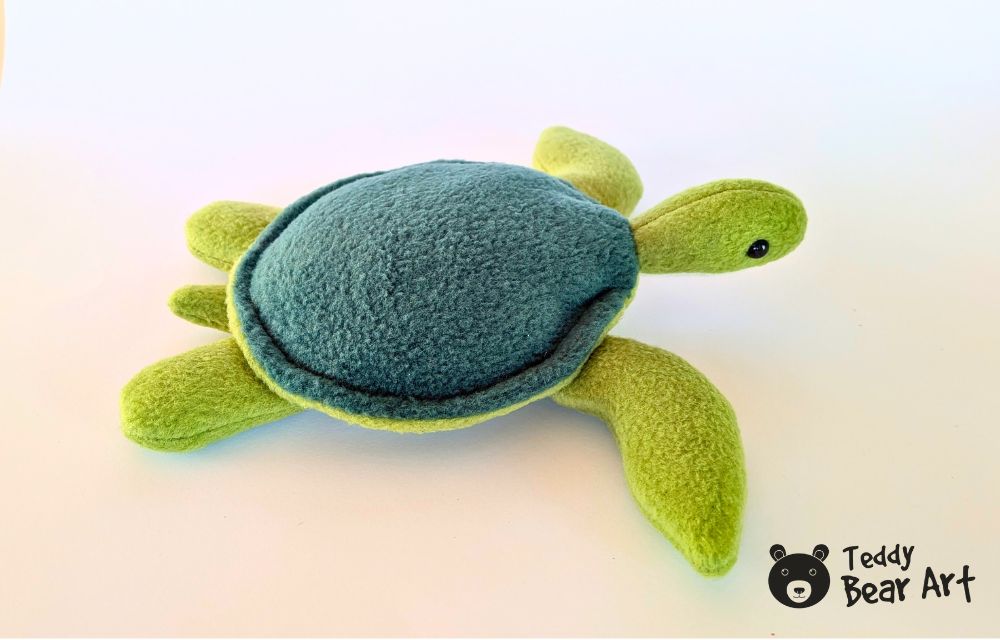
Next, prepare the turtle shell. Place the two round body pieces together and sew around the edge, leaving an opening for turning and stuffing. Turn the piece right side out and smooth the round shape. Then stitch around the circle again from the outside, close to the edge. This extra line of stitching is not only decorative, but it also helps the shell look more finished and gives the turtle that soft, raised border around the body.
Now stuff the body slowly. Add small pieces of stuffing instead of one big handful. Push the stuffing around the edges first, then fill the middle. This helps the shell stay smooth and rounded. If you overstuff it too quickly, the fleece can become lumpy, so take your time and shape the turtle with your hands as you go.
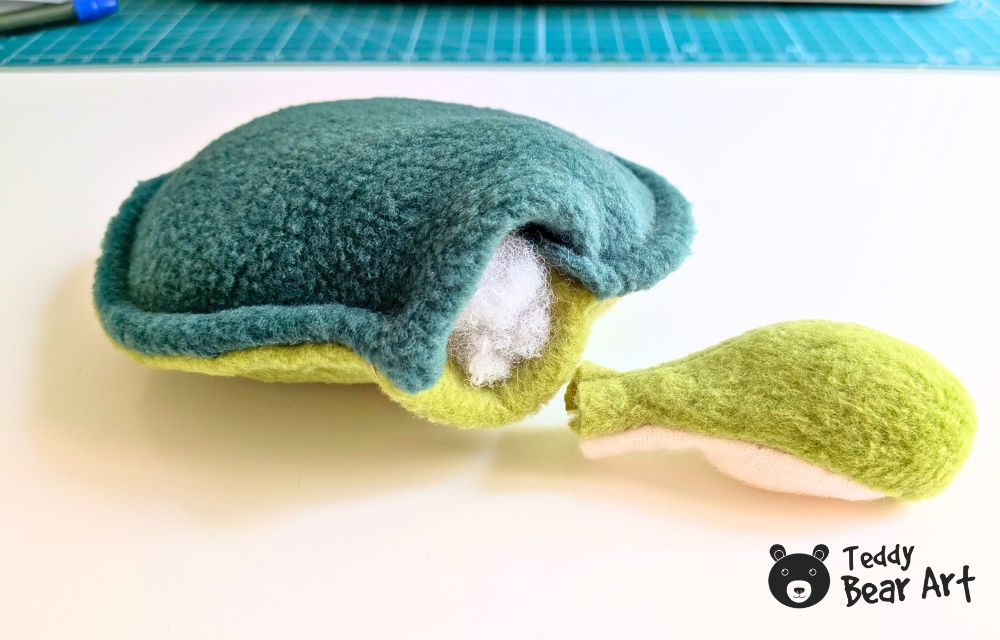
Close and insert the neck edge into the body opening and sew it securely. Make sure the white chin faces downward, and the head is centered. I like to check the turtle from the top and from the side before stitching everything closed, because even a small change in head angle can change the whole personality of the plushie.
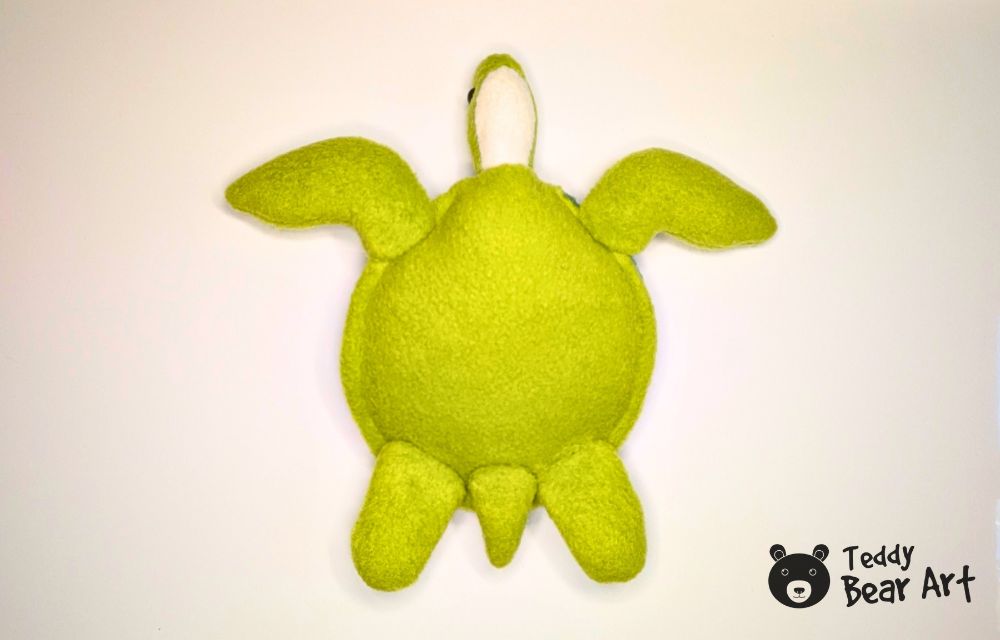
Attach the flippers and tail to the body by hand. Place the front flippers slightly forward, the back flippers lower on the body, and the little tail at the back. Pin everything first and look at the turtle from above. When the placement feels balanced, sew each part firmly to the body with matching thread.
If you need help closing openings neatly by hand, this ladder stitch tutorial is a useful resource. A neat closing stitch makes a big difference on handmade plush toys, especially on soft fleece.
Tips and Creative Variations
You can change the mood of the turtle with color. Dark green and olive shades feel calm and nature-inspired. Bright green looks more playful. A teal shell with pale green flippers gives the turtle an ocean style. A brown shell with warm beige details can make it look more like a little land turtle.
If you want to add detail to the shell, stitch a few gentle curved lines on the top before stuffing the body. Keep them simple. Too many lines can make the shell look busy, especially on a small plush. You can also add tiny embroidered cheeks, a small smile, or soft spots on the flippers.
This pattern can be resized, too. A tiny turtle would be adorable as part of a handmade mobile or ornament. A larger turtle could become a nursery decoration or a soft pillow. Once you understand the basic construction, you can sew several turtles in different colors and make a whole little sea turtle family.
This is also a good pattern for using leftover fleece. Small pieces are enough for the flippers, tail, and chin, so you do not need a large amount of fabric. The shell is the biggest piece, and even that can be made from a soft scrap if it is large enough for the round body. That makes this turtle plush a sweet little stash-busting project.
FAQ
Is this turtle plush good for beginners?
Yes, this turtle plush is beginner-friendly, especially if you use fleece. The round body is simple, and the flippers are easy to sew. The head needs a little more patience because of the chin piece, but it is still very manageable.
What fabric is best for this turtle plush?
Fleece is the best choice for beginners. It is soft, easy to sew, and forgiving around curves. Minky is very soft and beautiful, but it can slide while sewing, so it is better for people with a little more sewing experience.
Do I need a sewing machine?
No, you can sew this turtle plush by hand. A sewing machine makes the shell and flippers faster, but hand sewing works perfectly well if your stitches are small and even.
Can I sell finished turtles made from this pattern?
Yes, finished handmade turtles can be lovely for craft fairs, gifts, or small handmade shops. Try using different fleece colors so each turtle has its own little personality.
Can I resize the pattern?
Yes, you can make it smaller or larger. Just resize all the pieces together so the proportions stay the same. Very small turtles are cute, but the tiny head and flippers can be harder to turn.
Before You Go
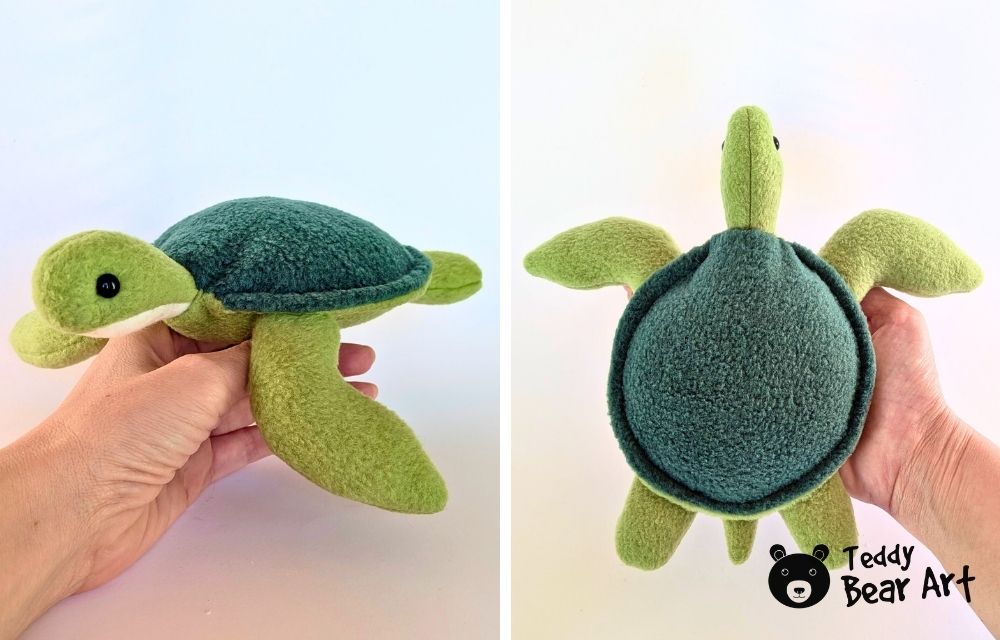
This little turtle plush is a simple project, but it has a lot of character. The rounded shell, soft flippers, tiny tail, and gentle face make it a sweet handmade sea animal to sew from fleece. It is also a lovely companion project if you are building a small ocean plush collection with whales, sharks, manta rays, or other sea animals.
Save this tutorial for your next sewing day, print the free pattern, and enjoy the slow, cozy process of turning a few soft pieces of fleece into a turtle plush with its own little personality.
Get Free Patterns & Be the First to Know!
Want free teddy bear patterns, exclusive tutorials, and a chance to win craft supplies?
Sign up for our newsletter using the subscribe form in the middle of this article to receive new patterns, insider tips, and the latest news on teddy bear art. You’ll also automatically be entered into our annual giveaway for a chance to win teddy bear crafting materials.
Bonus entry: Save one of our pins on Pinterest to increase your chances of winning!
Let’s create, inspire, and craft beautiful teddy bears together!
Hi Hanna! This turtle tutorial is really lovely and easy to follow. I started sewing this little turtle, and everything was going well, but I am having trouble with the circular stitching on the shell. I cannot get the circle even, and it keeps looking a little wavy. Do you have any tips for keeping that round line neat when sewing on fleece?
Hi Shafna,
Thank you so much! I’m really happy you started sewing the turtle.
Yes, the circular stitching on the shell can be tricky on a sewing machine, especially with fleece. The best way is to make a guide before you sew. For example, take a glass or cup with a bottom that is slightly smaller than the shell pattern. Place it on a piece of paper, trace around it, and cut out the paper circle. Then place this paper circle in the center of the shell and lightly mark around it with a disappearing fabric marker, chalk, or a thin piece of soap.
After that, remove the paper and sew slowly along the marked line. I recommend doing this before stuffing the shell, while the piece is still flat. Keep the needle down when you need to turn the fabric. Lift the presser foot slightly if needed, rotate the shell a little, lower the foot again, and continue sewing slowly. Try not to pull the fleece, because this can make the circle wavy. A slightly longer stitch, about 3–3.5 mm, can also help the line look smoother.