


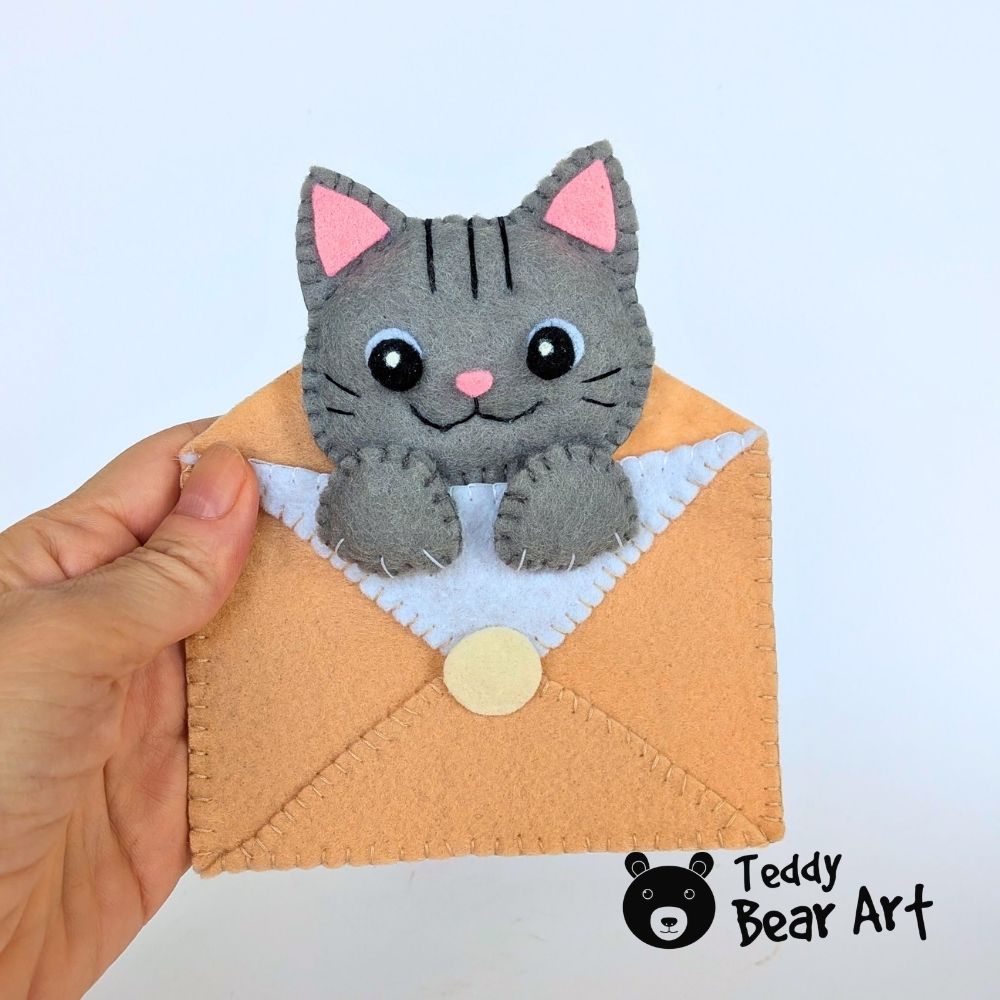
This free cat plush sewing pattern is a simple hand-sewn project for beginners. The little cat sits inside a felt envelope with its paws resting over the front edge. The cat and envelope are made separately and attached at the end.
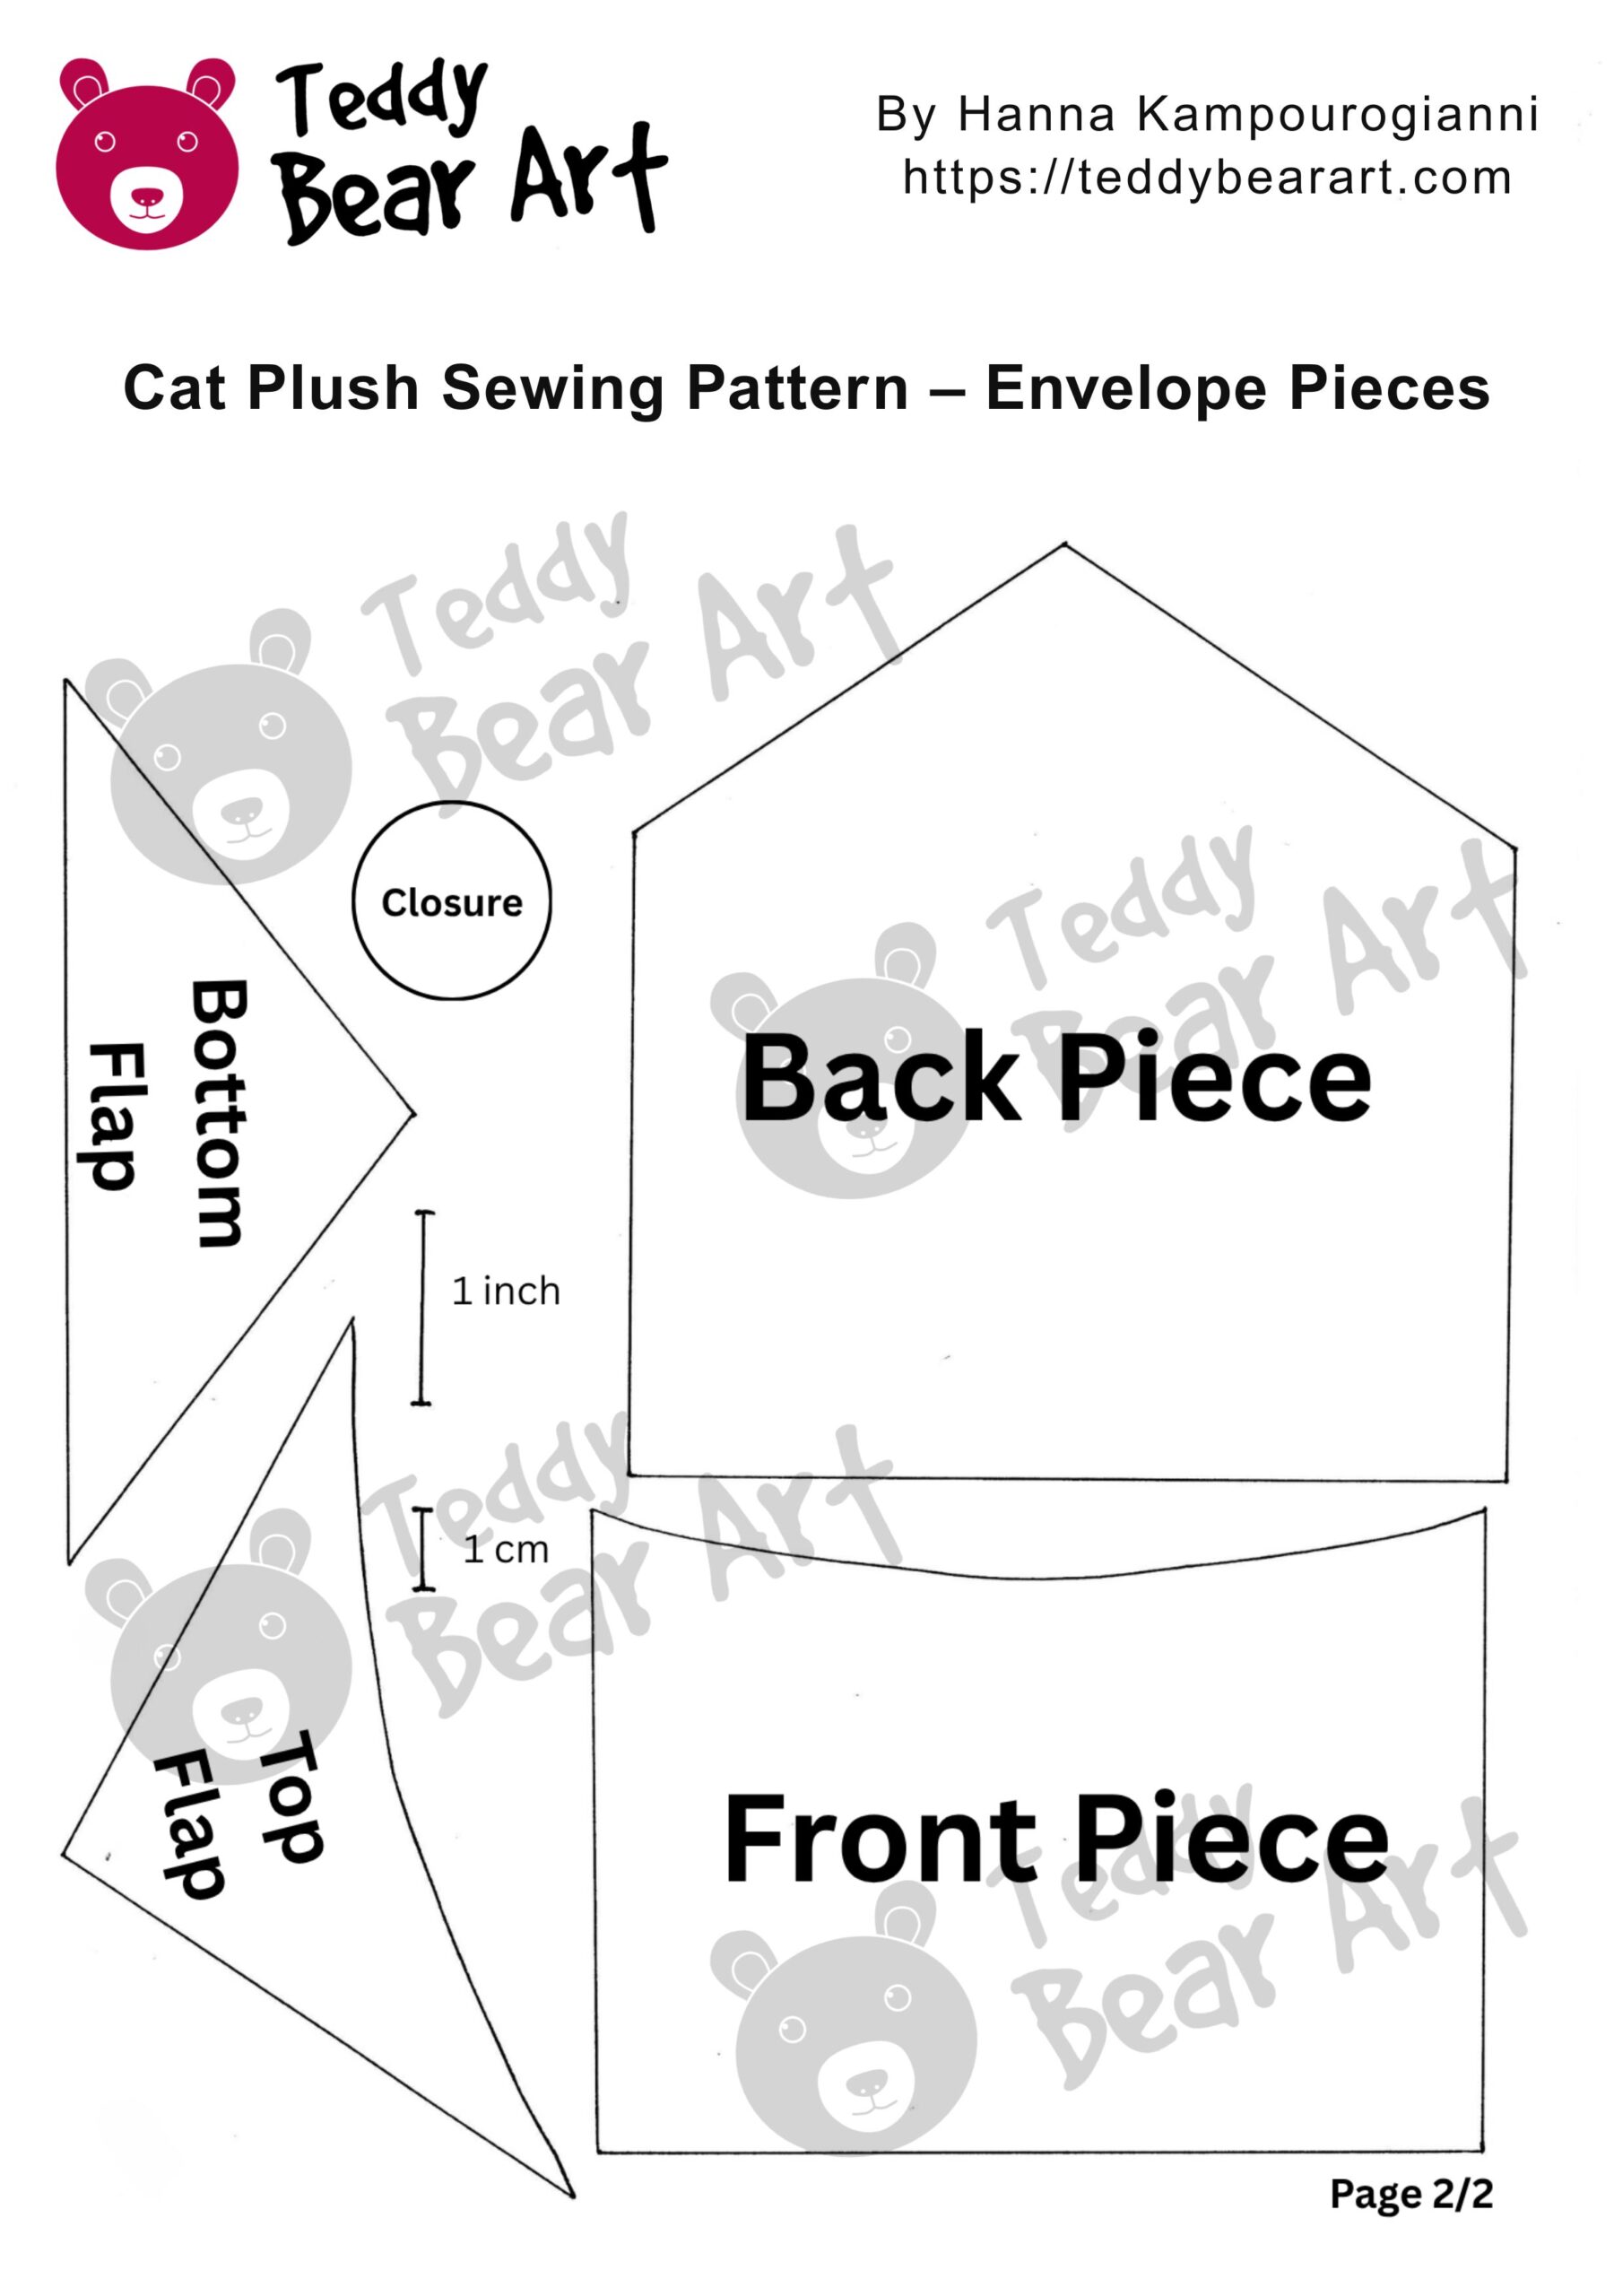
Download The Pattern
Notice: No additional seam allowance is needed. Cut directly along the pattern lines.
To download the pattern, follow the instructions below:
From a phone or tablet: There should be a similar option for mobile devices with Android or iOS. Click on the image. Save it by holding your finger on the image and selecting the “Save Image” option. Then, go to your photo gallery and print it (an option available).
From a computer: Click on the photo of the pattern you see below. In the new tab that will open, press the right mouse button and select the “Save image as …” option. Then, choose where the image will be saved on your computer.

What You’ll Need
- Felt
- Polyester stuffing
- Threads
- Hand-sewing needle
- Scissors
- Glue
- White acrylic paint, white pen, or a small piece of white felt for the eye highlights
Cat Plush Sewing Pattern Tutorial
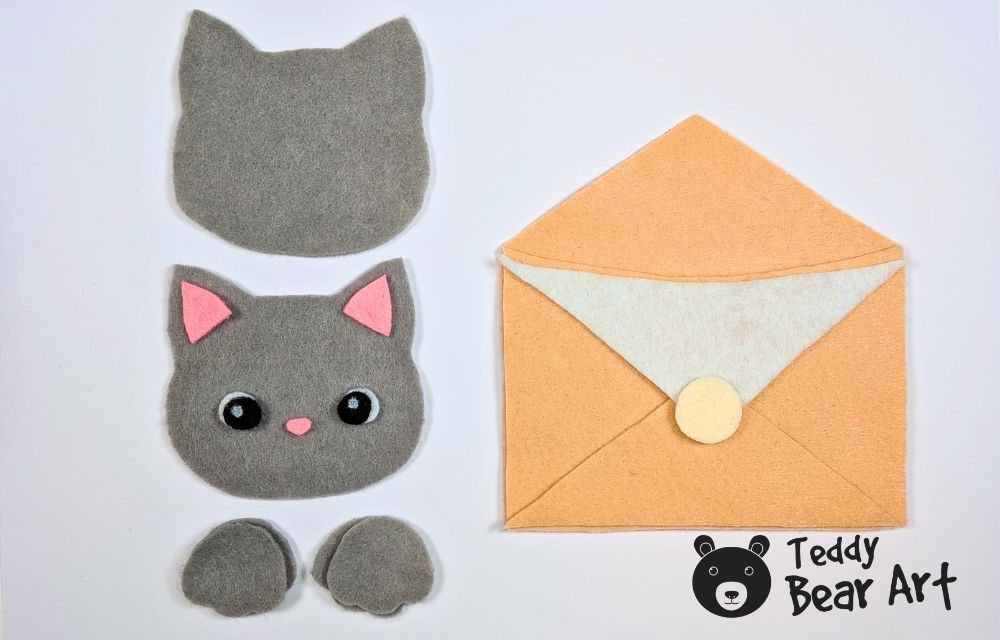
Cut Out the Pieces
Transfer the pattern pieces onto the felt and cut them out.
Lay everything out before sewing and check that all the pieces are ready.
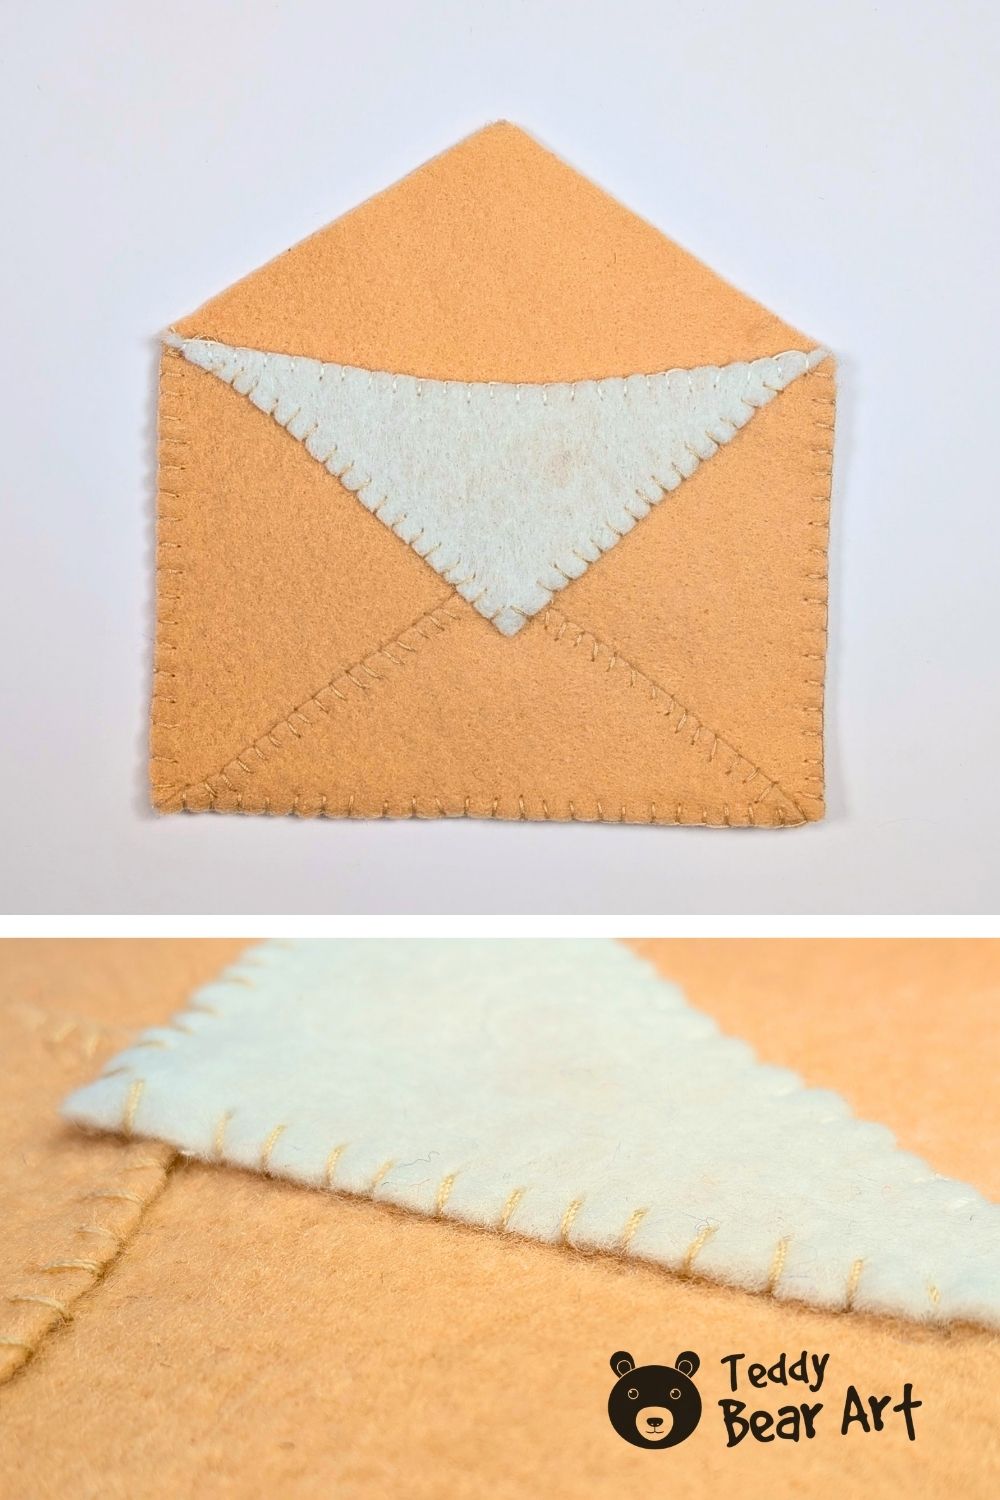
Sew the Envelope
Start with the Back Piece, Front Piece, and Bottom Flap. Position the three pieces as shown in the photo and sew them together along the outer edges using blanket stitch.
If this stitch is new to you, watch my Blanket Stitch Tutorial to see how I sew felt pieces by hand.
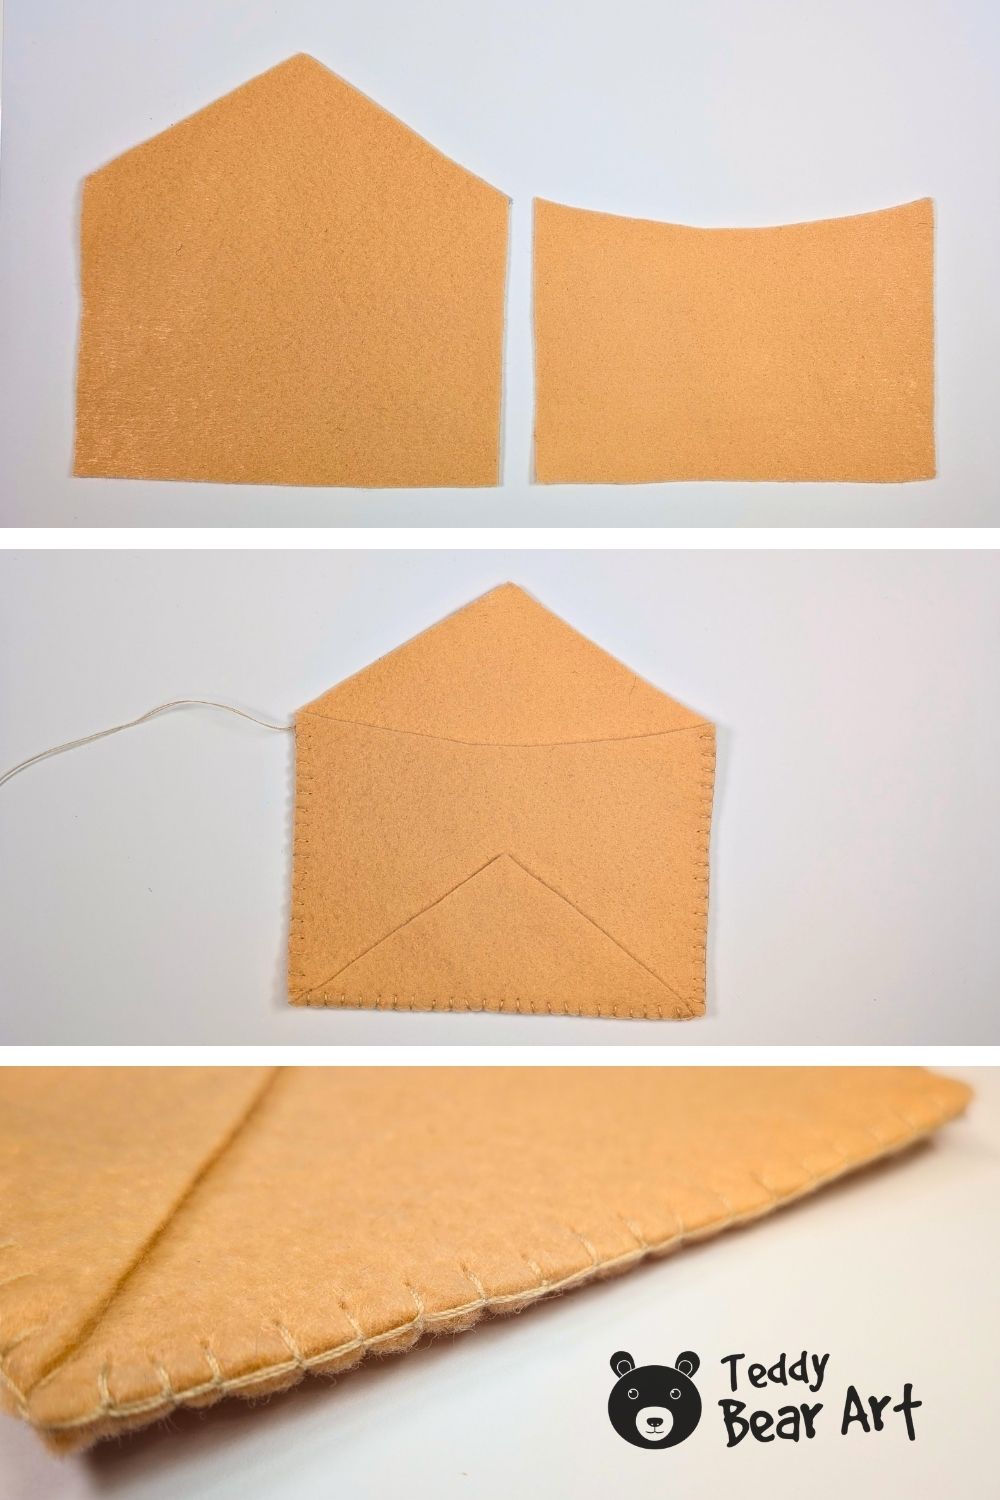
Next, place the Top Flap on the front of the envelope and attach it with whip stitch.
If you have not used this stitch before, watch my Whip Stitch Hand Sewing Tutorial before sewing the flap.
Make the Cat
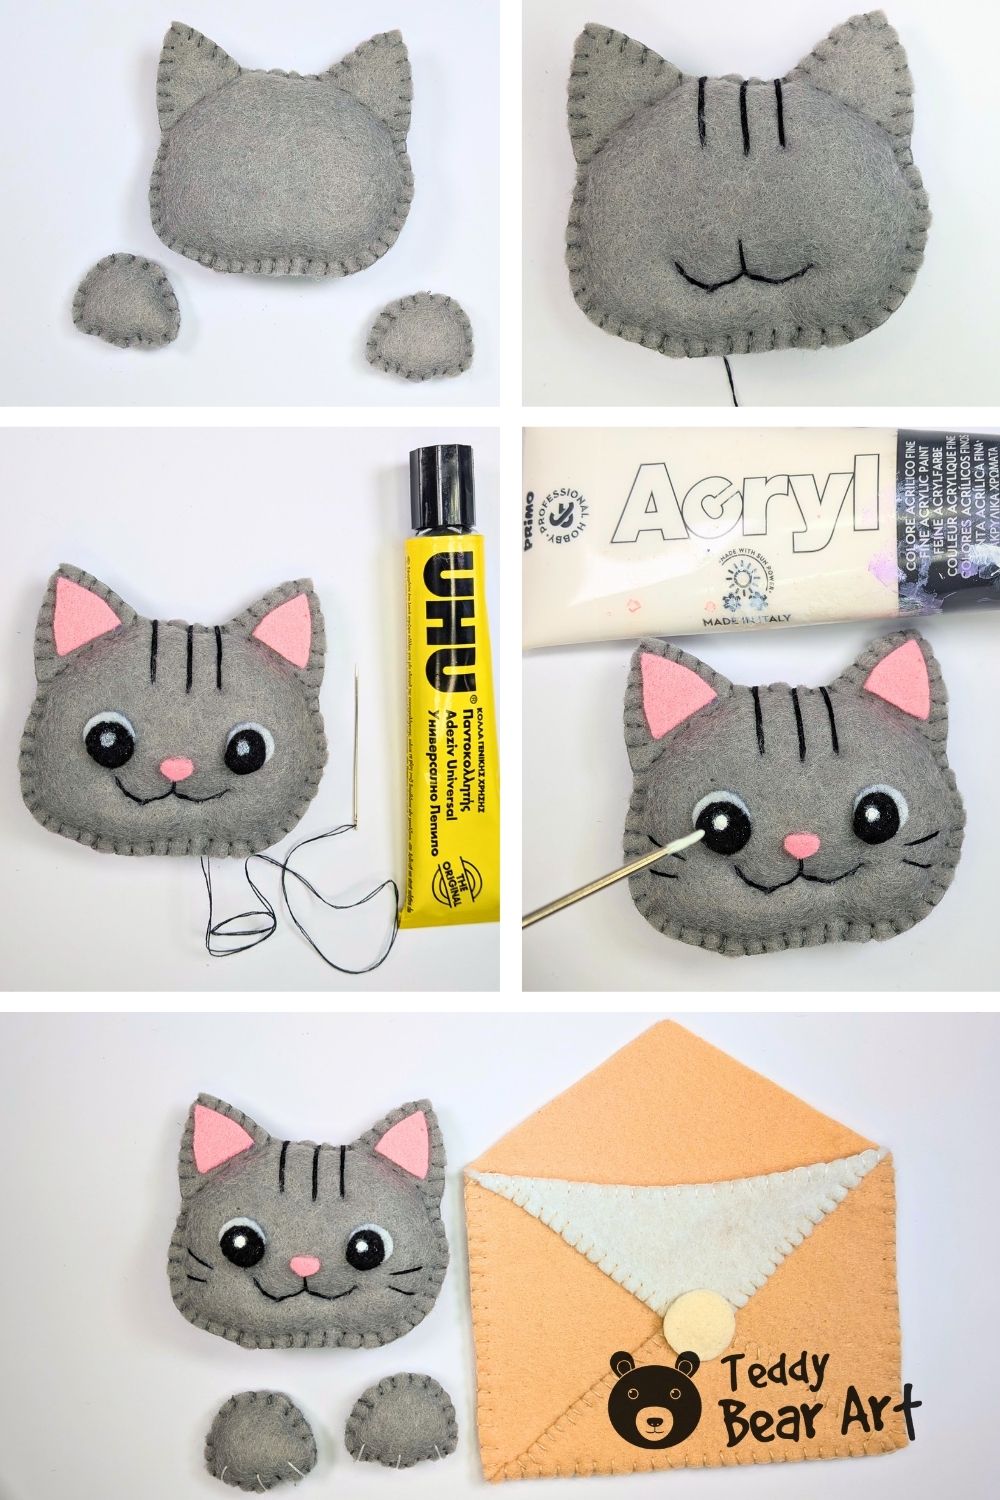
Place the two head pieces together and sew around the edge with blanket stitch. Leave a small opening, add a little stuffing, then close the opening.
Embroider the mouth, whiskers, and forehead stripes. Glue the inner ear pieces, nose, and eyes in place.
For the white highlights in the eyes, use white acrylic paint, a white pen, or tiny circles cut from white felt.
Sew the paw pieces together with blanket stitch and add a small amount of stuffing.
Assemble the Cat and Envelope
Place the head inside the envelope and adjust its position.
The paws can be sewn or glued to the head. You can also attach them to the envelope if you want them to stay firmly in place.
The head can be sewn or glued to the inside back of the envelope.
Once the cat is securely attached, glue the Closure in place on the front of the envelope.
Adjust the paws so they rest naturally over the edge, and the toy is finished.
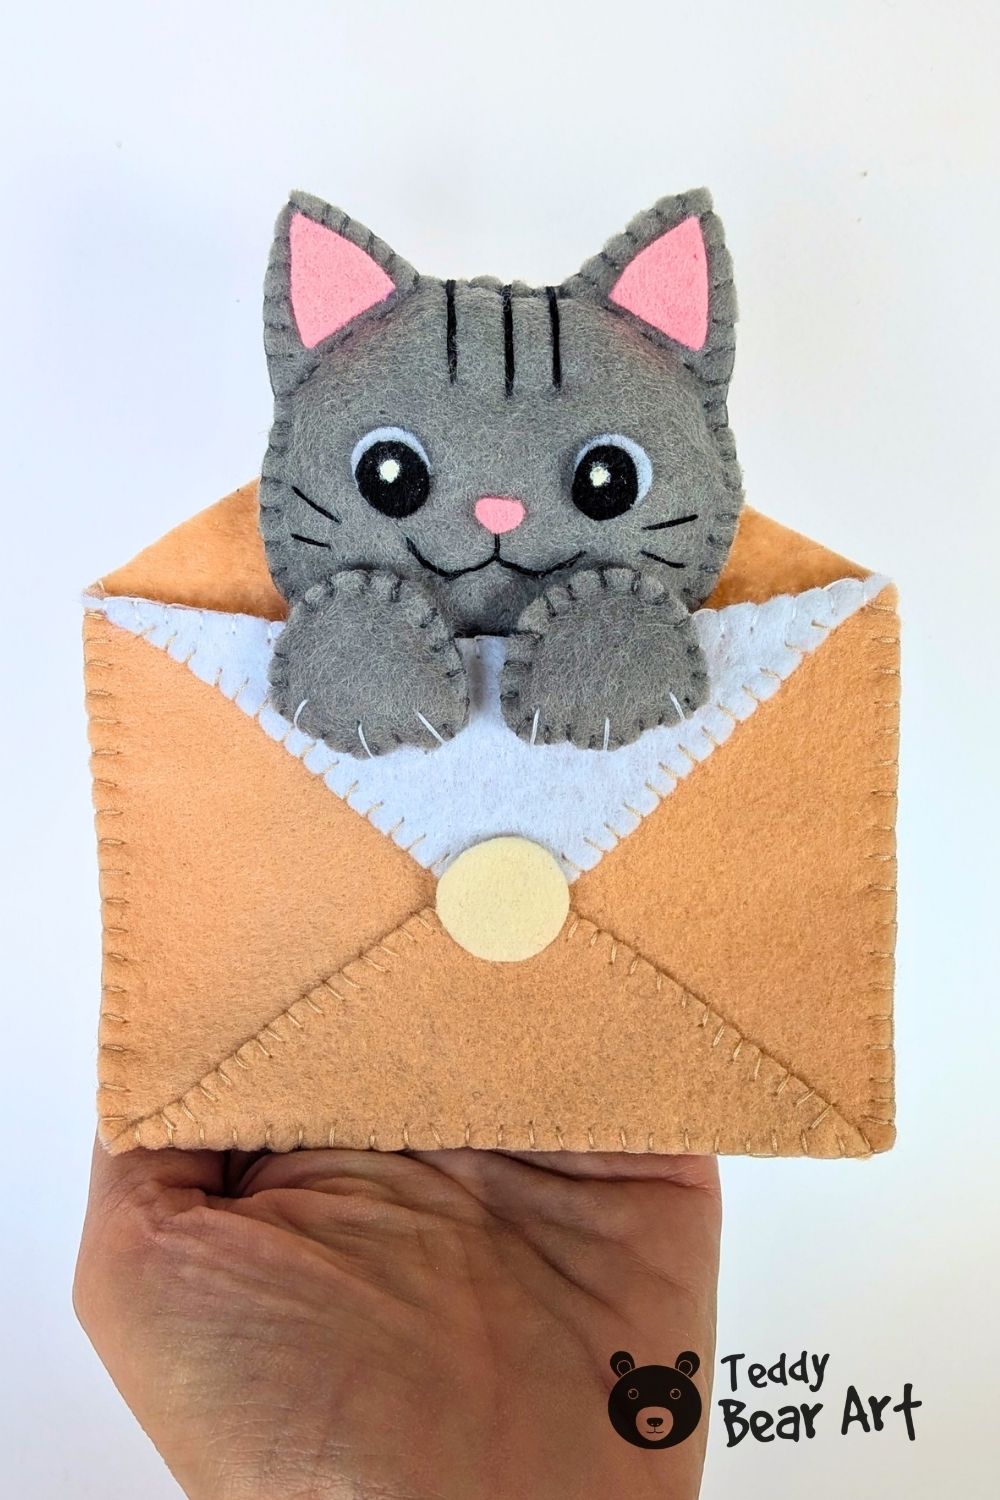
This cat plush sewing pattern is easy to personalize. Change the colors, add different stripes, or give the cat a slightly different expression.
FAQ
Do I need a sewing machine?
No. The entire project can be sewn by hand.
What thickness of felt should I use?
I recommend 2 mm felt. It is firm enough to help the envelope keep its shape but still easy to sew by hand.
Can I sew the small details instead of gluing them?
Yes. The eyes, inner ears, Closure, head, and paws can be sewn instead of glued. And you can embroider the nose.
Before You Go
If you enjoyed making this little cat, take a look at my Moon Cat Sewing Pattern. It is another hand-sewn cat project with the paws resting over the edge of a crescent moon.
You may also like my Felt Cat in a Cup Sewing Pattern, where another little cat peeks out from inside a felt cup.
Get Free Patterns & Be the First to Know!
Want free teddy bear patterns, exclusive tutorials, and a chance to win craft supplies?
Sign up for our newsletter using the subscribe form in the middle of this article to receive new patterns, insider tips, and the latest news on teddy bear art. You’ll also automatically be entered into our annual giveaway for a chance to win teddy bear crafting materials.
Bonus entry: Save one of our pins on Pinterest to increase your chances of winning!
Let’s create, inspire, and craft beautiful teddy bears together!