
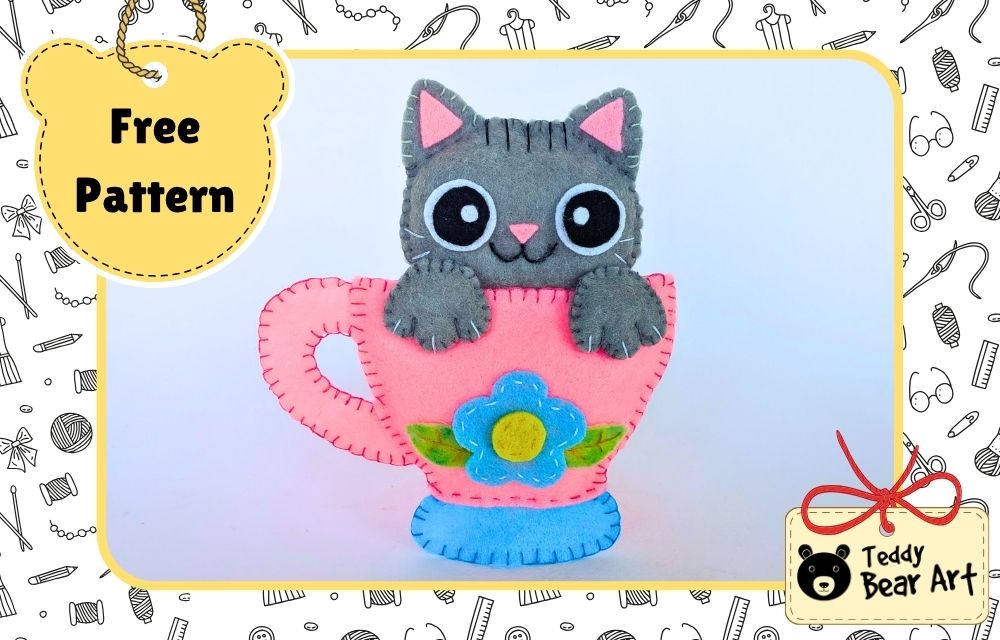

This felt cat sewing pattern is a sweet hand-sewn project featuring a little gray cat peeking out of a colorful felt cup. The finished toy is approximately 14 cm (5.5 inches) tall.
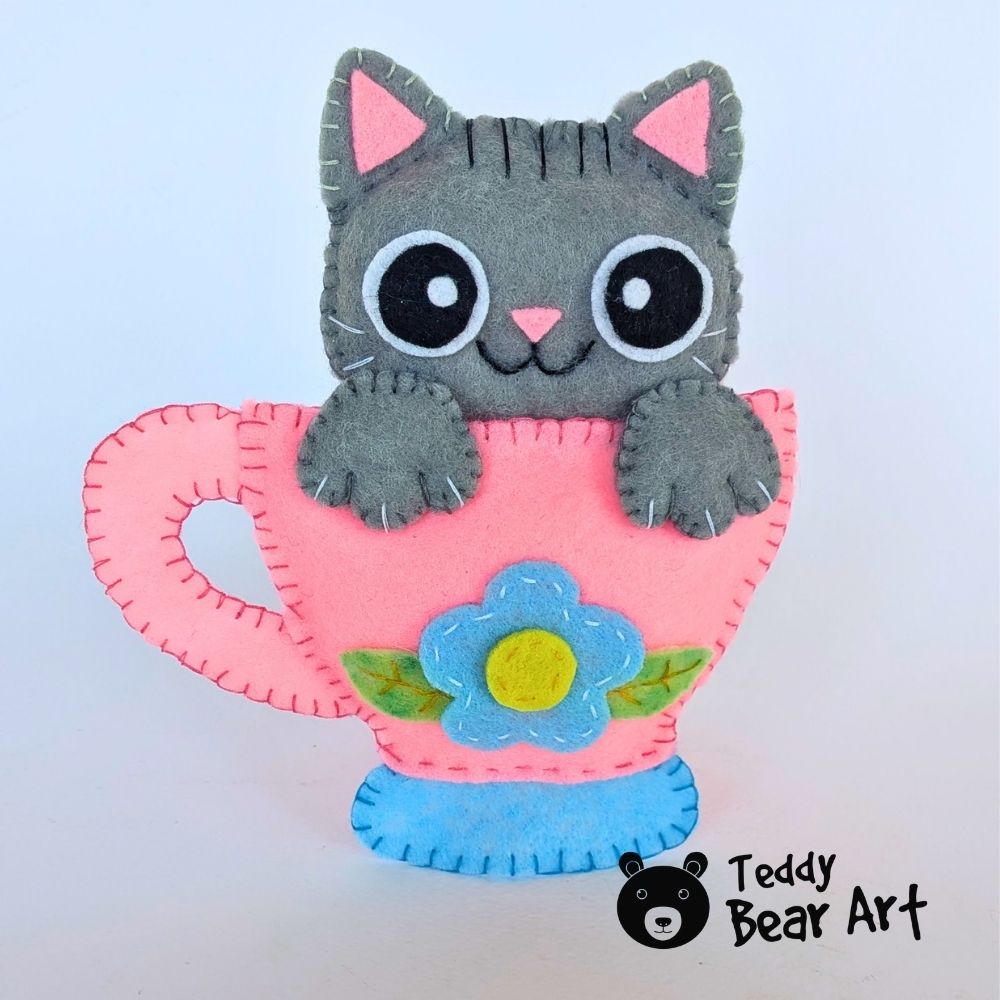
Everything is sewn by hand, so you do not need a sewing machine. The design also gives you plenty of room to play with colors. Make a gray, white, black, ginger, or patterned cat, then choose a cup color that makes your little character stand out.
You can keep the finished cat as a small decorative felt toy, make the bottom firmer so the cup can stand, or add a ribbon loop at the top and turn it into a hanging decoration.
Download The Pattern
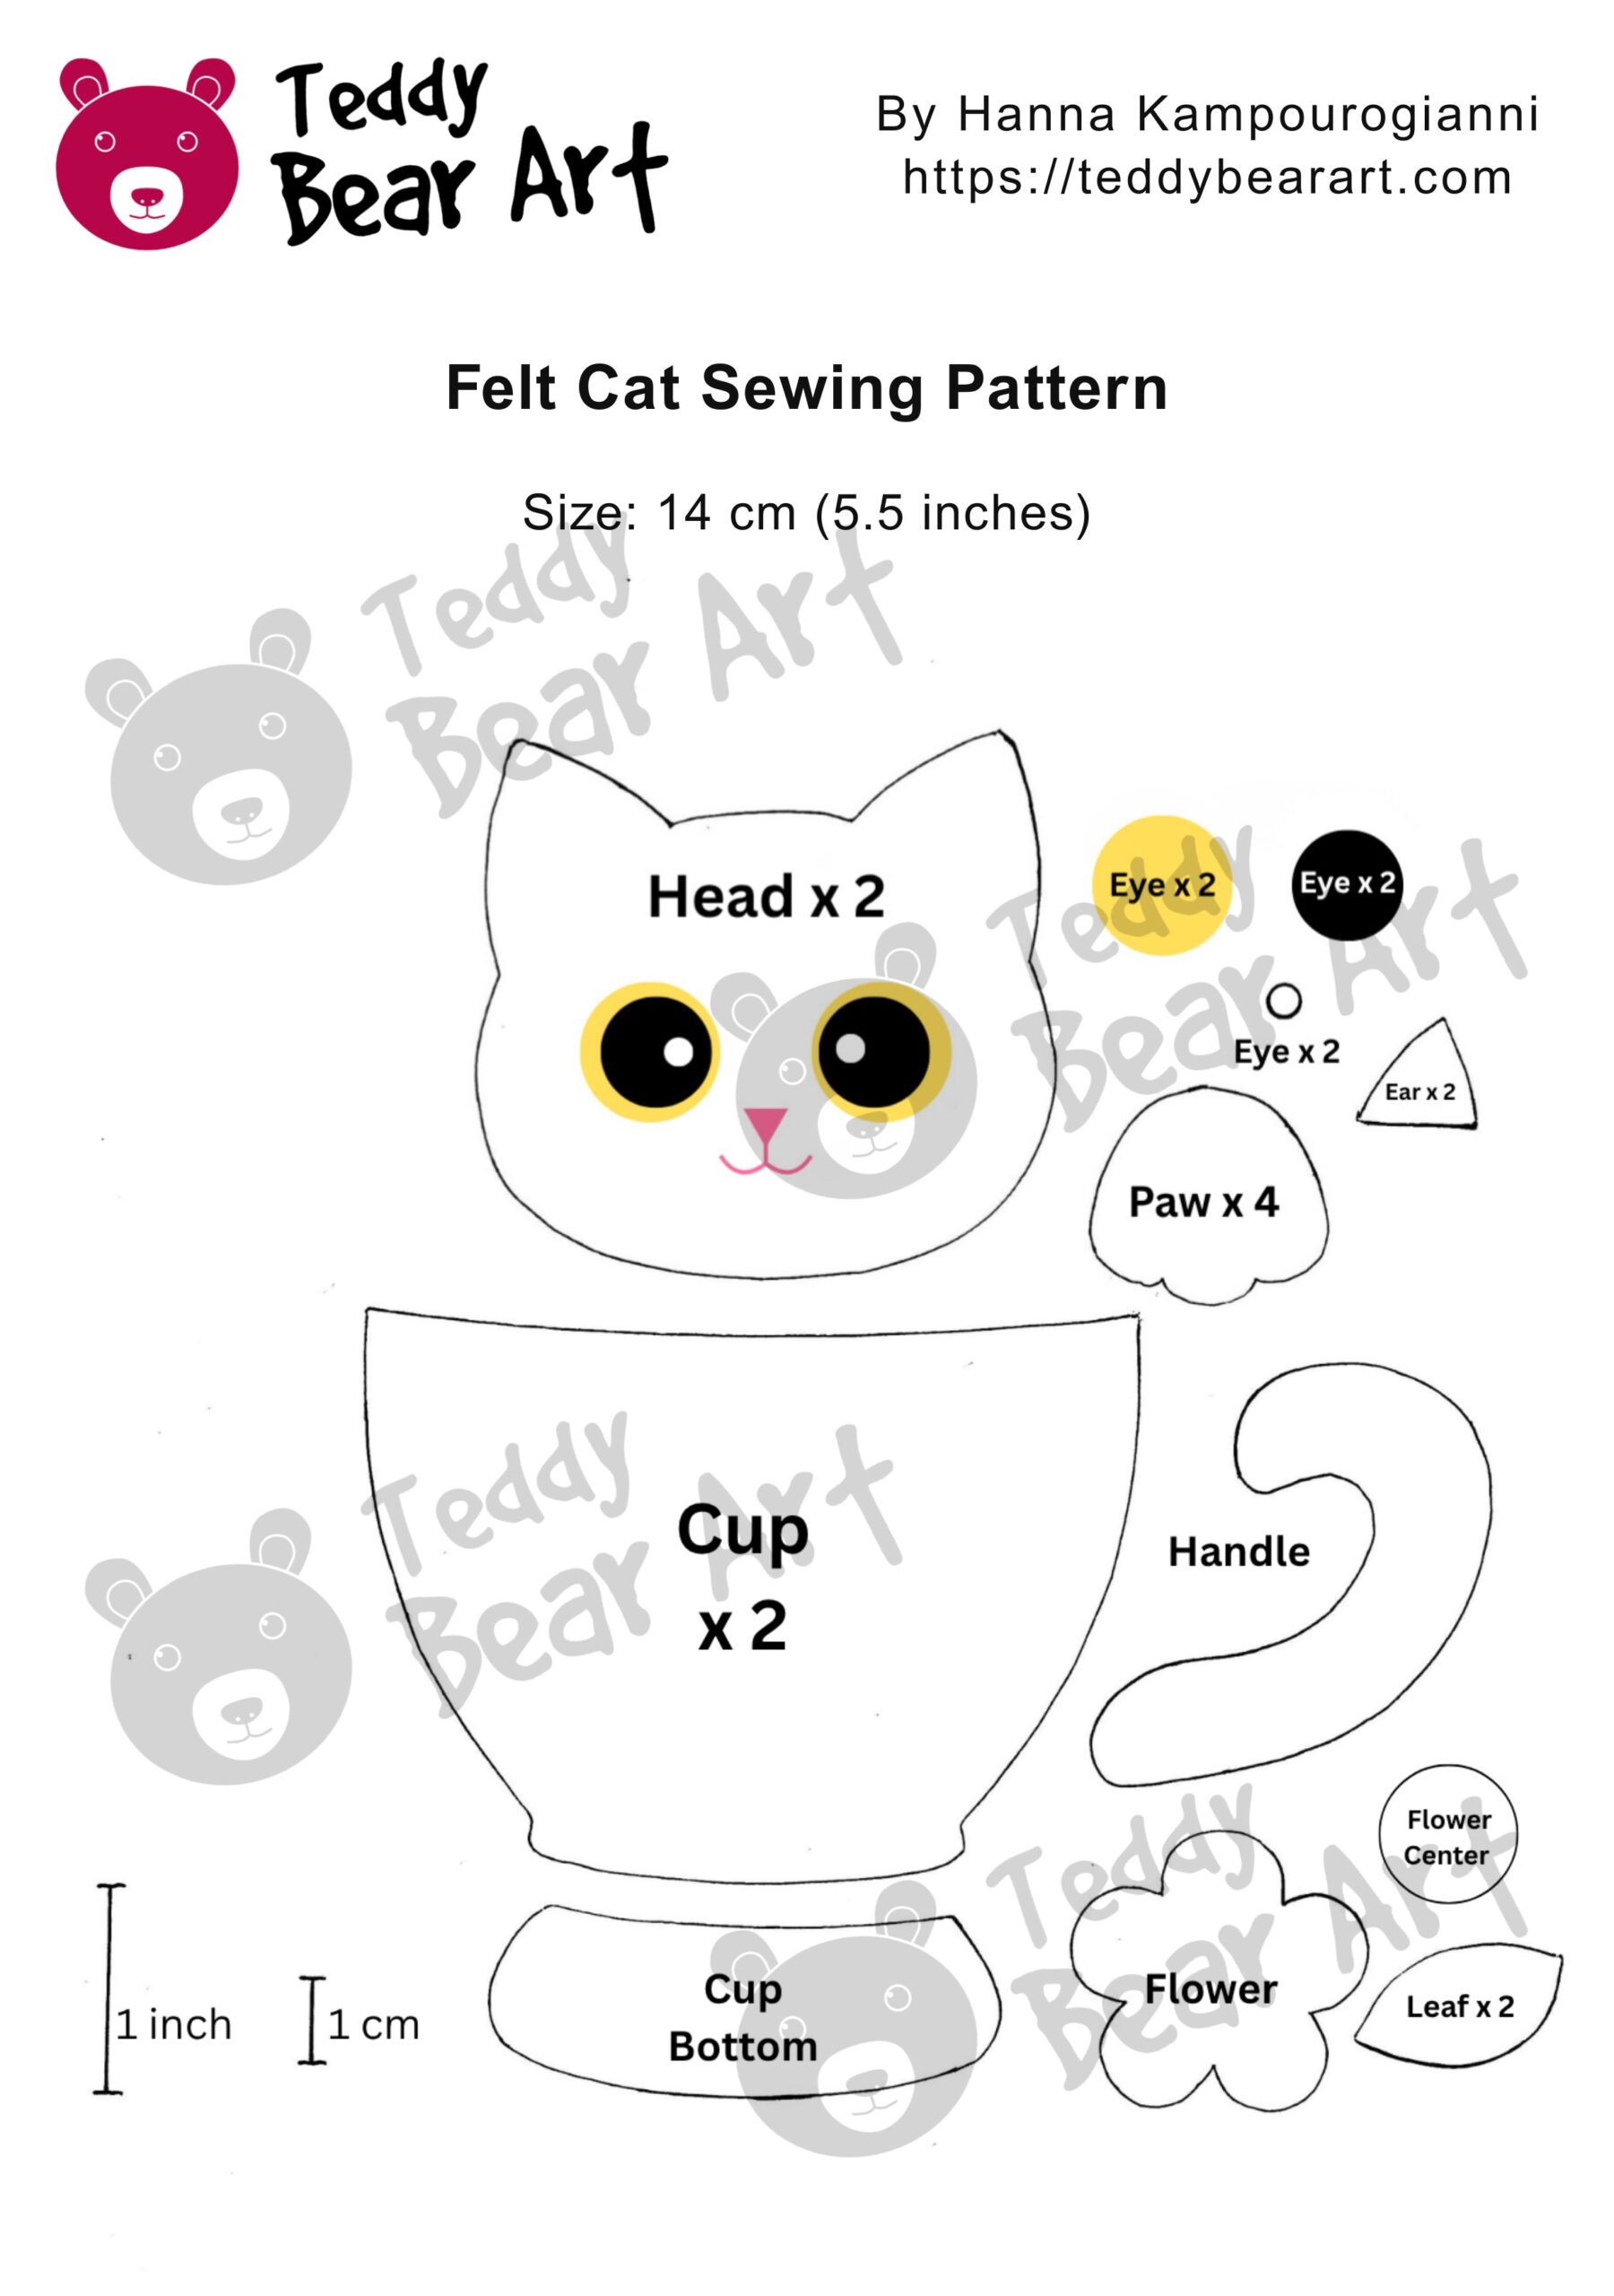
Notice: No additional seam allowance is needed. Cut directly along the pattern lines.
To download the pattern, follow the instructions below:
From a phone or tablet: There should be a similar option for mobile devices with Android or iOS. Click on the image. Save it by holding your finger on the image and selecting the “Save Image” option. Then, go to your photo gallery and print it (an option available).
From a computer: Click on the photo of the pattern you see below. In the new tab that will open, press the right mouse button and select the “Save image as …” option. Then, choose where the image will be saved on your computer.
What You’ll Need
- Felt in gray, pink, blue, yellow, green, black, and white
- Polyester stuffing
- Sewing thread
- Hand-sewing needle
- Scissors
- Glue
Felt Cat Sewing Pattern Tutorial
Prepare All The Pieces
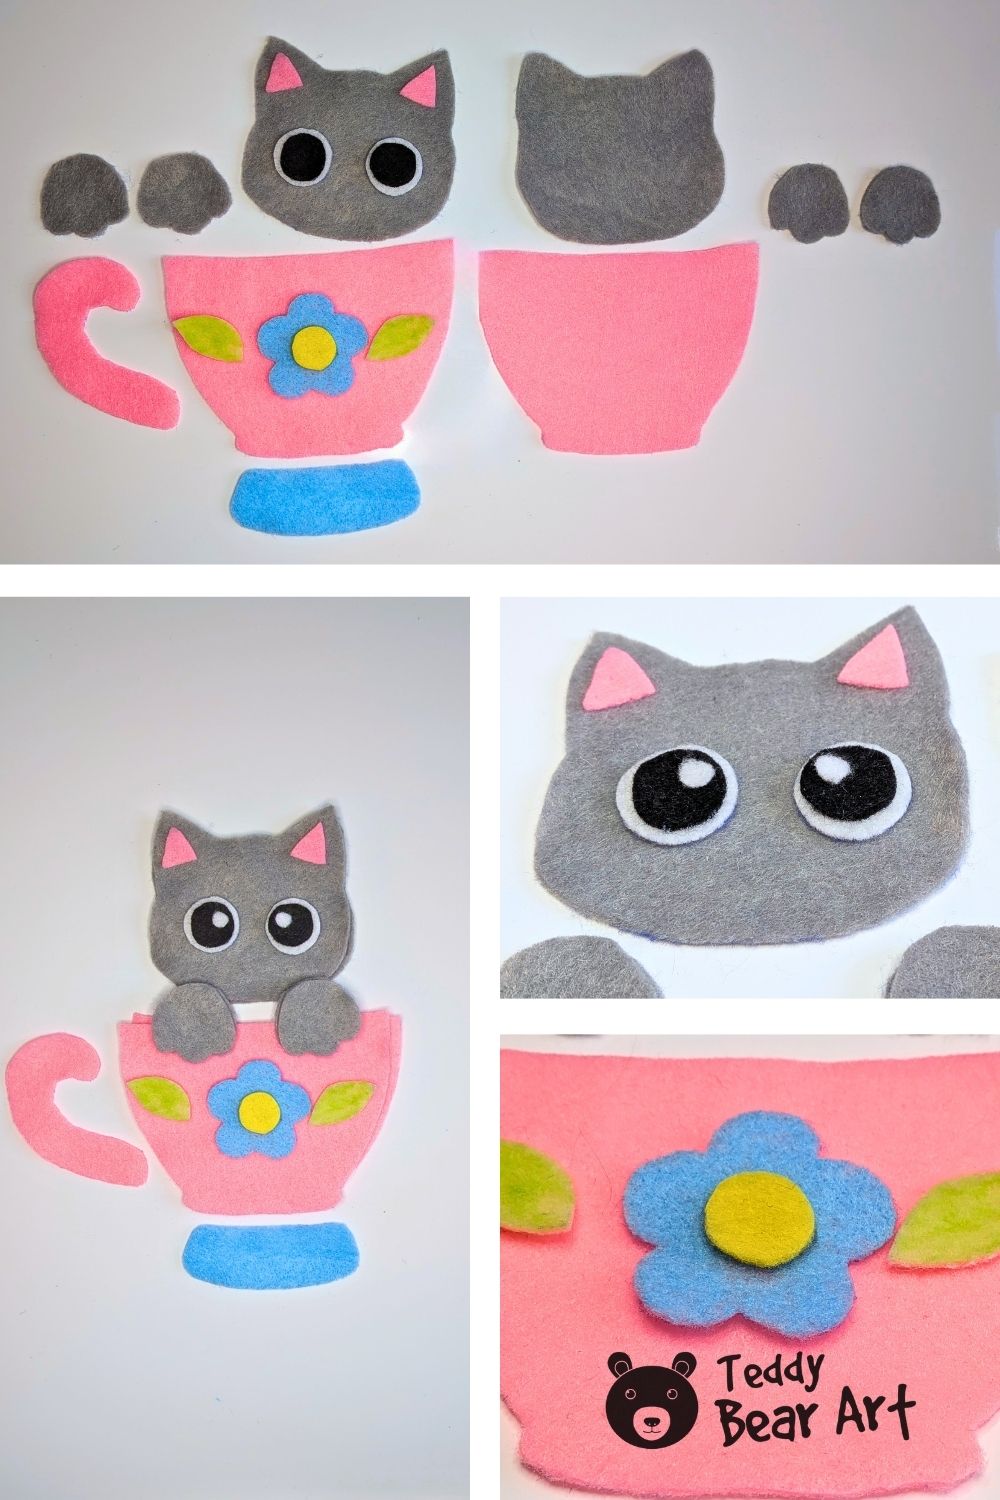
Cut all the pieces from felt using the printable template. Each paw is made from two matching pieces, while the head and cup each need a front and back piece. The gray ears are already part of the head shape, so the separate ear pieces on the pattern are only for the pink inner ears.
Lay everything out before you begin sewing. This makes it easier to check the placement of the face, paws, flower, leaves, handle, and cup bottom before the pieces become three-dimensional.
The project is mainly sewn with blanket stitch, which gives the exposed felt edges a neat handmade finish. If you have not used this stitch before, our blanket stitch video tutorial shows the hand movement and how to keep the stitches even around curves.
Prepare The Decorative Pieces
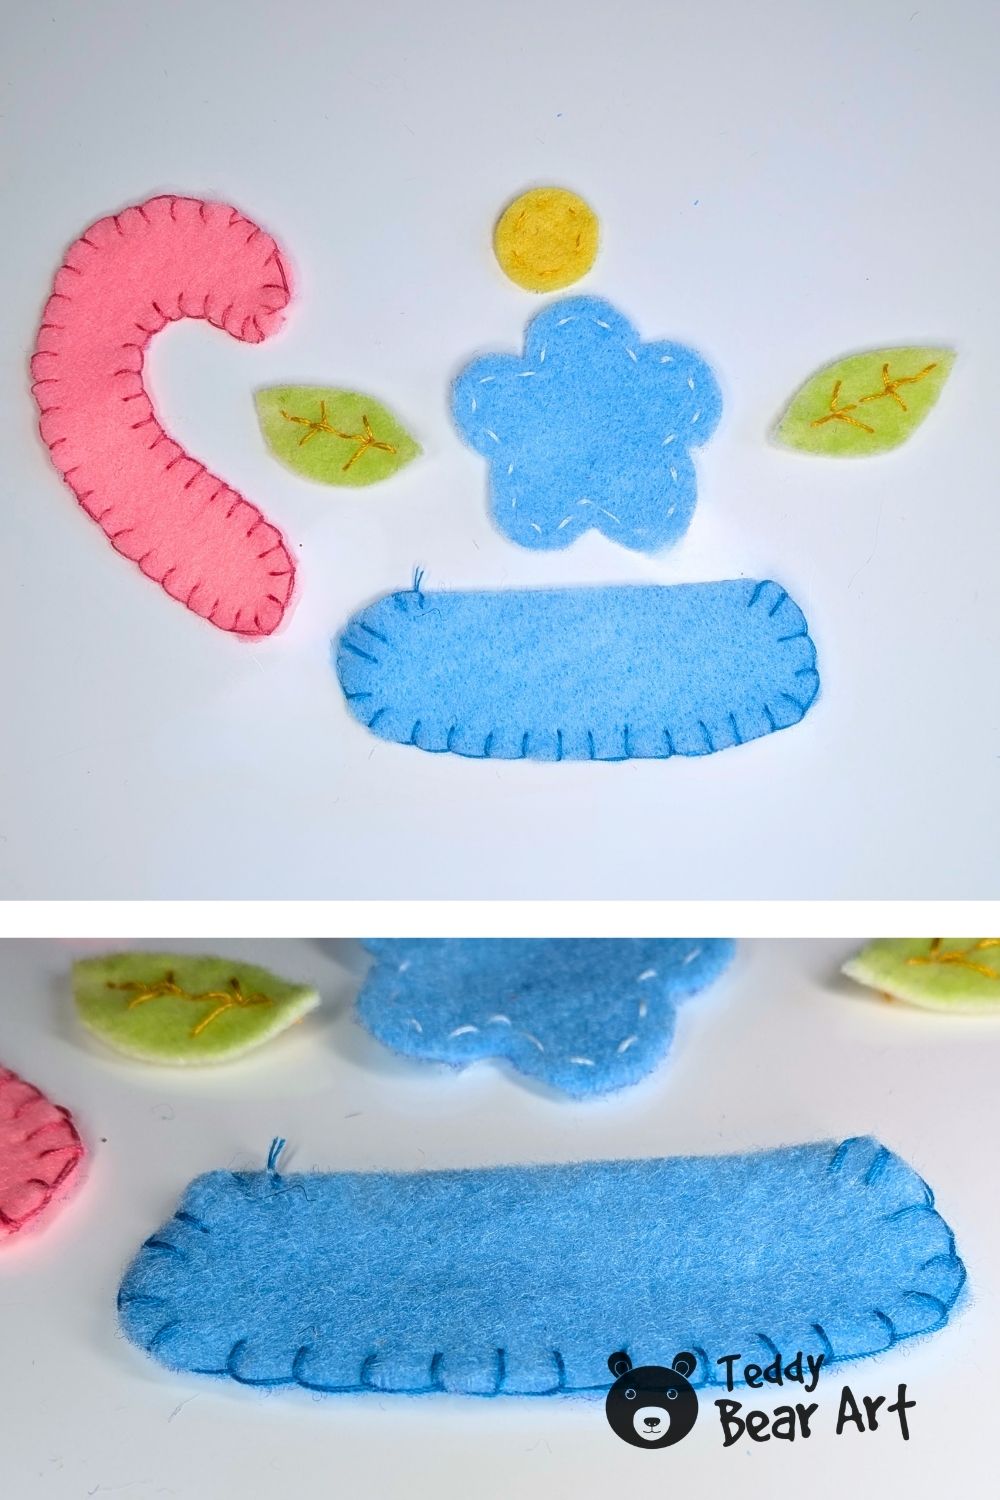
Start with the smaller cup details. The handle in this version is made from a single piece of felt. Sew blanket stitch around its entire edge.
The cup bottom is also made from one piece in our version. Blanket stitch around the outer curved edge that will remain visible. If you want the finished cup to stand more firmly, cut two bottom pieces instead, sew them together, and add a small amount of stuffing.
Add a few simple decorative stitches around the blue flower. Lightly shade the green leaves with green chalk to give them more depth, then embroider small veins onto each leaf. The flower center will be glued on later.
Sew The Cup
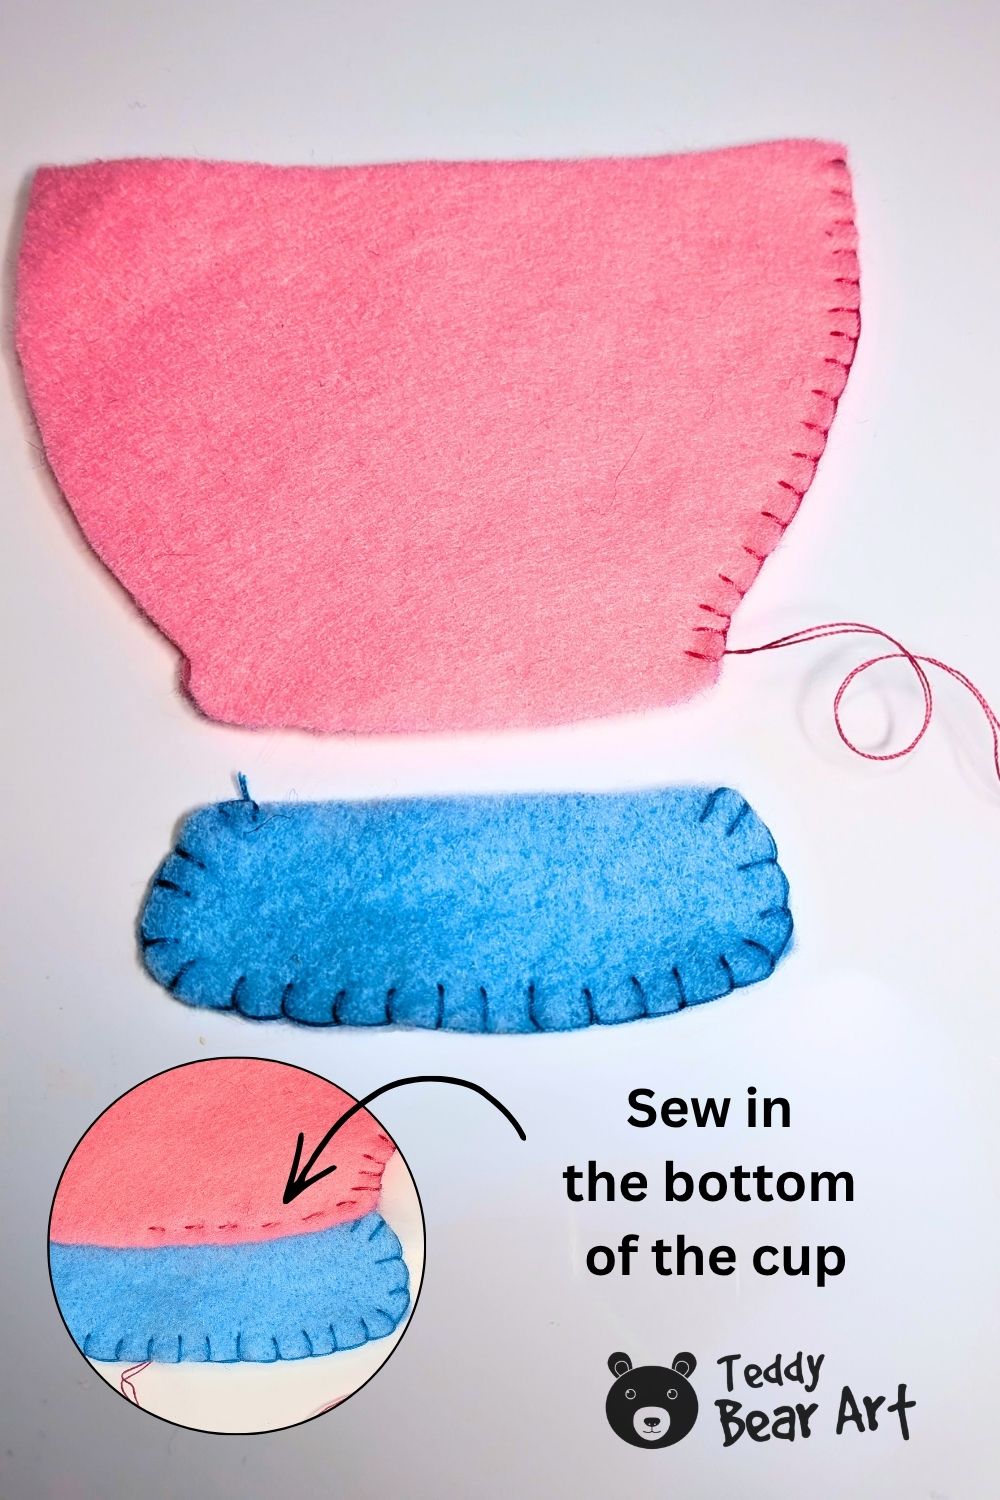
Place the two cup pieces together with their edges aligned. The handle and bottom are not simply attached on top, they are sewn into the cup construction.
Insert the ends of the handle between the front and back cup pieces at the side. Sew through the layers so the handle becomes securely caught inside the side seam.
The bottom is inserted between the two cup pieces in the same way. Sew it into the lower edge of the cup, working carefully around the curves so the shape remains smooth.
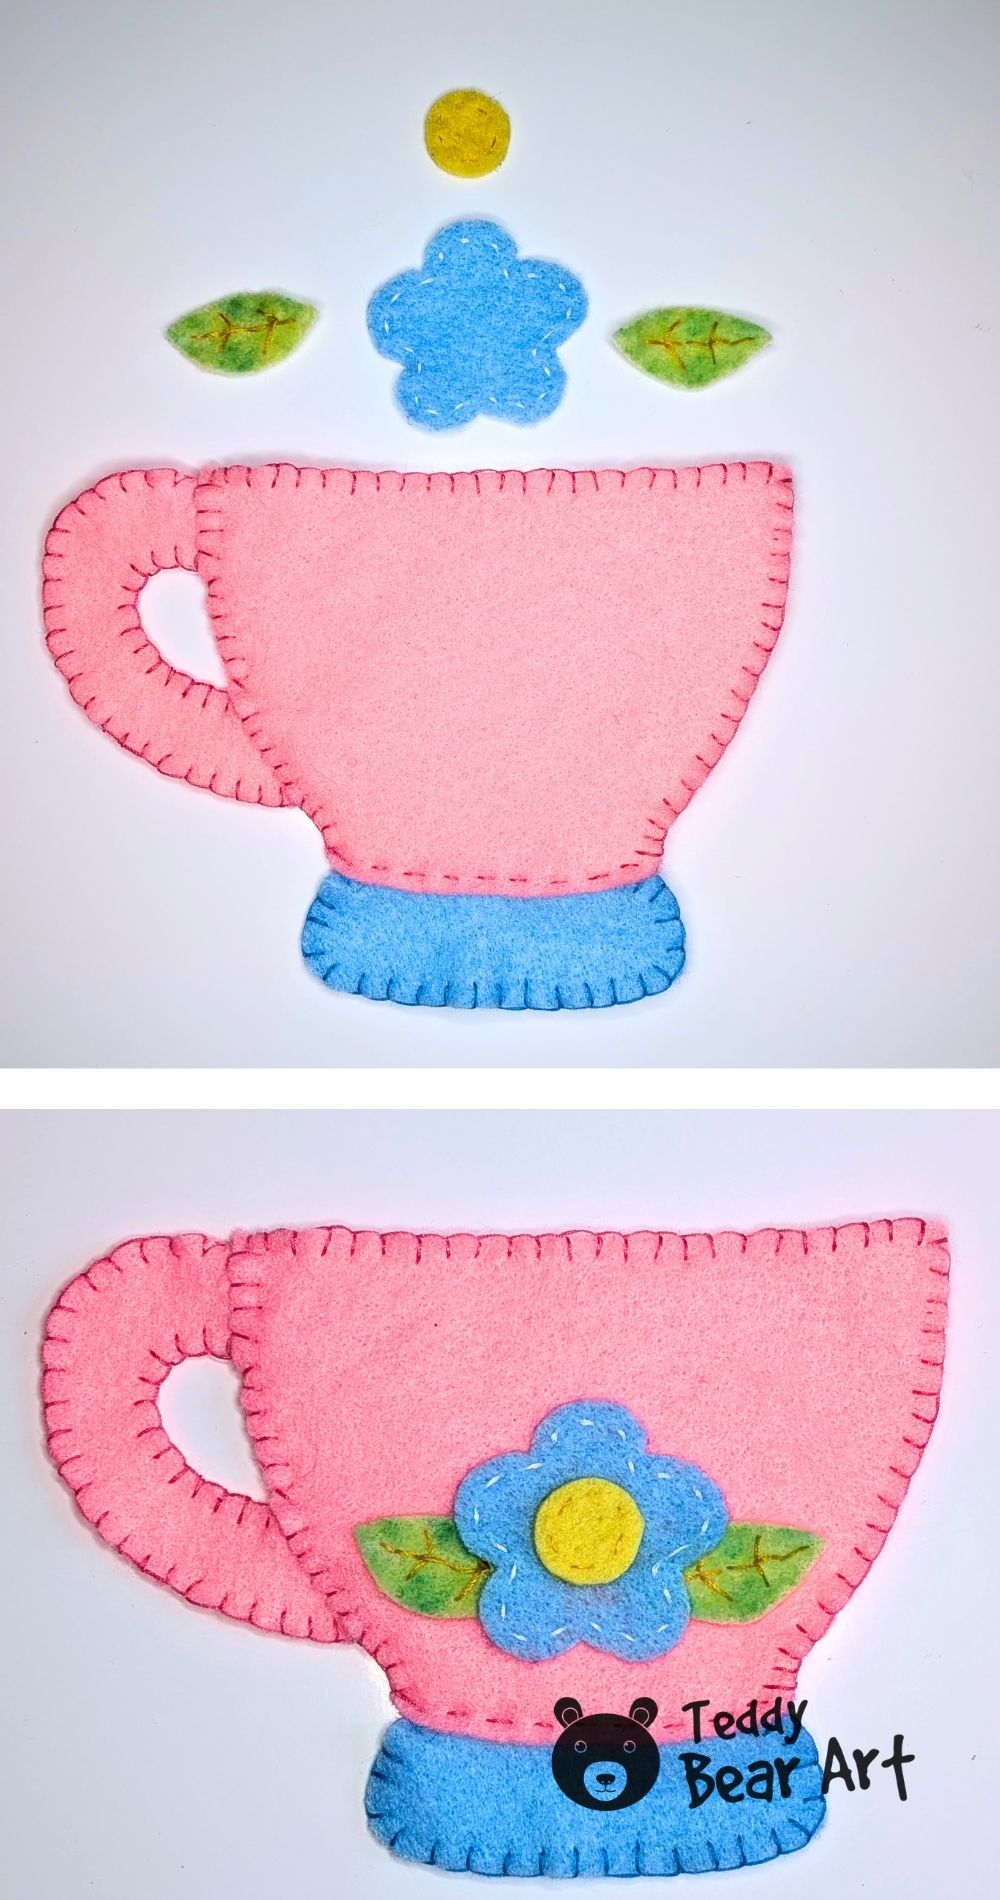
Continue sewing the cup around the sides, but leave the entire top open. Before adding the cat, glue the prepared leaves, flower, and yellow flower center onto the front of the cup.
Sew and Finish The Cat
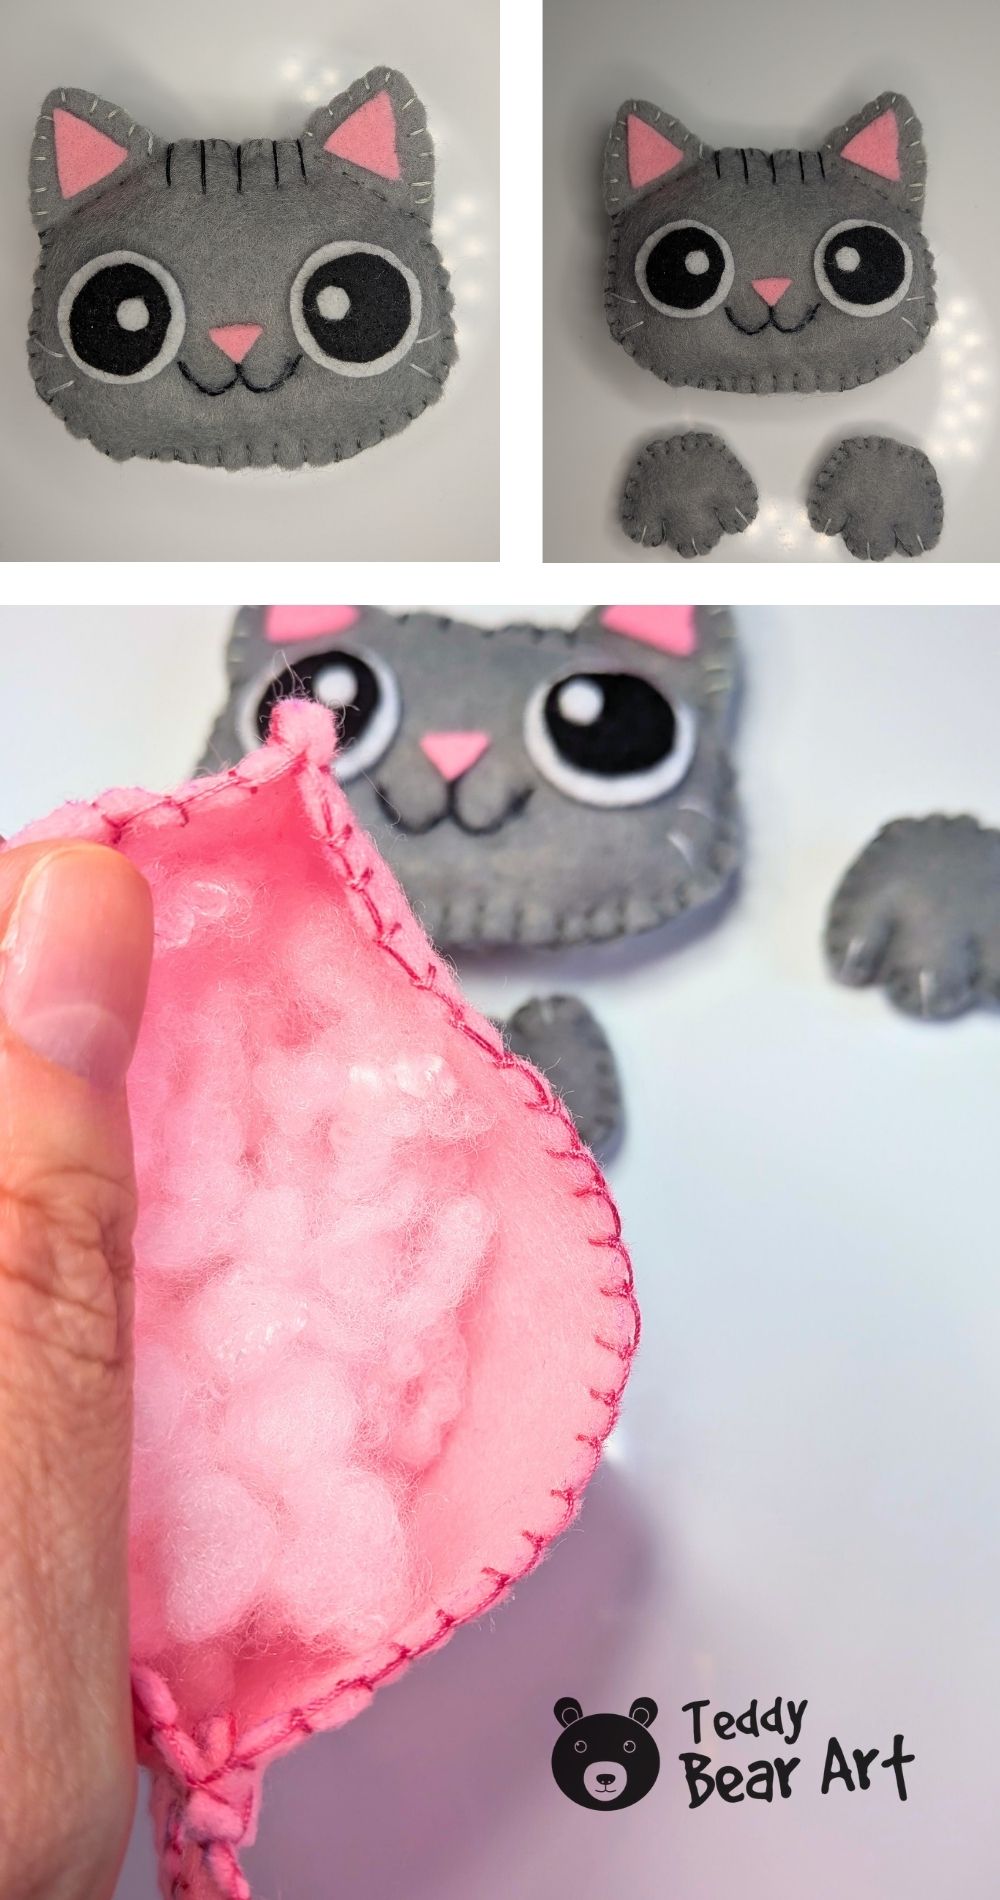
Place the two gray head pieces together and sew around the edge with blanket stitch, leaving an opening at the bottom for stuffing.
Before filling the head, sew a simple straight line across the base of each ear. This separates the ears from the stuffed part of the head and keeps them flat and pointed instead of letting the stuffing push into them.
Add the stuffing gradually, paying particular attention to the cheeks and top of the head. The face should look softly rounded without becoming too firm. Close the opening at the bottom once you are happy with the shape.
Now make the face. Embroider the curved mouth, then glue the small pink felt nose above it. Build each eye from the white outer circle, black pupil, and tiny white highlight, and glue the layers in place. Glue the pink inner ears onto the gray ears. Finish the expression with several dark lines across the forehead and fine white whiskers on the cheeks.

Make the two paws by placing each pair of gray felt pieces together. Sew around the edges with blanket stitch, leave a small opening, add a little stuffing, and close the opening. They only need enough filling to give them a soft, rounded shape.
Stuff The Cup and Assemble The Cat
Add stuffing through the open top of the cup. Keep it fairly light, especially near the opening, because we still need enough room to insert the cat’s head. Spread the stuffing into the corners and around the bottom instead of packing it tightly in one place.
Slide the finished head into the cup and adjust its height until the proportions look right. Glue the front of the head to the inside of the front cup piece. At the back, sew the head securely to the back edge of the cup. Then finish closing the top of the cup around the cat.
Finally, glue the two stuffed paws onto the outside of the cup. Position them over the upper edge so they look as if the cat is holding onto the rim.

FAQ
Is this felt cat sewing pattern suitable for beginners?
Yes. The shapes are simple, and most of the sewing uses blanket stitch. The small pieces give you good practice with curves without requiring a sewing machine.
How can I make the cat in a cup stand upright?
Cut two cup bottom pieces instead of one. Sew them together, add a little stuffing, and insert the finished bottom securely between the front and back cup pieces. This creates a thicker, more stable base.
Can I make this as a hanging decoration?
Yes. Use a single flat bottom piece and sew a ribbon loop into the top before closing the cup. The finished cat is light enough to work nicely as a handmade hanging decoration.
Before You Go
This felt cat sewing pattern is especially fun to customize because even small changes can give the cat a completely different personality. Try a ginger cat in a green cup, a black cat with bright eyes, or a white cat in a pastel cup. You can also change the flower colors or embroider your own tiny details on the cup.
The paws peeking over the rim are one of our favorite details. They turn a few simple felt shapes into a little character that looks as though it has climbed straight into its favorite cup.
If you enjoyed sewing this cat, continue the collection with our Moon Cat Sewing Pattern. It is another free felt cat project, this time with a cat nestled inside a stuffed crescent moon.
Get Free Patterns & Be the First to Know!
Want free teddy bear patterns, exclusive tutorials, and a chance to win craft supplies?
Sign up for our newsletter using the subscribe form in the middle of this article to receive new patterns, insider tips, and the latest news on teddy bear art. You’ll also automatically be entered into our annual giveaway for a chance to win teddy bear crafting materials.
Bonus entry: Save one of our pins on Pinterest to increase your chances of winning!
Let’s create, inspire, and craft beautiful teddy bears together!