
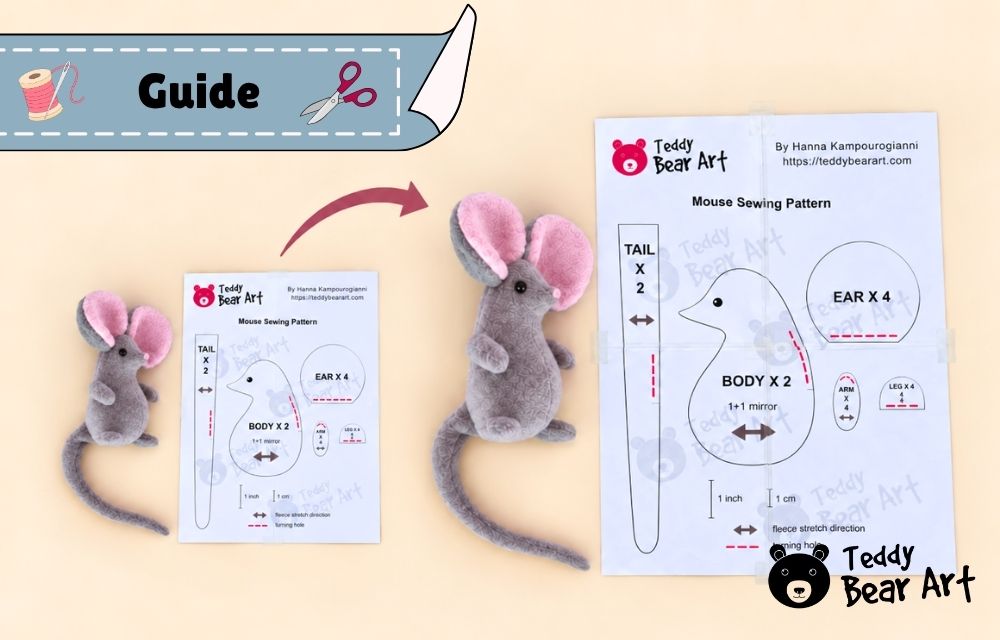

If you have ever found a plush pattern you love but wished the finished toy were bigger or smaller, learning how to resize a plush sewing pattern can save you a lot of time. You do not need to redraw the entire pattern. In most cases, you can simply change the scale, print the pattern again, and keep the same proportions.
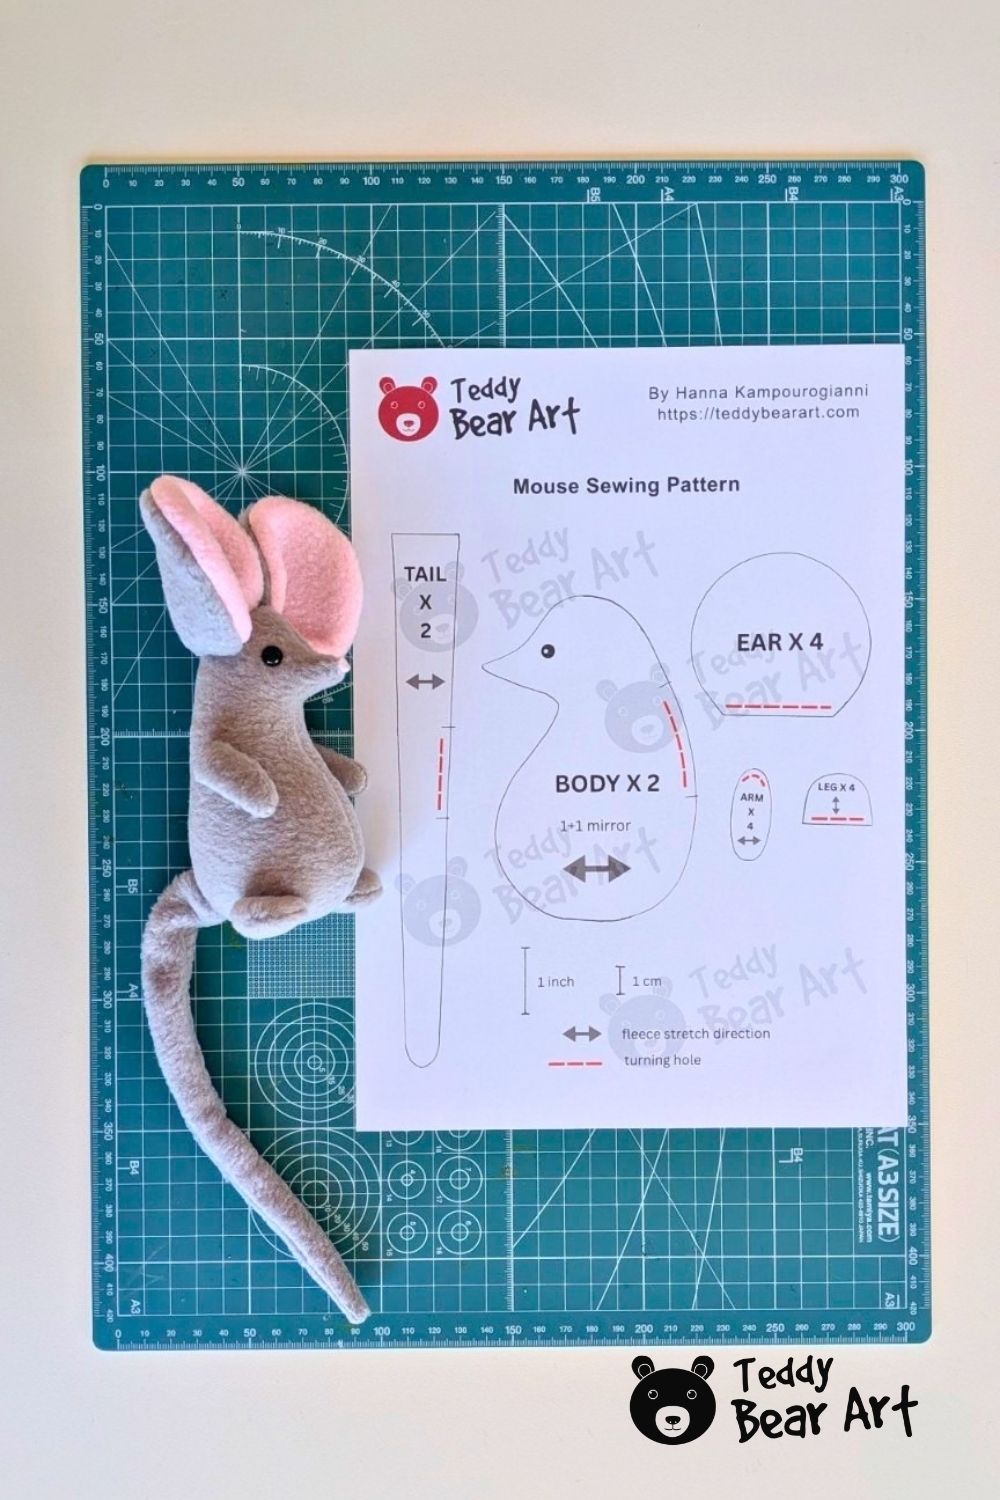
In this guide, I am using my mouse sewing pattern as an example. The same basic method can also be used for many other printable JPG and PDF plush patterns.
What Resizing a Plush Sewing Pattern Really Means
The original pattern size is your starting point. Before changing anything, make sure the pattern prints at its intended size.
If you want to change the finished size, use this simple formula:
desired size ÷ original size × 100 = new print percentage
For example, if the original plush is 20 cm tall and you want it to be 30 cm:
30 ÷ 20 × 100 = 150%
If you want a 20 cm plush to become 15 cm:
15 ÷ 20 × 100 = 75%
All pattern pieces should normally be resized by the same percentage so the proportions stay consistent.
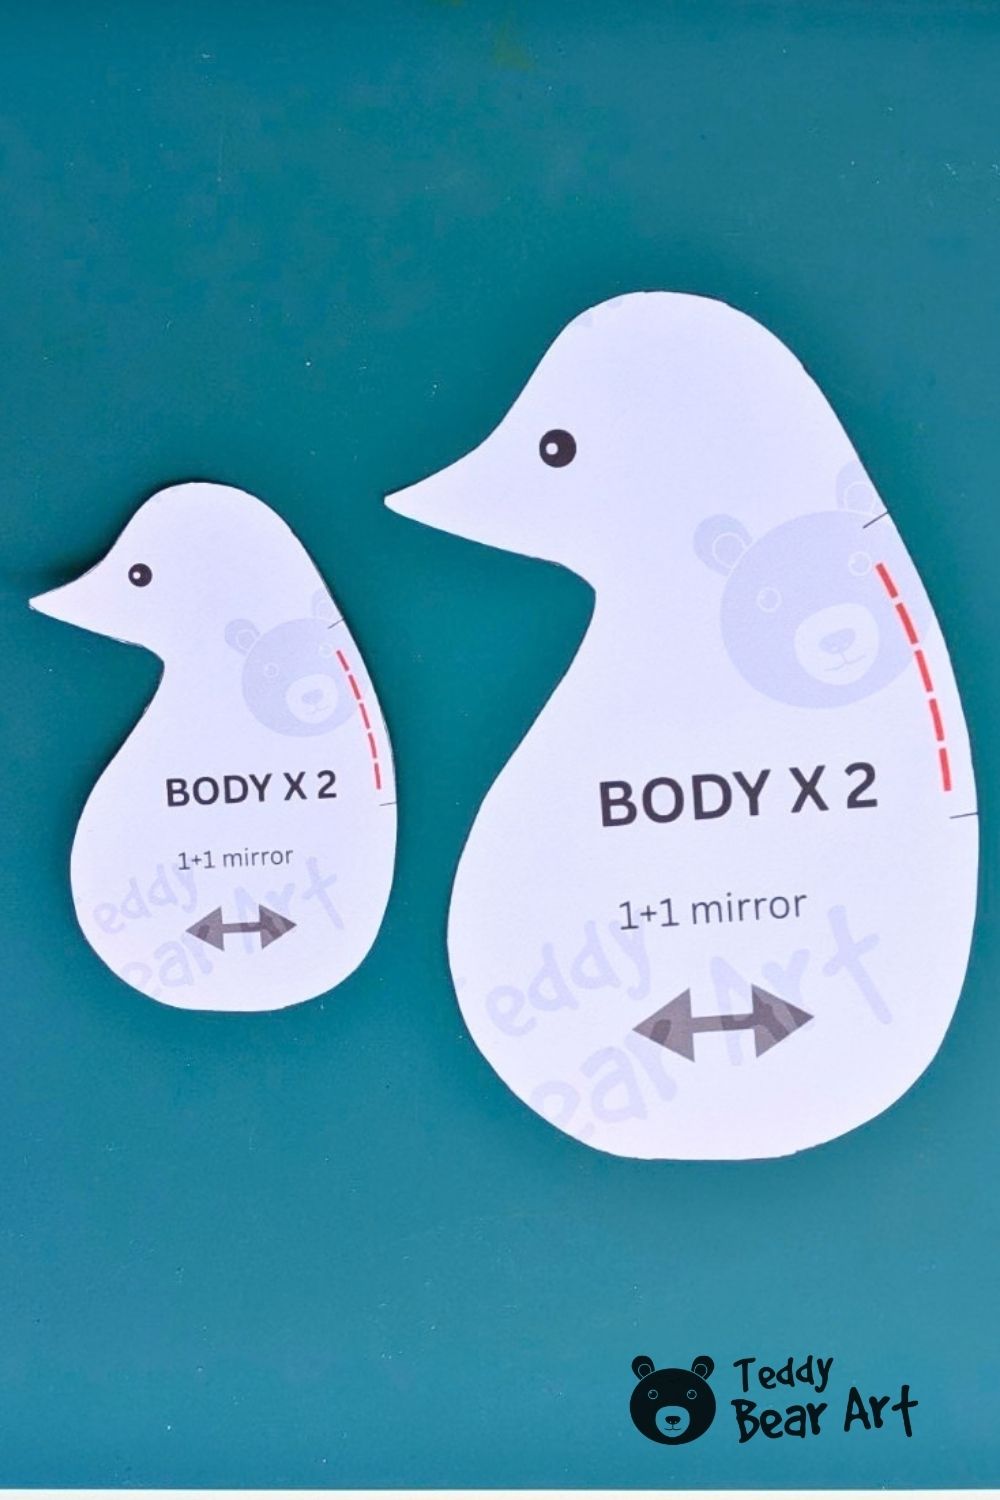
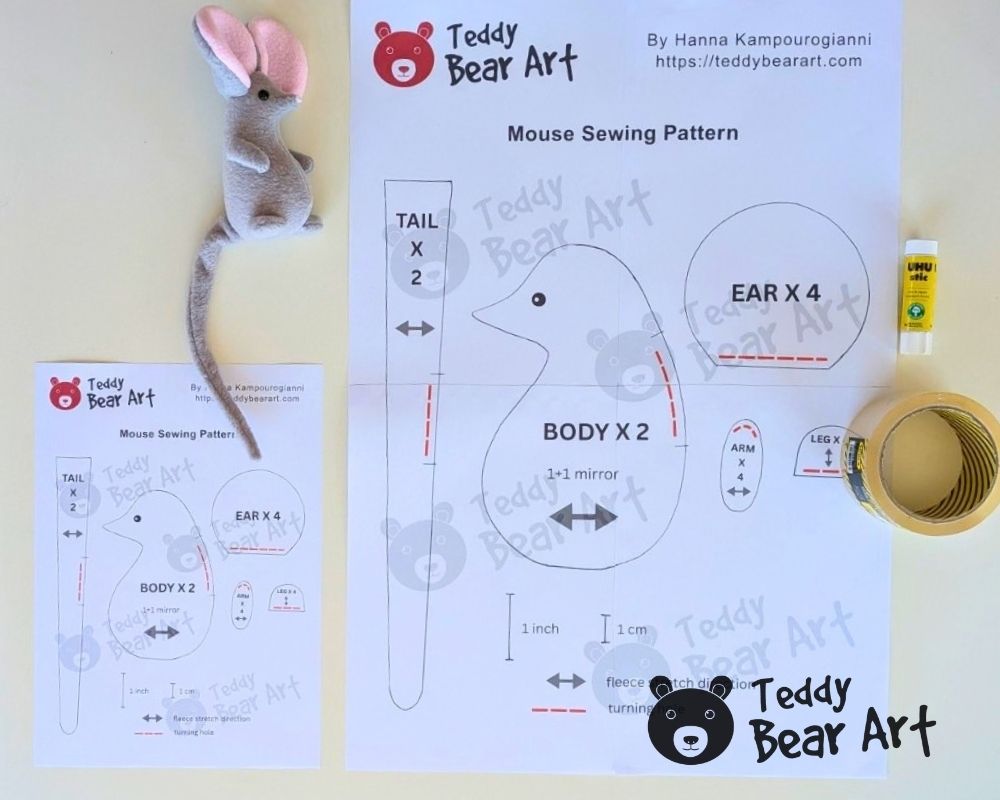
Here you can see the same body pattern piece at the original size and enlarged to approximately 150%.
How to Resize a Plush Sewing Pattern Step by Step
First, print the original pattern and check its test scale.
My patterns include test marks for 1 inch and 1 cm. When the pattern is printed correctly, those marks should measure exactly 1 inch and 1 cm with a ruler.
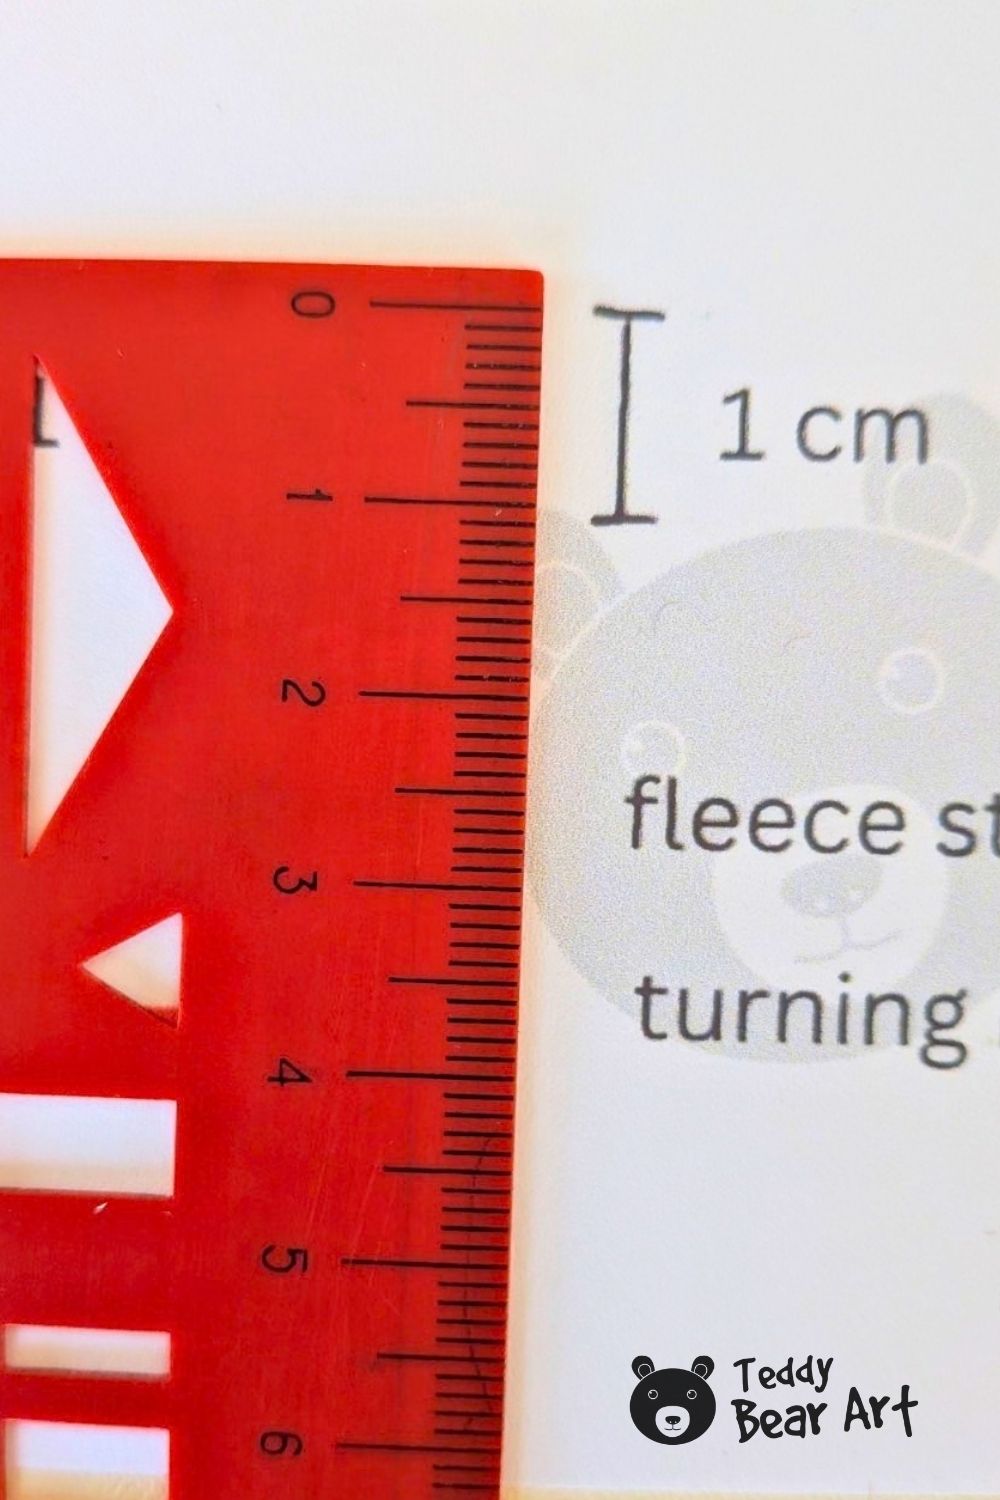
Do not rely only on what your printer says is 100%. Settings such as Fit to Page or automatic scaling can quietly change the printed size.
Once you know the original pattern is printing correctly, choose the percentage you need.
For example:
- 100% keeps the original size
- 150% makes the pattern one and a half times larger
- 75% reduces it to three quarters of the original size
- 50% makes it half the original size
Look for an option such as Custom Scale in your print settings and enter the required percentage.
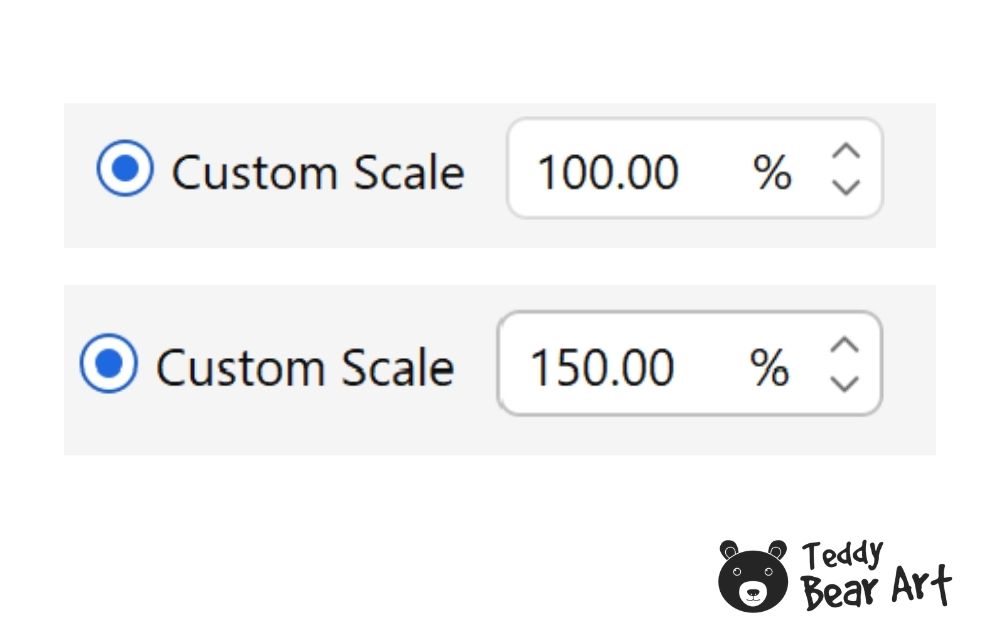
After printing, check the scale again. At 150%, a 1 cm test mark should measure about 1.5 cm, and a 1 inch test mark should measure about 1.5 inches.
This quick check can save you from cutting fabric with an incorrectly sized pattern.
What If the Enlarged Pattern Does Not Fit on One Page?
A larger body, head, tail, or other pattern piece may no longer fit on a single A4 or Letter sheet.
Look for a printing option called Tiling, Poster, Tiling/Poster, or something similar. The exact wording depends on your printer and software.
In my printer settings, I selected Tiling.
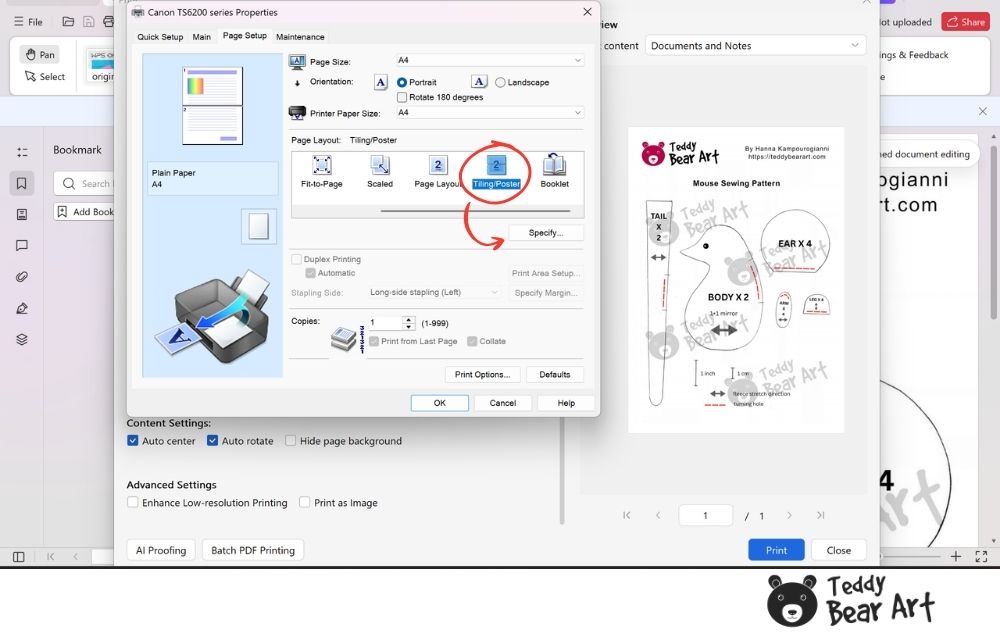
Then I chose Divided into 4 (2 x 2) and kept Print “Cut/Paste” lines in margins selected.
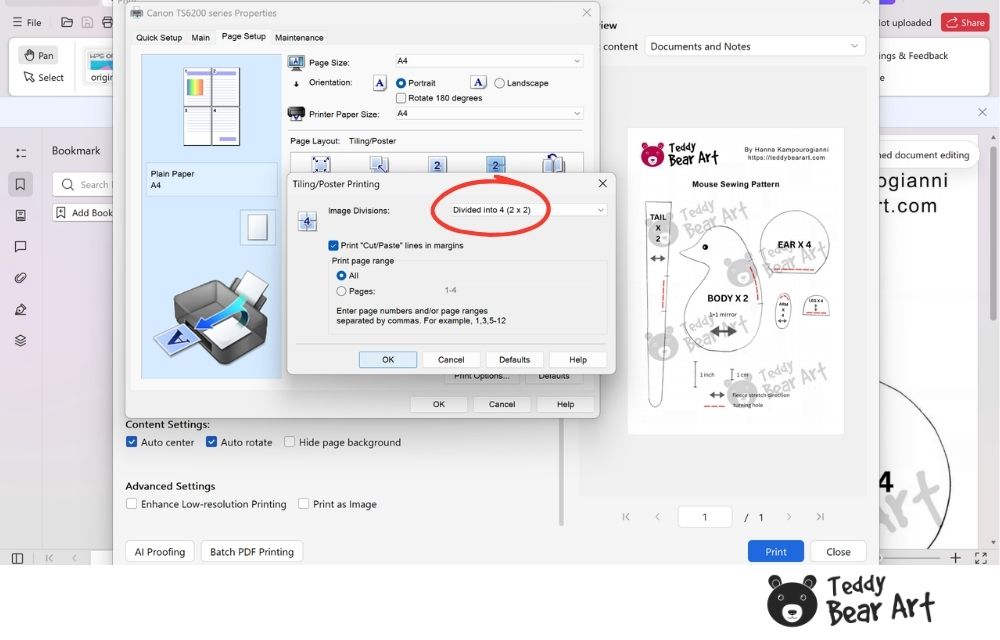
This divides the large pattern across several sheets.
Depending on your printer settings, Tiling/Poster may also change the final scale, so always check the test scale after printing.
Arrange the pages in the correct order before joining them.
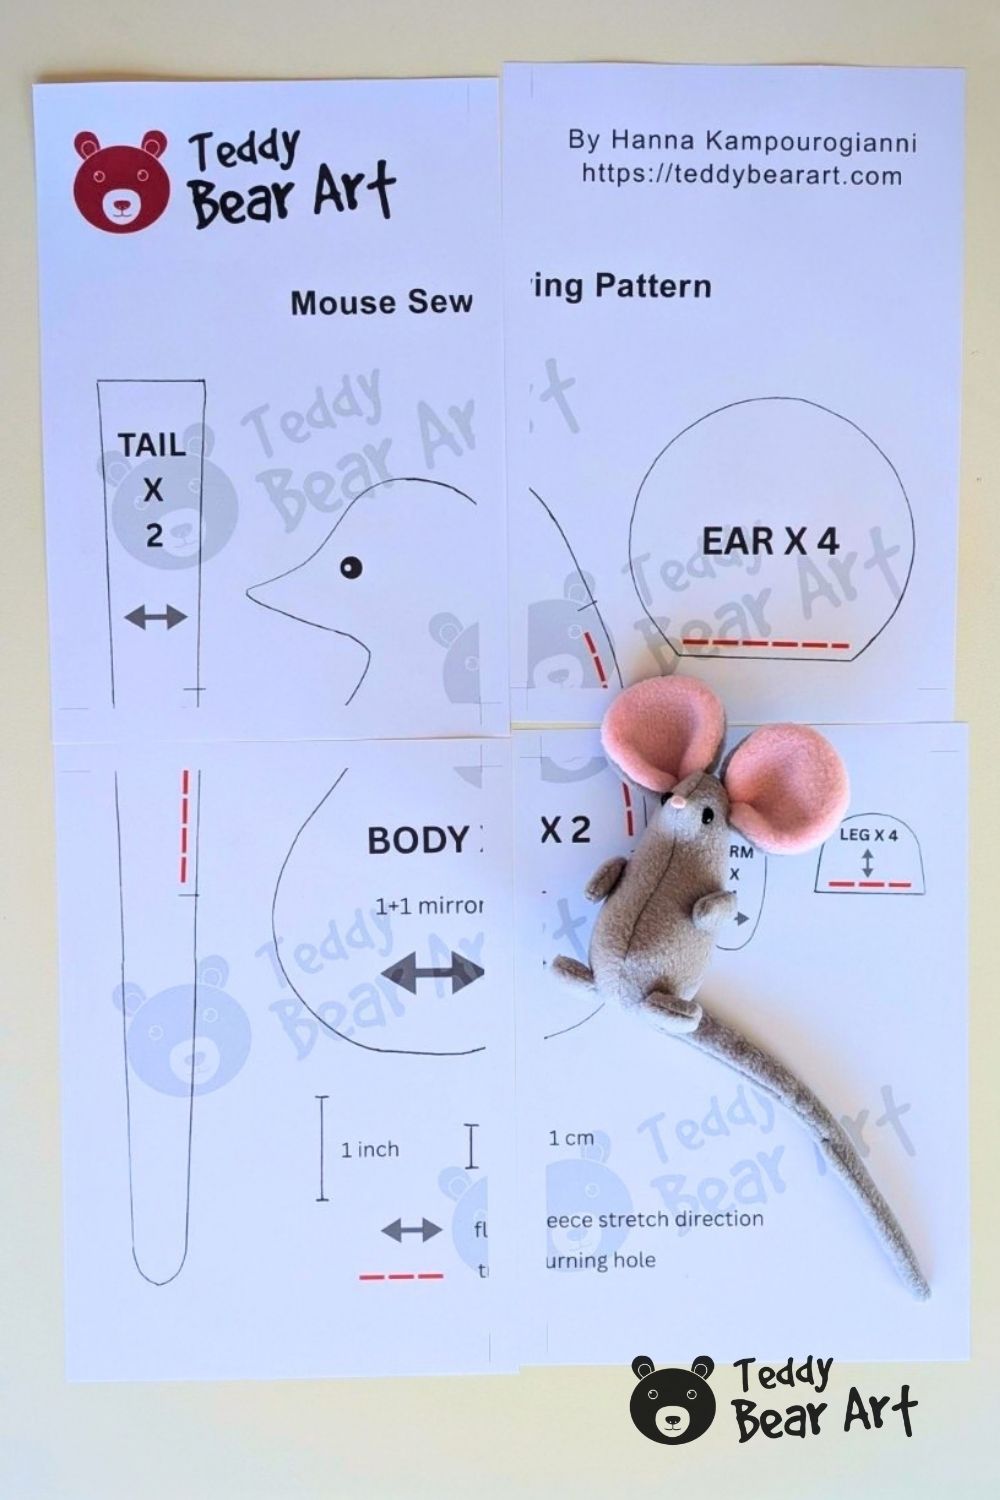
Trim the margins where necessary and match the pattern lines carefully.
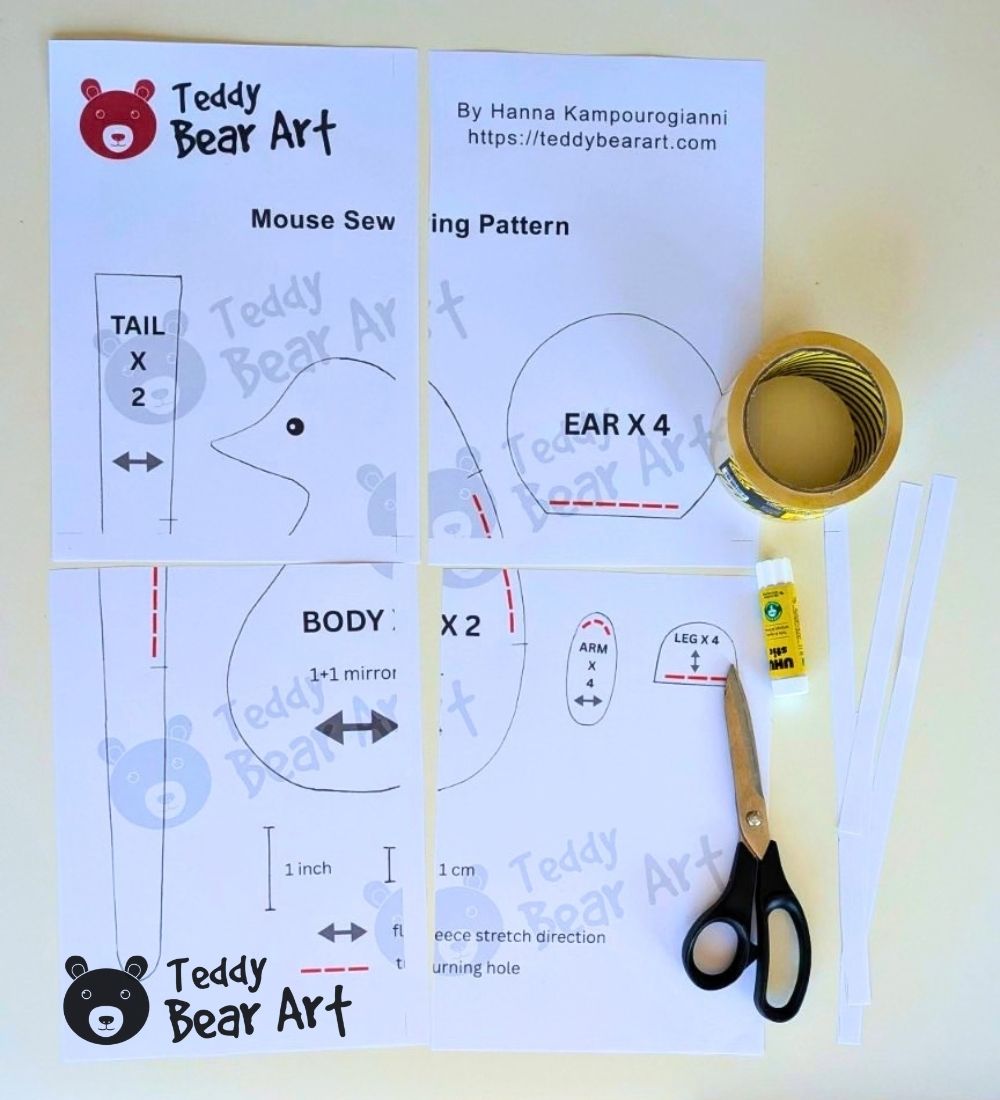
You can use tape or glue to secure the pages together.
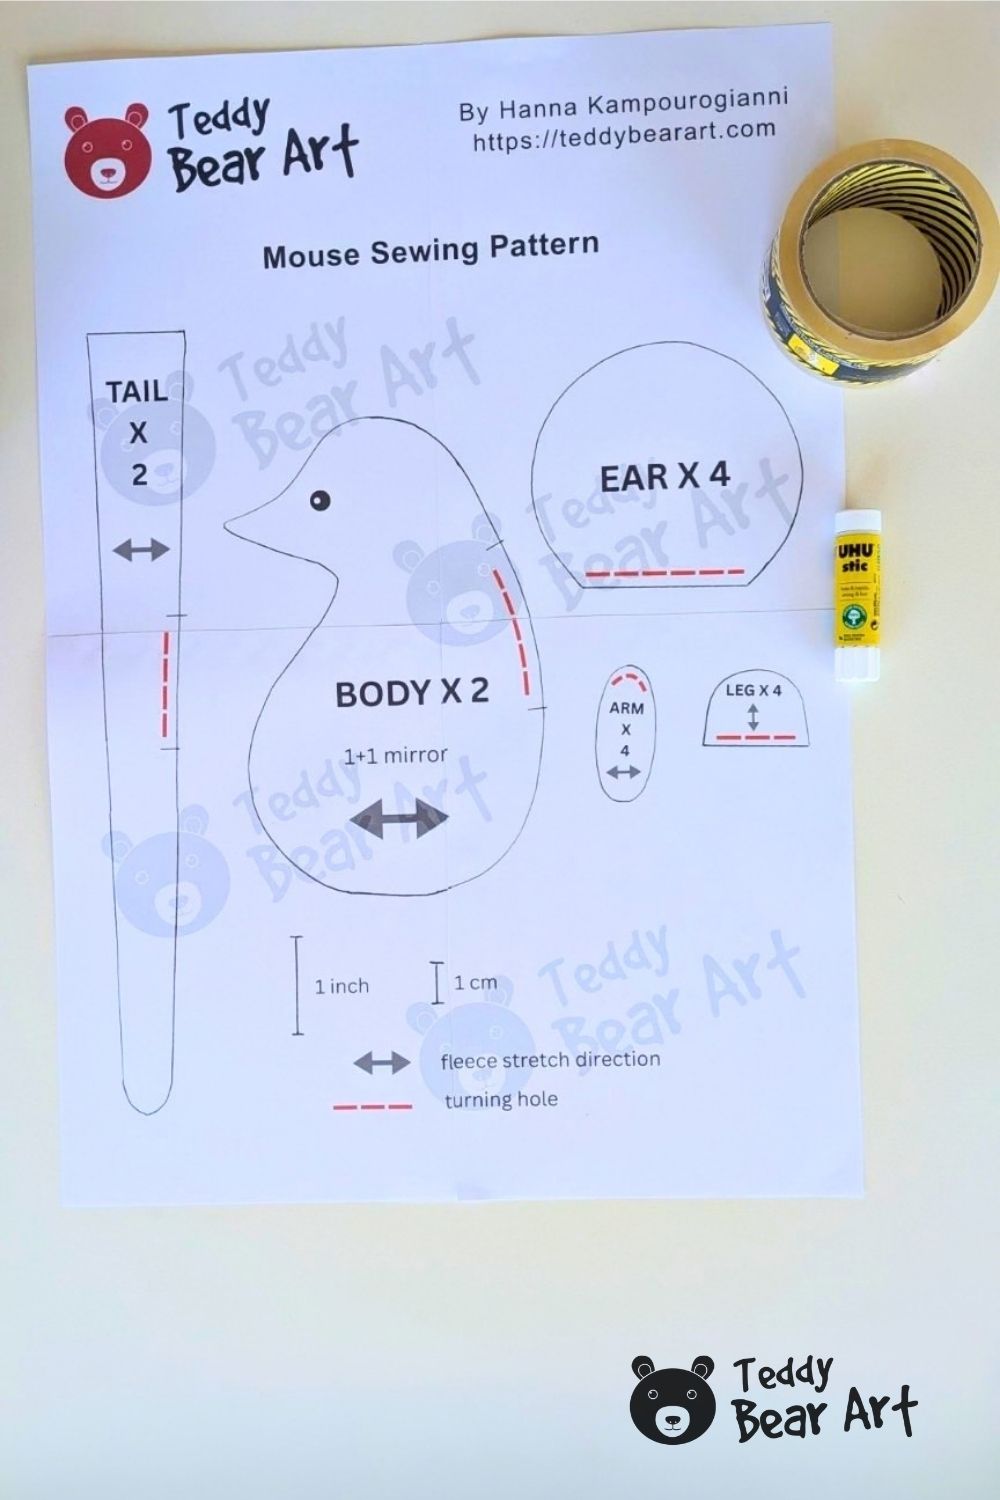
Once joined, the four sheets become one large pattern that can be cut out and used normally.
If your printer does not offer tiled or poster printing, you can enlarge the pattern in another program, print separate sections, and join them by hand.
What About Seam Allowances and Other Details?
Before resizing, check if seam allowances are included.
My Teddy Bear Art patterns don’t include seam allowances, so resize the pattern first, then add your usual seam allowance. I normally use about 5 mm and recommend this as a good starting point for most plush projects.
If the pattern already includes seam allowances, check the designer’s instructions before resizing. Scaling the entire pattern also changes any included seam allowance, so you may need to redraw it to the original width after resizing.
Eyes, joints, discs, buttons, and armature may also need some adjustment. They do not always have to increase by exactly the same percentage as the pattern.
A plush enlarged to 150% may look better with eyes slightly smaller than a strict 150% calculation suggests. Very small patterns can create the opposite problem, tiny ears, narrow limbs, and sharp curves may become difficult to sew neatly.
FAQ
Can I resize any plush sewing pattern?
Most plush sewing patterns can be enlarged or reduced. Very large or very small changes may require adjustments to tiny details, eyes, joints, or construction.
How do I enlarge a plush sewing pattern to 150%?
Make sure the original pattern prints at the correct scale, then set the print scale to 150% for the entire pattern. Check the test scale after printing.
Will the finished plush be exactly 150% larger?
Usually it will be close, but fabric thickness, stuffing, seam width, and construction can cause small differences.
Before You Go
Once you understand the percentage calculation, resizing a plush sewing pattern becomes quite simple. Check the original scale first, resize every piece by the same percentage, and measure the scale again before cutting your fabric.
And here is a free mouse pattern:
Get Free Patterns & Be the First to Know!
Want free teddy bear patterns, exclusive tutorials, and a chance to win craft supplies?
Sign up for our newsletter using the subscription form in the middle of this article to receive new patterns, insider tips, and the latest news on teddy bear art. You’ll also automatically be entered into our annual giveaway for a chance to win teddy bear crafting materials.
Bonus entry: Save one of our pins on Pinterest to increase your chances of winning!
Let’s create, inspire, and craft beautiful teddy bears together!