
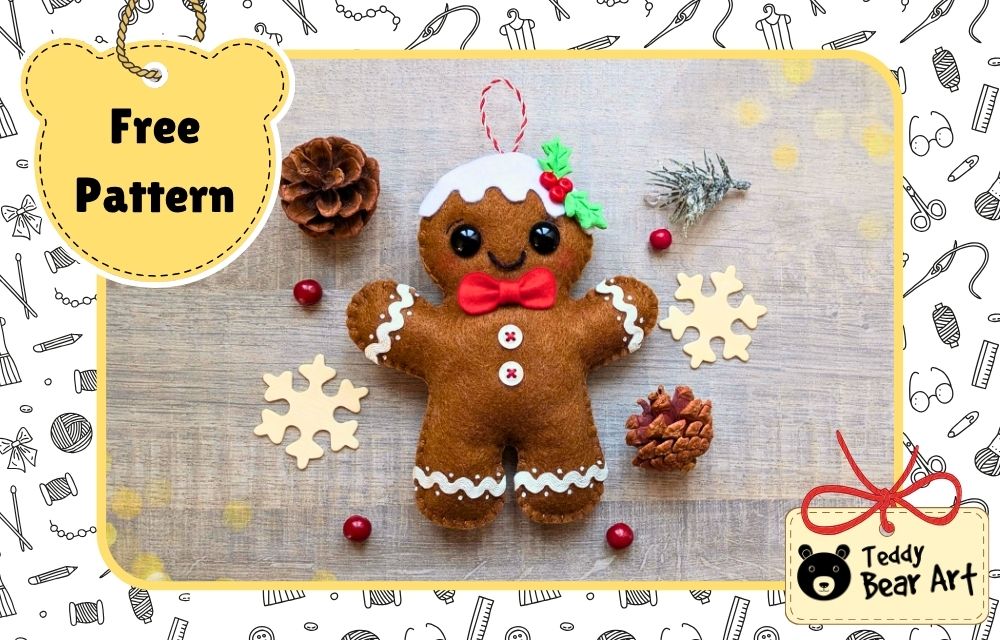

This felt gingerbread man pattern for beginners is designed with carefully balanced proportions, so the finished toy keeps its cute, chubby shape after sewing and stuffing. The body may look quite wide on the flat pattern, but this is intentional. Stuffing adds volume and takes away some of that width, so the finished gingerbread man stays nicely rounded instead of becoming narrow or skinny.
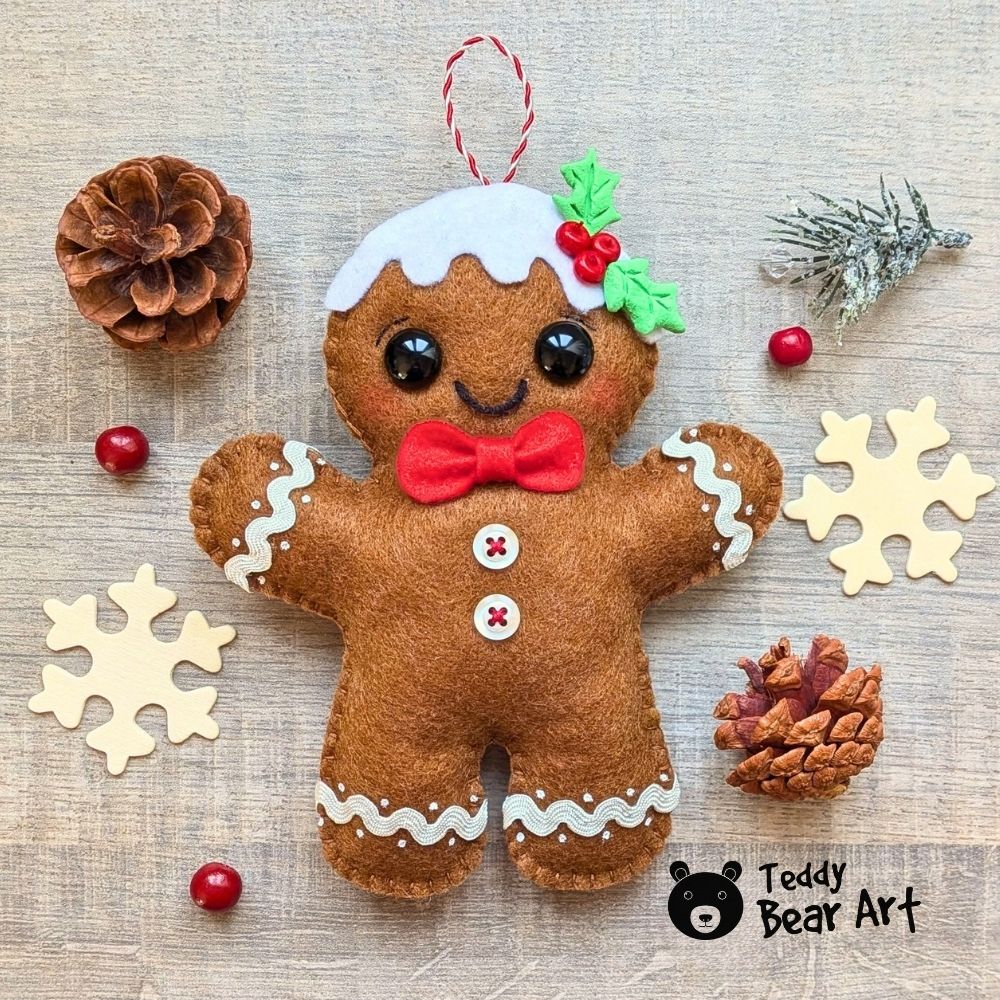
The construction itself is simple. I use two felt body pieces, blanket stitch, light stuffing, and a few easy decorative details. White ric rac trim creates the piped icing effect, while real buttons, red berries, a soft felt bow, and holly leaves give the gingerbread man plenty of Christmas character.
The decorations are also easy to adapt to whatever you already have in your craft box. The clay leaves can be replaced with felt, the eyes can be changed, and even the bow and buttons can be personalized.
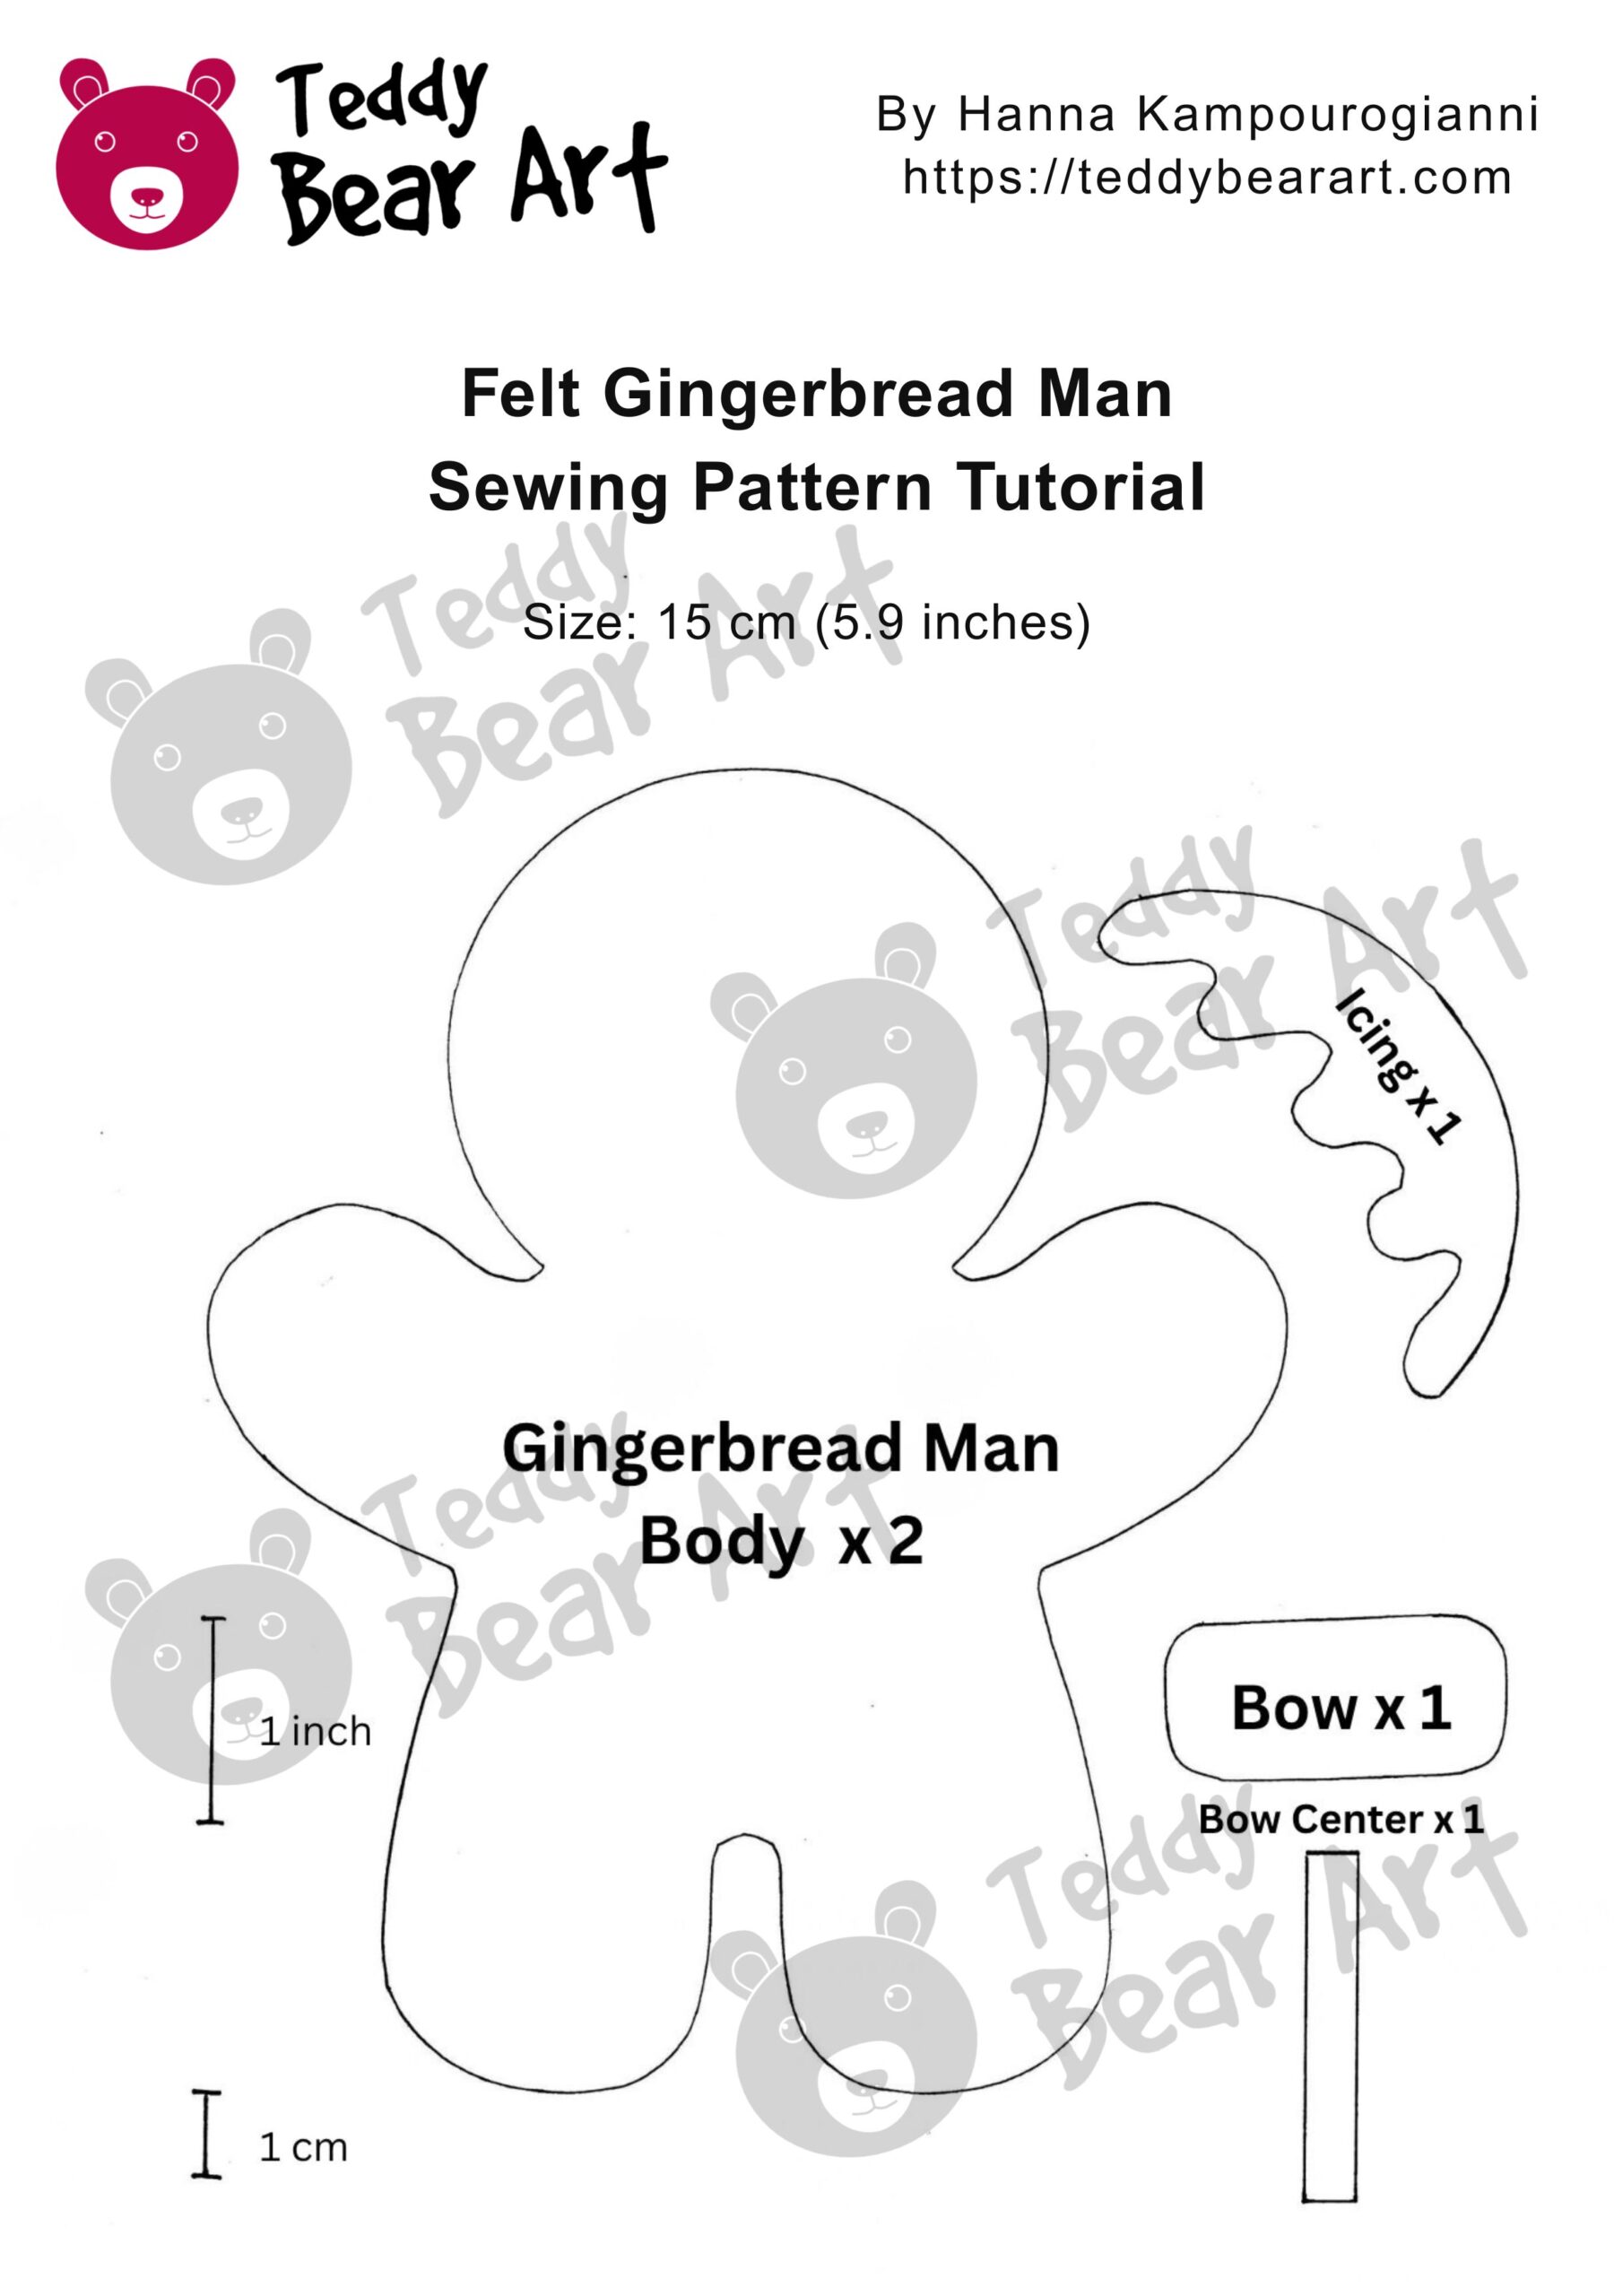
Download the Pattern
Notice: No additional seam allowance is needed. Cut directly along the pattern lines.
To download the pattern, follow the instructions below:
From a phone or tablet: There should be a similar option for mobile devices with Android or iOS. Click on the image. Save it by holding your finger on the image and selecting the “Save Image” option. Then, go to your photo gallery and print it (an option available).
From a computer: Click on the photo of the pattern you see below. In the new tab that will open, press the right mouse button and select the “Save image as …” option. Then, choose where the image will be saved on your computer.
What You’ll Need
- Brown felt
- White felt
- Red felt
- A small piece of green felt, optional
- Polyester stuffing
- Brown sewing thread
- Black embroidery thread
- Red thread
- Sewing needle
- Scissors
- Black sew-on eyes
- Black beads, buttons, felt circles, or embroidered eyes can be used instead
- Two small buttons
- Three red beads for the berries
- White ric-rac trim
- Red-and-white cord for the hanging loop
- White acrylic paint
- Glue
- Blush or soft pastel for the cheeks
- Two lightweight modeling clay holly leaves, optional
The holly leaves used here are small handmade pieces made from lightweight modeling clay. There is no need to make clay leaves specifically for this project. Simple leaves cut from green felt will work beautifully too, and they can be sewn or glued in place.
Most of the body is sewn with blanket stitch. If this stitch is new to you, watch our Blanket Stitch Video Tutorial first. It is an easy stitch to learn and works especially well with felt because it joins the pieces while creating a decorative edge at the same time.
Sewing Step-by-Step Tutorial
Cut and Sew the Gingerbread Man
Transfer the body pattern onto brown felt twice and cut out both pieces. Cut the icing from white felt and prepare the red felt pieces for the bow. Place the two brown body pieces together, matching all the edges carefully.
Begin sewing around the body with blanket stitch. Work slowly around the rounded hands, head, and feet so the stitches stay reasonably even. Felt is forgiving, so tiny differences between the stitches will not spoil the finished toy. Leave an opening large enough for stuffing.
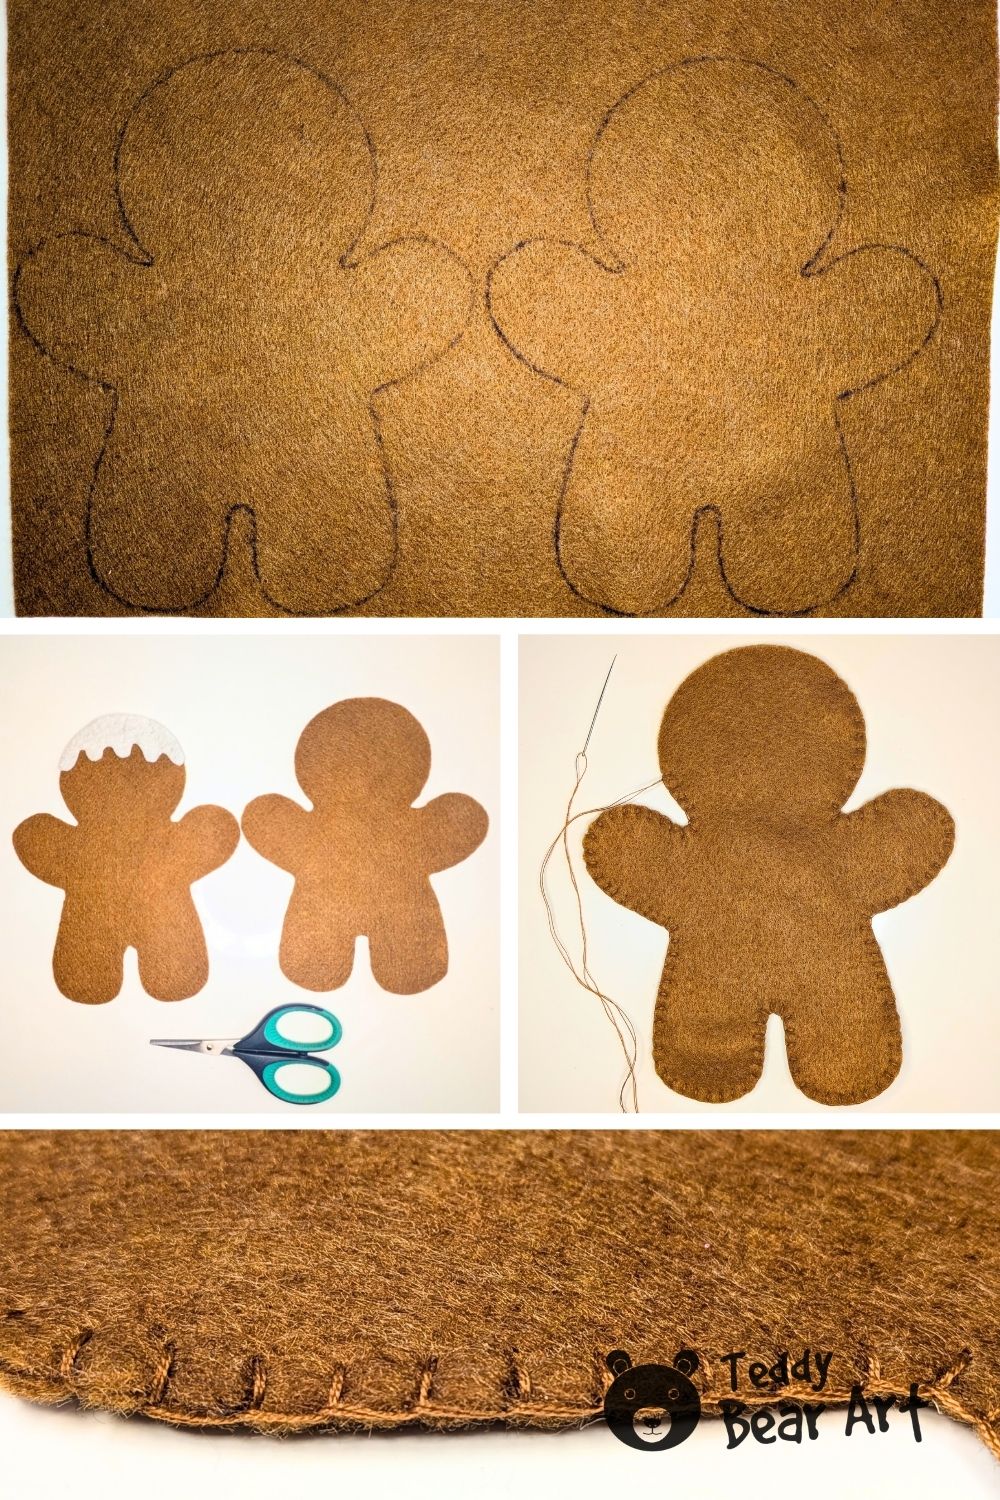
Add the stuffing little by little instead of pushing a large amount into the body at once. Fill the legs and arms first, then continue into the body and head. The gingerbread man should feel soft and rounded, not extremely firm.
This is the stage where the proportions really change. The broad flat body becomes fuller and slightly narrower as the stuffing creates depth. Once you are happy with the shape, sew the opening closed with the same blanket stitch.

Add the Icing, Hanging Loop, and Face
Fold a length of red-and-white cord into a loop and sew the ends securely to the top of the head. The loop should be strong enough to support the finished toy when it is hung.
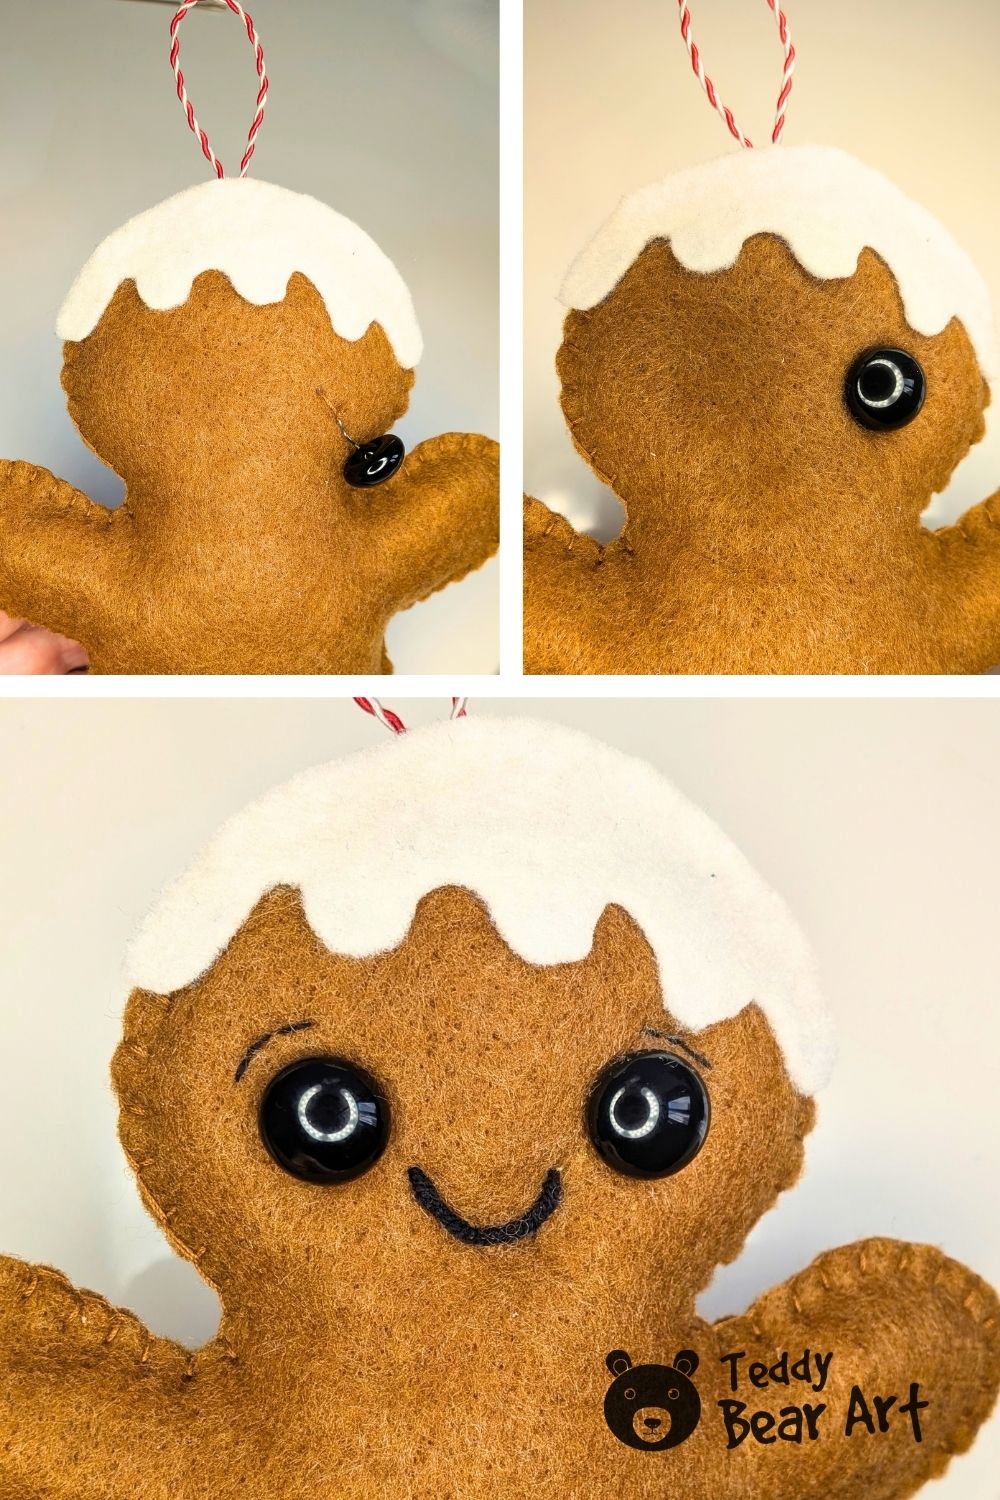
Next, position the white icing over the top of the head. It can be sewn in place or attached with glue. For this gingerbread man, we glued it, which keeps the icing clean and gives the front of the head a smooth finish.
Attach the eyes and check their position before securing them. Large shiny black eyes give this gingerbread man a very cheerful expression, but smaller beads, felt circles, buttons, or simple embroidered eyes are all good alternatives.
Embroider a curved smile with black thread and add one small eyebrow above each eye. Finish the face with a very light touch of blush on the cheeks. Build the color gradually, especially on felt, because strong pigment can be difficult to remove once it has worked into the fibers.
Decorate the Arms and Legs
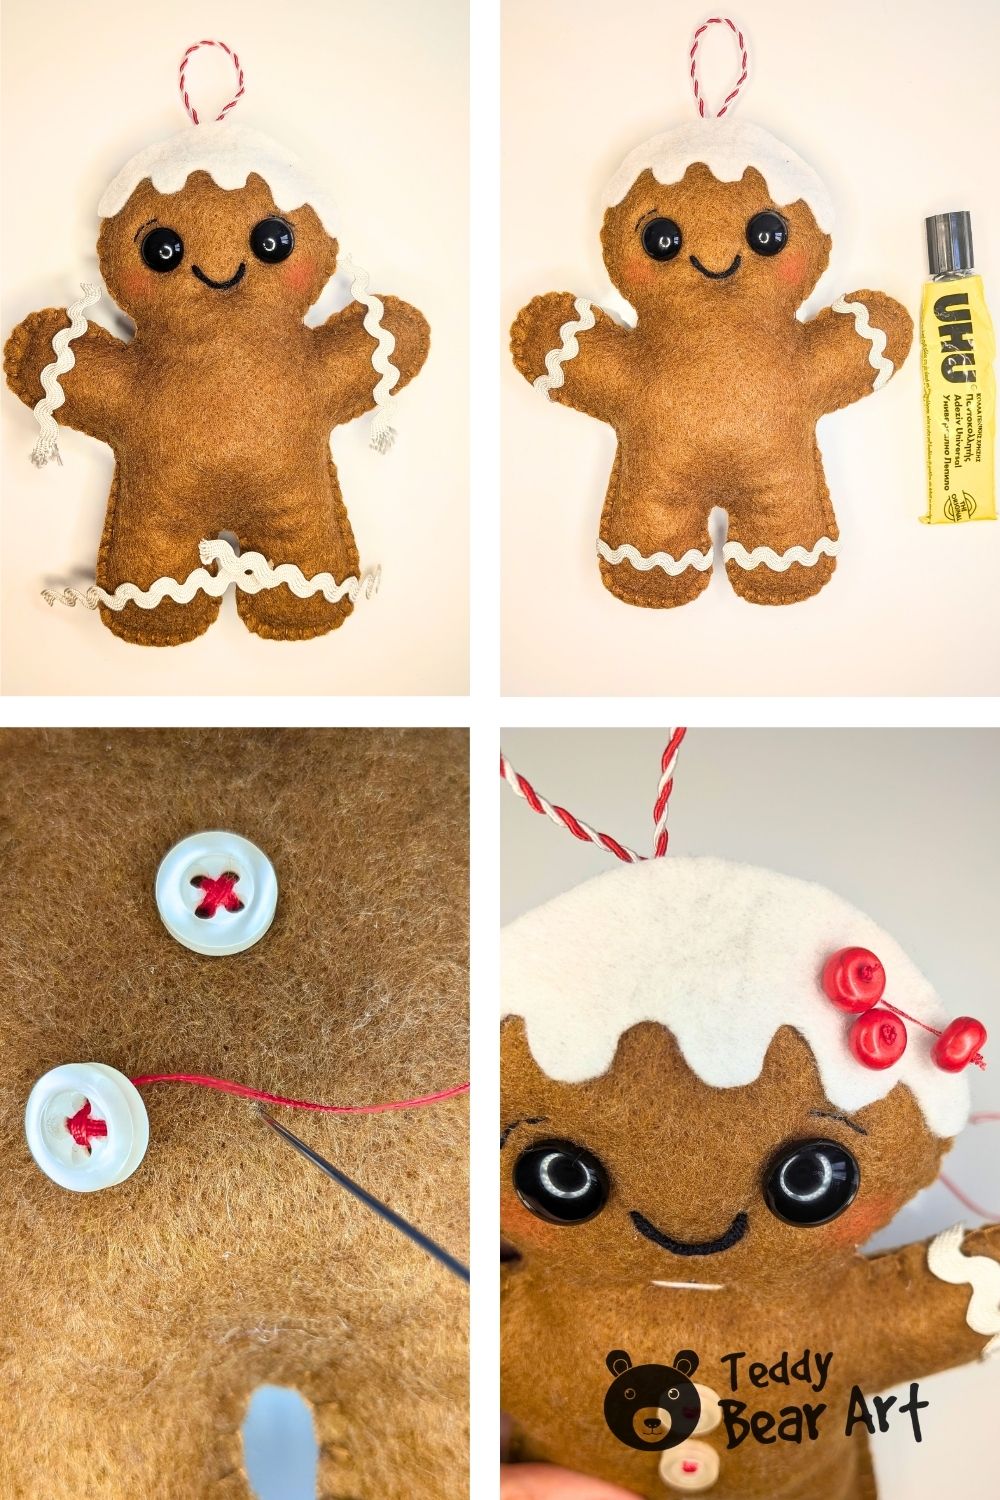
Cut four pieces of white ric rac trim to fit across the two arms and two legs. Position them before gluing so that the curves sit at approximately the same level on both sides.
Once the trim is secure, add tiny dots of white acrylic paint around it to imitate little drops of piped icing. A toothpick works well for this because it creates much smaller, neater dots than a regular paintbrush. Test the paint on a scrap of brown felt first, then add a second touch after drying if the first dots disappear into the fibers.
Sew two small buttons down the center of the body. Red thread looks especially pretty here. Stitching through the four holes in an X shape adds another tiny red detail without needing another decoration.
Attach three red beads beside the white icing to create the berries. Keep them grouped closely together so they read as one small cluster rather than three separate beads.
Add the Holly Leaves and Make the Felt Bow
Glue the two holly leaves close to the berries. The leaves on this gingerbread man were handmade from lightweight modeling clay, which gives the decoration a little extra dimension.
For an easier alternative, cut two simple holly leaf shapes from green felt. Add a few stitched or drawn vein lines if you like, then sew or glue them beside the berries. Keep the leaves close to the red beads so the entire decoration looks like one small holly sprig.
Before adding the bow, you can make a very slight indentation at the neck with a few tightening stitches. This step is optional, but it can help define the head and body a little more.
To make the bow, take the main red felt bow piece and gently gather it through the center. Secure the gathered middle with several stitches so the two sides puff outward. Wrap the narrow Bow Center piece around the gathered section, then stitch the ends together at the back. Do not pull too tightly, we want the bow to stay soft and rounded.
Glue the finished bow at the base of the neck. Once everything is dry, check the hanging loop, trim, leaves, berries, and buttons and make sure all parts are firmly attached.

At this point, our DIY felt gingerbread man is finished. The combination of soft felt, real buttons, dimensional berries, ric rac icing, and the bright red bow gives a simple beginner project much more character without making the sewing complicated.
FAQ
Can I make this Gingerbread Man without plastic or glass eyes?
Yes. Black beads, small buttons, circles cut from black felt, or embroidered eyes can all replace the shiny eyes shown here. Felt and embroidered eyes are especially useful if you prefer a completely soft finish.
Can I sew the white icing instead of gluing it?
Yes. The icing can be attached with small hand stitches instead of glue. We glued it for this version because the smooth white piece worked nicely against the brown felt, but both methods are suitable.
What kind of felt did you use?
I used 2 mm felt for this gingerbread man. It is very soft and easy to sew by hand. For projects like this, though, I personally prefer working with slightly thicker felt, around 3 mm, because it holds its shape better and gives the finished toy a firmer, more structured look.
Before You Go
This felt gingerbread man pattern for beginners is simple enough for a relaxed Christmas sewing project, but the little details make the finished toy feel special. The carefully shaped body stays plump after stuffing, while the icing, bow, berries, buttons, and holly give plenty of room for personalization.
You can also turn the same pattern into several different gingerbread characters. Change the bow color, use different buttons, embroider the eyes, or replace the clay holly with simple felt leaves. Small changes can give each gingerbread man a completely different personality.
Download the free pattern, choose your favorite Christmas details, and save this easy felt gingerbread man craft for a cozy holiday sewing day.
Looking for another easy felt project?
Try this Free Felt Owl Sewing Pattern Tutorial for Beginners next. It is another simple hand-sewing project that is perfect for practicing blanket stitch and making a cute felt toy.
Get Free Patterns & Be the First to Know!
Want free teddy bear patterns, exclusive tutorials, and a chance to win craft supplies?
Sign up for our newsletter using the subscribe form in the middle of this article to receive new patterns, insider tips, and the latest news on teddy bear art. You’ll also automatically be entered into our annual giveaway for a chance to win teddy bear crafting materials.
Bonus entry: Save one of our pins on Pinterest to increase your chances of winning!
Let’s create, inspire, and craft beautiful teddy bears together!