Updated February 2026
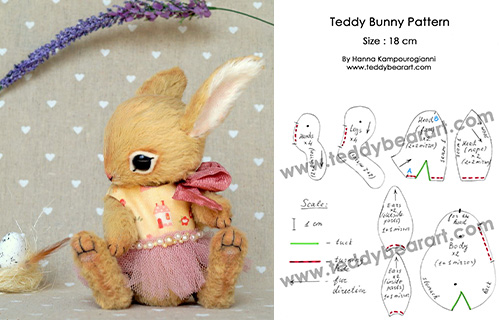
Looking for a free jointed teddy bunny pattern? This 18 cm teddy-style rabbit is perfect for teddy bear artists and crafters who want to learn how to make a jointed fur teddy bear. Its movable limbs and classic design make it ideal for collectors, spring or Easter-inspired projects, or anyone who loves bunnies and teddy bears.
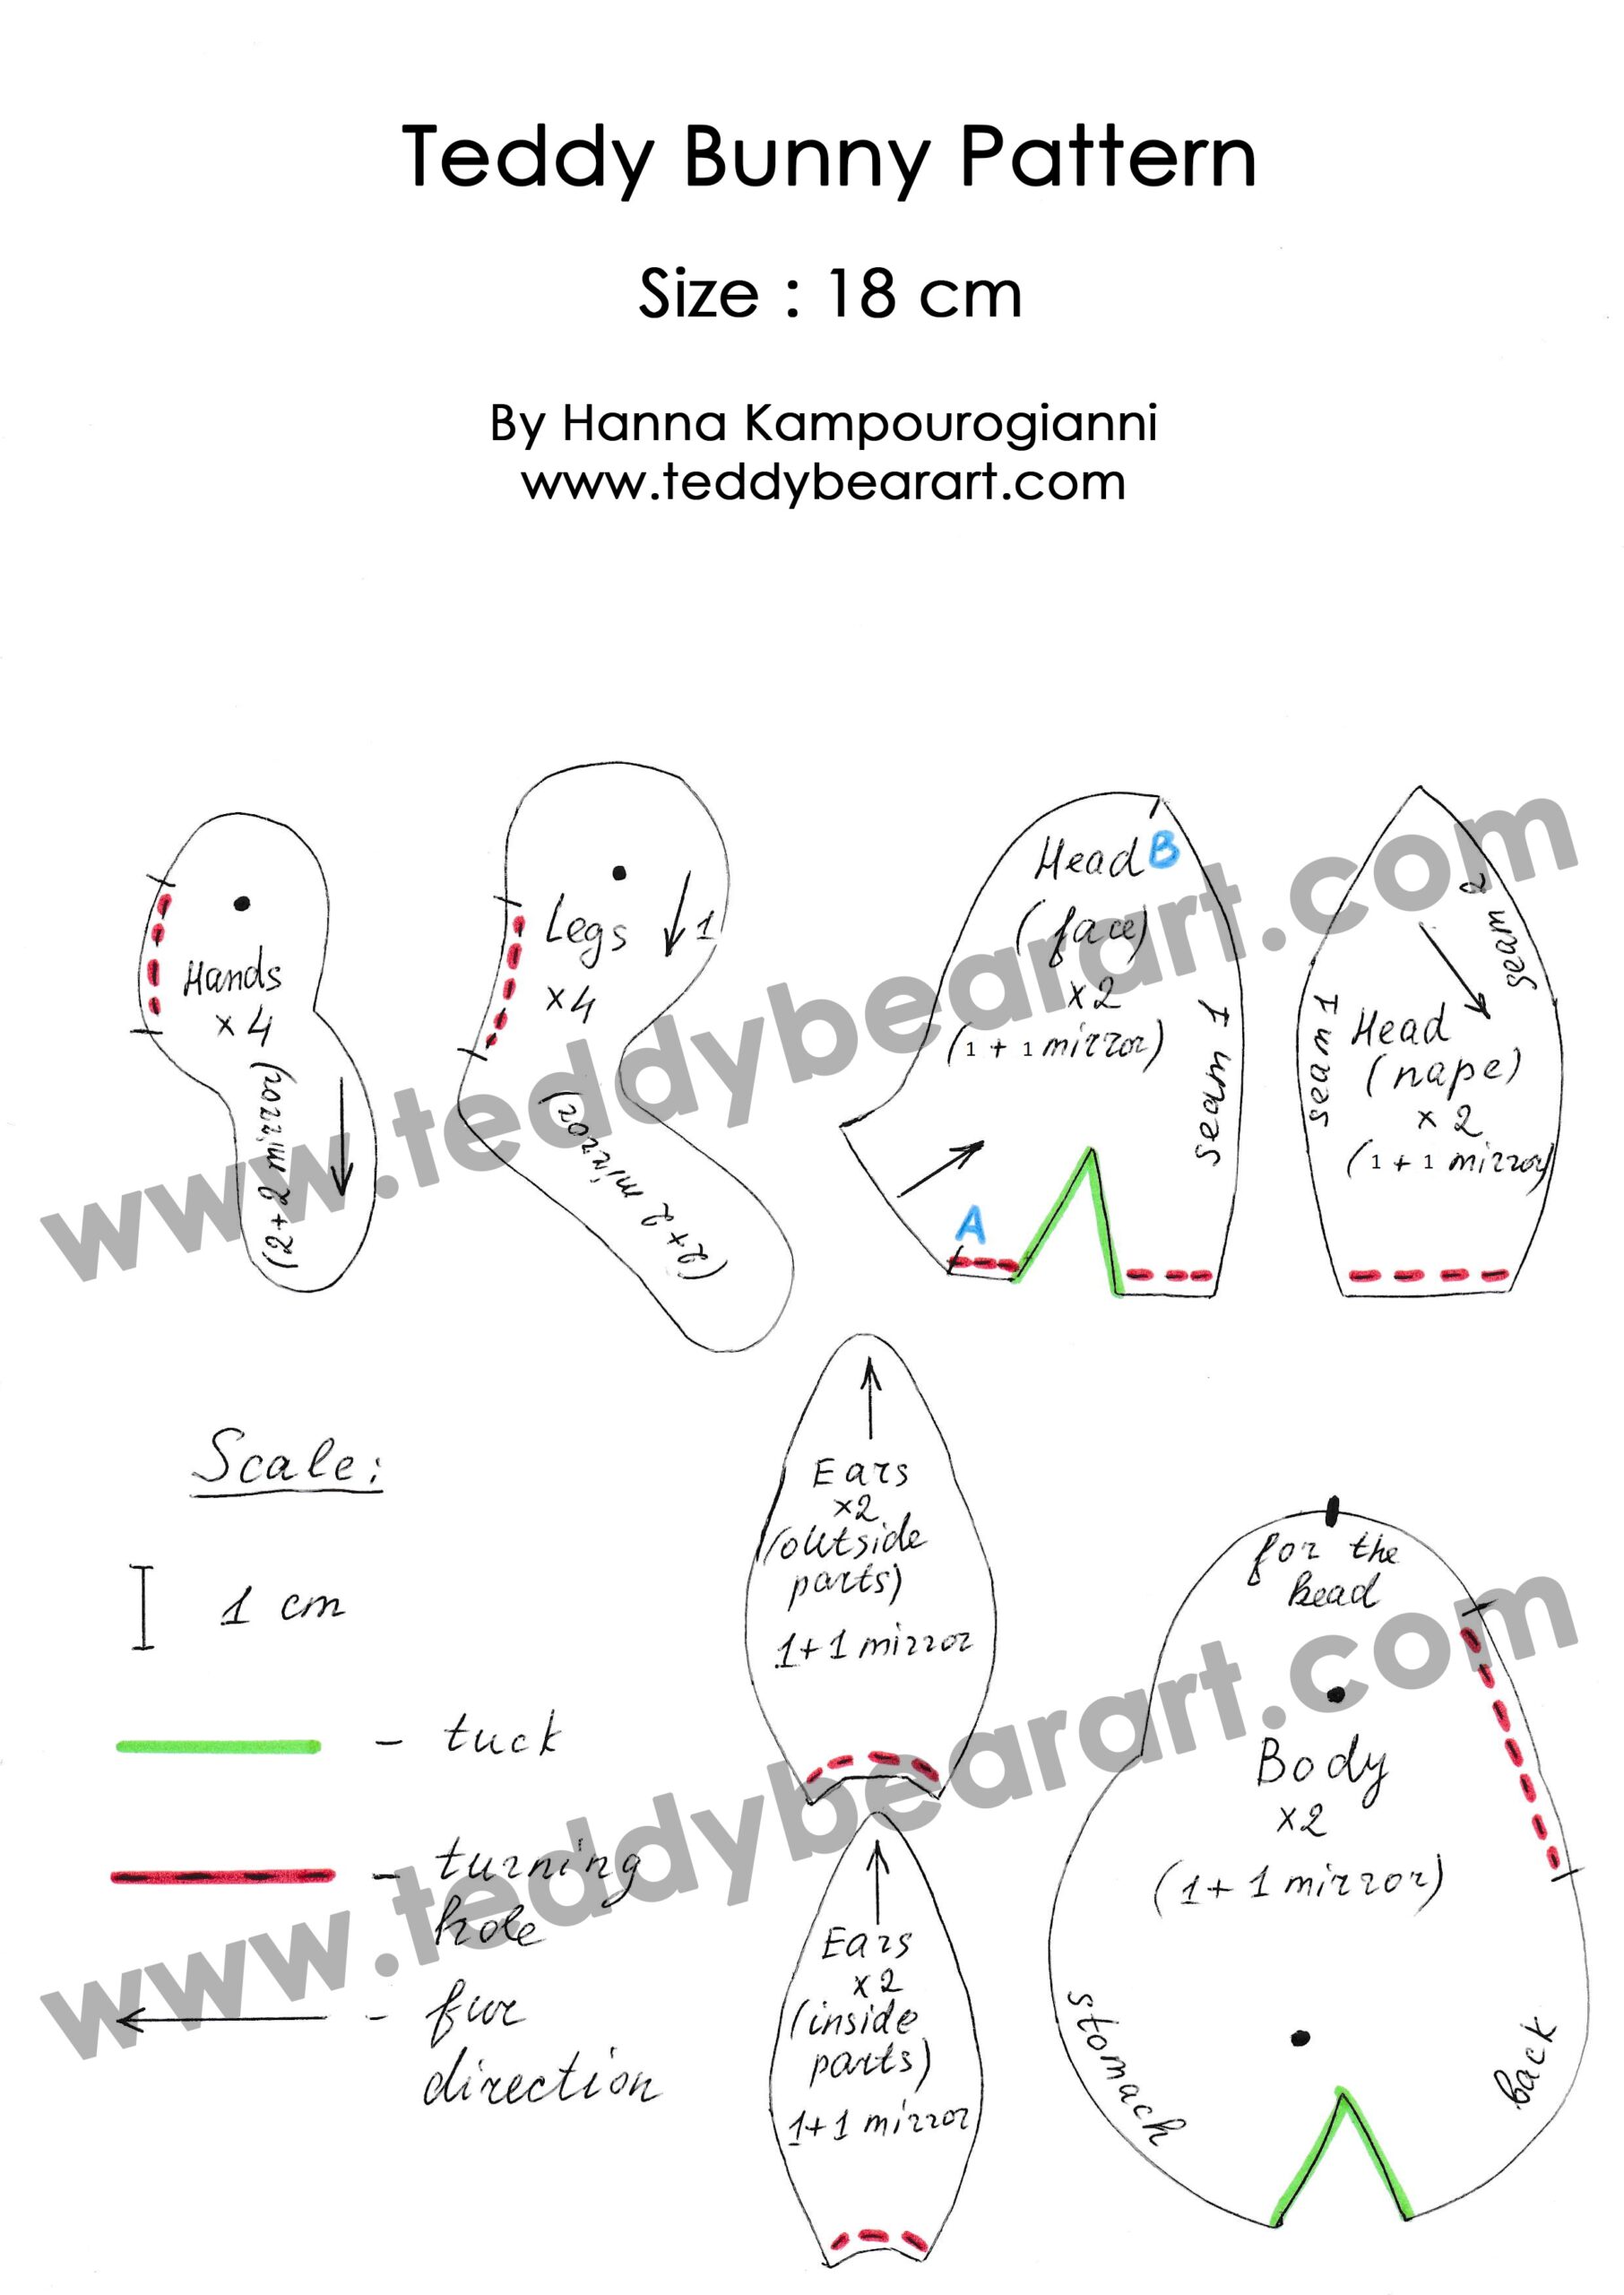
The printable pattern is provided in JPG format and includes a 1 cm scale guide to ensure accurate printing.

Download the Pattern
To download the pattern, follow the instructions below:
From a phone or a tablet (Android): There should be something similar for mobile devices with Android or iOS. Click on the image. Save it by holding your finger on the image and selecting the “Save Image” option. Then go to your photo gallery and print it (there is an option).
From a computer (Windows): Click on the photo of the pattern you see below. In the new tab that will open, you press the right mouse button and select the “Save image as …” option. Then, you choose where the image will be saved on your computer.
How to Print the Pattern at the Correct Scale
The printable pattern is provided in JPG format and includes a 1 cm reference line. Make sure the line measures exactly 1 cm after printing to maintain the correct proportions of your bunny.
Always print at 100% size and disable any automatic scaling in your printer settings.
For a step-by-step sewing guide, check out the full tutorial here: Free Jointed Teddy Bunny Pattern Tutorial.
Who Is This Pattern For?
This jointed teddy bunny pattern is suitable for:
- intermediate teddy bear makers
- artists who want to practice cotter pin joints
- collectors who appreciate traditional teddy-style animals
- crafters looking for a spring or Easter-inspired handmade project
The List of Materials
1. 1/16 piece (25×35 cm) of German Steiff Schulte viscose with a fur length of 6 mm.
2. A small piece of white viscose with a fur length of 6 mm for the ears.
3. Strong threads, the same color as your fabric, and a needle for hand sewing.
4. Scissors for cutting fabrics.
5. A pair of glass eyes on a metal loop – 12 mm in diameter.
6. Waxed thread.
7. An awl.
8. Synthetic filler.
9. Metal or glass pellets for the weight (small diameter).
10. Oil paints and brushes.
11. Pins.
12. Discs 16 mm in diameter – 6 pieces (for the head and for the hands).
13. Discs 20 mm in diameter – 4 pieces (for the legs).
14. Washers 15 mm diameter – 10 pieces.
15. T-shaped cotter pins 2,0×20 – 5 pieces.
16. Pliers.
17. A small piece of felt for the eyelids.
18. A glue.
19. A small piece of white fluffy faux fur for the tail.
20. Black thick thread for the embroidery of the bunny’s face and her limbs.
21. Tweezers.
22. A long needle (10 cm – 15 cm) for setting the eyes.
FAQ
Is this jointed teddy bunny suitable for beginners?
This pattern is not recommended for absolute beginners, as it uses cotter pin joints and requires careful assembly of movable limbs. If you are new to teddy-style animals, we recommend starting with a simpler plush bunny or reading our step-by-step tutorial on making your first teddy bear to build confidence before trying this pattern.
What type of joints are used?
This bunny uses traditional cotter pin joints with discs for the head, arms, and legs. These joints allow the limbs to move freely, giving your teddy bunny a realistic articulated feel. All materials needed for the joints are listed in the Materials section.
Can I resize the pattern?
Yes, but be careful! Since the pattern includes a 1 cm reference line, any resizing must maintain correct proportions. After printing, check that the reference line still measures 1 cm exactly to ensure your bunny’s limbs and body match the intended size (18 cm). Always print at 100% scale.
What fabric works best for a teddy-style jointed bunny?
For a classic teddy-style look, we recommend short-pile viscose or mohair. A small piece of white viscose can be used for the inner ears. These fabrics are sturdy enough for joints while giving a soft, plush finish. Avoid very thin or stretchy fabrics, as they may distort the bunny’s shape.
For a more detailed guide on different teddy bear fabrics and their properties, check out our comprehensive article: Exploring Different Types of Teddy Bear Fur & Fabric.
What type of stuffing and weighting should I use?
We recommend synthetic filler for softness and metal or glass pellets in small quantities to add weight for stability. Place pellets in the bottom of the body and limbs if desired, to give your bunny a balanced, realistic feel.
Can I make accessories or clothing for this bunny?
Absolutely! We have a Teddy Bunny Dress Sewing Pattern and Tutorial available that perfectly complements this bunny. Handmade clothes add charm and personality, making your teddy bunny even more special.
Before You Go
We hope you enjoyed this Free Jointed Teddy Bunny Pattern and feel inspired to create your own classic teddy-style rabbit. Don’t forget to follow the printing instructions carefully to maintain the correct proportions and bring your handmade bunny to life.
If you loved this project, be sure to check out our other adorable bunny pattern here:
Get Free Patterns & Be the First to Know!
Want free teddy bear patterns, exclusive tutorials, and a chance to win craft supplies?
Sign up for our newsletter using the subscribe form in the middle of this article to receive new patterns, insider tips, and the latest news on teddy bear art. You’ll also automatically be entered into our annual giveaway for a chance to win teddy bear crafting materials.
Bonus entry: Save one of our pins on Pinterest to increase your chances of winning!
Let’s create, inspire, and craft beautiful teddy bears together!